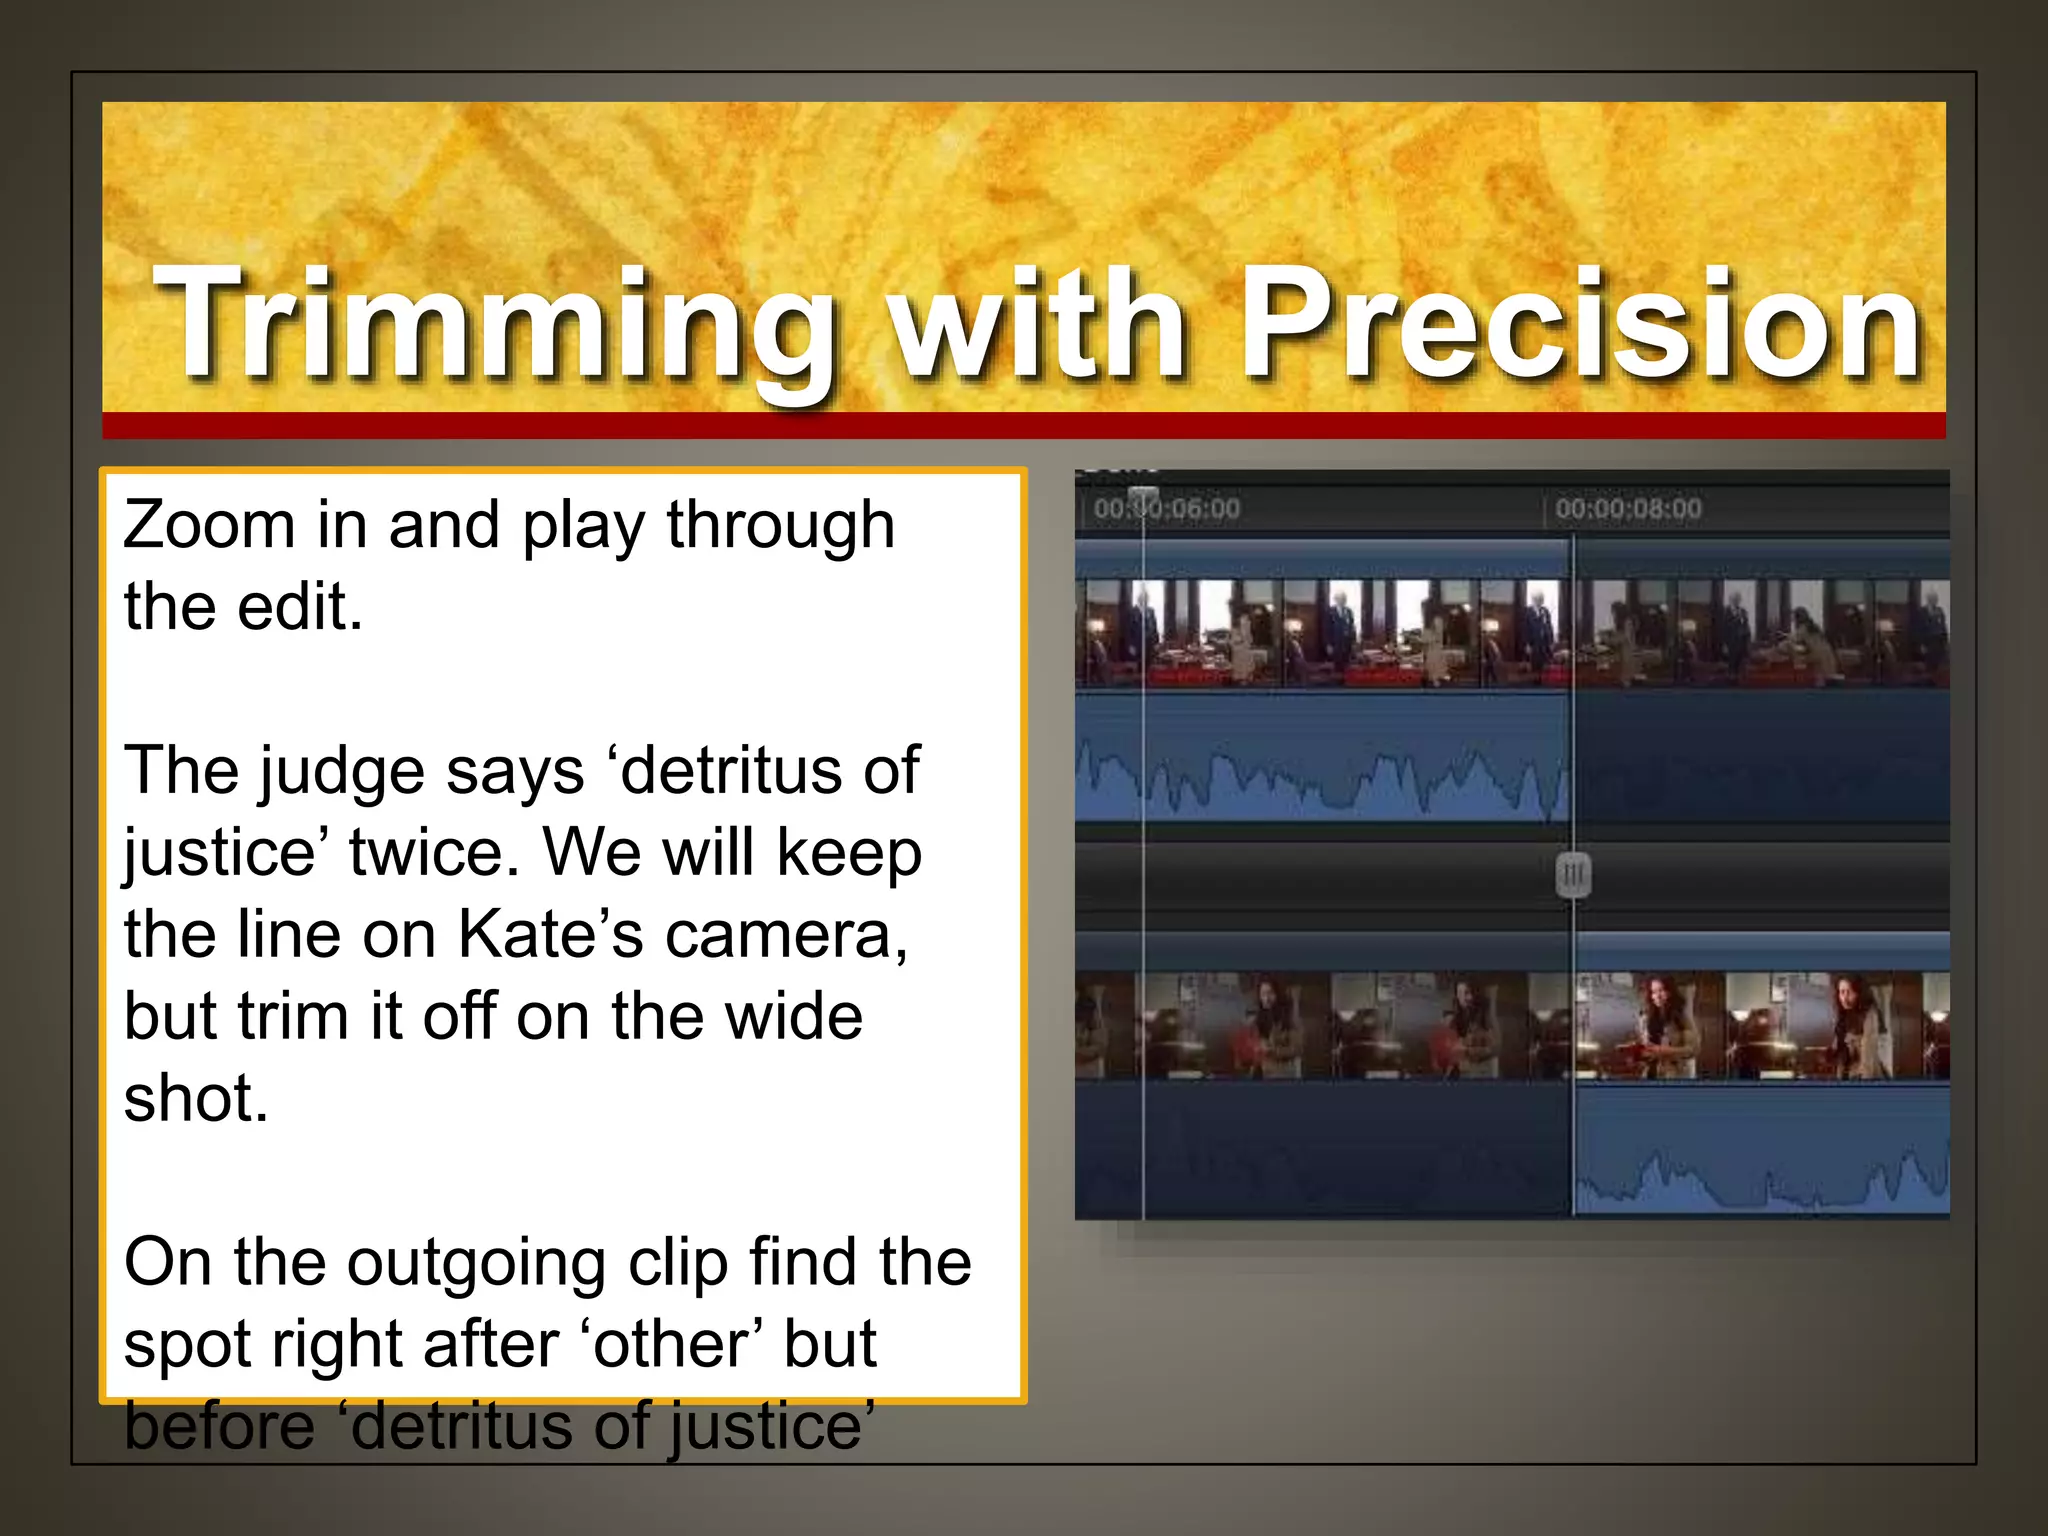
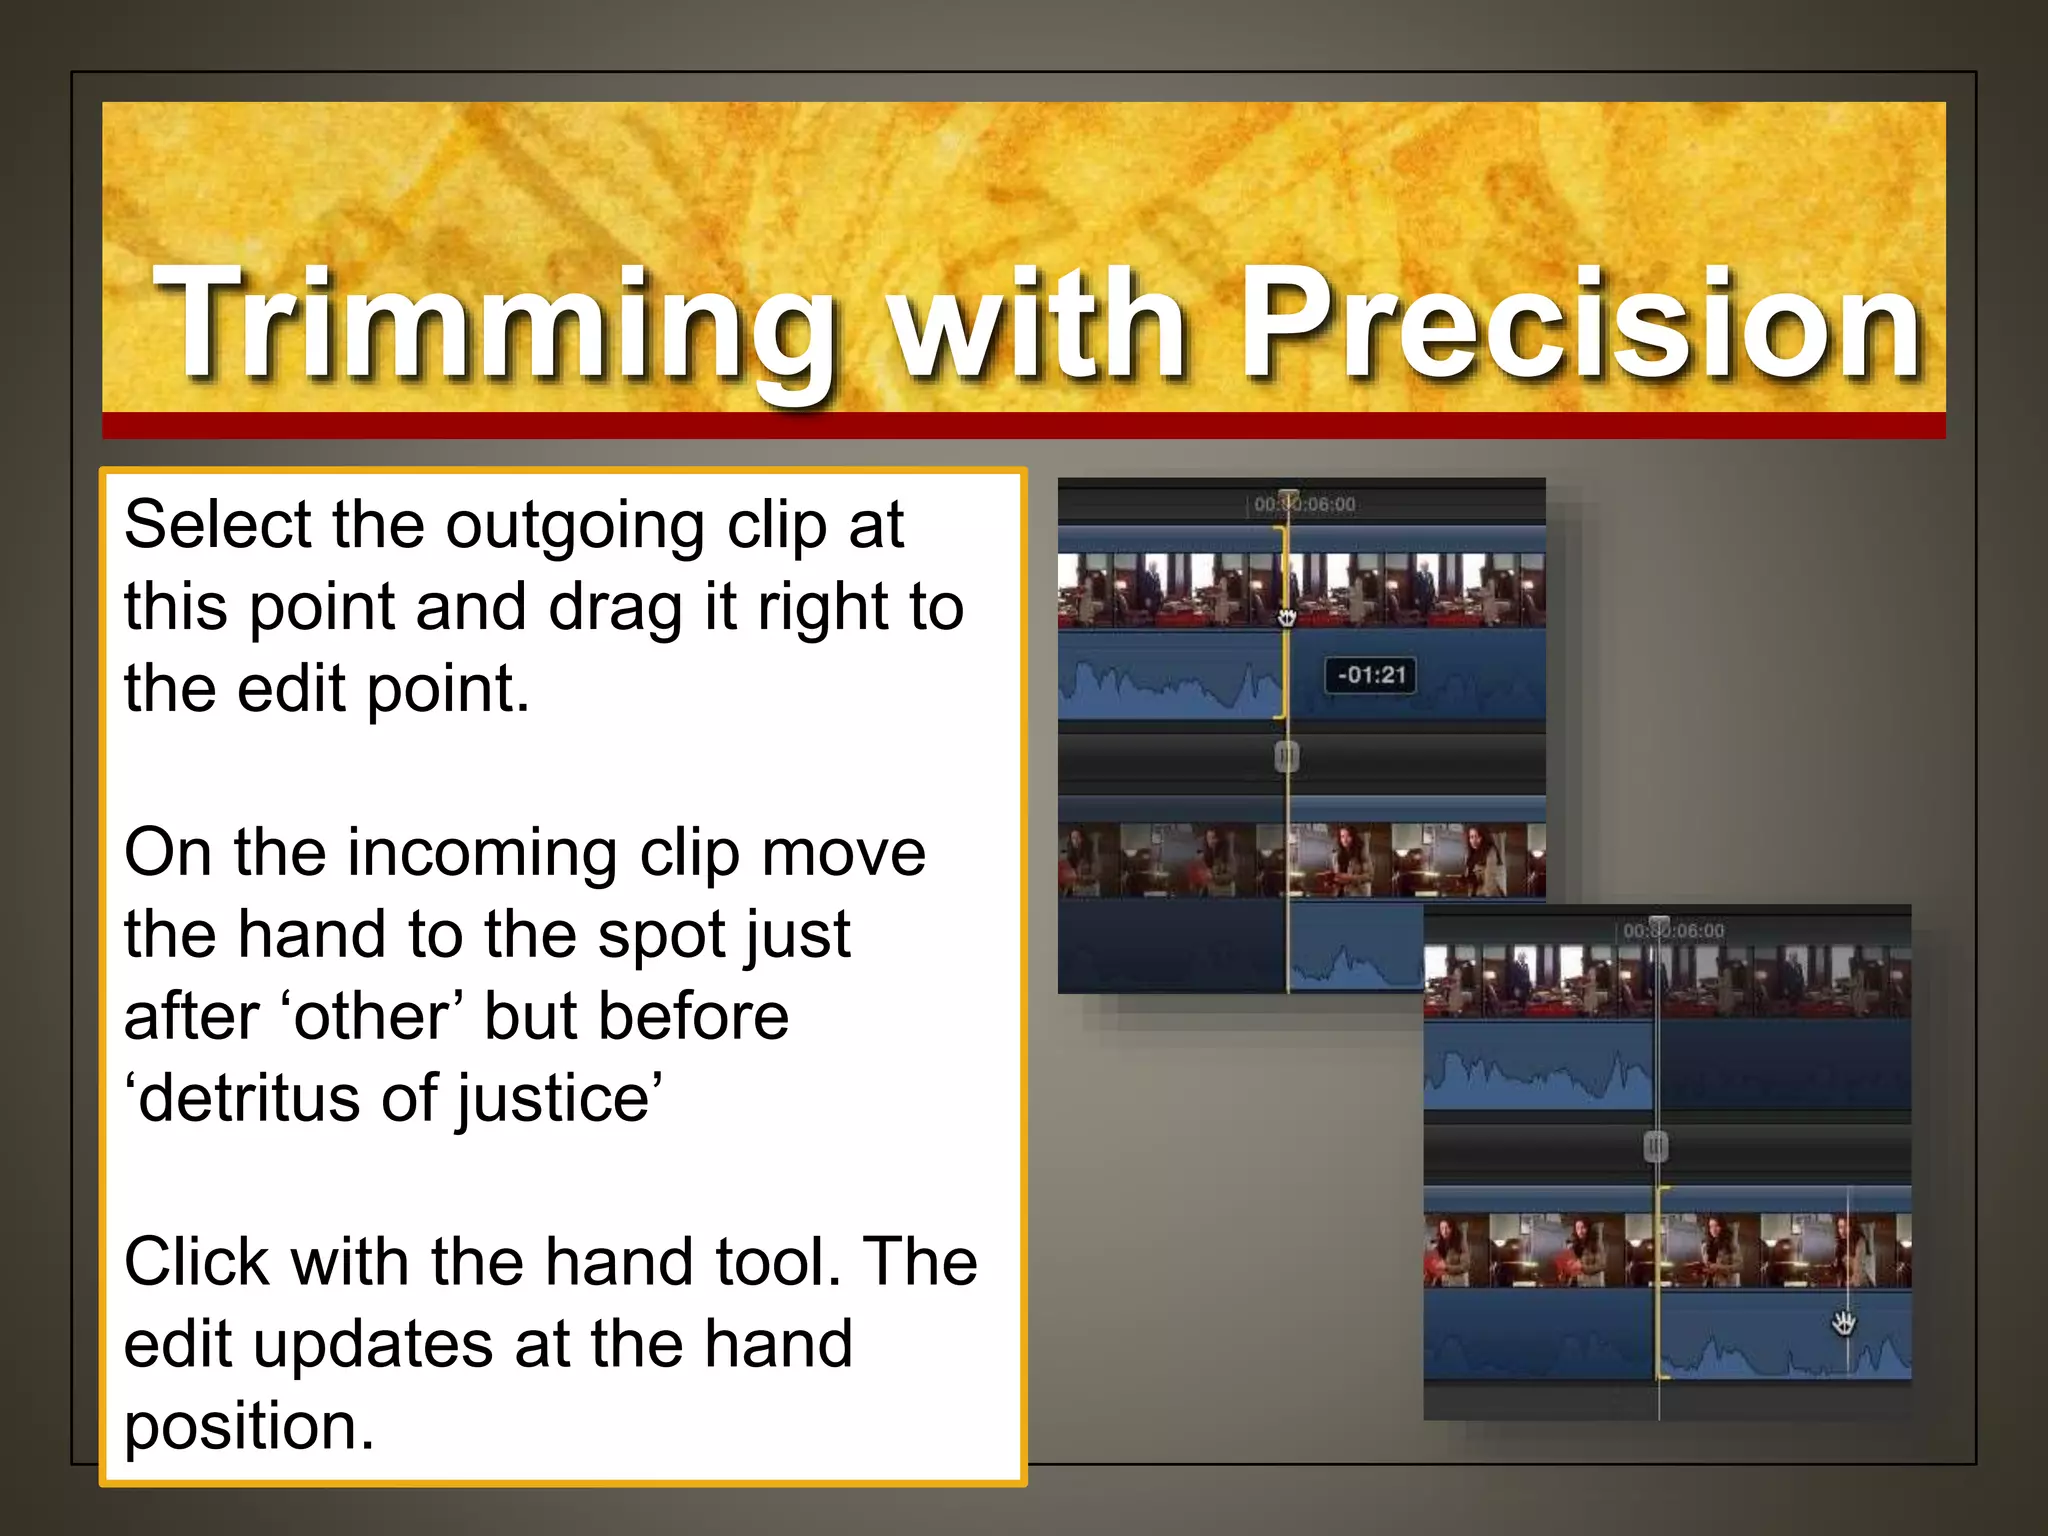
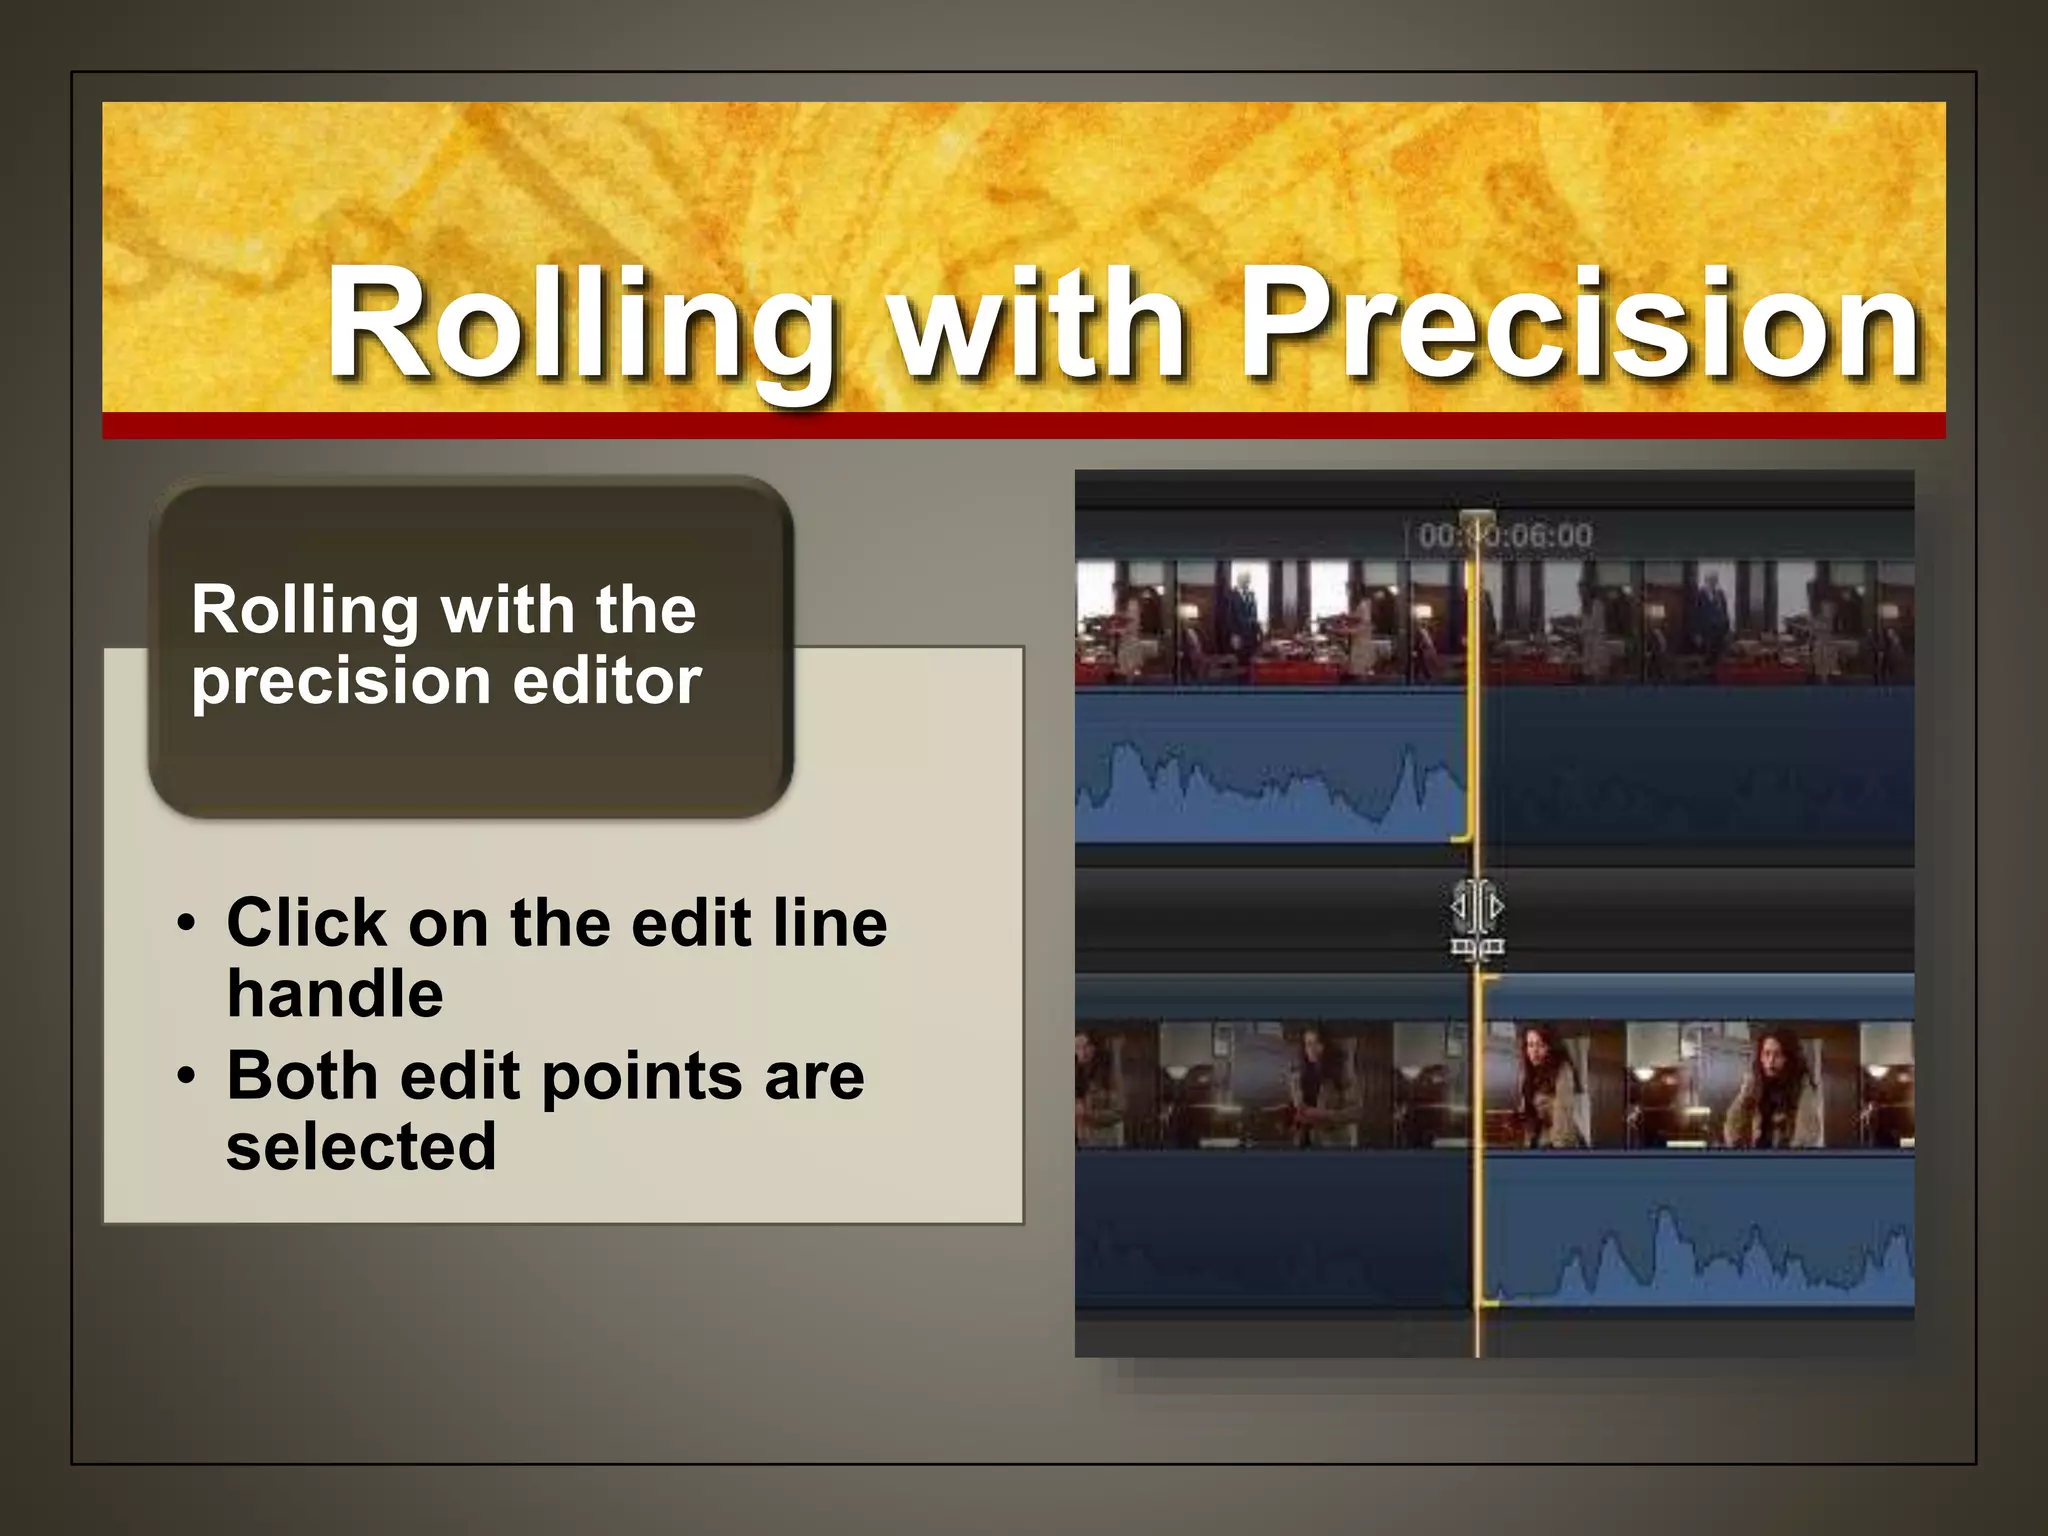
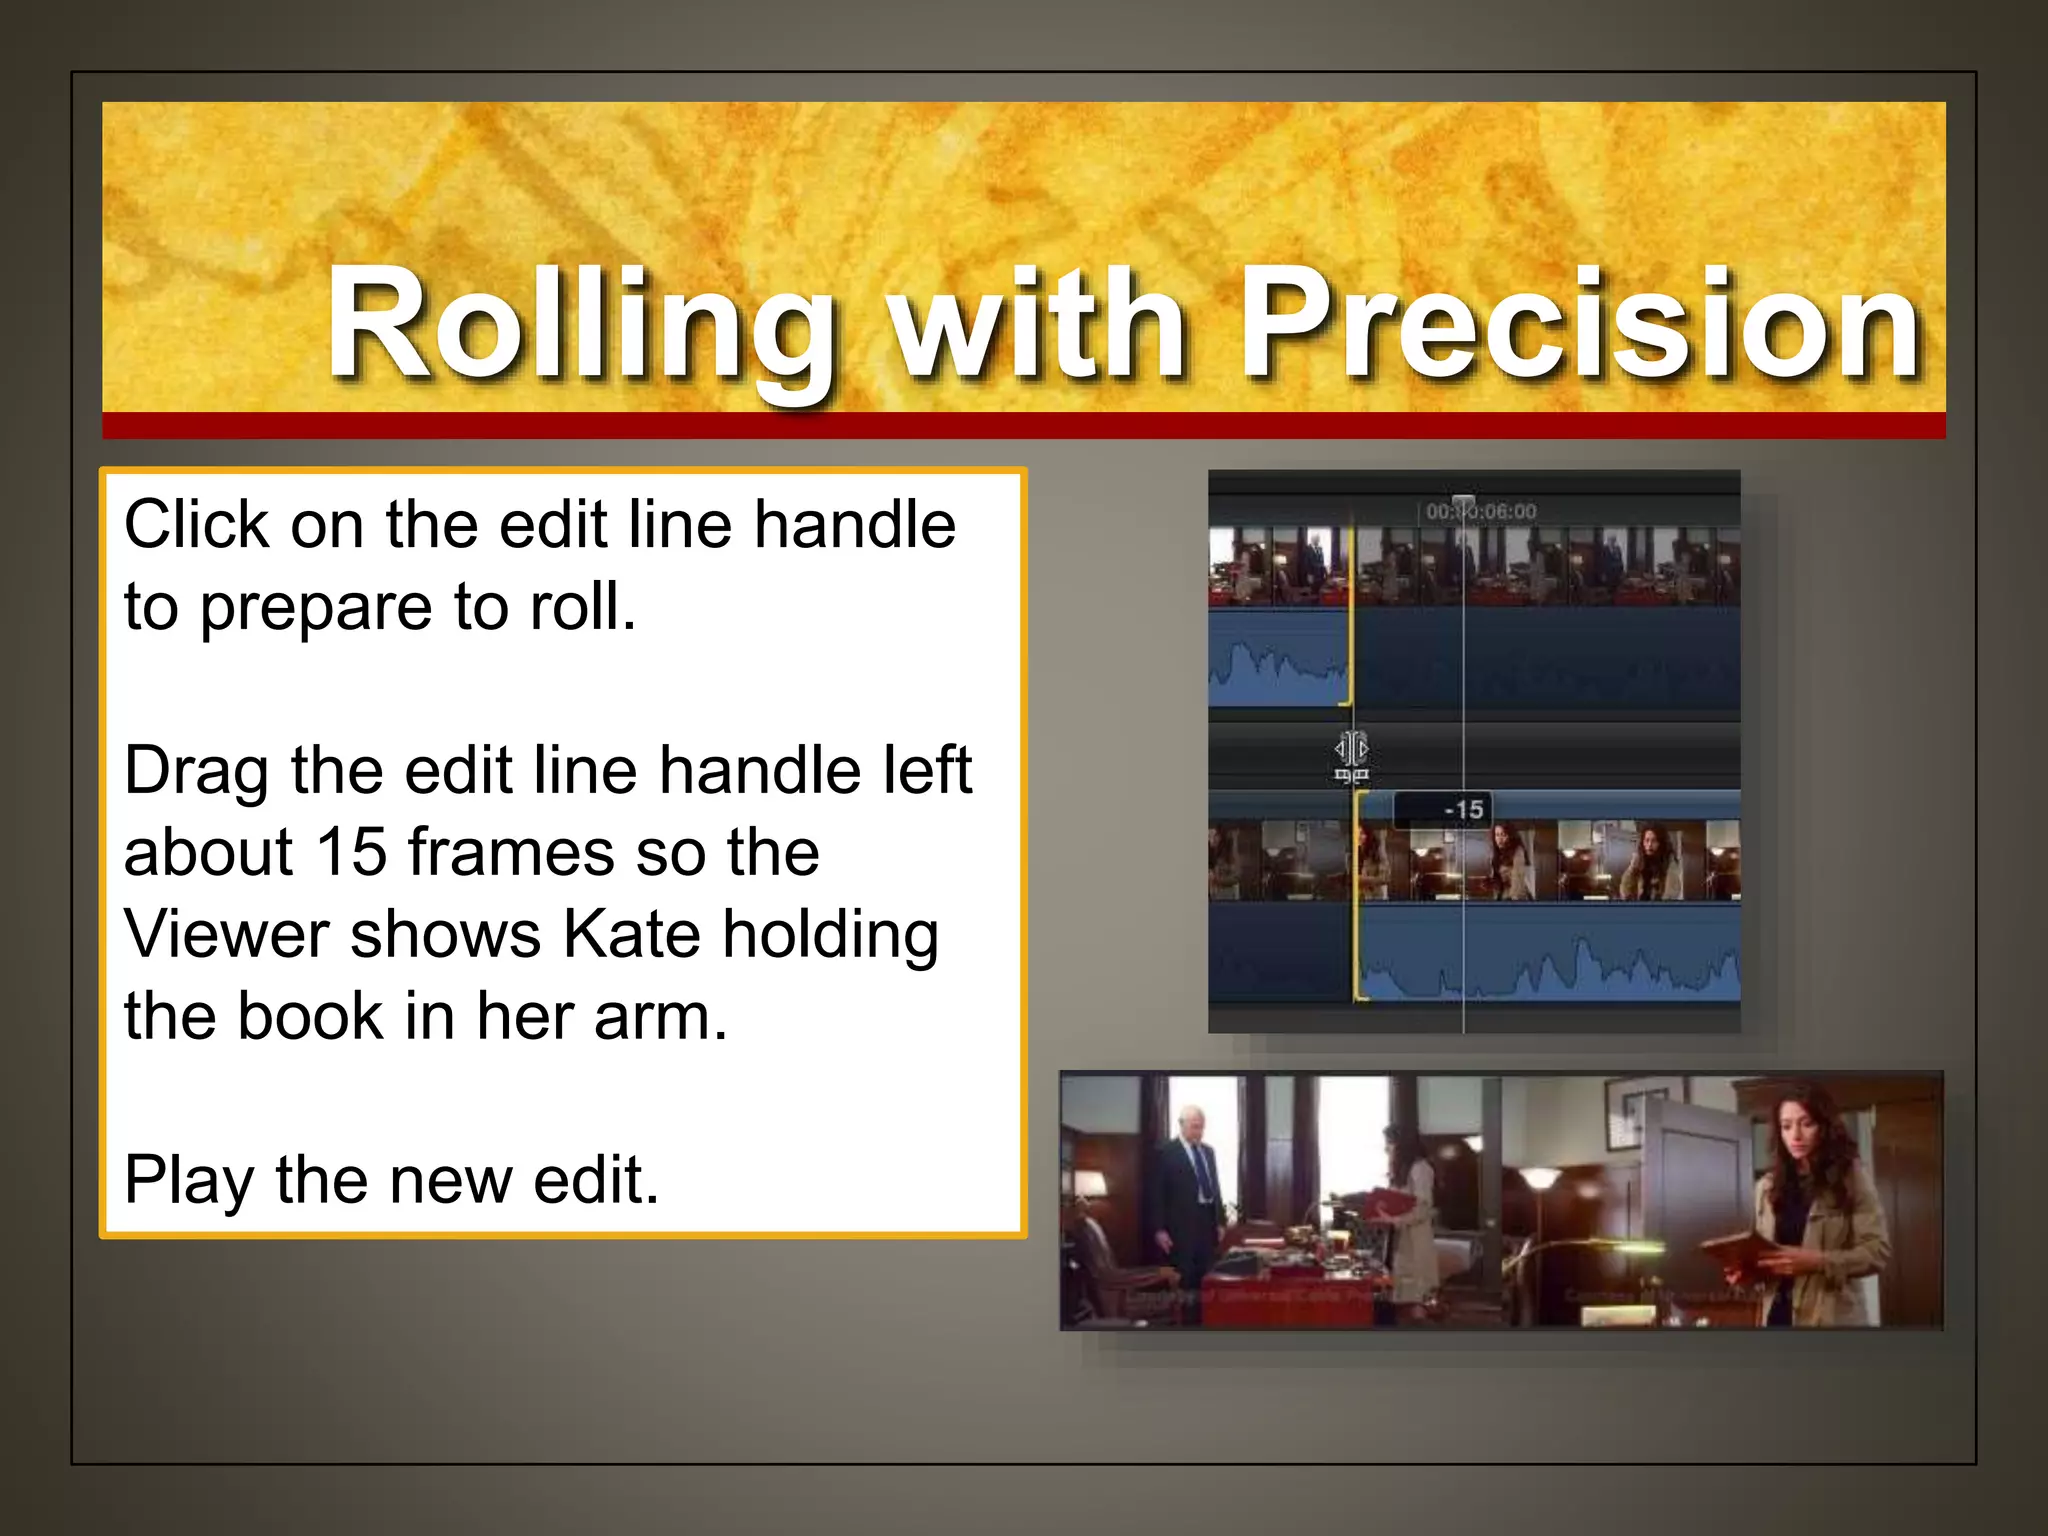
Downloaded 81 times


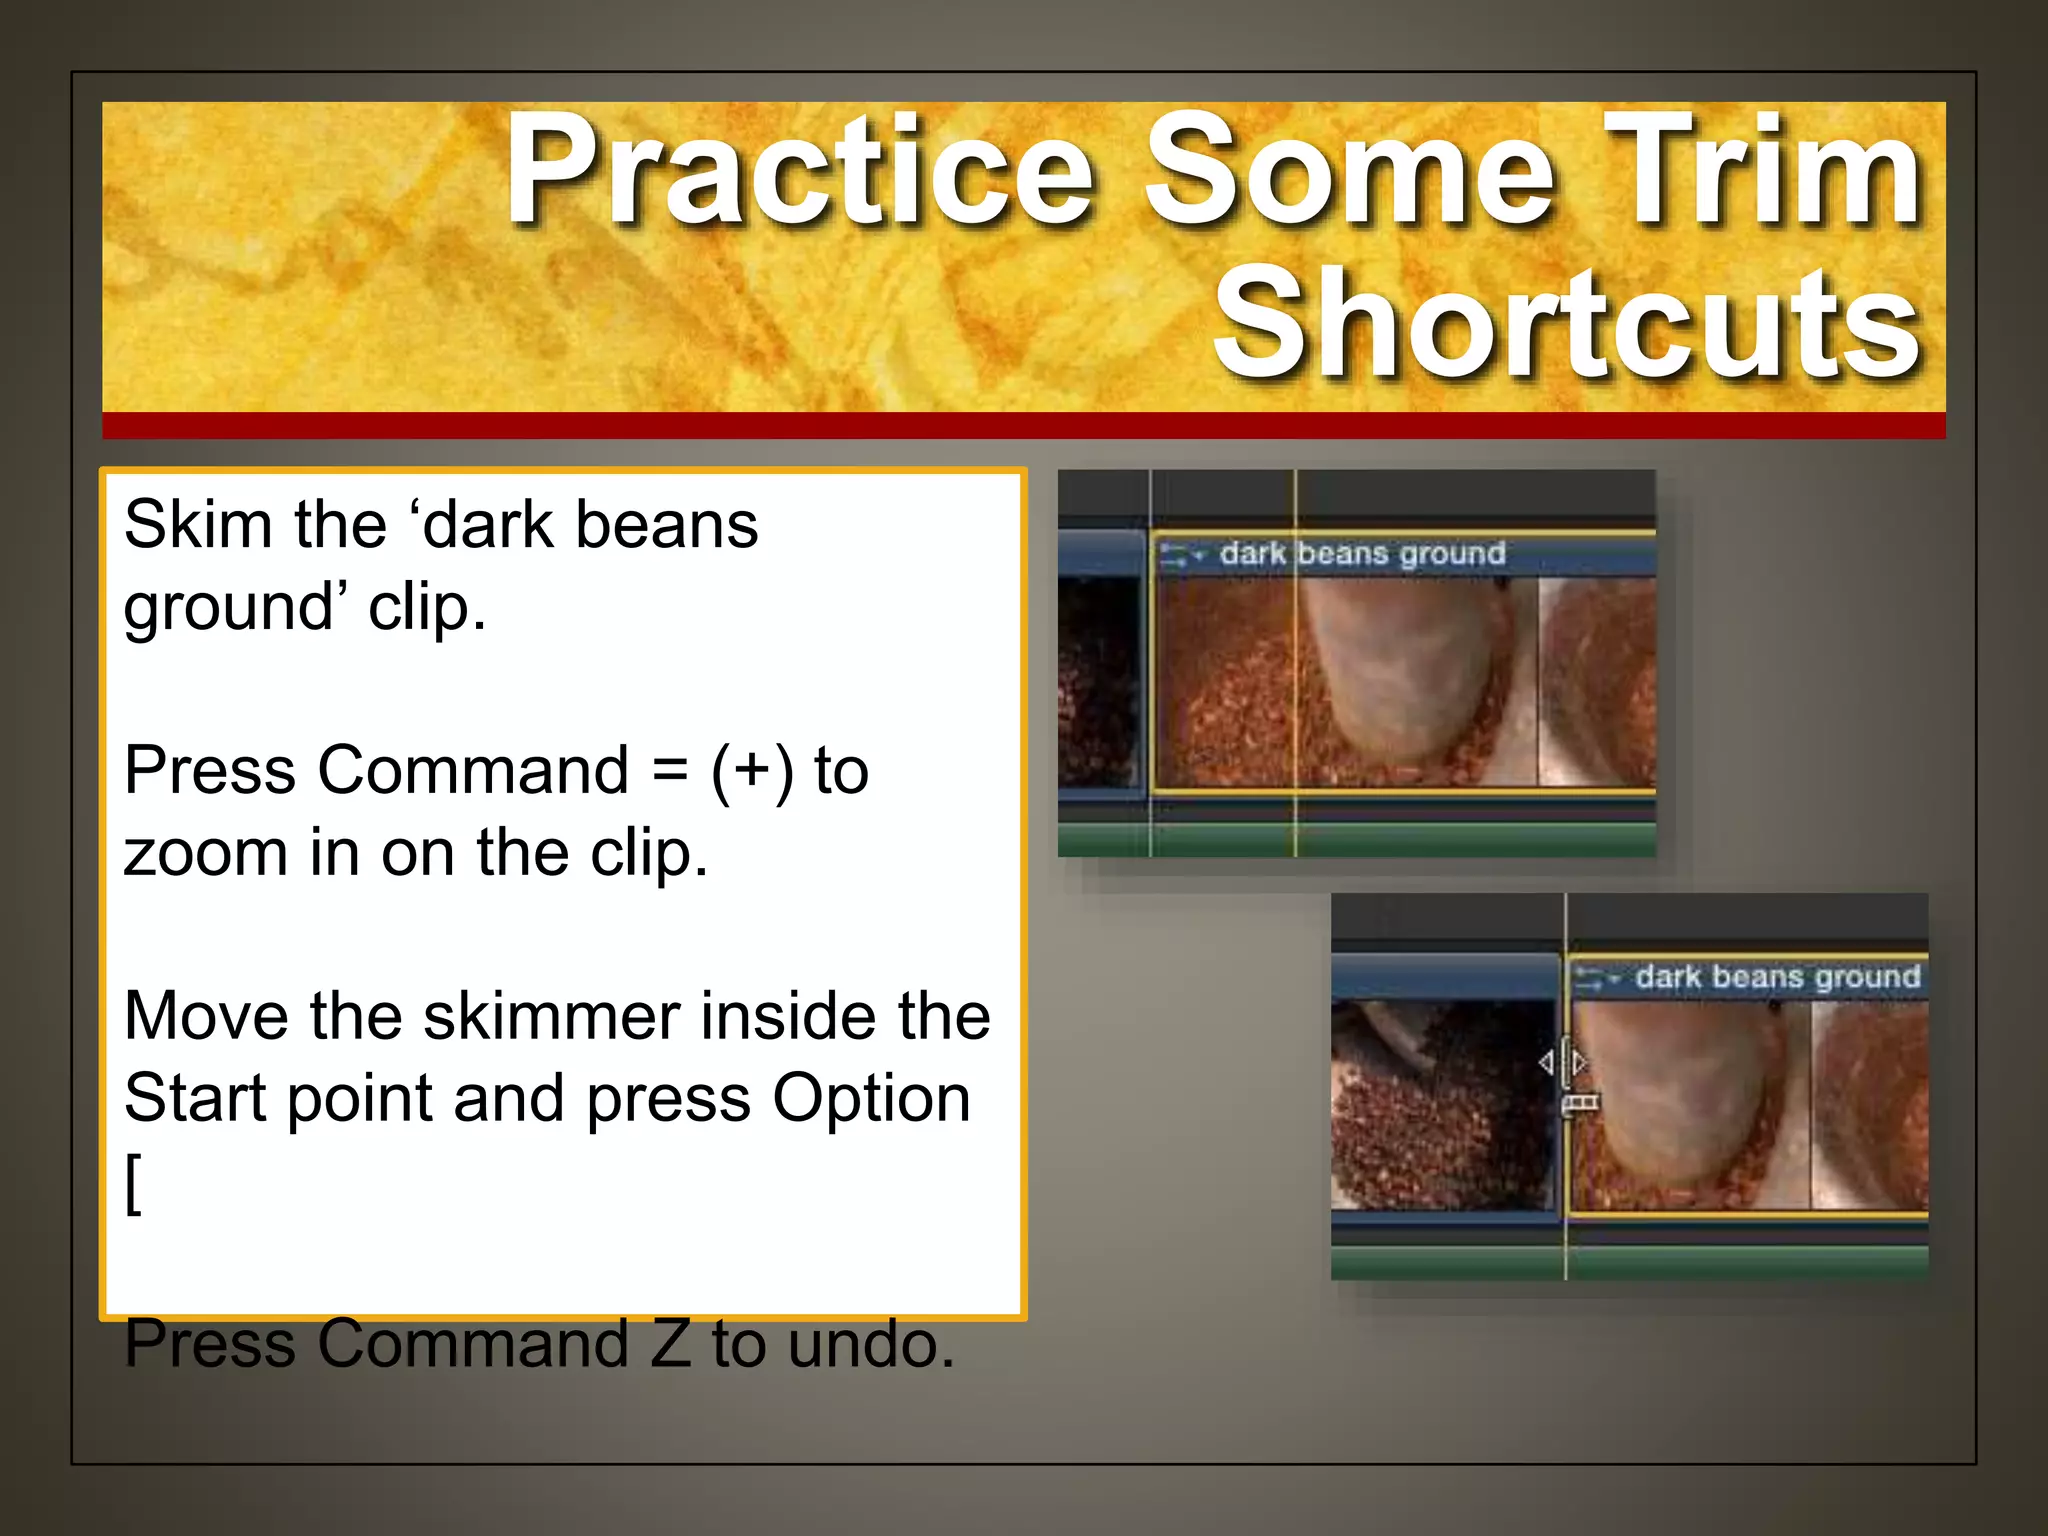
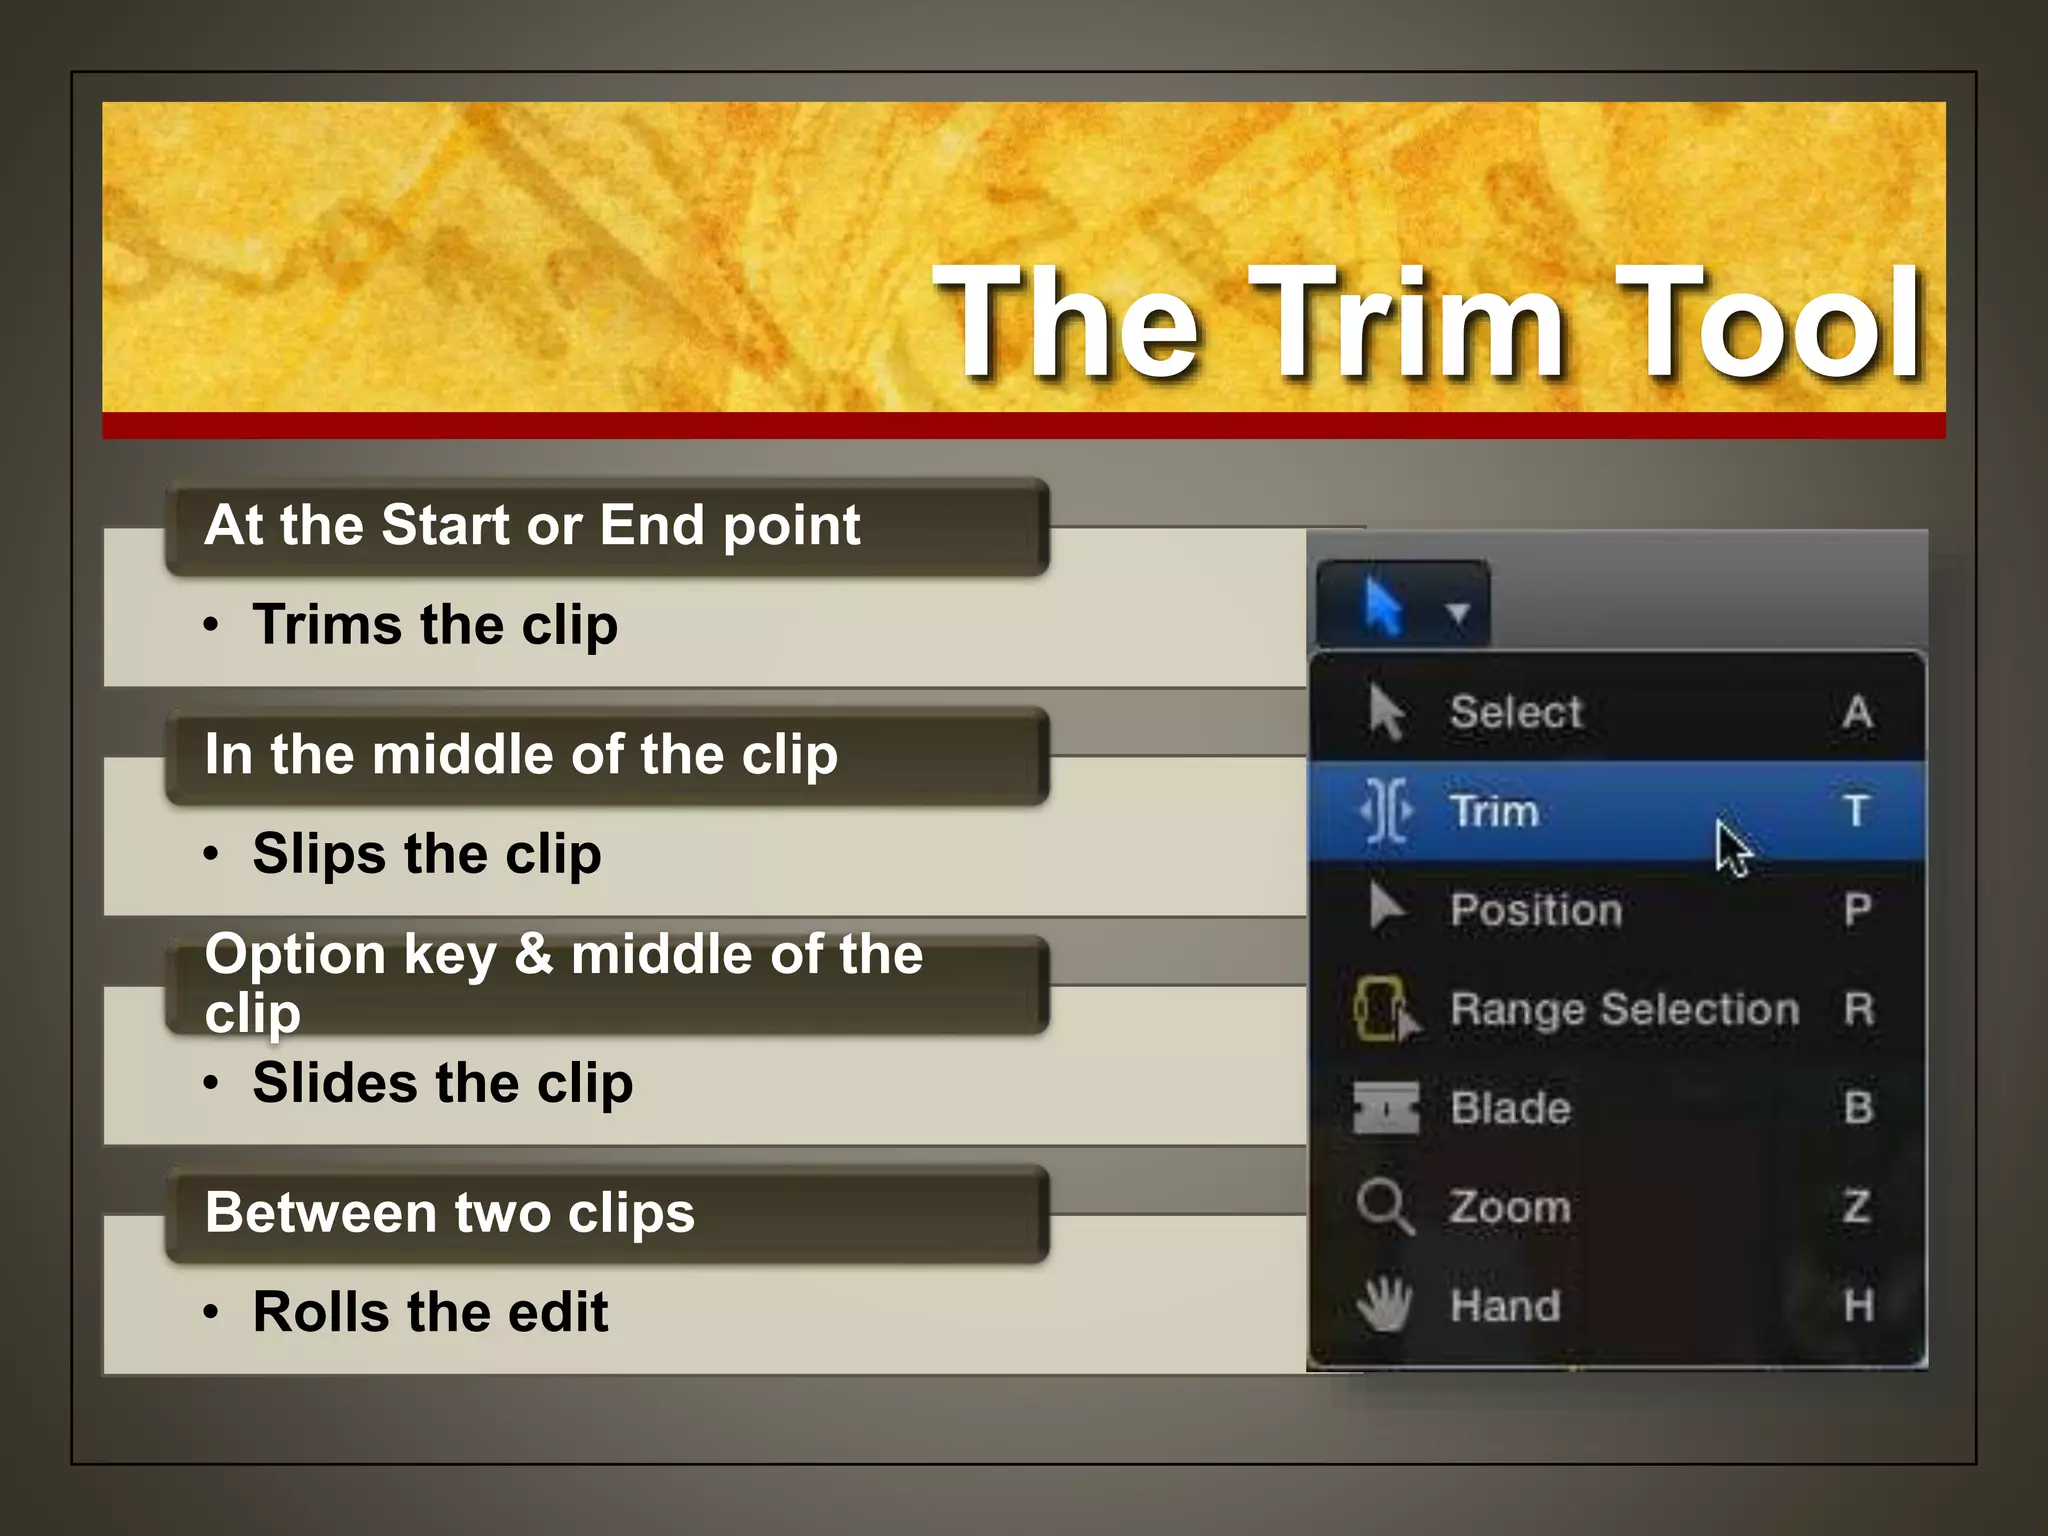
![Trimming Shortcuts
• Option & right bracket
• Trims an End point to the skimmer
location
Option ]
• Option & left bracket
• Trims a Start point to the skimmer
location
Option [
• Press I and O to set a range in a clip
• Press Option to trim the head and tail
material outside the selection
Option](https://image.slidesharecdn.com/lesson6x-111115151626-phpapp02/75/Final-Cut-Pro-X-Certification-Lesson-6-37-2048.jpg)
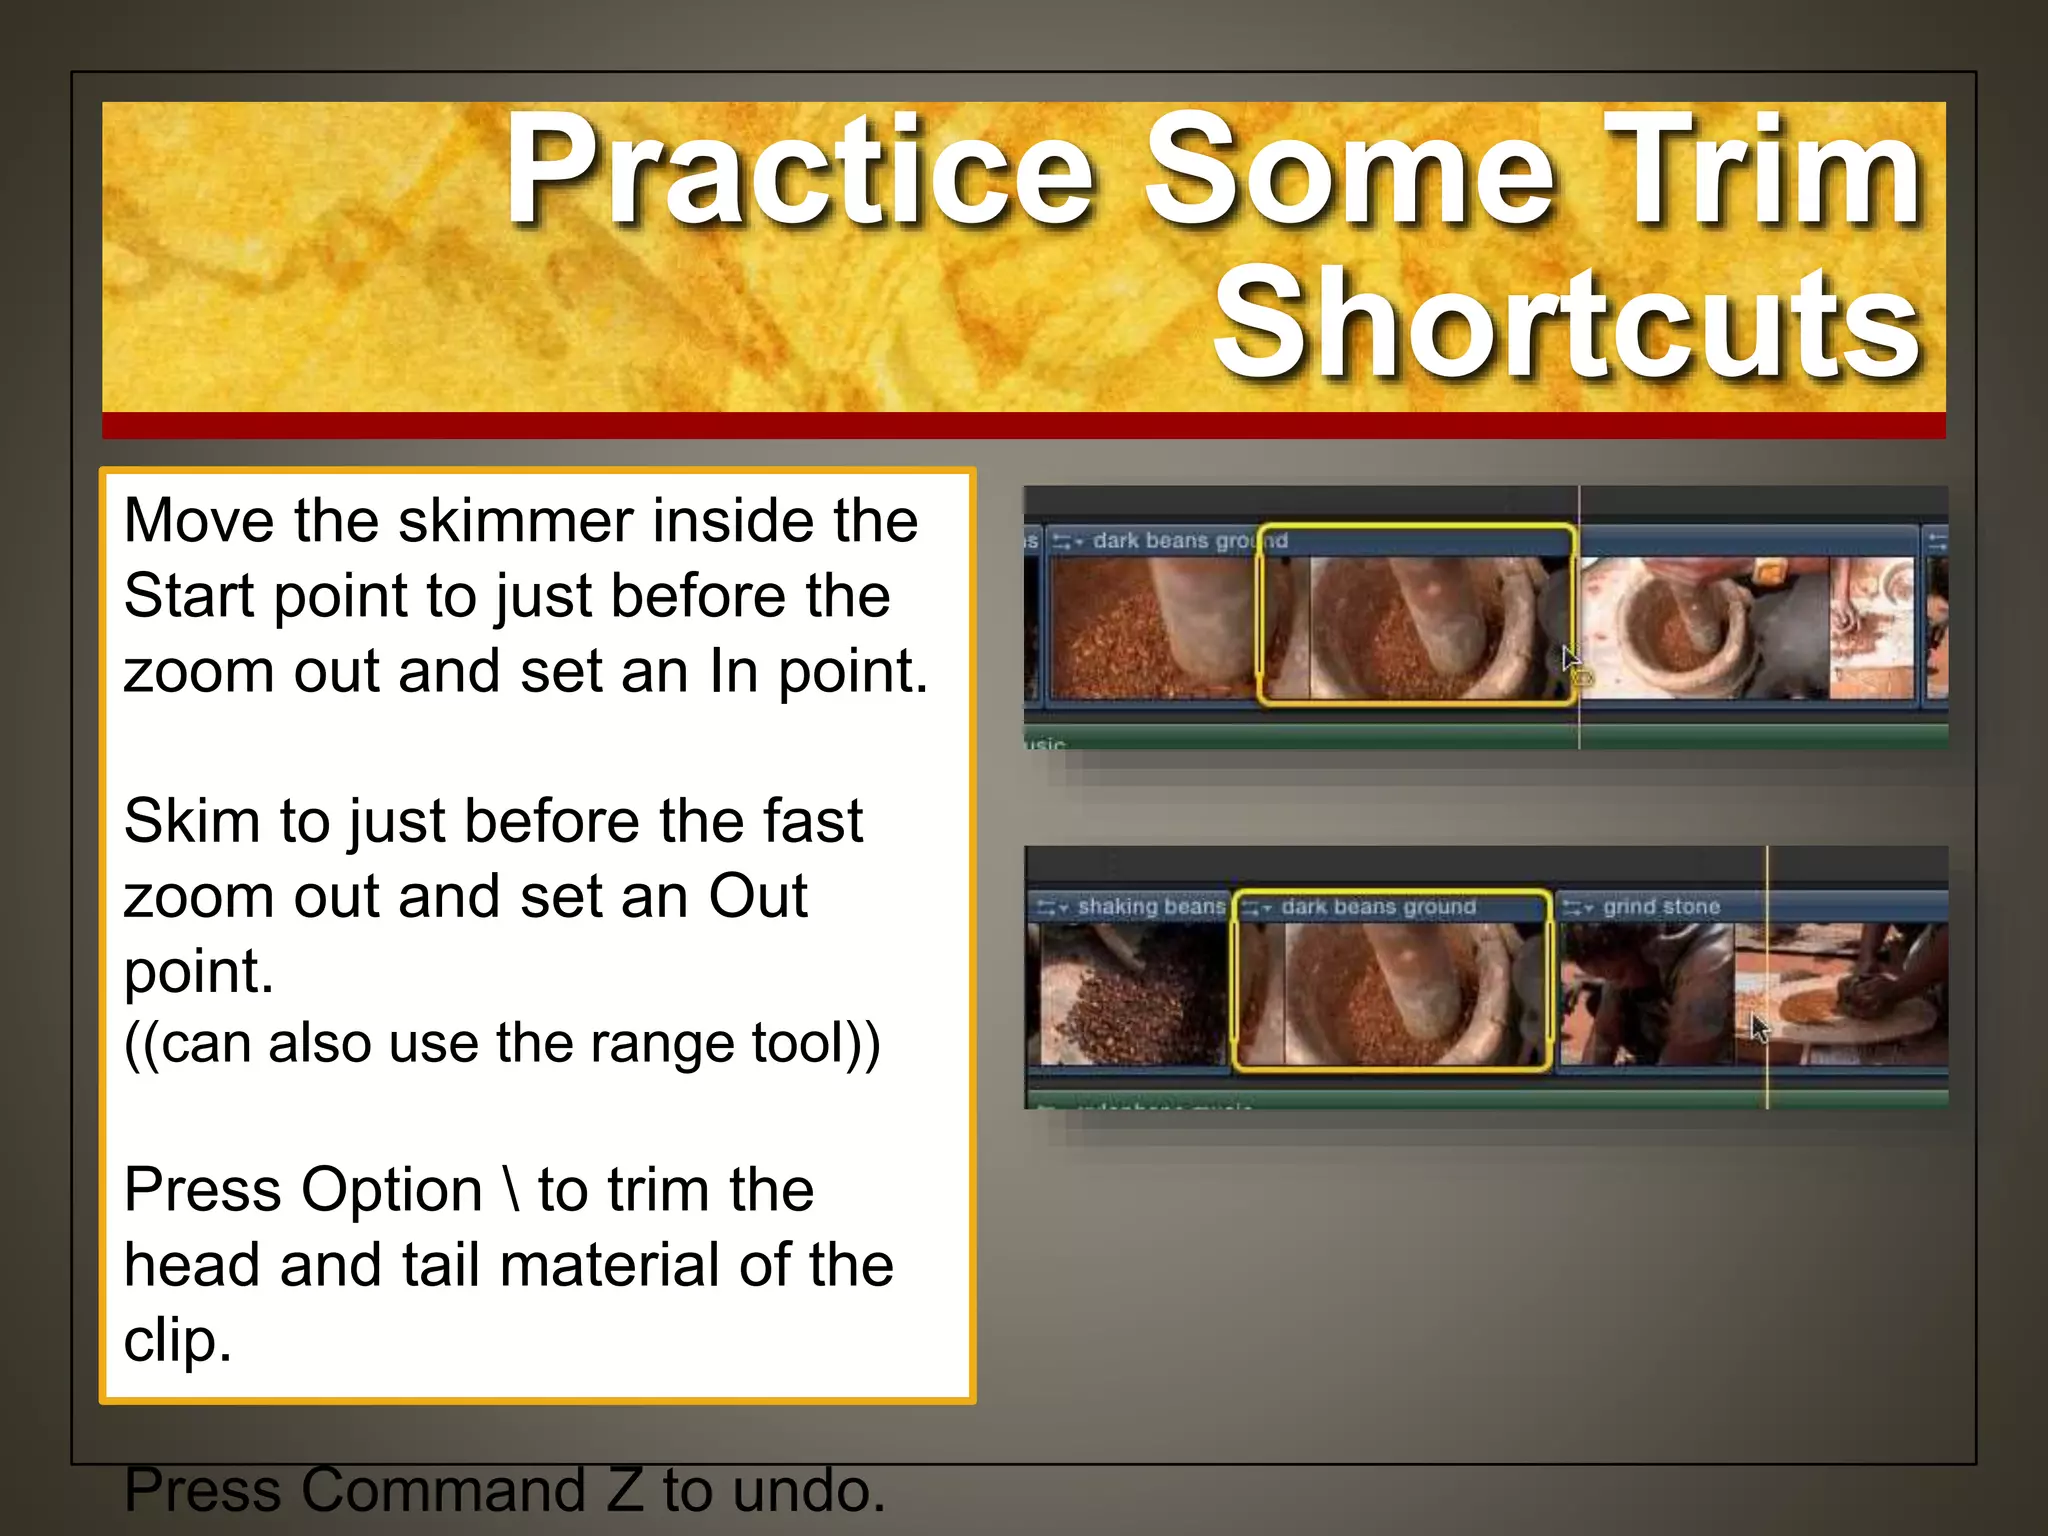
![Move the skimmer inside the
End point to just before the
zoom out
Press Option ] to trim the
End point.
Press Command Z to undo.
Practice Some Trim
Shortcuts](https://image.slidesharecdn.com/lesson6x-111115151626-phpapp02/75/Final-Cut-Pro-X-Certification-Lesson-6-39-2048.jpg)
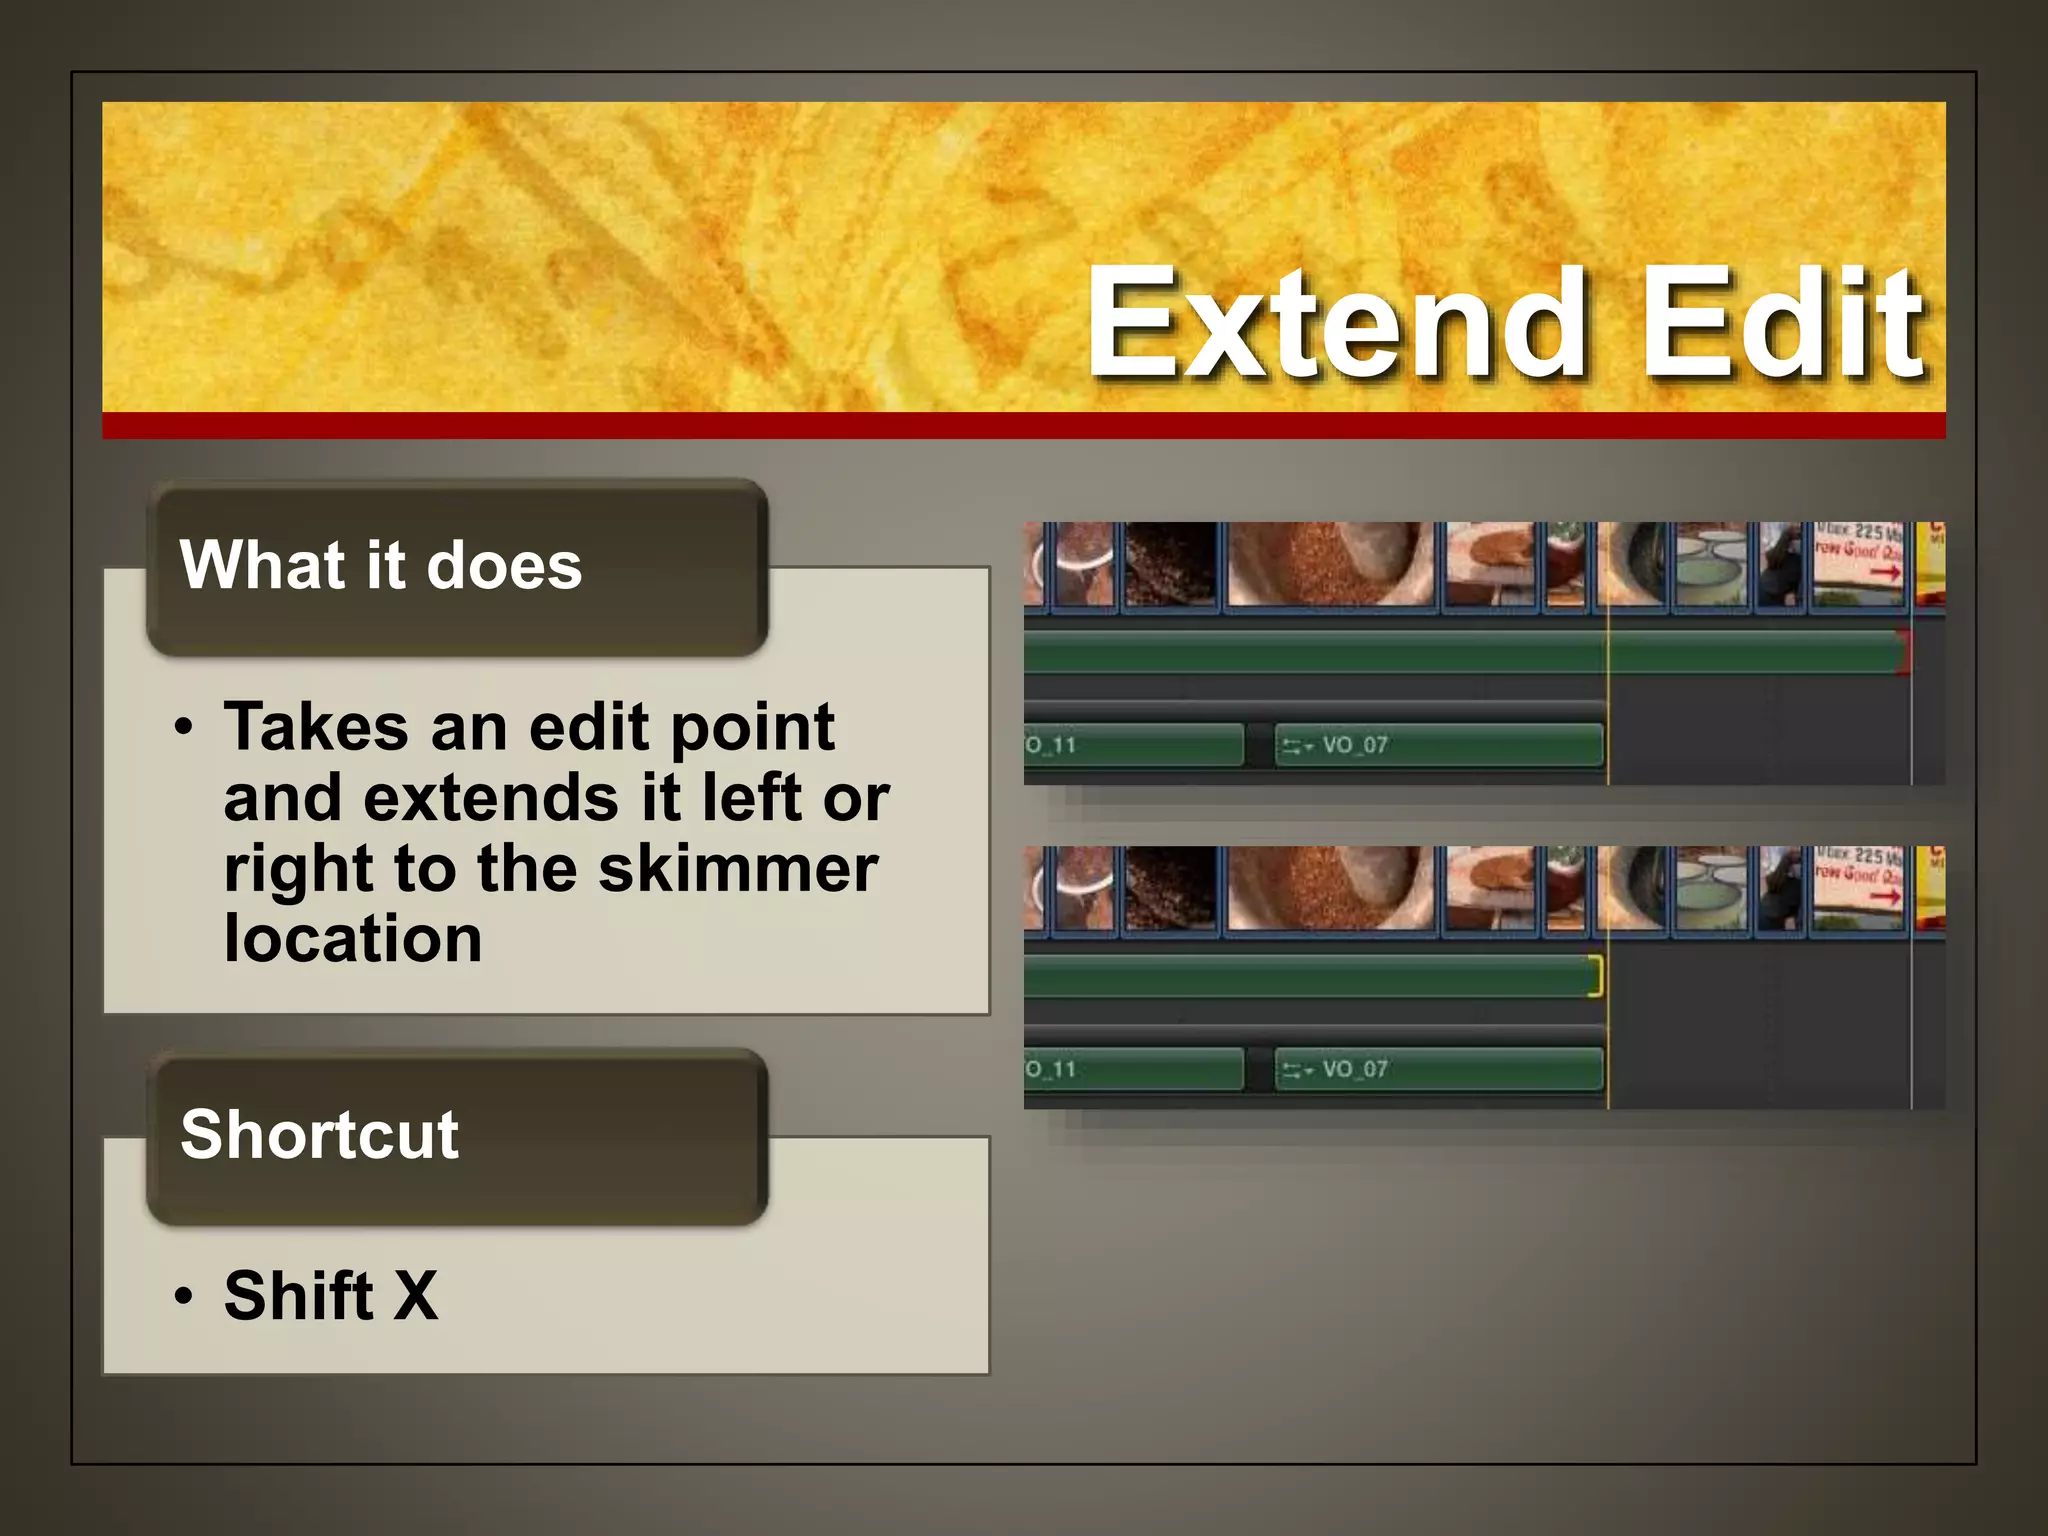
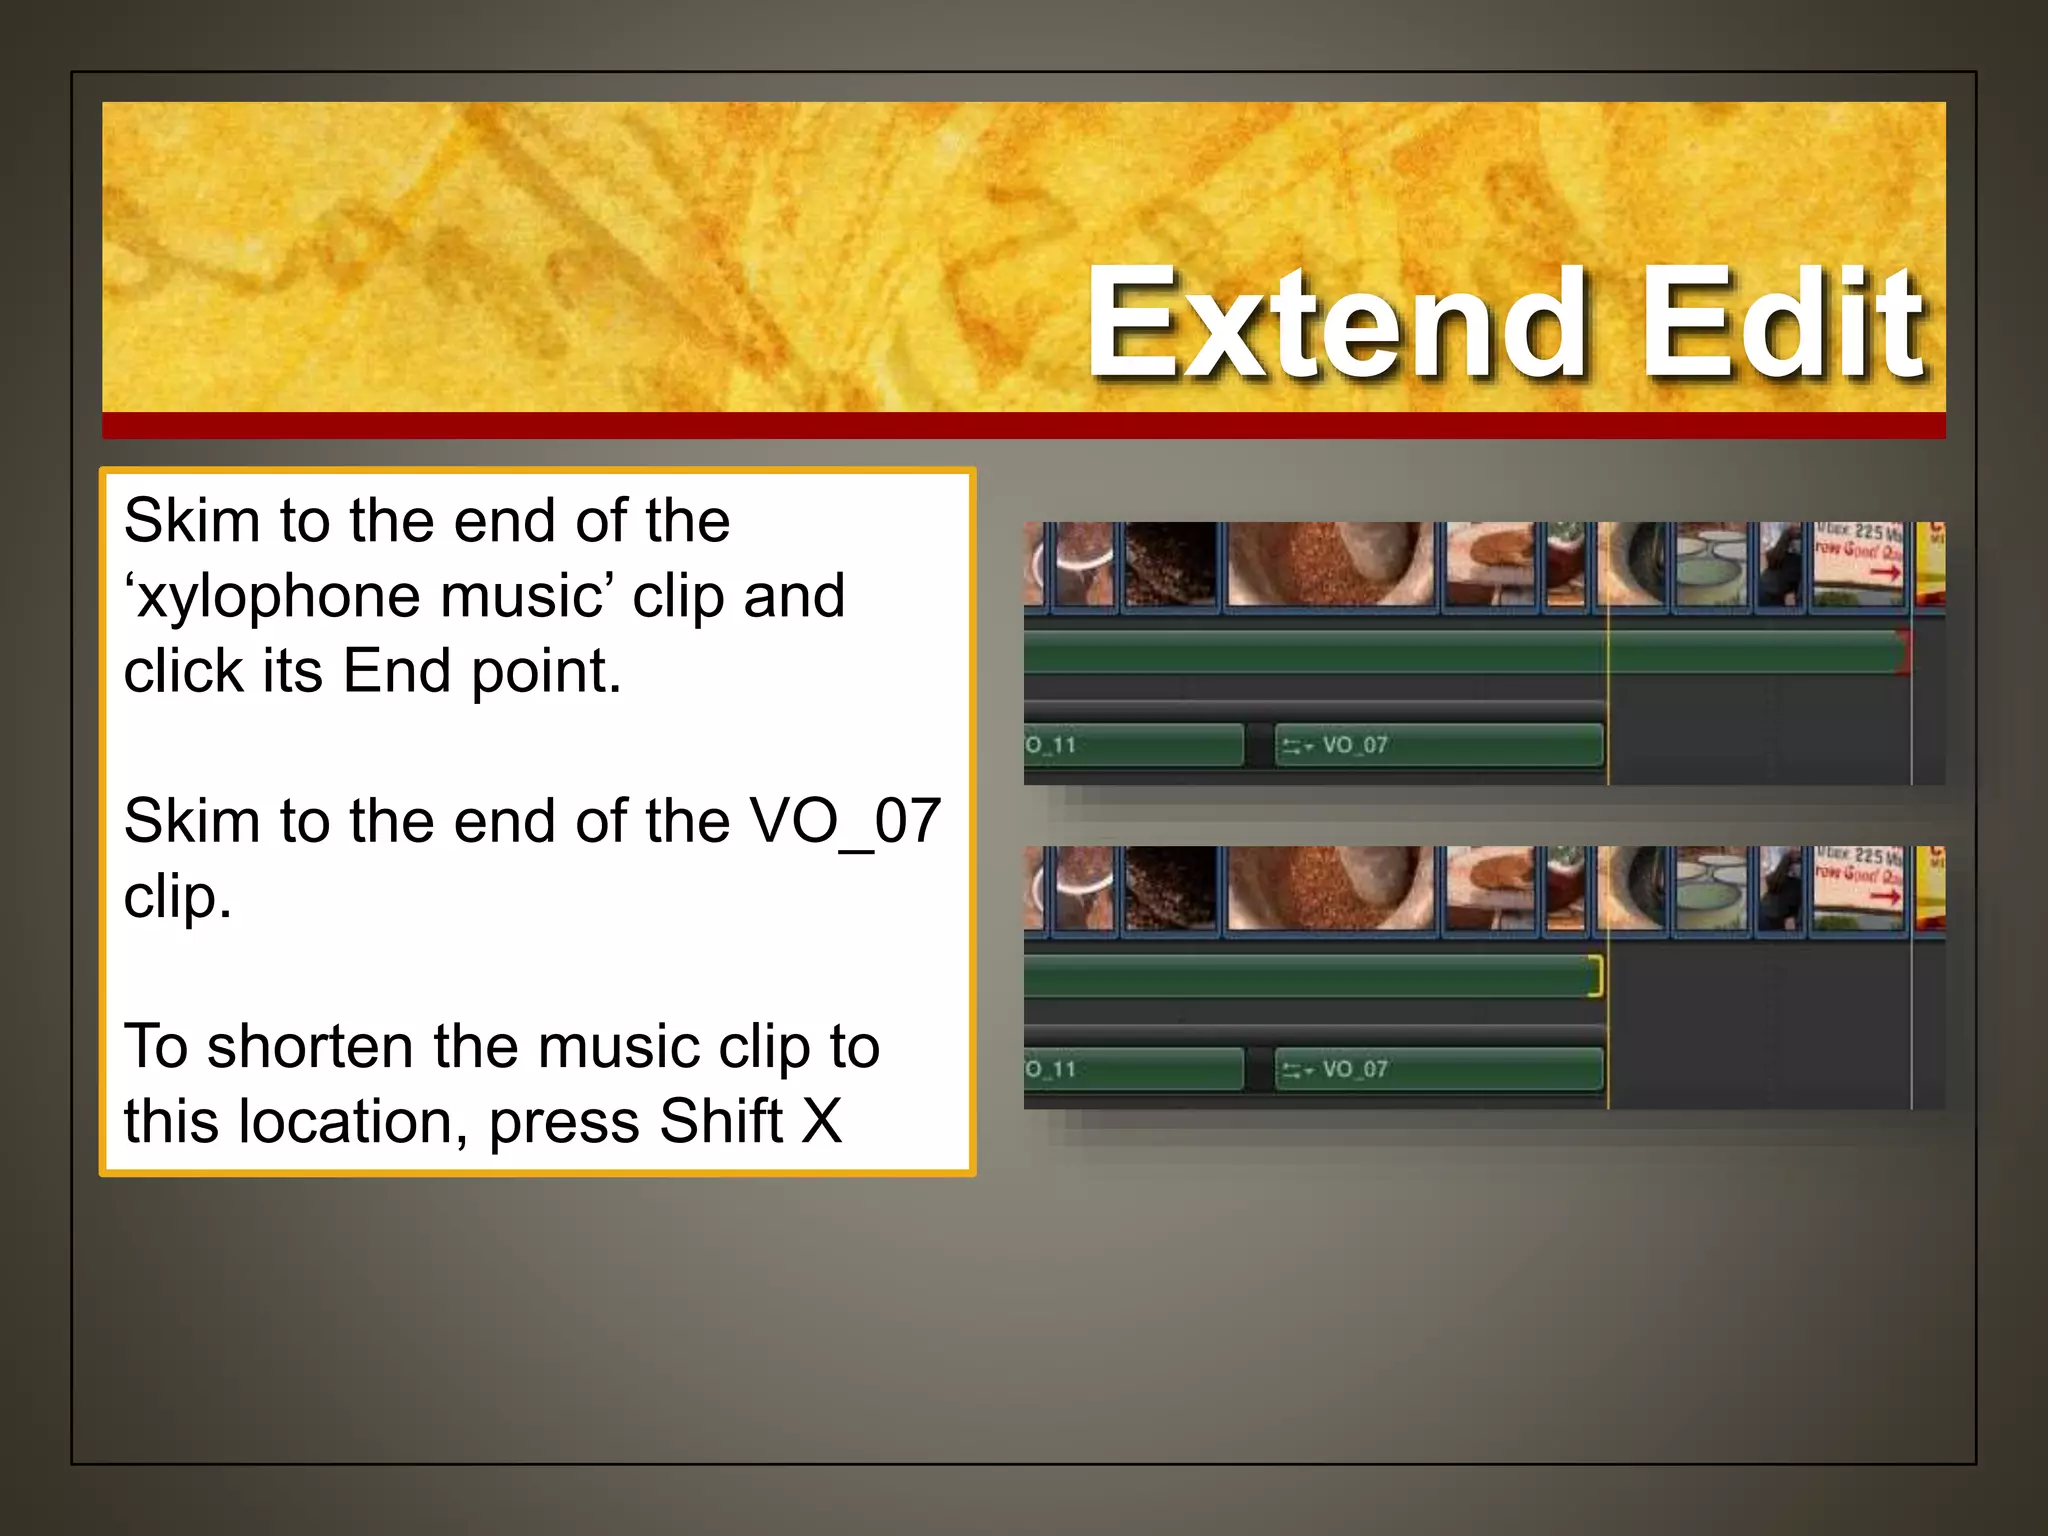

![Shortcuts:
• Expand Audio/VideoControl S
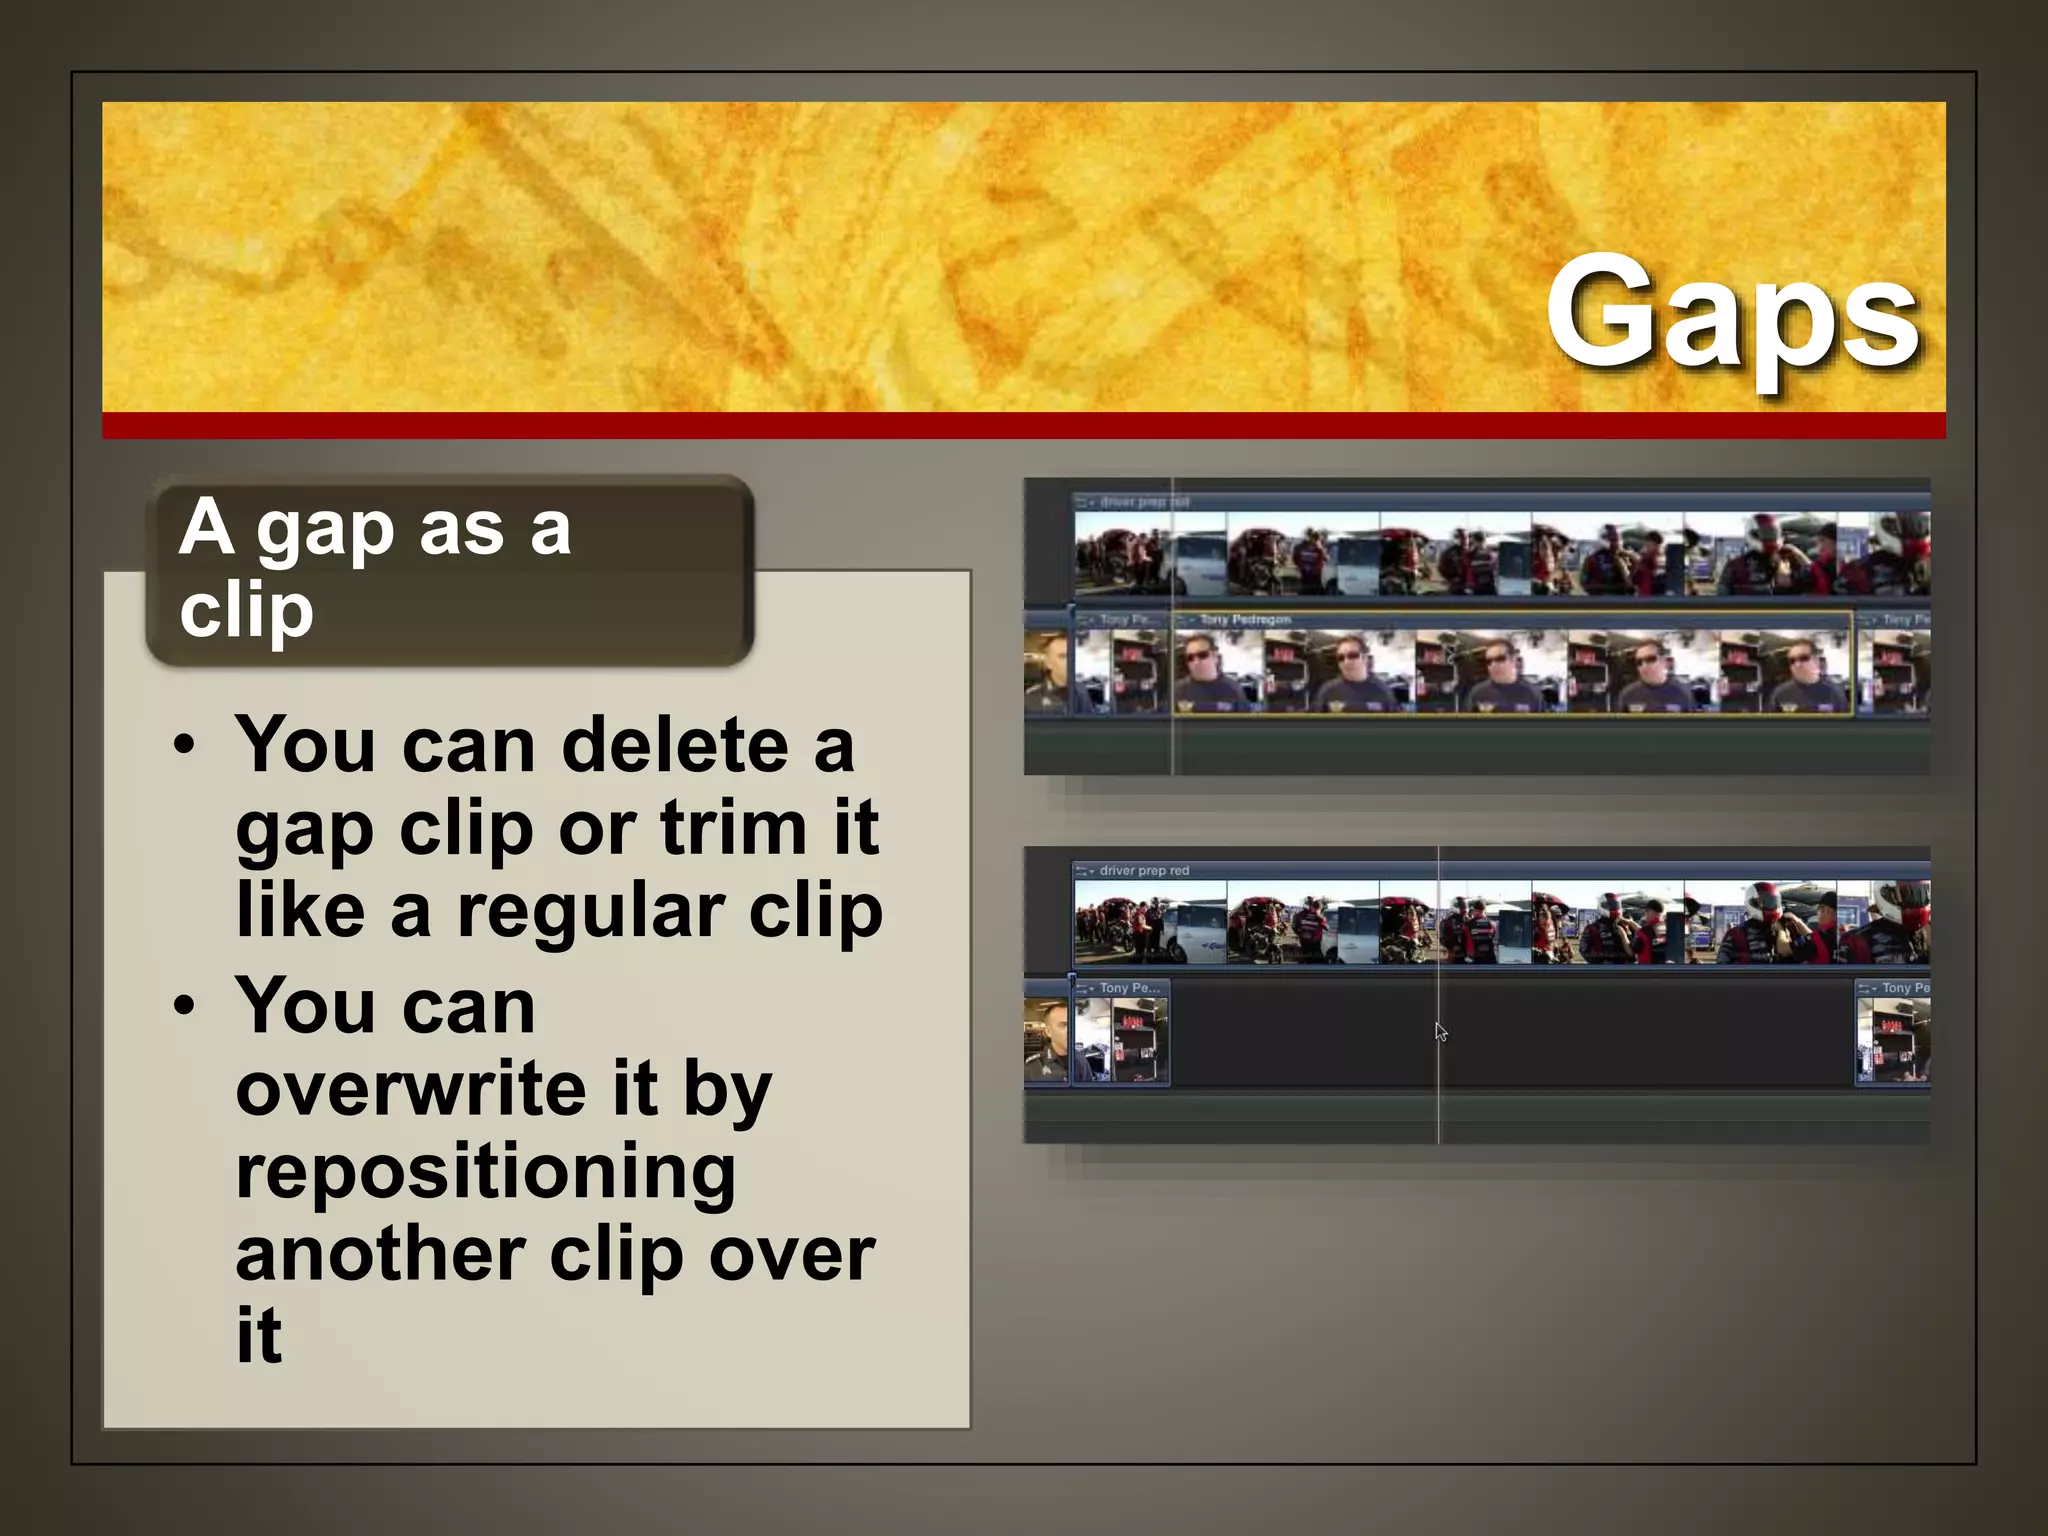
• Insert a gap clipOption W
• Trim the End point and remove all frames
to the right of the skimmer location
Option ]
• Trim the Start point and remove all frames
to the left of the skimmer location
Option [
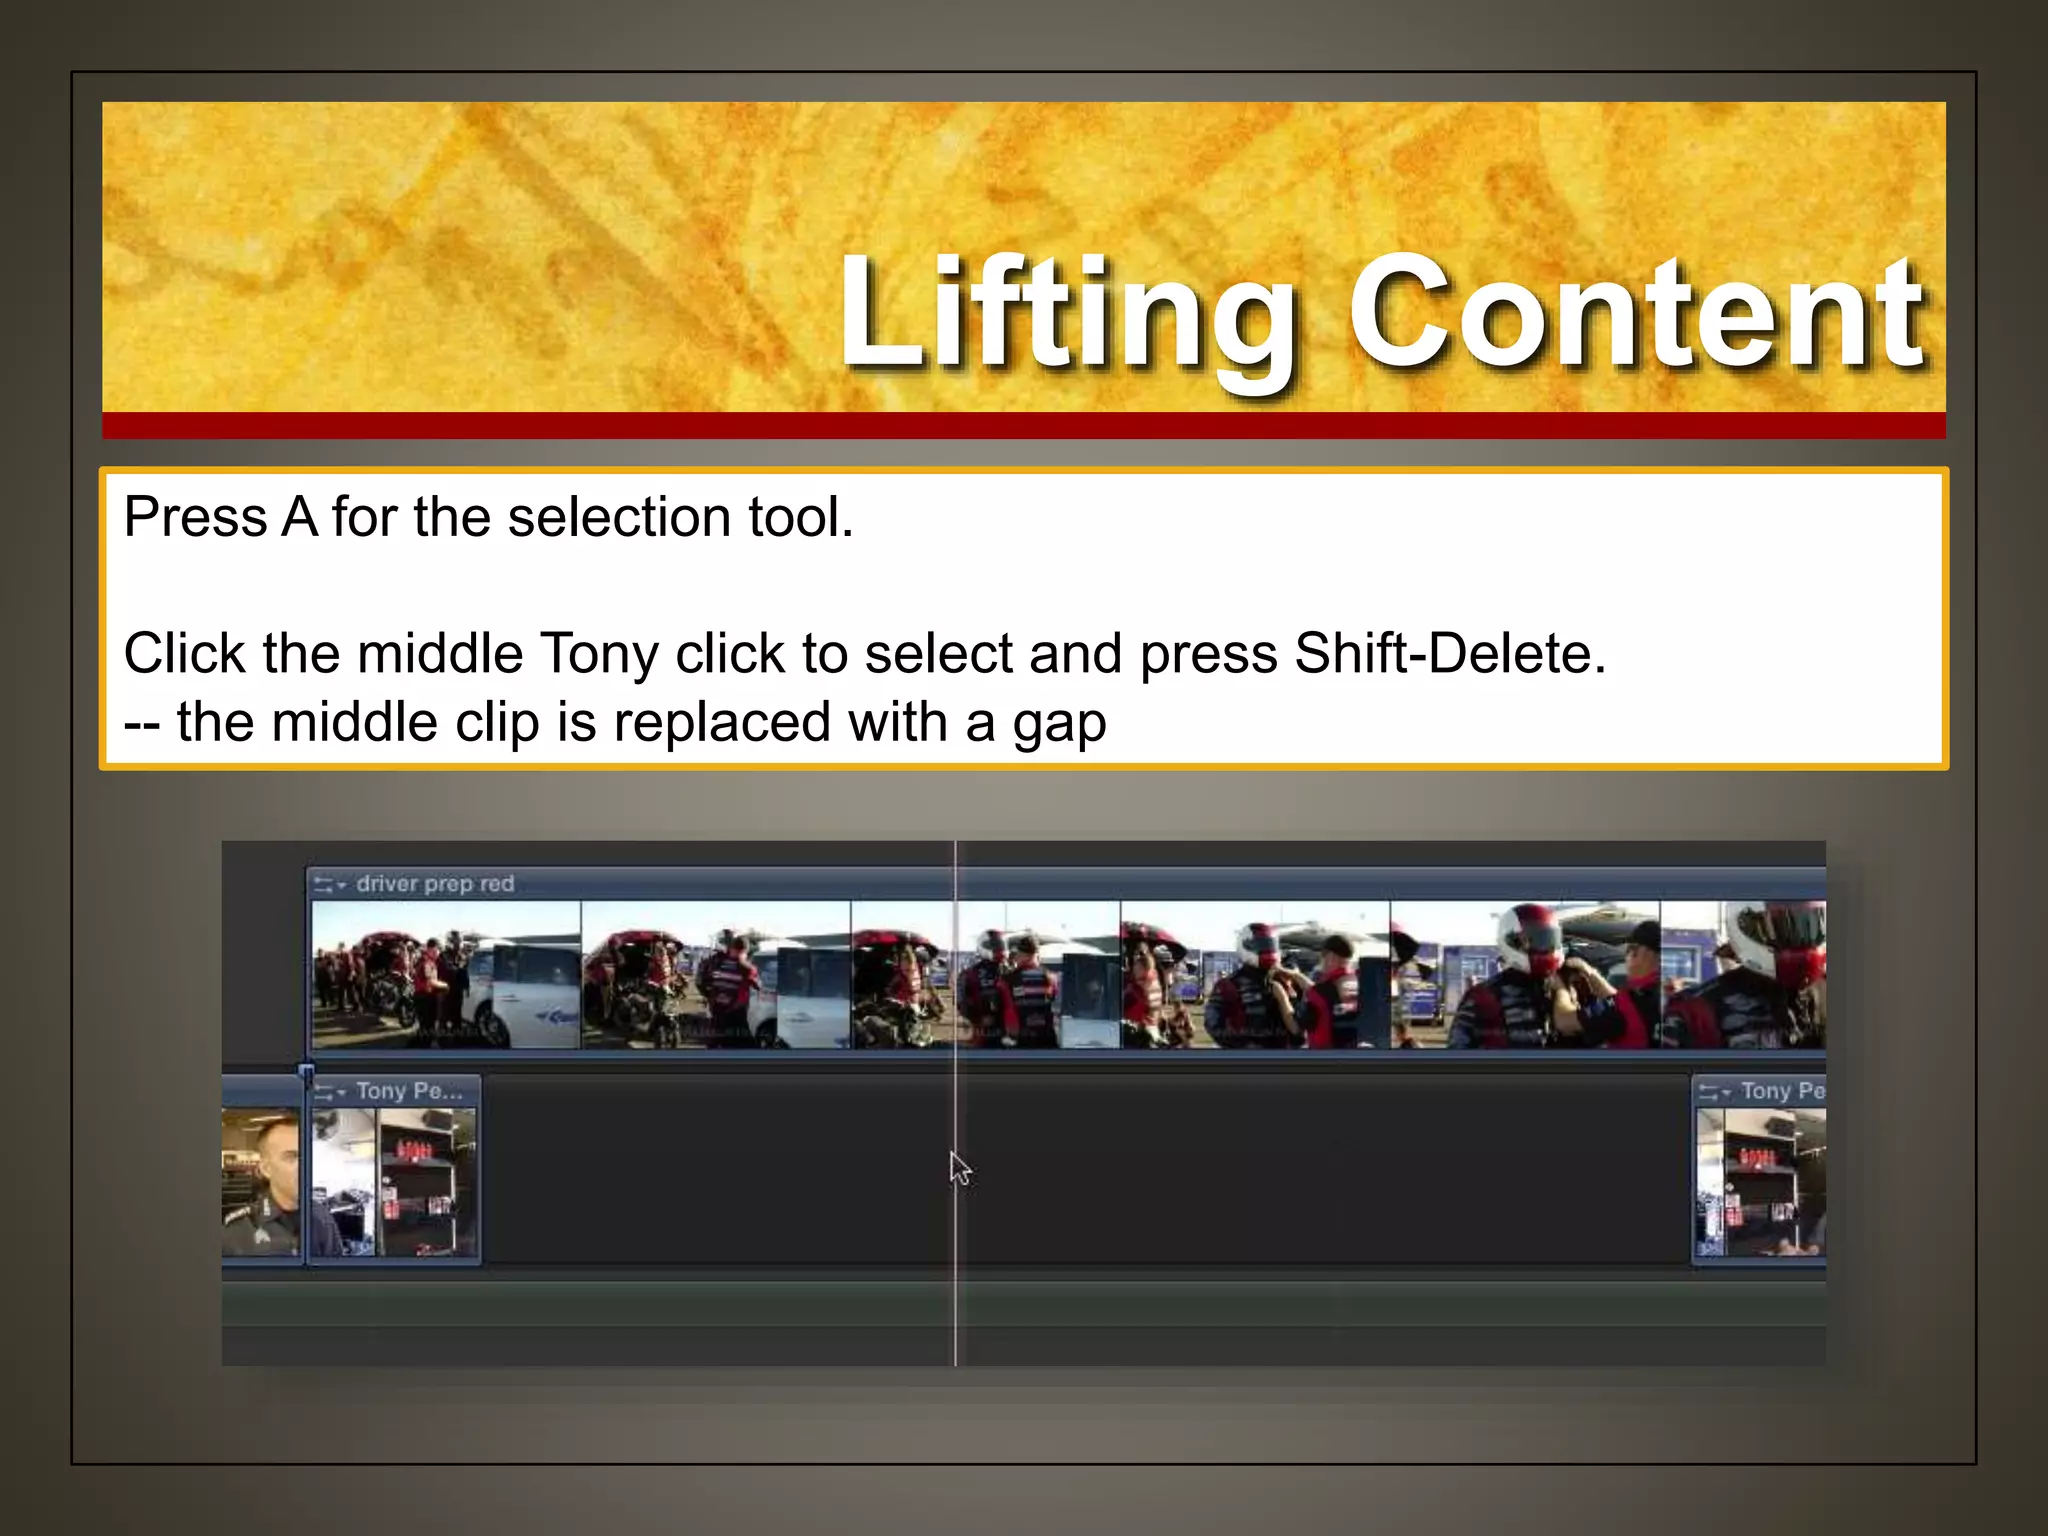
• Lift an item or section from the Timeline
and leave a gap
Shift Delete
• Play around an editShift /](https://image.slidesharecdn.com/lesson6x-111115151626-phpapp02/75/Final-Cut-Pro-X-Certification-Lesson-6-67-2048.jpg)


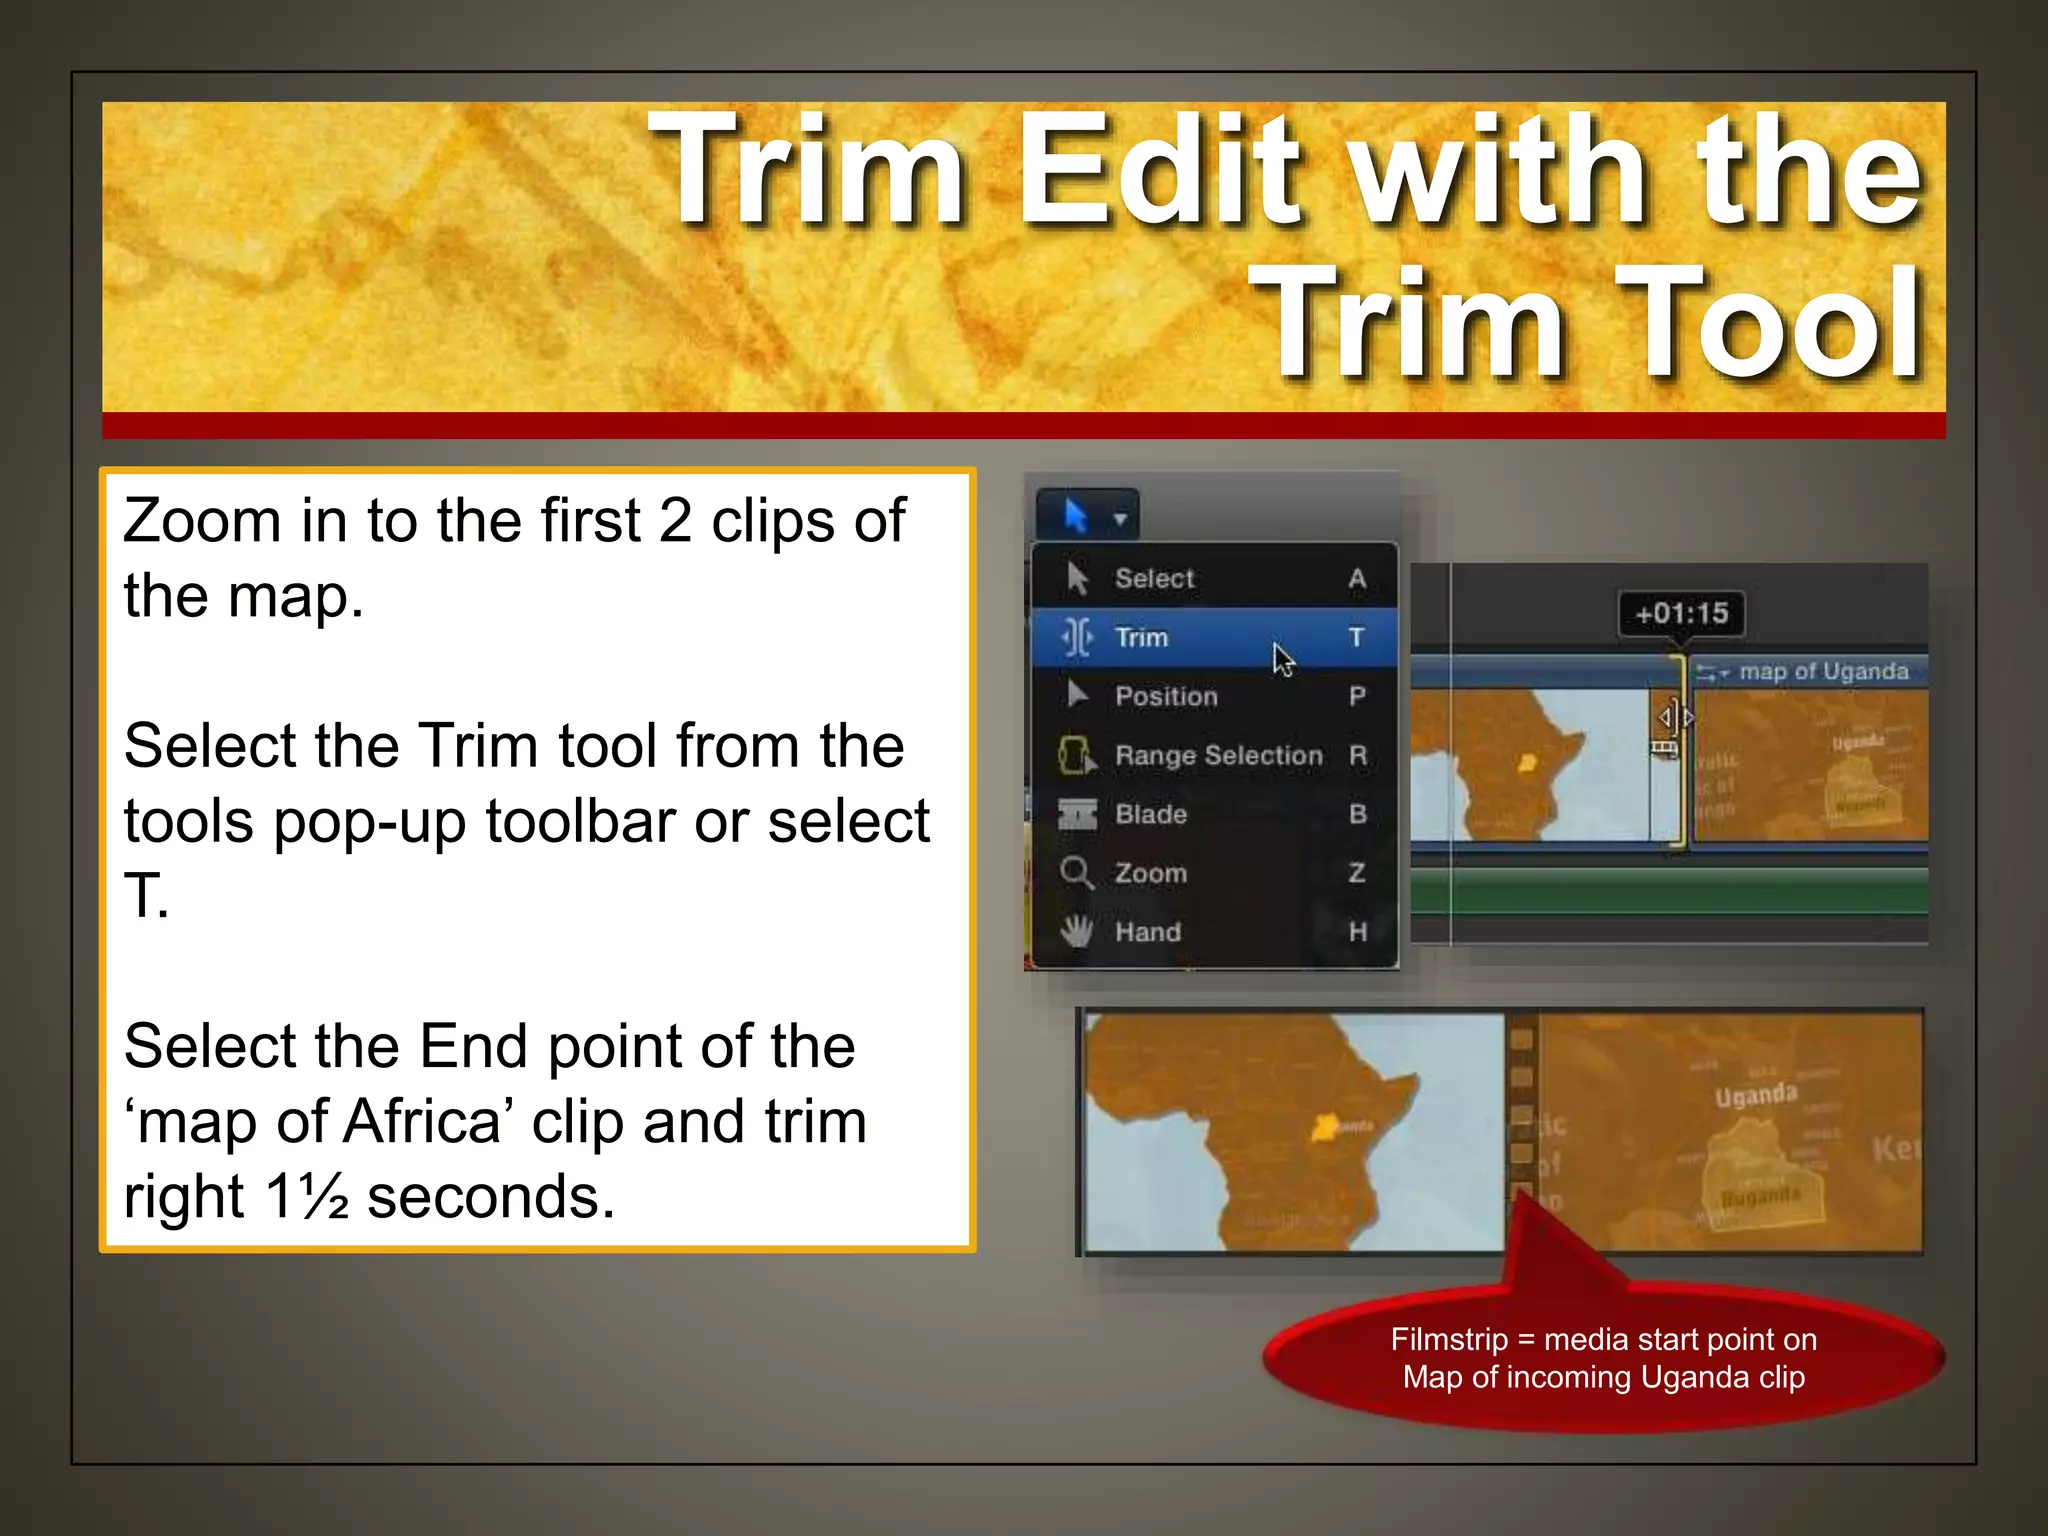
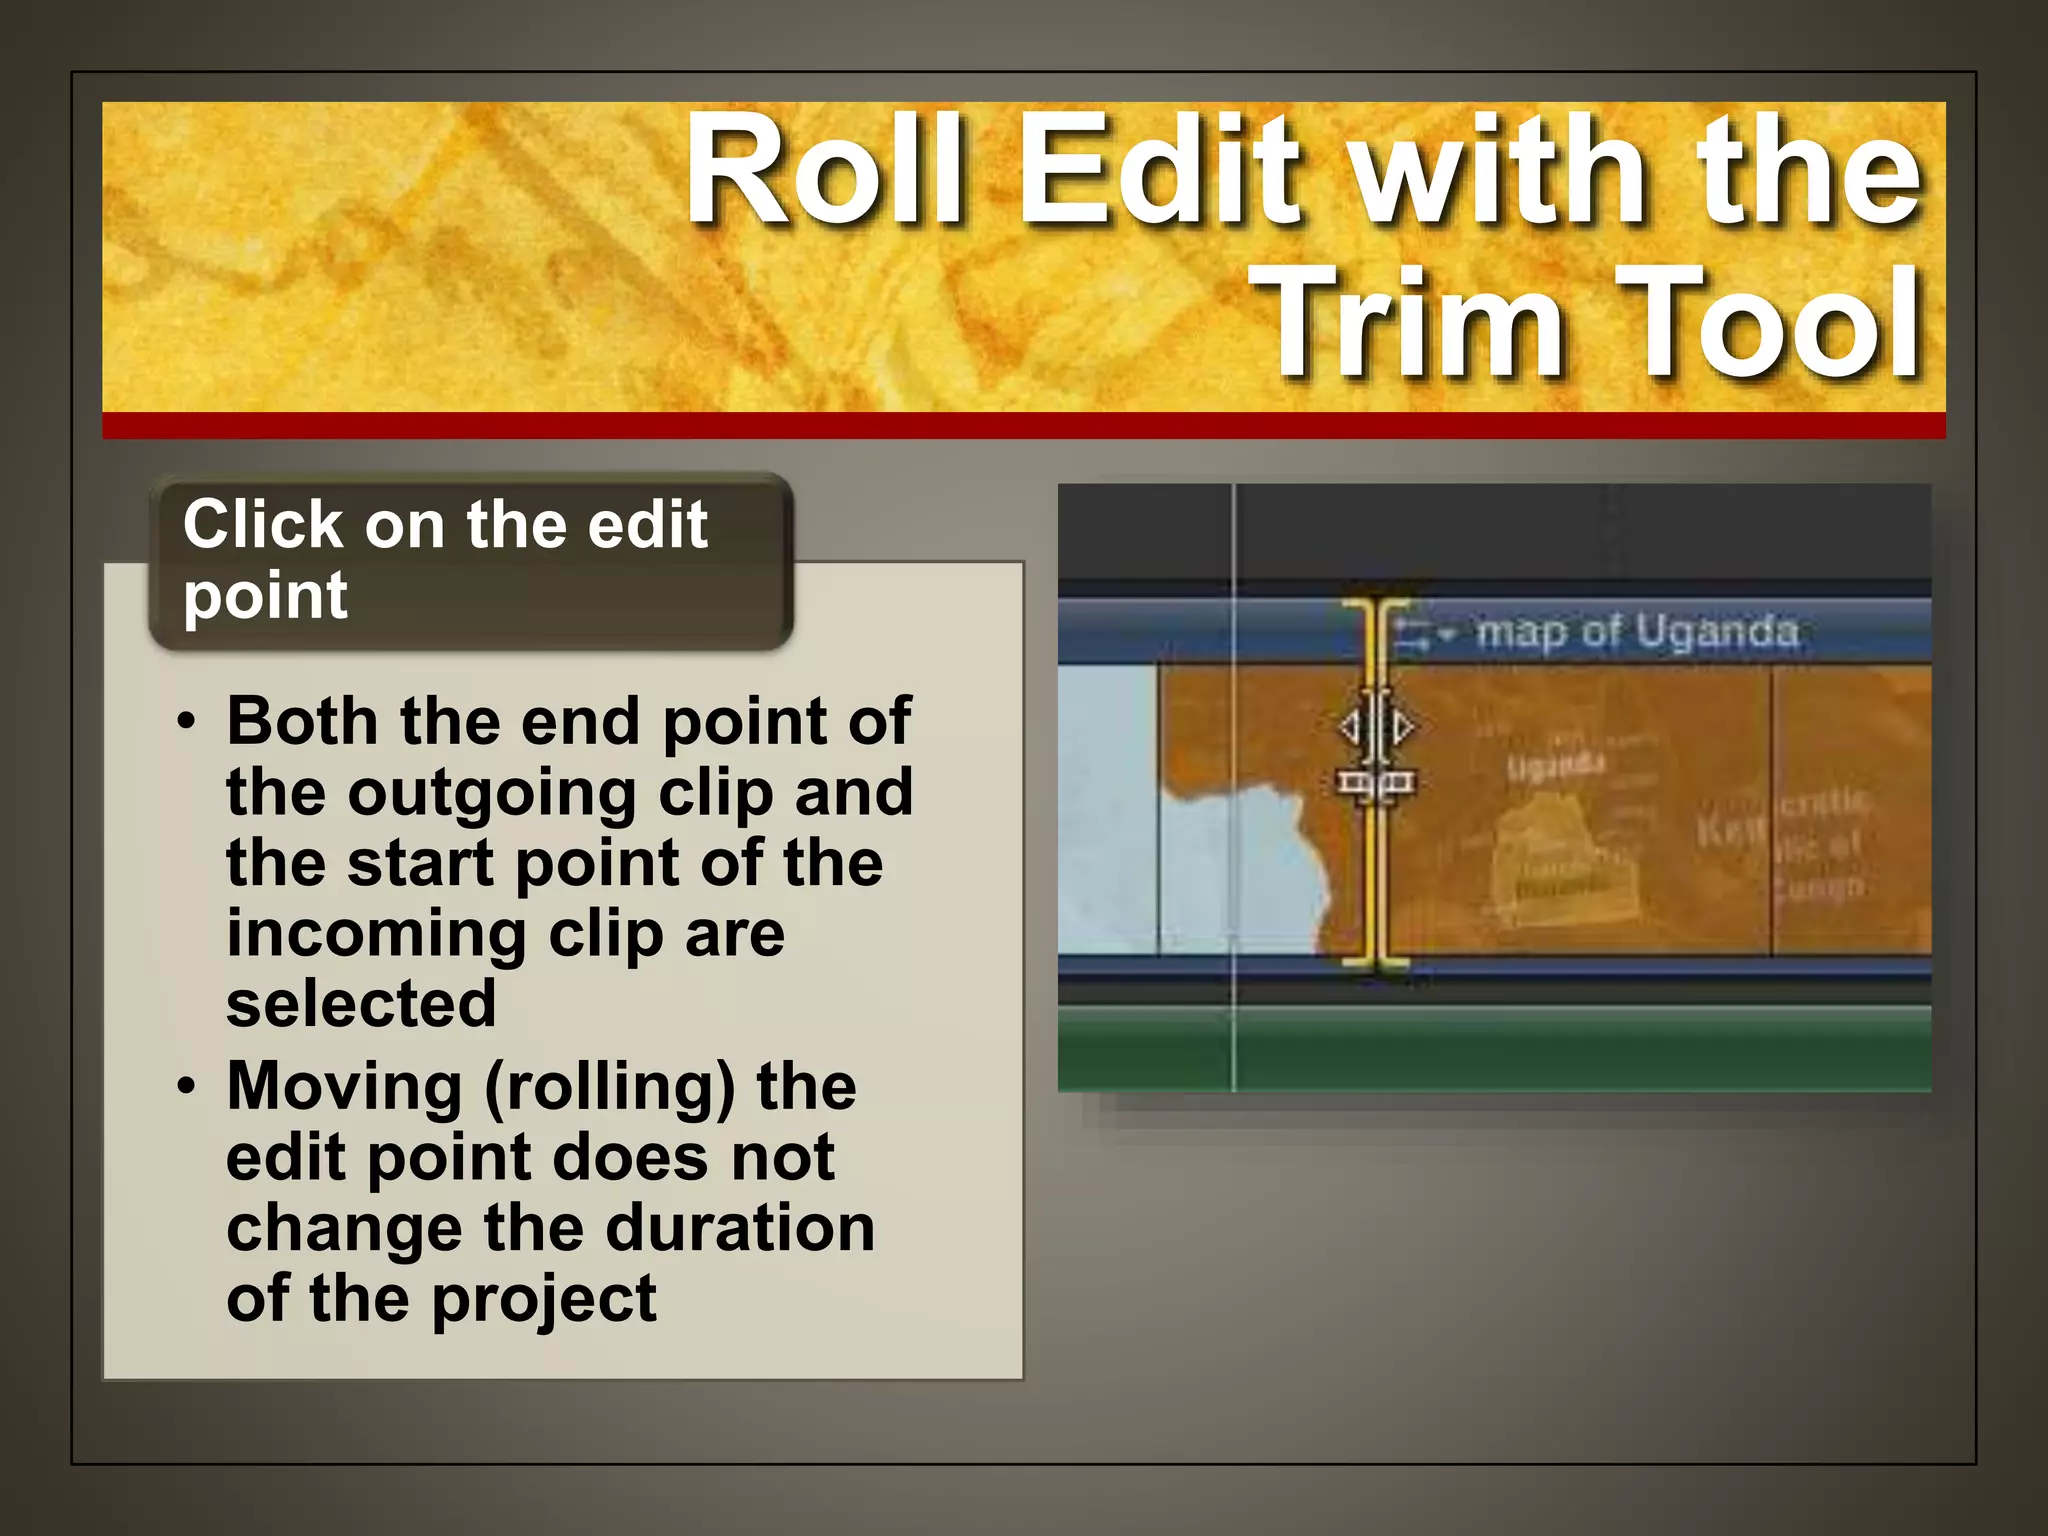
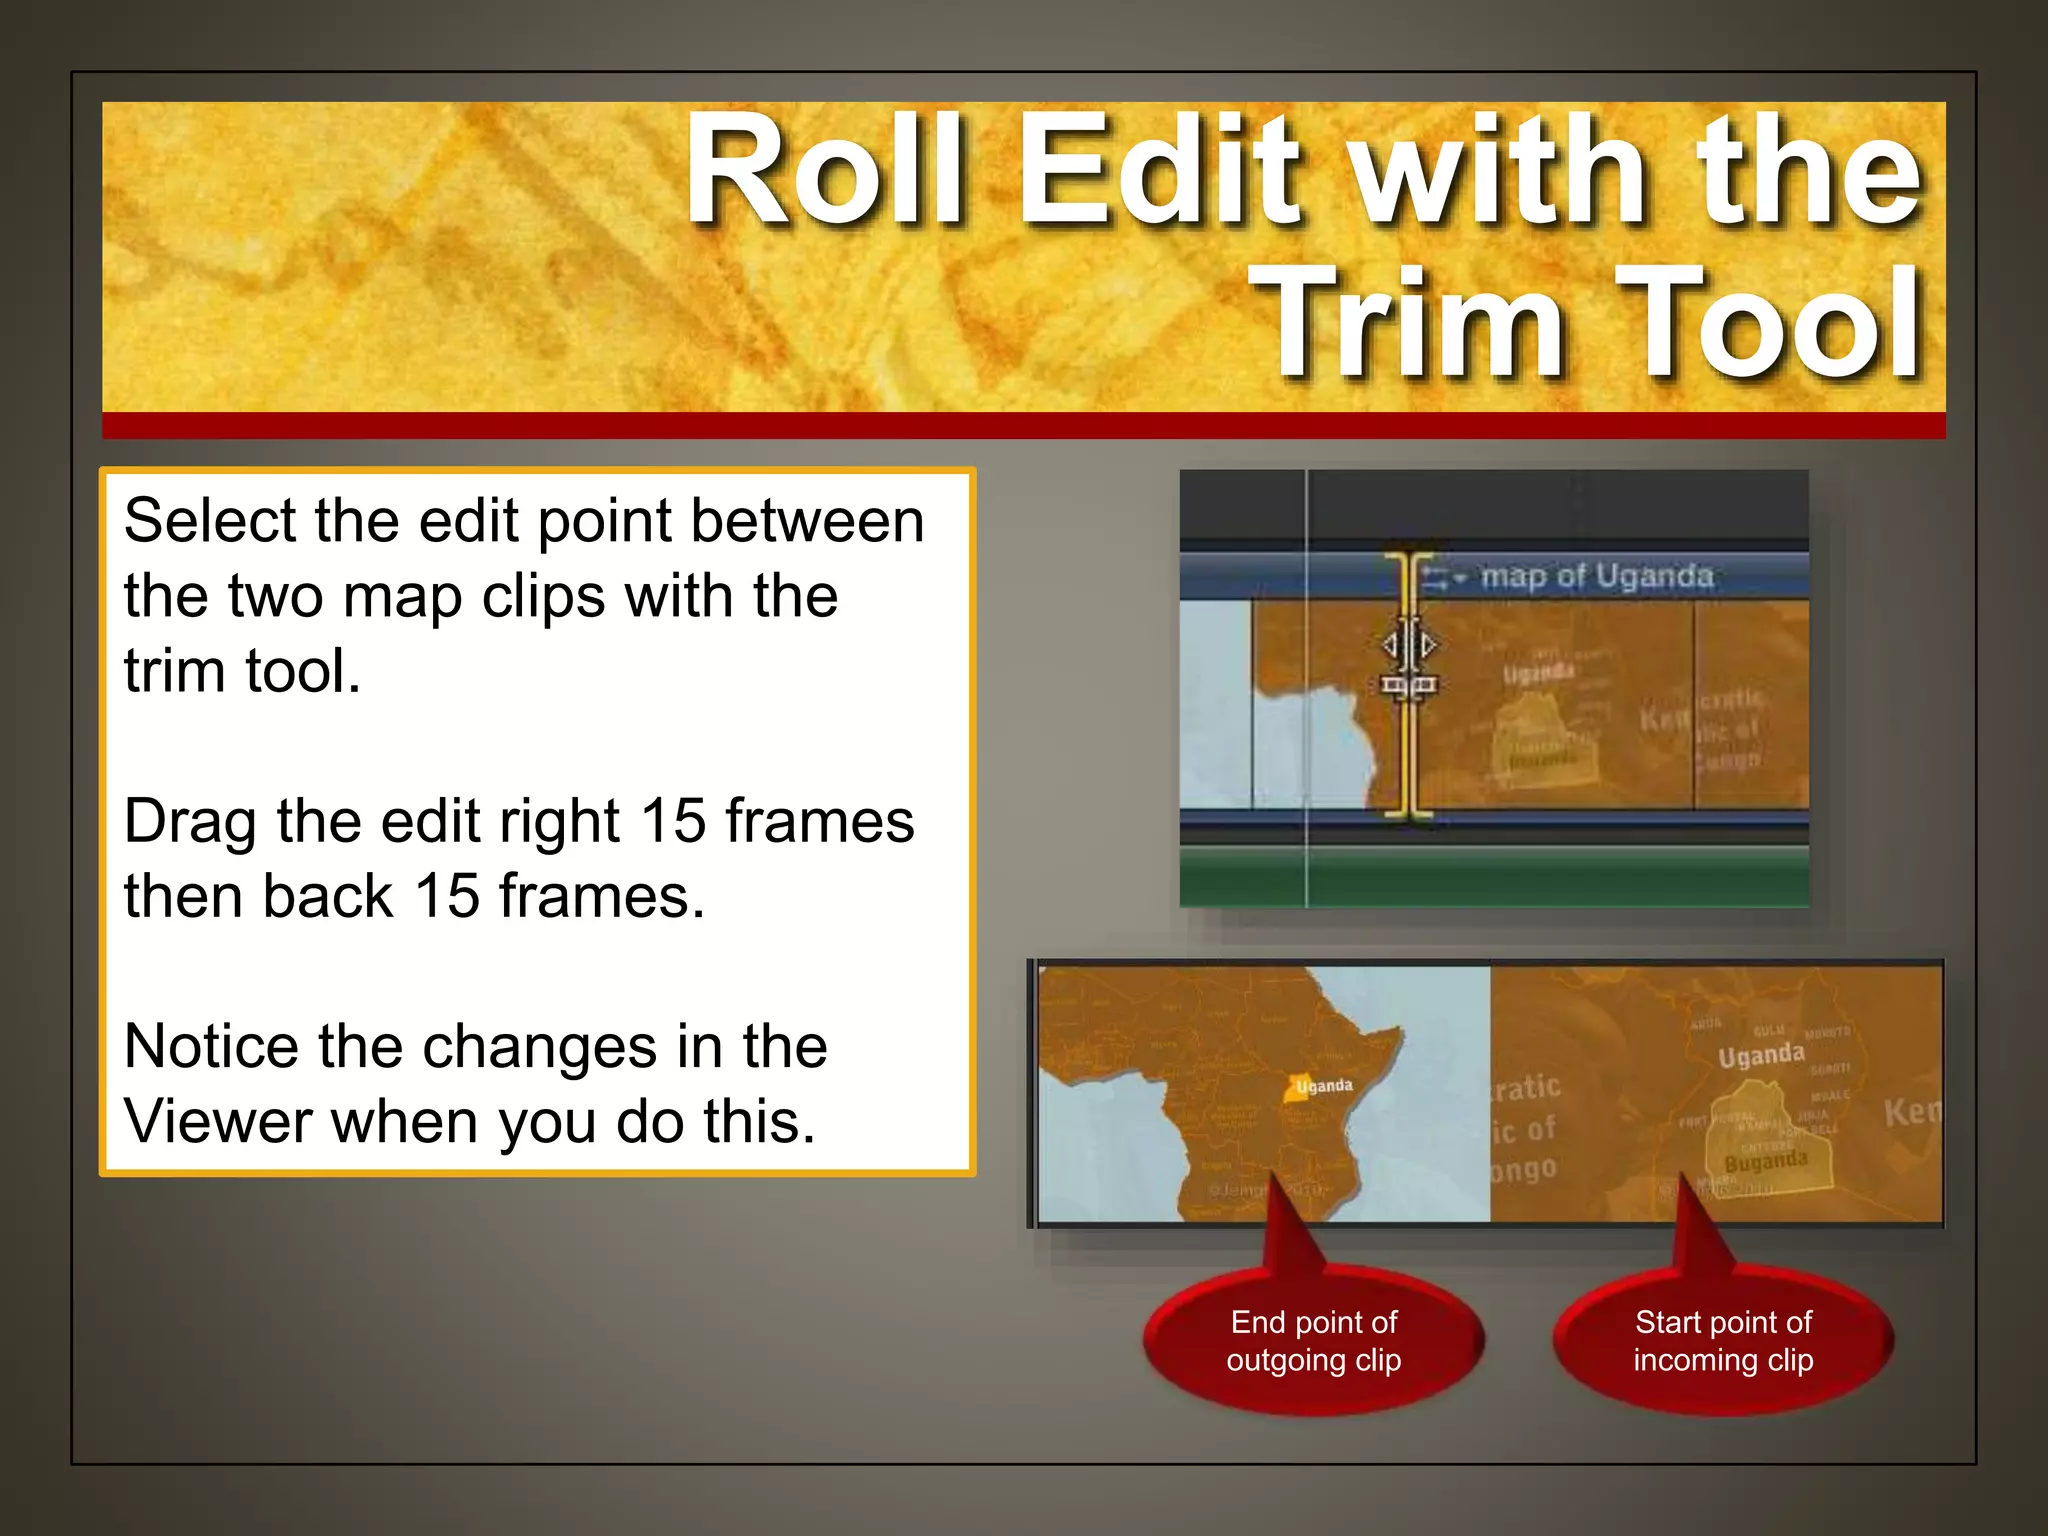
This document serves as a lesson guide for fine-tuning a rough cut in Final Cut Pro X, instructing users on project preparation, clip renaming, and various editing techniques such as removing clips, trimming, and using gap clips. It also covers advanced editing functions like rolling and slip editing, including shortcuts for refining projects efficiently. The lesson culminates in a homework assignment where users are tasked with applying these techniques to improve a scene's dialogue flow.


