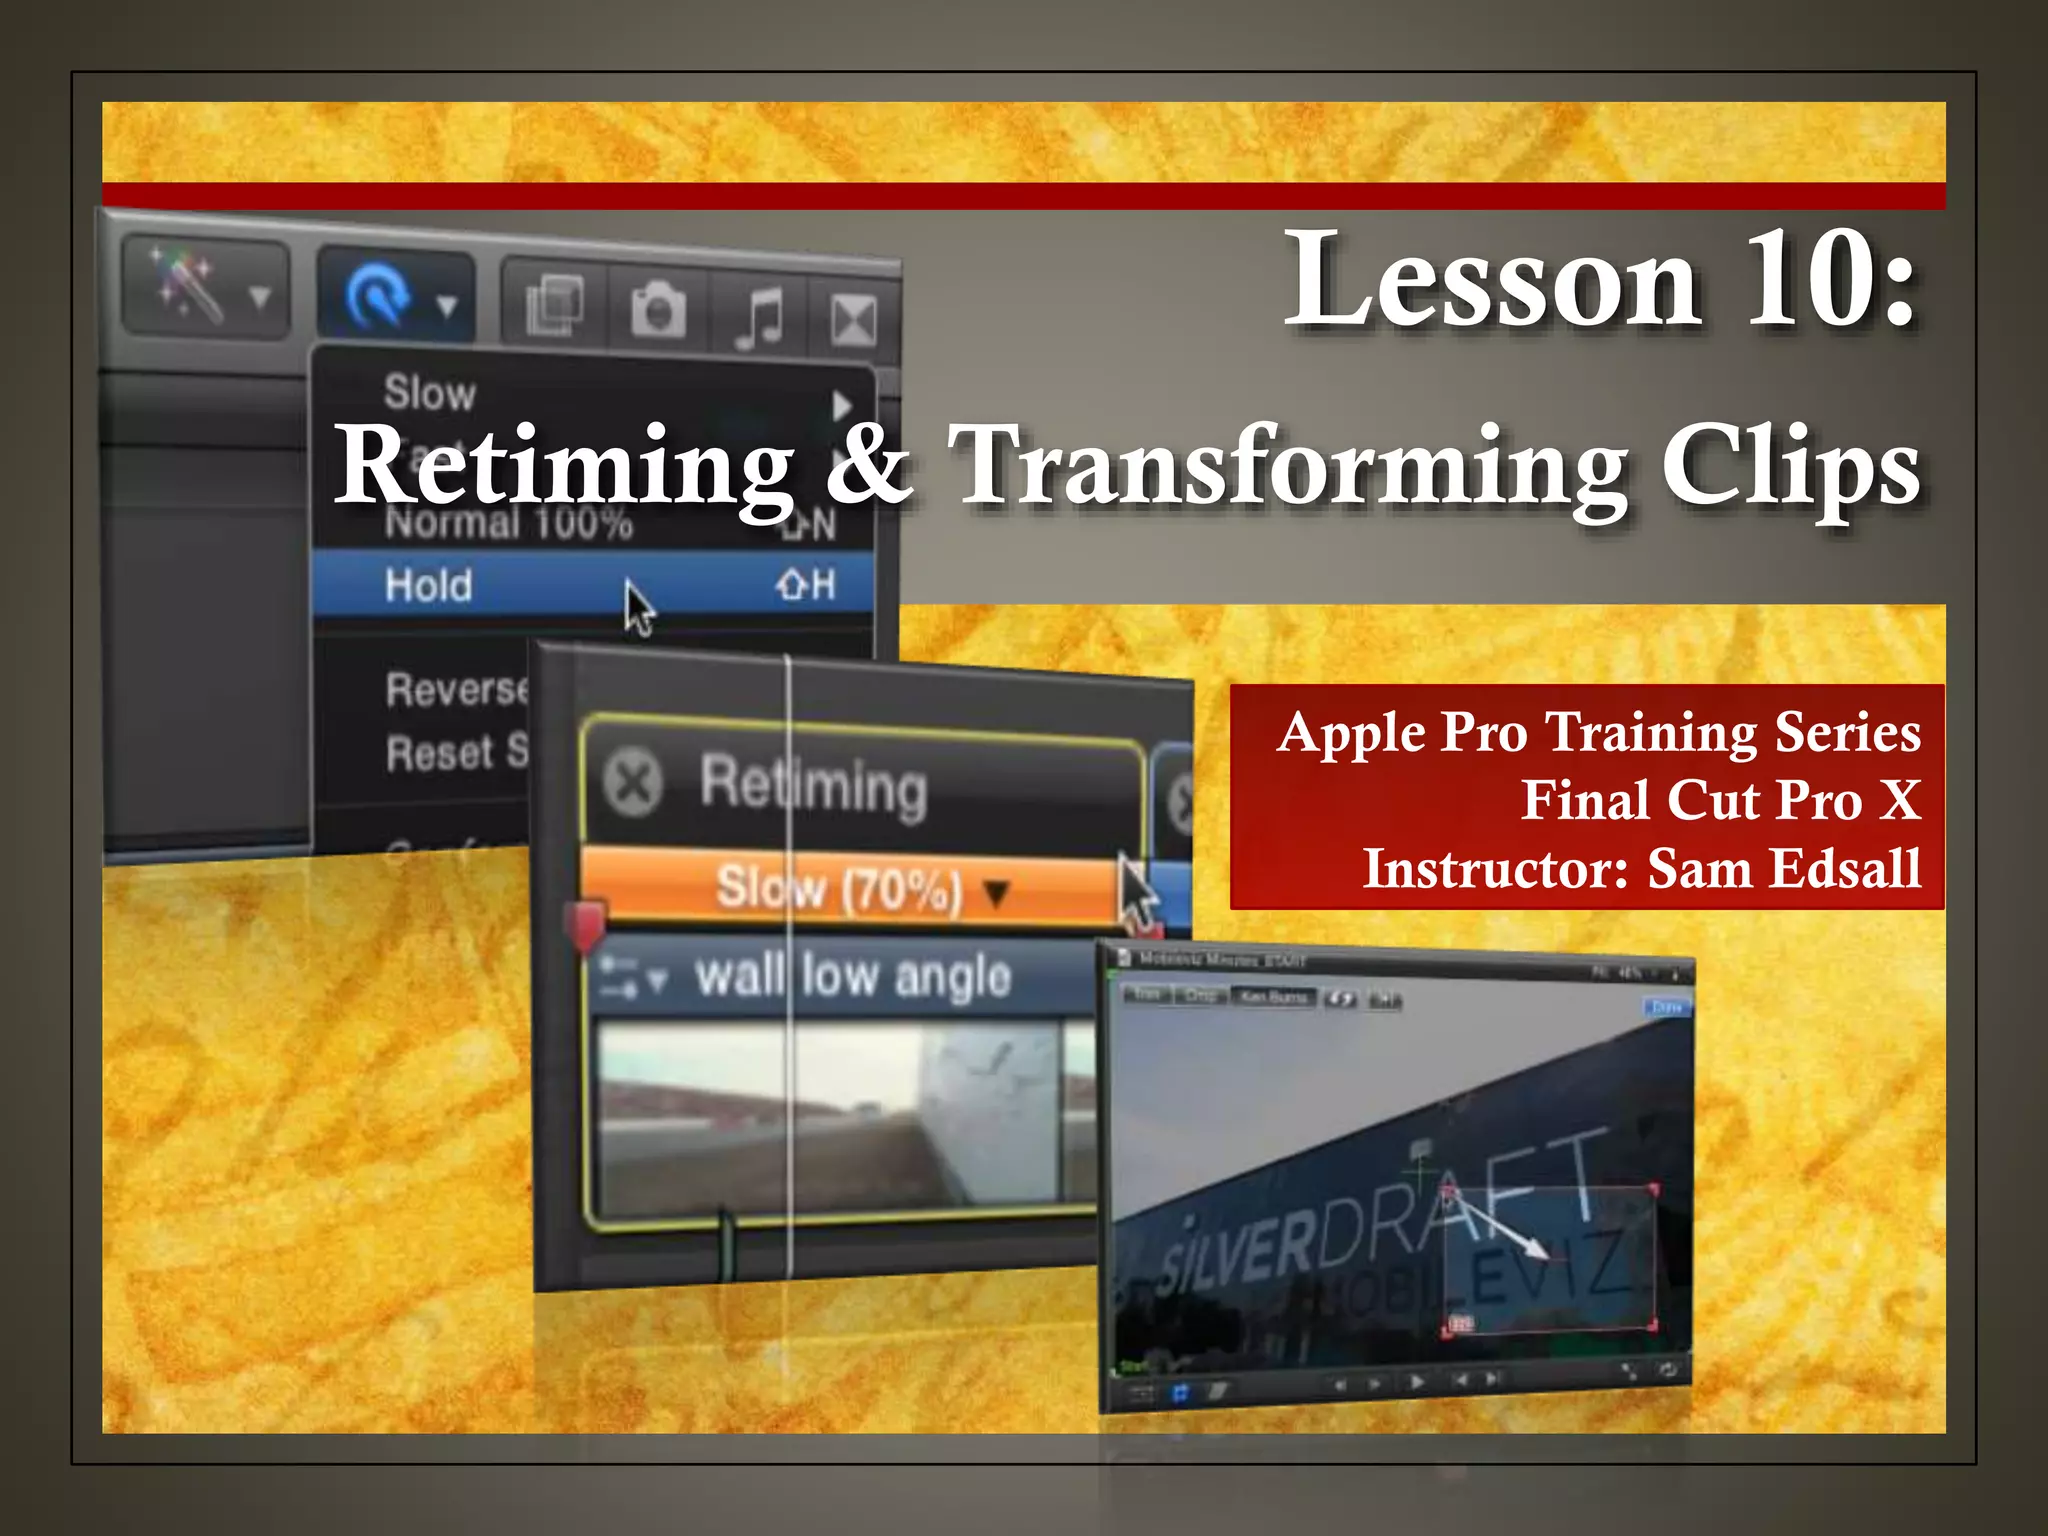
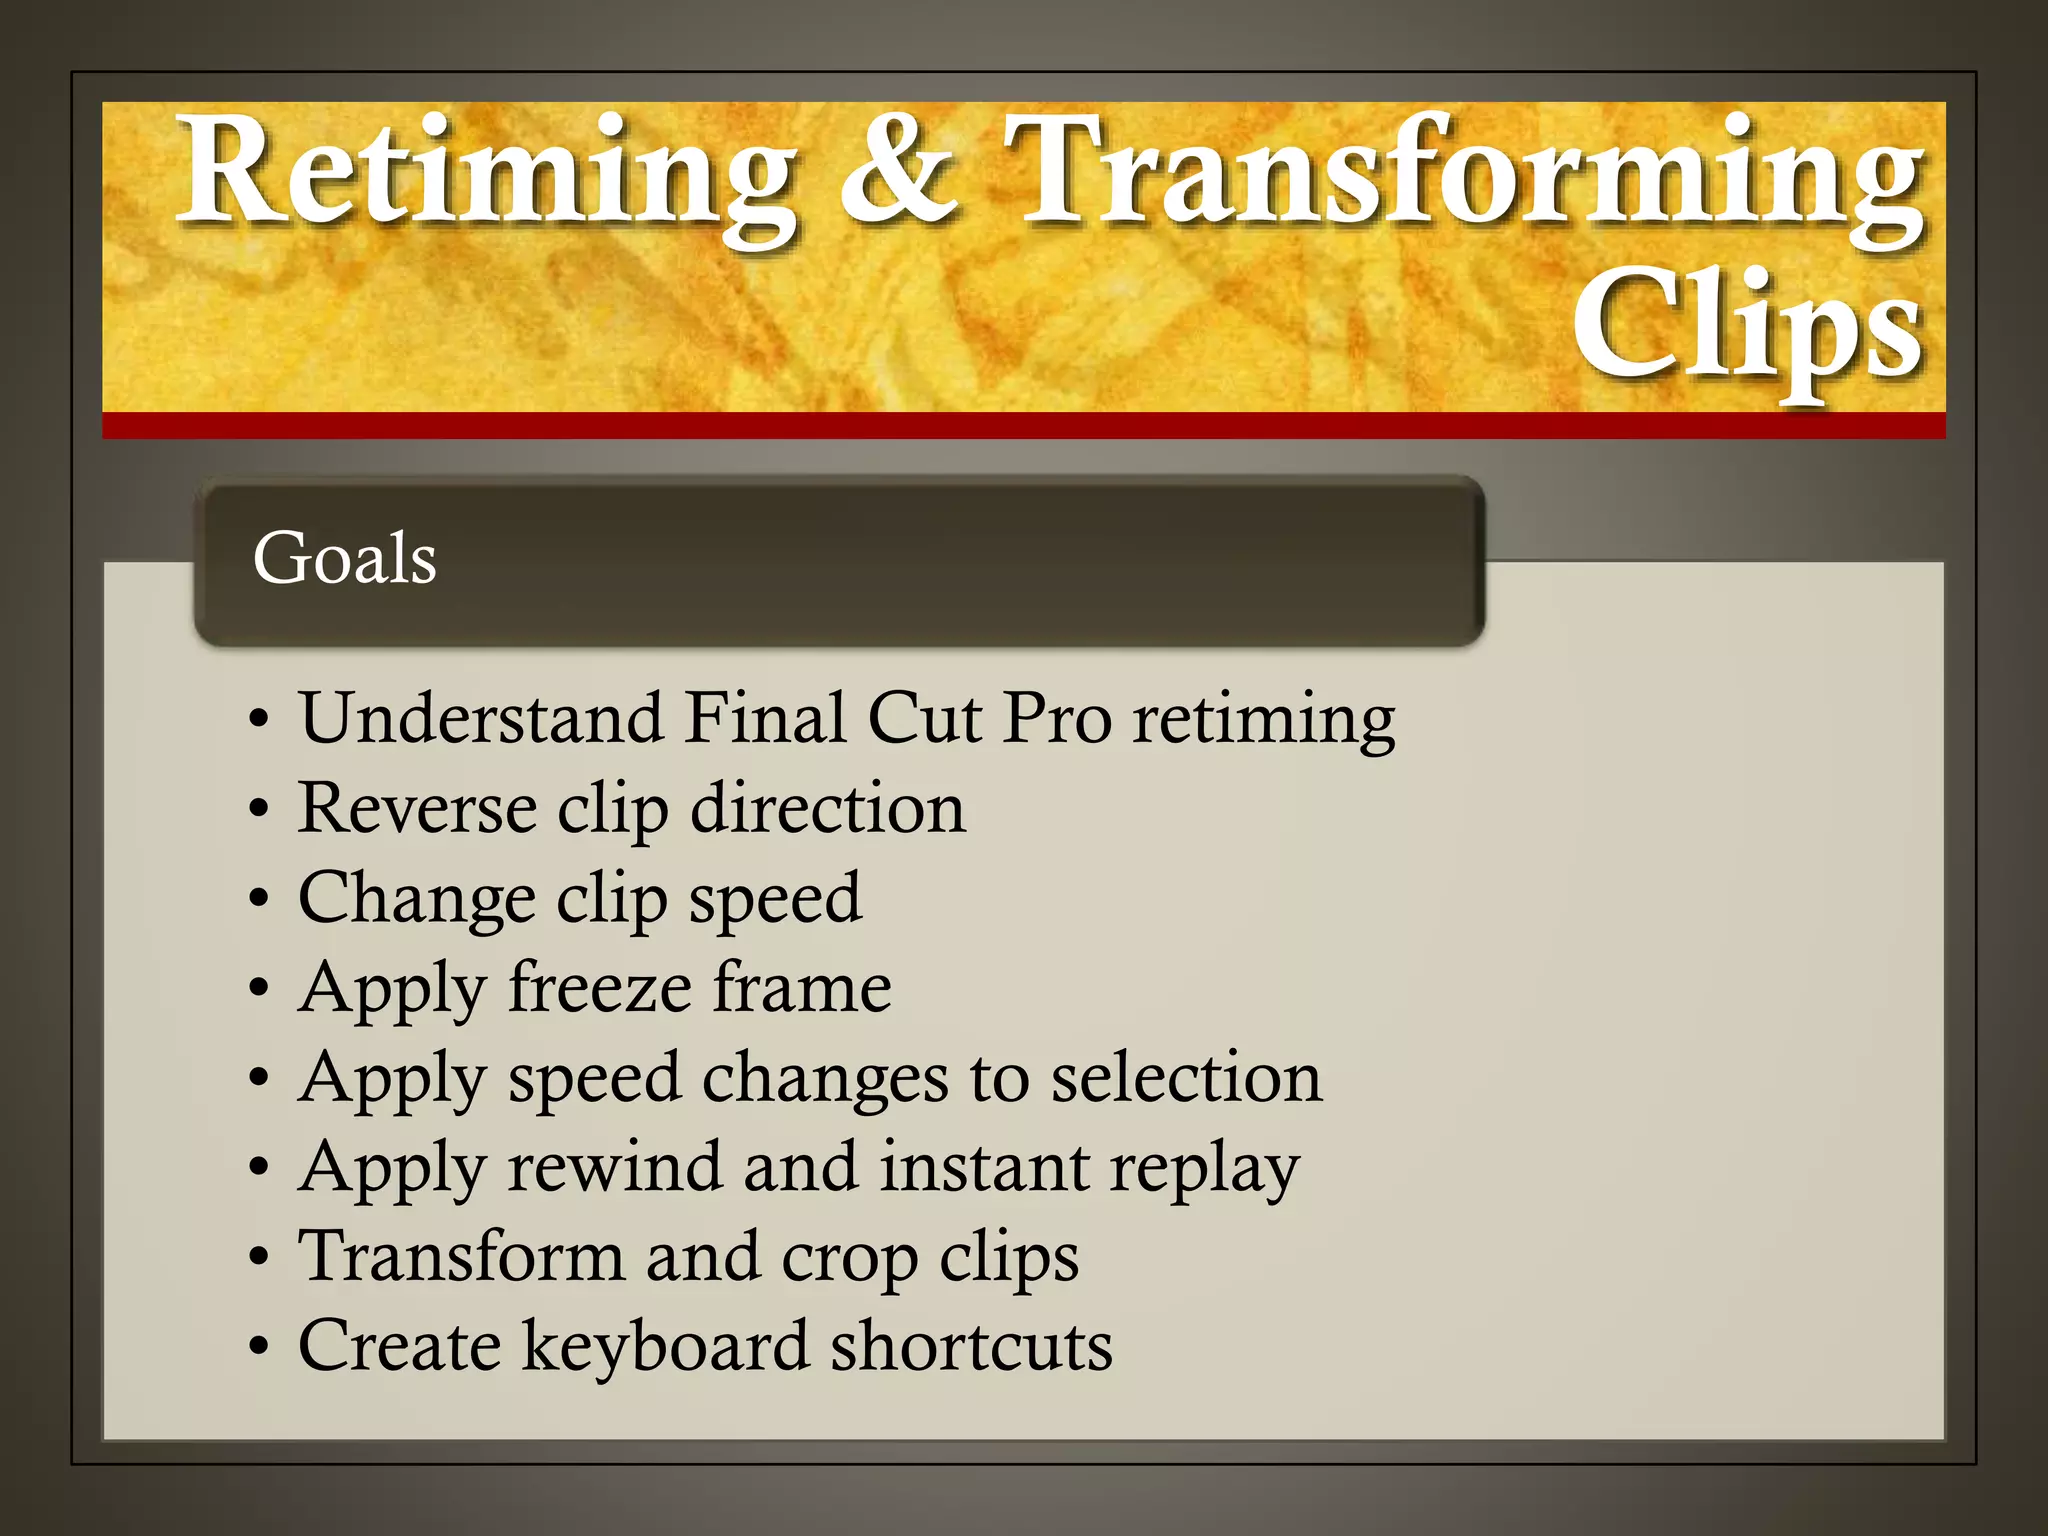
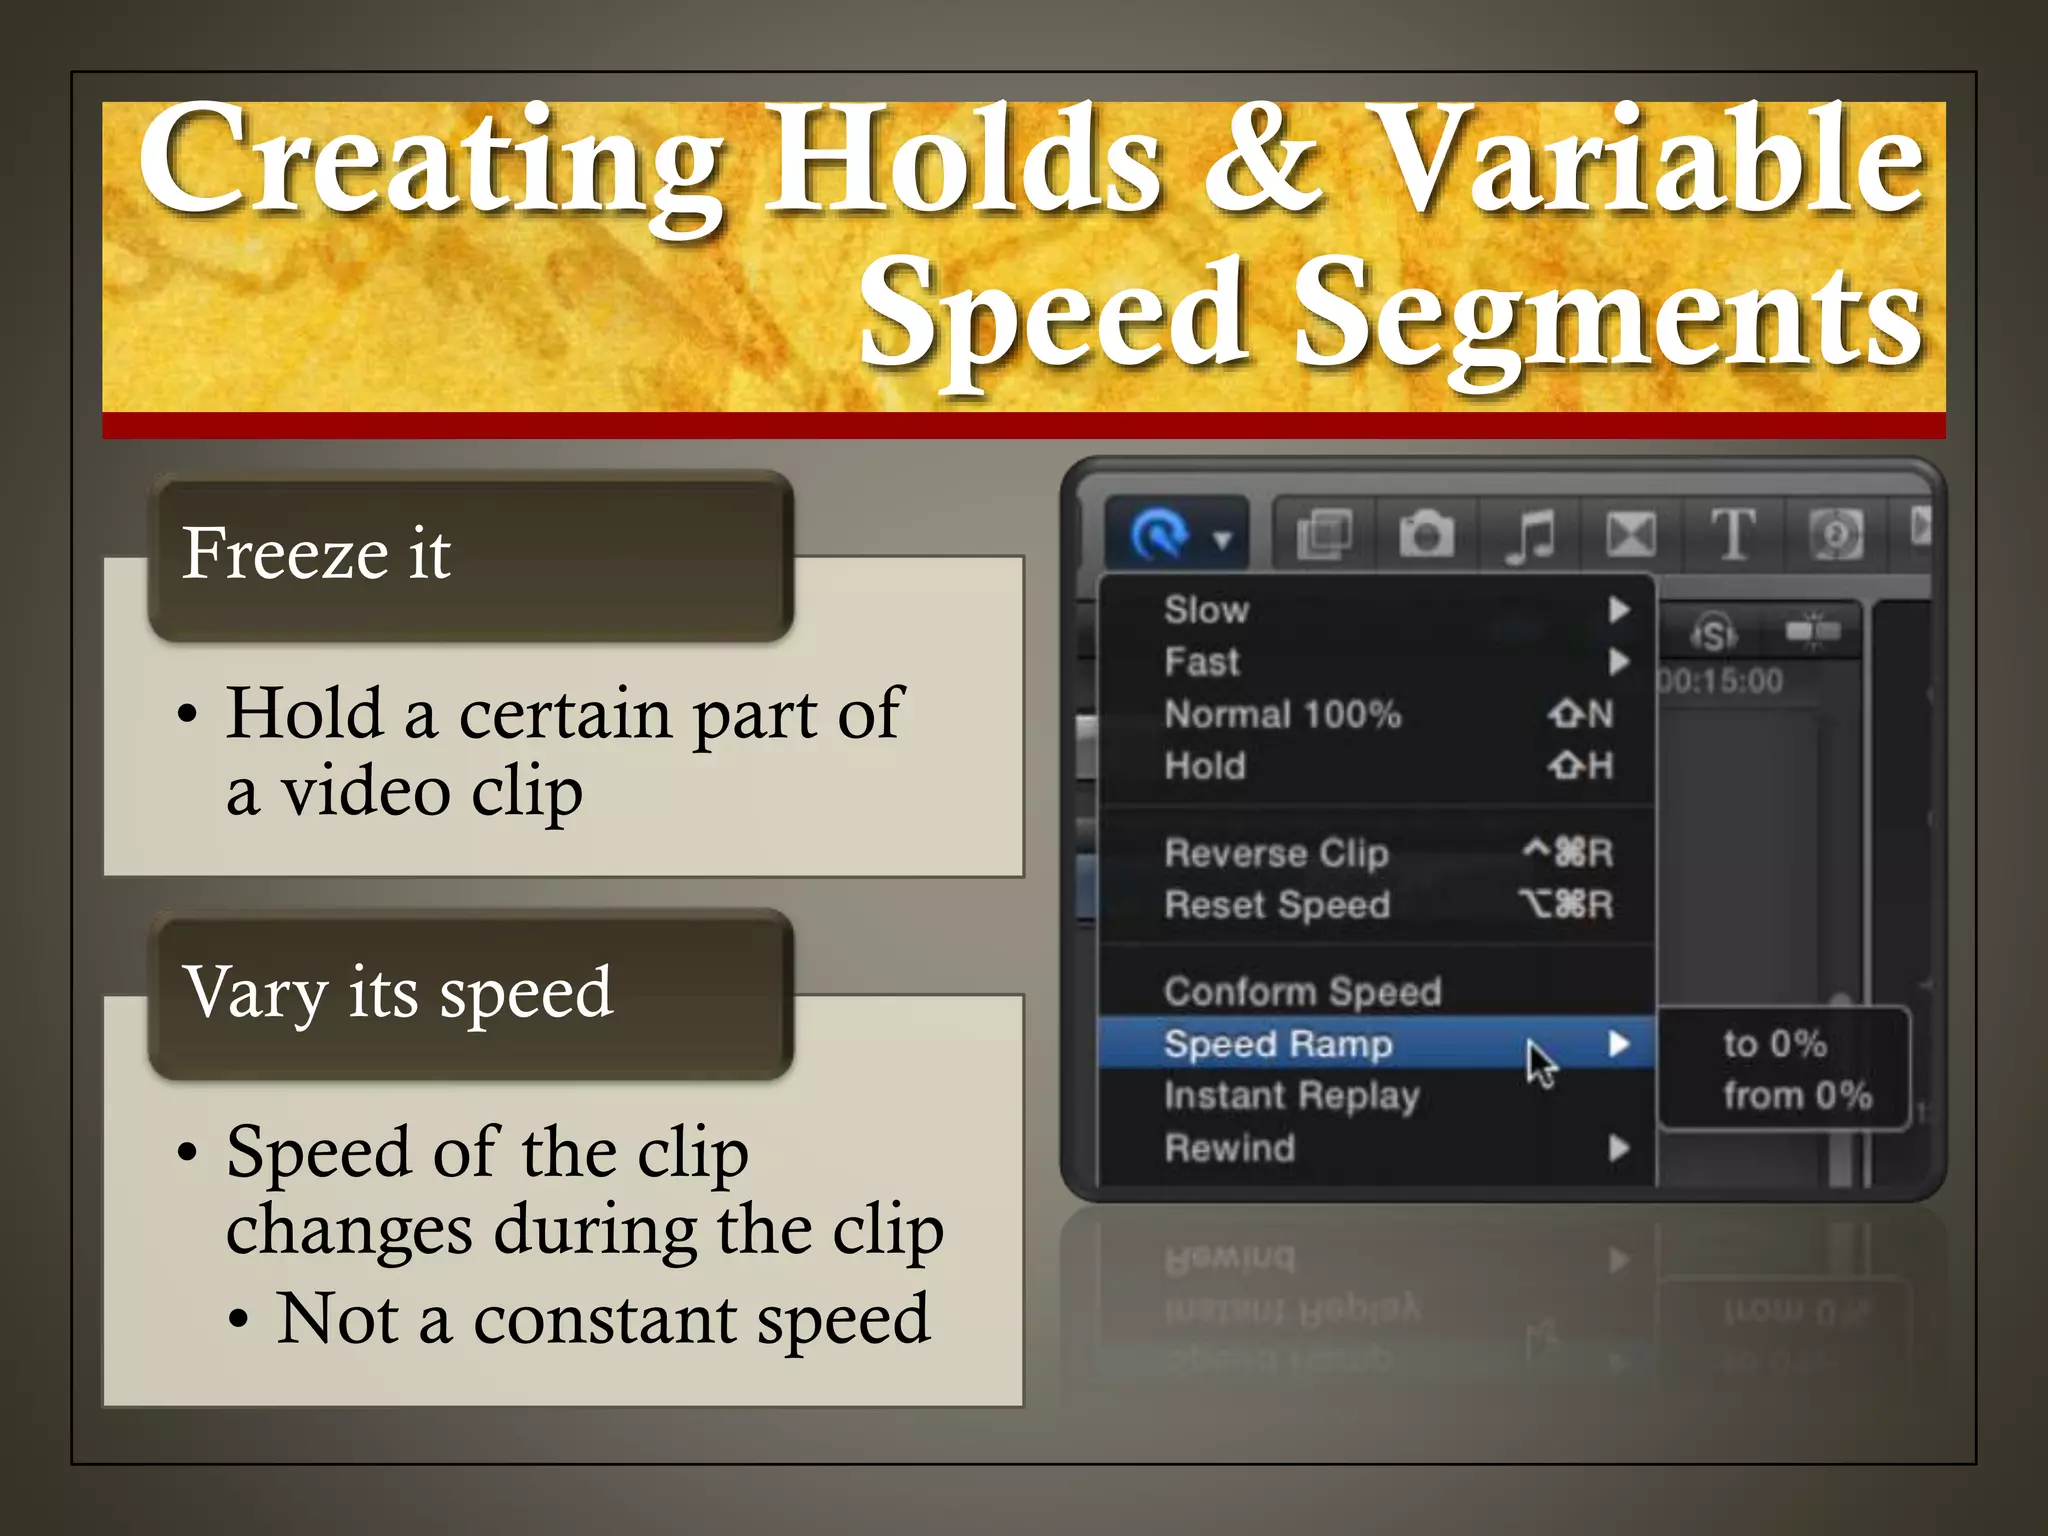
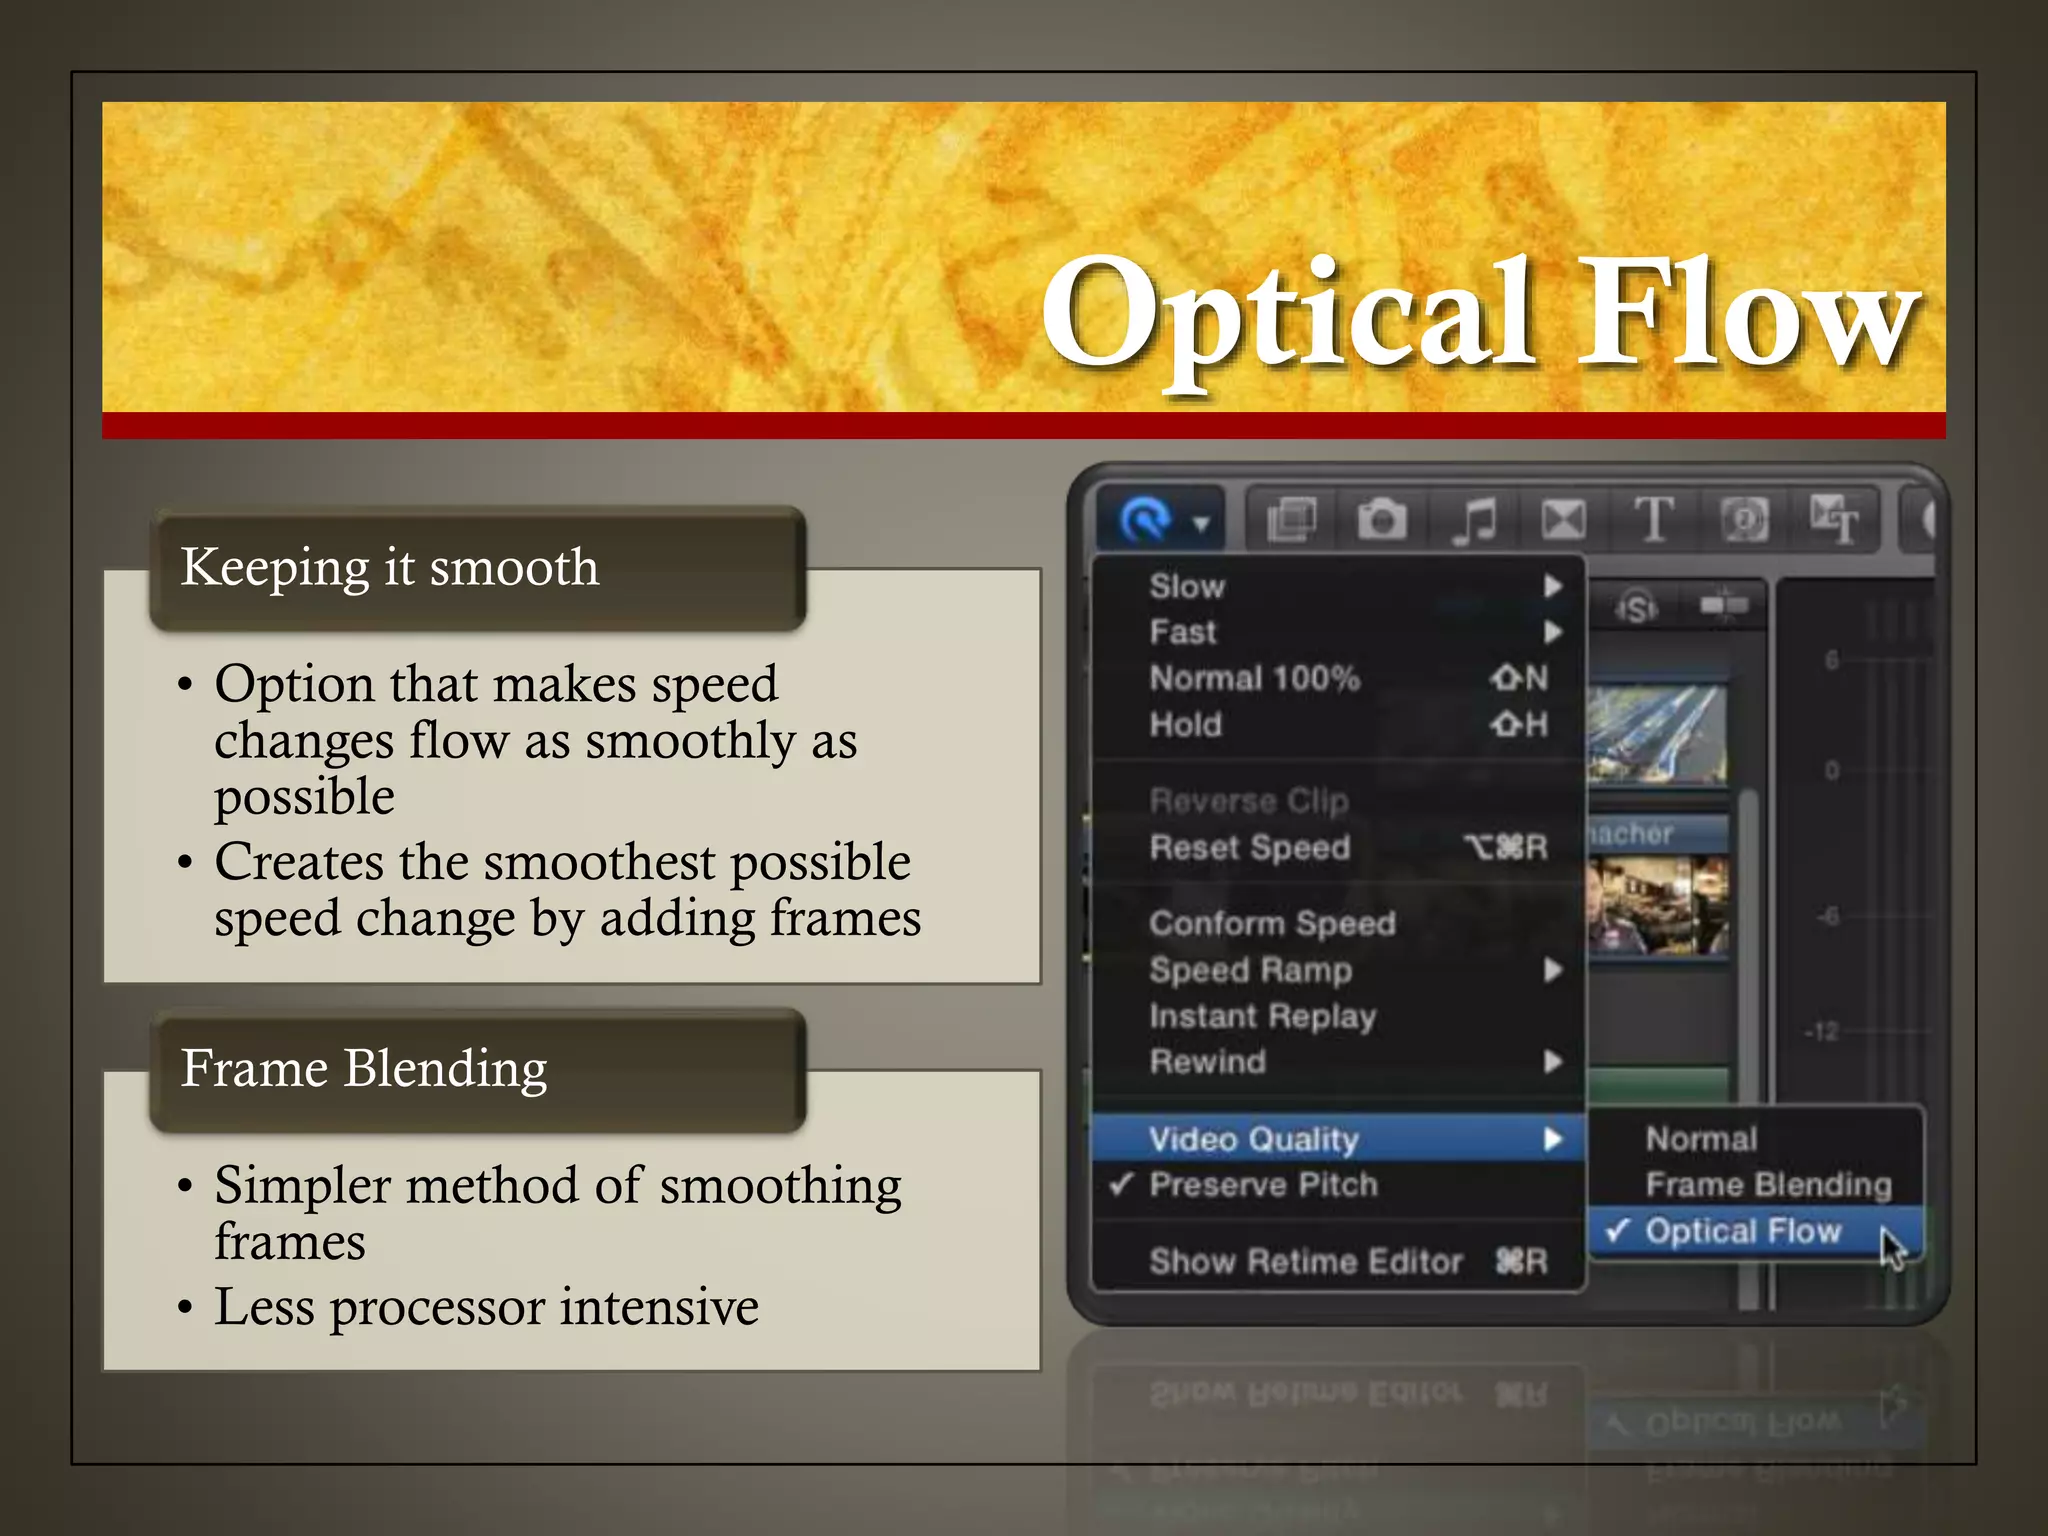
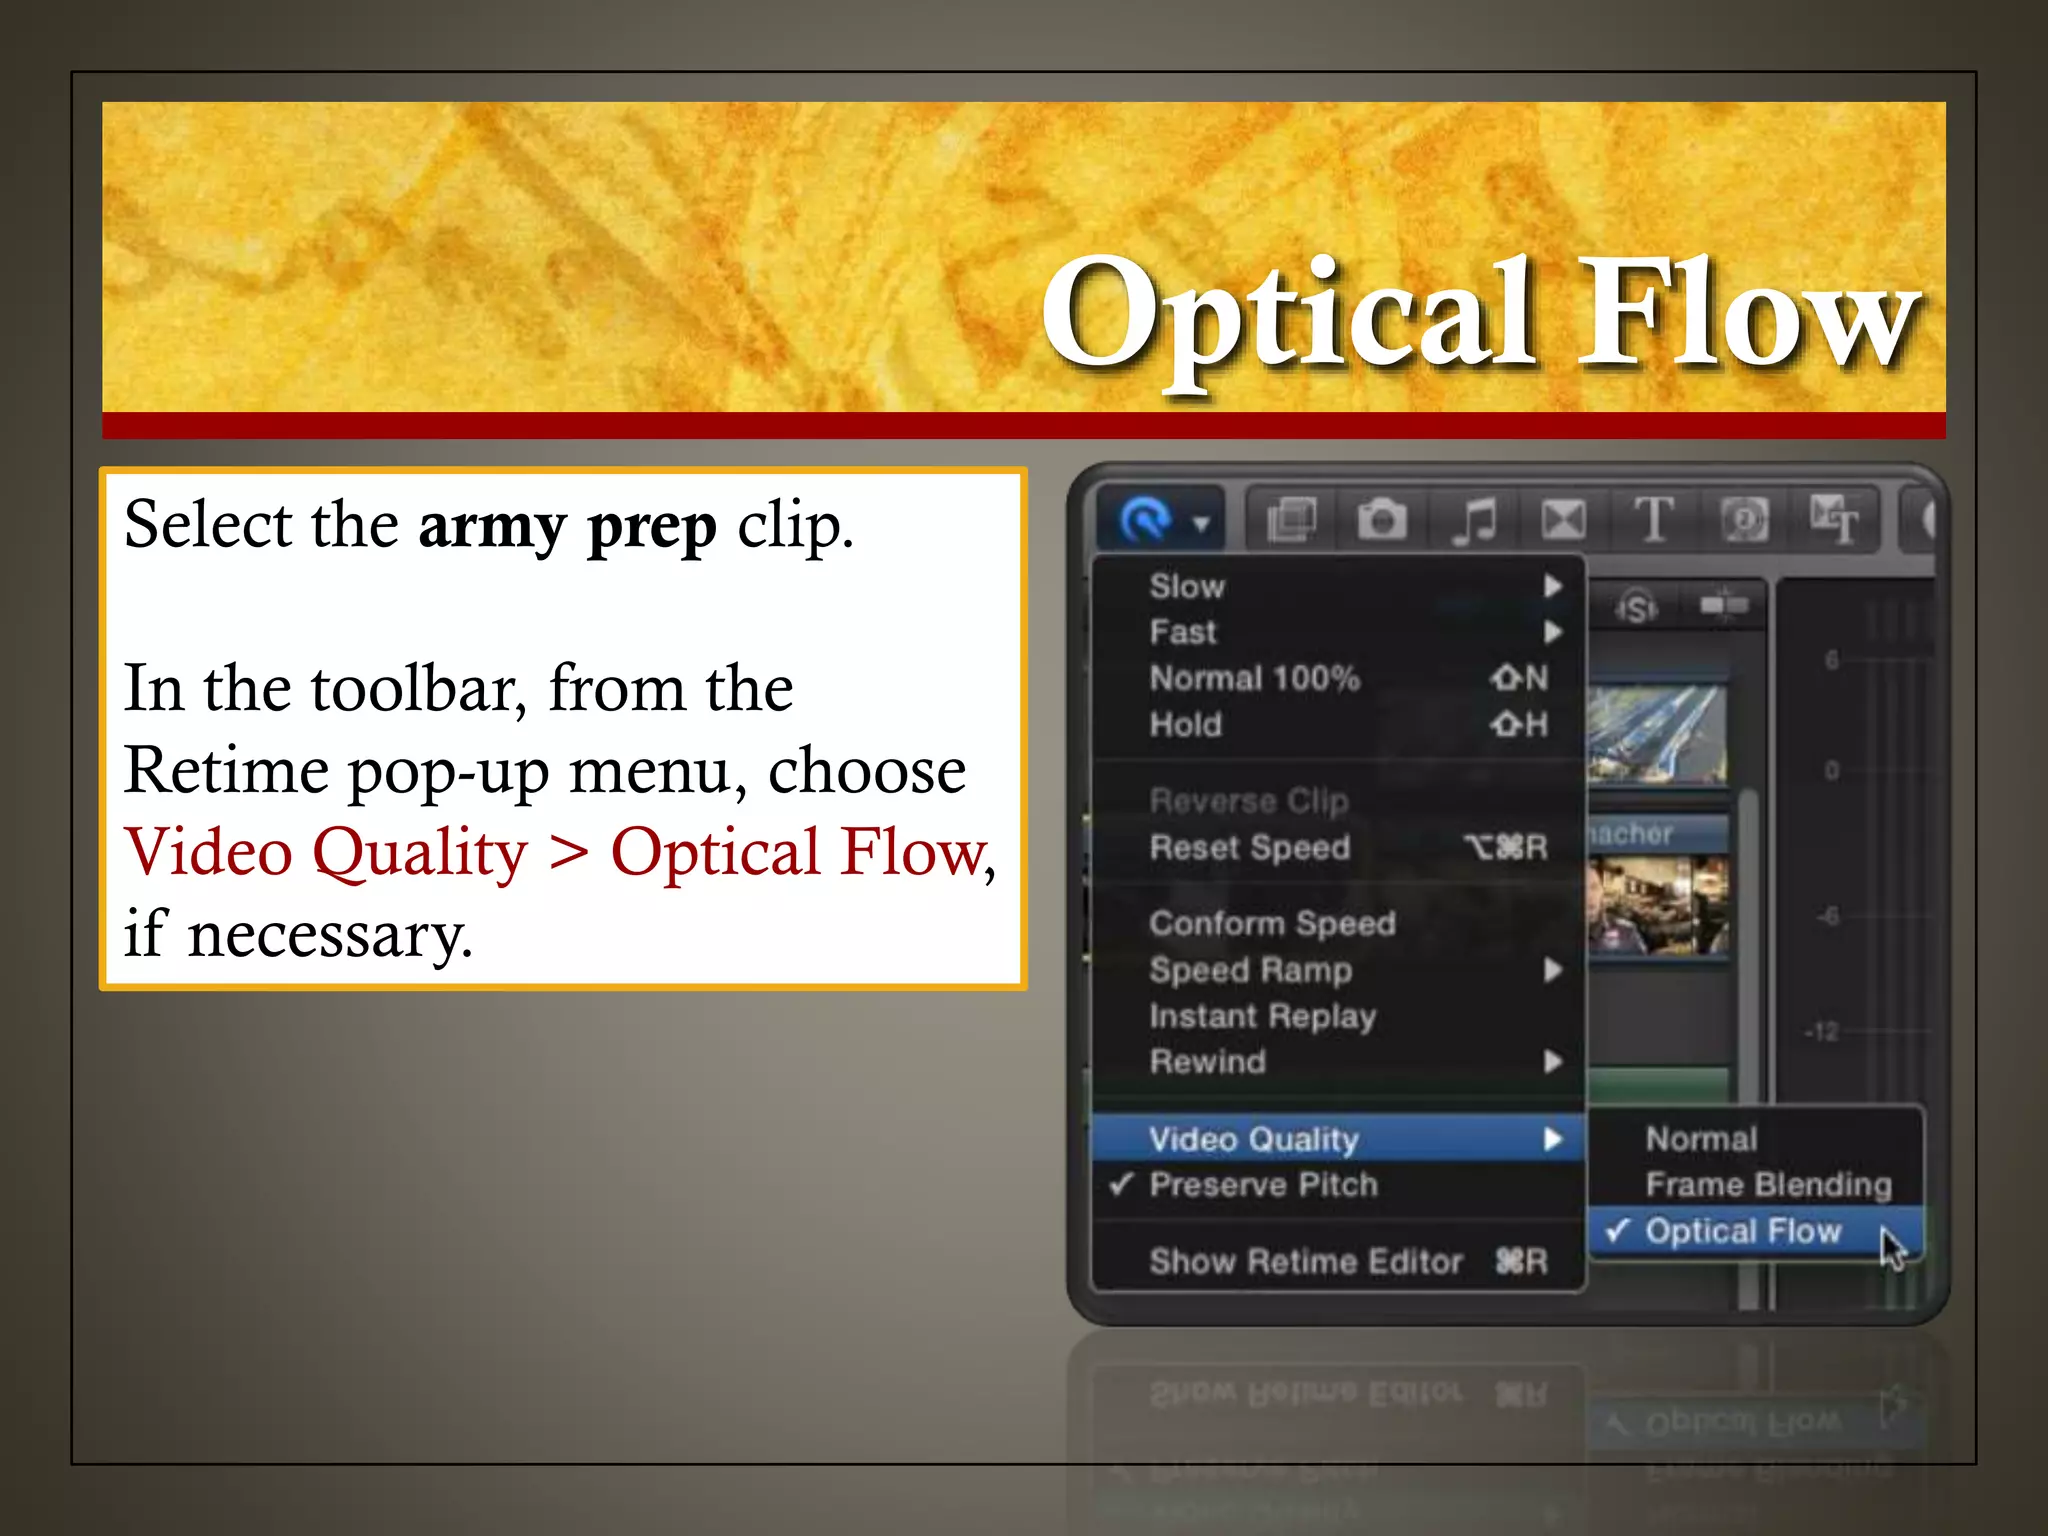
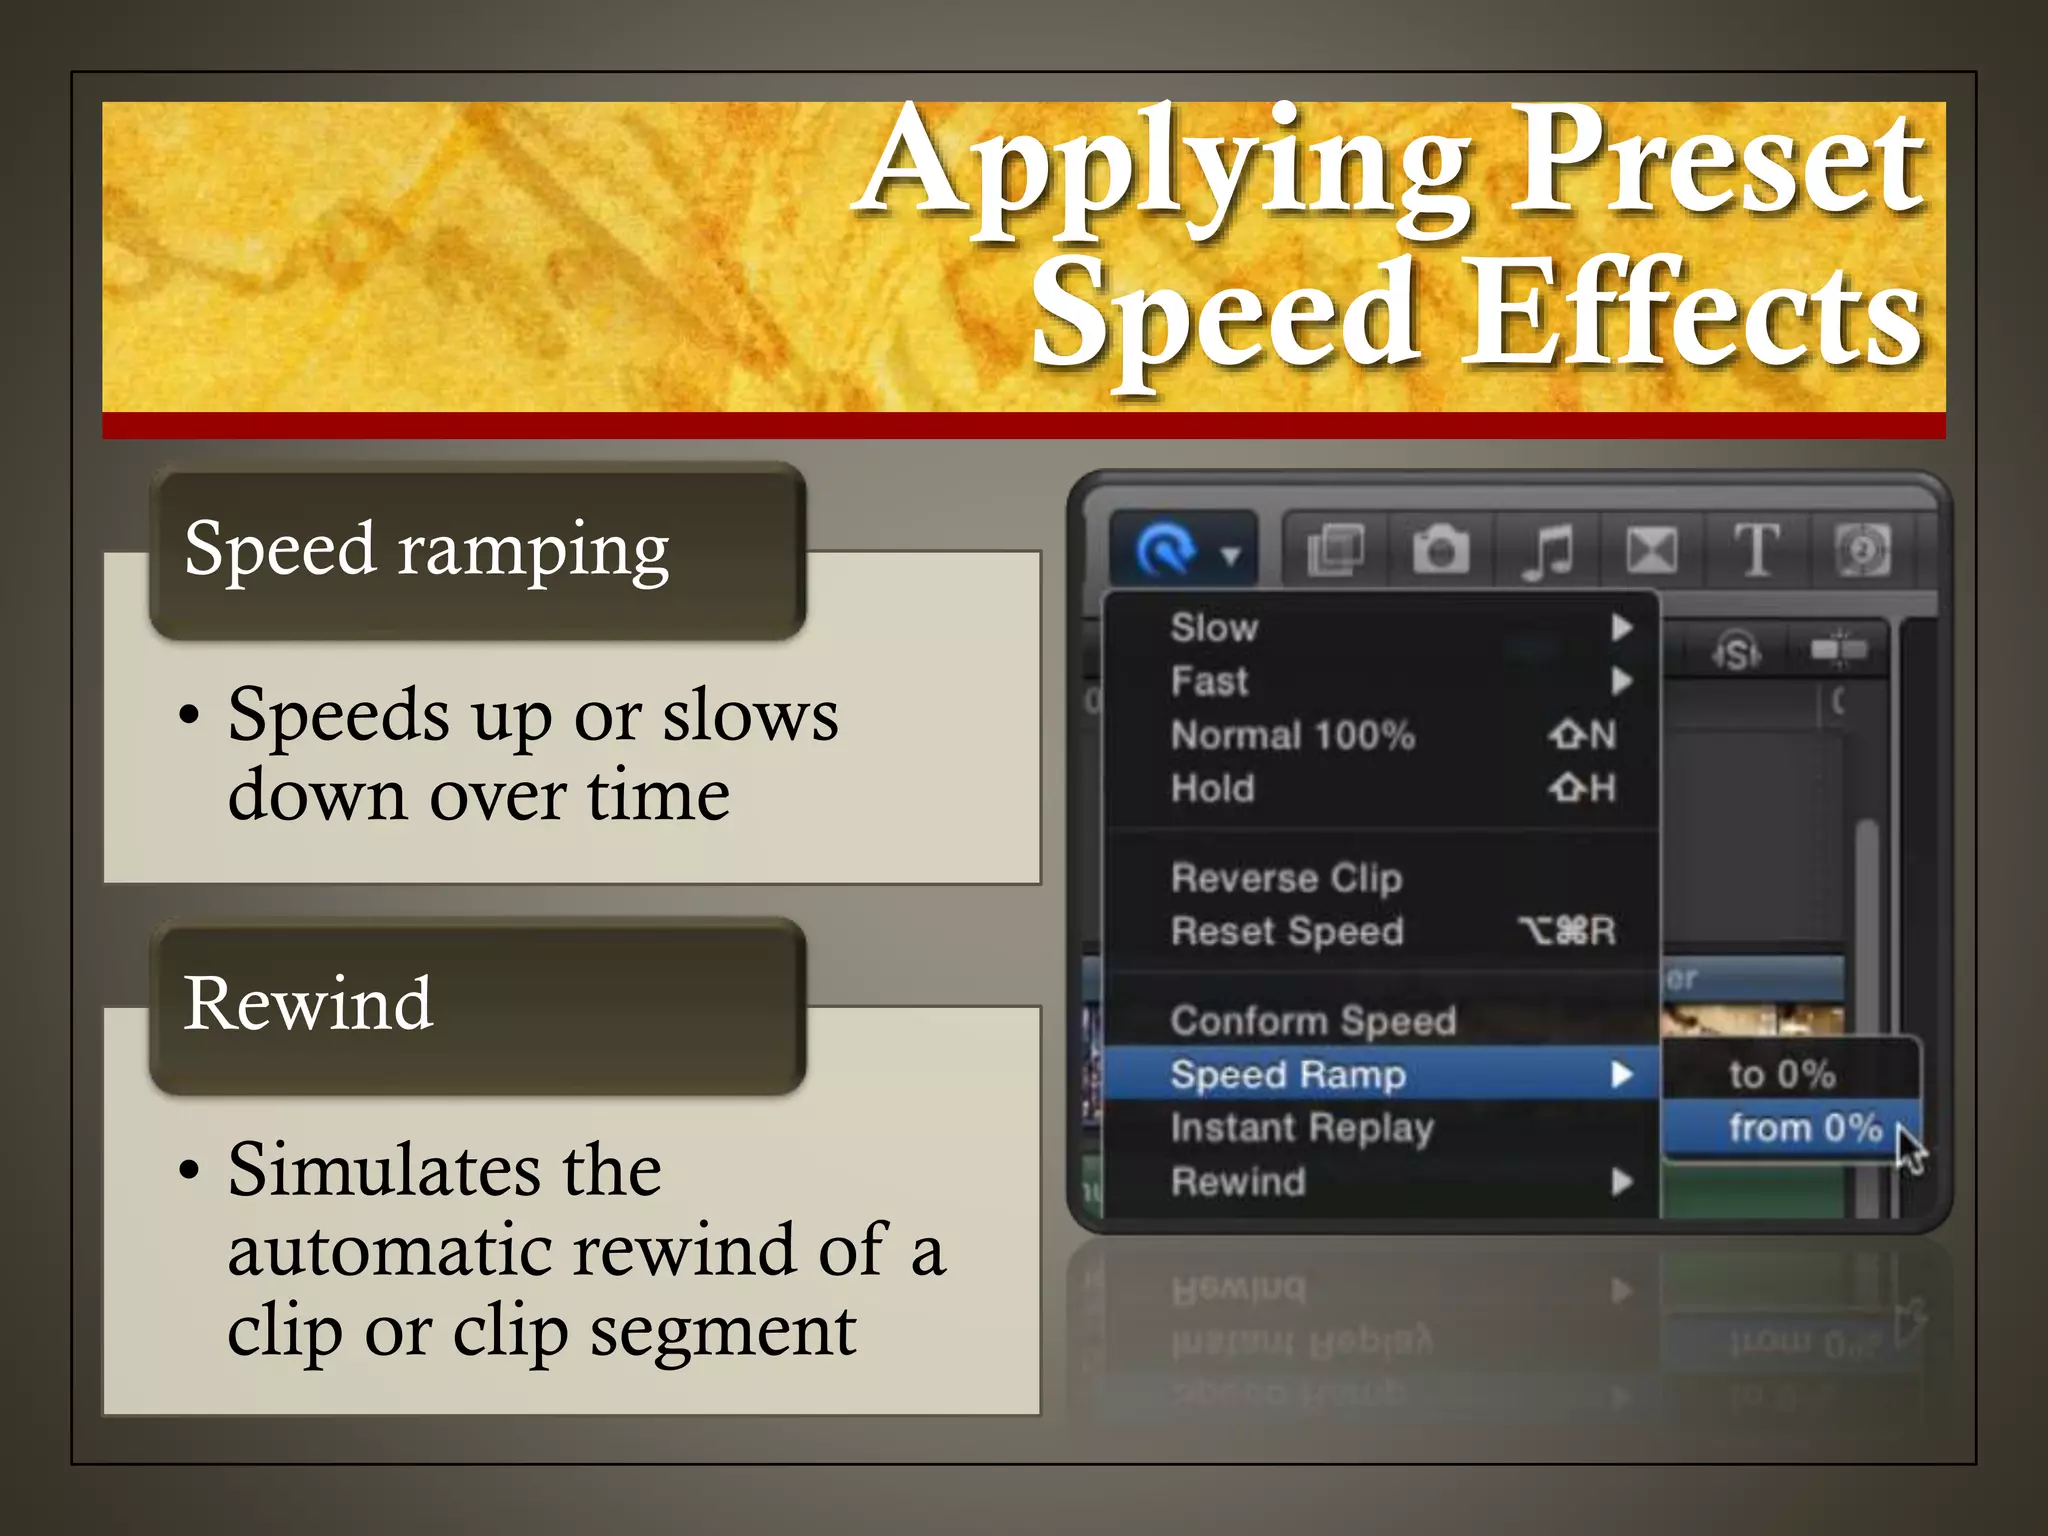
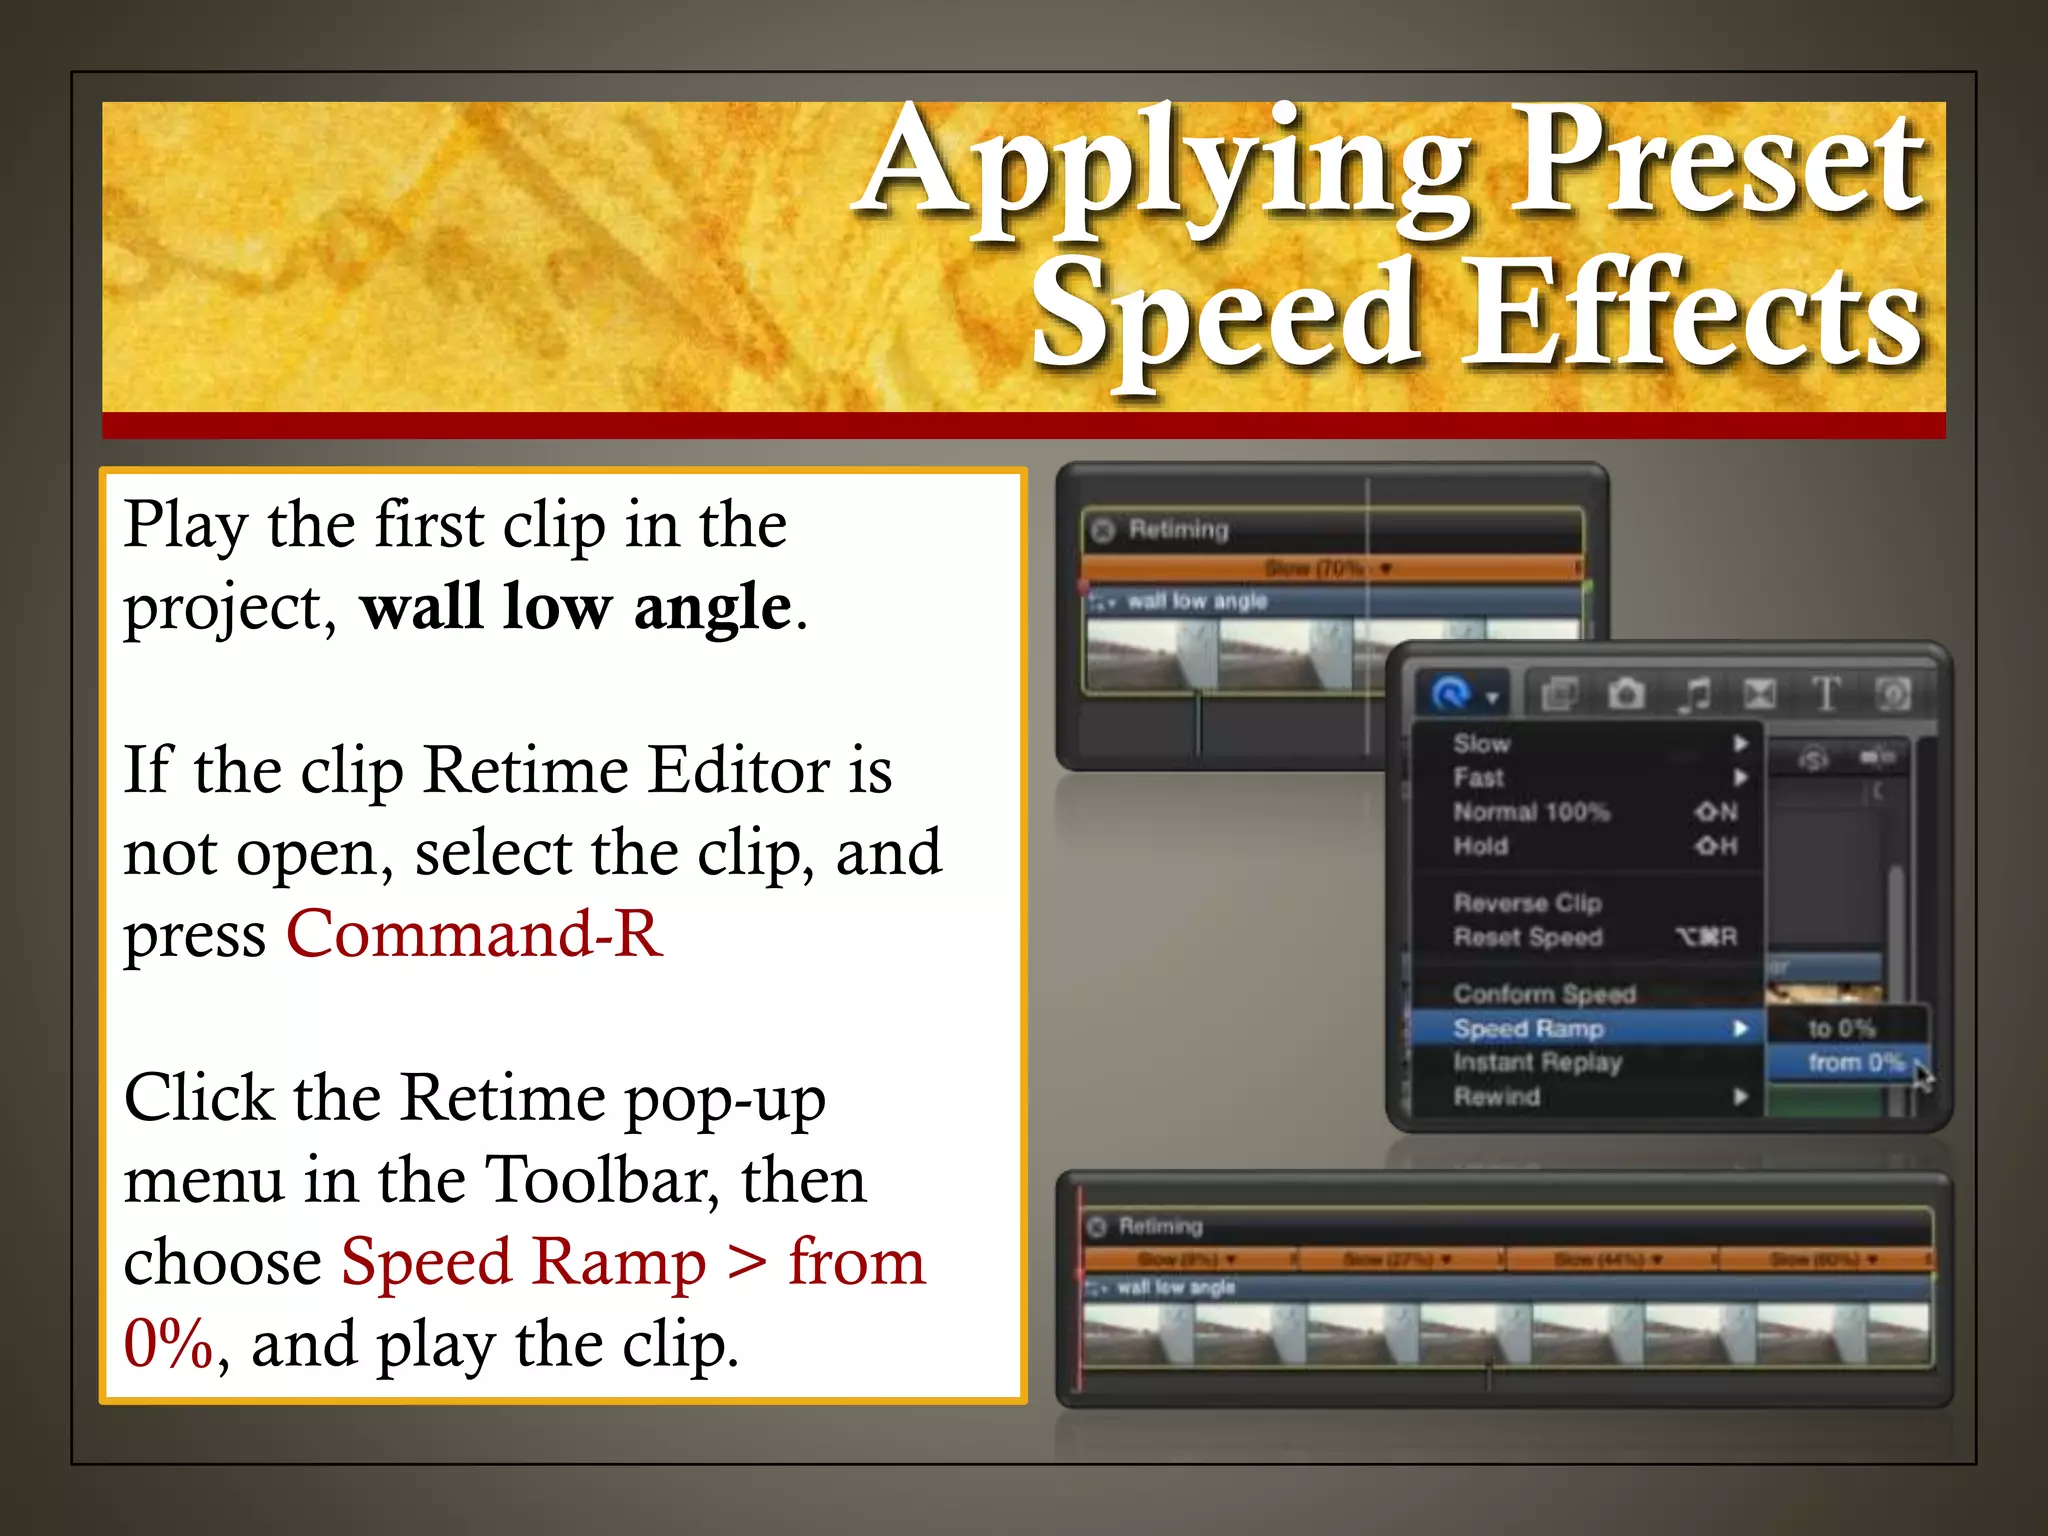
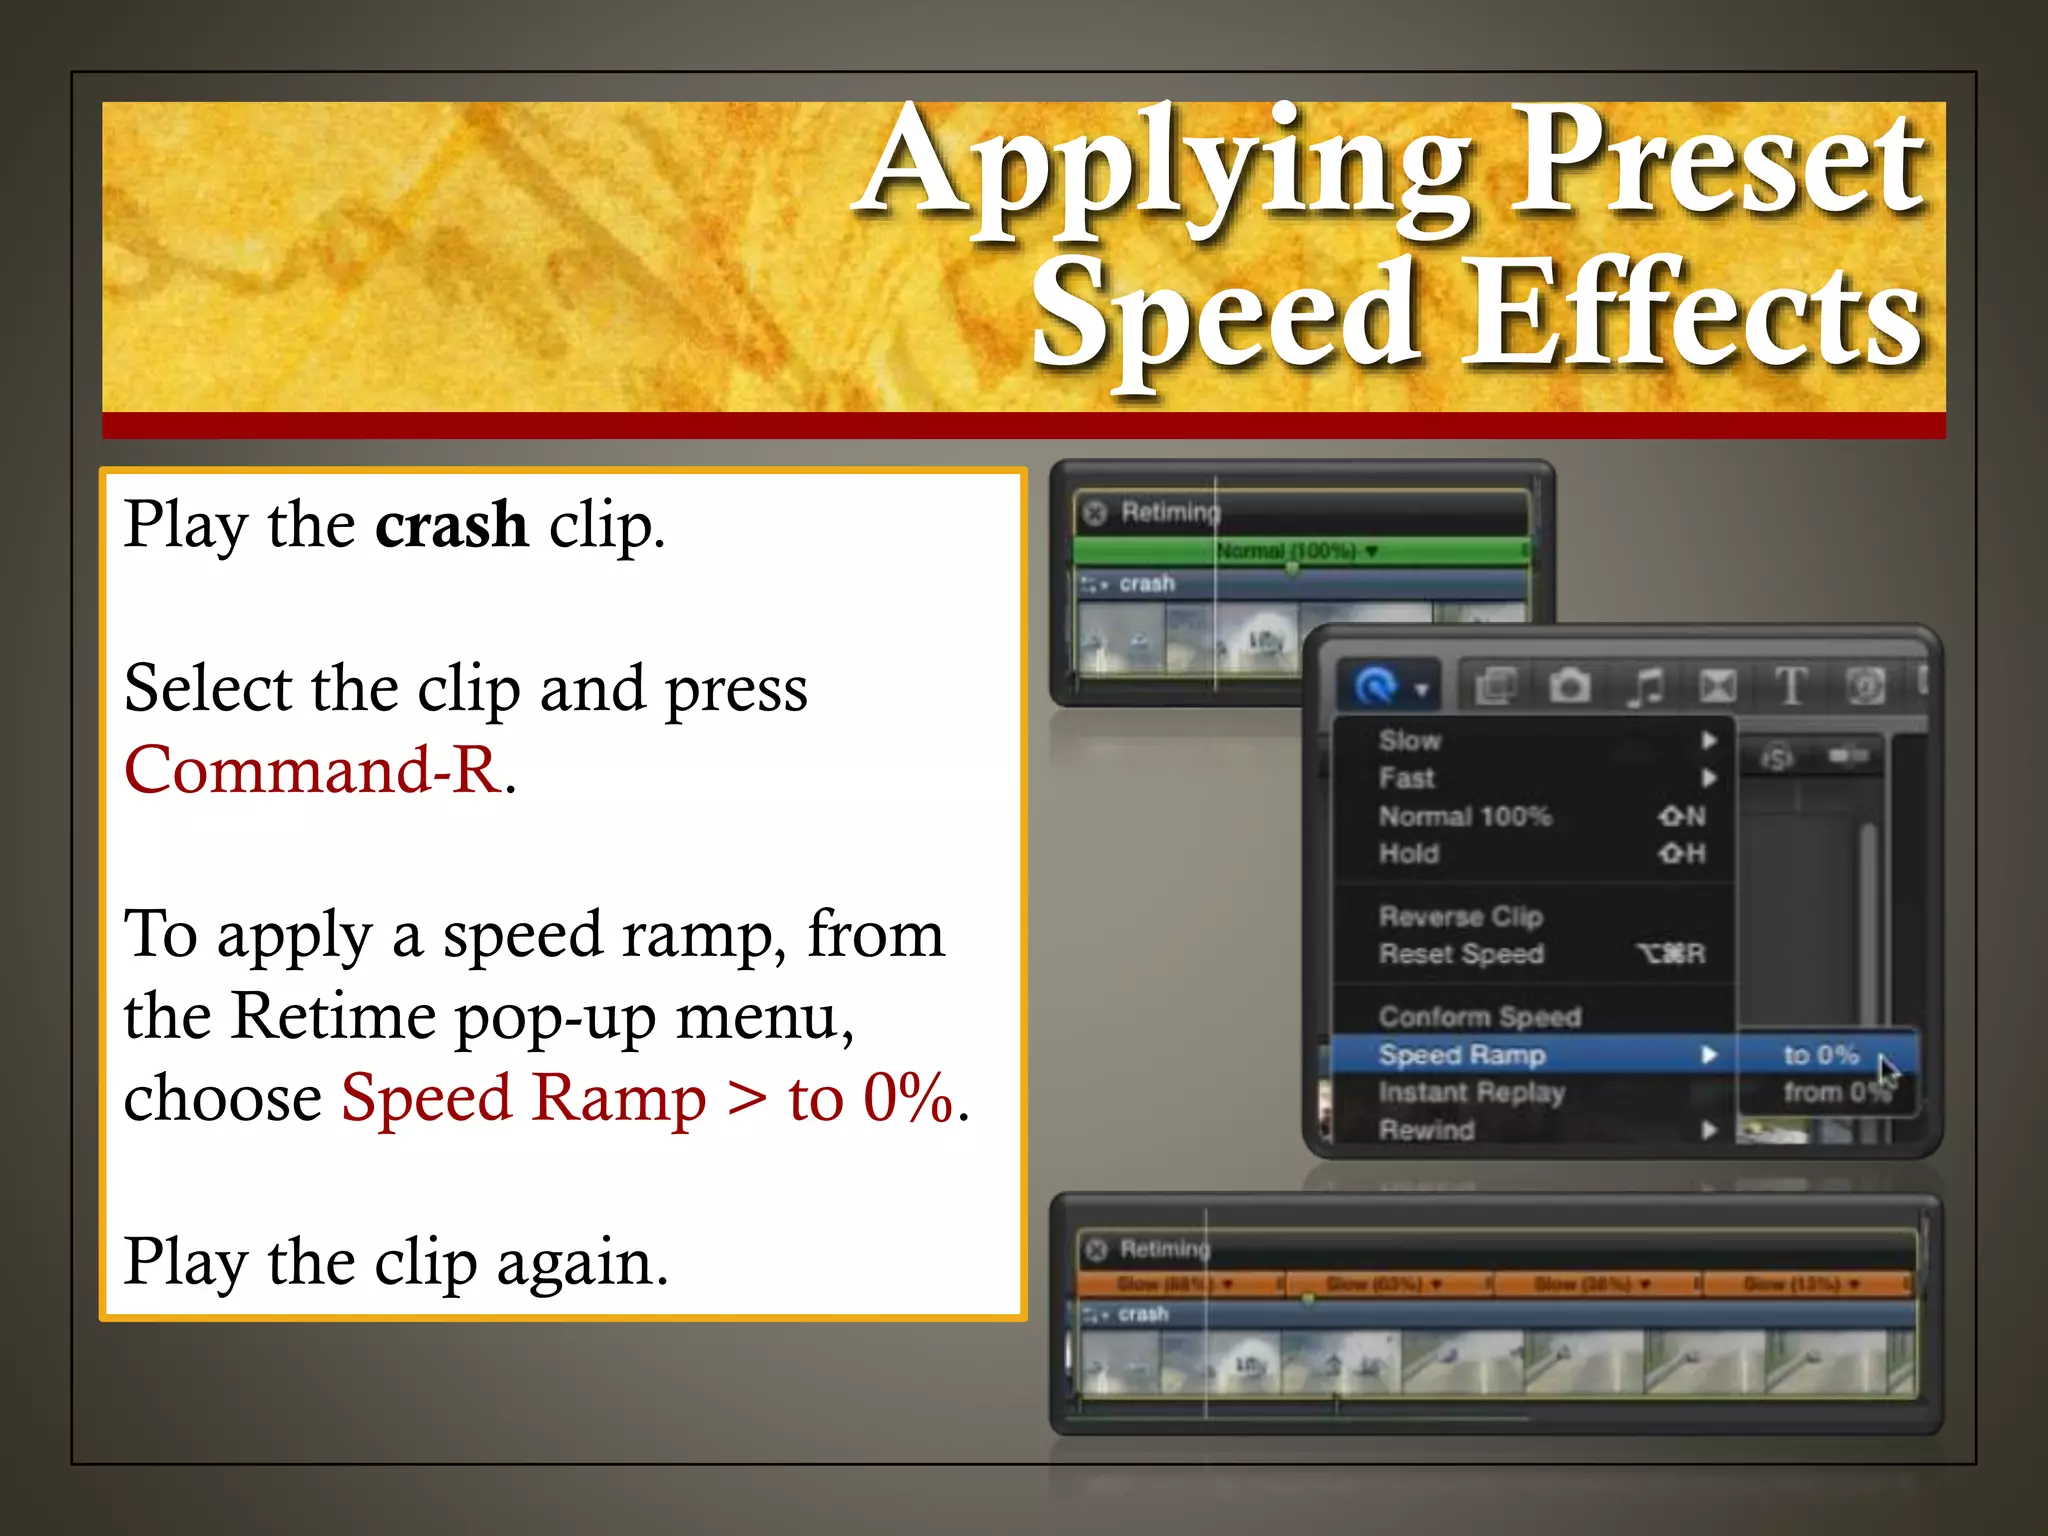
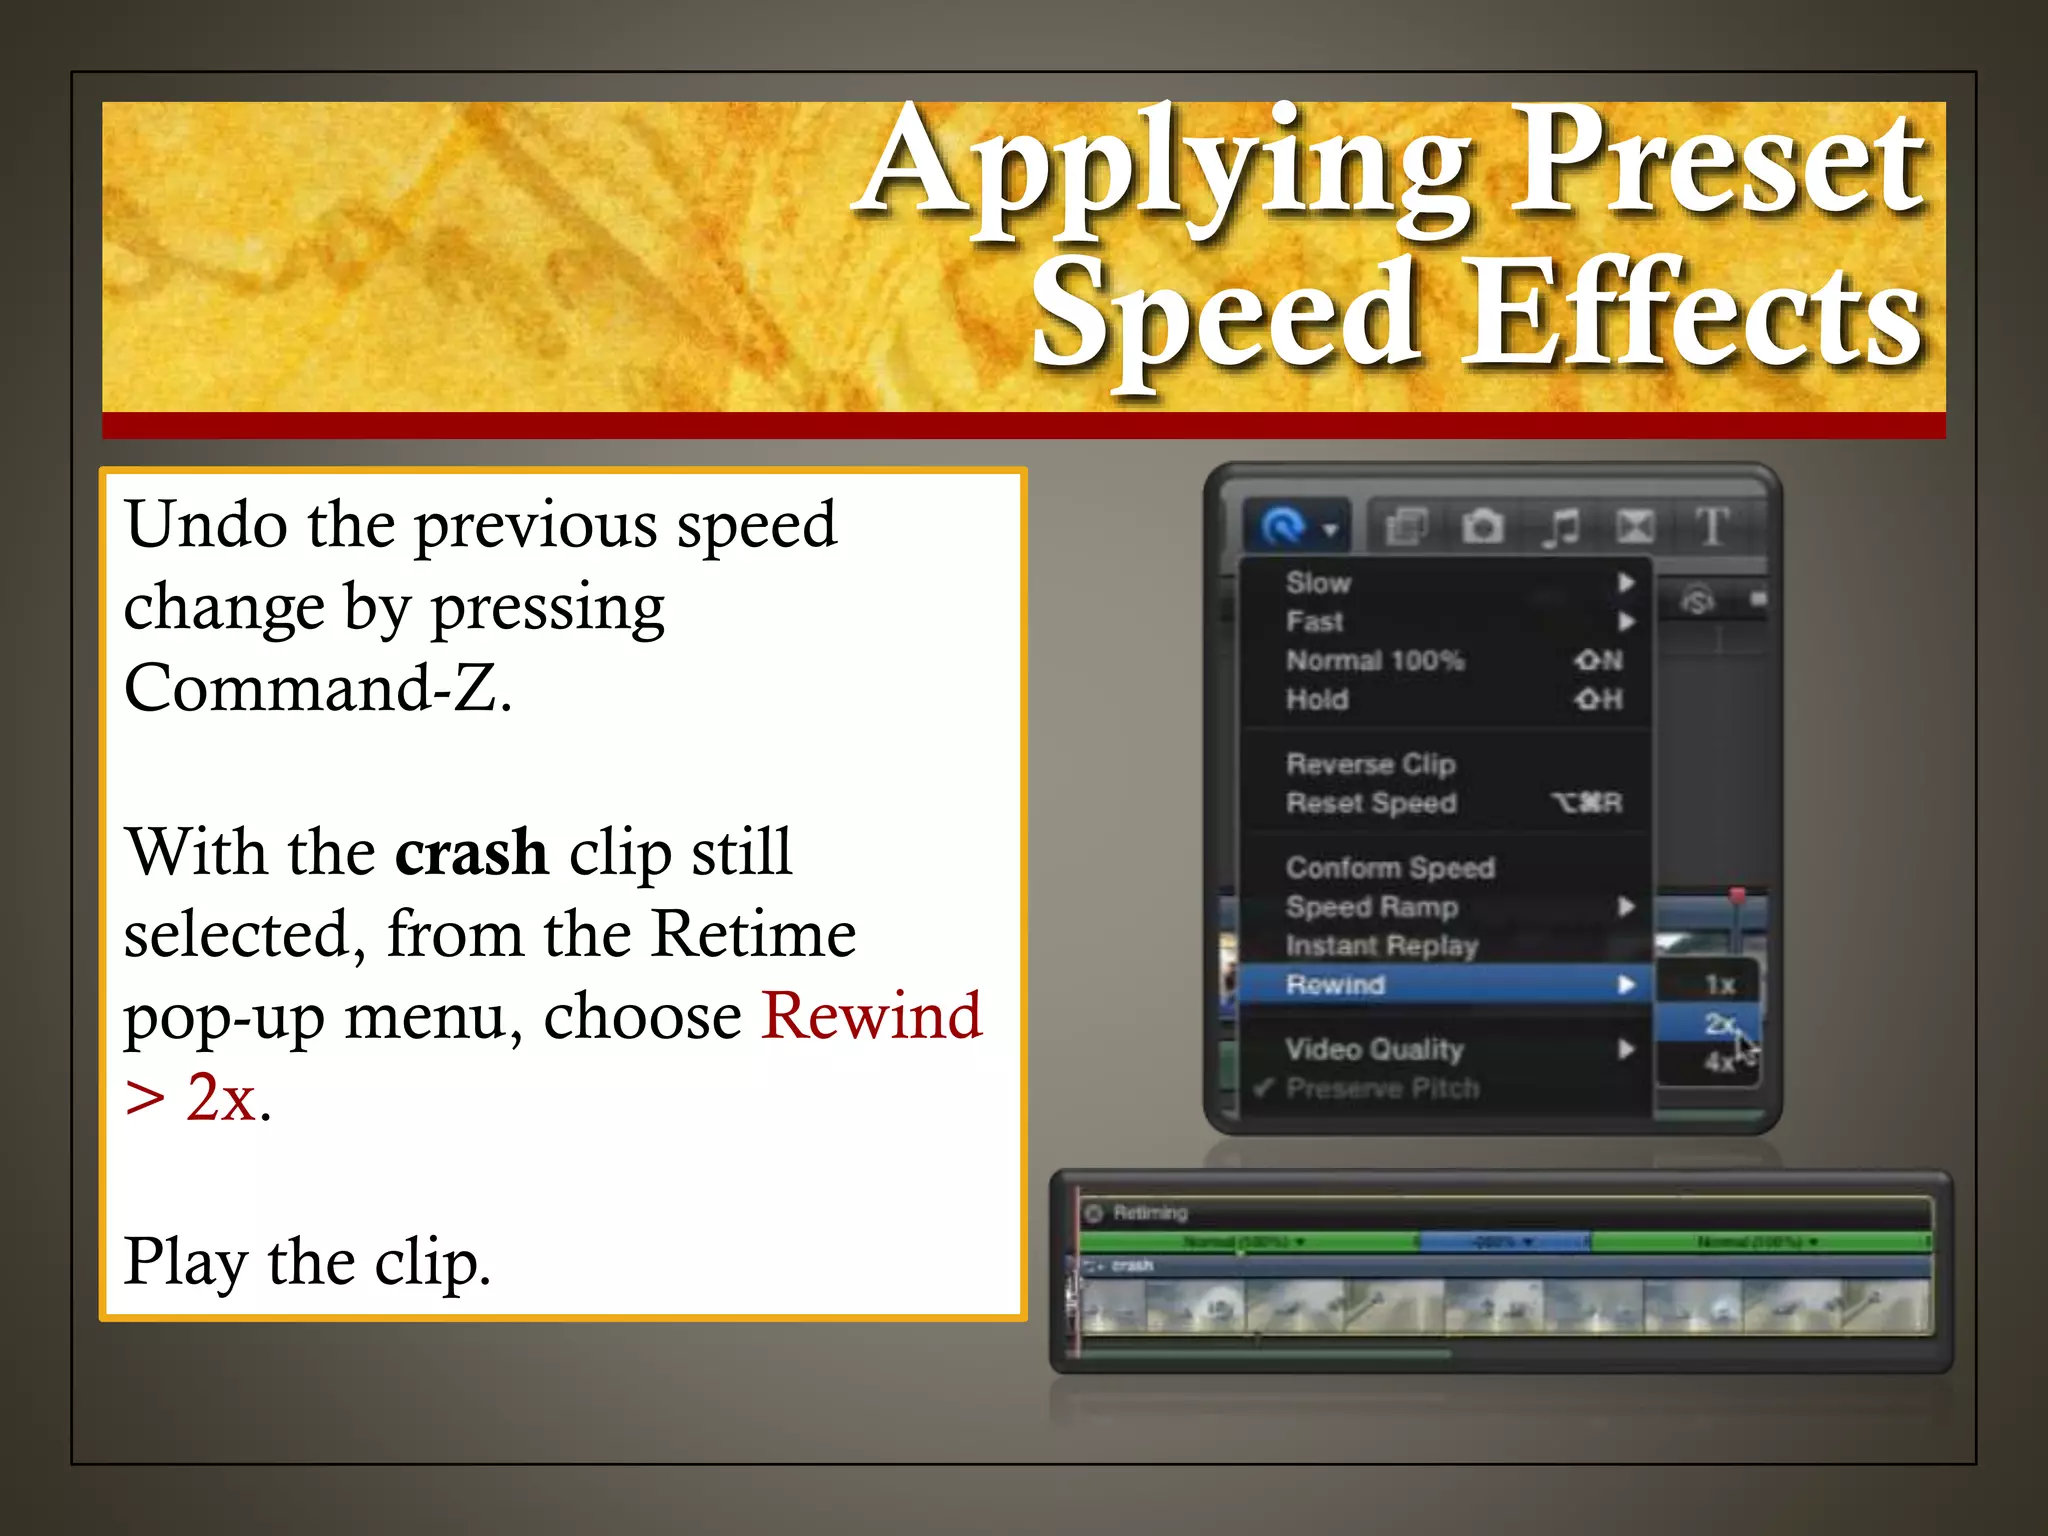
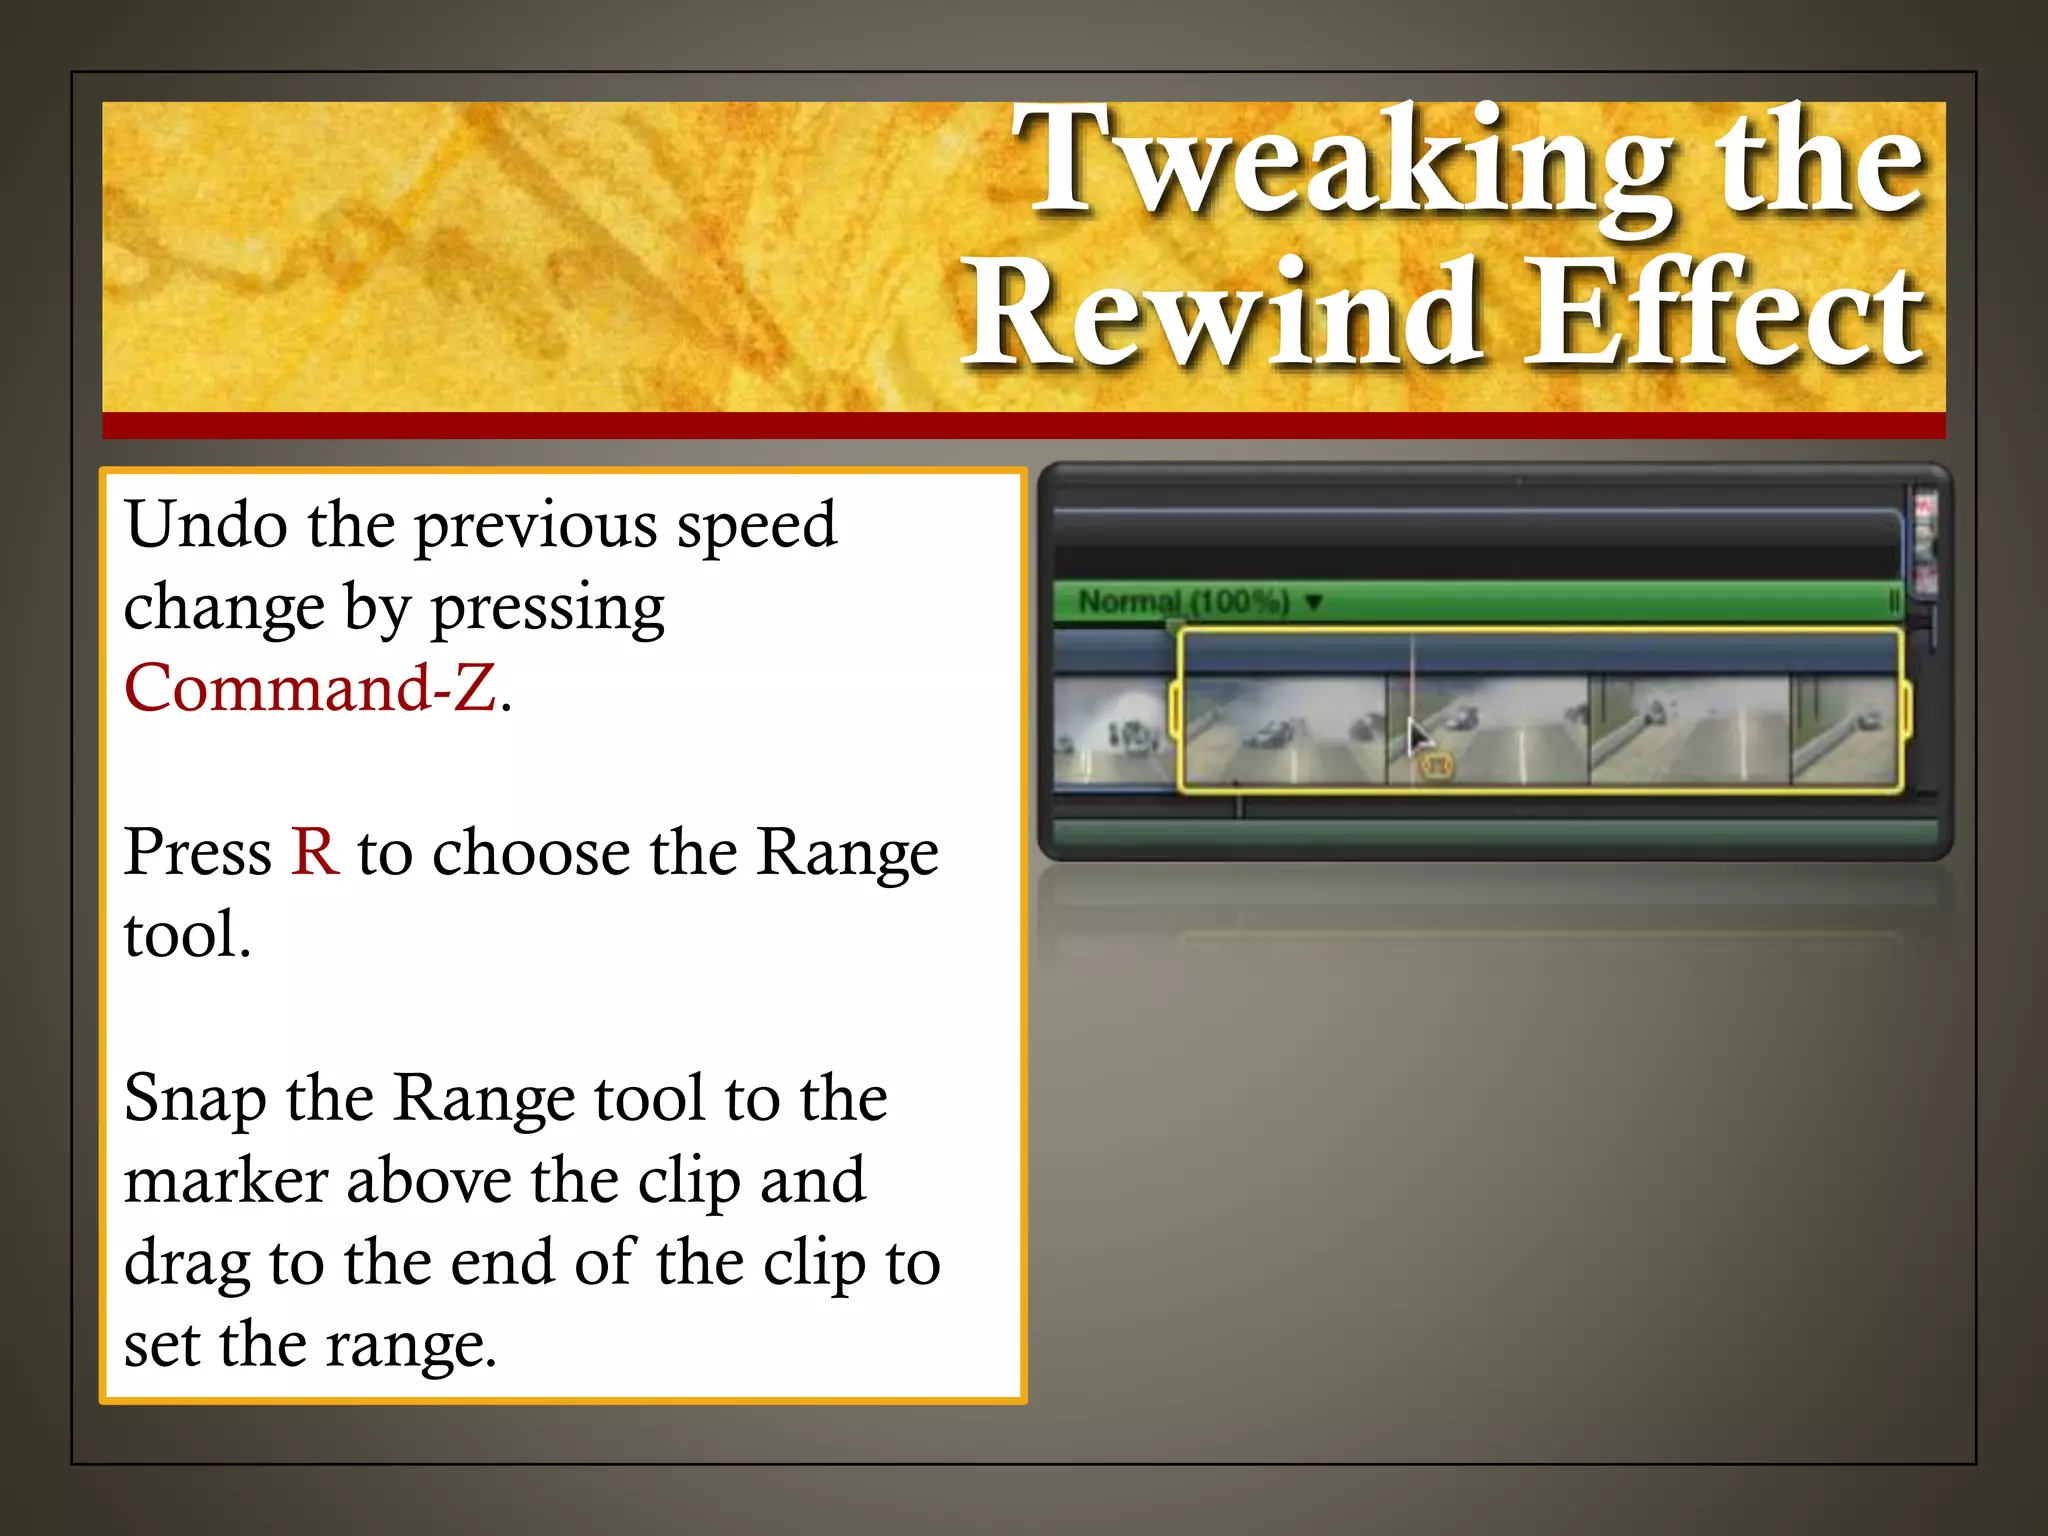
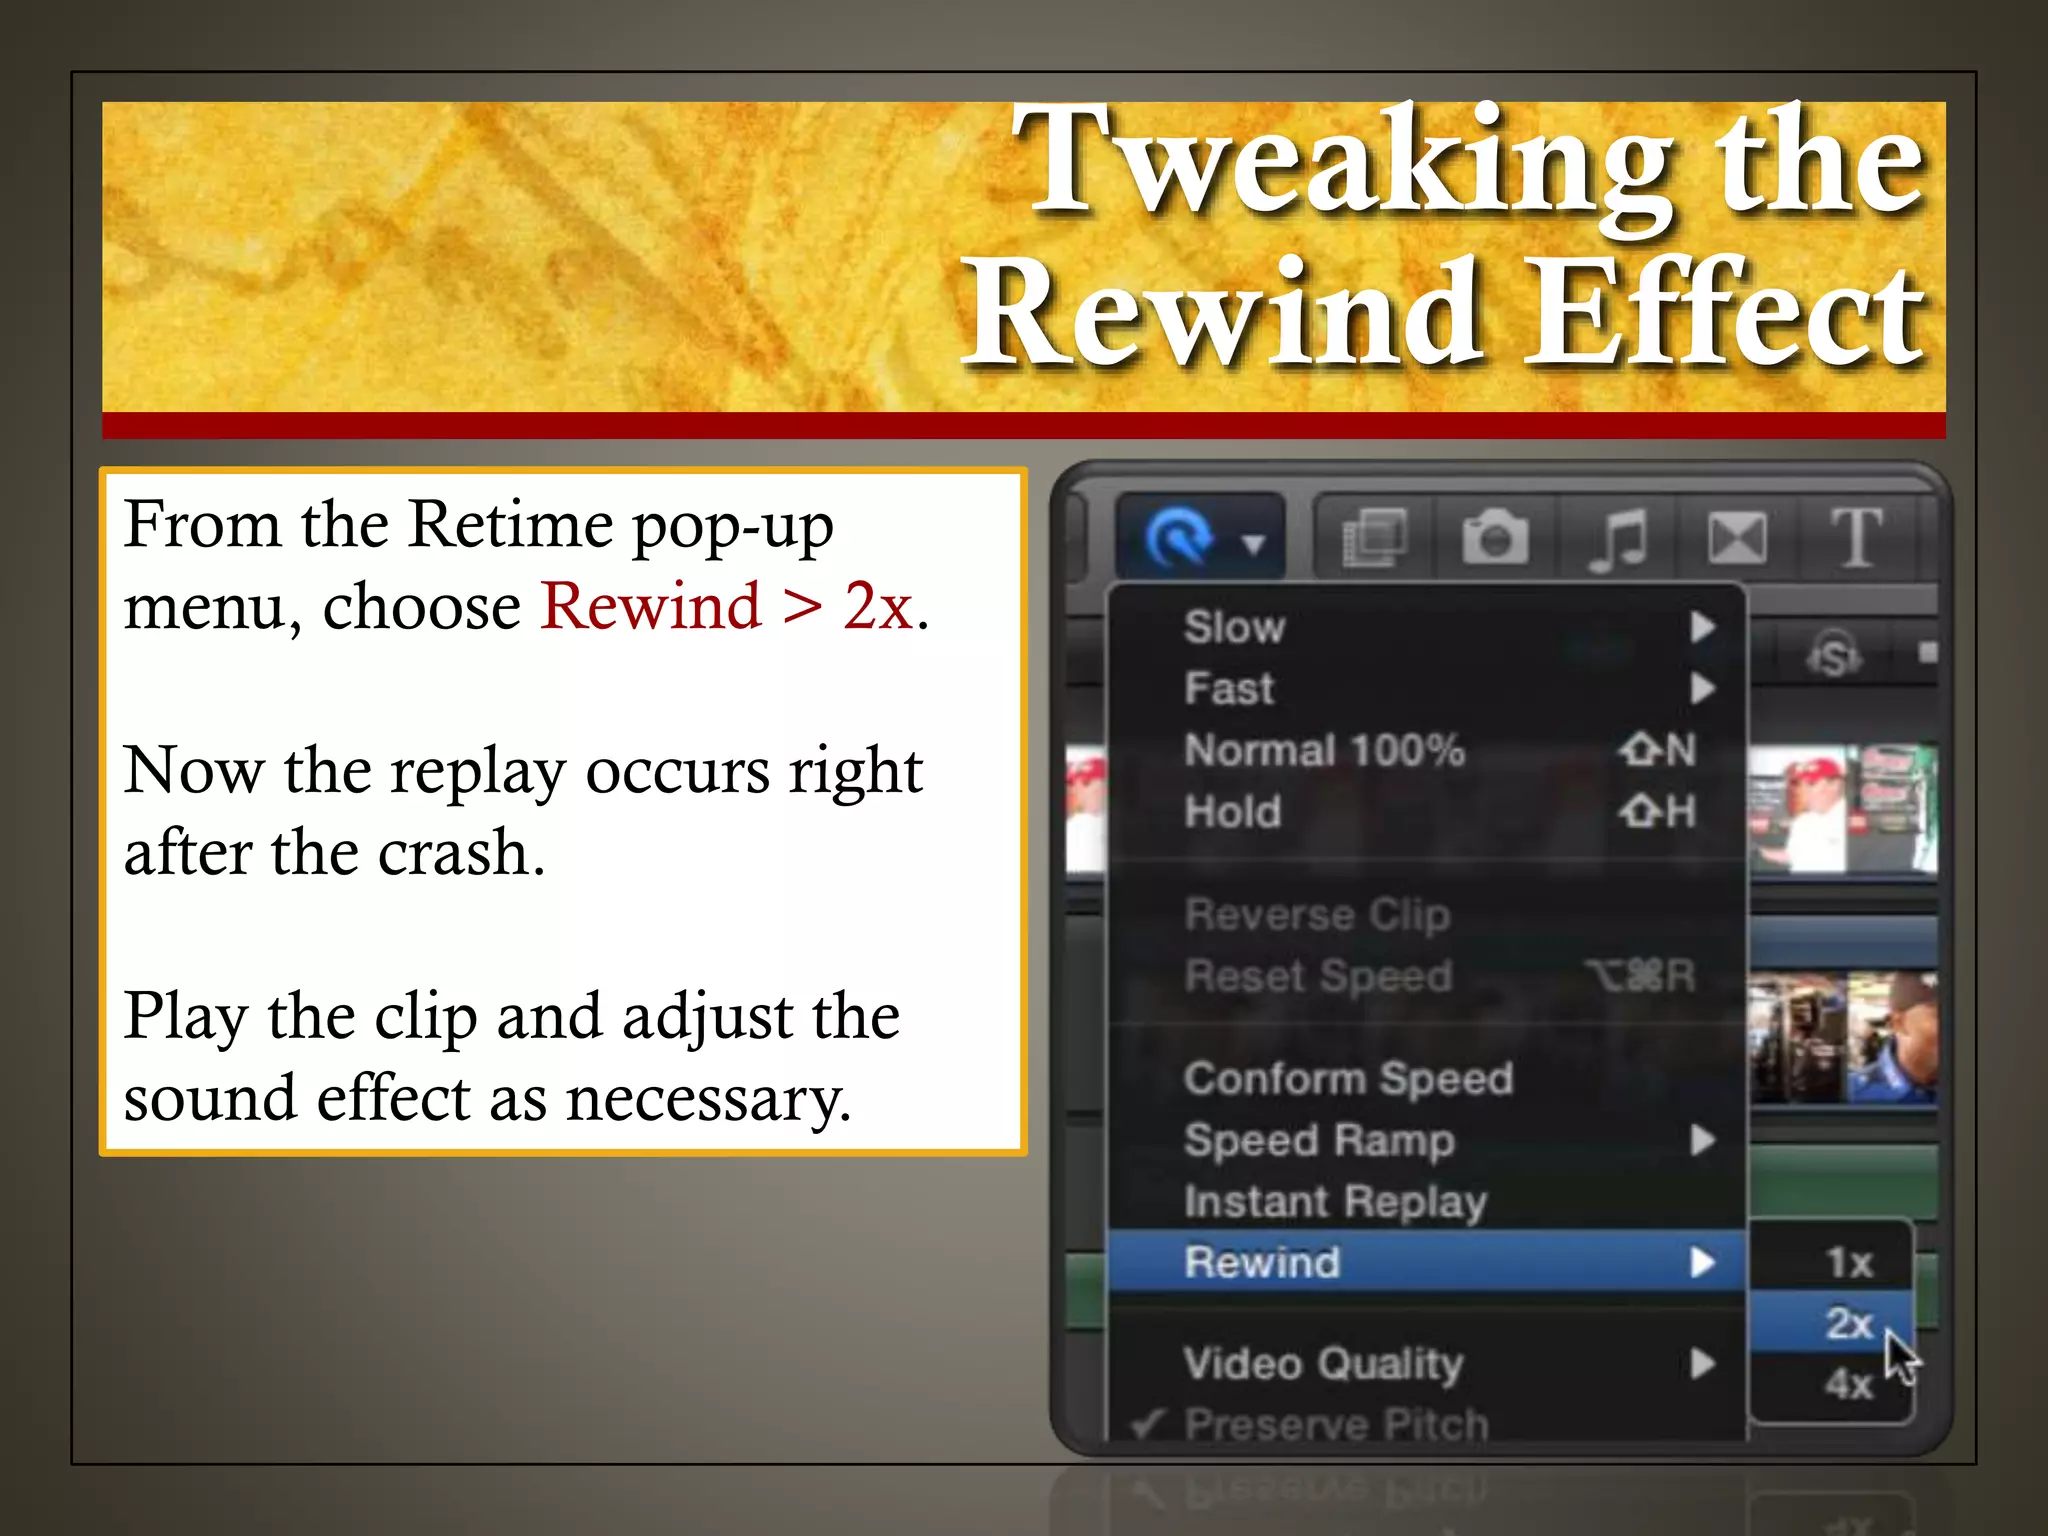
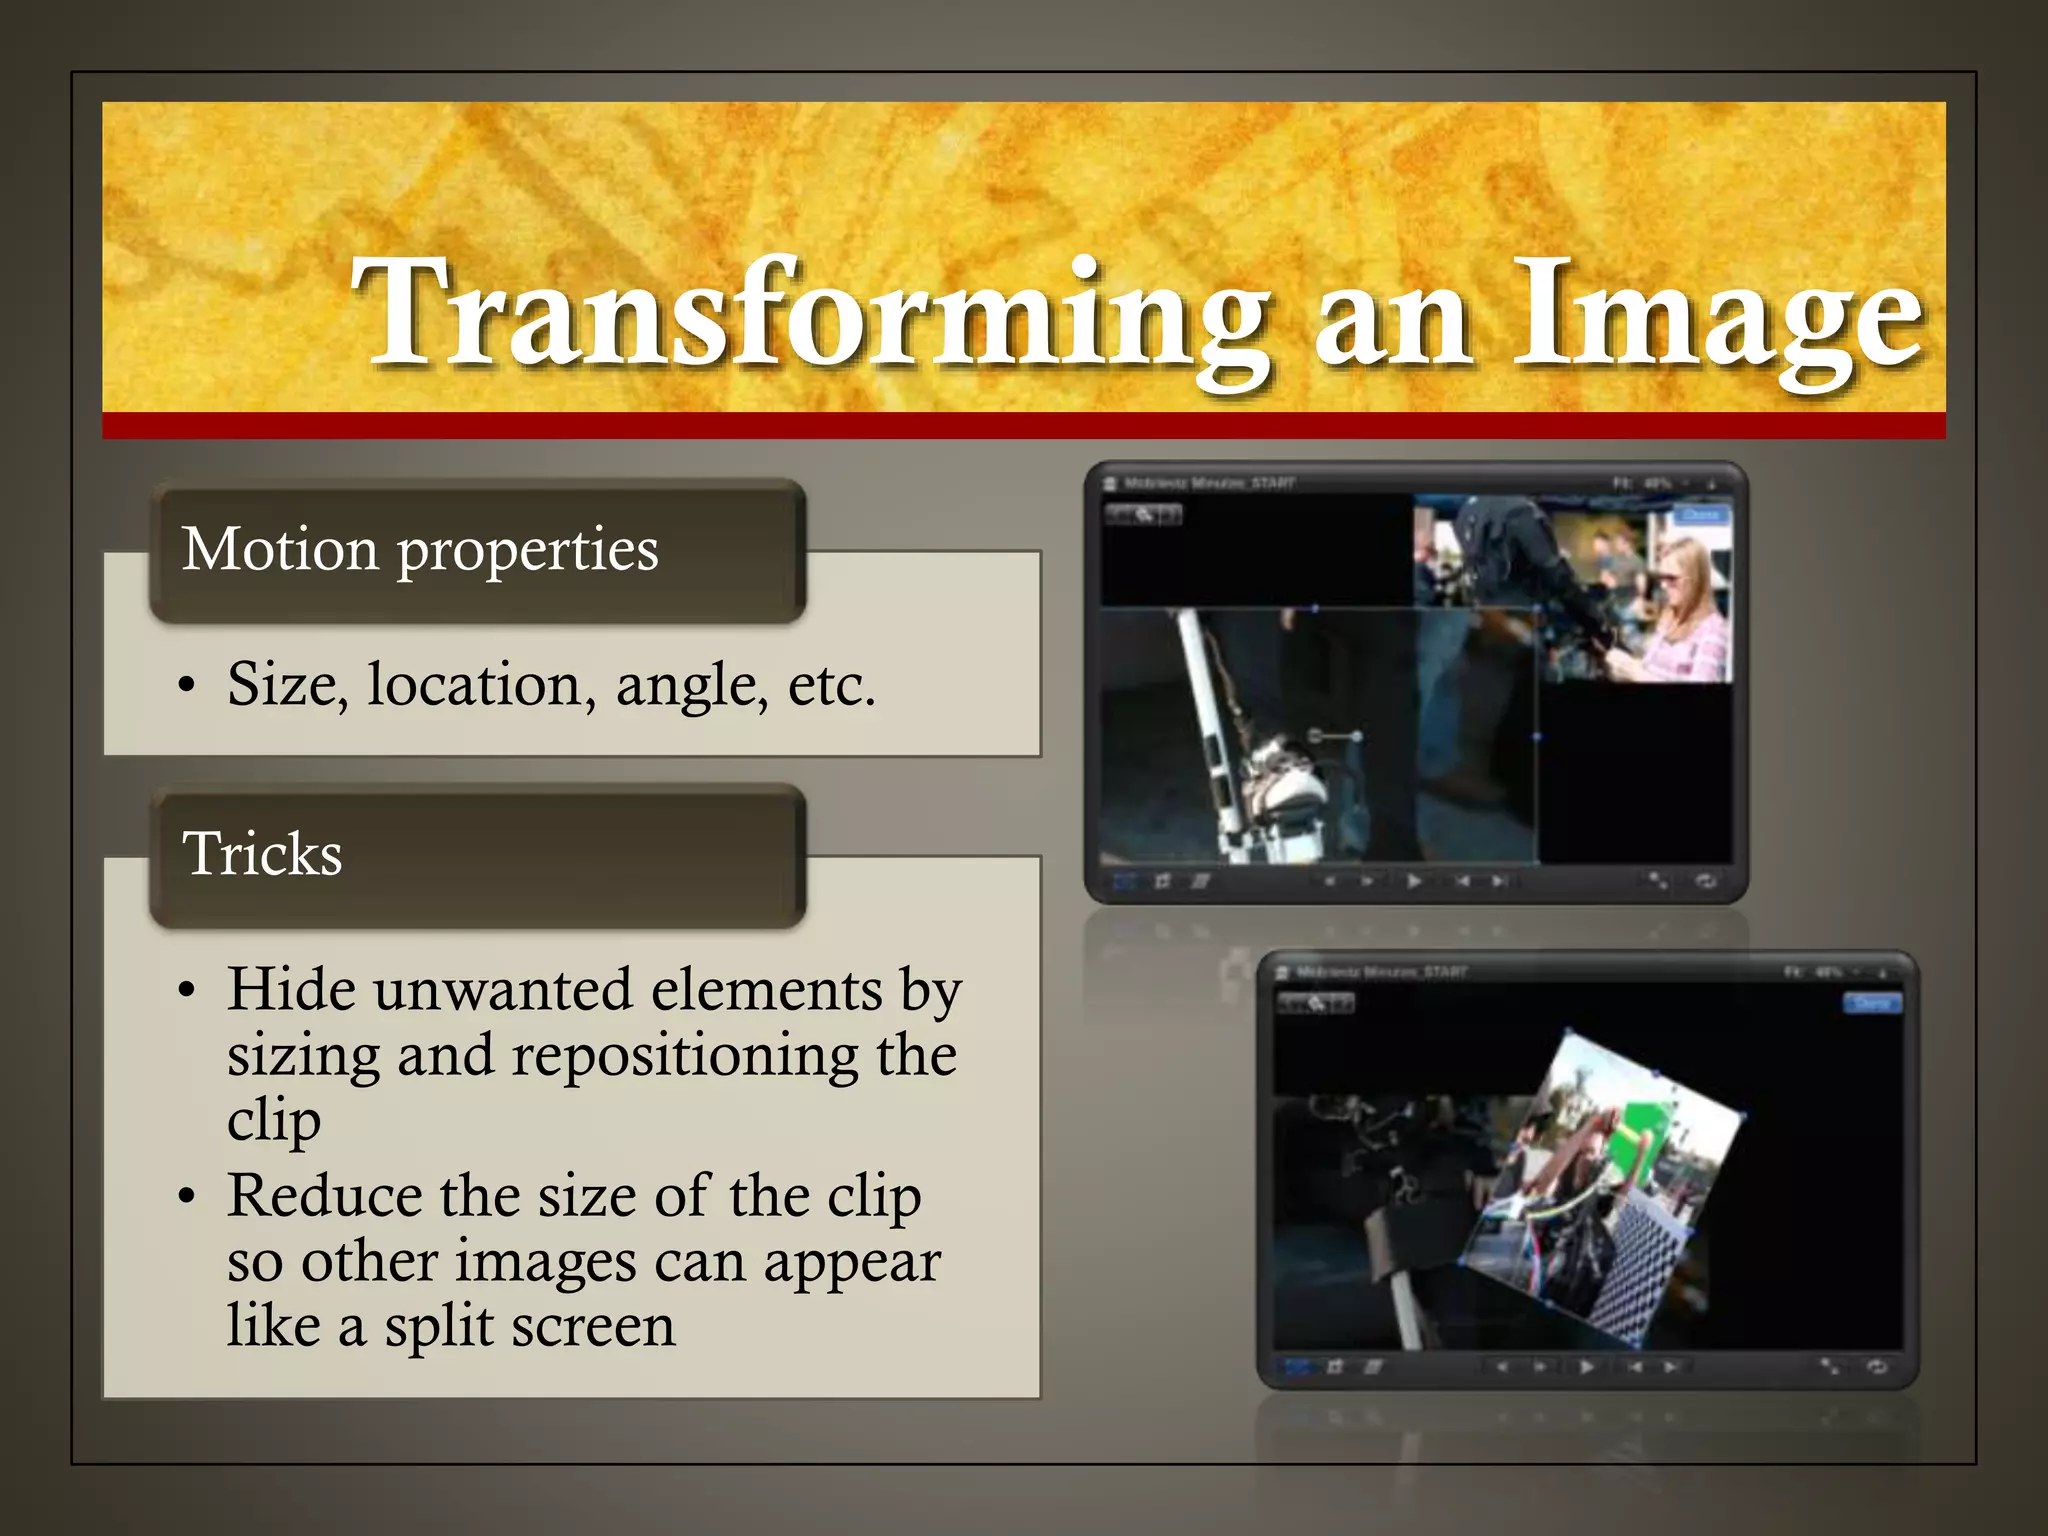
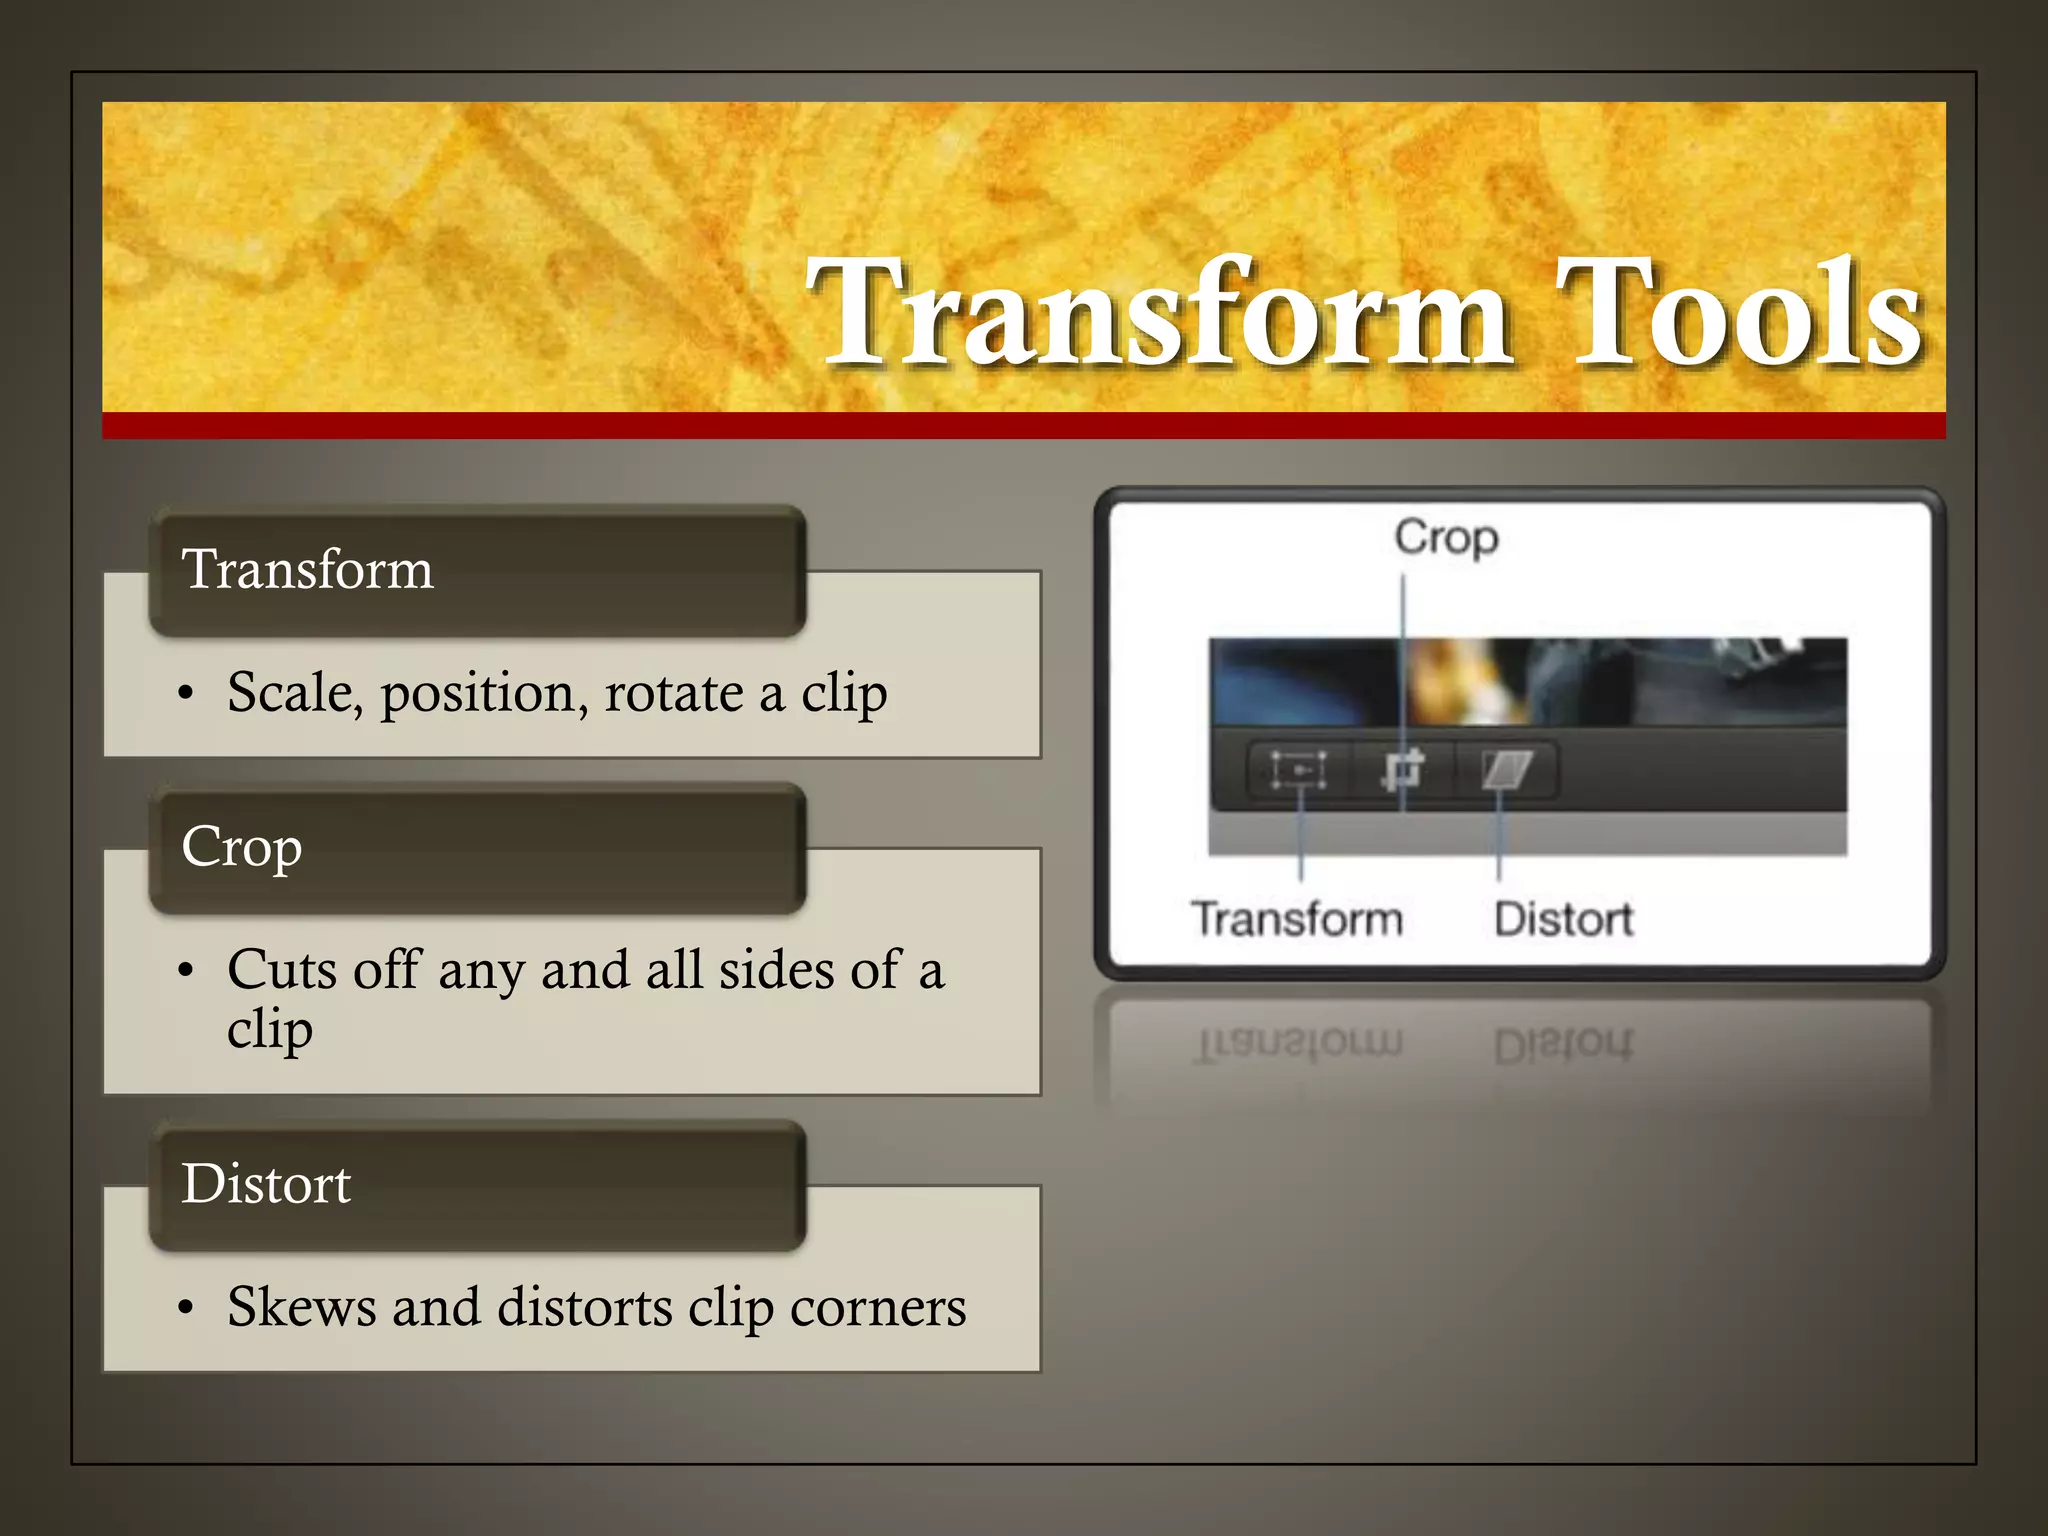
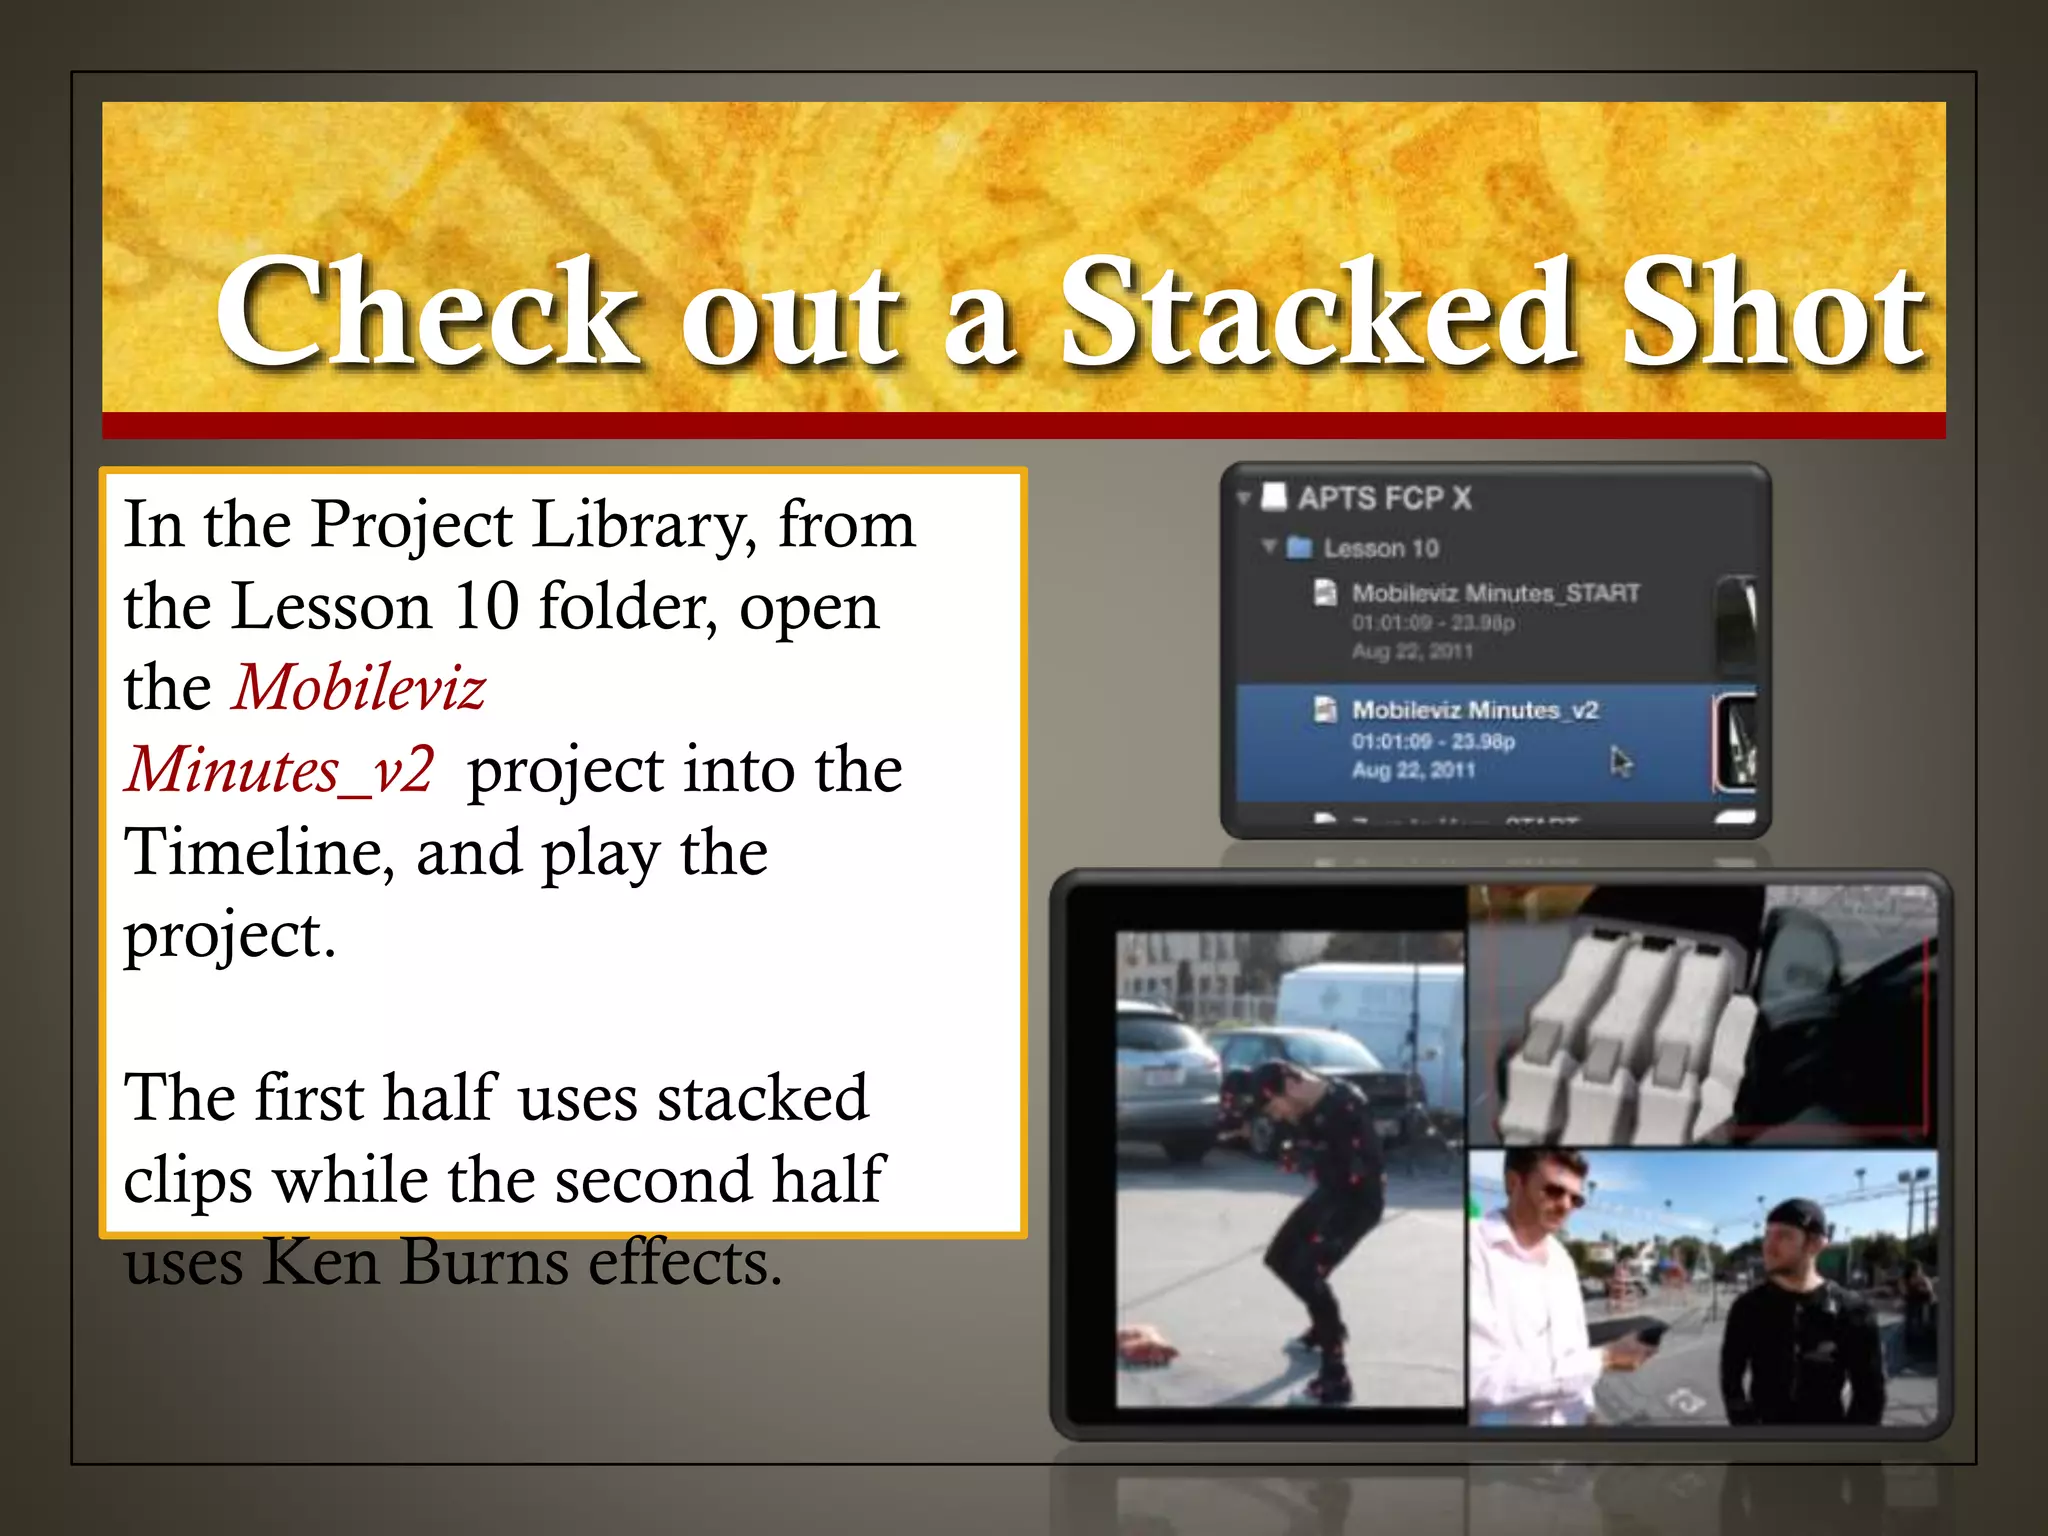
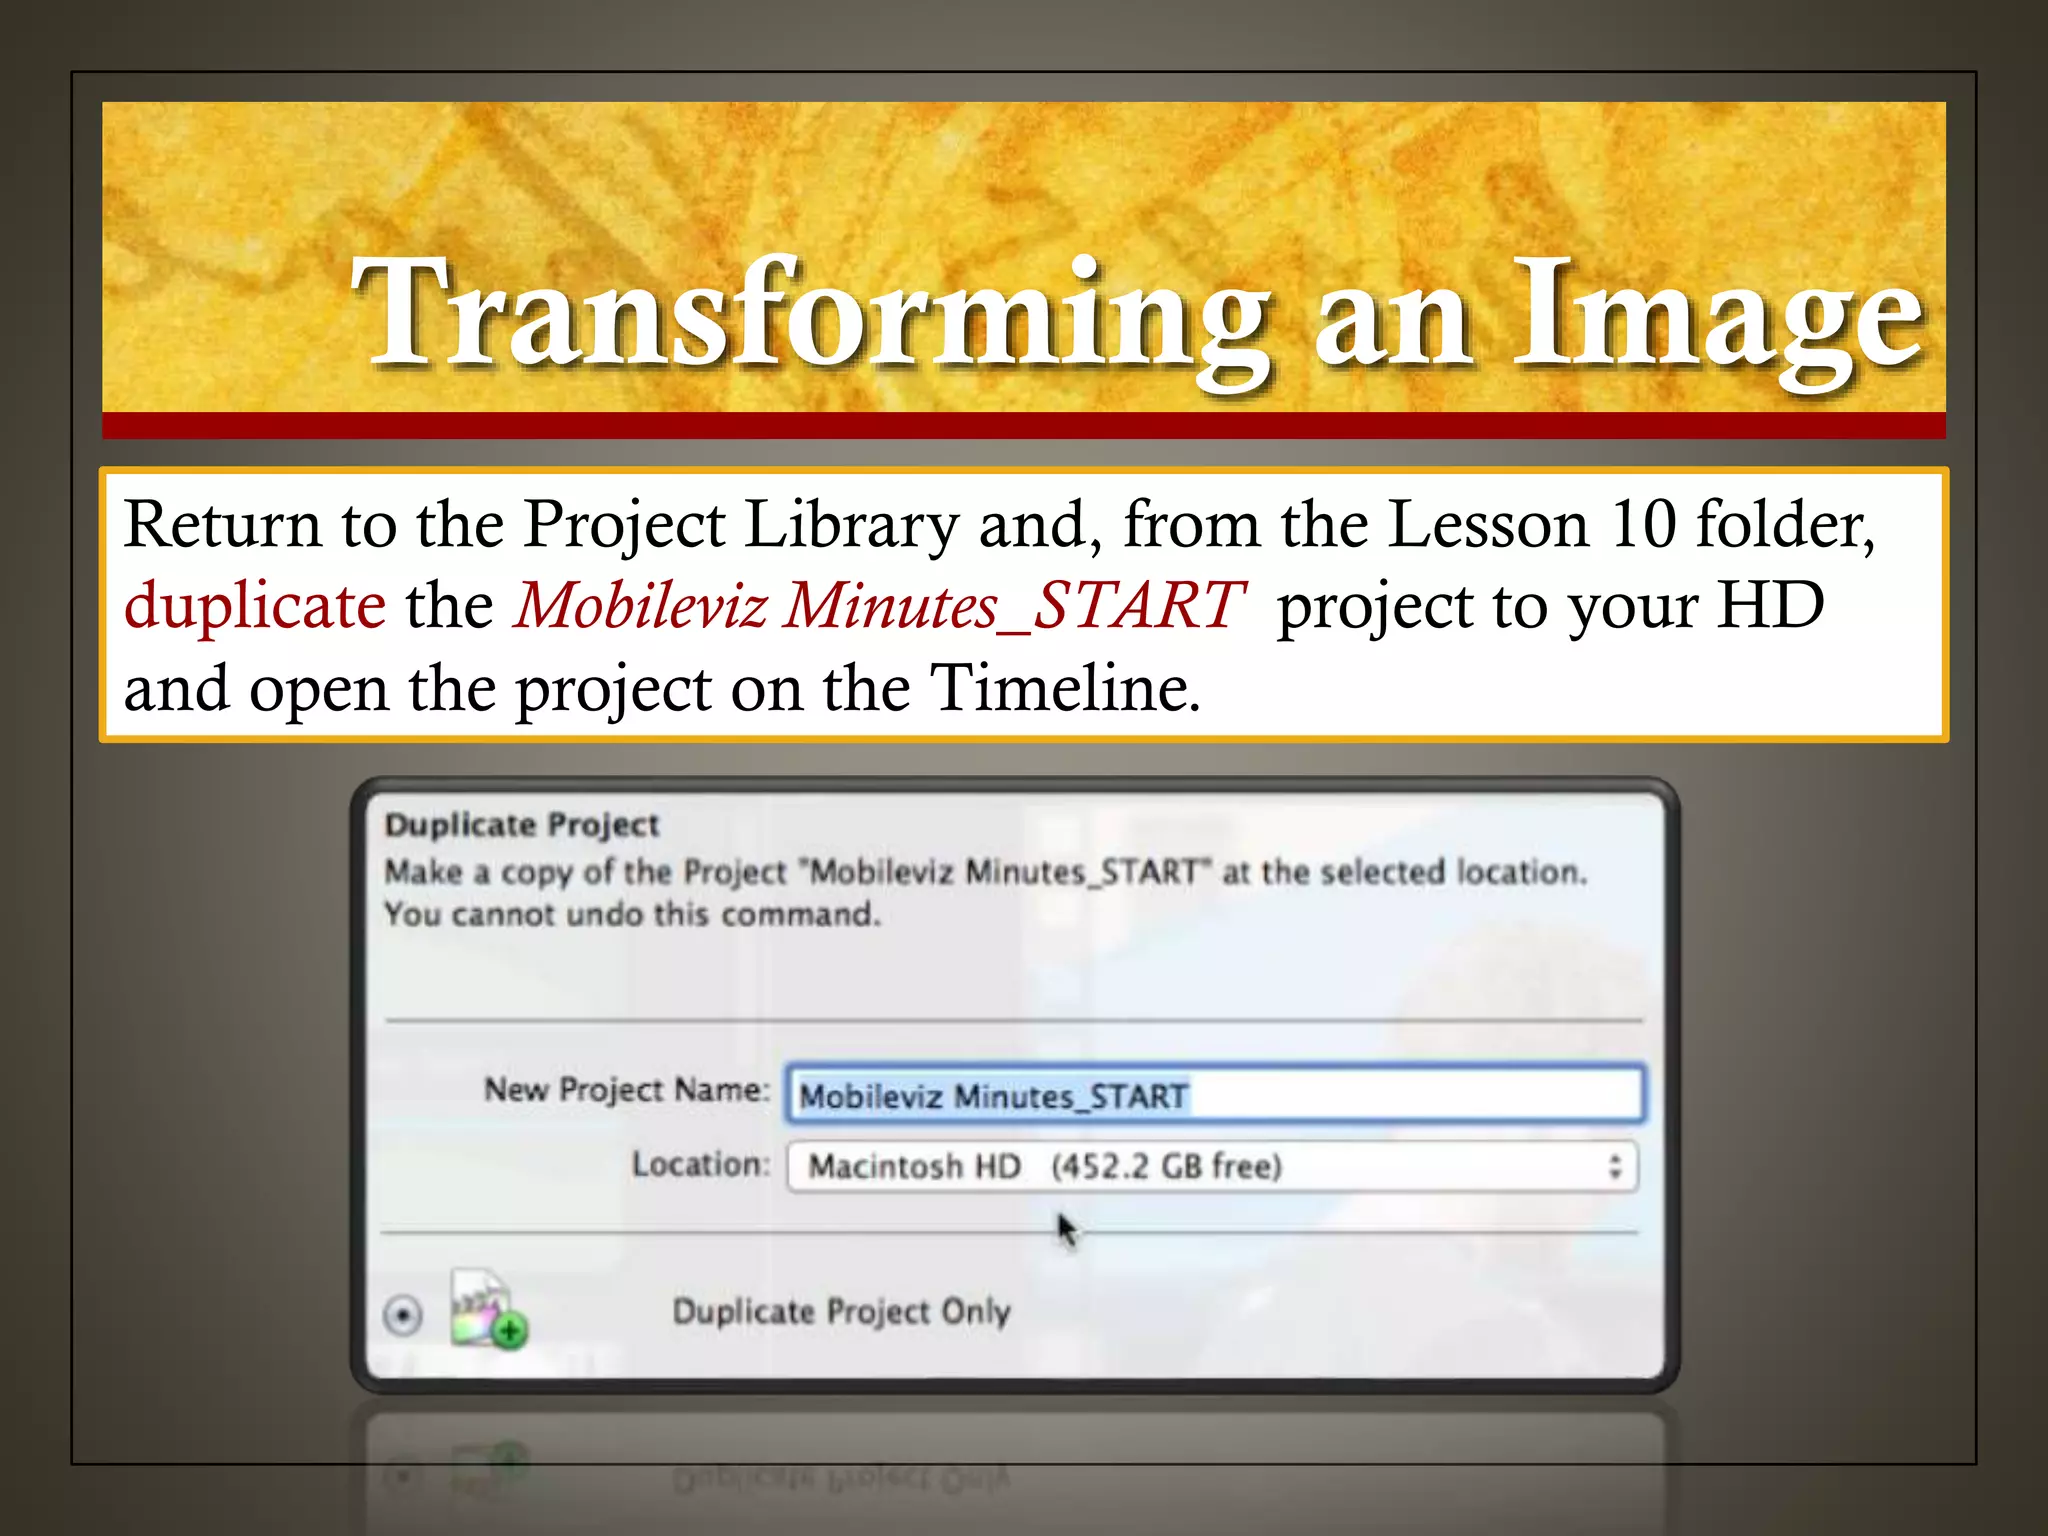
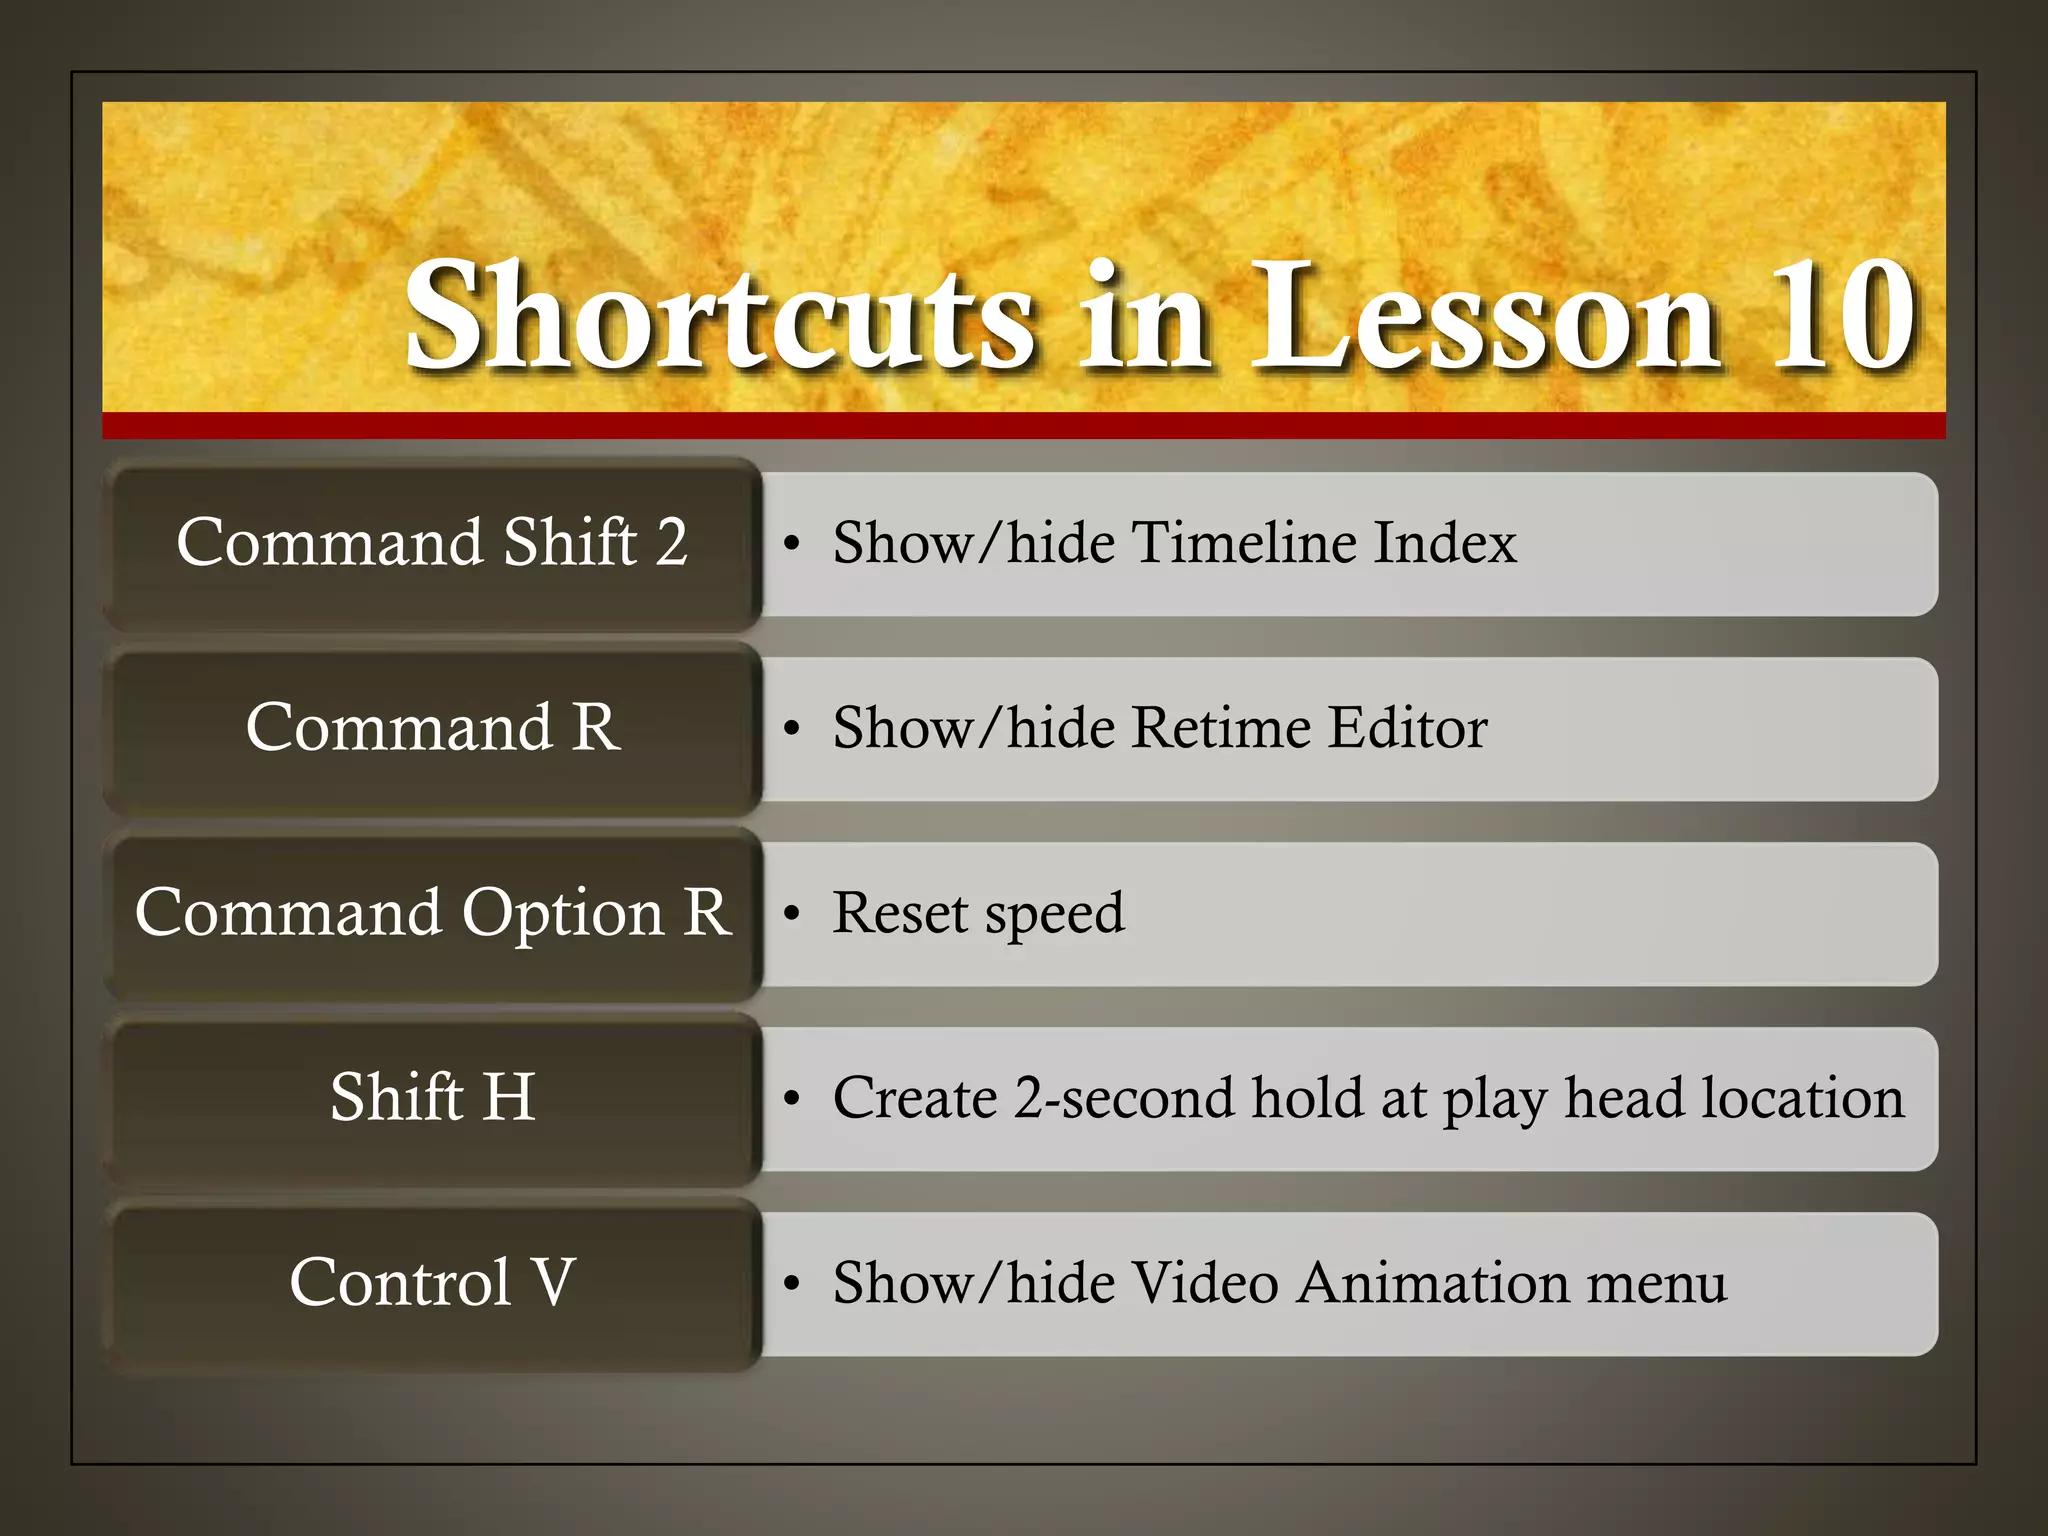
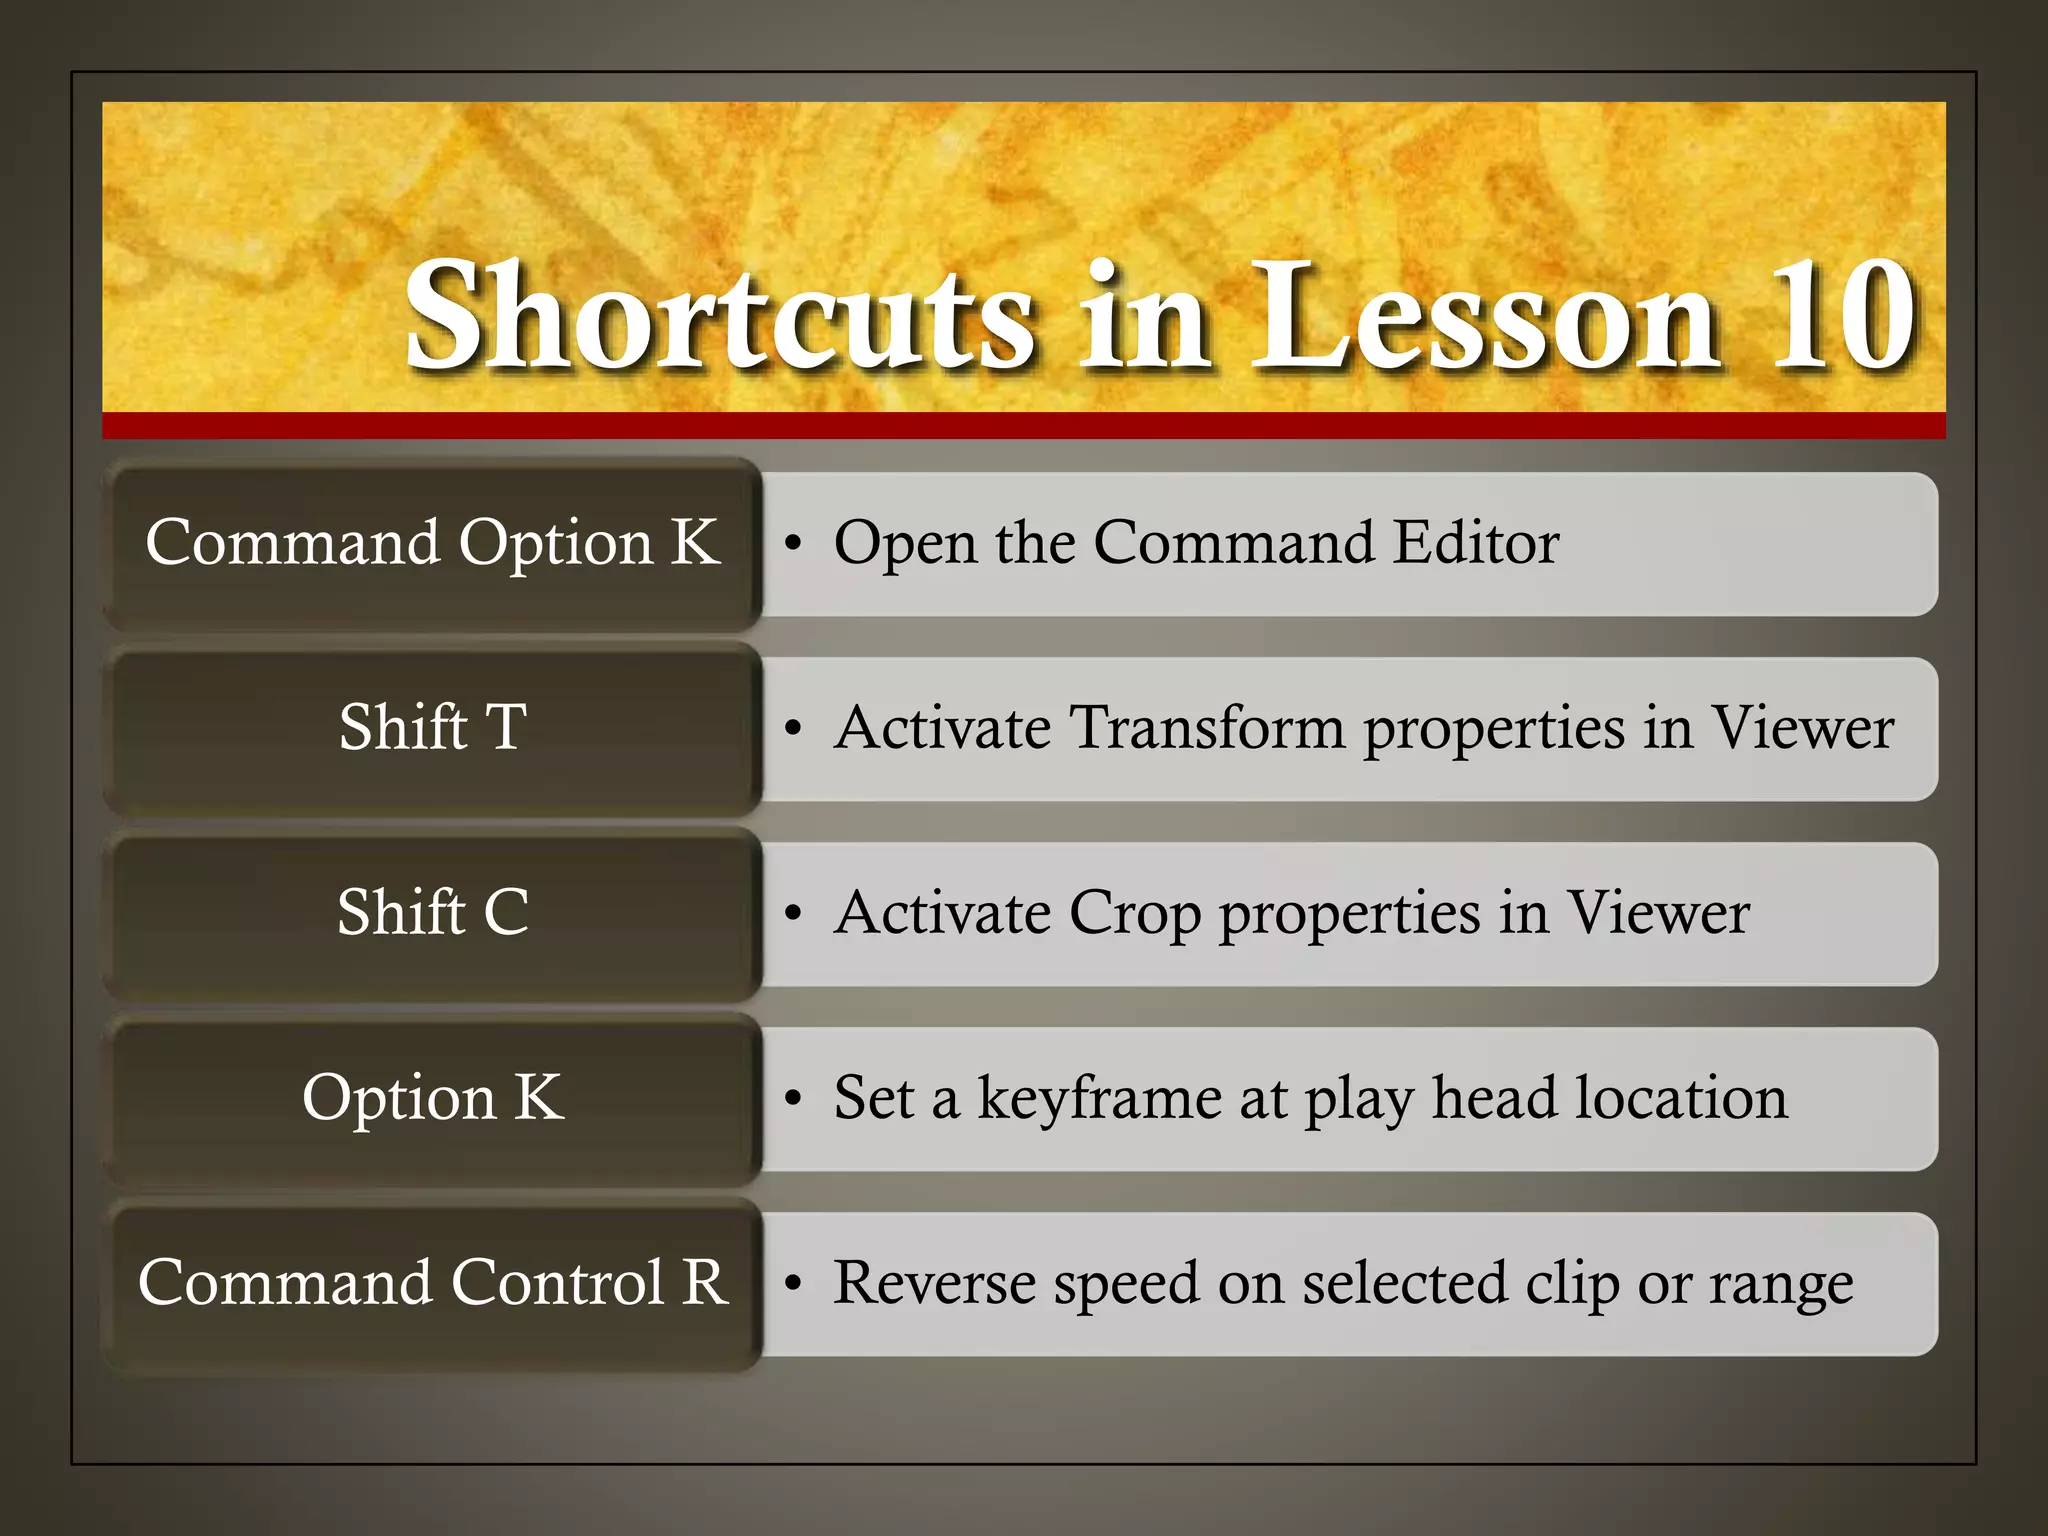
This document provides an overview of the lesson on retiming and transforming clips in Final Cut Pro X. The lesson covers retiming clips by changing their speed, applying freeze frames, and using the retime editor. It also demonstrates how to reverse clip direction, apply preset speed effects like rewind and instant replay, and transform clips by scaling, positioning, cropping, and applying Ken Burns effects. The goals are to understand FCPX retiming tools and to create keyboard shortcuts for common retiming commands.
iMovie is a proprietary video editing software application sold by Apple Inc. for the Mac and iOS (iPhone, iPad, iPad Mini and iPod Touch). Try it. You gone love this.
Teaching in the Distracted Age: What Students Expect from Online Courses - P...Samuel Edsall
Most students today will enroll in at least some online classes during their academic career. However, online pedagogy has a reputation of lacking interaction, instantaneous communication, or visual tools to assist in instruction. The purpose of this presentation will be to share student expectations in an introductory media online class and how these expectations were met through the use of social media, smartphone applications, and screen-capturing applications.
Securing Attention: How to Teach the Selfie Culture - Serena CarpenterSamuel Edsall
A common theme among futurists is that the individual is king. This perspective challenges traditional approaches to teaching students. This presentation will address how to teach to students immersed in selfie and performance cultures.
Digitizing the Classroom for the Online Environment - John HebbelerSamuel Edsall
The focus of this presentation will be on the conversion and application of a traditional media production course to an online class. Topics include the process involved in converting the traditional classroom experience to an online environment, effectively presenting information to users in the online environment, evaluation of digital media projects, and digital tools that enhance online pedagogy.
Applying Classroom Research to Improve Online Course Communication - Paul He...Samuel Edsall
We know a lot about what stimulates students in the classroom--but can we apply it to online coursework? There are a number of routes to effective teaching, even online--here's what the research says, and what you can do to move from just "high tech," to "high touch," online.
Education on the Move: Mobile Technologies, Online Platforms, and Pedagogy - ...Samuel Edsall
Education with mobile technologies and online platforms is, for the most part, education on the move. It is education that is convenient to populations of students who for whatever reason cannot commit to site- and time-specific class meetings. This kind of education serves a good purpose, by making education available to demographics of students, who, without mobile education, may not have any education. But in order for convenient education to produce quality learning, instructors must organize and structure the mobile and online presentation of educational content methodically and carefully. In a brick-and-mortar classroom, where course instruction occurs in a set place and time period, the regularity of place and time provide structure. With mobile and remote education, it is in the interest of both instructors and students for instructors to determine precisely when students will engage with educational content. Structuring the availability of learning information structures the educational experience. Structure can be created in a number of ways with technology: by date and time control mechanisms built into e-learning systems, with specialized client-side soft- ware, as well as with server-side controls on the computers storing the instructional data. With remote instruction, the technological framework is responsible for the
success of the pedagogy.
Social Media: Expanding Pedagogic Opportunities in Film and Television Produc...Samuel Edsall
Social media has changed the way television and films can be produced. Producers in New York can interactively discuss scripts, storyboards and rough cuts with their contacts in Los Angeles via on-line or via mobile devices and applications. The implications for integrating mobile media technology into higher education curricula and pedagogic methodology are equally transformative. For faculty teaching film and video production, mobile media can provide students with access to an infinite number of resources that exponentially expand what can be taught, how it can be conveyed, and where learning can take place.
At the University of Cincinnati a group of thirty-three students from four academic programs in three different colleges utilized a variety of social media technologies to experience an interdisciplinary class that was "team-taught" by both their UC Professor and professionals from the film and TV industry in LA and NY. Their work resulted in the 2012 Gold Rush Expedition Race documentary, an hour-long film that will air this March on a national cable television channel.
Mobile Technologies as Course Research Tools - BEA 2014 Presentation by Dr. D...Samuel Edsall
This presentation details the use of mobile technologies, such as smart phones and tablets, as important instructional research components in a global social media course. Examples will be provided relating to the research procedures, mobile technology implementation and designed academic activities that illustrate beneficial and enhanced student learning.
An introduction to Autodesk Smoke as taught by Professor Sam Edall using clips from FCP7 Quest media files. This first lecture shows the Media Hub and Timeline interface.
Synthetic Fiber Construction in lab .pptxPavel ( NSTU)
Synthetic fiber production is a fascinating and complex field that blends chemistry, engineering, and environmental science. By understanding these aspects, students can gain a comprehensive view of synthetic fiber production, its impact on society and the environment, and the potential for future innovations. Synthetic fibers play a crucial role in modern society, impacting various aspects of daily life, industry, and the environment. ynthetic fibers are integral to modern life, offering a range of benefits from cost-effectiveness and versatility to innovative applications and performance characteristics. While they pose environmental challenges, ongoing research and development aim to create more sustainable and eco-friendly alternatives. Understanding the importance of synthetic fibers helps in appreciating their role in the economy, industry, and daily life, while also emphasizing the need for sustainable practices and innovation.
Embracing GenAI - A Strategic ImperativePeter Windle
Artificial Intelligence (AI) technologies such as Generative AI, Image Generators and Large Language Models have had a dramatic impact on teaching, learning and assessment over the past 18 months. The most immediate threat AI posed was to Academic Integrity with Higher Education Institutes (HEIs) focusing their efforts on combating the use of GenAI in assessment. Guidelines were developed for staff and students, policies put in place too. Innovative educators have forged paths in the use of Generative AI for teaching, learning and assessments leading to pockets of transformation springing up across HEIs, often with little or no top-down guidance, support or direction.
This Gasta posits a strategic approach to integrating AI into HEIs to prepare staff, students and the curriculum for an evolving world and workplace. We will highlight the advantages of working with these technologies beyond the realm of teaching, learning and assessment by considering prompt engineering skills, industry impact, curriculum changes, and the need for staff upskilling. In contrast, not engaging strategically with Generative AI poses risks, including falling behind peers, missed opportunities and failing to ensure our graduates remain employable. The rapid evolution of AI technologies necessitates a proactive and strategic approach if we are to remain relevant.
The Roman Empire A Historical Colossus.pdfkaushalkr1407
The Roman Empire, a vast and enduring power, stands as one of history's most remarkable civilizations, leaving an indelible imprint on the world. It emerged from the Roman Republic, transitioning into an imperial powerhouse under the leadership of Augustus Caesar in 27 BCE. This transformation marked the beginning of an era defined by unprecedented territorial expansion, architectural marvels, and profound cultural influence.
The empire's roots lie in the city of Rome, founded, according to legend, by Romulus in 753 BCE. Over centuries, Rome evolved from a small settlement to a formidable republic, characterized by a complex political system with elected officials and checks on power. However, internal strife, class conflicts, and military ambitions paved the way for the end of the Republic. Julius Caesar’s dictatorship and subsequent assassination in 44 BCE created a power vacuum, leading to a civil war. Octavian, later Augustus, emerged victorious, heralding the Roman Empire’s birth.
Under Augustus, the empire experienced the Pax Romana, a 200-year period of relative peace and stability. Augustus reformed the military, established efficient administrative systems, and initiated grand construction projects. The empire's borders expanded, encompassing territories from Britain to Egypt and from Spain to the Euphrates. Roman legions, renowned for their discipline and engineering prowess, secured and maintained these vast territories, building roads, fortifications, and cities that facilitated control and integration.
The Roman Empire’s society was hierarchical, with a rigid class system. At the top were the patricians, wealthy elites who held significant political power. Below them were the plebeians, free citizens with limited political influence, and the vast numbers of slaves who formed the backbone of the economy. The family unit was central, governed by the paterfamilias, the male head who held absolute authority.
Culturally, the Romans were eclectic, absorbing and adapting elements from the civilizations they encountered, particularly the Greeks. Roman art, literature, and philosophy reflected this synthesis, creating a rich cultural tapestry. Latin, the Roman language, became the lingua franca of the Western world, influencing numerous modern languages.
Roman architecture and engineering achievements were monumental. They perfected the arch, vault, and dome, constructing enduring structures like the Colosseum, Pantheon, and aqueducts. These engineering marvels not only showcased Roman ingenuity but also served practical purposes, from public entertainment to water supply.
Biological screening of herbal drugs: Introduction and Need for
Phyto-Pharmacological Screening, New Strategies for evaluating
Natural Products, In vitro evaluation techniques for Antioxidants, Antimicrobial and Anticancer drugs. In vivo evaluation techniques
for Anti-inflammatory, Antiulcer, Anticancer, Wound healing, Antidiabetic, Hepatoprotective, Cardio protective, Diuretics and
Antifertility, Toxicity studies as per OECD guidelines
June 3, 2024 Anti-Semitism Letter Sent to MIT President Kornbluth and MIT Cor...Levi Shapiro
Letter from the Congress of the United States regarding Anti-Semitism sent June 3rd to MIT President Sally Kornbluth, MIT Corp Chair, Mark Gorenberg
Dear Dr. Kornbluth and Mr. Gorenberg,
The US House of Representatives is deeply concerned by ongoing and pervasive acts of antisemitic
harassment and intimidation at the Massachusetts Institute of Technology (MIT). Failing to act decisively to ensure a safe learning environment for all students would be a grave dereliction of your responsibilities as President of MIT and Chair of the MIT Corporation.
This Congress will not stand idly by and allow an environment hostile to Jewish students to persist. The House believes that your institution is in violation of Title VI of the Civil Rights Act, and the inability or
unwillingness to rectify this violation through action requires accountability.
Postsecondary education is a unique opportunity for students to learn and have their ideas and beliefs challenged. However, universities receiving hundreds of millions of federal funds annually have denied
students that opportunity and have been hijacked to become venues for the promotion of terrorism, antisemitic harassment and intimidation, unlawful encampments, and in some cases, assaults and riots.
The House of Representatives will not countenance the use of federal funds to indoctrinate students into hateful, antisemitic, anti-American supporters of terrorism. Investigations into campus antisemitism by the Committee on Education and the Workforce and the Committee on Ways and Means have been expanded into a Congress-wide probe across all relevant jurisdictions to address this national crisis. The undersigned Committees will conduct oversight into the use of federal funds at MIT and its learning environment under authorities granted to each Committee.
• The Committee on Education and the Workforce has been investigating your institution since December 7, 2023. The Committee has broad jurisdiction over postsecondary education, including its compliance with Title VI of the Civil Rights Act, campus safety concerns over disruptions to the learning environment, and the awarding of federal student aid under the Higher Education Act.
• The Committee on Oversight and Accountability is investigating the sources of funding and other support flowing to groups espousing pro-Hamas propaganda and engaged in antisemitic harassment and intimidation of students. The Committee on Oversight and Accountability is the principal oversight committee of the US House of Representatives and has broad authority to investigate “any matter” at “any time” under House Rule X.
• The Committee on Ways and Means has been investigating several universities since November 15, 2023, when the Committee held a hearing entitled From Ivory Towers to Dark Corners: Investigating the Nexus Between Antisemitism, Tax-Exempt Universities, and Terror Financing. The Committee followed the hearing with letters to those institutions on January 10, 202
A Strategic Approach: GenAI in EducationPeter Windle
Artificial Intelligence (AI) technologies such as Generative AI, Image Generators and Large Language Models have had a dramatic impact on teaching, learning and assessment over the past 18 months. The most immediate threat AI posed was to Academic Integrity with Higher Education Institutes (HEIs) focusing their efforts on combating the use of GenAI in assessment. Guidelines were developed for staff and students, policies put in place too. Innovative educators have forged paths in the use of Generative AI for teaching, learning and assessments leading to pockets of transformation springing up across HEIs, often with little or no top-down guidance, support or direction.
This Gasta posits a strategic approach to integrating AI into HEIs to prepare staff, students and the curriculum for an evolving world and workplace. We will highlight the advantages of working with these technologies beyond the realm of teaching, learning and assessment by considering prompt engineering skills, industry impact, curriculum changes, and the need for staff upskilling. In contrast, not engaging strategically with Generative AI poses risks, including falling behind peers, missed opportunities and failing to ensure our graduates remain employable. The rapid evolution of AI technologies necessitates a proactive and strategic approach if we are to remain relevant.
Honest Reviews of Tim Han LMA Course Program.pptxtimhan337
Personal development courses are widely available today, with each one promising life-changing outcomes. Tim Han’s Life Mastery Achievers (LMA) Course has drawn a lot of interest. In addition to offering my frank assessment of Success Insider’s LMA Course, this piece examines the course’s effects via a variety of Tim Han LMA course reviews and Success Insider comments.
Unit 8 - Information and Communication Technology (Paper I).pdfThiyagu K
This slides describes the basic concepts of ICT, basics of Email, Emerging Technology and Digital Initiatives in Education. This presentations aligns with the UGC Paper I syllabus.
Welcome to TechSoup New Member Orientation and Q&A (May 2024).pdfTechSoup
In this webinar you will learn how your organization can access TechSoup's wide variety of product discount and donation programs. From hardware to software, we'll give you a tour of the tools available to help your nonprofit with productivity, collaboration, financial management, donor tracking, security, and more.
1. Apple Pro Training Series
Final Cut Pro X
Instructor: Sam Edsall
Retiming & Transforming Clips
Lesson 10:
2. Retiming & Transforming
Clips
• Understand Final Cut Pro retiming
• Reverse clip direction
• Change clip speed
• Apply freeze frame
• Apply speed changes to selection
• Apply rewind and instant replay
• Transform and crop clips
• Create keyboard shortcuts
Goals
3. Preparing the Project
Start up the FCP External
Drive:
Find your APTS FCP X
drive and double click to
start it up.
4. Preparing a Project
In the Project Library, from
the Lesson Projects folder,
drag the Lesson 10 folder
onto APTS FCP X.
From that folder, duplicate
the Zero to Hero_START to
your HD, then play it in the
Timeline.
-- same one we used before, but
now with markers for things to fix
later.
5. The ‘To Do’ List
Click the Timeline Index
button, or press Command-
Shift-2.
To see a list of to-do items,
at the top of the Index, click
Tags, and then click the
“Show incomplete to-do
items” button.
6. Retime a Clip
In the Timeline, zoom into
the second clip, crowd ots,
and select it.
Choose Modify > Retime,
and look at some of the
ways to adjust clip playback.
Then choose Show Retime
Editor, or press Command-
R.
7. Retime a Clip
In the Timeline Index,
click the reverse marker,
and play the driver prep
red clip at that location.
Zoom the Timeline into
this clip.
8. Retime a Clip
With the skimmer
over the driver prep
red clip, press C to
select it.
Select Modify >
Retime > Reverse
Clip.
Play the clip.
9. Reverse
• Speed segment – green
• Reverse Normal (-100%)
• Green segment bar has faint arrows that indicate
playback direction
Indicators
10. Speed Things Up
In the Timeline
Index, click the fast
driver marker.
Select the clip and
choose Modify >
Retime > Fast > 2x
Play the clip again.
11. Do Two at a Time
Select the crowd
ots and crowd
wide clips.
In the toolbar, click
the Retime pop-up
menu and then
choose Fast > 2x.
Play the clips.
12. Slow Things Down
In the Timeline Index, click
the slow down marker, and
zoom into the flame out
smoke clip at this location.
Select the clip, and press
Command-R to open its
Retime Editor.
Choose Slow > 50% then
play the clip.
13. Make Note to Self
Press Home (Fn ) to move the play head to the beginning of the project.
Press M twice to set a maker at this location and open the Marker window.
Name the marker slow wall, click the Make To Do Item button, and click
Done.
14. Set Your Own Rate
Select the wall low angle clip
and press Command-R to
open the Retime Editor.
Drag the retiming handle
(edge) to the right until the
percentage reads Slow (70%),
and then play the clip.
15. Checking Off the
To-Do List
• Uncompleted task markers
are red
• Completed task markers are
green
To Do to To Done
• From the Timeline index
• Open the marker in the
timeline and mark it as
complete
Checking them off
16. Check Them Off
In the Timeline Index, double-click the slow wall marker.
When the Marker window appears, select the Completed
checkbox, and then click Done.
17. Check Them Off
In the Timeline Index,
click on the red box next
to:
• 200% both crowds
• Reverse
• Fast driver
18. To Do to To Done
• When you select the
Completed
checkbox, the to-do
item is removed
from the to-do index
list and placed on
the Completed list
Completed
19. Creating Holds & Variable
Speed Segments
• Hold a certain part of
a video clip
Freeze it
• Speed of the clip
changes during the clip
• Not a constant speed
Vary its speed
20. Hold That Shot
In the Timeline Index, click
the hold frame marker, and
zoom into the JF holds
trophy clip.
Select the clip, and then snap
the play head at the marker.
-- The play head sets the freeze
frame.
21. Hold That Shot
Make sure the clip is
selected.
In the toolbar, from the
Retime pop-up menu,
choose Hold, or press
Shift-H.
Render, then play the new
speed settings.
22. Time the Freeze
Play the clip again, and stop
playback after you hear
Antron Brown say, “Cause
you take the Wally home.”
In the Retime Editor, drag the
Hold retiming handle right to
the play head.
Play this clip.
23. Trim the Clip
Lose the tail:
Move the pointer over the end
of the JF holds trophy clip.
When the End point trim icon
appears, drag left and snap the
edit point to the play head
location.
Play the clip.
24. Setting a Range for
Speed Change
• Specifies a range
within a clip so you
can set a new speed
for just that range
• Interesting effects like
fast-slow-fast, normal-
fast-normal, etc.
The Range Tool
25. Set a Speed Range
In the army prep clip, skim
from the first marker to the
second.
-- the range for the speed change.
Select the Range tool R, and
select a range from the first
marker to the second marker.
Change the speed to Fast 8X.
Render and play the clip.
26. Tweak the Speed Effect
In the third speed segment of the army prep clip, drag the end
frame of this segment to change its speed to 80%, and play the
clip.
27. Tweak the Speed Effect
In the army prep clip, skim
across the end of the first
segment and the beginning of
the second.
Press the Left or Right Arrow
keys, if necessary, to find
precisely where the man
begins to turn away from the
car.
--Better to start the faster speed
segment before he turns so it will be
less noticeable.
28. Tweak the Speed Effect
In the Retime Editor for
the army prep clip, click the
triangle next to the speed
percentage, and choose Change
End Source Frame from the pop-
up menu.
When the tiny filmstrip icon
appears, drag it left or right and
watch the Viewer until you see
the frame of the man before he
turns.
29. Optical Flow
• Option that makes speed
changes flow as smoothly as
possible
• Creates the smoothest possible
speed change by adding frames
Keeping it smooth
• Simpler method of smoothing
frames
• Less processor intensive
Frame Blending
30. Optical Flow
Select the army prep clip.
In the toolbar, from the
Retime pop-up menu, choose
Video Quality > Optical Flow,
if necessary.
31. Applying Preset
Speed Effects
• Speeds up or slows
down over time
Speed ramping
• Simulates the
automatic rewind of a
clip or clip segment
Rewind
32. Applying Preset
Speed Effects
Play the first clip in the
project, wall low angle.
If the clip Retime Editor is
not open, select the clip, and
press Command-R
Click the Retime pop-up
menu in the Toolbar, then
choose Speed Ramp > from
0%, and play the clip.
33. Applying Preset
Speed Effects
Play the crash clip.
Select the clip and press
Command-R.
To apply a speed ramp, from
the Retime pop-up menu,
choose Speed Ramp > to 0%.
Play the clip again.
34. Applying Preset
Speed Effects
Undo the previous speed
change by pressing
Command-Z.
With the crash clip still
selected, from the Retime
pop-up menu, choose Instant
Replay.
Play the clip.
35. Applying Preset
Speed Effects
Undo the previous speed
change by pressing
Command-Z.
With the crash clip still
selected, from the Retime
pop-up menu, choose Rewind
> 2x.
Play the clip.
36. Tweaking the
Rewind Effect
Undo the previous speed
change by pressing
Command-Z.
Press R to choose the Range
tool.
Snap the Range tool to the
marker above the clip and
drag to the end of the clip to
set the range.
37. Tweaking the
Rewind Effect
From the Retime pop-up
menu, choose Rewind > 2x.
Now the replay occurs right
after the crash.
Play the clip and adjust the
sound effect as necessary.
38. Transforming an Image
• Size, location, angle, etc.
Motion properties
• Hide unwanted elements by
sizing and repositioning the
clip
• Reduce the size of the clip
so other images can appear
like a split screen
Tricks
39. Transform Tools
• Scale, position, rotate a clip
Transform
• Cuts off any and all sides of a
clip
Crop
• Skews and distorts clip corners
Distort
40. Stacking Clips
• To display two or more clips
together onscreen, they must
be placed, or stacked, on top
of each other in the
Timeline.
• Generally you see only the
uppermost clip in the Viewer.
• By making the clip smaller or
moving it to one side, you
can also see the clip or clips
beneath it.
Layering
41. Check out a Stacked Shot
In the Project Library, from
the Lesson 10 folder, open
the Mobileviz
Minutes_v2 project into the
Timeline, and play the
project.
The first half uses stacked
clips while the second half
uses Ken Burns effects.
42.
43. Transforming an Image
Return to the Project Library and, from the Lesson 10 folder,
duplicate the Mobileviz Minutes_START project to your HD
and open the project on the Timeline.
44. Transform an Image
Zoom into the first
clip, mocap hookup.
Position the play head at
about 00:00:01:15 where you
see more of the woman’s
head.
Select the clip, and in the
Viewer, click the Transform
button, or press Shift-T.
-- various onscreen controls appear
in the Viewer image area
45. Transform Tools
• Drag your pointer on any corner handle
Resize
• Drag your pointer inside the clip
Position
• Drag your pointers on the handle
extending from the center anchor point
Rotate
46. Transform an Image
Move your pointer to the
lower-left corner of the
Viewer image area.
When you see the diagonal
resize pointer, drag the handle
toward the center to make the
image about half-size.
--Dragging a corner handle
proportionately scales the image.
47. Transform an Image
Move your pointer inside the
clip’s image area, and drag up
and right.
Position and resize as desired.
When you finish using the
onscreen controls, click Done,
and play the clip.
48. Transform an Image
Move the play head to an
early frame in the second
clip, mocap strap stilts, and
select the clip.
Activate the Transform
controls, drag any corner
handle inward to reduce the
image size, and then drag the
image to the left of the Viewer
so the stilt is prominent in the
frame.
49. Try Some Other
Transform Tricks
Cue the play head over and
select the camera focus clip.
Try out these transform tricks:
• Drag, Option-drag, and
Shift-drag an edge handle.
• Drag, Option-drag, and
Shift-drag a corner handle.
• Rotate the image, drag the
handle extending from the
center like a steering wheel.
50. Use the Inspector
With the camera focus clip
still selected, open the
Inspector, and click the Video
tab.
Scroll down if necessary to
see the Transform section for
this clip.
Click the Show button to
reveal the Transform
parameters.
51. Use the Inspector
To reset the Transform
parameters, click the Reset
button (the curved arrow).
In the Viewer, use the
Transform onscreen controls
to scale and position the
image @2/3 size in the lower
right.
Click Done when you finish.
52. Trimming & Cropping
• You can remove portion of an image you don’t want to see by trimming
or cropping the image
A little off here, a little off there
• Removes portions on a side-by-side basis – does not maintain aspect ratio
Trimming
• Removes portions of a clip while maintaining aspect ratio
Cropping
53. Trimming an Image
Select the mocap strap
stilts clip and move the play
head to 00:00:03:00
In the Viewer, click the Crop
button, or press Shift-C.
While Trim is selected, drag
the right handle to the left to
remove the overlap and click
Done.
54. Trimming an Image
Select the camera focus clip
and cue the play head to
about 00:00:05:15
Drag the top-left corner of the
image down and to the right
to remove the overlap and
click Done.
55. Cropping an Image
Select and cue the play head
over the mocap sensor
rail clip.
In the Viewer, and choose
Crop as the crop type.
Drag a selection to exclude
the two men standing on the
left side of the image & click
Done.
56. Set Up a Stack
With the mocap sensor
rail clip still selected, click the
Transform button in the
Viewer.
Scale the image down a bit,
but leave it centered in the
Viewer.
-- notice that when you switched
from crop to trim, you lost your
crop effect (Hmm..)
57. Set Up a Stack
In the Viewer, click the Crop
button.
From the top left of the
Viewer, choose the Trim
option.
Trim the top of the image to
just above the rail in the shot.
58. Set Up a Stack
Click the Transform button,
and then drag the mocap
sensor rail clip’s image to the
top third of the Viewer.
Click Done.
Return to the beginning of the
project, and then play what
you’ve achieved thus far.
59. Adding the Ken Burns
Effect
• Producer of PBS
documentaries
• Mastered the art of
moving stills
Ken Burns
• Animates the crop
effect on stills or clips
The effect
60. Create a Ken Burns Effect
In the second portion of
the Mobileviz
Minutes_START project, play
the trailer cu clip.
Position the pointer over the
middle of the clip, and select
it.
-- The natural downward tilt of the
camera gives this shot some
movement but it doesn’t emphasize
Mobileviz much.
61. Create a Ken Burns Effect
In the Viewer, click the Crop
button, and choose Ken Burns
as the crop type.
Two crop selections appear.
One is green and labeled
Start, the other is red and
labeled End.
62. Create a Ken Burns Effect
Drag a corner handle of the
red End selection and position
it over the letters VIZ in the
Mobileviz name.
As you drag, an arrow
indicates the direction in
which the zoom will occur.
Play the clip.
63. Create a Ken Burns Effect
To refine where the clip ends,
position the play head toward
the end of the clip in the
Timeline, and select the clip
again.
Drag the End selection to an
improved location, and replay
the clip.
64. Create a Ken Burns Effect
Select and cue the play head
over the start of the trailer int
action clip.
Activate the Ken Burns
controls in the Viewer, if
necessary.
Reframe the green Start
selection around the monitor
on the left side of the image.
65. Create a Ken Burns Effect
Click Done and review the animation of both clips.
66. Creating Keyboard
Shortcuts
• In FCP, you can
make changes to the
default keyboard
layout in the
Command Editor.
If it isn't there,
make one
68. Creating Keyboard
Shortcuts
Make a Back-up:
In the upper-left corner of the
window, click the Command
pop-up menu, and choose
Duplicate.
When the rename dialog
appears, enter your name to
personalize the new
command set, and click OK.
69. Creating Keyboard
Shortcuts
To search for a specific
command, such as reverse
clip, click in the search field.
Enter reverse clip.
In the keyboard area, click the
R key.
--Notice on the right side of the
window, a list appears featuring
commands that use the letter R
along with the combination of
modifier keys.
70. Creating Keyboard
Shortcuts
Find an empty slot, such as
Command-Control-R, and
drag the command from the
Command list onto the
shortcut’s empty slot.
To save this layout with your
newly created keyboard
shortcut, click Save.
71. Shortcuts in Lesson 10
• Show/hide Timeline IndexCommand Shift 2
• Show/hide Retime EditorCommand R
• Reset speedCommand Option R
• Create 2-second hold at play head locationShift H
• Show/hide Video Animation menuControl V
72. Shortcuts in Lesson 10
• Open the Command EditorCommand Option K
• Activate Transform properties in ViewerShift T
• Activate Crop properties in ViewerShift C
• Set a keyframe at play head locationOption K
• Reverse speed on selected clip or rangeCommand Control R
73. Apple Pro Training Series
Final Cut Pro X
Instructor: Sam Edsall
Retiming & Transforming Clips
Lesson 10: