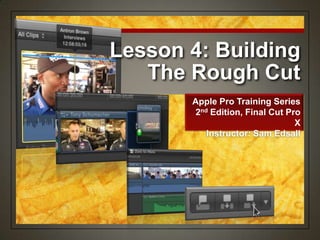
Lesson 4: Building
The Rough Cut
Apple Pro Training Series
2nd Edition, Final Cut Pro
X
Instructor: Sam Edsall
Building & Crafting
Your Story
• Start with a primary story line
• Takes the viewer from start to finish
Start with a foundation
• Rearrange some clips and trim others
• Add complementary B-roll visuals
• Add music or narration
Refine it
Creating a Project
• Every story you tell using Final Cut Pro is
contained within a project
• Story is stitched together into a Timeline
• Project needs the Event(s) that make up the
project
• If you delete an Event used in a project, you will
have missing (offline) clips in your Timeline
The Project
• Where projects are created, cataloged and stored
The Event
Create a New Project
Make sure your external
drive is booted and on your
desktop.
Choose File > Open Library
> Lesson 4
If you don‟t see LESSON 4
choose Other and then
select LESSON 4
Create a New Project
In the Library, select the
Zero to Hero Event under
LESSON 4.
In the Timeline area on the
bottom click on „Create New
Project
-- or Right click on the Zero
to Hero Event and choose
„New Project‟
Creating a Project
• Asks you to:
• Name the new Project
• Default Event - Where the media will come
from
The Dialogue Box
Customizing a Project
• Format of your project will
match the format of the
media you shot with
• Based on your first clip in
the timeline
Automatic settings
• Your can edit in any
format needed
• Like making a SD
version of a production
shot in HD
Custom settings
Create a New Project
In the Name field, enter Zero to Hero
From the Default Event pop-up menu, choose the Zero to
Hero Event listed.
Do not choose „Use Custom Settings‟
Click OK
Screening &
Marking Clips
• Select a Start and End
point and edit straight to the
timeline
• Select a Start and End
point and mark the clip,
then edit it to the timeline
later
Selecting content
Screening &
Marking Clips
In the Event Library, click the disclosure triangle
next to the Zero to Hero Event.
Select the Interviews Keyword Collection.
Click the Filmstrip View button.
Set-up for Screening
In the Action pop-up menu,
choose
Group clips by > None
Arrange clips by > Name
> Ascending.
Drag the Duration slider to
All
Set-up for Screening
In the Clip Appearance pop-
up menu, deselect Show
Waveforms, and make the
thumbnails as large as
possible.
In the Timeline, make sure
Skimming, Audio
Skimming, and Snapping
are on.
Screening
Select the first clip, Antron
Brown, by clicking on it.
Move your pointer through
the clip to skim it.
-- White playhead stays where you
clicked on clip
-- Pink skimmer moves with your
pointer
Screening
Skim away from the
playhead, then press the
space key to play the clip.
-- Playhead plays from your
skimmer location (not where you
left it) – kind of handy
Use some of your other
shortcuts to move around
your clip like J,K,L and  
keys.
Marking your Clip
Press Shift I to move the
playhead and skimmer to the
beginning of the clip.
Play the clip and stop just
after Antron says, “… didn‟t
qualify for a race.”
Press O to set an End Point
-- (O for Out point)
Marking your Clip
• Once you have a range
selected in a clip, it‟s a
good idea to check your
in‟s and out‟s
• Press the / key to play
your selection from
start to finish
Check your Mark
Marking your Clip
Press the forward slash
key / to play your range
from start to finish.
Marking your Clip
• If you find your Start or End
point isn‟t just where you
want it, then tweak it
• Use   keys to nudge
the playhead
• Press I for a new Start
point
• Press O for a new End
point
• Drag the range handle
Tweaking your Marks
Marking your Clip
In the Antron Brown clip,
rate this portion as a
Favorite by clicking the
Favorite button, or pressing
F.
-- Green Favorite line appears in
the clip over the selected range.
-- Now you can always see or
return to the portion of the clip you
liked.
Mark ‘Em Up
In the John Force clip set a
range between “There‟s
nothing like....greatest
feeling in the world.”
Press F to save that portion
as a Favorite.
Mark ‘Em Up
In the Tony Pedregon clip
select a range between “The
breed of the drag racer...has
no fear.”
Press F to save this portion
as a Favorite.
Mark ‘Em Up
In the Tony Schumacher
clip mark the range between
“Nobody wakes up and
thinks...average my whole
life.”
Press F to mark as a
Favorite
Mark ‘Em Up
Skim past the first sound
byte and set new in and out
points around “People
dream of that massive...big
monster moment.”
Press F to make this a
Favorite, too.
Appending Clips
on a Timeline
• Adds or appends a clip
to the end of the
storyline.
• Always added at the
end. Doesn‟t matter
where the play head is
located.
• Appending clips is often
the simplest approach
to creating your primary
storyline
Appending
Prep for an Edit
To view just the Favorite
selections of the four racers,
in the Event Browser click
the Filters pop-up, and
choose Favorites.
-- 4 media clips, but 5 displayed in
Favorites.
-- Two portions of Tony
Schumacher were marked as a
Favorite.
In the Event Browser, select the Antron Brown clip.
In the toolbar, click the Append button.
-- The Antron Brown clip is edited into the dark gray area in the middle
of the Timeline (the primary storyline).
Perform an Append Edit
What Are You
Looking At (in the Viewer)?
• Event Browser
• Command 1
• Window > Go To >
Event Browser
• Timeline
• Command 2
• Window > Go To >
Timeline
Choosing the
active window
What Are You
Looking At?
• Command 1
• Clip selection outline is
yellow
• Clip appears in the
Viewer
• Rating buttons are
active.
• Browser background
lighter gray
Event Browser active
What Are You
Looking At?
• Command 2
• Selected clip in browser
has a white line
• Rating buttons are
dimmed
• The Timeline time code is
displayed in the
Dashboard
Timeline active
The Append Edit
• It doesn‟t matter where
the playhead is on your
timeline when Append
editing
• The newly edited clip
will ALWAYS be added
after the last clip on the
storyline
Append no
matter what
Press the Home key (fn 
for laptops) to move the
playhead in the timeline to
the beginning.
Play the Antron clip until he
says, “take the Wally home”
and stop.
Put Append to the Test
In the Event Browser, select
the John Force clip.
Press E or select the
Append button to append
this clip to the timeline.
-Notice that the clip went to the
end of the Antron clip without
cutting into it.
Show Some Force
In the Event Browser, select
the Tony Pedregon clip.
To review it, press the /
(slash) key.
To append the clip to your
project, press E.
Perform another
Append Edit
Appending More Than
One Clip at a Time
• Command Click the
clips in the Event
Browser in the order
you want them in
your project
Picking clips
Change the size of the clips
so you can see both of the
Tony clips together.
In the Event Browser, drag
a selection rectangle
around the two Tony
Schumacher clips to select
them.
To append these two clips
to the storyline, press E.
Group Append Clips to
the Timeline
Skim Control
• Skimmer aligns or
snaps to the edit
point and
• Skimmer turns
yellow as a visual
cue
Snapping
Making Things Fit
• Will make
whichever window
you select, fit its
contents to the
window size
Shift Z
Select your Timeline or press Command 2 to make it
active.
Press Shift Z to make the clips within the timeline fit to its
space.
Make Things Fit
With Snapping turned on,
notice how your skimmer
snaps to edit points.
Press N to turn snapping
off, then skim around edit
points.
-- no more snapping
When done, press N to turn
Snapping back on.
Skim Control
Skim Control
• When you skim the timeline
you can also skim the audio
Skimming the timeline
• When you drag the playhead
across the timeline, you do not
hear audio
• Play to hear audio – Space bar,
J,K,L
Dragging the playhead
Make sure Skimming &
Audio Skimming is turned
on, then skim across your
timeline.
-- sound!!
Click the top of the
playhead and drag across
the timeline
-- no sound!!
Press the space bar or
J,K,L
Skim Control
Click the Clip Appearance
button.
Click through the six buttons,
and then click the fifth button
from the left to create larger
thumbnails.
Drag the Clip Height slider to a
middle position.
Prep the Timeline
Timeline Index
• Master list of clips and
tags (such as
keywords) in the
current project are
listed in their order of
appearance.
• Provides a textual way
to navigate your
project.
Timeline Index
Timeline Index
• Bluish highlight bar
indicates the clip that is
currently selected in the
Timeline.
• Position is where the
clip is located in time
code in your Timeline
Timeline Index
In the lower-left corner
of the Timeline, next to
the Project Library
button, click the
Timeline Index button.
-- Shortcut Command-Shift-
2.
Check out the Index
At the top of the pane, click
Clips, if it‟s not already
selected.
Beneath the list of clips,
select All.
Then select the Antron
Brown clip at the top of the
list.
-- notice that the Antron clip in
your project is now selected
The Index & the
Timeline
In the Index, select the
John Force clip.
-- notice that this clip is now
highlighted in the Timeline.
In the Timeline, select the
Tony Pedregon clip.
-- notice that this clip is now
highlighted in the Index.
The Index & the
Timeline
In the Timeline, drag
the playhead through
multiple clips, and
watch what happens in
the Index.
-- Index playhead moves up
and down following your
actions in the Timeline.
The Index & the
Timeline
Close the Timeline
Index by clicking on the
Index button
-- shortcut Command Shift
2
The Index & the
Timeline
Zooming In & Out
on your Timeline
• Below the Timeline
• Drag left and right
Zoom control
• Command – to zoom out
• Command = (+) to zoom in
• Shift Z – fit all the timeline
in the window
Use Shortcuts
Zooming In & Out
on your Timeline
• When skimming is
activated, you zoom in
and out where your
skimmer is located
• If skimming is
deactivated, you zoom
in an your where your
playhead is located
Playhead or
Skimmer?
Move the skimmer to the middle of the Timeline.
Press Command - (minus) a few times to zoom out
Press Command = (equals) several times to zoom in to the
clips.
Drag the Zoom slider to @1/3 so there‟s space for more clips.
Practice Zooming
In & Out
Viewing/Arranging Clips
on the Magnetic
Timeline
• Changing the order of
your clips in the
timeline is simple
• Drag a clip to a
different location and
Final Cut Pro
automatically creates
a space for the clip by
shifting the other clips.
Magnetic what?
In the Timeline, play the
first Tony Schumacher
clip, “Nobody wakes
up...”
-- Nice bite to start this
project.
-- Let‟s move it to the
beginning of the sequence
of clips.
Arrange Clips in the
Magnetic Timeline
Drag the first Tony
Schumacher clip left to the
head of the project.
-- notice the blue insertion line
where you will place the clip.
When you see the
remaining clips reposition
themselves, release the
mouse button to place the
clip at this location.
-- Play your new arrangement.
Arrange Clips in the
Magnetic Timeline
Drag the Tony Pedregon
clip to follow the first clip.
When you see the blue
insertion line and the other
clips scoot aside, release
the mouse button.
Play the first two clips.
Arrange Clips in the
Magnetic Timeline
Viewing/Arranging Clips
on the Magnetic
Timeline
• When you drag a clip
in the Timeline, a
numerical value
appears
• Indicates the length of
time and in which
direction you are
repositioning the clip.
The readout
The Tony clip is being
moved backwards
@16 seconds.
Close the Timeline Index.
Make all your clips fit your Timeline by pressing Shift Z.
Reduce the size of your clips in the Timeline so there is
room for B-roll clips on top of the main storyline.
Prep for Some B-Roll
Insert Clips into the
Timeline
• Insert them between
existing clips in the
primary storyline.
• When inserting, a
space for the new clip
opens up in the
storyline
• Like repositioning
them using the
Magnetic Timeline
In-between edits
In the Event Library, select
the B-Roll Keyword
Collection.
In the Event Browser, from
the Filter pop-up menu,
choose All Clips.
Change the thumbnail view
so all clips are visible in the
Event Browser.
Find Some B-Roll
In the search field, click the Filter
(magnifying glass) button to open
the Filter window.
-- shortcut Command F
Click the Add Rule (+) pop-up
menu, choose Media Type.
From the Type pop-up menu,
choose Video With Audio.
Close the Filter window.
-- no need to make a smart
collection.
Hide the Audio
Active Searches
• Filters allow you to fine-
tune what you see in
your Browser
• An icon in the Search
field let‟s you know
filtering is active
Filtering your
content
Close the Filter window.
In the Event Browser, skim the
wall low angle clip.
Drag a selection from the head of
the clip to the point where both
cars are out of frame.
Mark it as a Favorite - F
Mark a Clip
Skim through the crowd ots clip.
Press I to set the Start point when
the red racing lights come on, just
before the man with a camera
turns.
Press F to rate this selection as a
Favorite.
Mark a Clip
Skim the crowd wide clip.
Mark a Start point before the
heads turn, and press F to rate
the selection from here to the end
as a Favorite.
Mark a Clip
To view the Favorites you
just created, from the
Filters pop-up menu,
choose Favorites.
Press Command 2 to
switch to the Timeline.
Press the Home key (fn )
to move the playhead to
the beginning of the
project.
Prep for an Insert Edit
In the Event Browser,
select the wall low angle
clip.
In the toolbar, click the
Insert button.
Then play the first few
clips.
-- wall low angle clip now
appears before the Tony
Schumacher clip.
Perform an Insert Edit
In the Timeline, snap the
playhead between the 1st
two clips
In the Event Browser,
select the crowd ots clip,
and click the Insert button.
-- Shortcut W
Perform an Insert Edit
In the Timeline, make sure
the playhead is between
crowd ots & Tony.
In the Event Browser,
select the crowd wide clip,
and click the Insert button.
-- Shortcut - W
Perform an Insert Edit
Drag & Drop
• First, select the clip or
range from the Event
Browser
• Drag it straight to the
Timeline
• Drag it to the end for
an Append edit
• Drag it between clips
for an Insert edit
No line, no
waiting
In the timeline press
Shift Z to see all your
clips.
In the Event Browser,
from the Filter pop-up
menu, choose All.
Drag & Drop
Select the smokey
banner clip.
Drag the clip to the end
of the Tony
Schumacher clip.
-- Look for the blue
insertion line before
releasing the mouse
button.
Drag & Drop
Changing Edited Clips
• Sometimes you
have have a clip in
your Timeline that
needs TLC
• Colors are off
• Audio is too soft
or too loud
• Use the Inspector to
tweak your clip
Something need
fixing?
In the Timeline, click
the Clip Appearance
button and click the
third thumbnail button.
Drag the Clip Height
control to make the
clips taller.
Changing Edited Clips
Play the first three clips in
the project and watch the
waveforms as they play.
The waveforms of the
second and third clips are
too loud.
-- Yellow indicates audio levels
approaching peak levels
-- Red indicates peaked audio
Changing Edited Clips
In the Timeline, move your
pointer into the crowd ots
clip and position it over the
volume line.
When it turns into a vertical
resize pointer, drag down
until the waveform is at a
similar level to the first clip.
Changing Edited Clips
The „flat-top‟ of this audio
means it was clipped
when it was recorded
In the crowd wide clip,
drag the volume line
down to match the first
two clips.
Play these clips in the
Timeline.
Changing Edited Clips
Select the fourth clip, Tony
Schumacher, and play it.
-- Background sounds are
too loud
-- Video has a yellow tint
Leave the playhead over
the clip so you can see it in
the Viewer.
Changing Edited Clips
The Balance Button
• White balancing finds a
balance between the reds
and blues in your shot
• Inside shots tend to look
yellowish-red
• Outside shots tend to look
bluish
Red vs. Blue
• FCP automatically balances
the shot for you
Balance button
In the toolbar, click the
Inspector button, and then
click the Video tab at the
top of the window.
In the Color section, select
the checkbox next to
Balance, and notice how
the clip changes in the
Viewer.
Balance the Color
If it‟s not already selected,
select the first Tony
Schumacher clip.
In the Inspector, click the
Audio tab.
Make sure the Channel
Configuration area displays
four mono channels.
-- Click the disclosure triangle if it
doesn‟t.
Fix the Audio
- 2 channels of lav mike
- 2 channels of nat sound
In the Timeline, select Tony
Schumacher clip and press /
to play the clip.
As it plays, deselect the third
and fourth mono audio
channels in the Inspector
window.
Fix the Audio
-Adjust the overall
volume of the clip so
the no red shows in the
waveform.
Fix the Audio
Duplicating a Project
• Editing is all about
making changes
• Save a backup of the
current version of the
project from time to
time.
• If you don‟t like the new
changes, you can go
back to the previous
version and start again.
Backing up
In the Library, select the Zero to Hero Event
In the Event Browser, right click the Zero to Hero
Project and choose Duplicate Project (or select the
press Command D)
Duplicate a Project
Select the new project and
retitle it, ZTH Backup and
press Return.
Duplicate a Project
The Connect Edit
• Any clip that is attached
to the primary storyline
in the Timeline.
• Connected clips remain
attached where you edit
them until you move or
remove them.
Added outside
the primary
storyline
In the Event Browser, from the Filter pop-up menu, choose
All if you need to.
Press Command-F or click on the filter icon to open the
Filter window
Filter for Audio Only
Change the Media Type
category to Audio Only.
Close the Filter window.
Filter for Audio Only
Take a better look:
In the Event Browser, click
the List View button.
Then play the first part of
the Battle Lines music
clip.
-- Viewing this clip in list view
provides an expanded view of
the waveform.
Filter for Audio Only
To edit the first half of
this clip, mark a Start
point just before the
music begins.
Set an End point after
the first series of
waveform peaks.
Set a Range
Make the Timeline window
active by pressing
Command-2.
Press the Up or Down
Arrow key to move the
playhead to the beginning
of the crowd ots clip
Prep for the Connect
Edit
In the toolbar, click the
Connect button.
-- Shortcut Q
In the Timeline, play the
first few clips, and then
look at the thin vertical line
connecting the Battle
Lines music to the crowd
ots clip.
Make a Connect Edit
The Connect Edit
• When connected, if
you move the clip in
the primary storyline,
the connected clip will
move with it
• If you move the
connected clip, the
primary clip stays put
We belong
together
Drag the crowd ots clip to
the right and reposition it
after the crowd wide clip.
Play this arrangement, and
then drag the clip back to
its original position.
Give the Connected
Clip a Ride
Audio clip not moving? Undo the edit,
cue the play head to the beginning of the
clip, then nudge 1 frame forward and try
again.
Drag the Battle Lines
clip to the right and
snap it to the head of
the first Tony
Schumacher clip.
-- Make sure Snap is on
-- Notice the playhead turns
thick and yellow = re-
linking with a new clip.
Give the Connected
Clip a Ride
Nudging Clips on the
Timeline
• Rather than connect
clips at edit points, you
can nudge them left
and right on the
timeline
Go here, go there
• , and . (or <>)
• 1 frame left or right
• Shift , and Shift .
• 10 frames left or
right
Shortcuts
It may be easier to remember the
nudge keys by the < and >
symbols.
With the Battle Lines clip
selected, press the ,
(comma) and . (period) key
several times to move the
clip left & right 1 frame at
time.
Try it with the Shift key to
move 10 frames at a time.
Give the Connected
Clip a Ride
Nudging Clips on the
Timeline
• If you need to nudge
the clip more then a
few frames, then just
type in a value
• + values nudge the
clip forward
• - Values nudge the clip
backwards
• H:M:S:F
Type in a value
-200 = back up 2 seconds
With the Battle Lines
clip still selected, enter
– 2 0 0
-- Dashboard number entry
has replaced the time code
location.
Press Return.
Give the Connected
Clip a Ride
Shortcuts
• Turns snapping off and onN
• Create a new projectCommand N
• Open the Filter windowCommand F
• Nudge selection back and forth 1 frame, and .
• Nudge selection back and forth 10
frames
Shift , and .
Shortcuts
• Open the Project LibraryCommand 0
• Go to the Event BrowserCommand 1
• Go to the TimelineCommand 2
• Zoom out and in on the Timeline, Event
Browser or Viewer
Command – and +
• Zoom the contents to fit the size of the
Event Browser, the Viewer, or Timeline
Shift Z
Shortcuts
• Go to previous item in the Event
Browser or previous edit point in the
Timeline
Up arrow
• Go to next item in the Event Browser or
next edit point in the Timeline
Down arrow
• Connect editQ
• Insert editW
• Append editE
• Play selection/
Trim off the beginning of Battle Lines where there is no music. Move
Battle Lines to the beginning of your project.
Adjust the audio levels of all the clips in the primary storyline and the
connected music clip so you have a good audio balance.
Trim the end of the music clip so its duration matches the video of your
project.
Homework
Click the Show/Share
Destinations button and
choose Apple Devices 720P
Homework
On the Info tab change the name of your clip from Zero to
Hero to „(your name) Week 4‟
-- this is very important. If you don‟t change the title of this project, the
original name will revert when you post on iTunes U
Homework
On the Settings tab change the Resolution pop-up menu to
the smallest resolution 854 X 480
Change When done: pop-up menu to Do Nothing
Press Next
Homework
Save your project to the desktop and wait for the render to
complete.
Homework
Open your browser to the
WIU iTunes U page:
http://www.wiu.edu/iTunesU
Log in with your ecom name
and password.
Navigate to the BC 142
folder.
Select the Homework folder
and upload your homework.
Homework
Lesson 4: Building
The Rough Cut
Apple Pro Training Series
2nd Edition, Final Cut Pro
X
Instructor: Sam Edsall

Final Cut Pro X Weynand Certification Lesson 4

  • 1.
    Lesson 4: Building TheRough Cut Apple Pro Training Series 2nd Edition, Final Cut Pro X Instructor: Sam Edsall
  • 2.
    Building & Crafting YourStory • Start with a primary story line • Takes the viewer from start to finish Start with a foundation • Rearrange some clips and trim others • Add complementary B-roll visuals • Add music or narration Refine it
  • 3.
    Creating a Project •Every story you tell using Final Cut Pro is contained within a project • Story is stitched together into a Timeline • Project needs the Event(s) that make up the project • If you delete an Event used in a project, you will have missing (offline) clips in your Timeline The Project • Where projects are created, cataloged and stored The Event
  • 4.
    Create a NewProject Make sure your external drive is booted and on your desktop. Choose File > Open Library > Lesson 4 If you don‟t see LESSON 4 choose Other and then select LESSON 4
  • 5.
    Create a NewProject In the Library, select the Zero to Hero Event under LESSON 4. In the Timeline area on the bottom click on „Create New Project -- or Right click on the Zero to Hero Event and choose „New Project‟
  • 6.
    Creating a Project •Asks you to: • Name the new Project • Default Event - Where the media will come from The Dialogue Box
  • 7.
    Customizing a Project •Format of your project will match the format of the media you shot with • Based on your first clip in the timeline Automatic settings • Your can edit in any format needed • Like making a SD version of a production shot in HD Custom settings
  • 8.
    Create a NewProject In the Name field, enter Zero to Hero From the Default Event pop-up menu, choose the Zero to Hero Event listed. Do not choose „Use Custom Settings‟ Click OK
  • 9.
    Screening & Marking Clips •Select a Start and End point and edit straight to the timeline • Select a Start and End point and mark the clip, then edit it to the timeline later Selecting content
  • 10.
    Screening & Marking Clips Inthe Event Library, click the disclosure triangle next to the Zero to Hero Event. Select the Interviews Keyword Collection. Click the Filmstrip View button.
  • 11.
    Set-up for Screening Inthe Action pop-up menu, choose Group clips by > None Arrange clips by > Name > Ascending. Drag the Duration slider to All
  • 12.
    Set-up for Screening Inthe Clip Appearance pop- up menu, deselect Show Waveforms, and make the thumbnails as large as possible. In the Timeline, make sure Skimming, Audio Skimming, and Snapping are on.
  • 13.
    Screening Select the firstclip, Antron Brown, by clicking on it. Move your pointer through the clip to skim it. -- White playhead stays where you clicked on clip -- Pink skimmer moves with your pointer
  • 14.
    Screening Skim away fromthe playhead, then press the space key to play the clip. -- Playhead plays from your skimmer location (not where you left it) – kind of handy Use some of your other shortcuts to move around your clip like J,K,L and   keys.
  • 15.
    Marking your Clip PressShift I to move the playhead and skimmer to the beginning of the clip. Play the clip and stop just after Antron says, “… didn‟t qualify for a race.” Press O to set an End Point -- (O for Out point)
  • 16.
    Marking your Clip •Once you have a range selected in a clip, it‟s a good idea to check your in‟s and out‟s • Press the / key to play your selection from start to finish Check your Mark
  • 17.
    Marking your Clip Pressthe forward slash key / to play your range from start to finish.
  • 18.
    Marking your Clip •If you find your Start or End point isn‟t just where you want it, then tweak it • Use   keys to nudge the playhead • Press I for a new Start point • Press O for a new End point • Drag the range handle Tweaking your Marks
  • 19.
    Marking your Clip Inthe Antron Brown clip, rate this portion as a Favorite by clicking the Favorite button, or pressing F. -- Green Favorite line appears in the clip over the selected range. -- Now you can always see or return to the portion of the clip you liked.
  • 20.
    Mark ‘Em Up Inthe John Force clip set a range between “There‟s nothing like....greatest feeling in the world.” Press F to save that portion as a Favorite.
  • 21.
    Mark ‘Em Up Inthe Tony Pedregon clip select a range between “The breed of the drag racer...has no fear.” Press F to save this portion as a Favorite.
  • 22.
    Mark ‘Em Up Inthe Tony Schumacher clip mark the range between “Nobody wakes up and thinks...average my whole life.” Press F to mark as a Favorite
  • 23.
    Mark ‘Em Up Skimpast the first sound byte and set new in and out points around “People dream of that massive...big monster moment.” Press F to make this a Favorite, too.
  • 24.
    Appending Clips on aTimeline • Adds or appends a clip to the end of the storyline. • Always added at the end. Doesn‟t matter where the play head is located. • Appending clips is often the simplest approach to creating your primary storyline Appending
  • 25.
    Prep for anEdit To view just the Favorite selections of the four racers, in the Event Browser click the Filters pop-up, and choose Favorites. -- 4 media clips, but 5 displayed in Favorites. -- Two portions of Tony Schumacher were marked as a Favorite.
  • 26.
    In the EventBrowser, select the Antron Brown clip. In the toolbar, click the Append button. -- The Antron Brown clip is edited into the dark gray area in the middle of the Timeline (the primary storyline). Perform an Append Edit
  • 27.
    What Are You LookingAt (in the Viewer)? • Event Browser • Command 1 • Window > Go To > Event Browser • Timeline • Command 2 • Window > Go To > Timeline Choosing the active window
  • 28.
    What Are You LookingAt? • Command 1 • Clip selection outline is yellow • Clip appears in the Viewer • Rating buttons are active. • Browser background lighter gray Event Browser active
  • 29.
    What Are You LookingAt? • Command 2 • Selected clip in browser has a white line • Rating buttons are dimmed • The Timeline time code is displayed in the Dashboard Timeline active
  • 30.
    The Append Edit •It doesn‟t matter where the playhead is on your timeline when Append editing • The newly edited clip will ALWAYS be added after the last clip on the storyline Append no matter what
  • 31.
    Press the Homekey (fn  for laptops) to move the playhead in the timeline to the beginning. Play the Antron clip until he says, “take the Wally home” and stop. Put Append to the Test
  • 32.
    In the EventBrowser, select the John Force clip. Press E or select the Append button to append this clip to the timeline. -Notice that the clip went to the end of the Antron clip without cutting into it. Show Some Force
  • 33.
    In the EventBrowser, select the Tony Pedregon clip. To review it, press the / (slash) key. To append the clip to your project, press E. Perform another Append Edit
  • 34.
    Appending More Than OneClip at a Time • Command Click the clips in the Event Browser in the order you want them in your project Picking clips
  • 35.
    Change the sizeof the clips so you can see both of the Tony clips together. In the Event Browser, drag a selection rectangle around the two Tony Schumacher clips to select them. To append these two clips to the storyline, press E. Group Append Clips to the Timeline
  • 36.
    Skim Control • Skimmeraligns or snaps to the edit point and • Skimmer turns yellow as a visual cue Snapping
  • 37.
    Making Things Fit •Will make whichever window you select, fit its contents to the window size Shift Z
  • 38.
    Select your Timelineor press Command 2 to make it active. Press Shift Z to make the clips within the timeline fit to its space. Make Things Fit
  • 39.
    With Snapping turnedon, notice how your skimmer snaps to edit points. Press N to turn snapping off, then skim around edit points. -- no more snapping When done, press N to turn Snapping back on. Skim Control
  • 40.
    Skim Control • Whenyou skim the timeline you can also skim the audio Skimming the timeline • When you drag the playhead across the timeline, you do not hear audio • Play to hear audio – Space bar, J,K,L Dragging the playhead
  • 41.
    Make sure Skimming& Audio Skimming is turned on, then skim across your timeline. -- sound!! Click the top of the playhead and drag across the timeline -- no sound!! Press the space bar or J,K,L Skim Control
  • 42.
    Click the ClipAppearance button. Click through the six buttons, and then click the fifth button from the left to create larger thumbnails. Drag the Clip Height slider to a middle position. Prep the Timeline
  • 43.
    Timeline Index • Masterlist of clips and tags (such as keywords) in the current project are listed in their order of appearance. • Provides a textual way to navigate your project. Timeline Index
  • 44.
    Timeline Index • Bluishhighlight bar indicates the clip that is currently selected in the Timeline. • Position is where the clip is located in time code in your Timeline Timeline Index
  • 45.
    In the lower-leftcorner of the Timeline, next to the Project Library button, click the Timeline Index button. -- Shortcut Command-Shift- 2. Check out the Index
  • 46.
    At the topof the pane, click Clips, if it‟s not already selected. Beneath the list of clips, select All. Then select the Antron Brown clip at the top of the list. -- notice that the Antron clip in your project is now selected The Index & the Timeline
  • 47.
    In the Index,select the John Force clip. -- notice that this clip is now highlighted in the Timeline. In the Timeline, select the Tony Pedregon clip. -- notice that this clip is now highlighted in the Index. The Index & the Timeline
  • 48.
    In the Timeline,drag the playhead through multiple clips, and watch what happens in the Index. -- Index playhead moves up and down following your actions in the Timeline. The Index & the Timeline
  • 49.
    Close the Timeline Indexby clicking on the Index button -- shortcut Command Shift 2 The Index & the Timeline
  • 50.
    Zooming In &Out on your Timeline • Below the Timeline • Drag left and right Zoom control • Command – to zoom out • Command = (+) to zoom in • Shift Z – fit all the timeline in the window Use Shortcuts
  • 51.
    Zooming In &Out on your Timeline • When skimming is activated, you zoom in and out where your skimmer is located • If skimming is deactivated, you zoom in an your where your playhead is located Playhead or Skimmer?
  • 52.
    Move the skimmerto the middle of the Timeline. Press Command - (minus) a few times to zoom out Press Command = (equals) several times to zoom in to the clips. Drag the Zoom slider to @1/3 so there‟s space for more clips. Practice Zooming In & Out
  • 53.
    Viewing/Arranging Clips on theMagnetic Timeline • Changing the order of your clips in the timeline is simple • Drag a clip to a different location and Final Cut Pro automatically creates a space for the clip by shifting the other clips. Magnetic what?
  • 54.
    In the Timeline,play the first Tony Schumacher clip, “Nobody wakes up...” -- Nice bite to start this project. -- Let‟s move it to the beginning of the sequence of clips. Arrange Clips in the Magnetic Timeline
  • 55.
    Drag the firstTony Schumacher clip left to the head of the project. -- notice the blue insertion line where you will place the clip. When you see the remaining clips reposition themselves, release the mouse button to place the clip at this location. -- Play your new arrangement. Arrange Clips in the Magnetic Timeline
  • 56.
    Drag the TonyPedregon clip to follow the first clip. When you see the blue insertion line and the other clips scoot aside, release the mouse button. Play the first two clips. Arrange Clips in the Magnetic Timeline
  • 57.
    Viewing/Arranging Clips on theMagnetic Timeline • When you drag a clip in the Timeline, a numerical value appears • Indicates the length of time and in which direction you are repositioning the clip. The readout The Tony clip is being moved backwards @16 seconds.
  • 58.
    Close the TimelineIndex. Make all your clips fit your Timeline by pressing Shift Z. Reduce the size of your clips in the Timeline so there is room for B-roll clips on top of the main storyline. Prep for Some B-Roll
  • 59.
    Insert Clips intothe Timeline • Insert them between existing clips in the primary storyline. • When inserting, a space for the new clip opens up in the storyline • Like repositioning them using the Magnetic Timeline In-between edits
  • 60.
    In the EventLibrary, select the B-Roll Keyword Collection. In the Event Browser, from the Filter pop-up menu, choose All Clips. Change the thumbnail view so all clips are visible in the Event Browser. Find Some B-Roll
  • 61.
    In the searchfield, click the Filter (magnifying glass) button to open the Filter window. -- shortcut Command F Click the Add Rule (+) pop-up menu, choose Media Type. From the Type pop-up menu, choose Video With Audio. Close the Filter window. -- no need to make a smart collection. Hide the Audio
  • 62.
    Active Searches • Filtersallow you to fine- tune what you see in your Browser • An icon in the Search field let‟s you know filtering is active Filtering your content
  • 63.
    Close the Filterwindow. In the Event Browser, skim the wall low angle clip. Drag a selection from the head of the clip to the point where both cars are out of frame. Mark it as a Favorite - F Mark a Clip
  • 64.
    Skim through thecrowd ots clip. Press I to set the Start point when the red racing lights come on, just before the man with a camera turns. Press F to rate this selection as a Favorite. Mark a Clip
  • 65.
    Skim the crowdwide clip. Mark a Start point before the heads turn, and press F to rate the selection from here to the end as a Favorite. Mark a Clip
  • 66.
    To view theFavorites you just created, from the Filters pop-up menu, choose Favorites. Press Command 2 to switch to the Timeline. Press the Home key (fn ) to move the playhead to the beginning of the project. Prep for an Insert Edit
  • 67.
    In the EventBrowser, select the wall low angle clip. In the toolbar, click the Insert button. Then play the first few clips. -- wall low angle clip now appears before the Tony Schumacher clip. Perform an Insert Edit
  • 68.
    In the Timeline,snap the playhead between the 1st two clips In the Event Browser, select the crowd ots clip, and click the Insert button. -- Shortcut W Perform an Insert Edit
  • 69.
    In the Timeline,make sure the playhead is between crowd ots & Tony. In the Event Browser, select the crowd wide clip, and click the Insert button. -- Shortcut - W Perform an Insert Edit
  • 70.
    Drag & Drop •First, select the clip or range from the Event Browser • Drag it straight to the Timeline • Drag it to the end for an Append edit • Drag it between clips for an Insert edit No line, no waiting
  • 71.
    In the timelinepress Shift Z to see all your clips. In the Event Browser, from the Filter pop-up menu, choose All. Drag & Drop
  • 72.
    Select the smokey bannerclip. Drag the clip to the end of the Tony Schumacher clip. -- Look for the blue insertion line before releasing the mouse button. Drag & Drop
  • 73.
    Changing Edited Clips •Sometimes you have have a clip in your Timeline that needs TLC • Colors are off • Audio is too soft or too loud • Use the Inspector to tweak your clip Something need fixing?
  • 74.
    In the Timeline,click the Clip Appearance button and click the third thumbnail button. Drag the Clip Height control to make the clips taller. Changing Edited Clips
  • 75.
    Play the firstthree clips in the project and watch the waveforms as they play. The waveforms of the second and third clips are too loud. -- Yellow indicates audio levels approaching peak levels -- Red indicates peaked audio Changing Edited Clips
  • 76.
    In the Timeline,move your pointer into the crowd ots clip and position it over the volume line. When it turns into a vertical resize pointer, drag down until the waveform is at a similar level to the first clip. Changing Edited Clips The „flat-top‟ of this audio means it was clipped when it was recorded
  • 77.
    In the crowdwide clip, drag the volume line down to match the first two clips. Play these clips in the Timeline. Changing Edited Clips
  • 78.
    Select the fourthclip, Tony Schumacher, and play it. -- Background sounds are too loud -- Video has a yellow tint Leave the playhead over the clip so you can see it in the Viewer. Changing Edited Clips
  • 79.
    The Balance Button •White balancing finds a balance between the reds and blues in your shot • Inside shots tend to look yellowish-red • Outside shots tend to look bluish Red vs. Blue • FCP automatically balances the shot for you Balance button
  • 80.
    In the toolbar,click the Inspector button, and then click the Video tab at the top of the window. In the Color section, select the checkbox next to Balance, and notice how the clip changes in the Viewer. Balance the Color
  • 81.
    If it‟s notalready selected, select the first Tony Schumacher clip. In the Inspector, click the Audio tab. Make sure the Channel Configuration area displays four mono channels. -- Click the disclosure triangle if it doesn‟t. Fix the Audio
  • 82.
    - 2 channelsof lav mike - 2 channels of nat sound In the Timeline, select Tony Schumacher clip and press / to play the clip. As it plays, deselect the third and fourth mono audio channels in the Inspector window. Fix the Audio
  • 83.
    -Adjust the overall volumeof the clip so the no red shows in the waveform. Fix the Audio
  • 84.
    Duplicating a Project •Editing is all about making changes • Save a backup of the current version of the project from time to time. • If you don‟t like the new changes, you can go back to the previous version and start again. Backing up
  • 85.
    In the Library,select the Zero to Hero Event In the Event Browser, right click the Zero to Hero Project and choose Duplicate Project (or select the press Command D) Duplicate a Project
  • 86.
    Select the newproject and retitle it, ZTH Backup and press Return. Duplicate a Project
  • 87.
    The Connect Edit •Any clip that is attached to the primary storyline in the Timeline. • Connected clips remain attached where you edit them until you move or remove them. Added outside the primary storyline
  • 88.
    In the EventBrowser, from the Filter pop-up menu, choose All if you need to. Press Command-F or click on the filter icon to open the Filter window Filter for Audio Only
  • 89.
    Change the MediaType category to Audio Only. Close the Filter window. Filter for Audio Only
  • 90.
    Take a betterlook: In the Event Browser, click the List View button. Then play the first part of the Battle Lines music clip. -- Viewing this clip in list view provides an expanded view of the waveform. Filter for Audio Only
  • 91.
    To edit thefirst half of this clip, mark a Start point just before the music begins. Set an End point after the first series of waveform peaks. Set a Range
  • 92.
    Make the Timelinewindow active by pressing Command-2. Press the Up or Down Arrow key to move the playhead to the beginning of the crowd ots clip Prep for the Connect Edit
  • 93.
    In the toolbar,click the Connect button. -- Shortcut Q In the Timeline, play the first few clips, and then look at the thin vertical line connecting the Battle Lines music to the crowd ots clip. Make a Connect Edit
  • 94.
    The Connect Edit •When connected, if you move the clip in the primary storyline, the connected clip will move with it • If you move the connected clip, the primary clip stays put We belong together
  • 95.
    Drag the crowdots clip to the right and reposition it after the crowd wide clip. Play this arrangement, and then drag the clip back to its original position. Give the Connected Clip a Ride Audio clip not moving? Undo the edit, cue the play head to the beginning of the clip, then nudge 1 frame forward and try again.
  • 96.
    Drag the BattleLines clip to the right and snap it to the head of the first Tony Schumacher clip. -- Make sure Snap is on -- Notice the playhead turns thick and yellow = re- linking with a new clip. Give the Connected Clip a Ride
  • 97.
    Nudging Clips onthe Timeline • Rather than connect clips at edit points, you can nudge them left and right on the timeline Go here, go there • , and . (or <>) • 1 frame left or right • Shift , and Shift . • 10 frames left or right Shortcuts It may be easier to remember the nudge keys by the < and > symbols.
  • 98.
    With the BattleLines clip selected, press the , (comma) and . (period) key several times to move the clip left & right 1 frame at time. Try it with the Shift key to move 10 frames at a time. Give the Connected Clip a Ride
  • 99.
    Nudging Clips onthe Timeline • If you need to nudge the clip more then a few frames, then just type in a value • + values nudge the clip forward • - Values nudge the clip backwards • H:M:S:F Type in a value -200 = back up 2 seconds
  • 100.
    With the BattleLines clip still selected, enter – 2 0 0 -- Dashboard number entry has replaced the time code location. Press Return. Give the Connected Clip a Ride
  • 101.
    Shortcuts • Turns snappingoff and onN • Create a new projectCommand N • Open the Filter windowCommand F • Nudge selection back and forth 1 frame, and . • Nudge selection back and forth 10 frames Shift , and .
  • 102.
    Shortcuts • Open theProject LibraryCommand 0 • Go to the Event BrowserCommand 1 • Go to the TimelineCommand 2 • Zoom out and in on the Timeline, Event Browser or Viewer Command – and + • Zoom the contents to fit the size of the Event Browser, the Viewer, or Timeline Shift Z
  • 103.
    Shortcuts • Go toprevious item in the Event Browser or previous edit point in the Timeline Up arrow • Go to next item in the Event Browser or next edit point in the Timeline Down arrow • Connect editQ • Insert editW • Append editE • Play selection/
  • 104.
    Trim off thebeginning of Battle Lines where there is no music. Move Battle Lines to the beginning of your project. Adjust the audio levels of all the clips in the primary storyline and the connected music clip so you have a good audio balance. Trim the end of the music clip so its duration matches the video of your project. Homework
  • 105.
    Click the Show/Share Destinationsbutton and choose Apple Devices 720P Homework
  • 106.
    On the Infotab change the name of your clip from Zero to Hero to „(your name) Week 4‟ -- this is very important. If you don‟t change the title of this project, the original name will revert when you post on iTunes U Homework
  • 107.
    On the Settingstab change the Resolution pop-up menu to the smallest resolution 854 X 480 Change When done: pop-up menu to Do Nothing Press Next Homework
  • 108.
    Save your projectto the desktop and wait for the render to complete. Homework
  • 109.
    Open your browserto the WIU iTunes U page: http://www.wiu.edu/iTunesU Log in with your ecom name and password. Navigate to the BC 142 folder. Select the Homework folder and upload your homework. Homework
  • 110.
    Lesson 4: Building TheRough Cut Apple Pro Training Series 2nd Edition, Final Cut Pro X Instructor: Sam Edsall