The document provides tips for printing Excel worksheets, including:
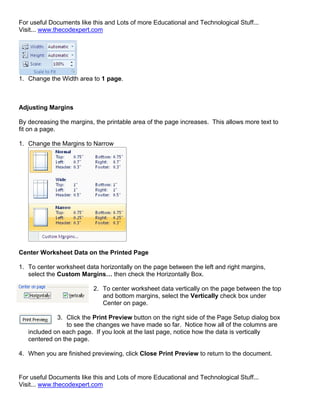
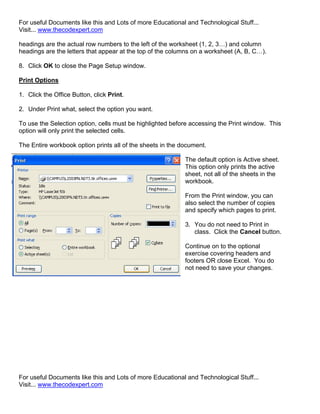
1. How to view a print preview and change the page orientation to landscape.
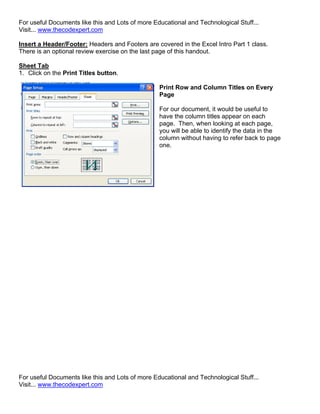
2. How to fit the worksheet to a certain number of pages by adjusting the width, scale, and margins.
3. How to center the worksheet data horizontally and vertically on each printed page.
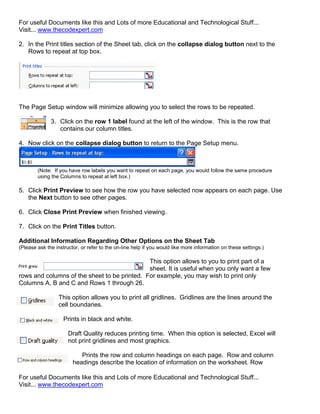
4. How to print row and column titles on every page to identify column data on each sheet.
Aligning Text in a Microsoft Word Document can be a tedious task if you try to do it
using only Tabs and Spaces.
Fortunately, Word has a Table feature which you can
use to present the same information but in a more structured and easy-to-read
format.
MS Word Table Feature helps Creating
Tabular Data, Managing their Structures and Dimensions, Formatting them, and
Displaying them in a form that you most desire.
A form in Access is a database object that you can use to create a user interface for a database application. A "bound" form is one that is directly connected to a data source such as a table or query, and can be used to enter, edit, or display data from that data source. Alternatively, you can create an "unbound" form that does not link directly to a data source, but which still contains command buttons, labels, or other controls that you need to operate your application.
This article focuses primarily on bound forms. You can use bound forms to control access to data, such as which fields or rows of data are displayed. For example, certain users might need to see only several fields in a table with many fields. Providing those users with a form that contains only those fields makes it easier for them to use the database. You can also add command buttons and other features to a form to automate frequently performed actions.
Think of bound forms as windows through which people see and reach your database. An effective form speeds the use of your database, because people don't have to search for what they need. A visually attractive form makes working with the database more pleasant and more efficient, and it can also help prevent incorrect data from being entered.
Working with tables in digital documentsSanjay Parmar
Unit 1 Digital Documentation (Advanced) - topic working with tables in OO writer for CBSE class 10 IT 402 notes, Tables in MS Word, Tables in OO Writer.
A Skills Approach Excel 2016 Chapter 4 Formatting Worksheets.docxransayo
A Skills Approach: Excel 2016 Chapter 4: Formatting Worksheets
and Managing the Workbook
1 | Page Skill Review 4.1 Last Updated 4/15/16
Skill Review 4.1
In this project, you will work on an attendance log for a 16-week college course. For one section of the course,
you will set up the sheet to print as an attendance sign-in sheet. For another section, you will set up the sheet
to print as an attendance report for the administration office. This is a long project. Be sure to save often!
Skills needed to complete this project:
Naming Worksheets
Changing the Color of Sheet Tabs
Moving and Copying Worksheets
Grouping Worksheets
Modifying Column Widths and Row Heights
Changing the Worksheet View
Adding Headers and Footers
Applying Themes
Splitting Workbooks
Inserting and Deleting Rows and Columns
Deleting Worksheets
Freezing and Unfreezing Rows and Columns
Hiding and Unhiding Rows and Columns
Changing Worksheet Orientation
Setting Up Margins for Printing
Scaling Worksheets for Printing
Showing and Hiding Worksheet Elements
Printing Selections, Worksheets, and Workbooks
Printing Titles
Inserting Page Breaks
1. Open the start file EX2016-SkillReview-4-1. The file will be renamed automatically to include your
name. Change the project file name if directed to do so by your instructor, and save it.
2. If the workbook opens in Protected View, click the Enable Editing button in the Message Bar at the
top of the workbook so you can modify the workbook.
3. Rename Sheet1 and change the color of the sheet tab.
a. Right‐click on the Sheet1 tab, choose Rename, and type: TTh300
b. Press the ENTER key.
c. Right‐click the sheet tab again, point to Tab Color, and select Green, Accent 6 (the last color in the
first row of theme colors).
4. Make a copy of the TTh300 sheet.
a. Right‐click the sheet tab and select Move or Copy... to open the Move or Copy dialog.
b. In the Before sheet box, select Sheet2.
c. Check the Create a copy check box.
d. Click OK.
Step 1
Download
start file
A Skills Approach: Excel 2016 Chapter 4: Formatting Worksheets
and Managing the Workbook
2 | Page Skill Review 4.1 Last Updated 4/15/16
5. Name the new sheet MWF301 and change the tab color.
a. Right‐click the new TTh300 (2) sheet tab, choose Rename, and type: MWF301
b. Press the ENTER key.
c. Right‐click the sheet tab again, point to Tab Color, and select Blue, Accent 5 (the second color
from the right in the first row of theme colors).
6. Group sheets TTh300 and MWF301 so you can apply formatting changes to both sheets at once.
a. Click the TTh300 sheet tab, press and hold the Ctrl key, and click the MWF301 sheet tab. Now any
changes made to one of the sheets will be made to both sheets.
b. Verify that [Group] appears in the title bar, indicating that the selected sheets are grouped.
7. Resize column A in both worksheets at once to bes.
Microsoft Word is a word processing software developed by Microsoft. It was first released on October 25, 1983, under the name Multi-Tool Word for Xenix systems
June 3, 2024 Anti-Semitism Letter Sent to MIT President Kornbluth and MIT Cor...Levi Shapiro
Letter from the Congress of the United States regarding Anti-Semitism sent June 3rd to MIT President Sally Kornbluth, MIT Corp Chair, Mark Gorenberg
Dear Dr. Kornbluth and Mr. Gorenberg,
The US House of Representatives is deeply concerned by ongoing and pervasive acts of antisemitic
harassment and intimidation at the Massachusetts Institute of Technology (MIT). Failing to act decisively to ensure a safe learning environment for all students would be a grave dereliction of your responsibilities as President of MIT and Chair of the MIT Corporation.
This Congress will not stand idly by and allow an environment hostile to Jewish students to persist. The House believes that your institution is in violation of Title VI of the Civil Rights Act, and the inability or
unwillingness to rectify this violation through action requires accountability.
Postsecondary education is a unique opportunity for students to learn and have their ideas and beliefs challenged. However, universities receiving hundreds of millions of federal funds annually have denied
students that opportunity and have been hijacked to become venues for the promotion of terrorism, antisemitic harassment and intimidation, unlawful encampments, and in some cases, assaults and riots.
The House of Representatives will not countenance the use of federal funds to indoctrinate students into hateful, antisemitic, anti-American supporters of terrorism. Investigations into campus antisemitism by the Committee on Education and the Workforce and the Committee on Ways and Means have been expanded into a Congress-wide probe across all relevant jurisdictions to address this national crisis. The undersigned Committees will conduct oversight into the use of federal funds at MIT and its learning environment under authorities granted to each Committee.
• The Committee on Education and the Workforce has been investigating your institution since December 7, 2023. The Committee has broad jurisdiction over postsecondary education, including its compliance with Title VI of the Civil Rights Act, campus safety concerns over disruptions to the learning environment, and the awarding of federal student aid under the Higher Education Act.
• The Committee on Oversight and Accountability is investigating the sources of funding and other support flowing to groups espousing pro-Hamas propaganda and engaged in antisemitic harassment and intimidation of students. The Committee on Oversight and Accountability is the principal oversight committee of the US House of Representatives and has broad authority to investigate “any matter” at “any time” under House Rule X.
• The Committee on Ways and Means has been investigating several universities since November 15, 2023, when the Committee held a hearing entitled From Ivory Towers to Dark Corners: Investigating the Nexus Between Antisemitism, Tax-Exempt Universities, and Terror Financing. The Committee followed the hearing with letters to those institutions on January 10, 202
2024.06.01 Introducing a competency framework for languag learning materials ...Sandy Millin
http://sandymillin.wordpress.com/iateflwebinar2024
Published classroom materials form the basis of syllabuses, drive teacher professional development, and have a potentially huge influence on learners, teachers and education systems. All teachers also create their own materials, whether a few sentences on a blackboard, a highly-structured fully-realised online course, or anything in between. Despite this, the knowledge and skills needed to create effective language learning materials are rarely part of teacher training, and are mostly learnt by trial and error.
Knowledge and skills frameworks, generally called competency frameworks, for ELT teachers, trainers and managers have existed for a few years now. However, until I created one for my MA dissertation, there wasn’t one drawing together what we need to know and do to be able to effectively produce language learning materials.
This webinar will introduce you to my framework, highlighting the key competencies I identified from my research. It will also show how anybody involved in language teaching (any language, not just English!), teacher training, managing schools or developing language learning materials can benefit from using the framework.
Operation “Blue Star” is the only event in the history of Independent India where the state went into war with its own people. Even after about 40 years it is not clear if it was culmination of states anger over people of the region, a political game of power or start of dictatorial chapter in the democratic setup.
The people of Punjab felt alienated from main stream due to denial of their just demands during a long democratic struggle since independence. As it happen all over the word, it led to militant struggle with great loss of lives of military, police and civilian personnel. Killing of Indira Gandhi and massacre of innocent Sikhs in Delhi and other India cities was also associated with this movement.
Biological screening of herbal drugs: Introduction and Need for
Phyto-Pharmacological Screening, New Strategies for evaluating
Natural Products, In vitro evaluation techniques for Antioxidants, Antimicrobial and Anticancer drugs. In vivo evaluation techniques
for Anti-inflammatory, Antiulcer, Anticancer, Wound healing, Antidiabetic, Hepatoprotective, Cardio protective, Diuretics and
Antifertility, Toxicity studies as per OECD guidelines
Francesca Gottschalk - How can education support child empowerment.pptxEduSkills OECD
Francesca Gottschalk from the OECD’s Centre for Educational Research and Innovation presents at the Ask an Expert Webinar: How can education support child empowerment?
Embracing GenAI - A Strategic ImperativePeter Windle
Artificial Intelligence (AI) technologies such as Generative AI, Image Generators and Large Language Models have had a dramatic impact on teaching, learning and assessment over the past 18 months. The most immediate threat AI posed was to Academic Integrity with Higher Education Institutes (HEIs) focusing their efforts on combating the use of GenAI in assessment. Guidelines were developed for staff and students, policies put in place too. Innovative educators have forged paths in the use of Generative AI for teaching, learning and assessments leading to pockets of transformation springing up across HEIs, often with little or no top-down guidance, support or direction.
This Gasta posits a strategic approach to integrating AI into HEIs to prepare staff, students and the curriculum for an evolving world and workplace. We will highlight the advantages of working with these technologies beyond the realm of teaching, learning and assessment by considering prompt engineering skills, industry impact, curriculum changes, and the need for staff upskilling. In contrast, not engaging strategically with Generative AI poses risks, including falling behind peers, missed opportunities and failing to ensure our graduates remain employable. The rapid evolution of AI technologies necessitates a proactive and strategic approach if we are to remain relevant.
How to Make a Field invisible in Odoo 17Celine George
It is possible to hide or invisible some fields in odoo. Commonly using “invisible” attribute in the field definition to invisible the fields. This slide will show how to make a field invisible in odoo 17.
Model Attribute Check Company Auto PropertyCeline George
In Odoo, the multi-company feature allows you to manage multiple companies within a single Odoo database instance. Each company can have its own configurations while still sharing common resources such as products, customers, and suppliers.
1. For useful Documents like this and Lots of more Educational and Technological Stuff...
Visit... www.thecodexpert.com
EXCEL-2007 PRINTING TIPS
1. Start Excel.
2. Open the Excel Printing Tips file.
Print Preview
Begin by viewing the print out before any changes are made to the print settings. To view the
document as it will appear when printed:
1. From the Office Button menu on the menu toolbar, choose Print Preview.
OR
Click on the Print Preview button on the Quick Access toolbar.
Now notice the dashed lines (for example, between columns G and H and between
rows 46 and 47). These lines indicate the edges of pages.
2. To close the print preview window, click the Close button near the top of the screen.
Using the Page Layout Tab:
Changing the Page Orientation
1. Under Orientation, click the Landscape radio button to change to landscape orientation.
Reduce or Enlarge a Worksheet to Fit the Page
On the Page Layout tab, in the scale to fit area, you can choose to fit to a certain number of
pages by selecting the width and height that you would like the worksheet to fit OR you can
change the size of the worksheet by entering the percentage by which you want to reduce or
enlarge the worksheet in the Scale box.
For useful Documents like this and Lots of more Educational and Technological Stuff...
Visit... www.thecodexpert.com
2. For useful Documents like this and Lots of more Educational and Technological Stuff...
Visit... www.thecodexpert.com
1. Change the Width area to 1 page.
Adjusting Margins
By decreasing the margins, the printable area of the page increases. This allows more text to
fit on a page.
1. Change the Margins to Narrow
Center Worksheet Data on the Printed Page
1. To center worksheet data horizontally on the page between the left and right margins,
select the Custom Margins… then check the Horizontally Box.
2. To center worksheet data vertically on the page between the top
and bottom margins, select the Vertically check box under
Center on page.
3. Click the Print Preview button on the right side of the Page Setup dialog box
to see the changes we have made so far. Notice how all of the columns are
included on each page. If you look at the last page, notice how the data is vertically
centered on the page.
4. When you are finished previewing, click Close Print Preview to return to the document.
For useful Documents like this and Lots of more Educational and Technological Stuff...
Visit... www.thecodexpert.com
3. For useful Documents like this and Lots of more Educational and Technological Stuff...
Visit... www.thecodexpert.com
Insert a Header/Footer: Headers and Footers are covered in the Excel Intro Part 1 class.
There is an optional review exercise on the last page of this handout.
Sheet Tab
1. Click on the Print Titles button.
Print Row and Column Titles on Every
Page
For our document, it would be useful to
have the column titles appear on each
page. Then, when looking at each page,
you will be able to identify the data in the
column without having to refer back to page
one.
For useful Documents like this and Lots of more Educational and Technological Stuff...
Visit... www.thecodexpert.com
4. For useful Documents like this and Lots of more Educational and Technological Stuff...
Visit... www.thecodexpert.com
2. In the Print titles section of the Sheet tab, click on the collapse dialog button next to the
Rows to repeat at top box.
The Page Setup window will minimize allowing you to select the rows to be repeated.
3. Click on the row 1 label found at the left of the window. This is the row that
contains our column titles.
4. Now click on the collapse dialog button to return to the Page Setup menu.
(Note: If you have row labels you want to repeat on each page, you would follow the same procedure
using the Columns to repeat at left box.)
5. Click Print Preview to see how the row you have selected now appears on each page. Use
the Next button to see other pages.
6. Click Close Print Preview when finished viewing.
7. Click on the Print Titles button.
Additional Information Regarding Other Options on the Sheet Tab
(Please ask the instructor, or refer to the on-line help if you would like more information on these settings.)
This option allows to you to print part of a
sheet. It is useful when you only want a few
rows and columns of the sheet to be printed. For example, you may wish to print only
Columns A, B and C and Rows 1 through 26.
This option allows you to print all gridlines. Gridlines are the lines around the
cell boundaries.
Prints in black and white.
Draft Quality reduces printing time. When this option is selected, Excel will
not print gridlines and most graphics.
Prints the row and column headings on each page. Row and column
headings describe the location of information on the worksheet. Row
For useful Documents like this and Lots of more Educational and Technological Stuff...
Visit... www.thecodexpert.com
5. For useful Documents like this and Lots of more Educational and Technological Stuff...
Visit... www.thecodexpert.com
headings are the actual row numbers to the left of the worksheet (1, 2, 3…) and column
headings are the letters that appear at the top of the columns on a worksheet (A, B, C…).
8. Click OK to close the Page Setup window.
Print Options
1. Click the Office Button, click Print.
2. Under Print what, select the option you want.
To use the Selection option, cells must be highlighted before accessing the Print window. This
option will only print the selected cells.
The Entire workbook option prints all of the sheets in the document.
The default option is Active sheet.
This option only prints the active
sheet, not all of the sheets in the
workbook.
From the Print window, you can
also select the number of copies
and specify which pages to print.
3. You do not need to Print in
class. Click the Cancel button.
Continue on to the optional
exercise covering headers and
footers OR close Excel. You do
not need to save your changes.
For useful Documents like this and Lots of more Educational and Technological Stuff...
Visit... www.thecodexpert.com
6. For useful Documents like this and Lots of more Educational and Technological Stuff...
Visit... www.thecodexpert.com
Header/Footer Tab - Optional Exercise:
Create Custom Headers and Footers
Excel Headers and Footers are covered in the Excel-Intro Part 1 class. This page contains an optional
review exercise.
1. Click Header & footer button from the Insert Tab.
2. Type Human Resources Employee Report here.
3. Highlight the text you just typed and click on the Home tab to format the text.
4. Change the font to Arial, and the size to 12 from the drop down lists.
Select a Built-in Header or Footer
There are many built-in headers and footers. To view these, use the drop down boxes under
Header and Footer on the left side of the Design tab.
To use a built-in footer:
1. From the drop down Footer box,
located on the left side of the
screen in the Design tab, choose
Page 1 of ?.
2. Use the Print Preview button to see the results.
3. Close the document. You do not need to save your changes.
For useful Documents like this and Lots of more Educational and Technological Stuff...
Visit... www.thecodexpert.com
7. For useful Documents like this and Lots of more Educational and Technological Stuff...
Visit... www.thecodexpert.com
For useful Documents
like this and
Lots of more
Educational and
Technological Stuff...
Visit...
www.thecodexpert.com
For useful Documents like this and Lots of more Educational and Technological Stuff...
Visit... www.thecodexpert.com