Download to read offline


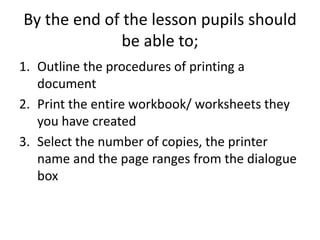


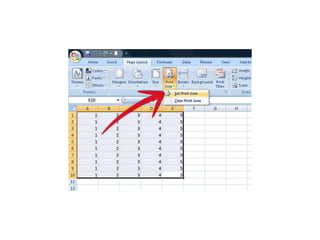
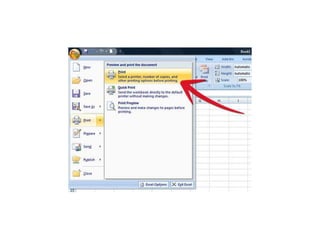

This document provides instructions for printing worksheets and workbooks in Excel. It describes how to print the entire workbook, specific worksheets, a selection of cells, or a table. The steps include selecting print options like page range, number of copies, and printer in the print dialogue box. Tips are provided for printing multiple worksheets or workbooks at once.