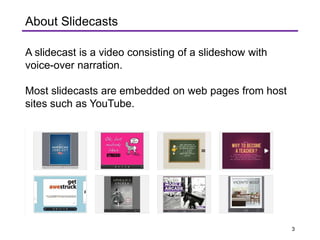
How to Create the
Slidecast Intercultural Guide
About Slidecasts 3-4
Slidecasting Tool Options 5-10
Decide How to Work 11
Writing the Script 12-16
Designing the Slideshow 17-27
Table of Contents
2
A slidecast is a video consisting of a slideshow with
voice-over narration.
Most slidecasts are embedded on web pages from host
sites such as YouTube.
About Slidecasts
3
• Promote products or services,
• Provide instructions to users,
• Present test results to project team members who are
at different locations.
These are just a few of the ways they can be used.
How slidecasts are used in the workplace.
4
• You will need a microphone, and the one in your
computer will be fine for this project.
• You will need to decide how you will create the
slidecast from the following options.
• Please note the warnings.
Slidecasting Tool Options
5
• Signup for a free account.
• Create the slideshow in PPT or any other
slideware program.
• Save as a PDF.
• Upload PDF to Knovio and use the
recording feature to add the voice-over
narration.
• Knovio allows you to easily record one
slide at a time, a highly desirable feature.
• Plus, it will host your file.
• NOTE: you cannot use animations with the
Knovio free version.
Option 1: Knovio
6
• Create a PowerPoint slideshow.
• Use the recording feature to add voice-
over narration.
• Save as a movie file and upload to a host
site such as YouTube or Vimeo.
• WARNING to Mac Users. PPT has a bug
in it that will strip your audio out when
saving as a movie file. So, you can’t use it
to record the voice-over. There is no
solution to-date.
Option 2: PowerPoint (PC users only)
7
• Keynote will work the same way
PPT does for PC users, but it’s not
free ($19.99).
Option 3: Keynote (Mac users only)
8
• Strictly speaking, this screen capture tool
creates a screencast. But if you position
the capture feature over your slideshow,
you can advance the slides as you record.
• It also works to record one slide at a time
by starting and stopping the recording
feature (although results may slightly
more choppy than Knovio).
• Screencast-O-Matic will also preserve any
animations.
Option 4: Screencast-O-Matic
9
• Remember, this course does not accept
video files (mp4, mov, etc.).
• Here’s why. You are practicing how to
create and share these types of files as
they are shared in workplace settings.
• So, if you choose to create a video file on
your computer, be certain it is uploaded
to a host site and will play without a user
needing to download the file.
Your file must be hosted.
10
• Some students like to write the script for
the voice-over narration first and then
design the slideshow.
• Others prefer to do the slideshow first
and then write the script.
• Still others, work by alternating between
slides and script.
Do the process that works best for you.
Decide how to work.
11
• How you format the script is up to you but
consider using document design.
• Keep your sentences short but also varied.
• Write in a conversational style.
• Keep to one topic per slide and get to the
point.
• When you practice the script, mark it to show
where you want to pause, create emphasis
etc.
• How many slides you need will depend on
the content of your guide, but the slidecast
should be no more than 5 minutes.
Writing the Script
12
There are many ways to write the introduction. It's a
good idea create an engaging opening.
Example:
• As you prepare to travel to England to recruit new
University of Idaho students, it is important to keep
some cultural differences in mind to help you better
plan and execute your recruitment plans.
Introduction
13
Signposts are forecasting statements that help
viewers follow the logical flow of your narrative.
Example:
Business meeting etiquette in Austria includes
knowing how far in advance to make an
appointment, when not to schedule meetings, and
how to make a good first impression. I’ll explain
each of these in the slides that follow.
You may need only one signpost, but decide
how many you need based on the content of
your narration and how many slides you need.
Use Signposts
14
Have a clear conclusion.
As in the podcast, you could
direct the viewer to sources of
additional information.
Remember to thank the
audience for listening.
Closing
15
• The final slide will need to be a bibliography of your image and
content sources.
• You may use any standard documentation style for the
bibliography, but don’t just provide a list of URLs. Use MLA, APA,
Chicago, etc.
• This should not be narrated.
Bibliography
16
• Use a “free-form slide
design” (see pages 454-5).
• Follow Canva’s Design
advice.
• Design for maximum visual
appeal.
• The following slides are the
key tips from Canva.
Designing the Slideshow.
17
• Your audience is not here to read
but to listen to you and be engaged
visually with the material.
• Remember, the lectures in this
course are slidedocs and meant to
be read, so you should not use
these as a model for your
presentation.
• You are creating a slidecast video
training guide, so design the slides
for maximum visual appeal.
Be Bold and Keep Text Short.
18
• It’s boring to use bullet
points like this, and it
inevitably leads to a
speaker reading from the
slides.
Avoid Death by PowerPoint
19
• You want the pace to be
lively. So, keep to one
main point per slide, so
you are not staying on
one slide too long.
Make one point per slide.
20
• Use less text and size it
for maximum visual
appeal.
• You need to a title for
each slide but not all
slides need text.
How to use text.
21
• Do a search for modern
typefaces, but keep your
content, audience, and
purpose in mind.
Choose fonts wisely.
22
• Apply what you learned
about the principle of
alignment in project one
to align elements on
each slide.
Keep layout balanced and aligned.
23
• If using a background color for
your slides, maintain effective
contrast between the
background, and text/images.
• Notice how difficult it is to see
the text on this slide because
the contrast is ineffective.
Color and Contrast
24
• Use the same type of images
throughout the slideshow.
• If using photos of people pick
ones that look like real people
being real and not cheesy
stock photos.
Using images.
25
• If you use a template, choose a
simple design avoid letting the
template dictate the layout.
• Instead, adapt it.
Using templates.
26
• Turn the feature on, and it will
make design suggestions as
you create your slideshow.
Try the PowerPoint design ideas feature.
27

Engl313 project3 slidedoc2 kirchmeier spring 2020

  • 1.
    How to Createthe Slidecast Intercultural Guide
  • 2.
    About Slidecasts 3-4 SlidecastingTool Options 5-10 Decide How to Work 11 Writing the Script 12-16 Designing the Slideshow 17-27 Table of Contents 2
  • 3.
    A slidecast isa video consisting of a slideshow with voice-over narration. Most slidecasts are embedded on web pages from host sites such as YouTube. About Slidecasts 3
  • 4.
    • Promote productsor services, • Provide instructions to users, • Present test results to project team members who are at different locations. These are just a few of the ways they can be used. How slidecasts are used in the workplace. 4
  • 5.
    • You willneed a microphone, and the one in your computer will be fine for this project. • You will need to decide how you will create the slidecast from the following options. • Please note the warnings. Slidecasting Tool Options 5
  • 6.
    • Signup fora free account. • Create the slideshow in PPT or any other slideware program. • Save as a PDF. • Upload PDF to Knovio and use the recording feature to add the voice-over narration. • Knovio allows you to easily record one slide at a time, a highly desirable feature. • Plus, it will host your file. • NOTE: you cannot use animations with the Knovio free version. Option 1: Knovio 6
  • 7.
    • Create aPowerPoint slideshow. • Use the recording feature to add voice- over narration. • Save as a movie file and upload to a host site such as YouTube or Vimeo. • WARNING to Mac Users. PPT has a bug in it that will strip your audio out when saving as a movie file. So, you can’t use it to record the voice-over. There is no solution to-date. Option 2: PowerPoint (PC users only) 7
  • 8.
    • Keynote willwork the same way PPT does for PC users, but it’s not free ($19.99). Option 3: Keynote (Mac users only) 8
  • 9.
    • Strictly speaking,this screen capture tool creates a screencast. But if you position the capture feature over your slideshow, you can advance the slides as you record. • It also works to record one slide at a time by starting and stopping the recording feature (although results may slightly more choppy than Knovio). • Screencast-O-Matic will also preserve any animations. Option 4: Screencast-O-Matic 9
  • 10.
    • Remember, thiscourse does not accept video files (mp4, mov, etc.). • Here’s why. You are practicing how to create and share these types of files as they are shared in workplace settings. • So, if you choose to create a video file on your computer, be certain it is uploaded to a host site and will play without a user needing to download the file. Your file must be hosted. 10
  • 11.
    • Some studentslike to write the script for the voice-over narration first and then design the slideshow. • Others prefer to do the slideshow first and then write the script. • Still others, work by alternating between slides and script. Do the process that works best for you. Decide how to work. 11
  • 12.
    • How youformat the script is up to you but consider using document design. • Keep your sentences short but also varied. • Write in a conversational style. • Keep to one topic per slide and get to the point. • When you practice the script, mark it to show where you want to pause, create emphasis etc. • How many slides you need will depend on the content of your guide, but the slidecast should be no more than 5 minutes. Writing the Script 12
  • 13.
    There are manyways to write the introduction. It's a good idea create an engaging opening. Example: • As you prepare to travel to England to recruit new University of Idaho students, it is important to keep some cultural differences in mind to help you better plan and execute your recruitment plans. Introduction 13
  • 14.
    Signposts are forecastingstatements that help viewers follow the logical flow of your narrative. Example: Business meeting etiquette in Austria includes knowing how far in advance to make an appointment, when not to schedule meetings, and how to make a good first impression. I’ll explain each of these in the slides that follow. You may need only one signpost, but decide how many you need based on the content of your narration and how many slides you need. Use Signposts 14
  • 15.
    Have a clearconclusion. As in the podcast, you could direct the viewer to sources of additional information. Remember to thank the audience for listening. Closing 15
  • 16.
    • The finalslide will need to be a bibliography of your image and content sources. • You may use any standard documentation style for the bibliography, but don’t just provide a list of URLs. Use MLA, APA, Chicago, etc. • This should not be narrated. Bibliography 16
  • 17.
    • Use a“free-form slide design” (see pages 454-5). • Follow Canva’s Design advice. • Design for maximum visual appeal. • The following slides are the key tips from Canva. Designing the Slideshow. 17
  • 18.
    • Your audienceis not here to read but to listen to you and be engaged visually with the material. • Remember, the lectures in this course are slidedocs and meant to be read, so you should not use these as a model for your presentation. • You are creating a slidecast video training guide, so design the slides for maximum visual appeal. Be Bold and Keep Text Short. 18
  • 19.
    • It’s boringto use bullet points like this, and it inevitably leads to a speaker reading from the slides. Avoid Death by PowerPoint 19
  • 20.
    • You wantthe pace to be lively. So, keep to one main point per slide, so you are not staying on one slide too long. Make one point per slide. 20
  • 21.
    • Use lesstext and size it for maximum visual appeal. • You need to a title for each slide but not all slides need text. How to use text. 21
  • 22.
    • Do asearch for modern typefaces, but keep your content, audience, and purpose in mind. Choose fonts wisely. 22
  • 23.
    • Apply whatyou learned about the principle of alignment in project one to align elements on each slide. Keep layout balanced and aligned. 23
  • 24.
    • If usinga background color for your slides, maintain effective contrast between the background, and text/images. • Notice how difficult it is to see the text on this slide because the contrast is ineffective. Color and Contrast 24
  • 25.
    • Use thesame type of images throughout the slideshow. • If using photos of people pick ones that look like real people being real and not cheesy stock photos. Using images. 25
  • 26.
    • If youuse a template, choose a simple design avoid letting the template dictate the layout. • Instead, adapt it. Using templates. 26
  • 27.
    • Turn thefeature on, and it will make design suggestions as you create your slideshow. Try the PowerPoint design ideas feature. 27