Downloaded 1,238 times


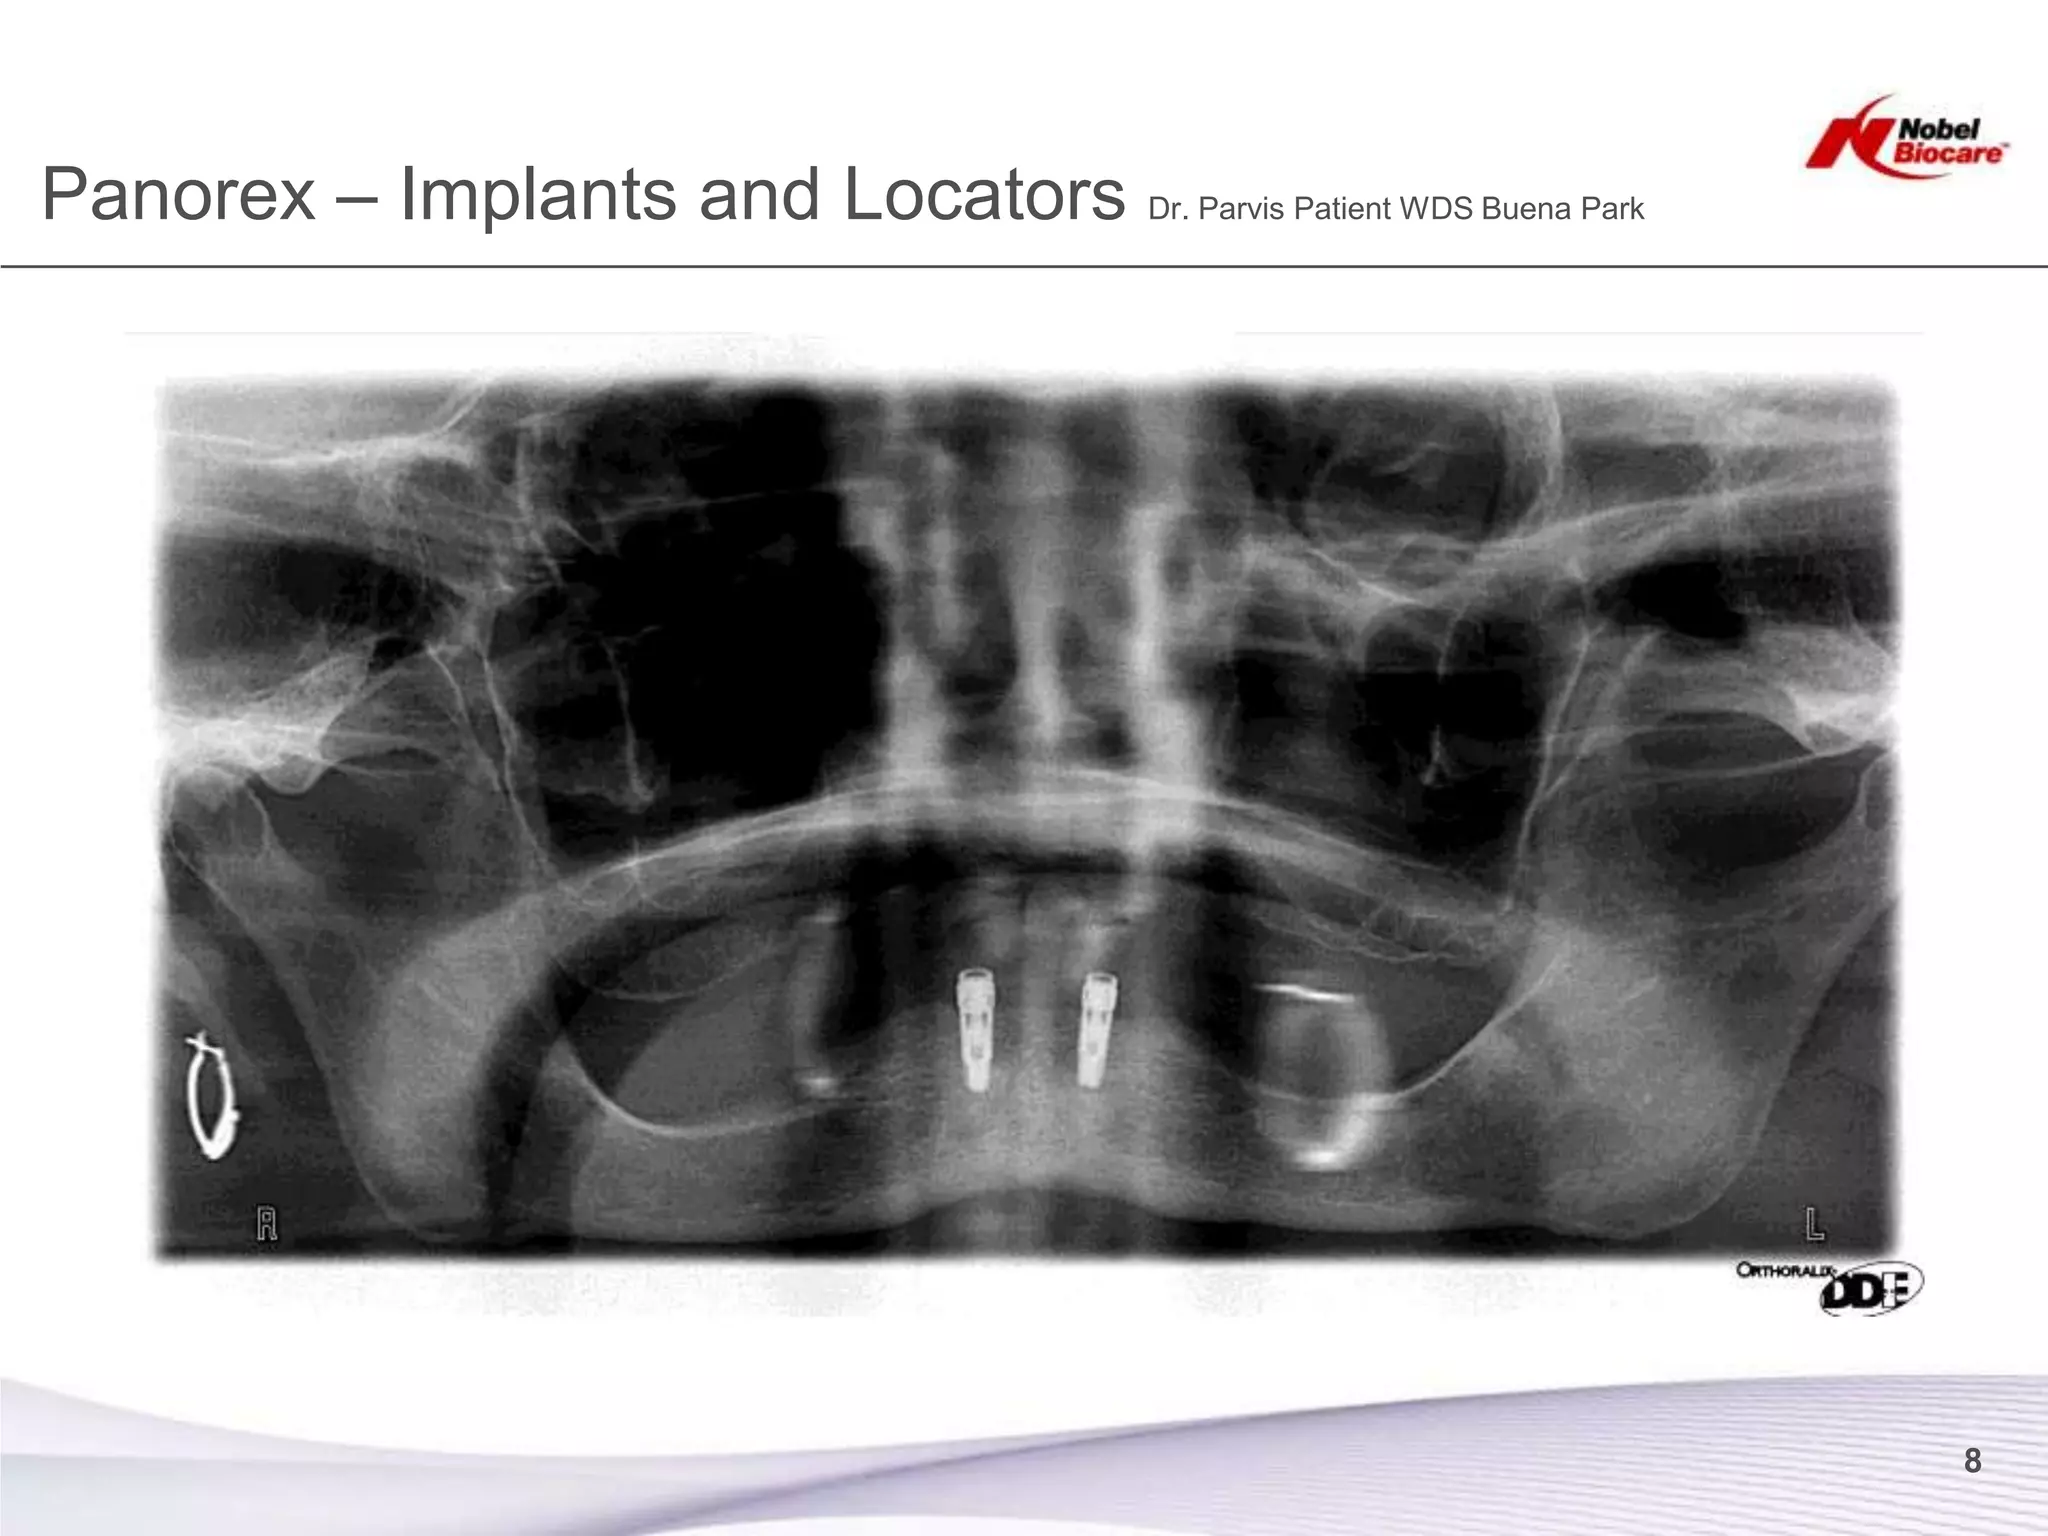
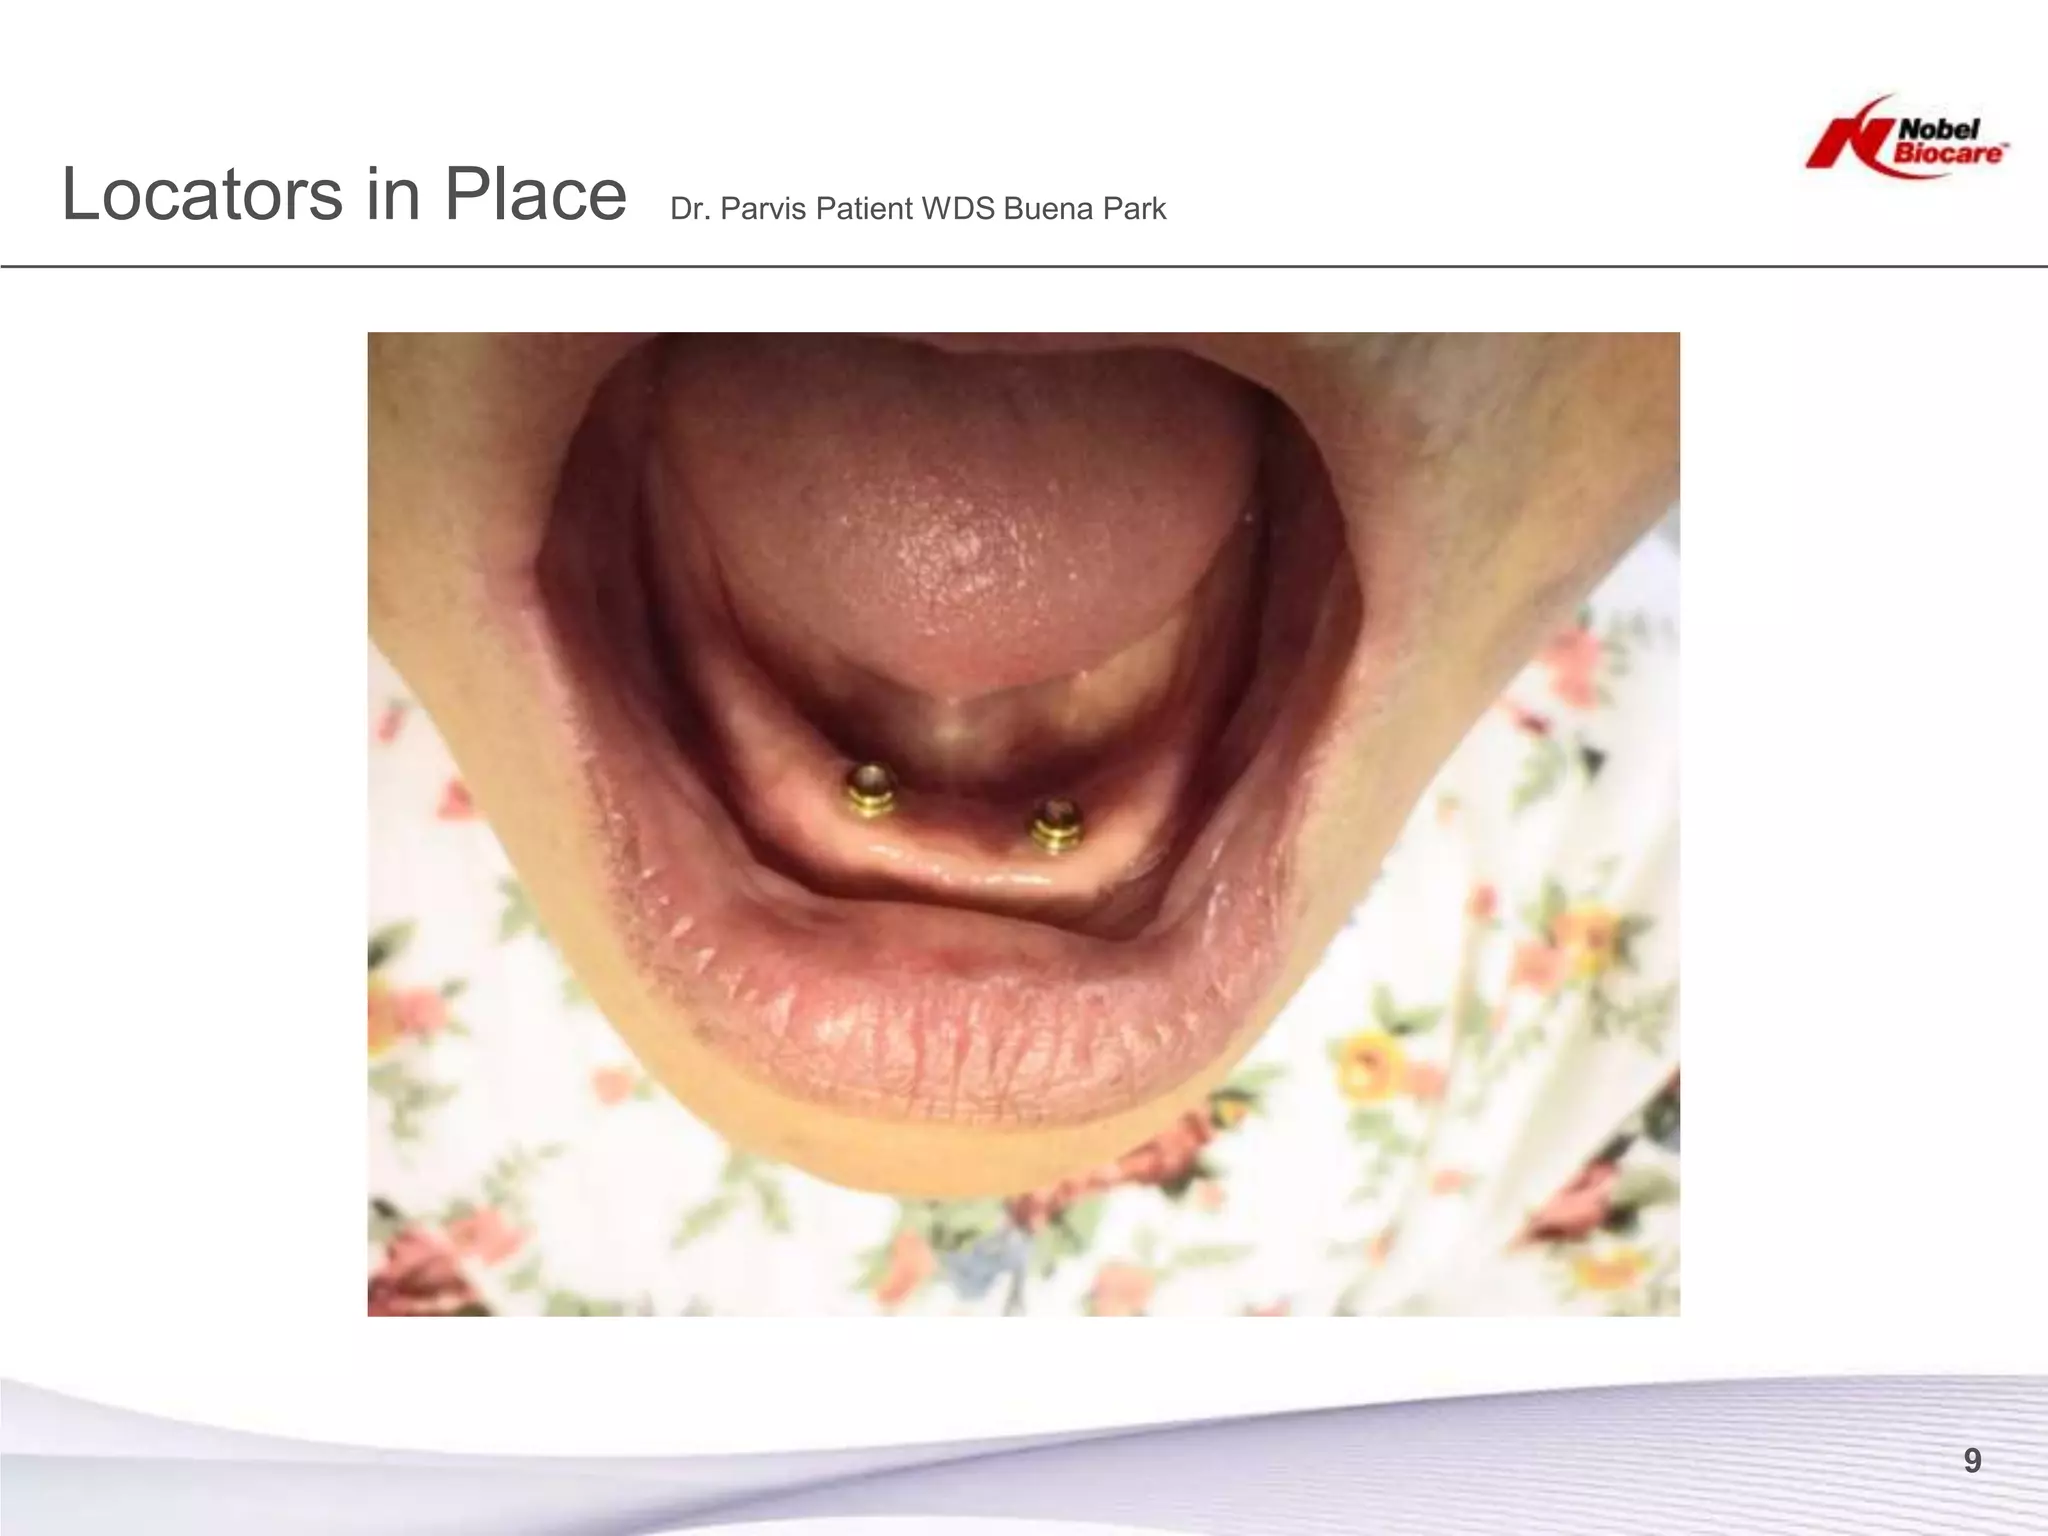
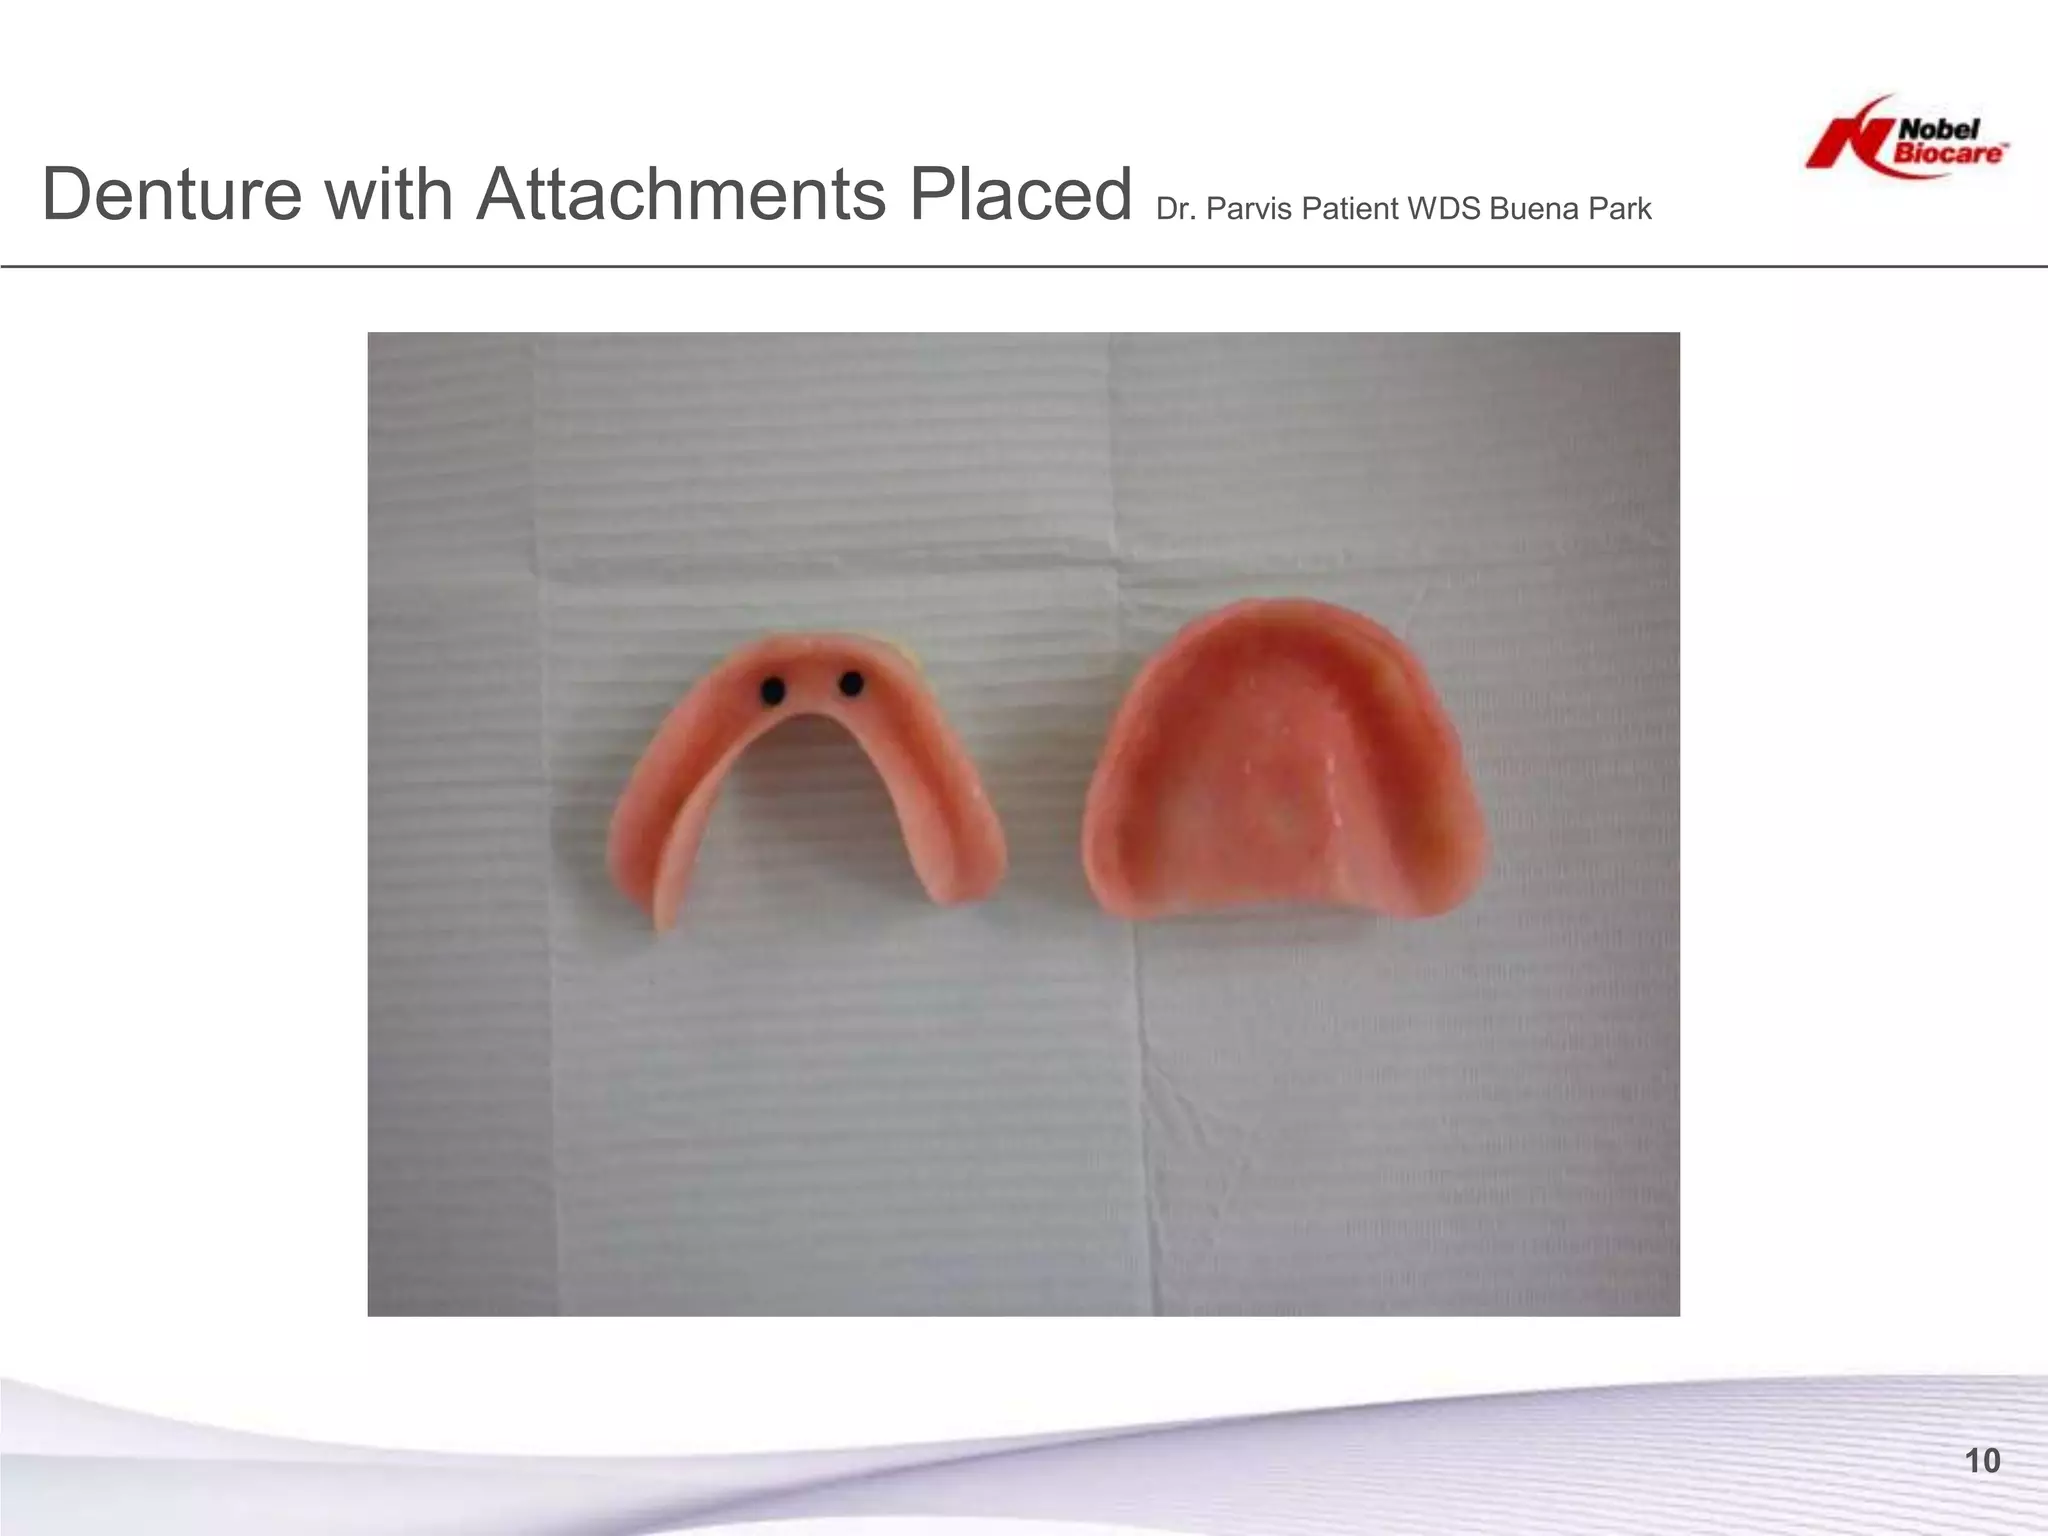
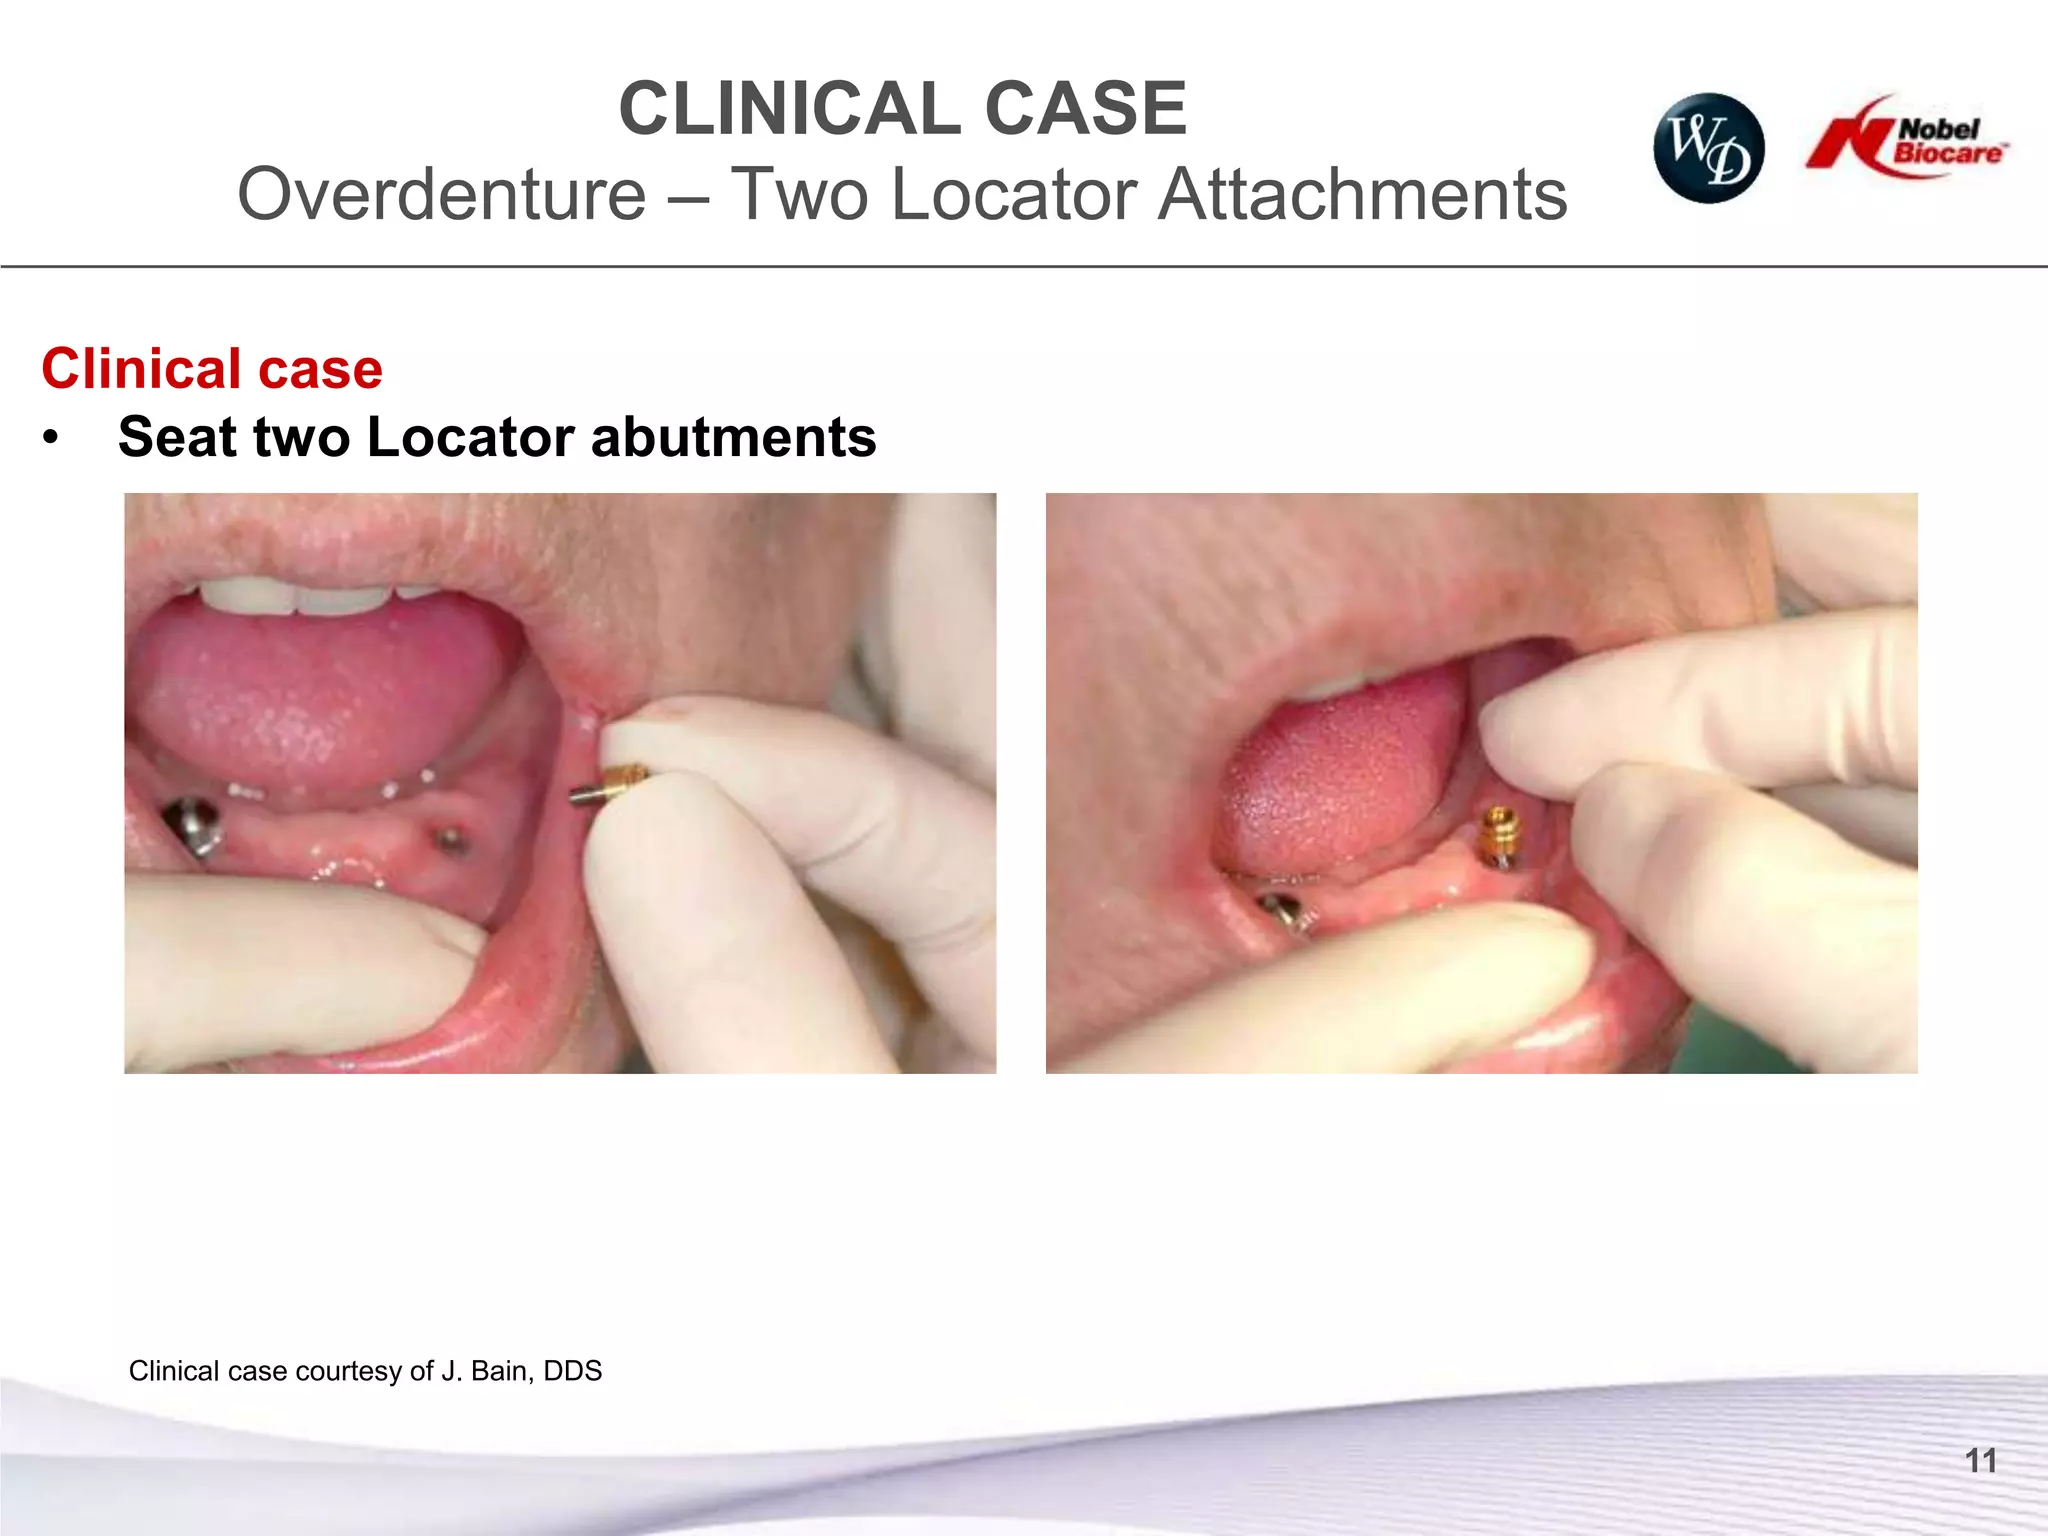
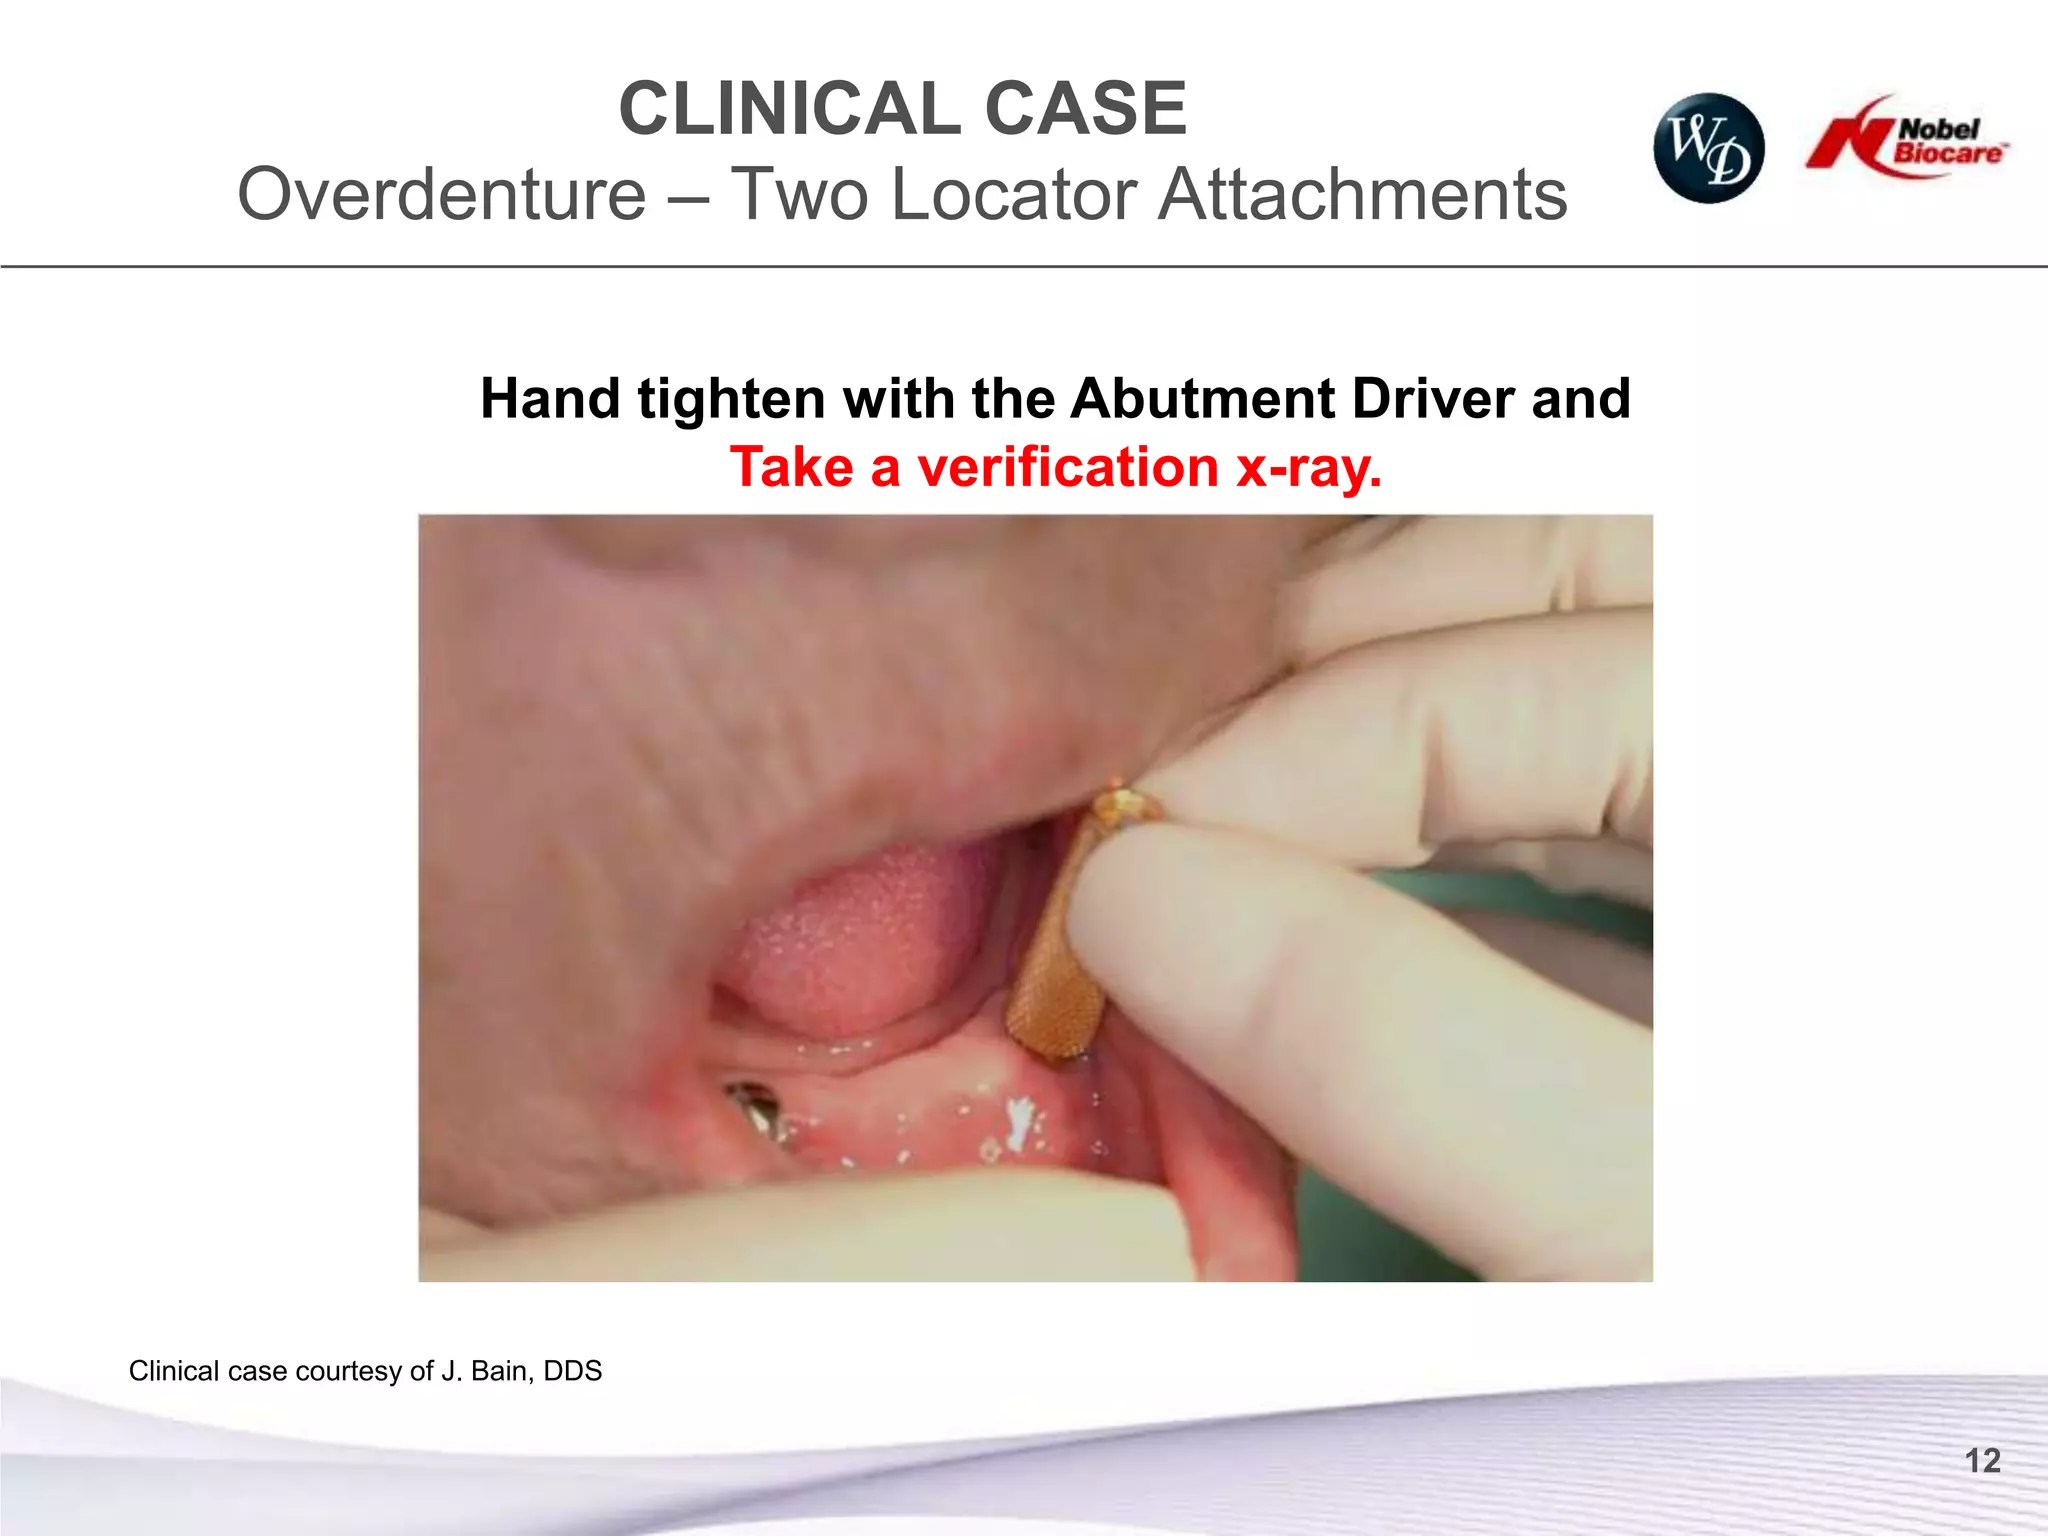
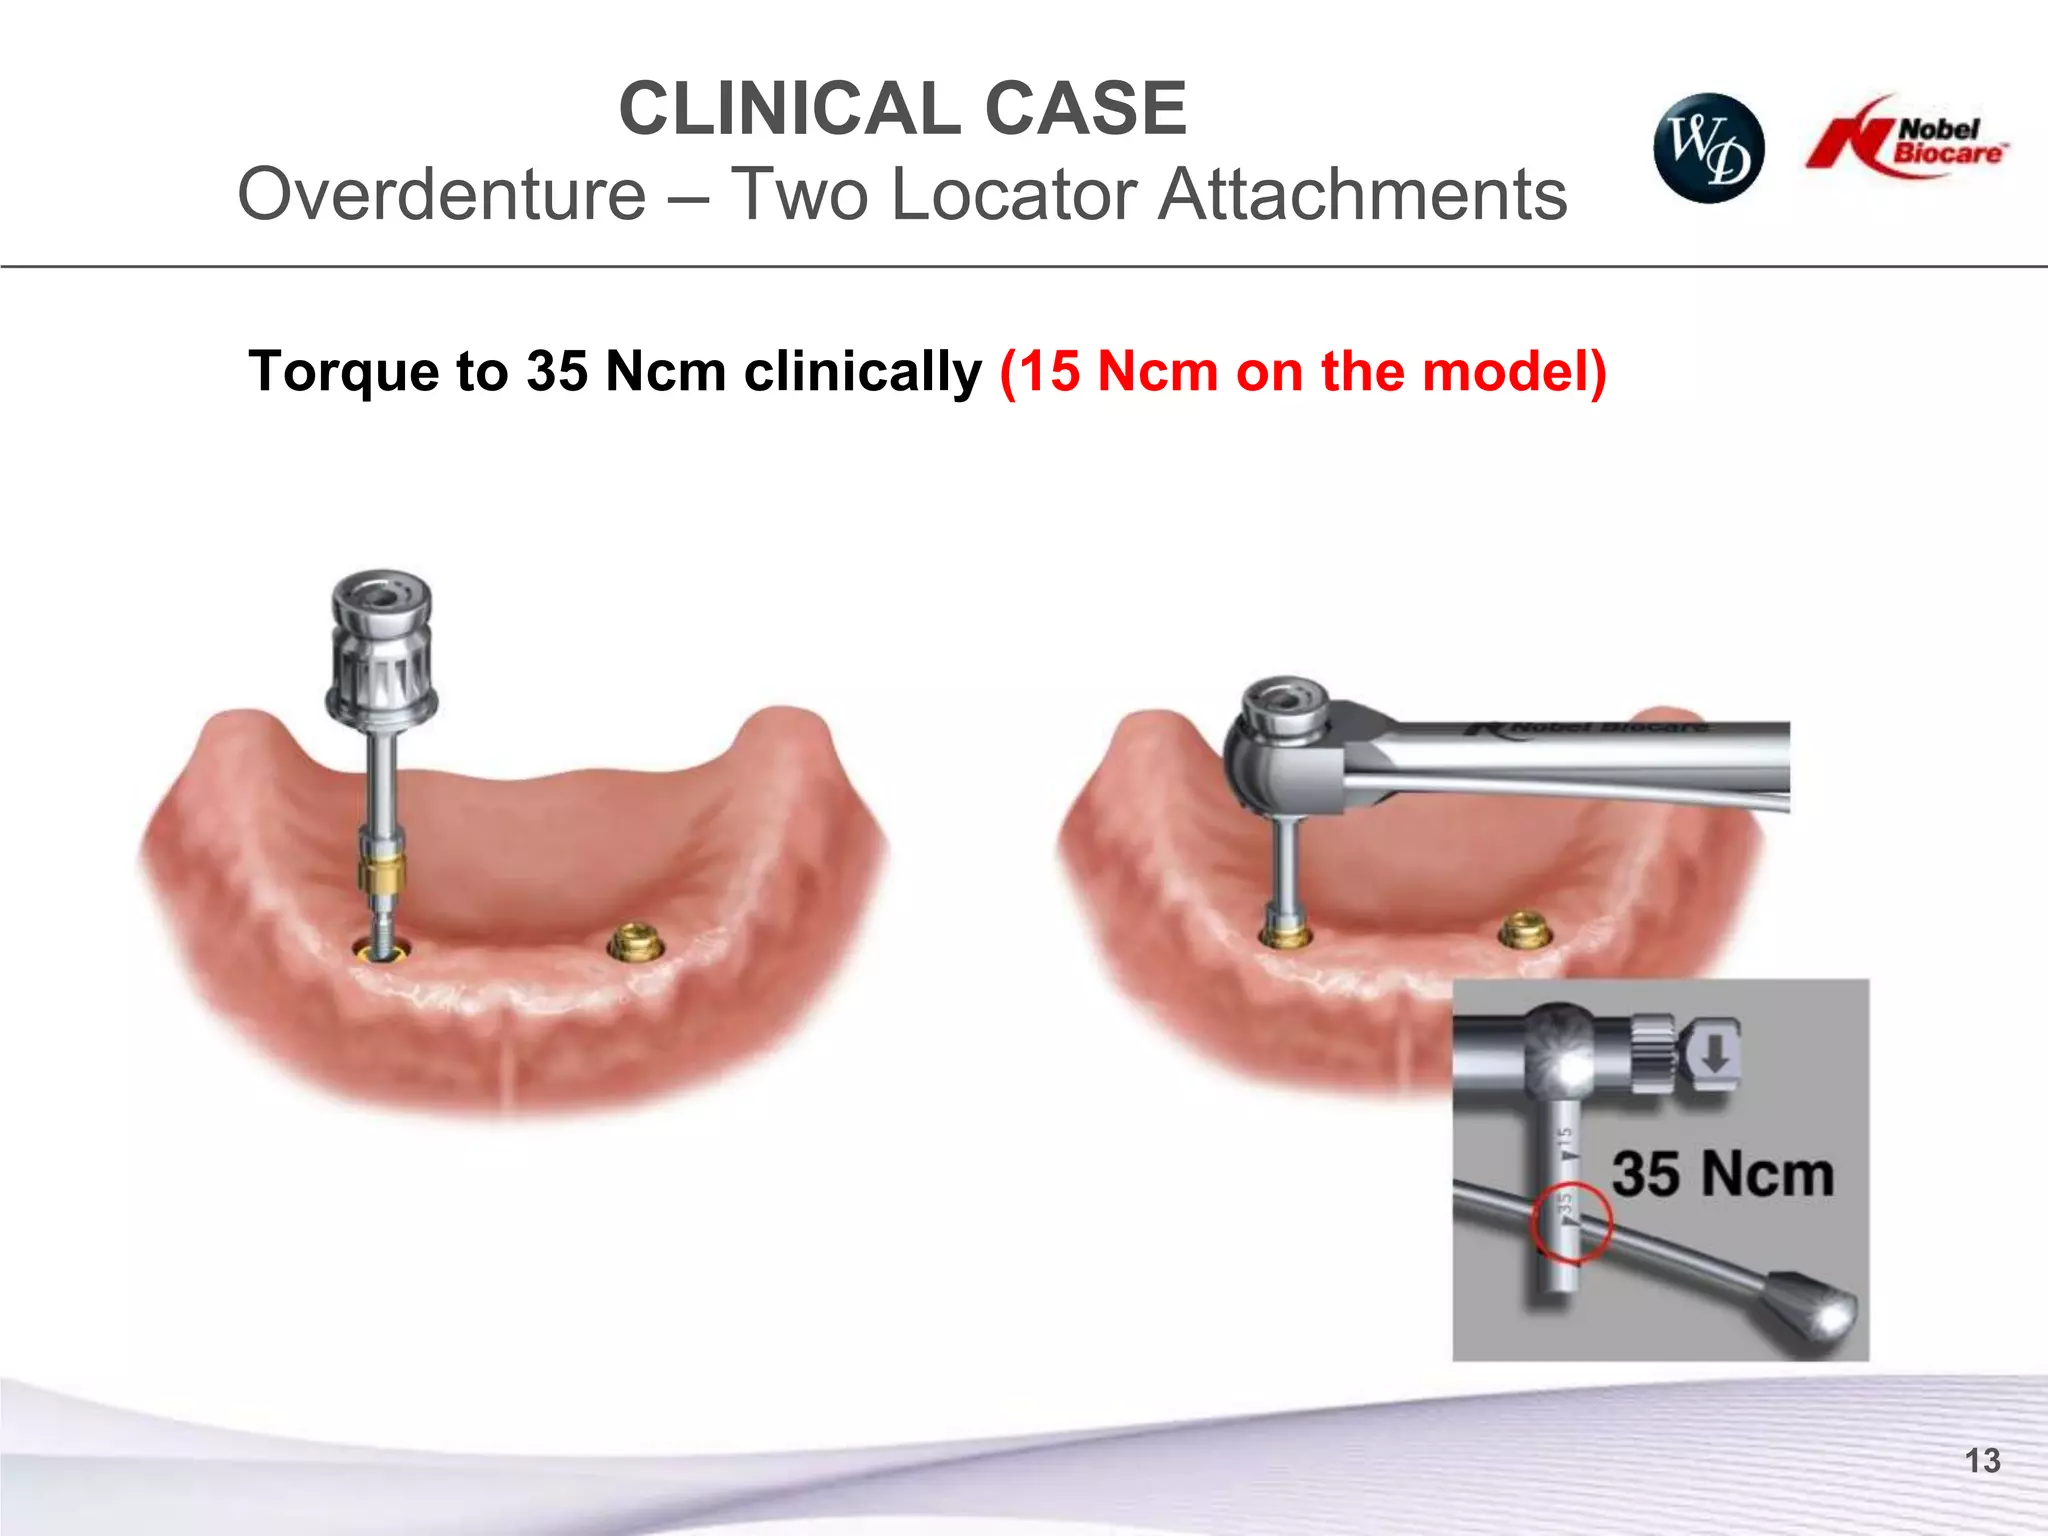
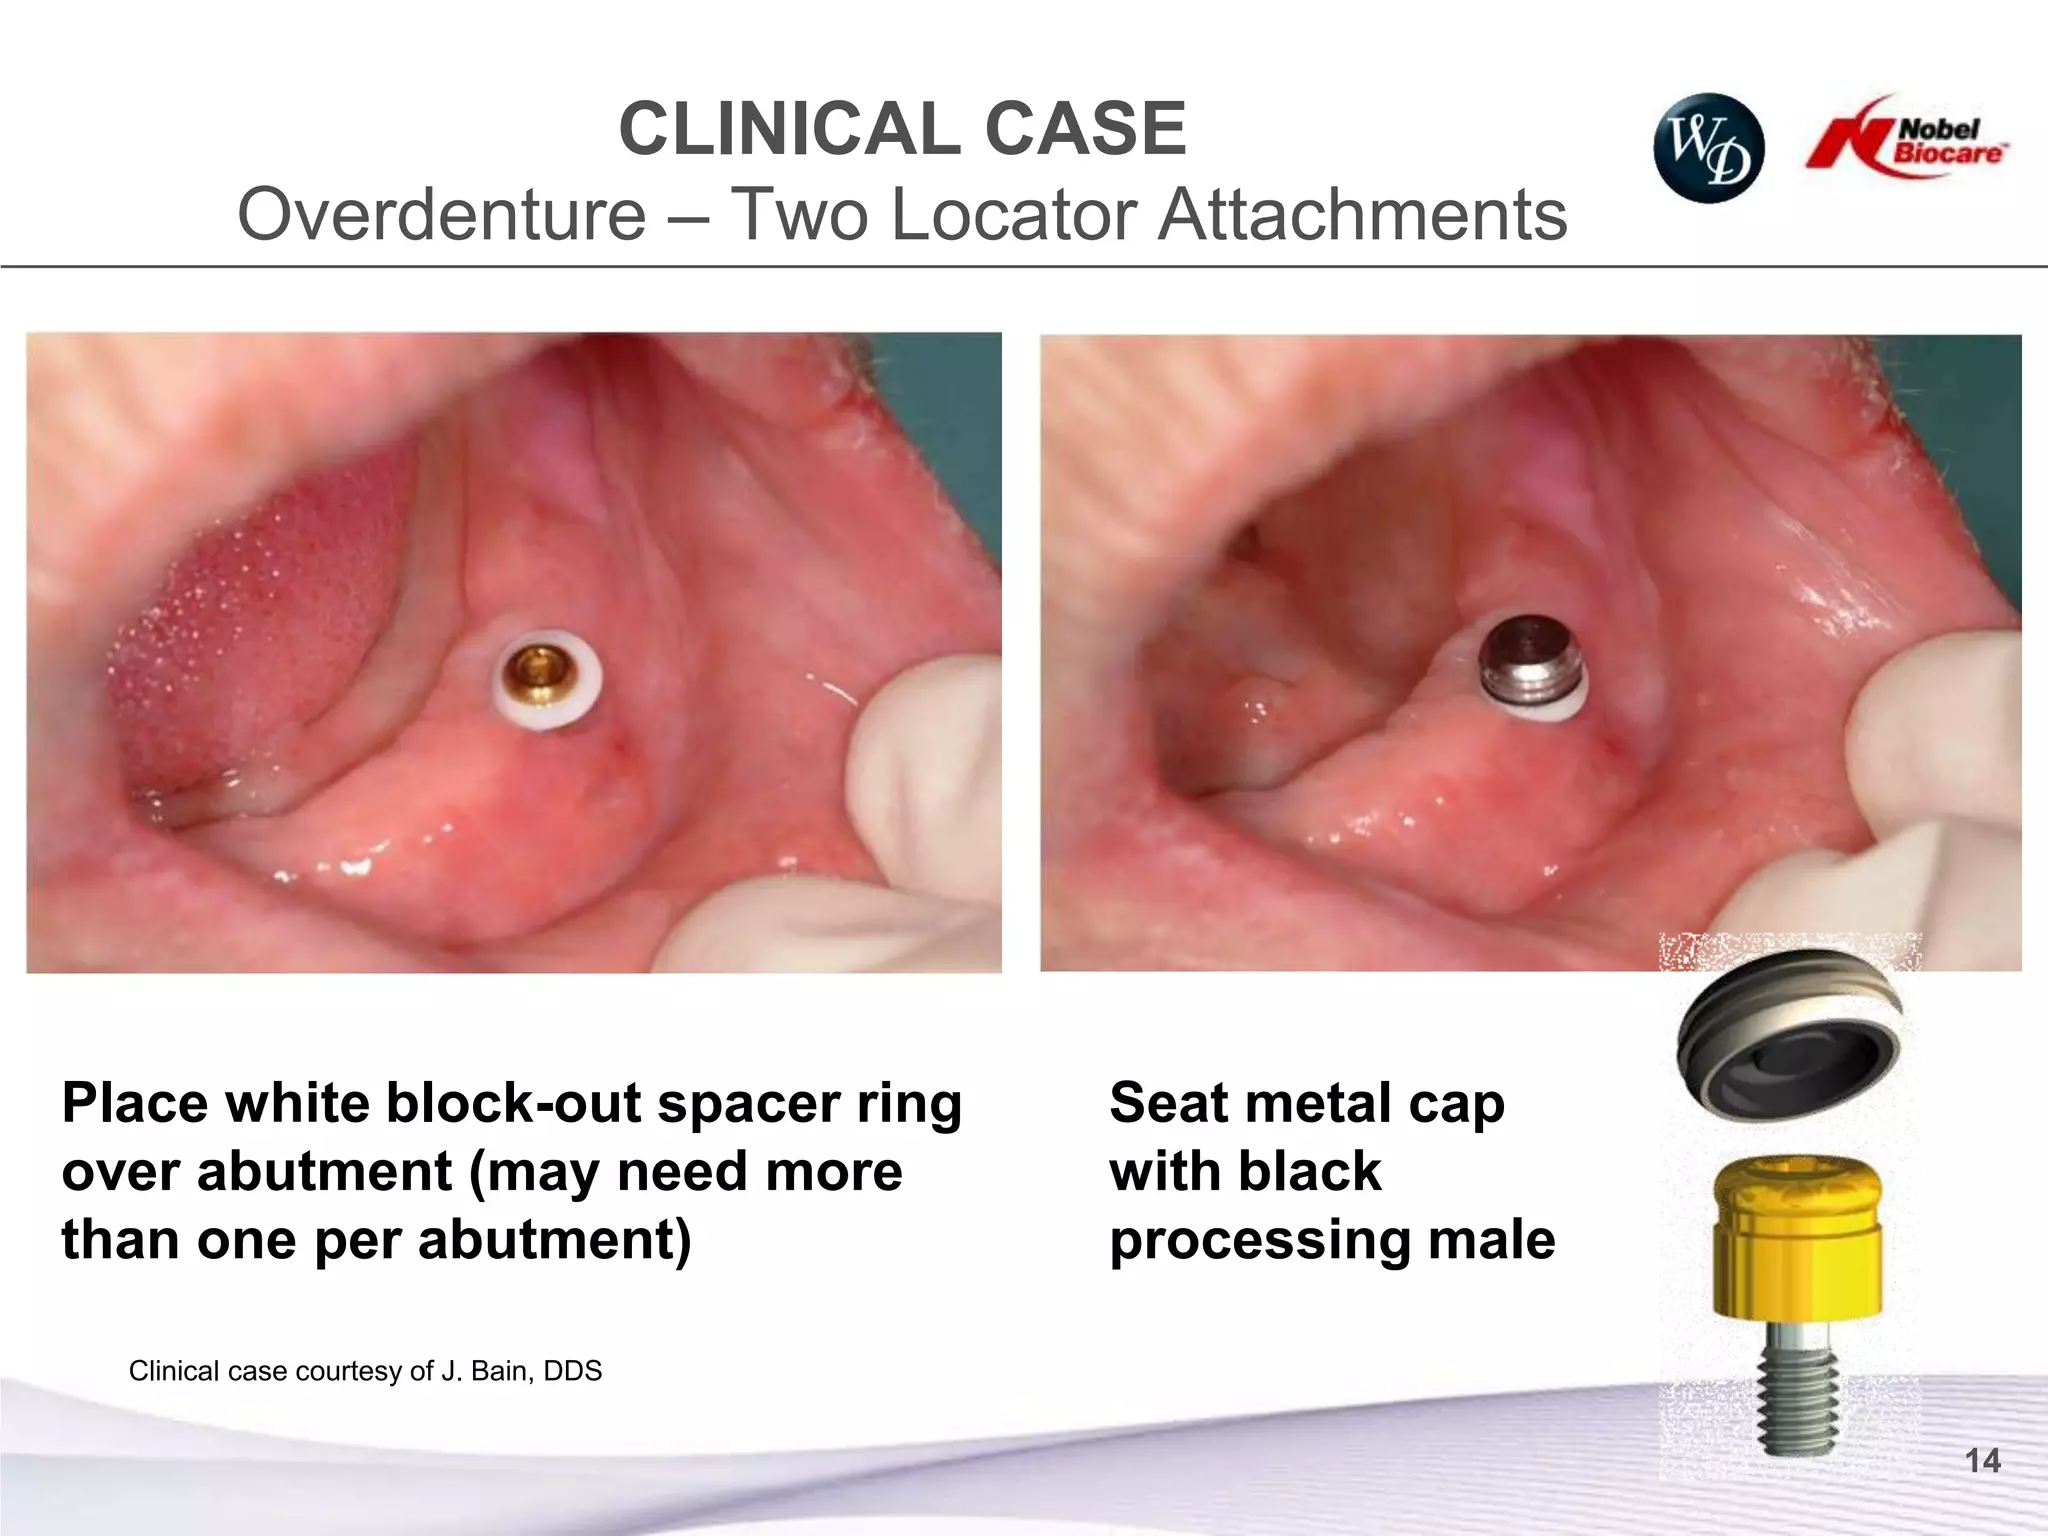


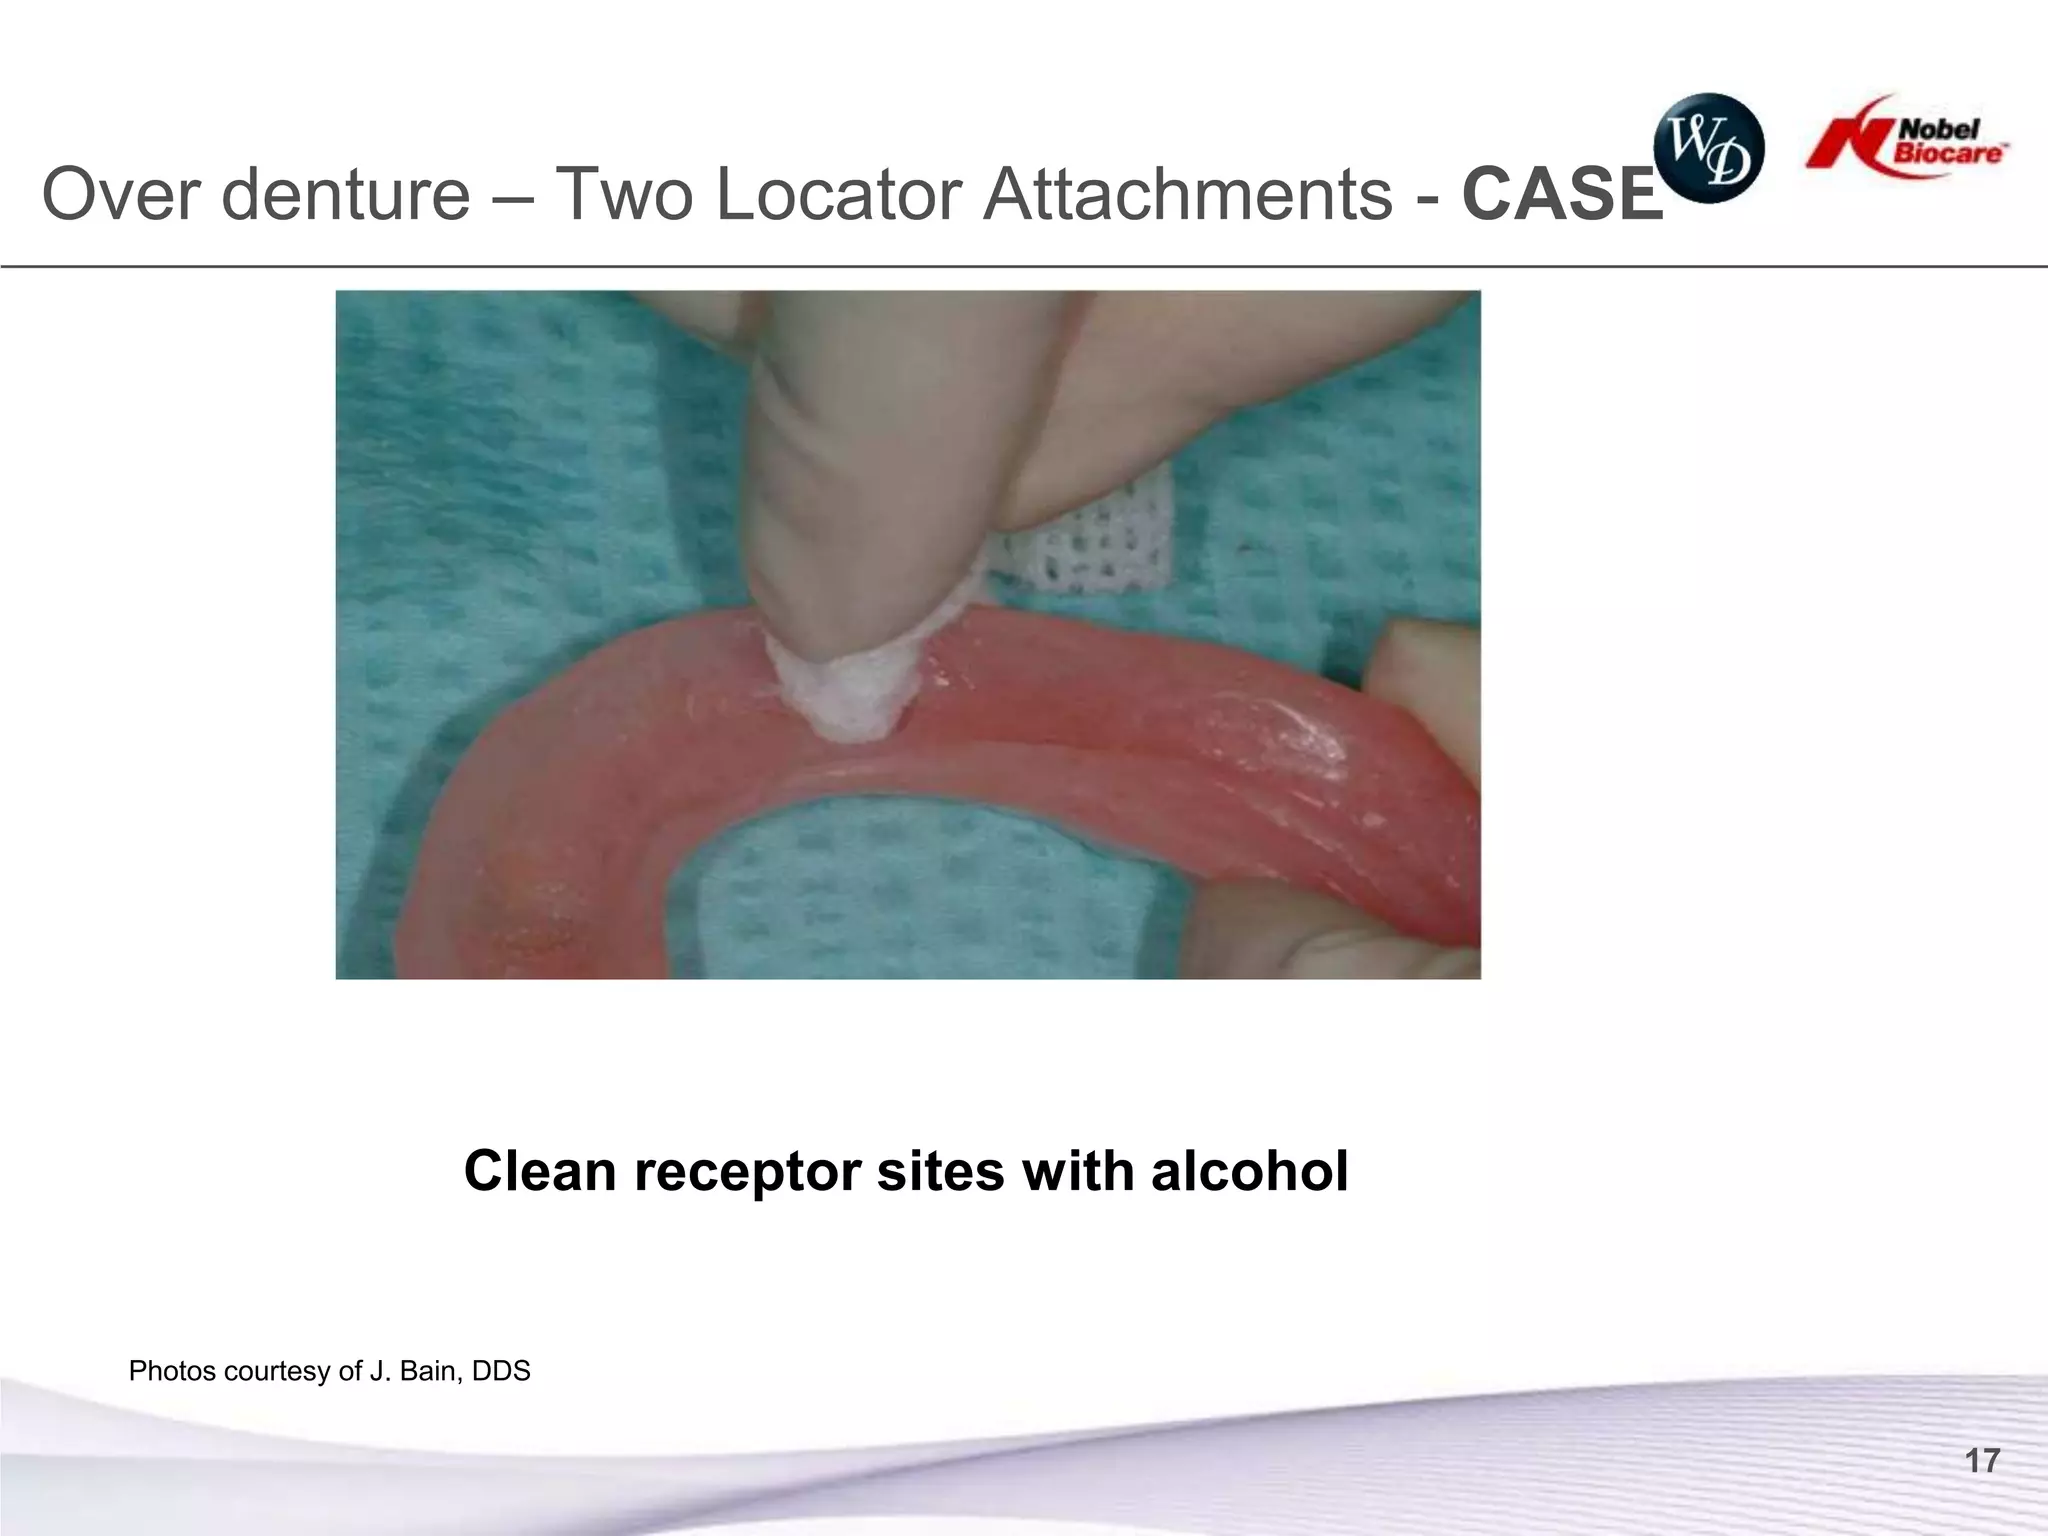
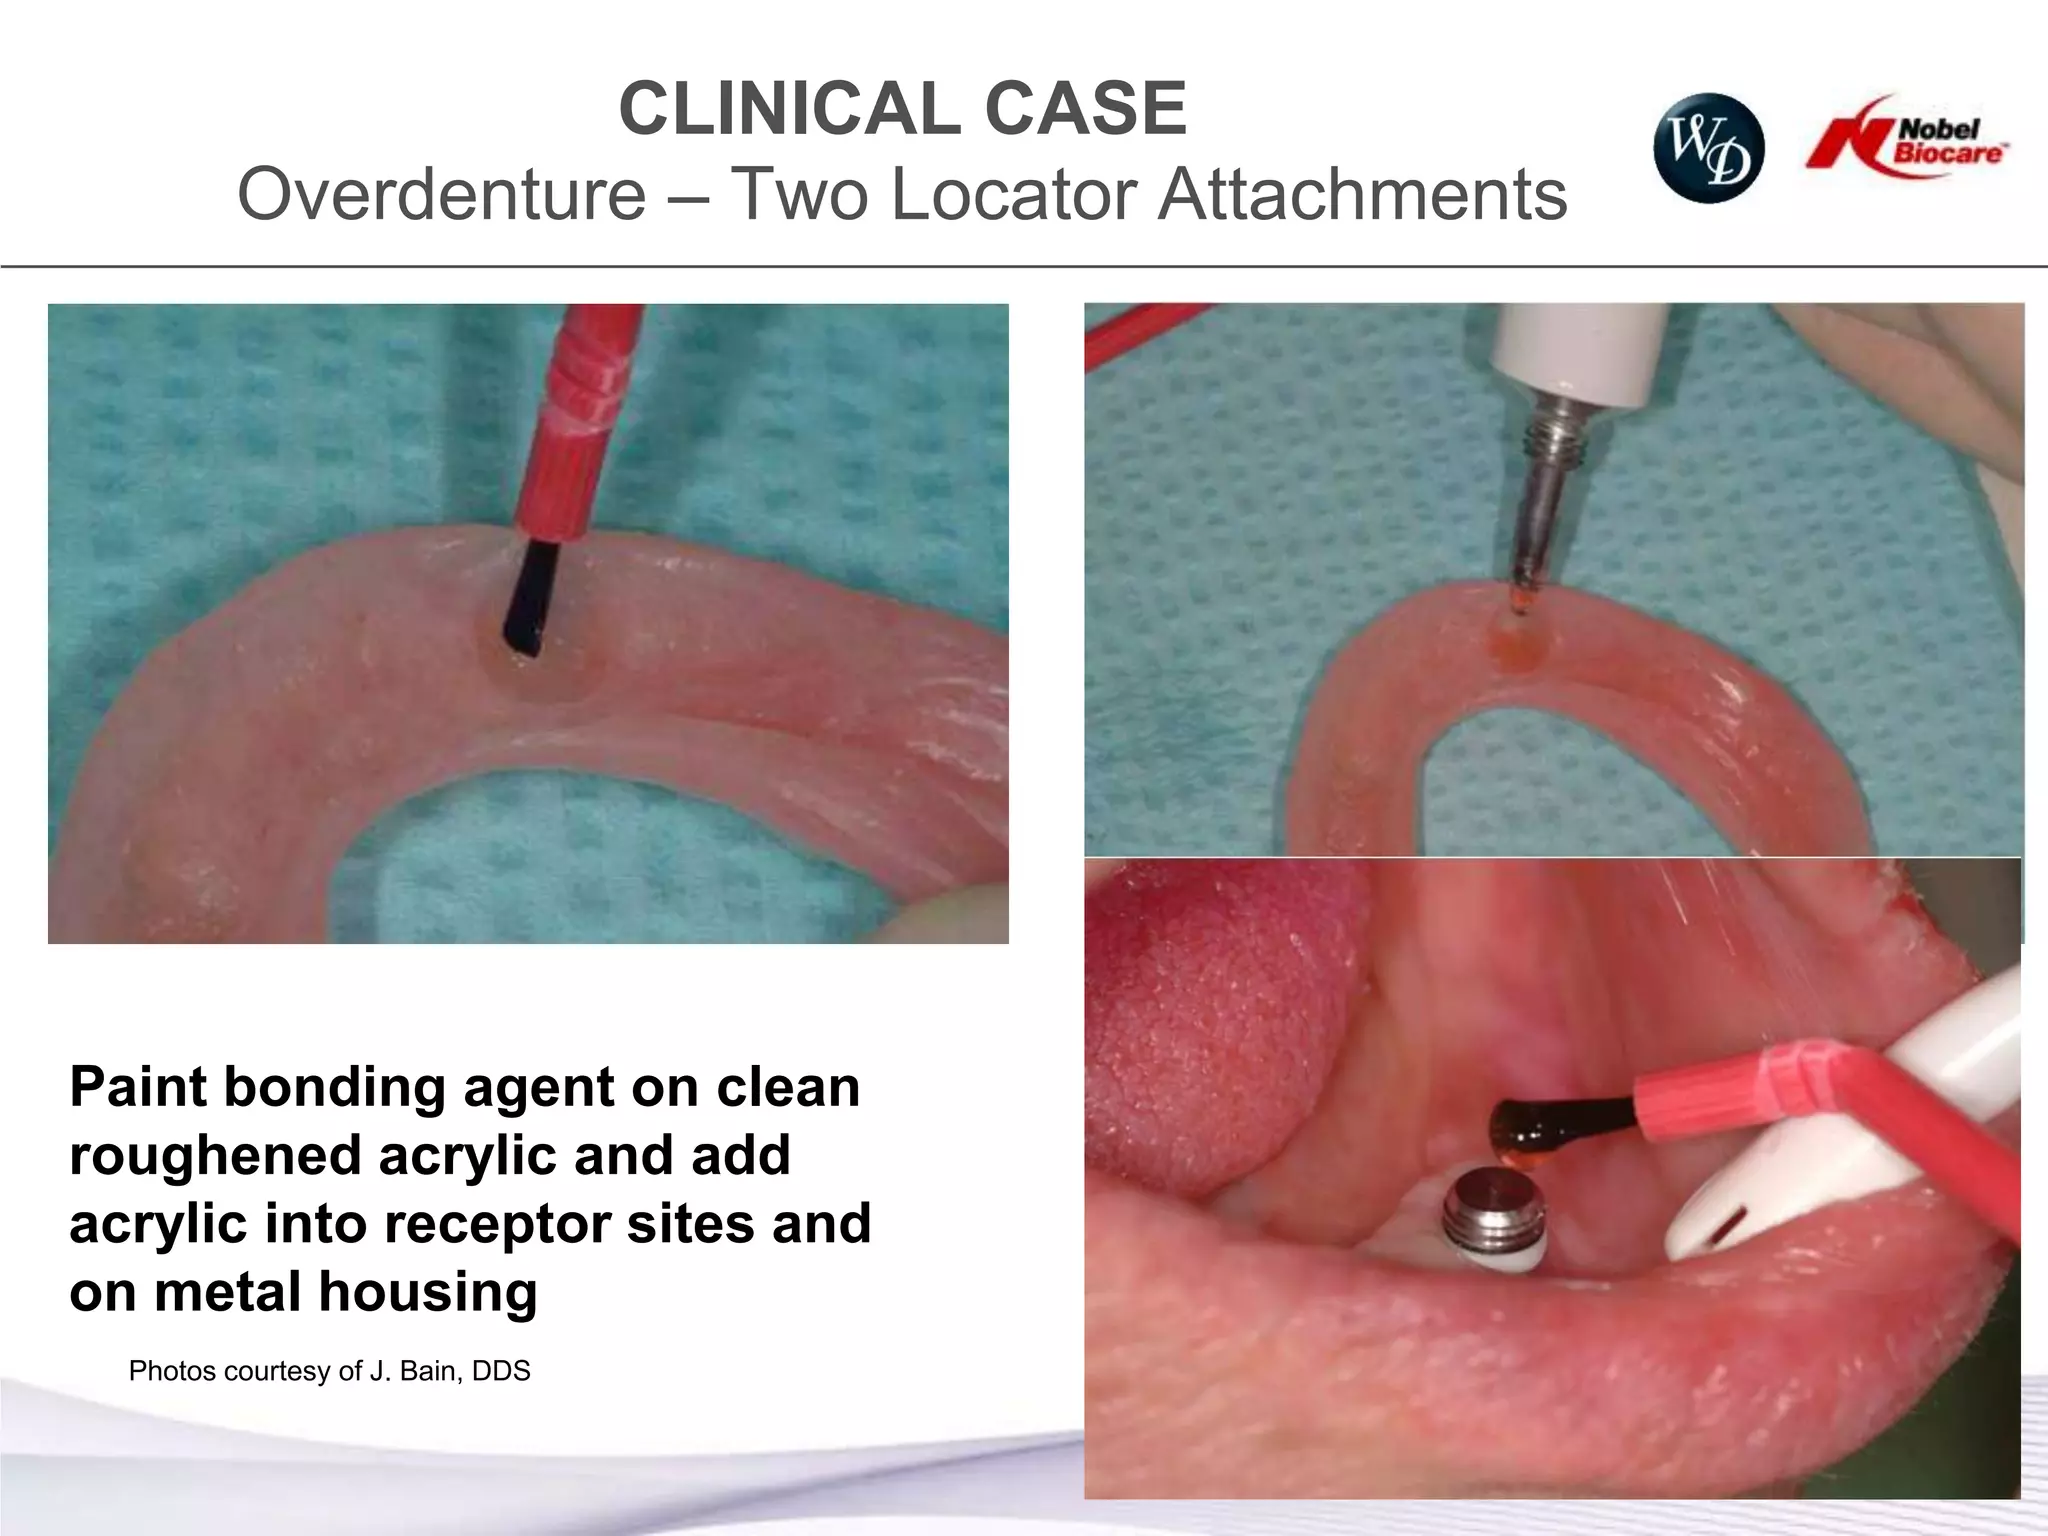
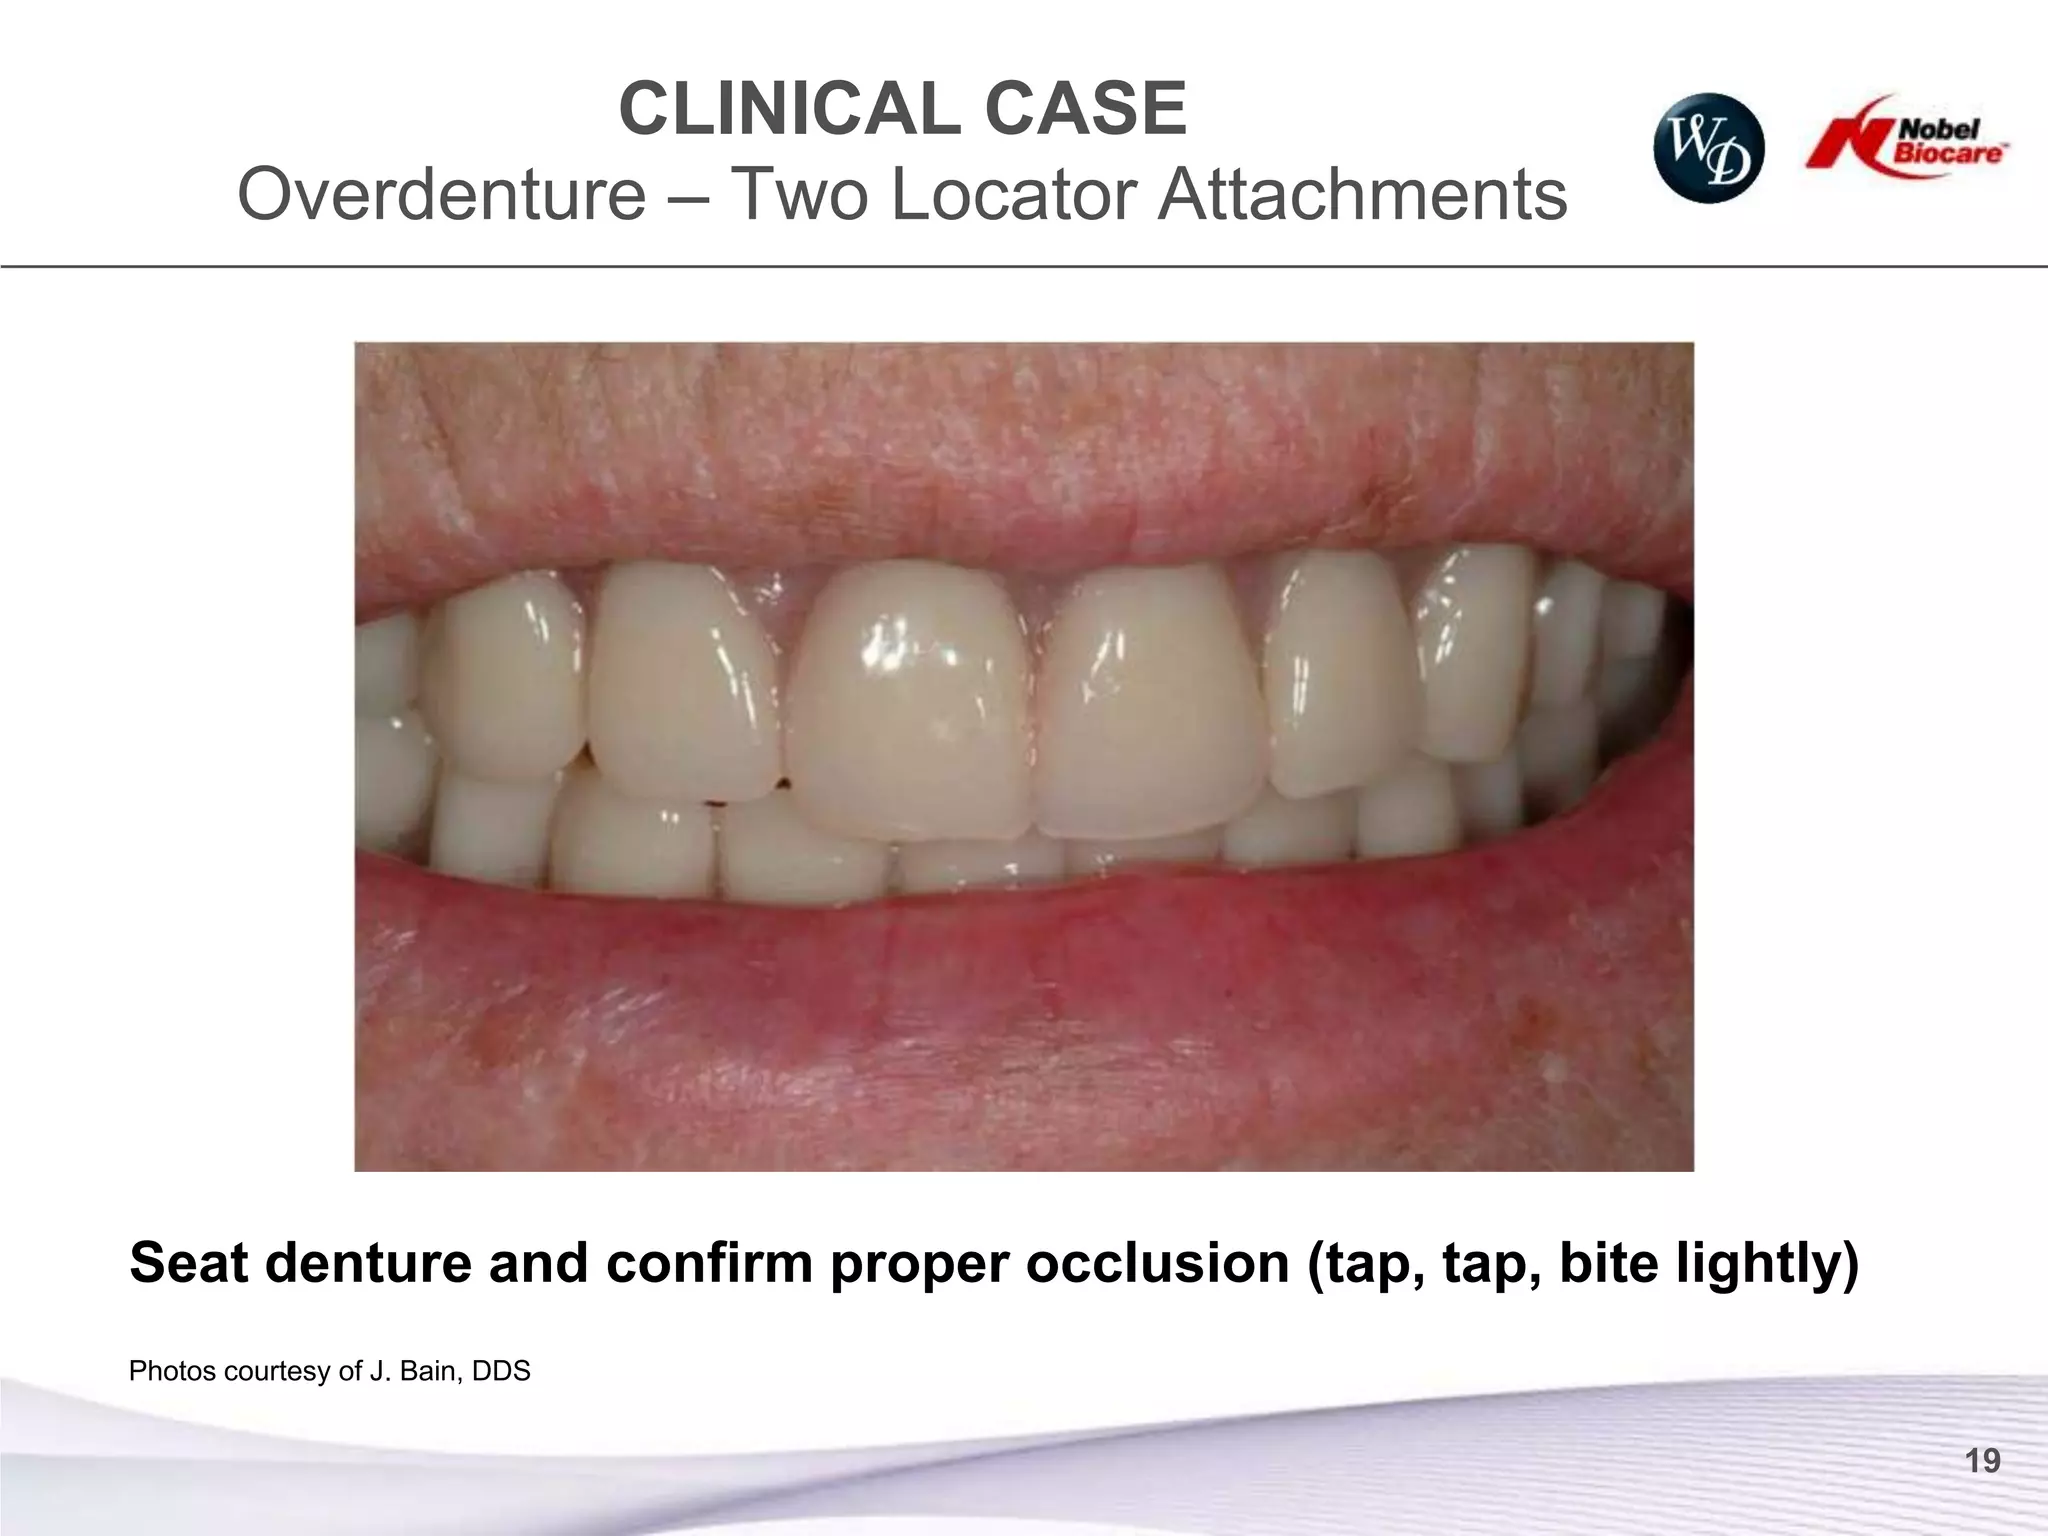

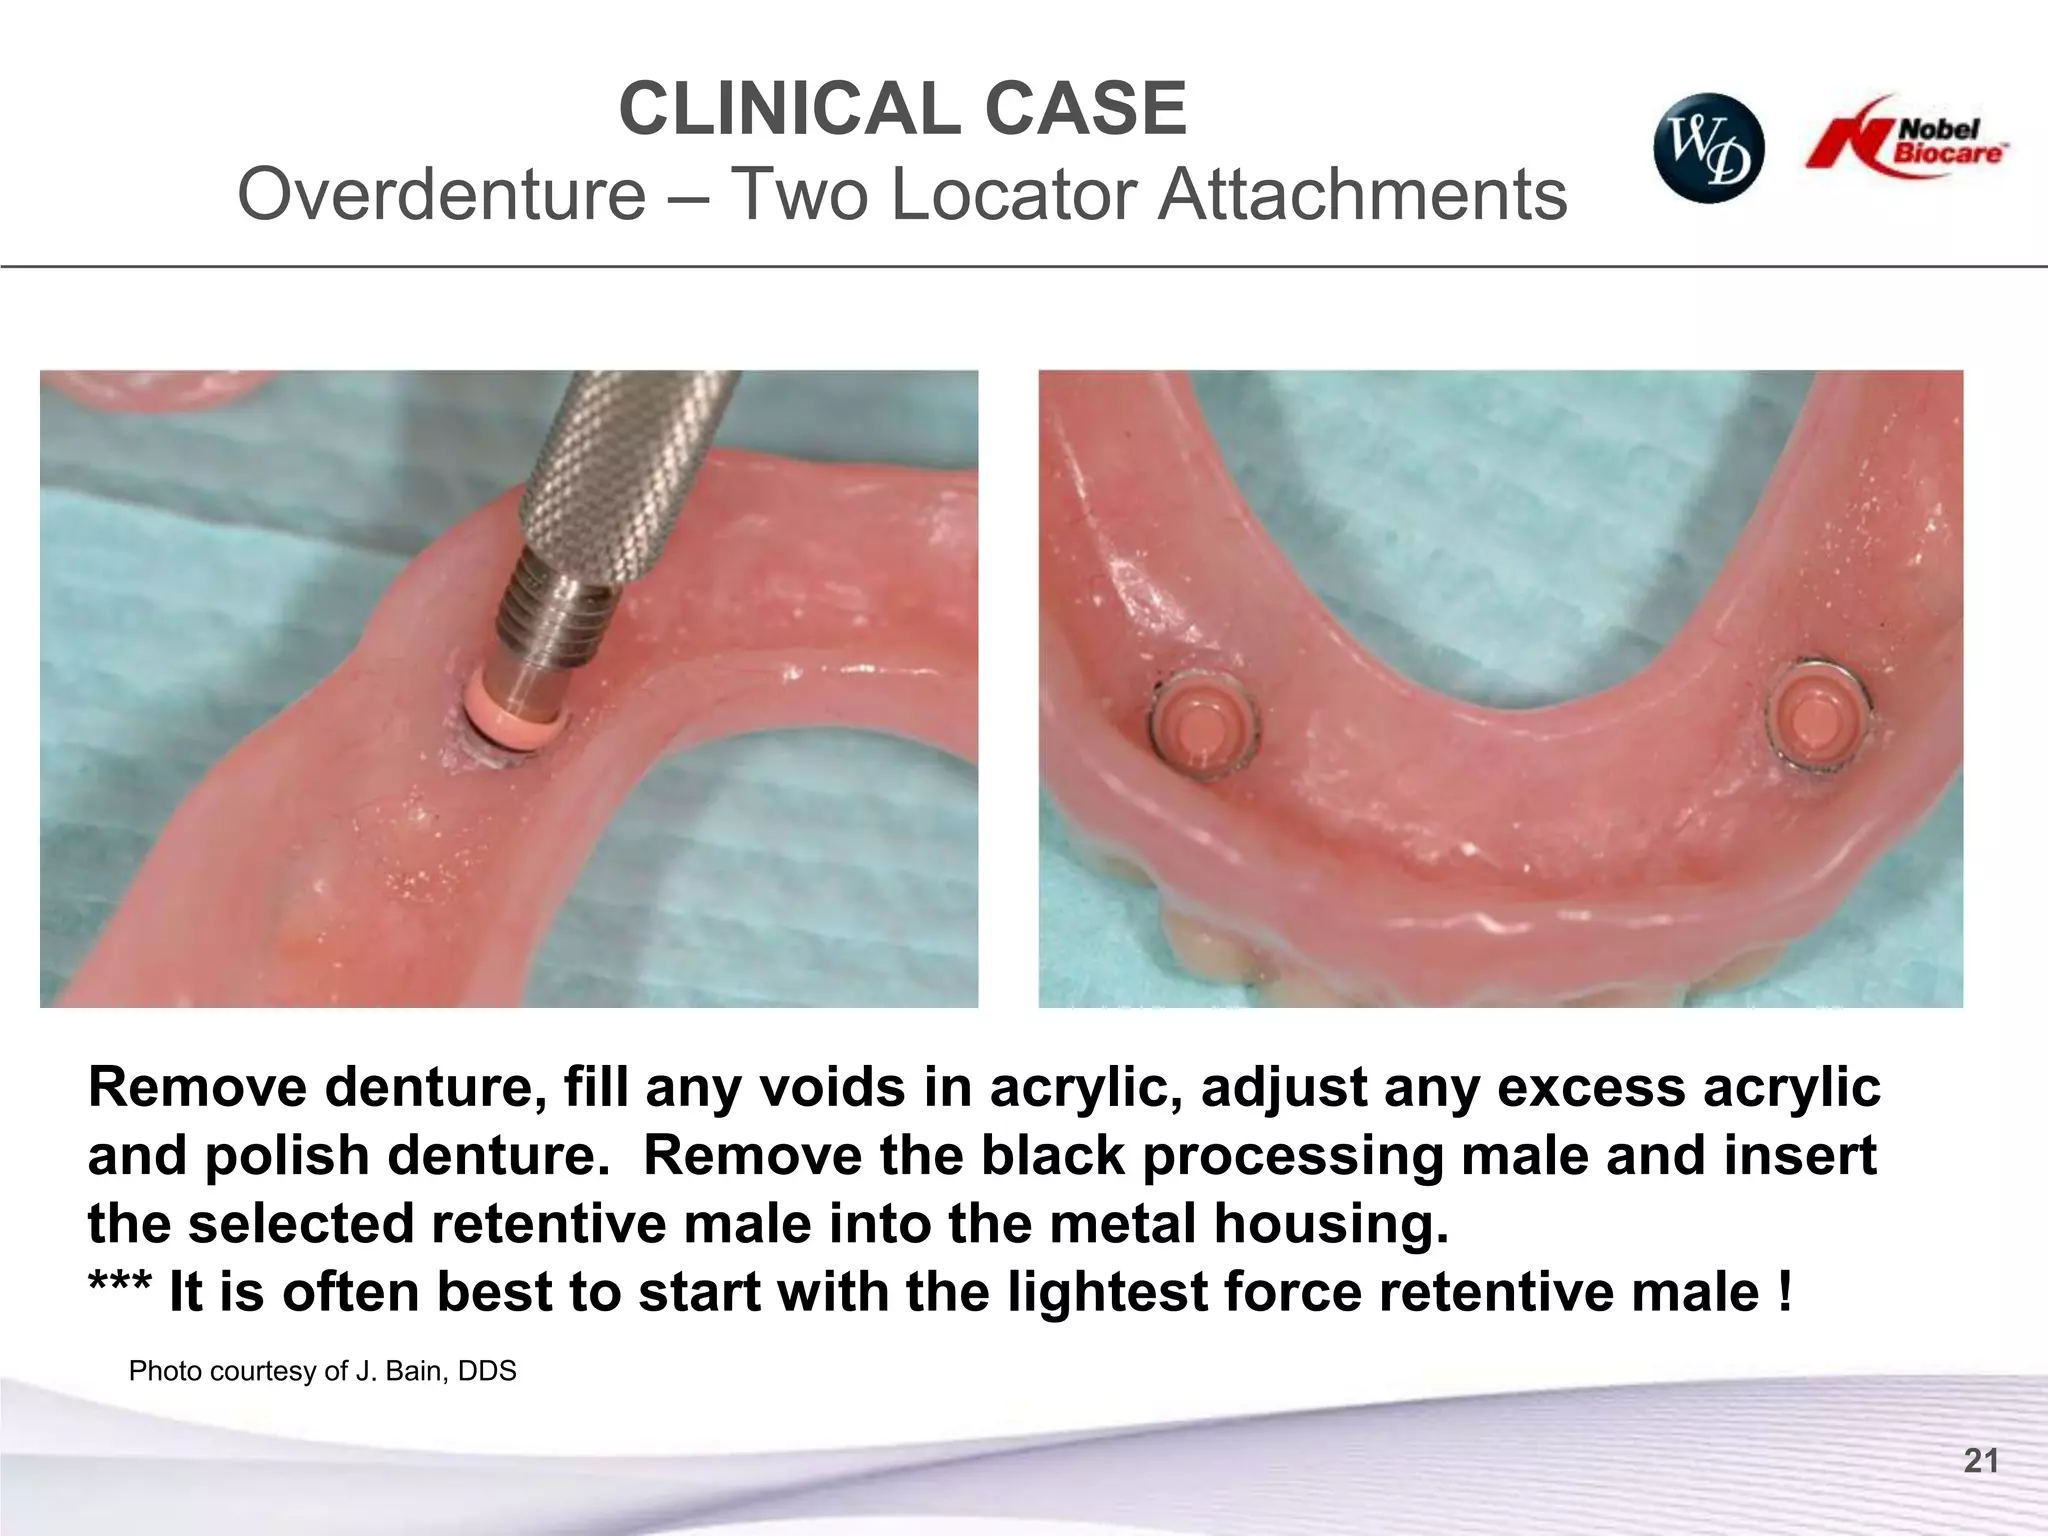
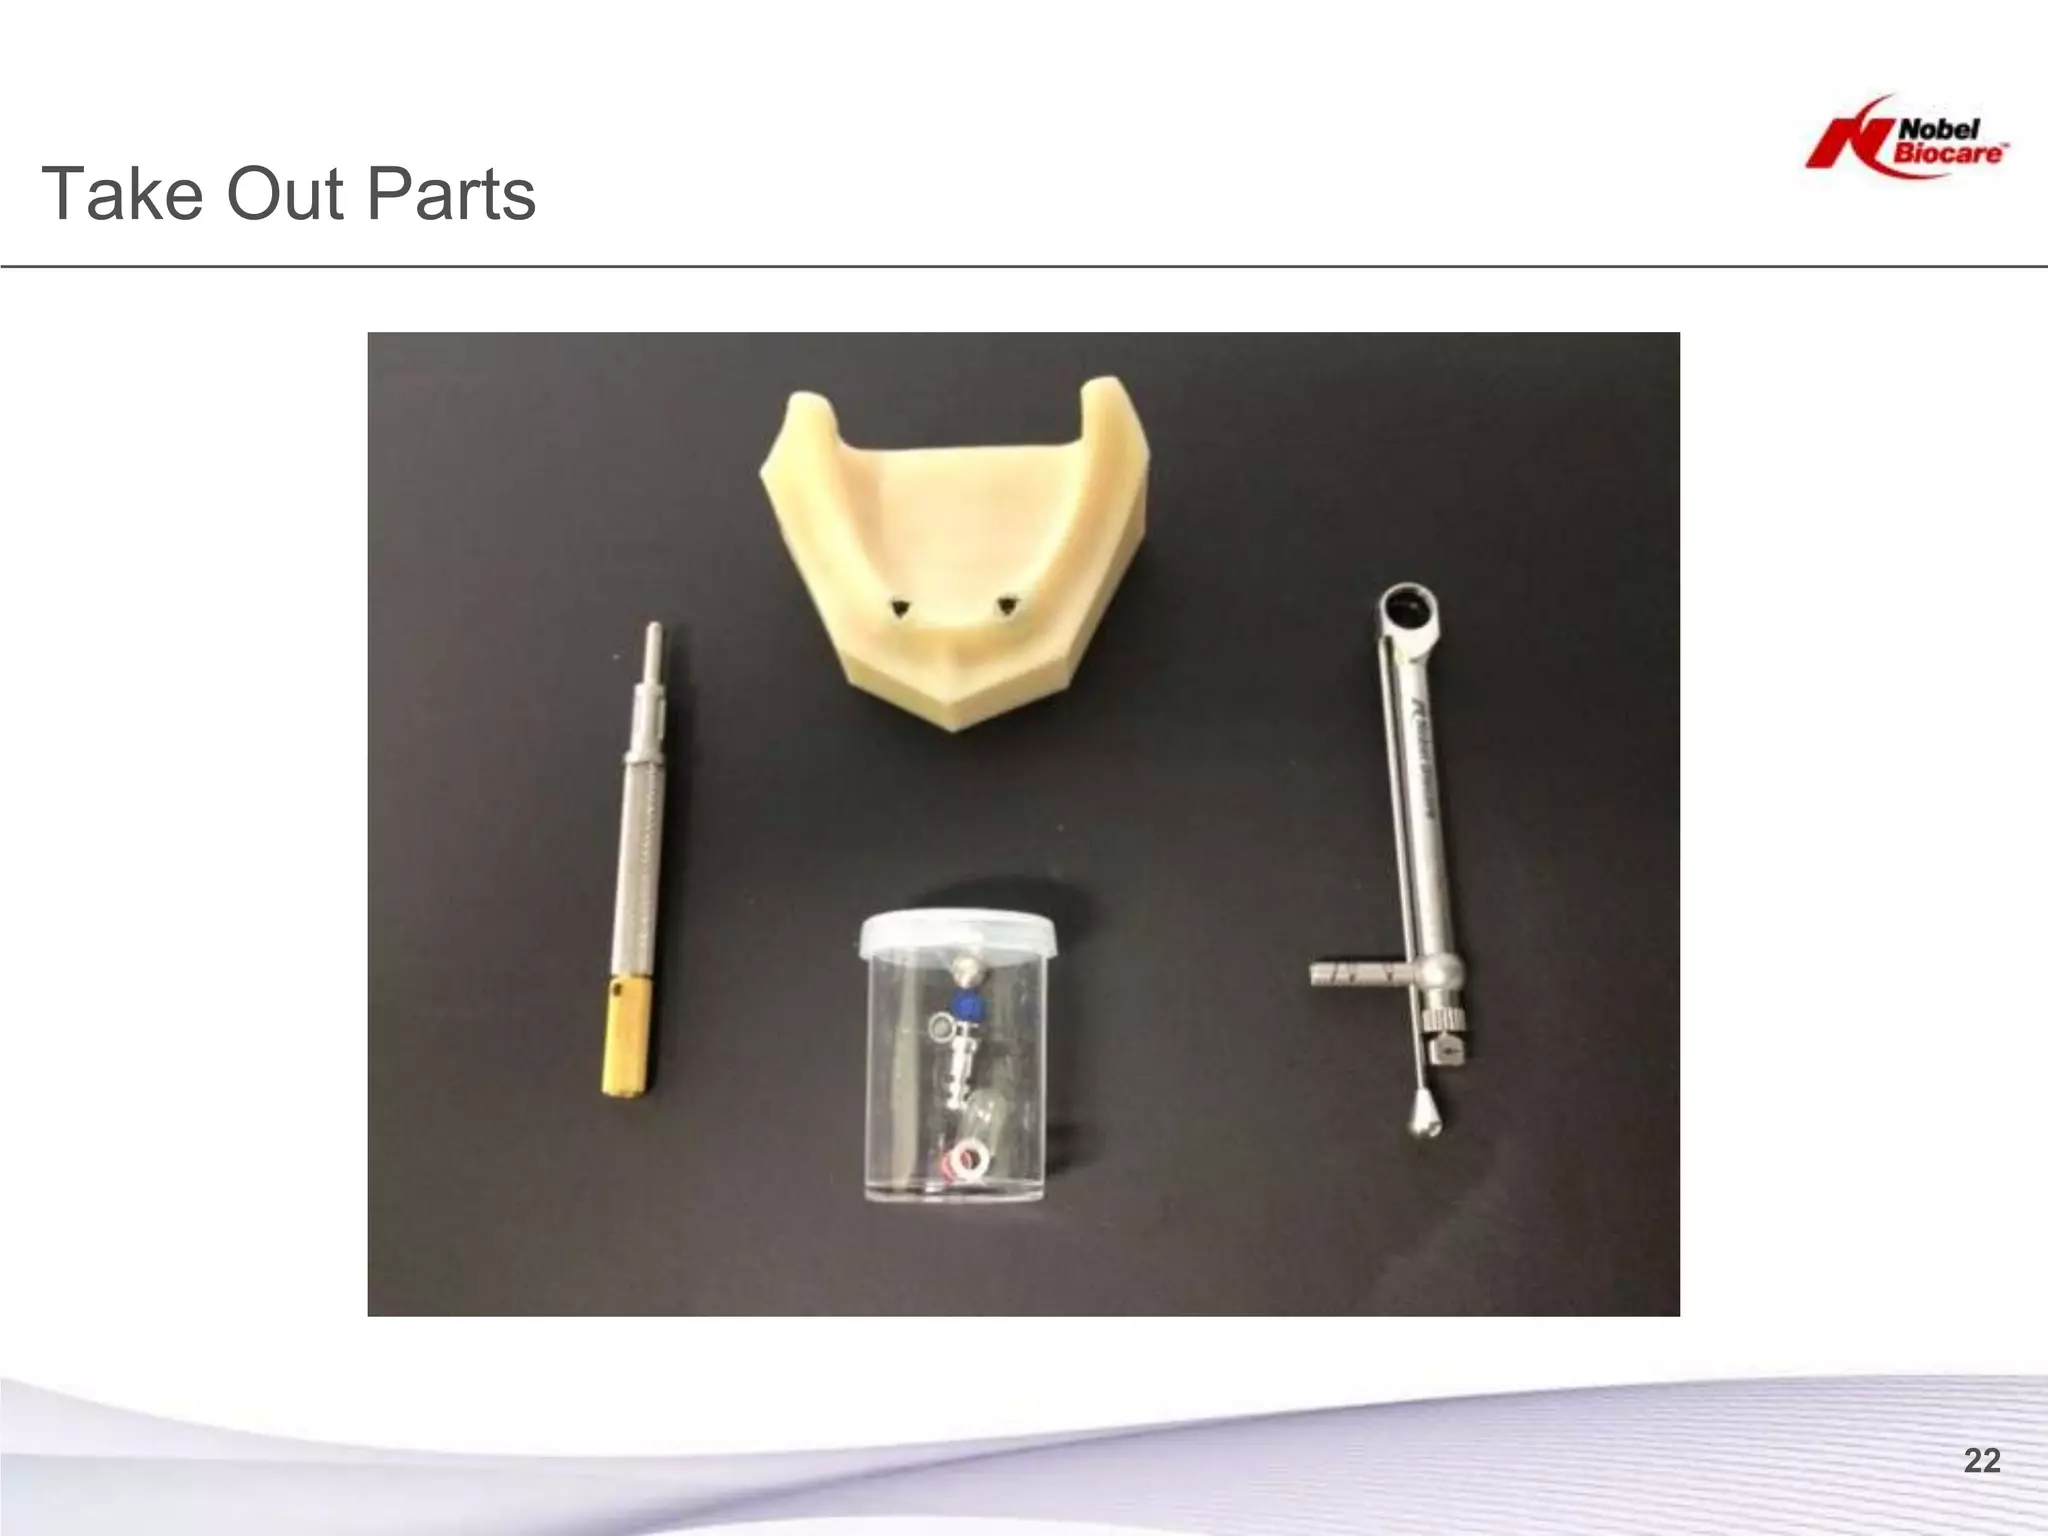
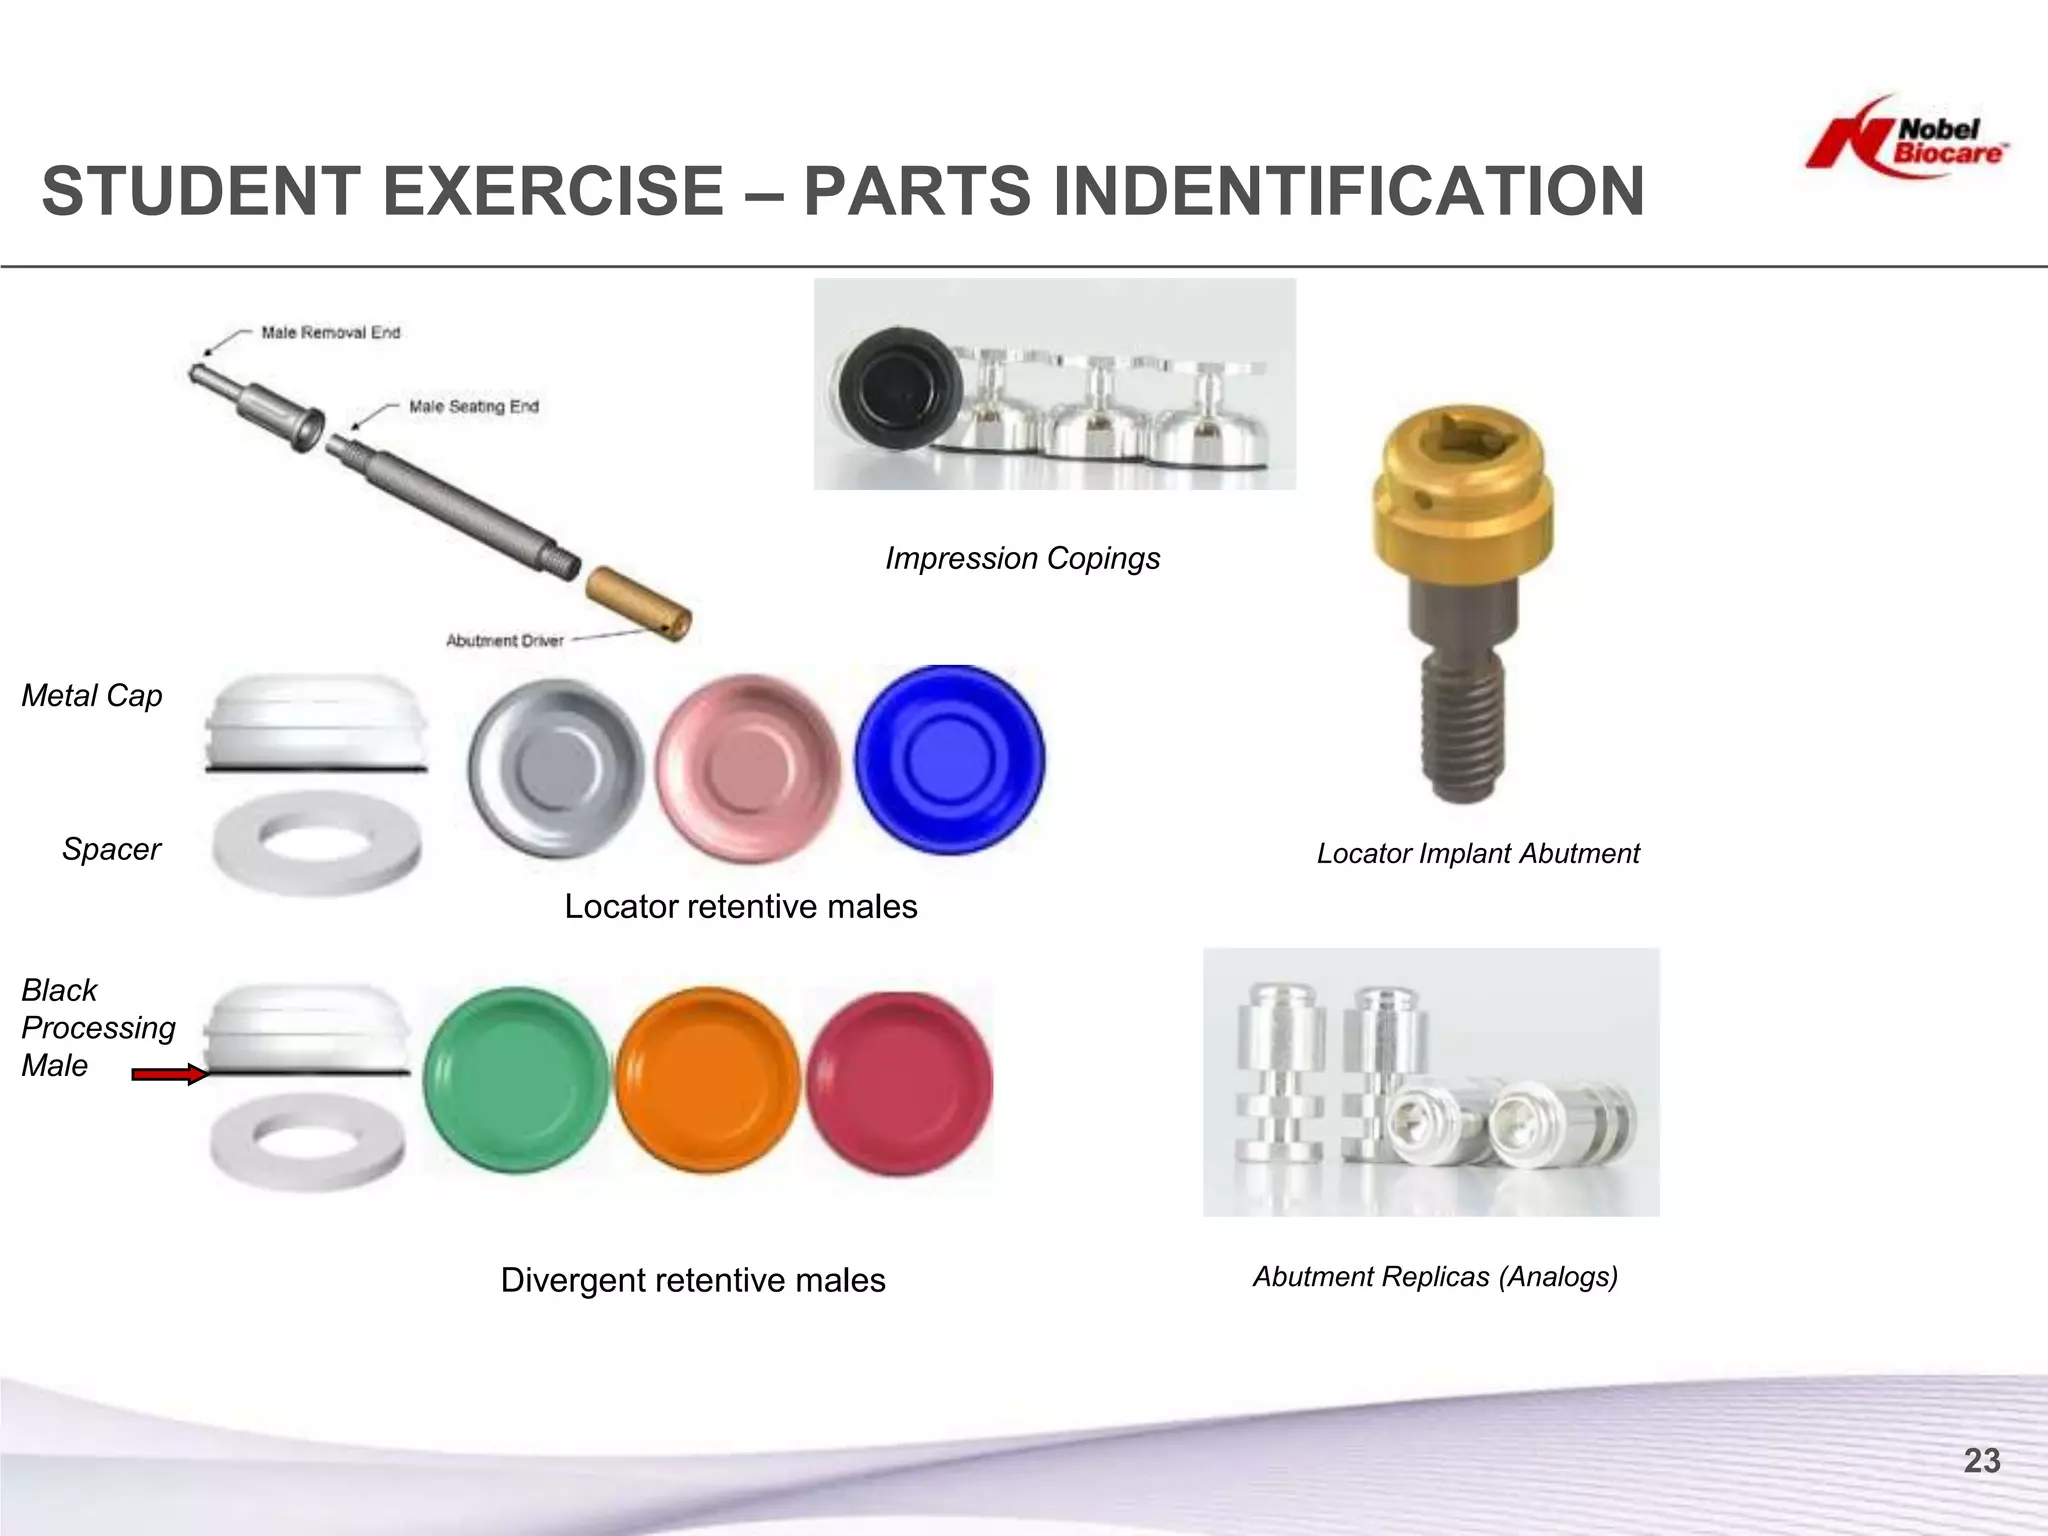
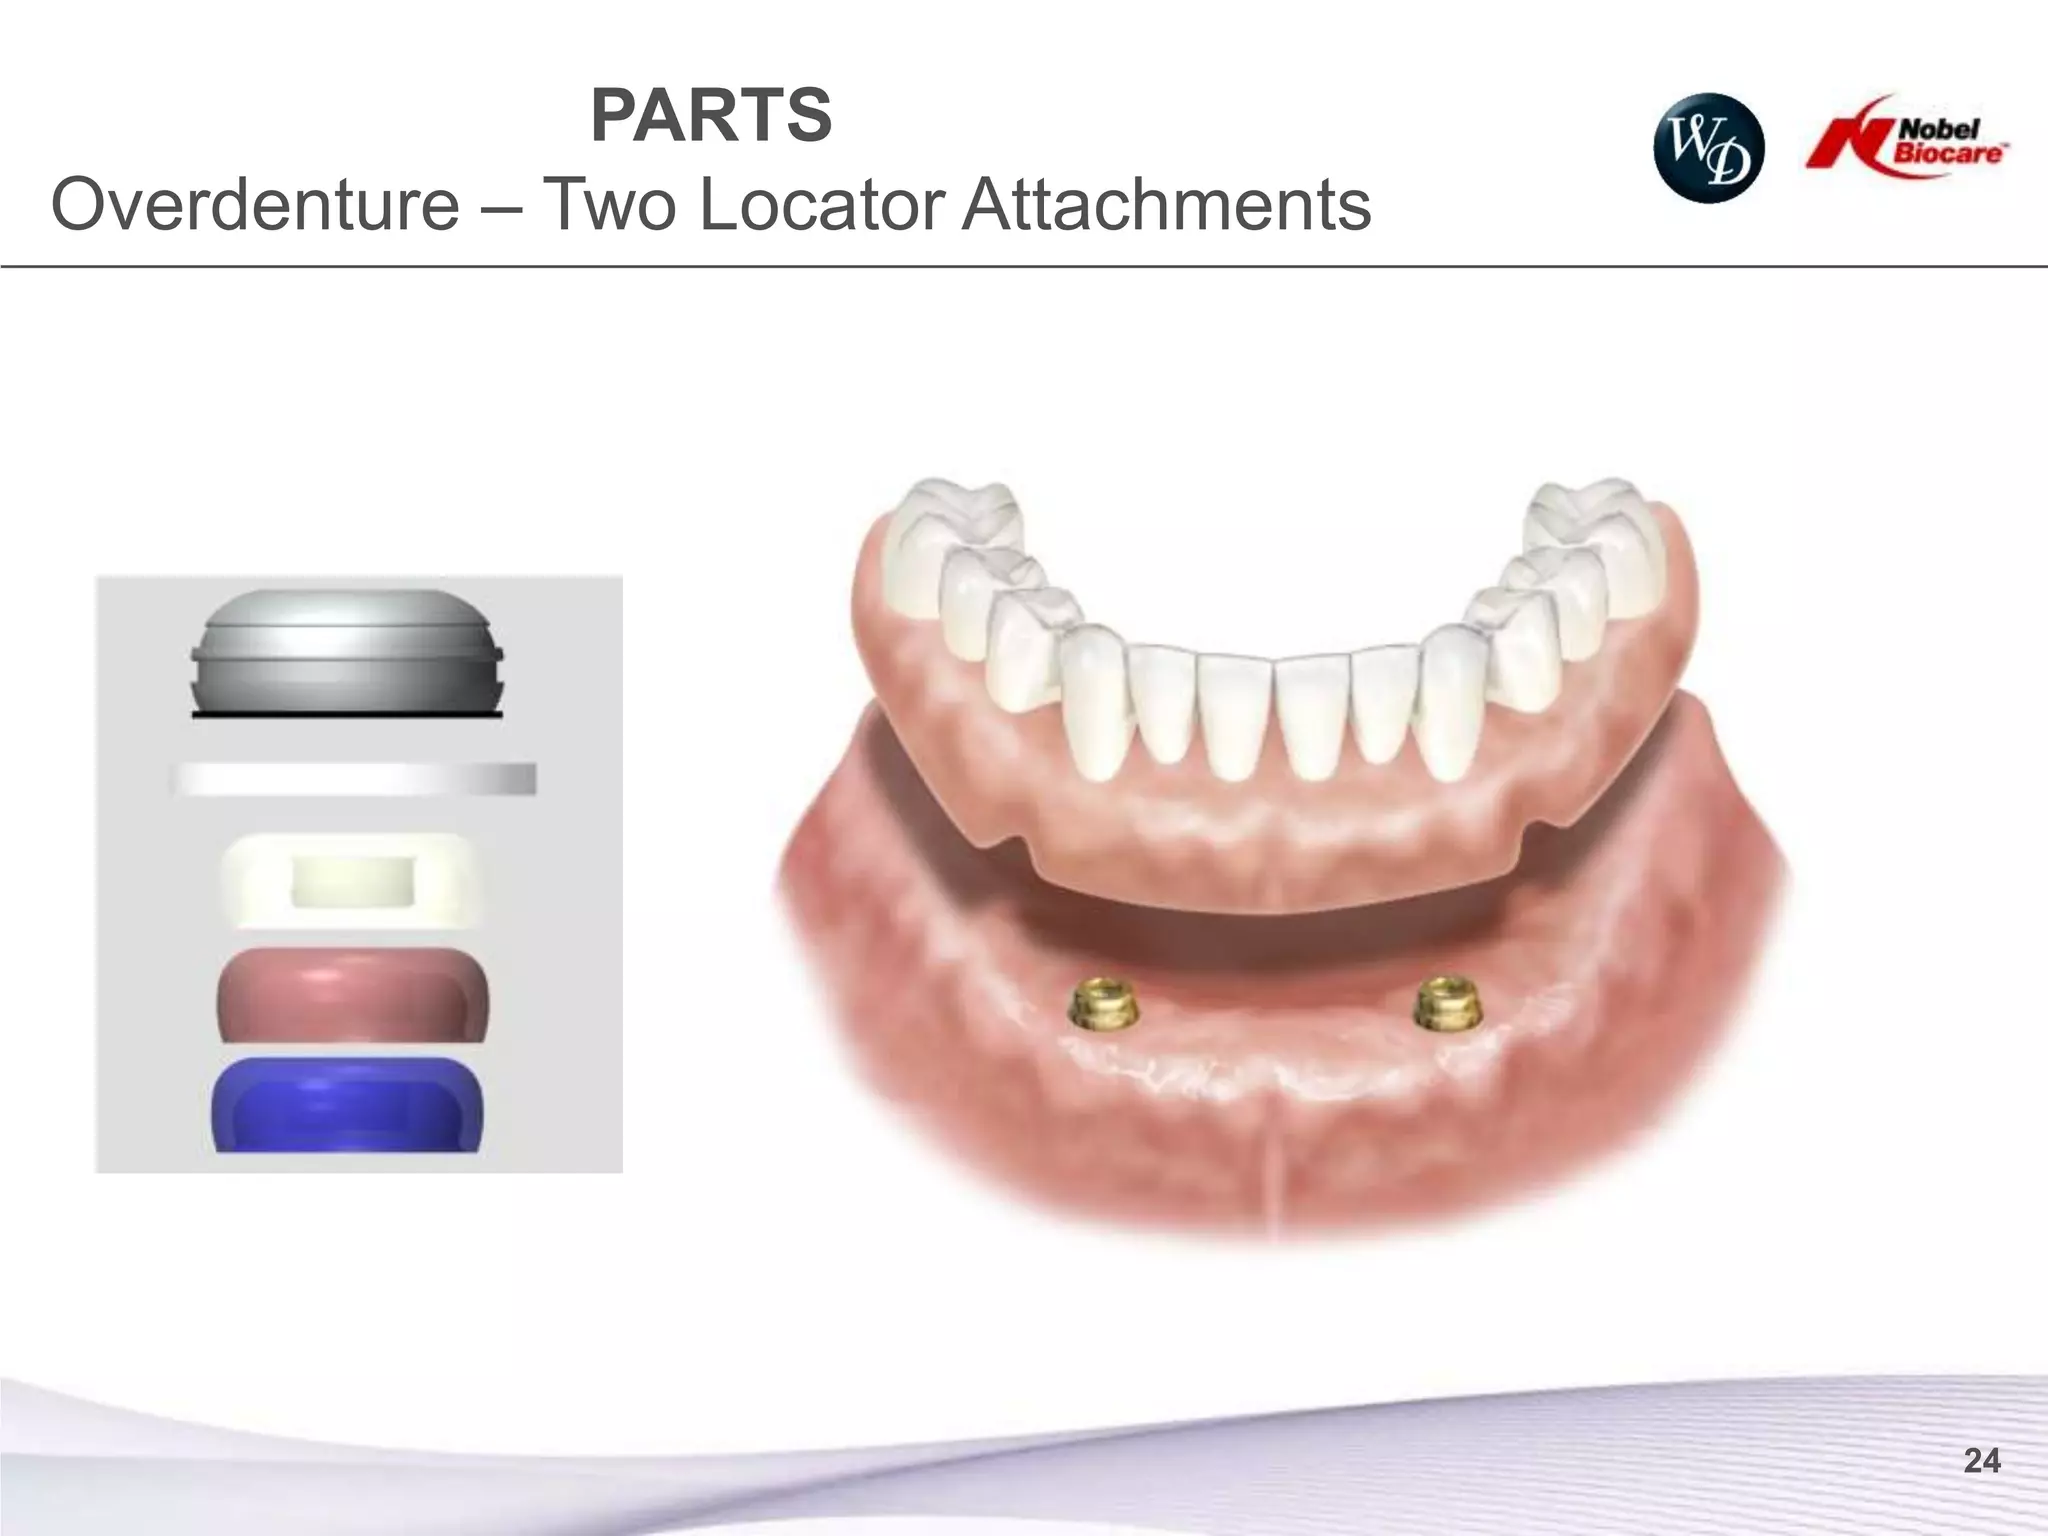
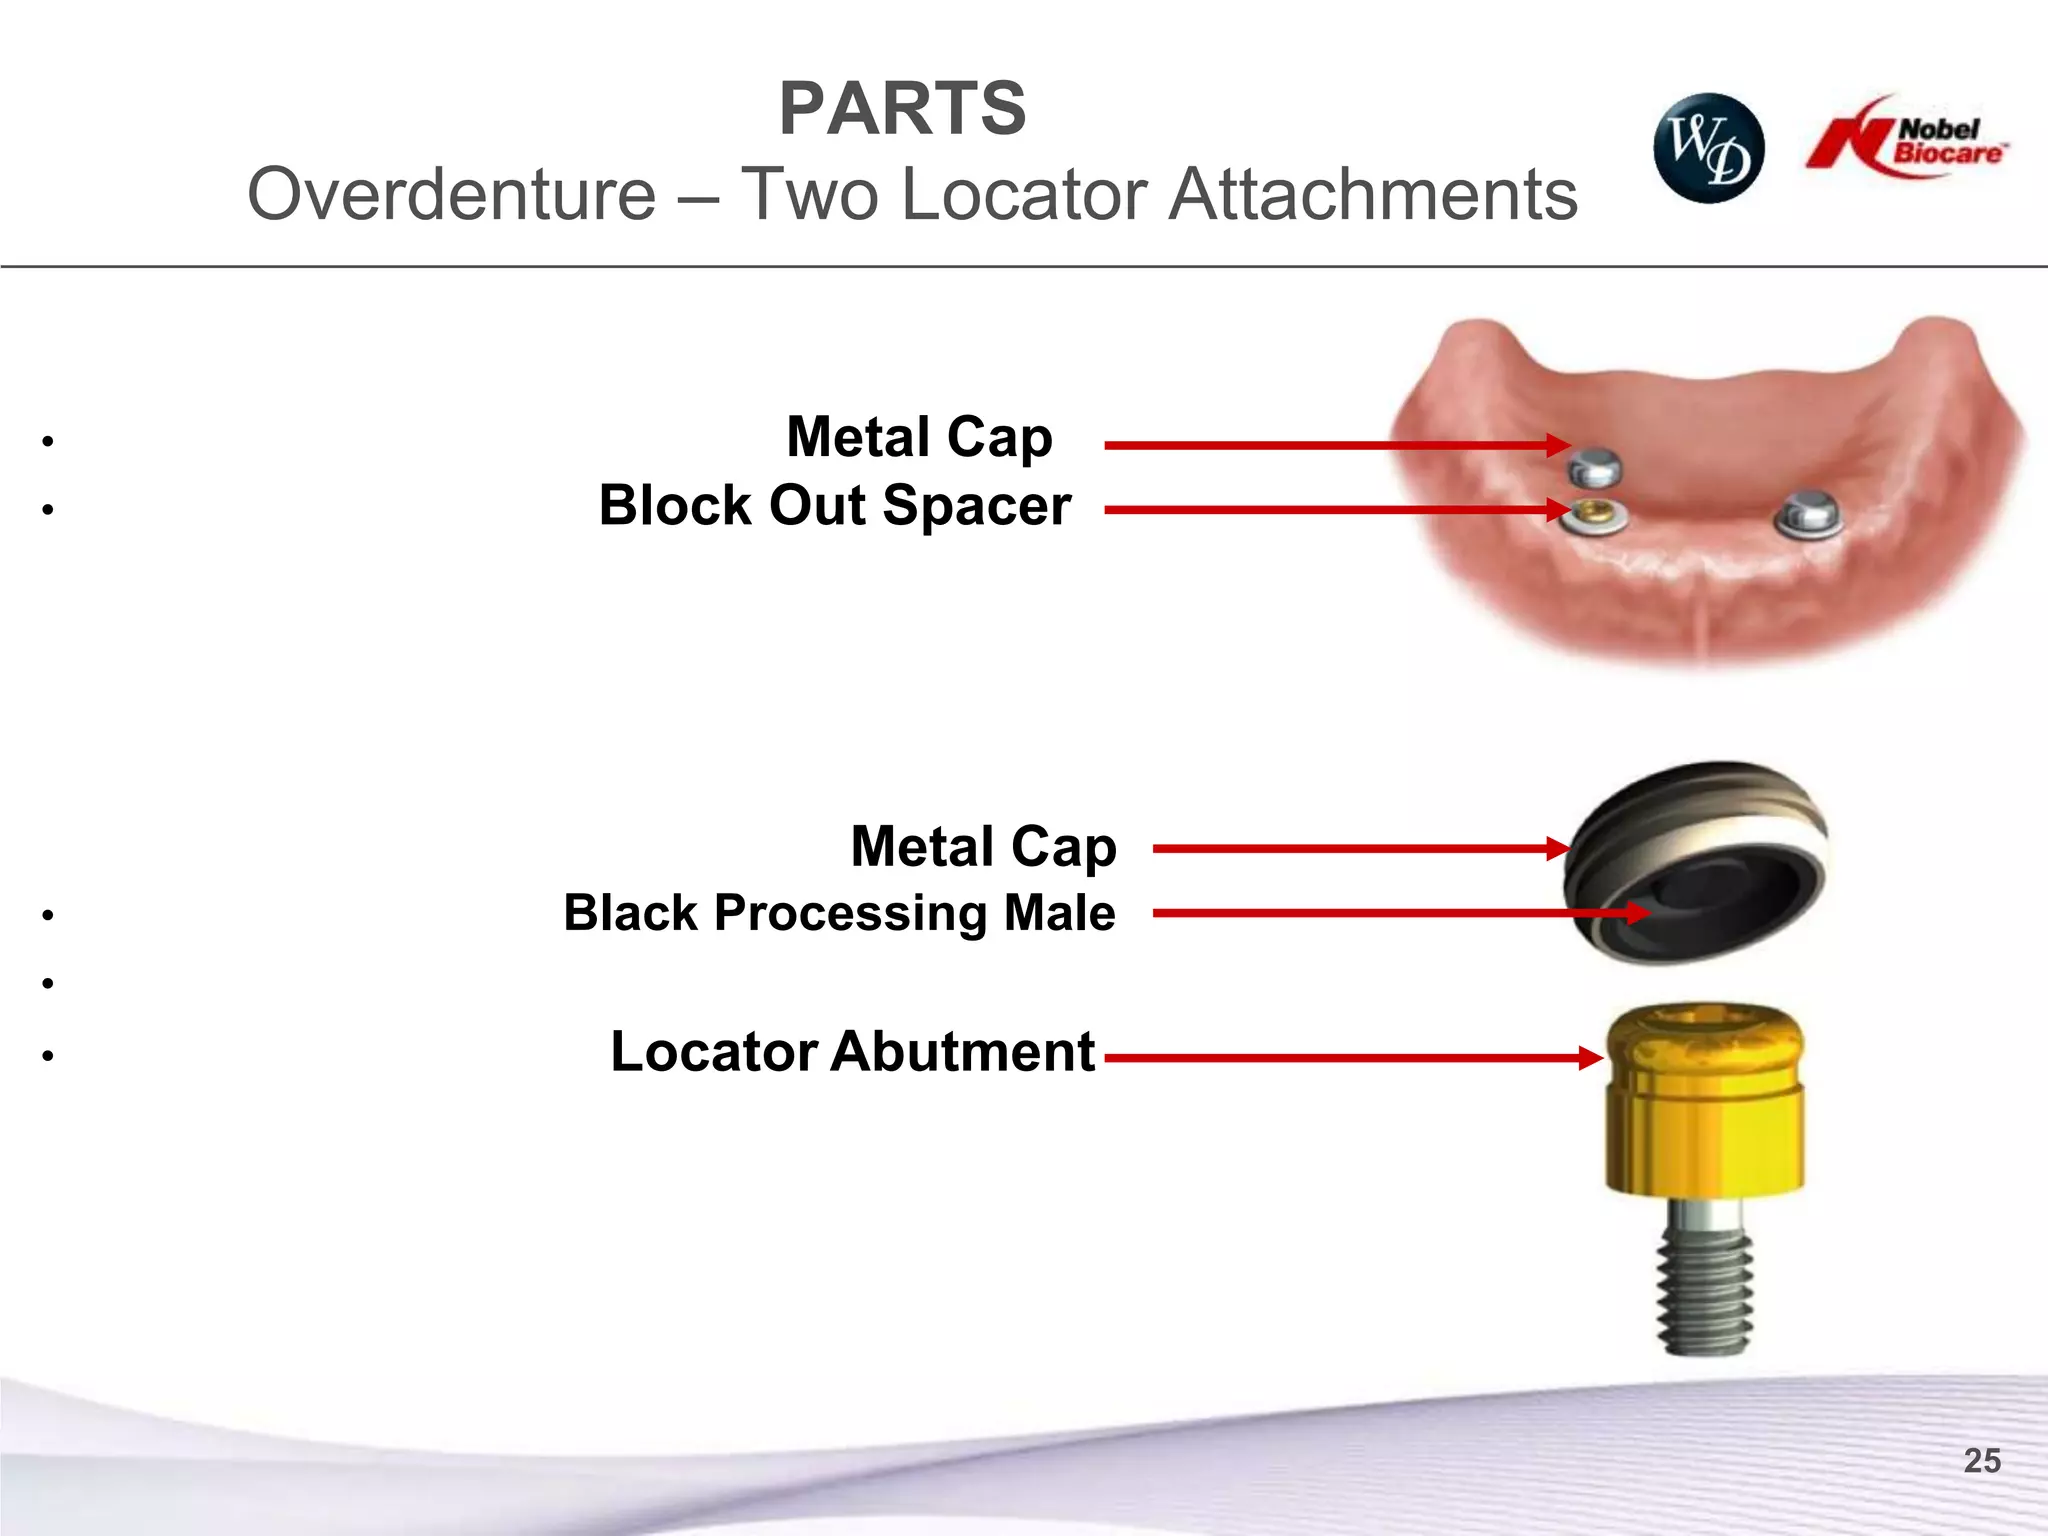
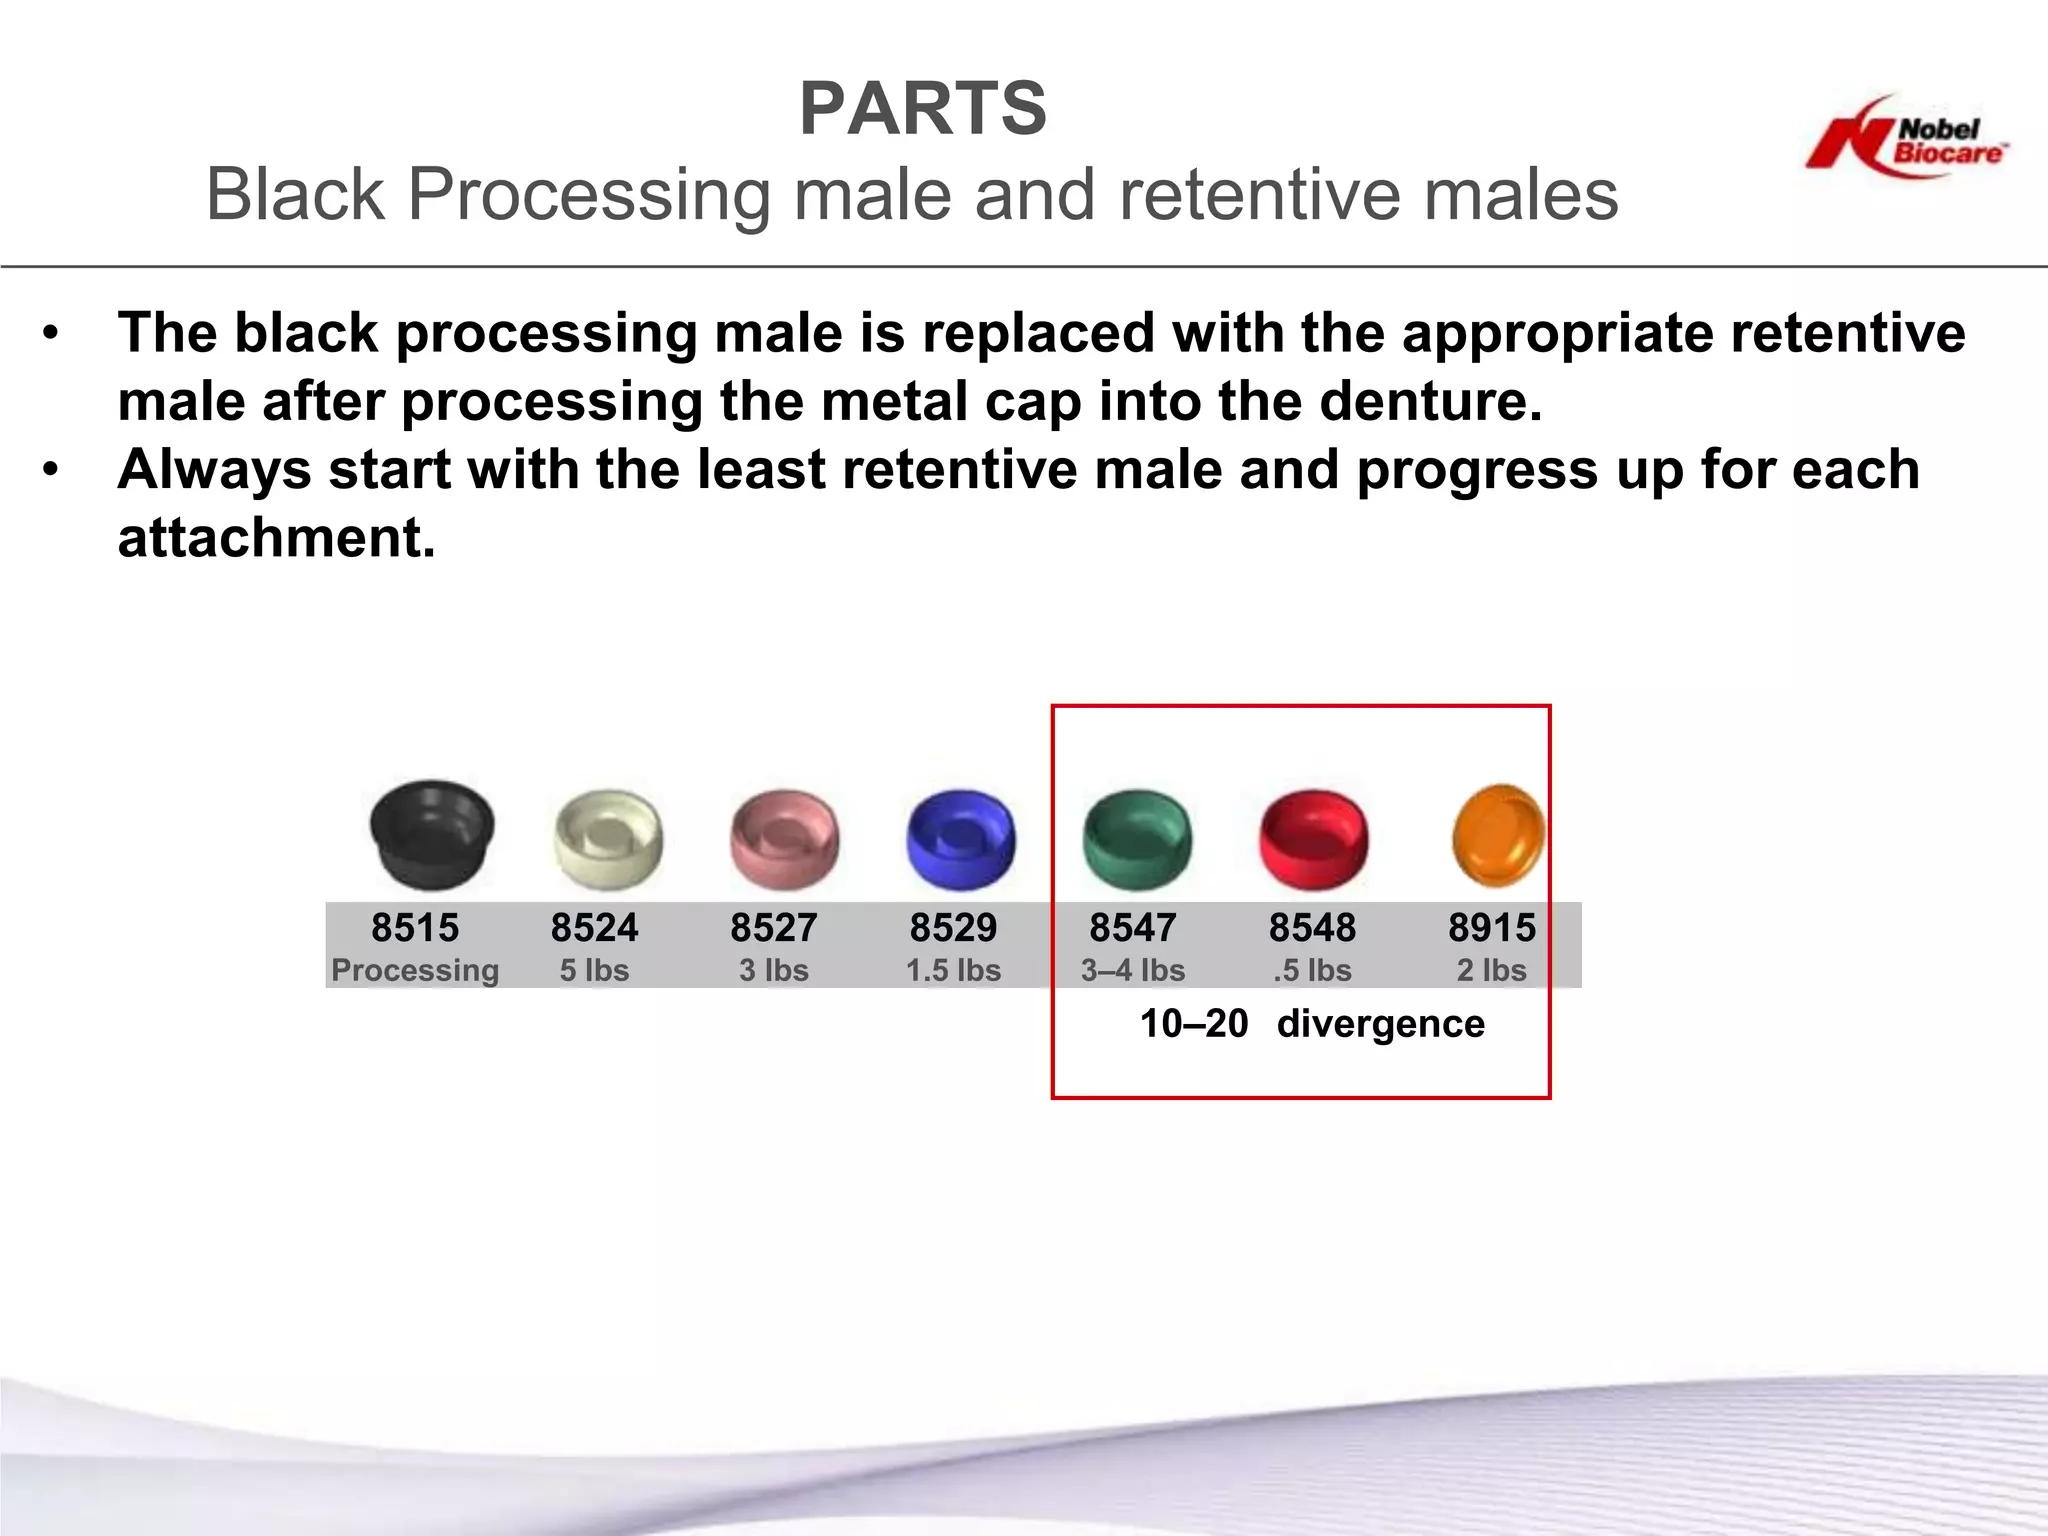

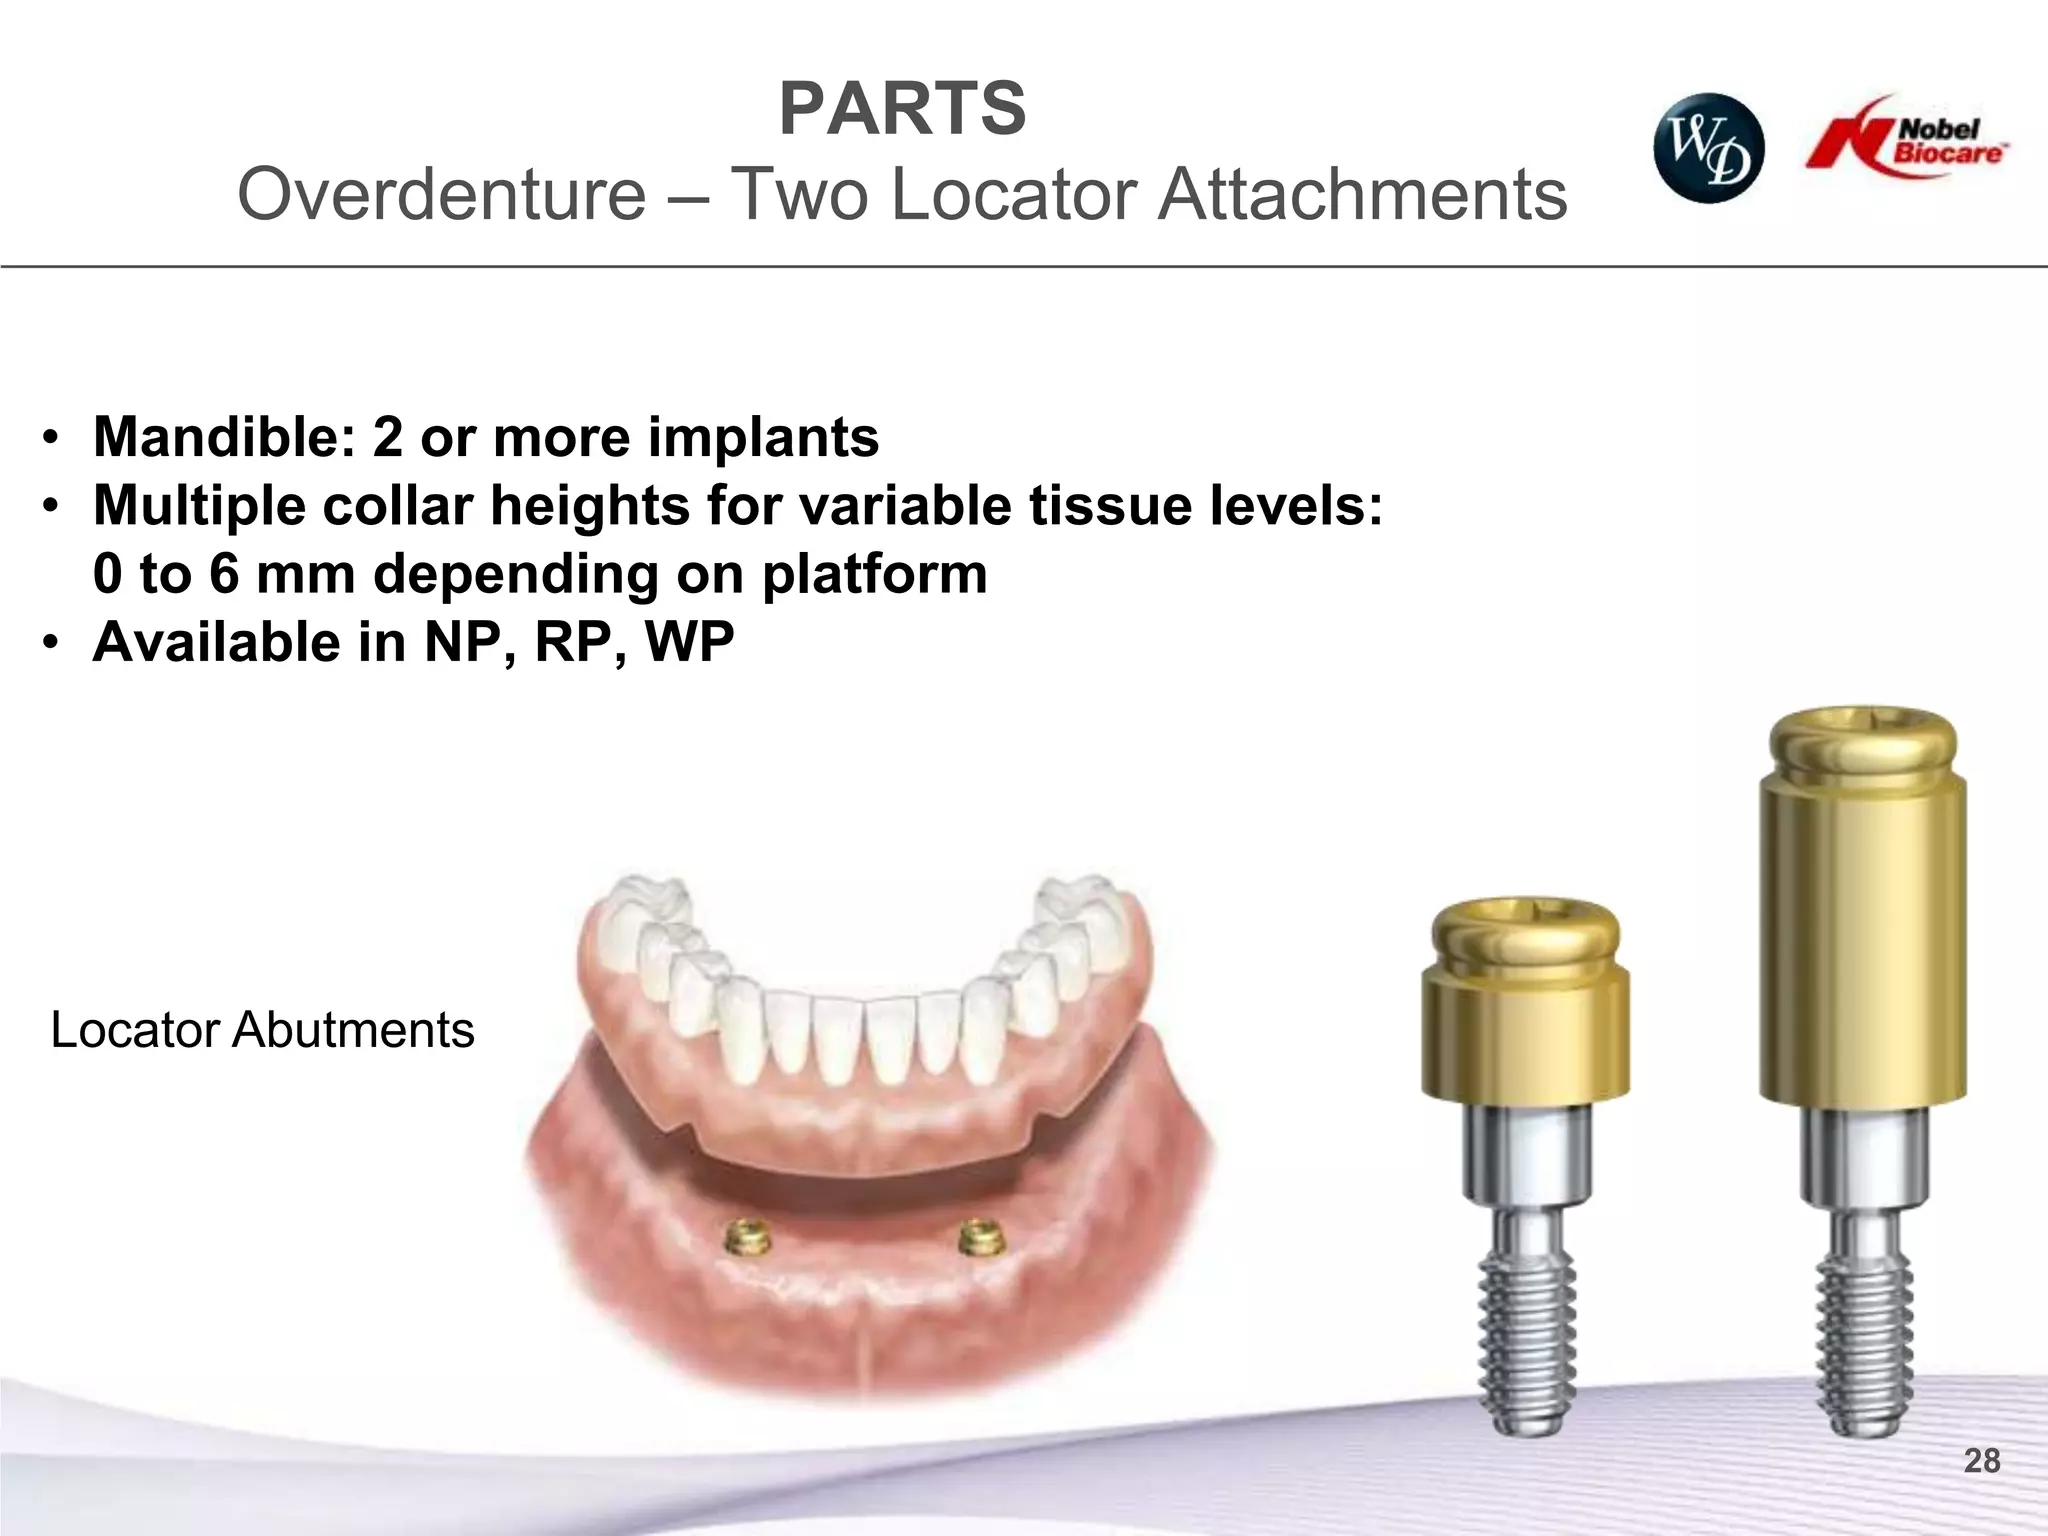
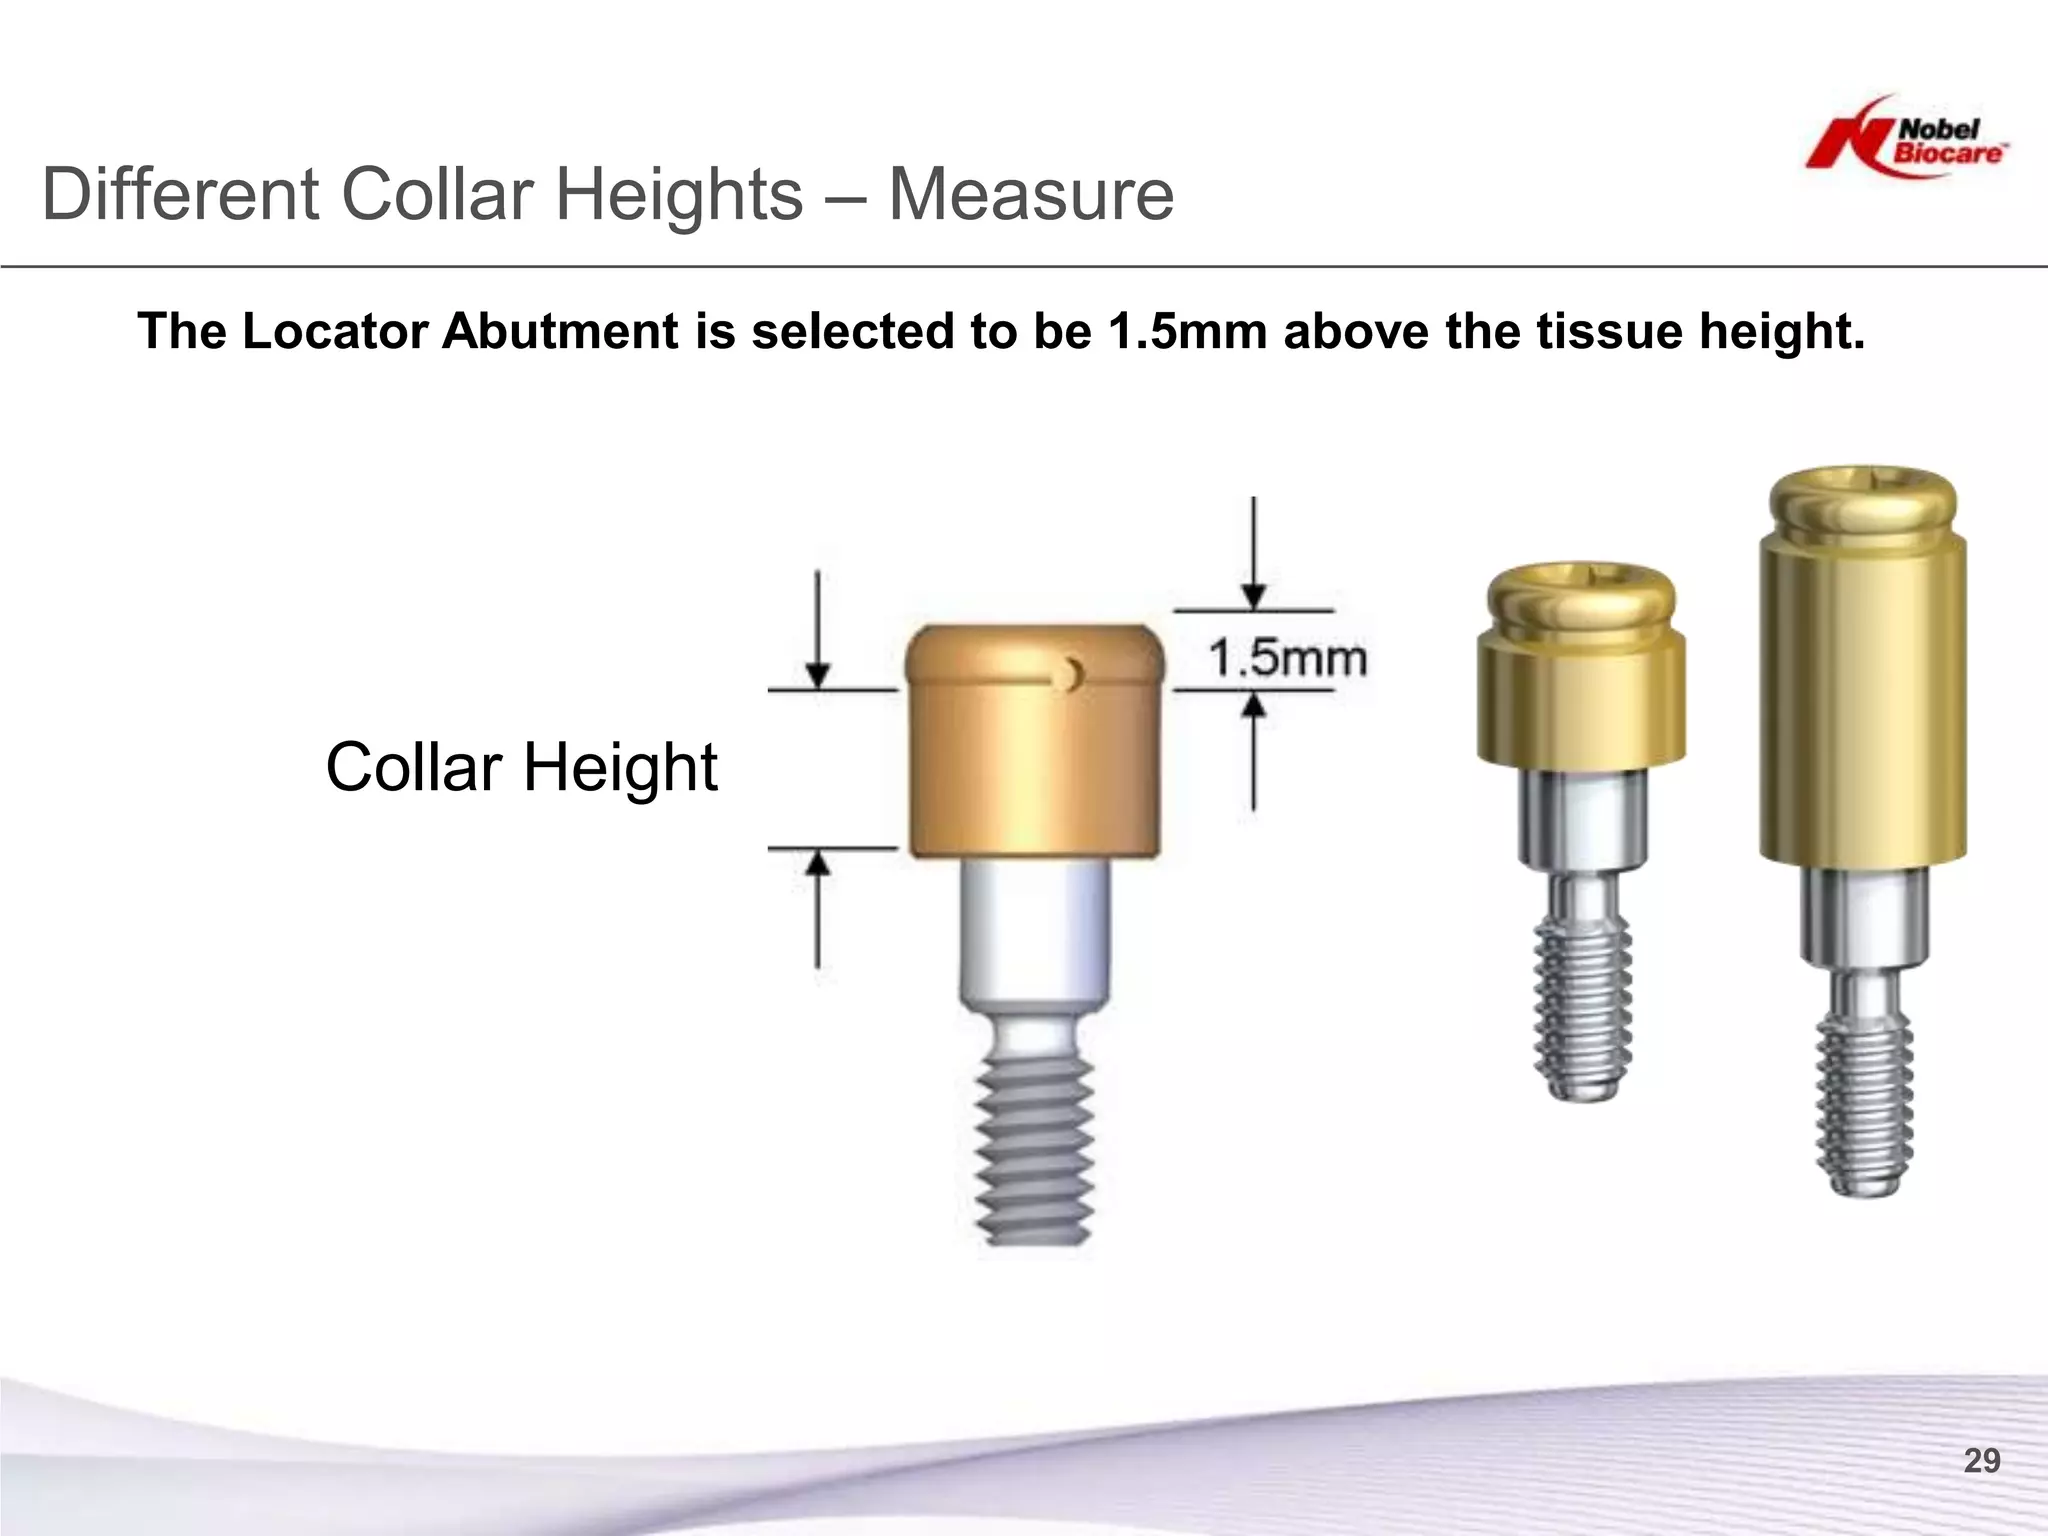

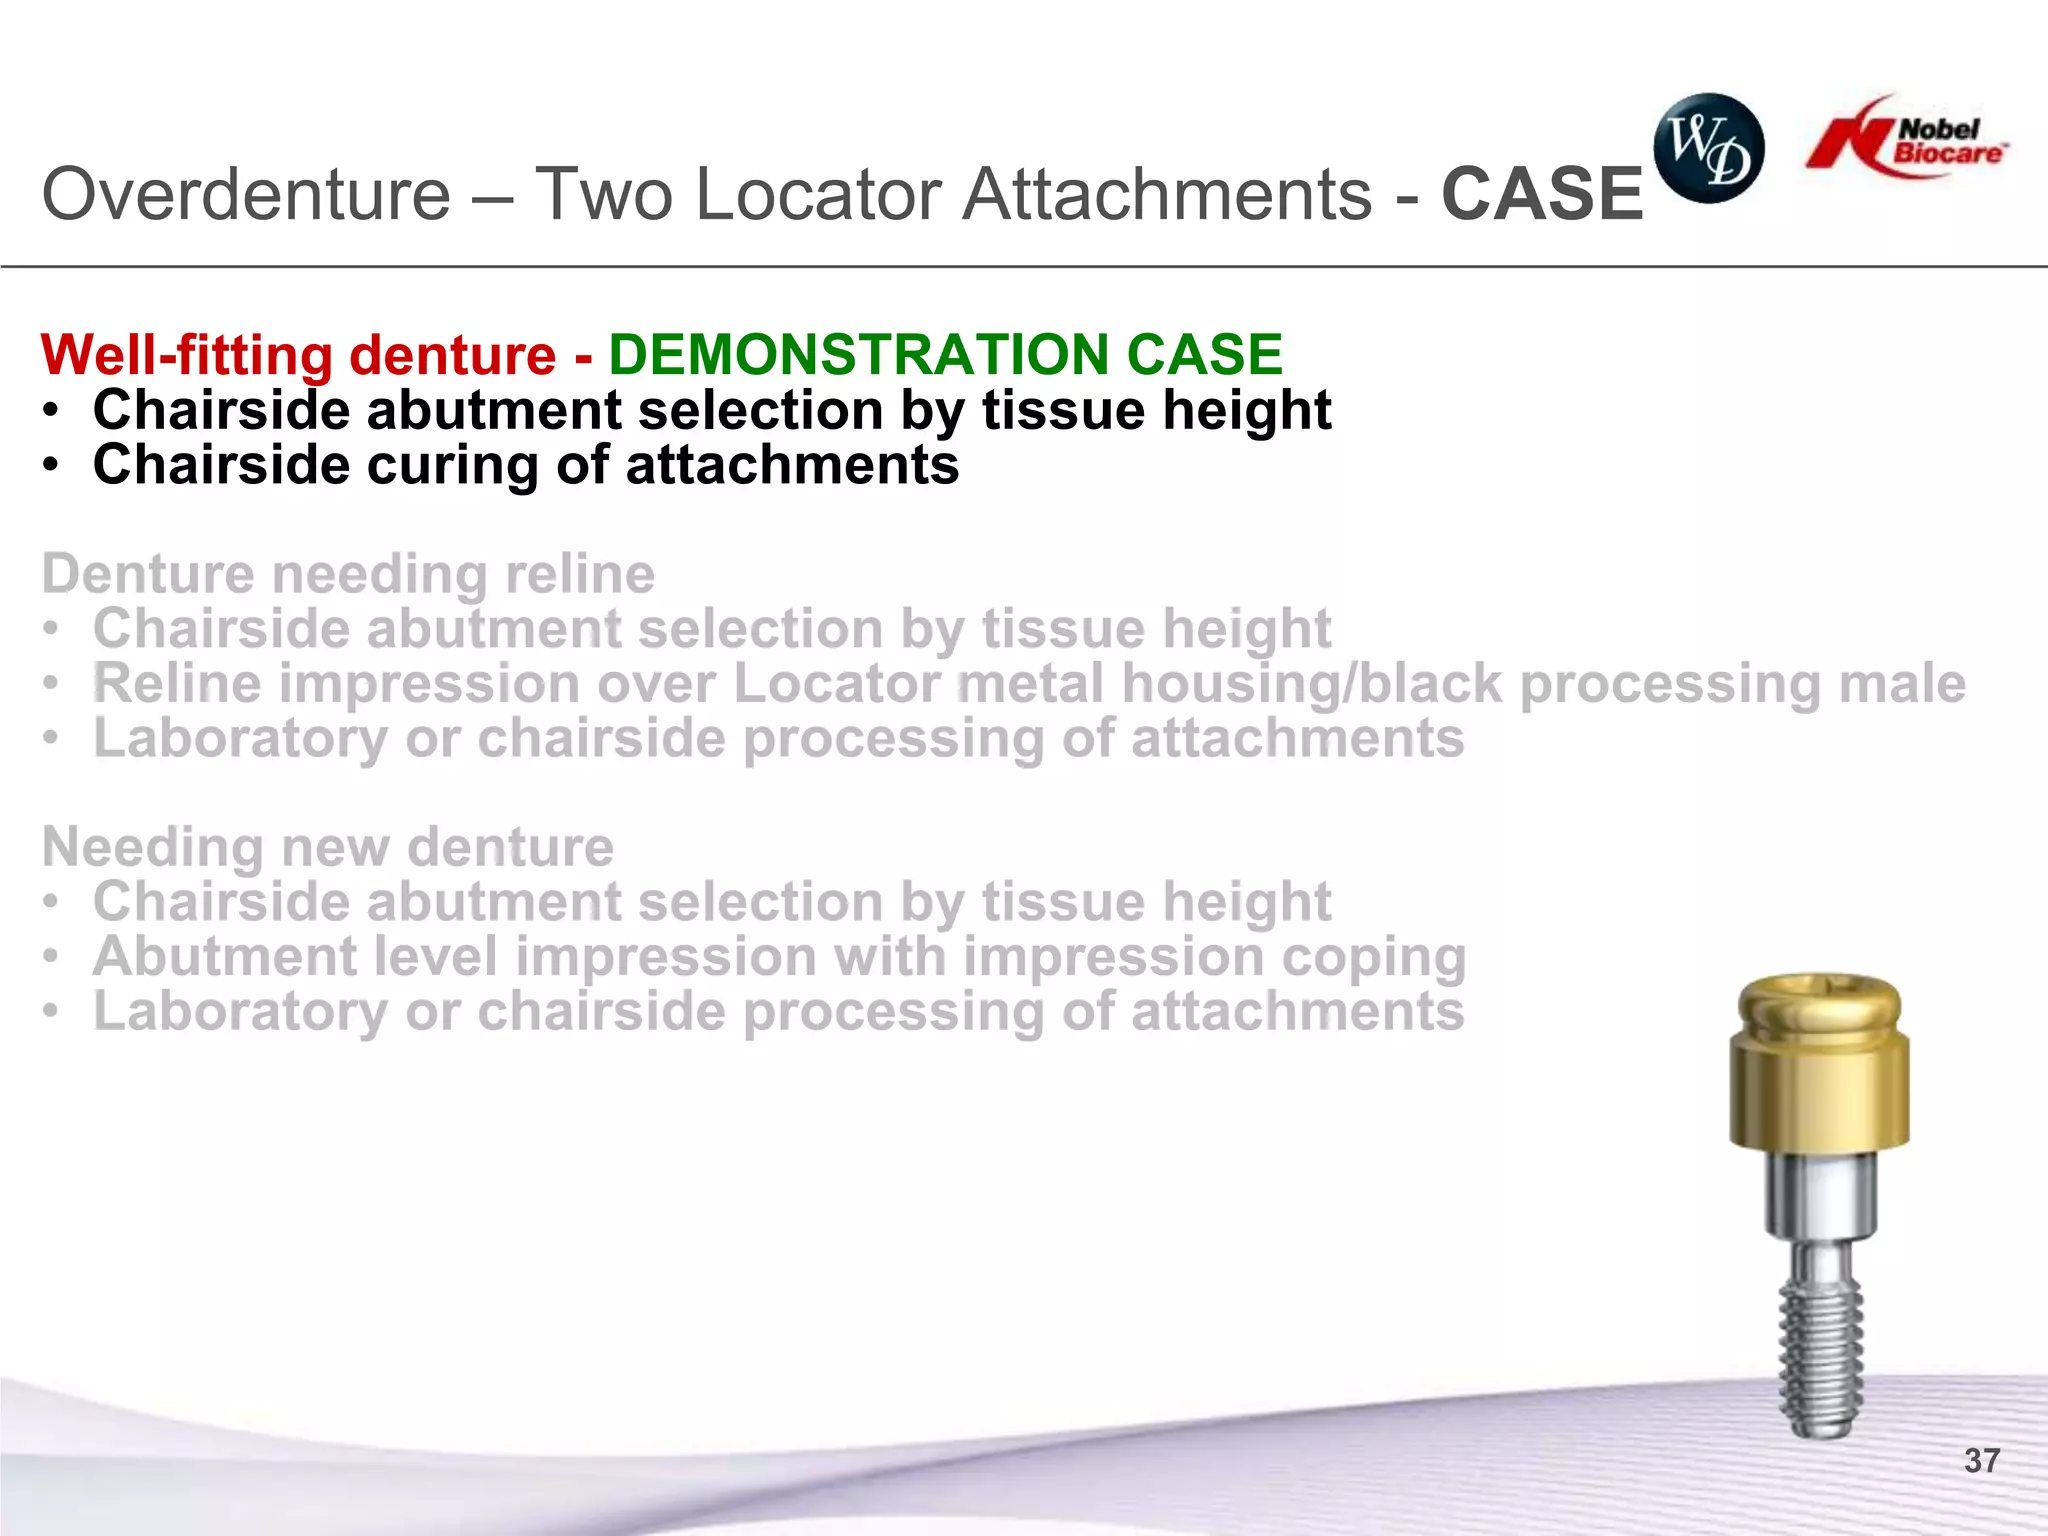
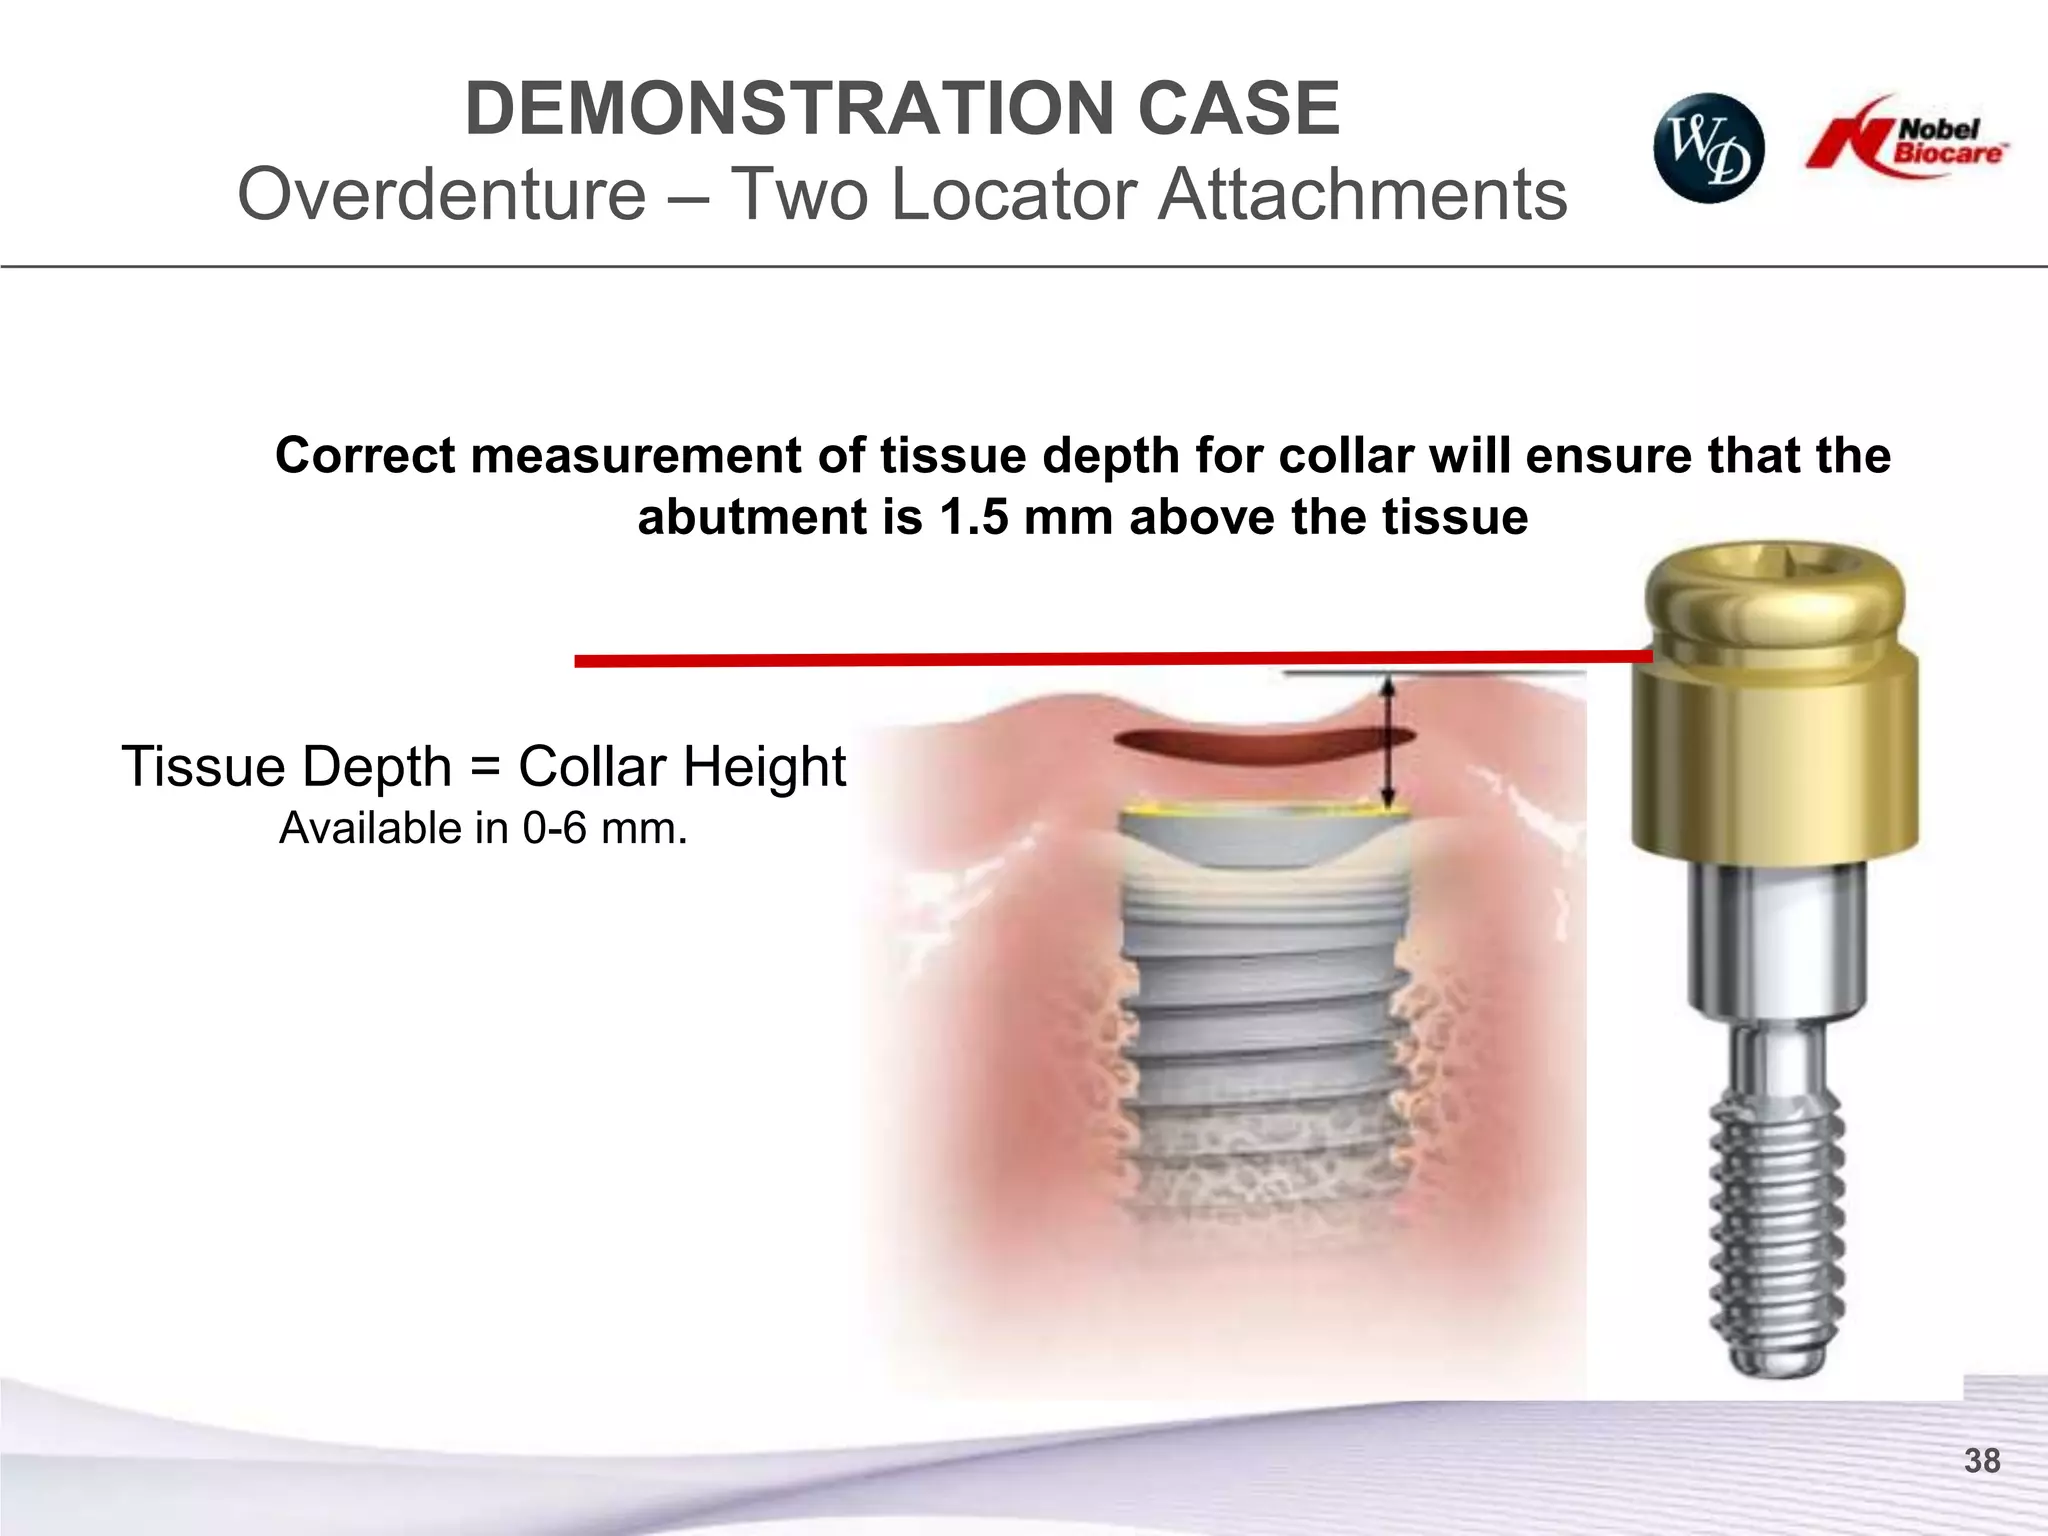


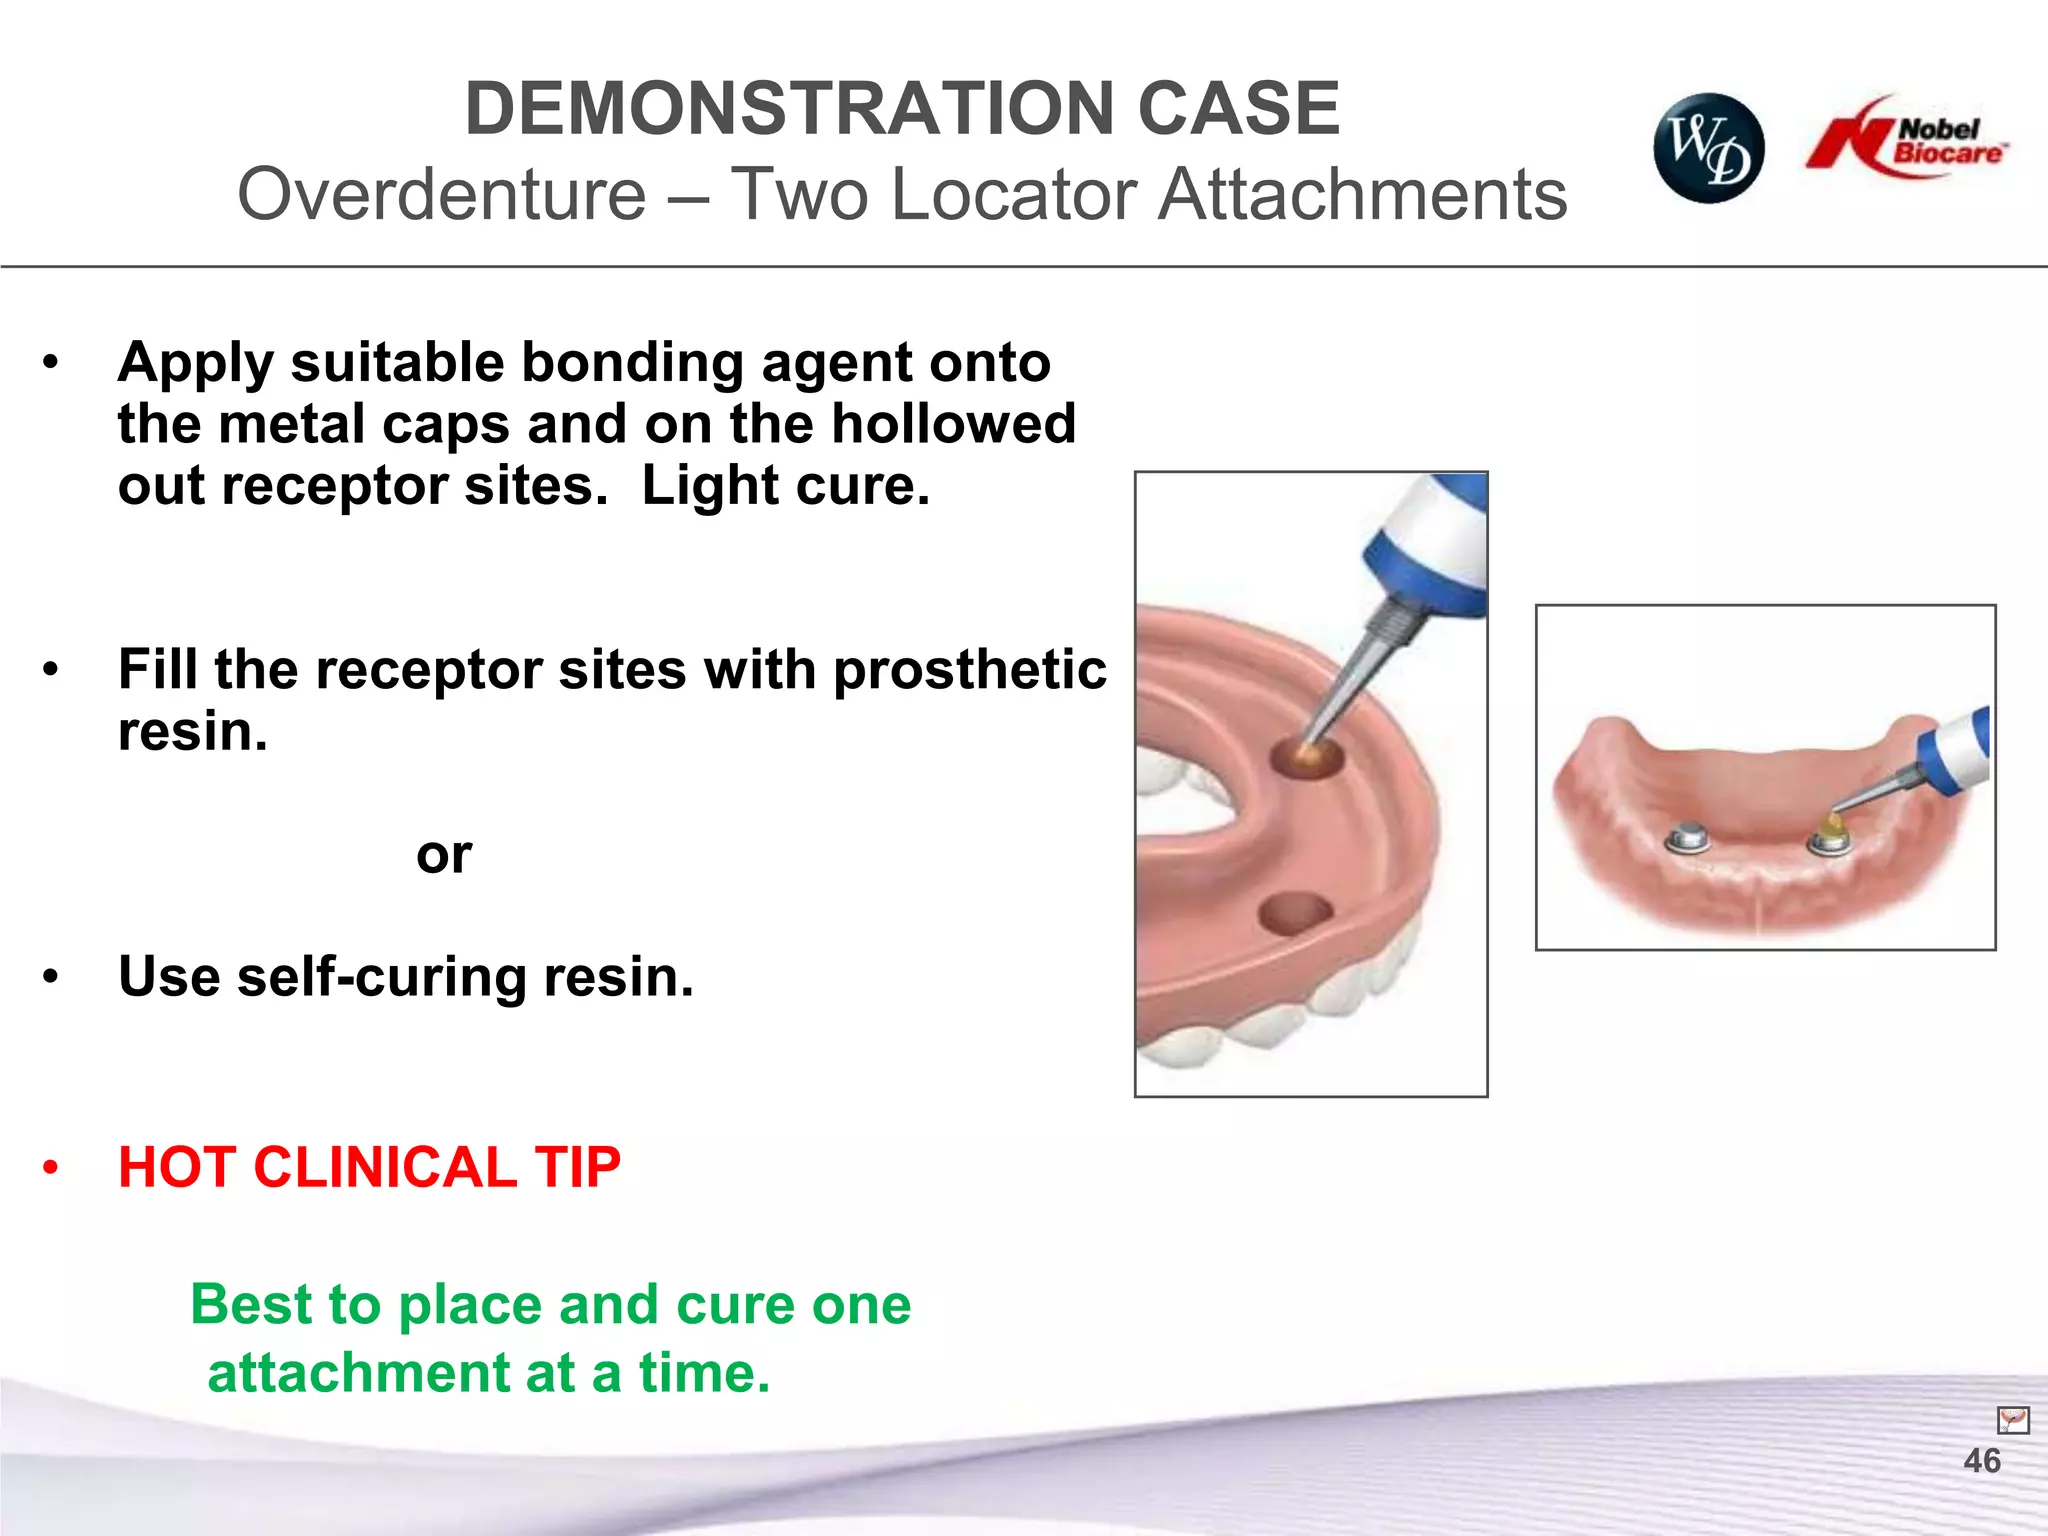
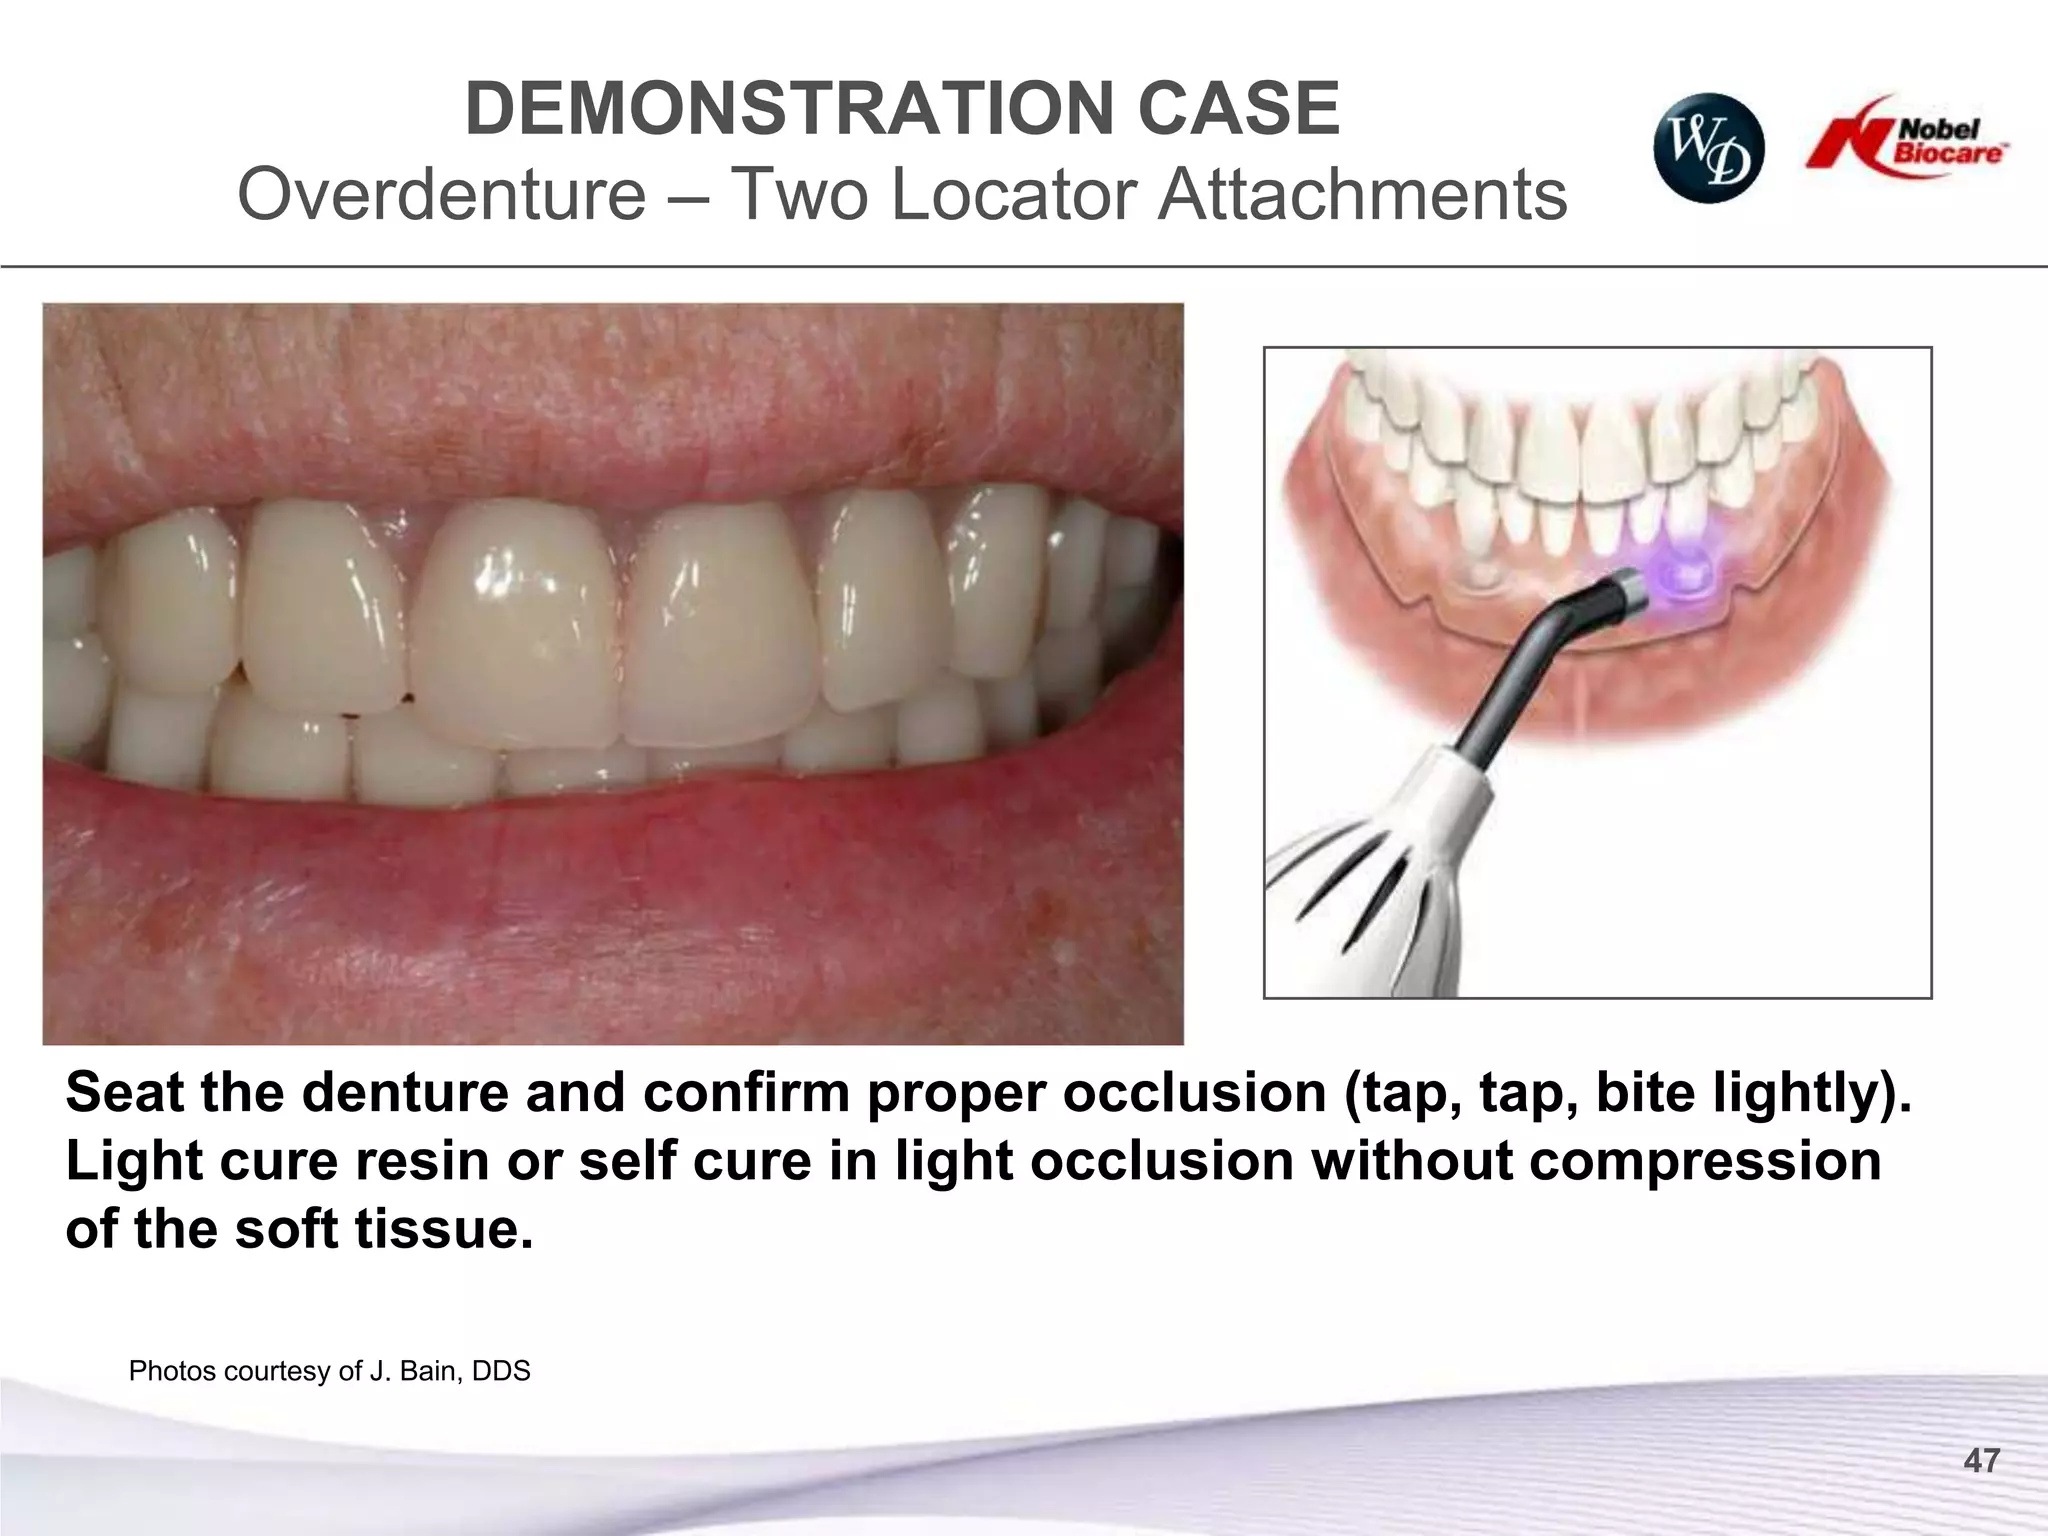
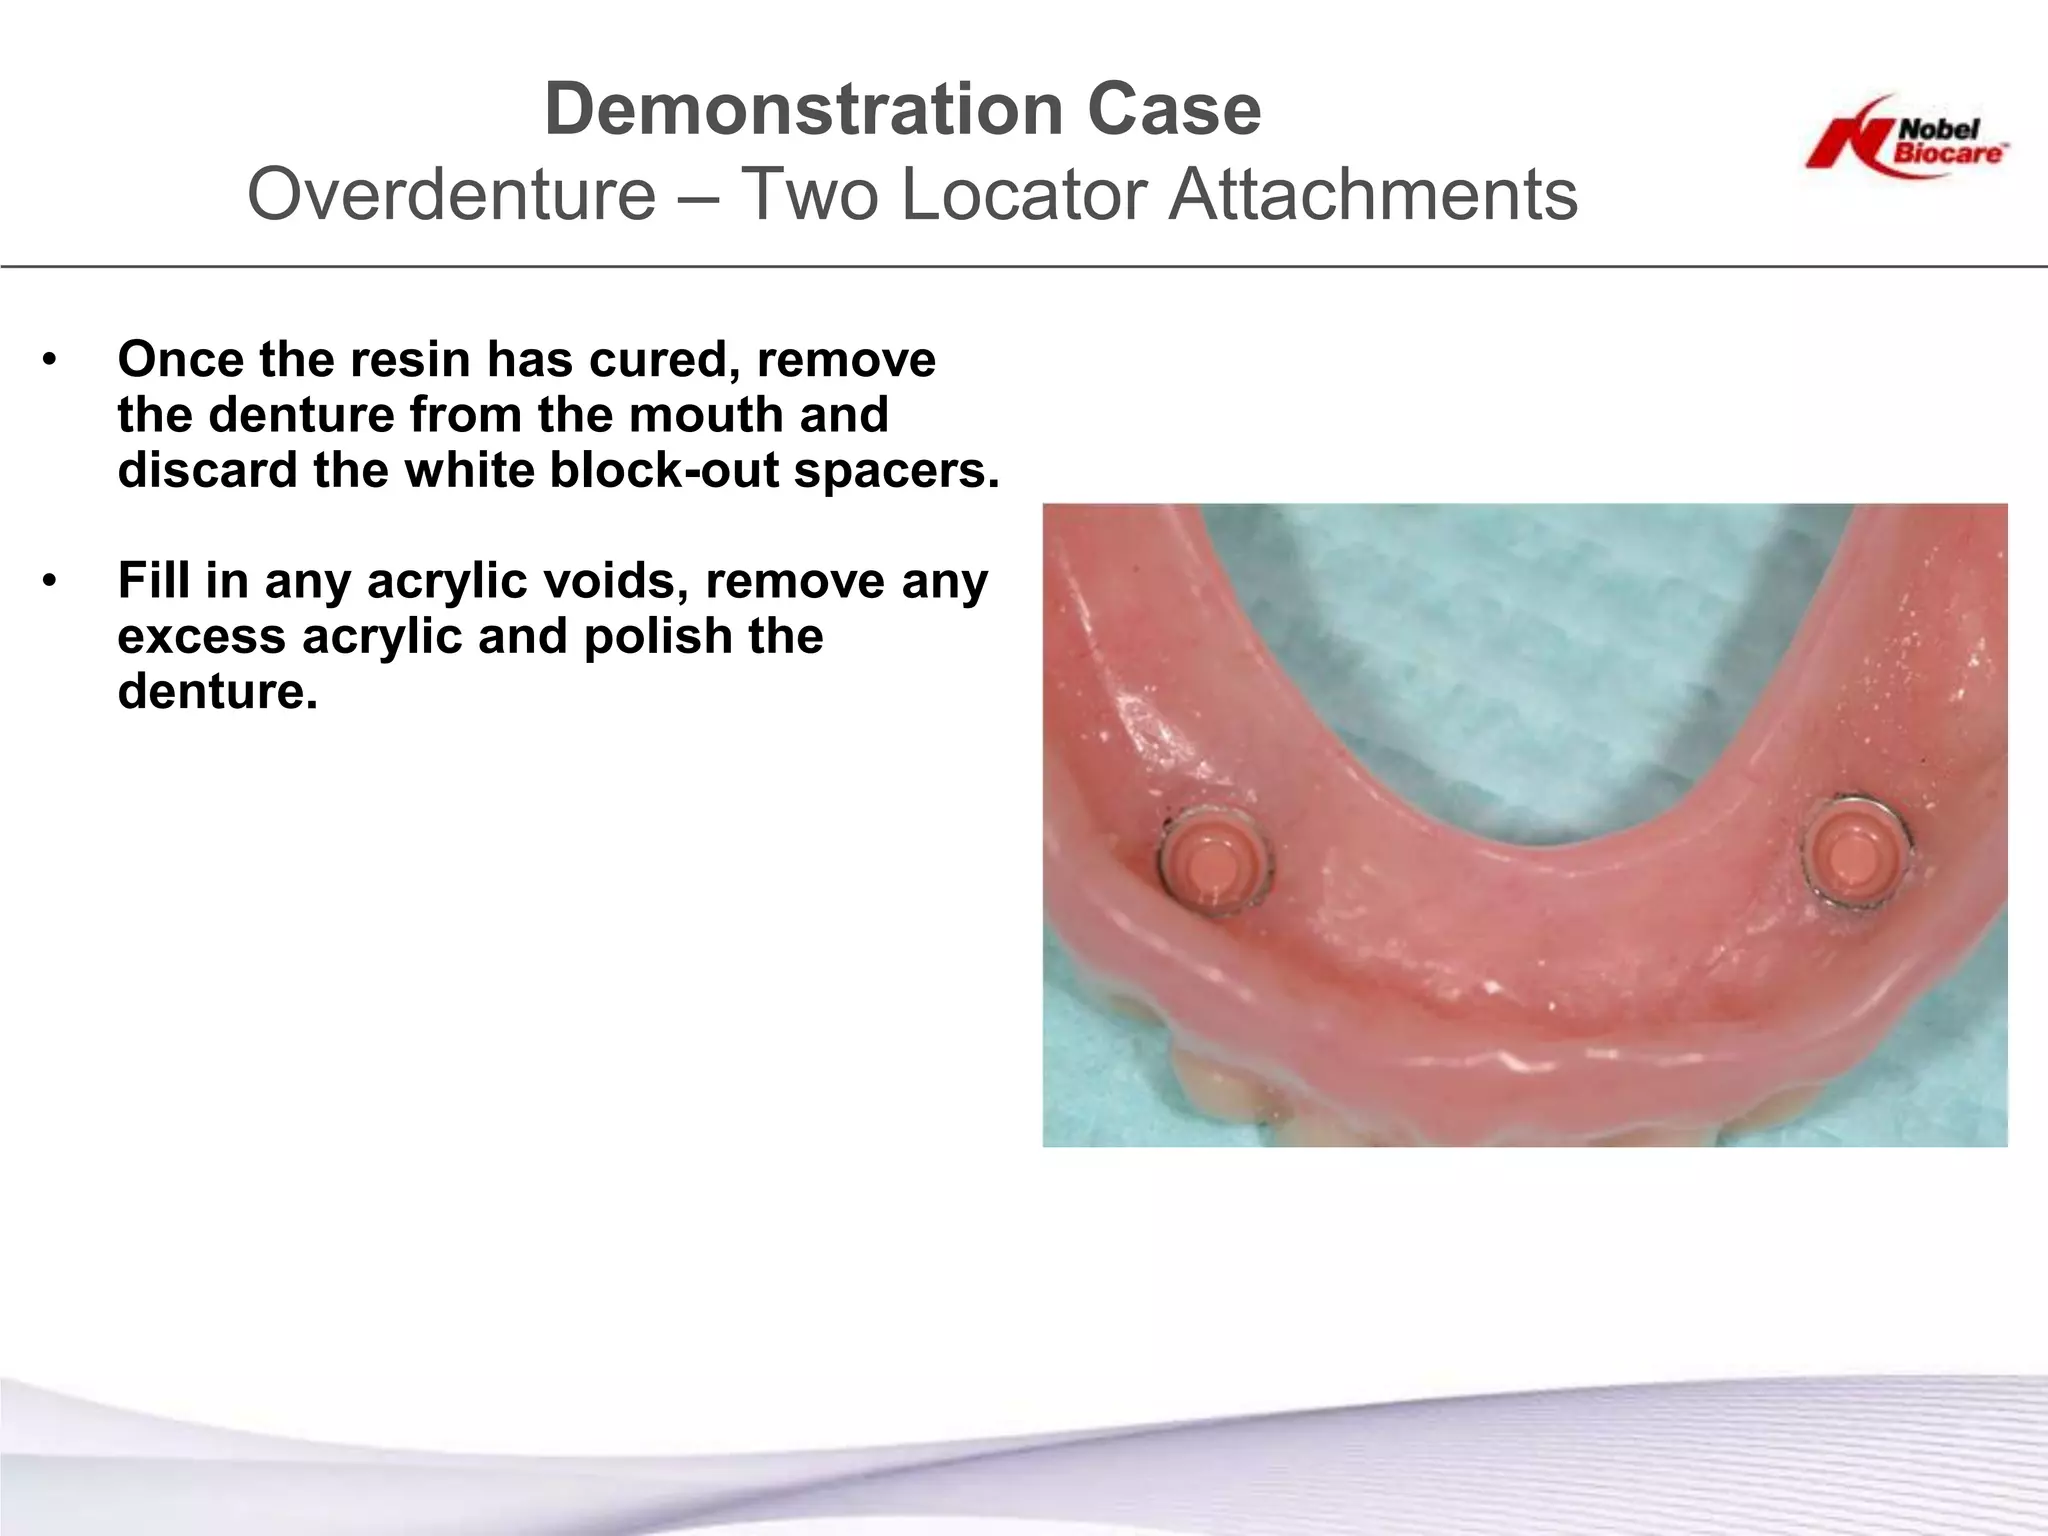

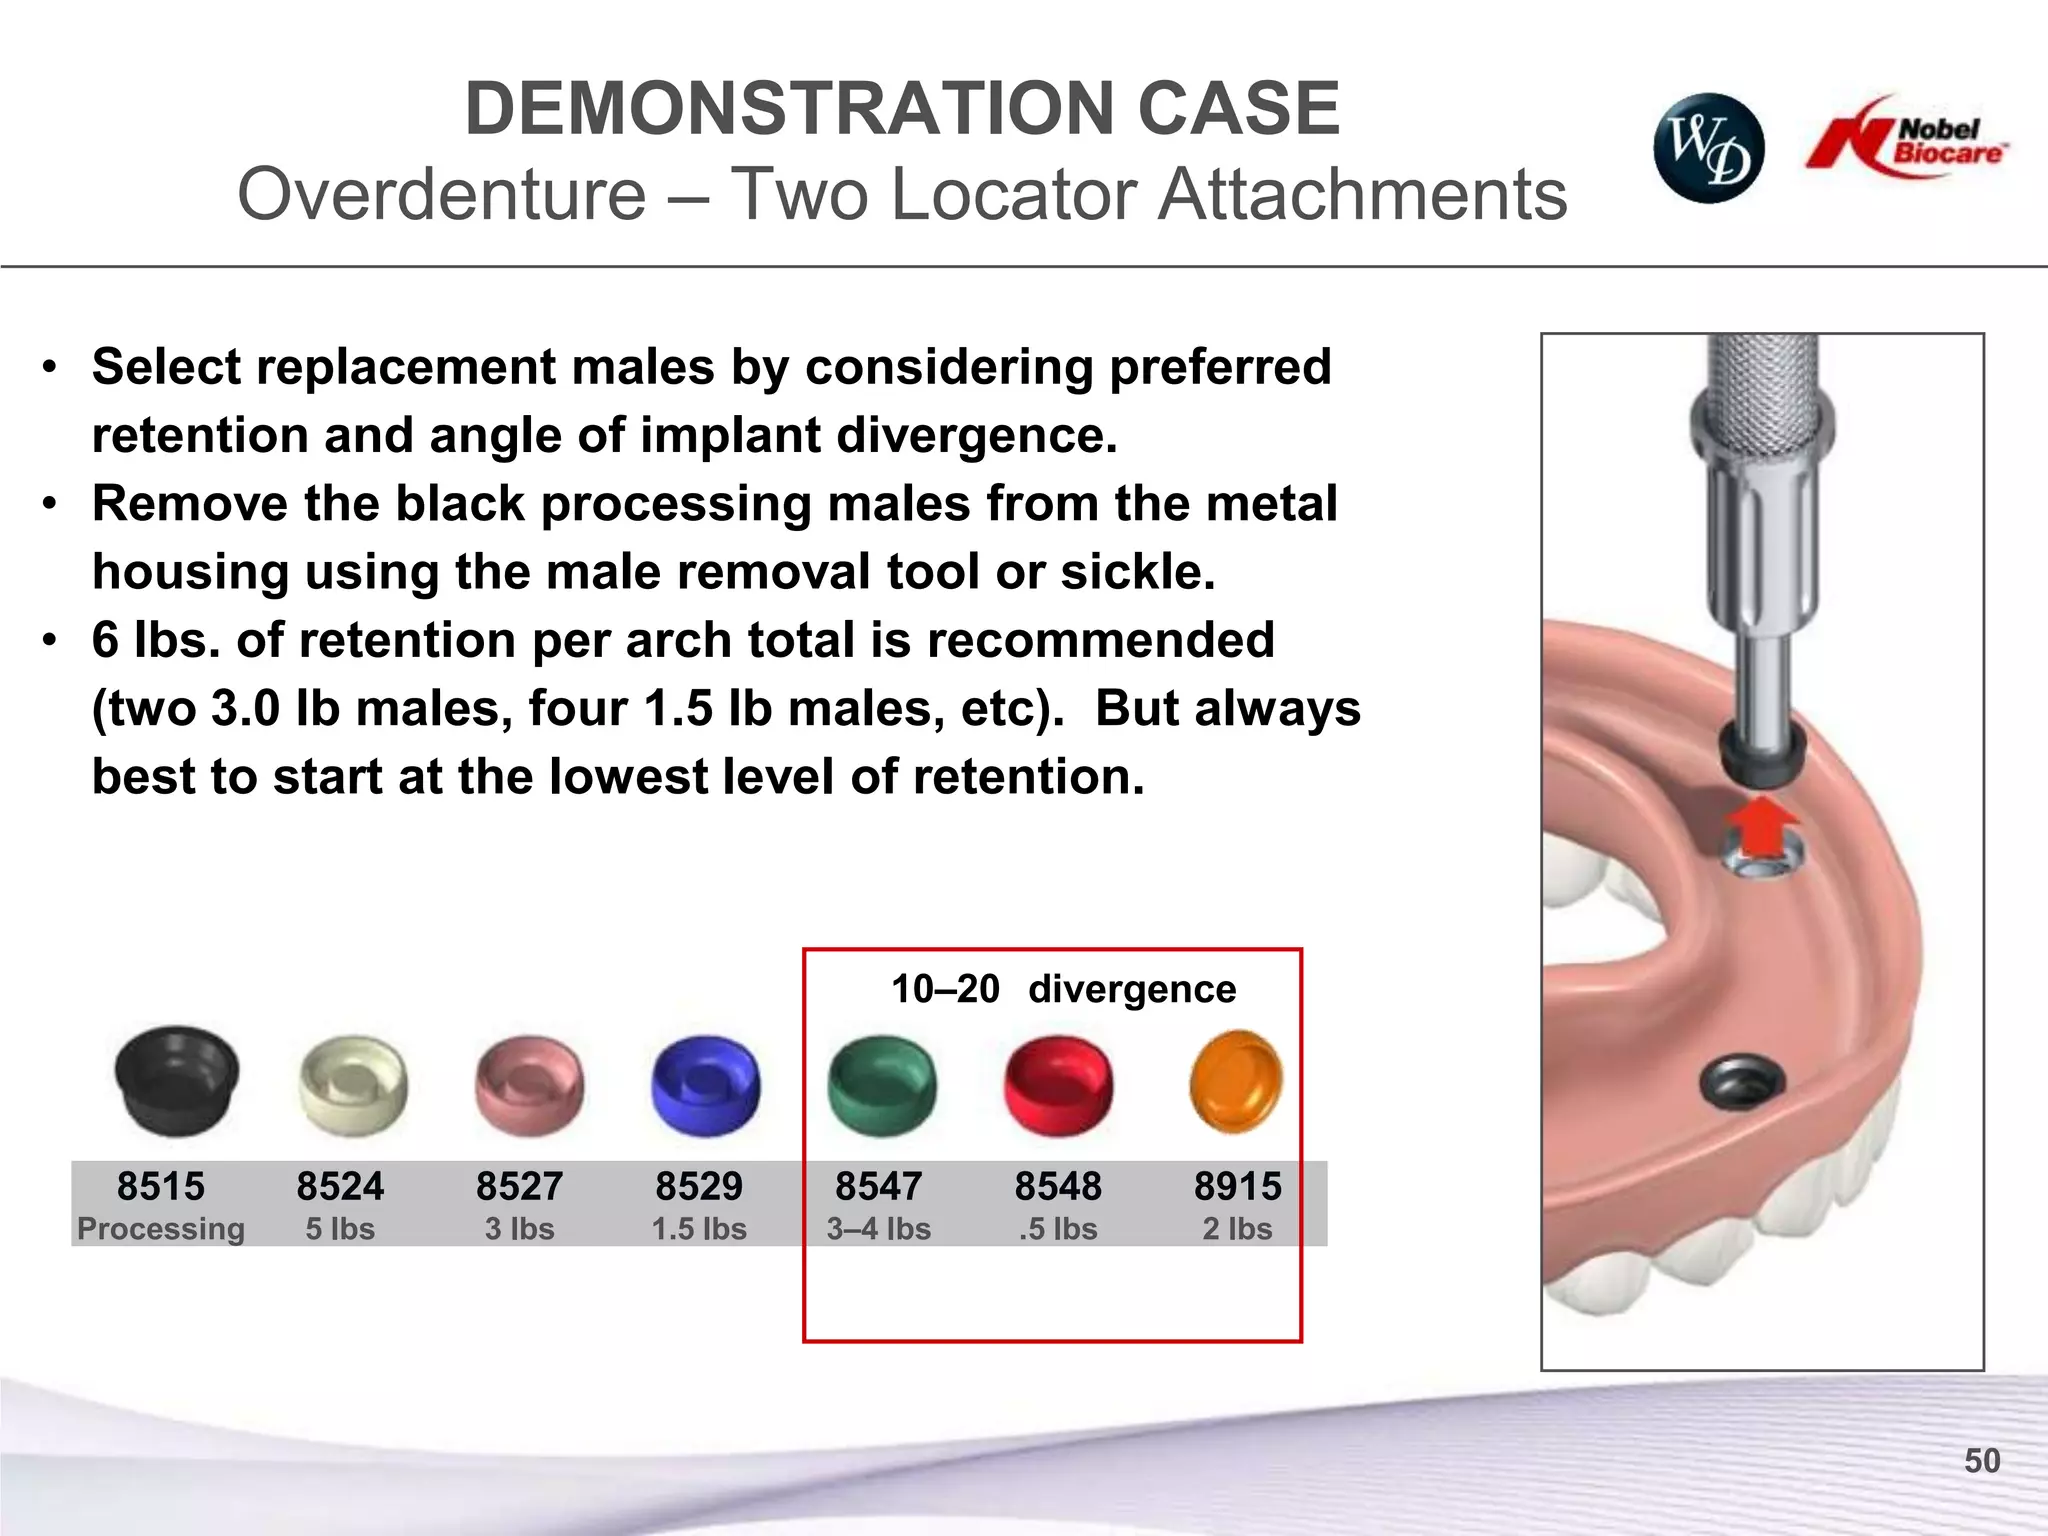
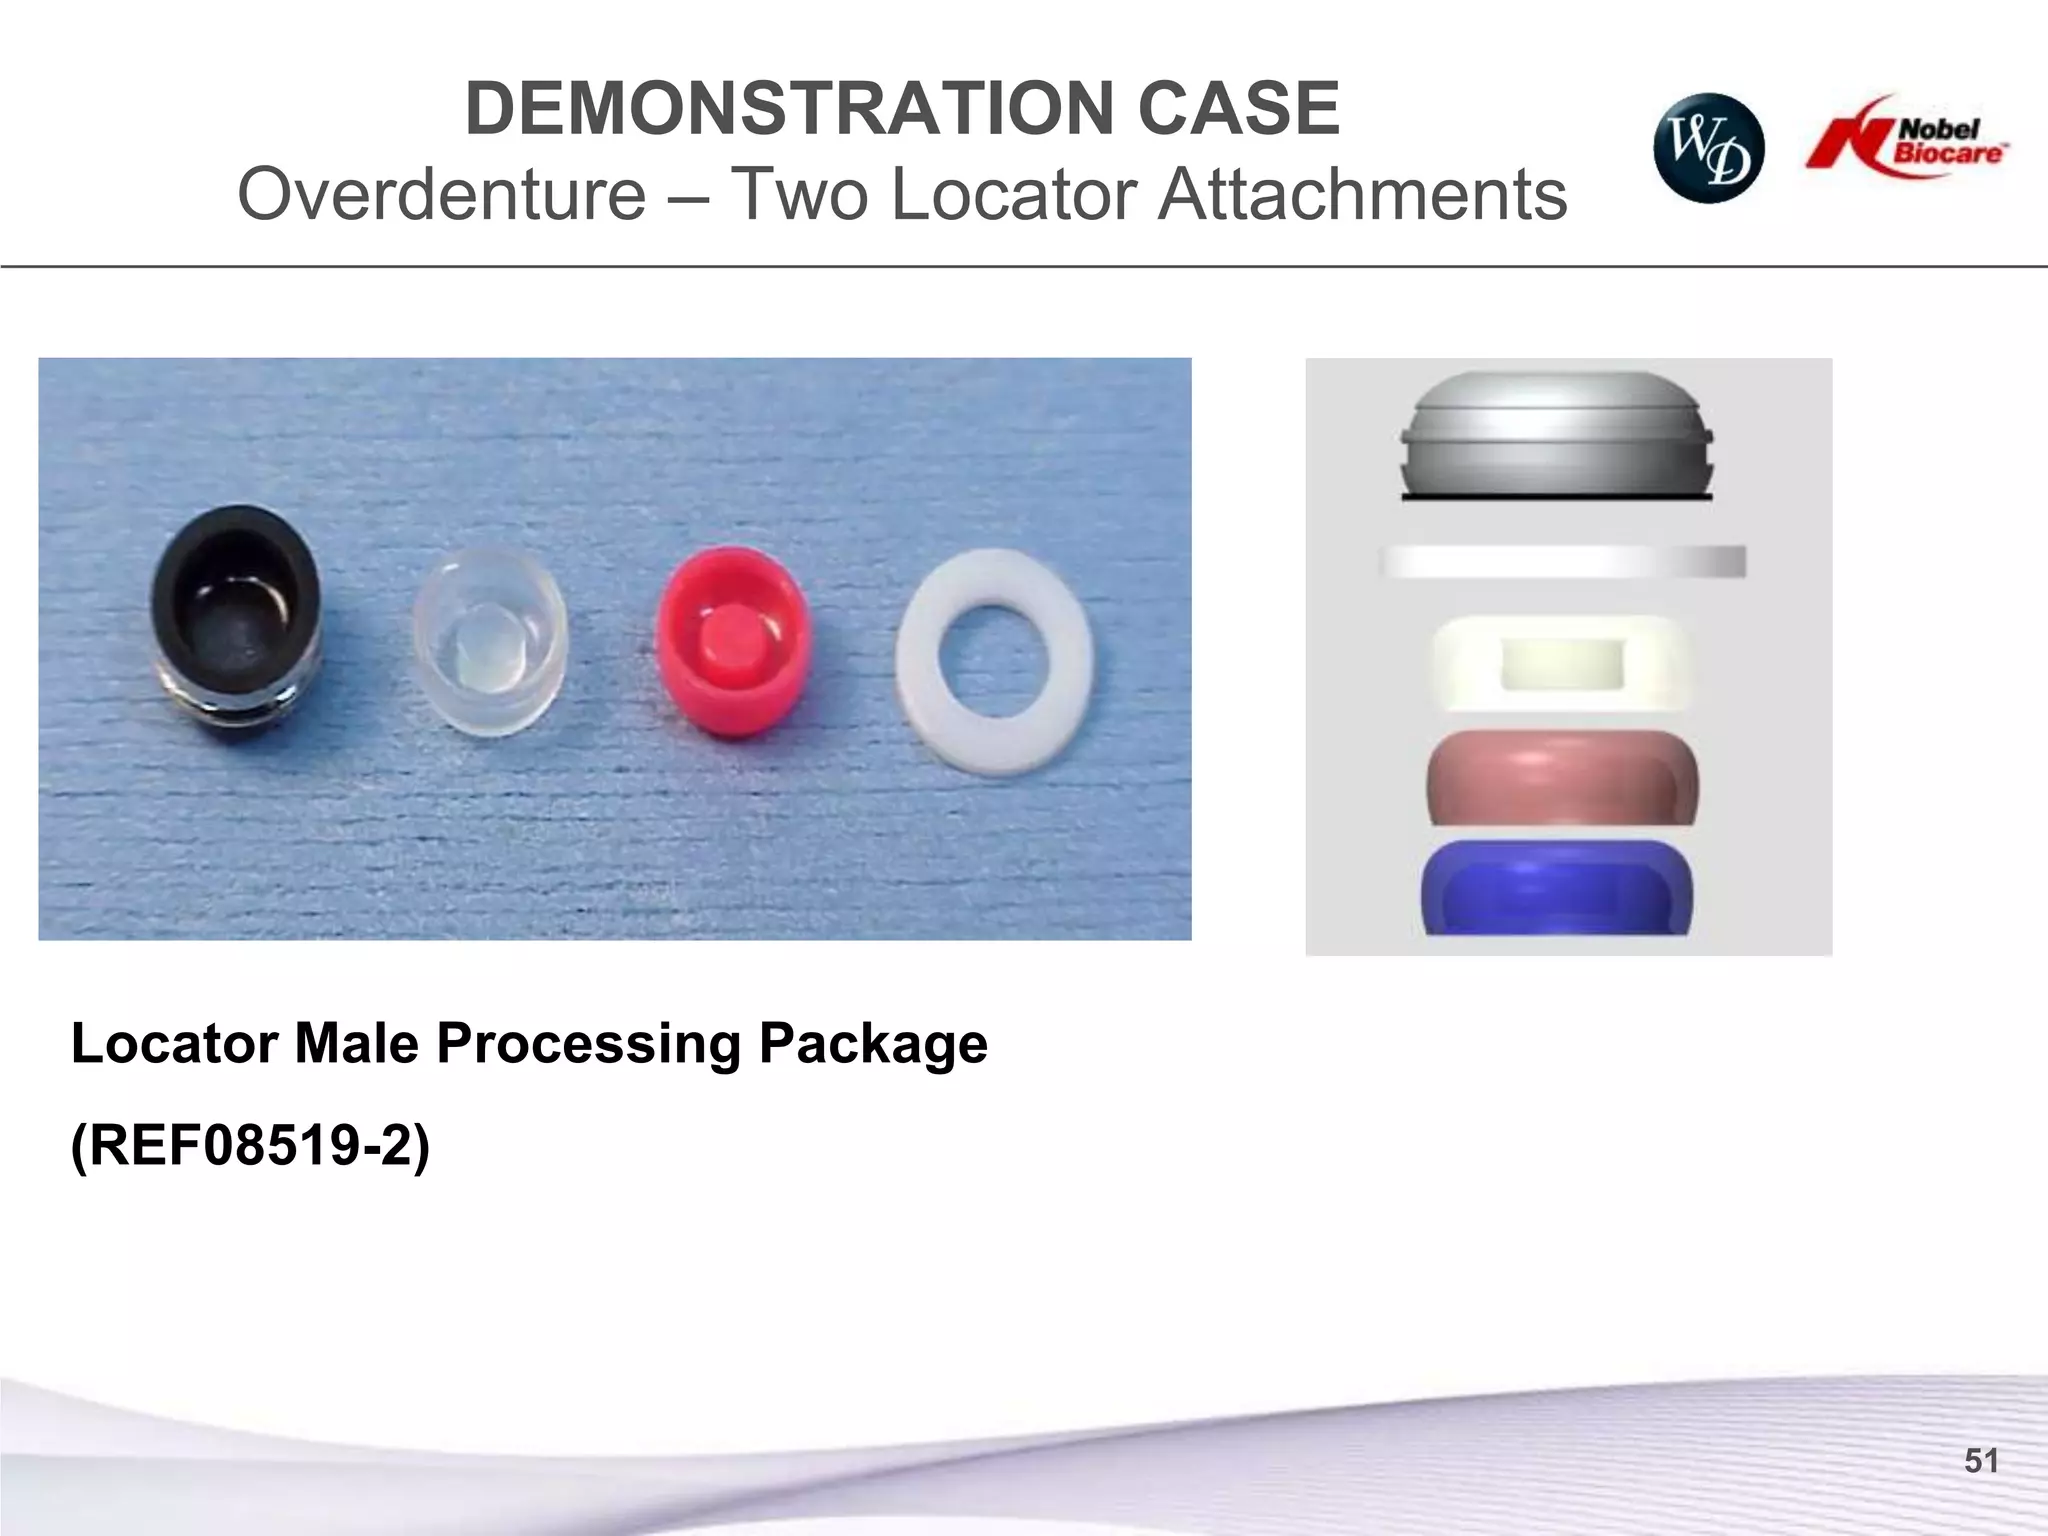
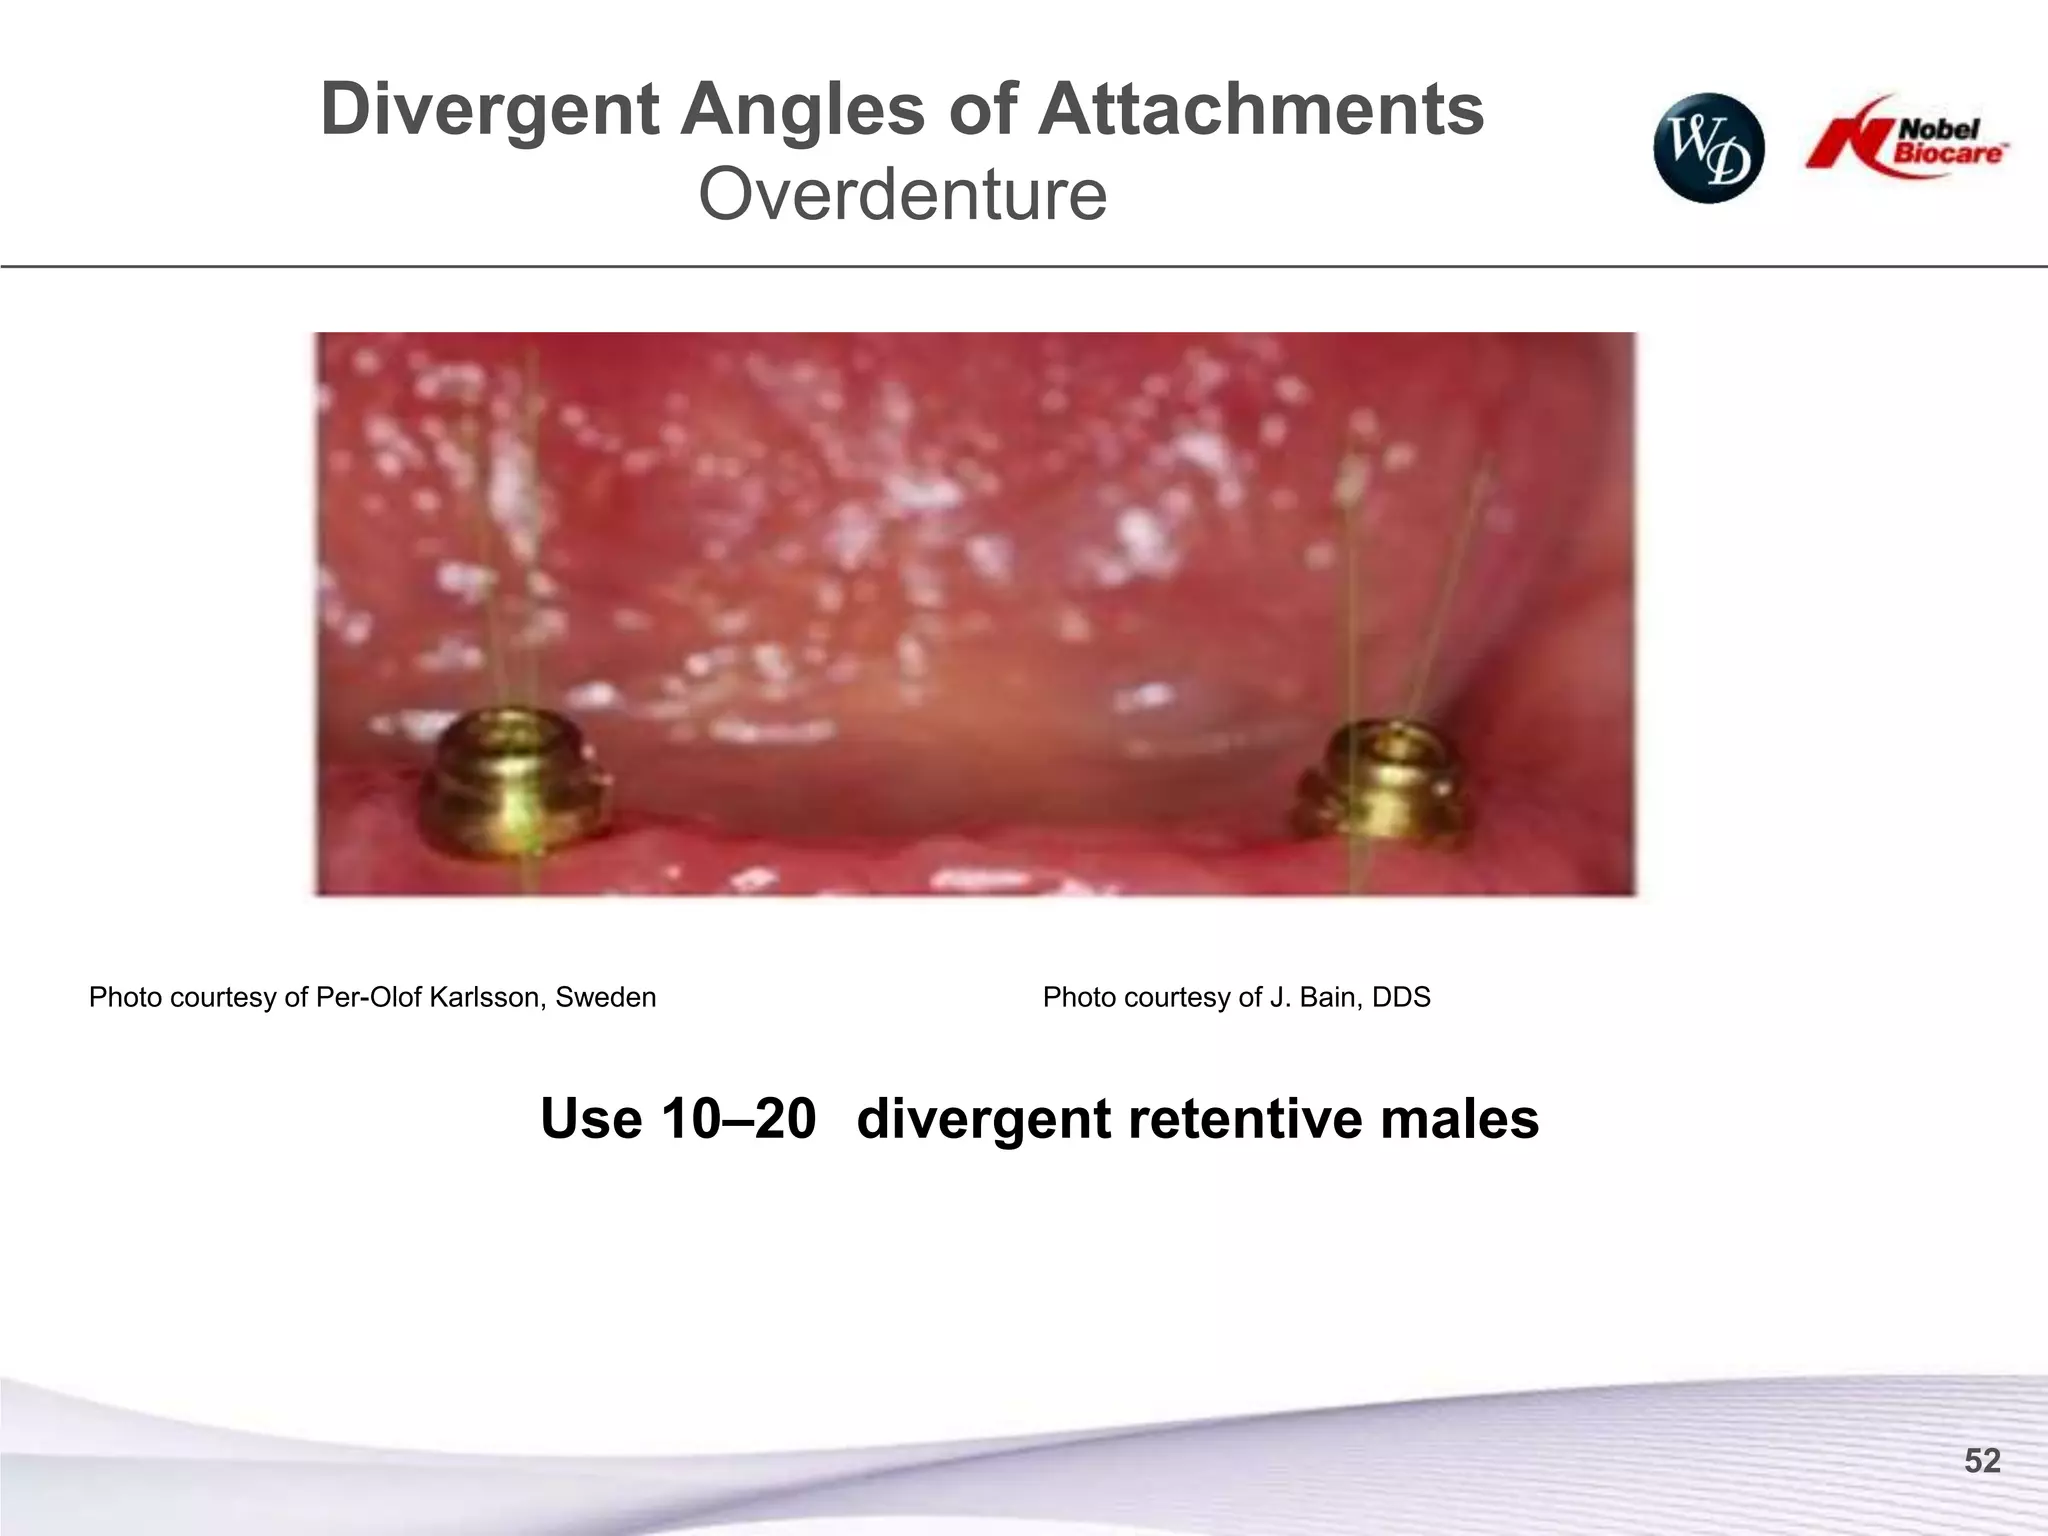
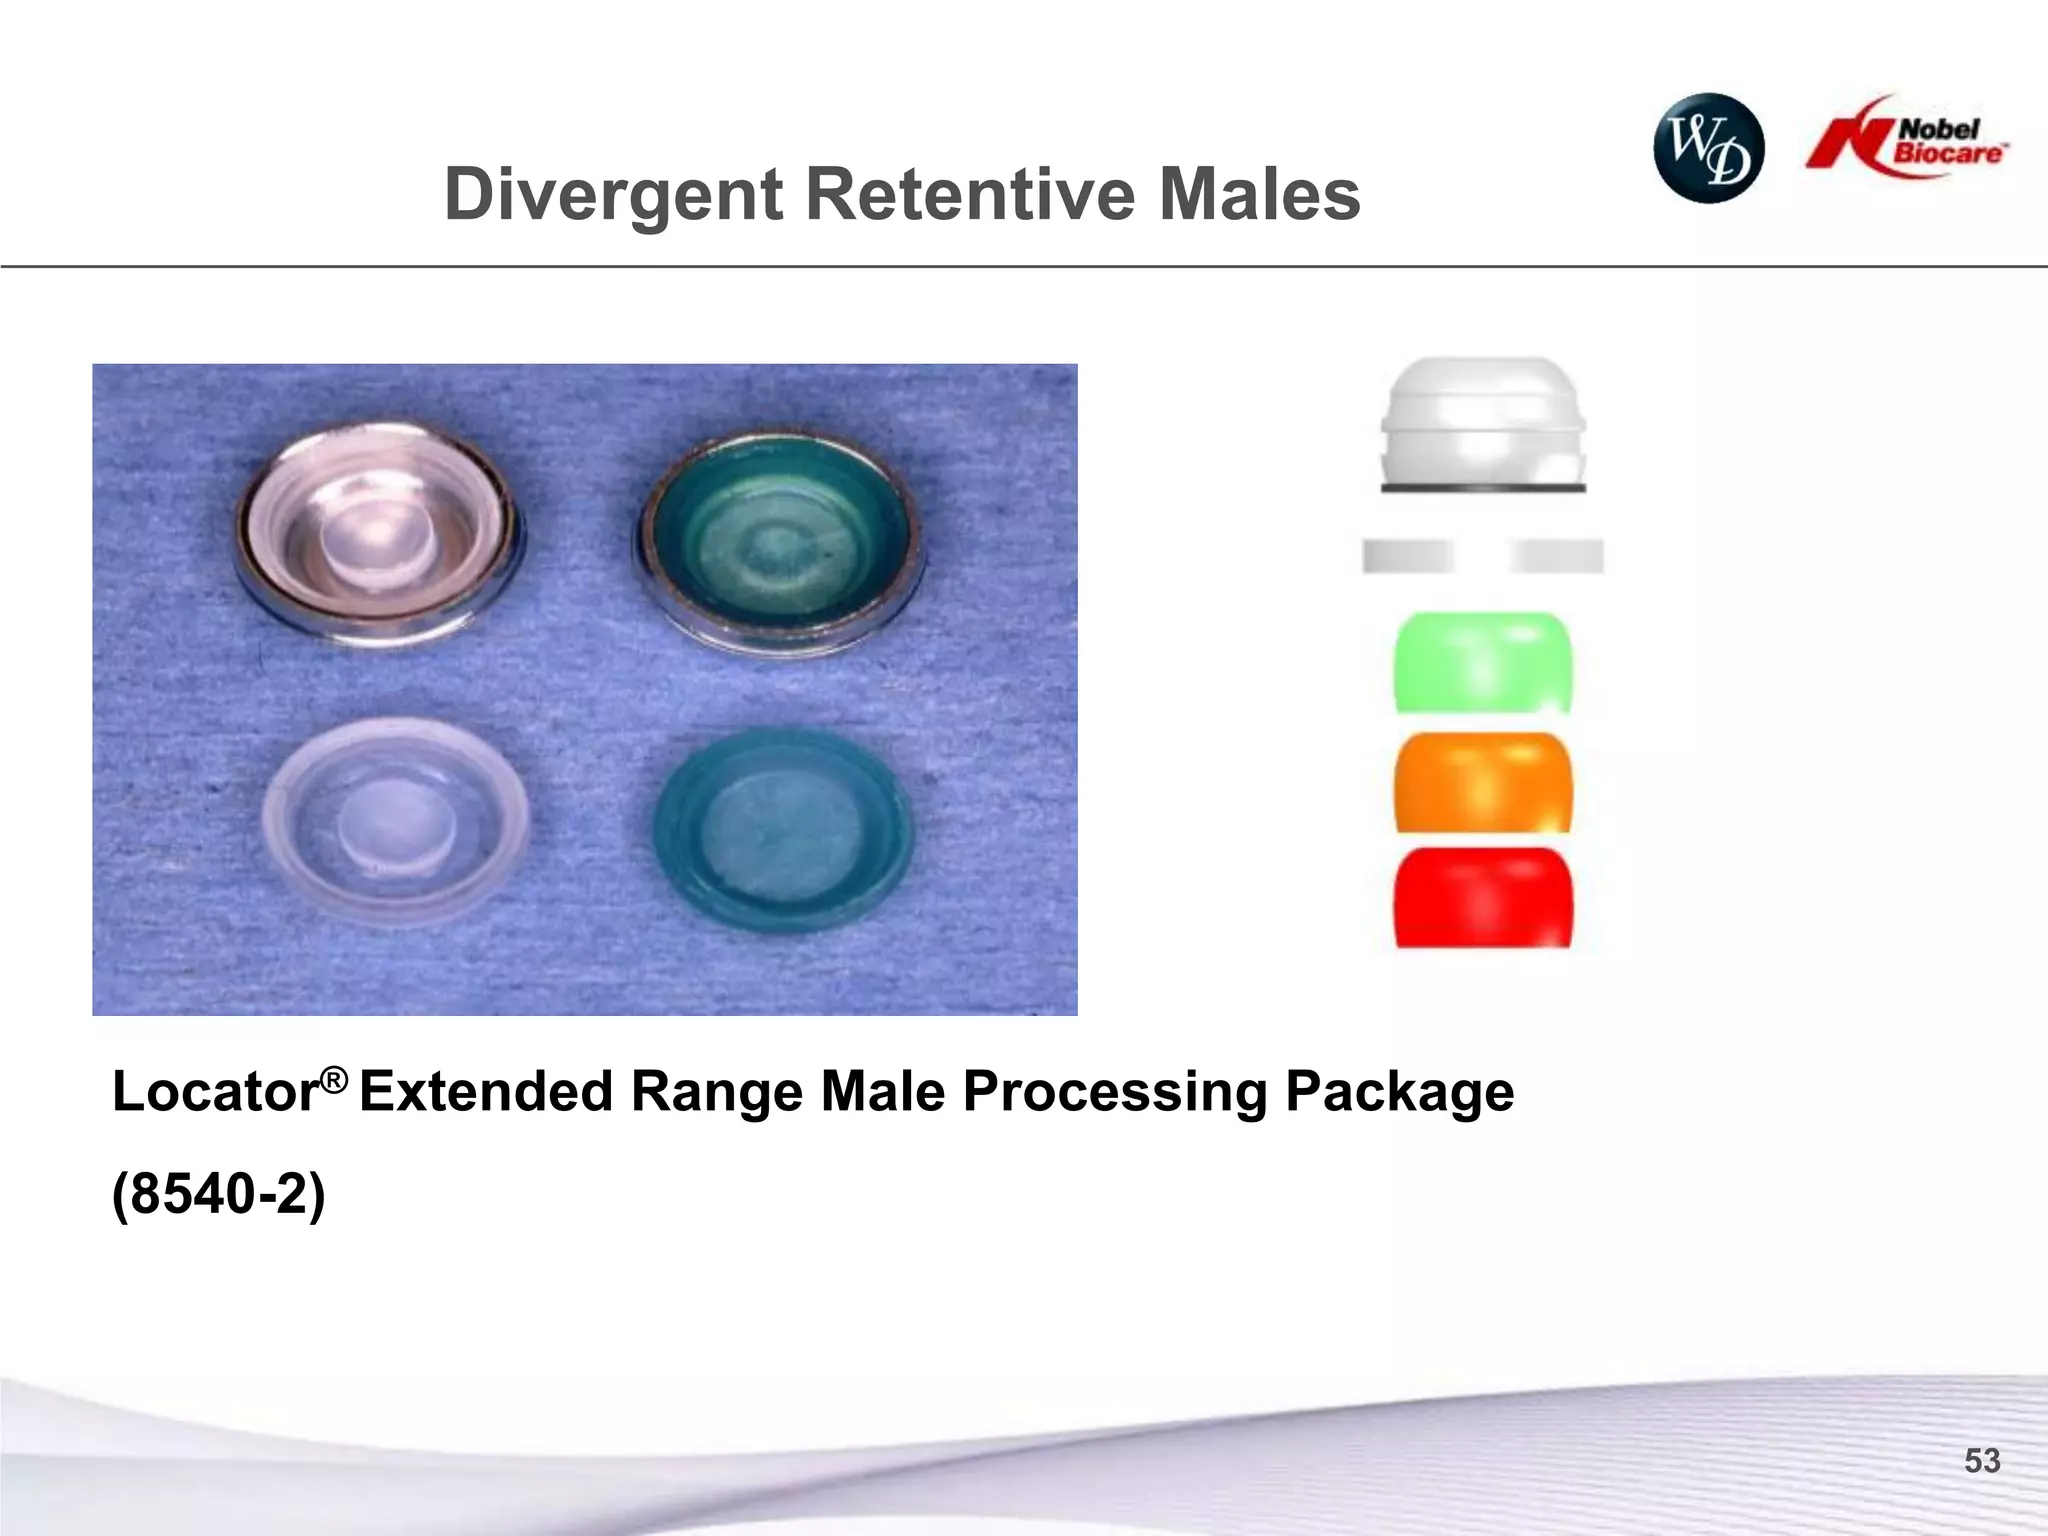
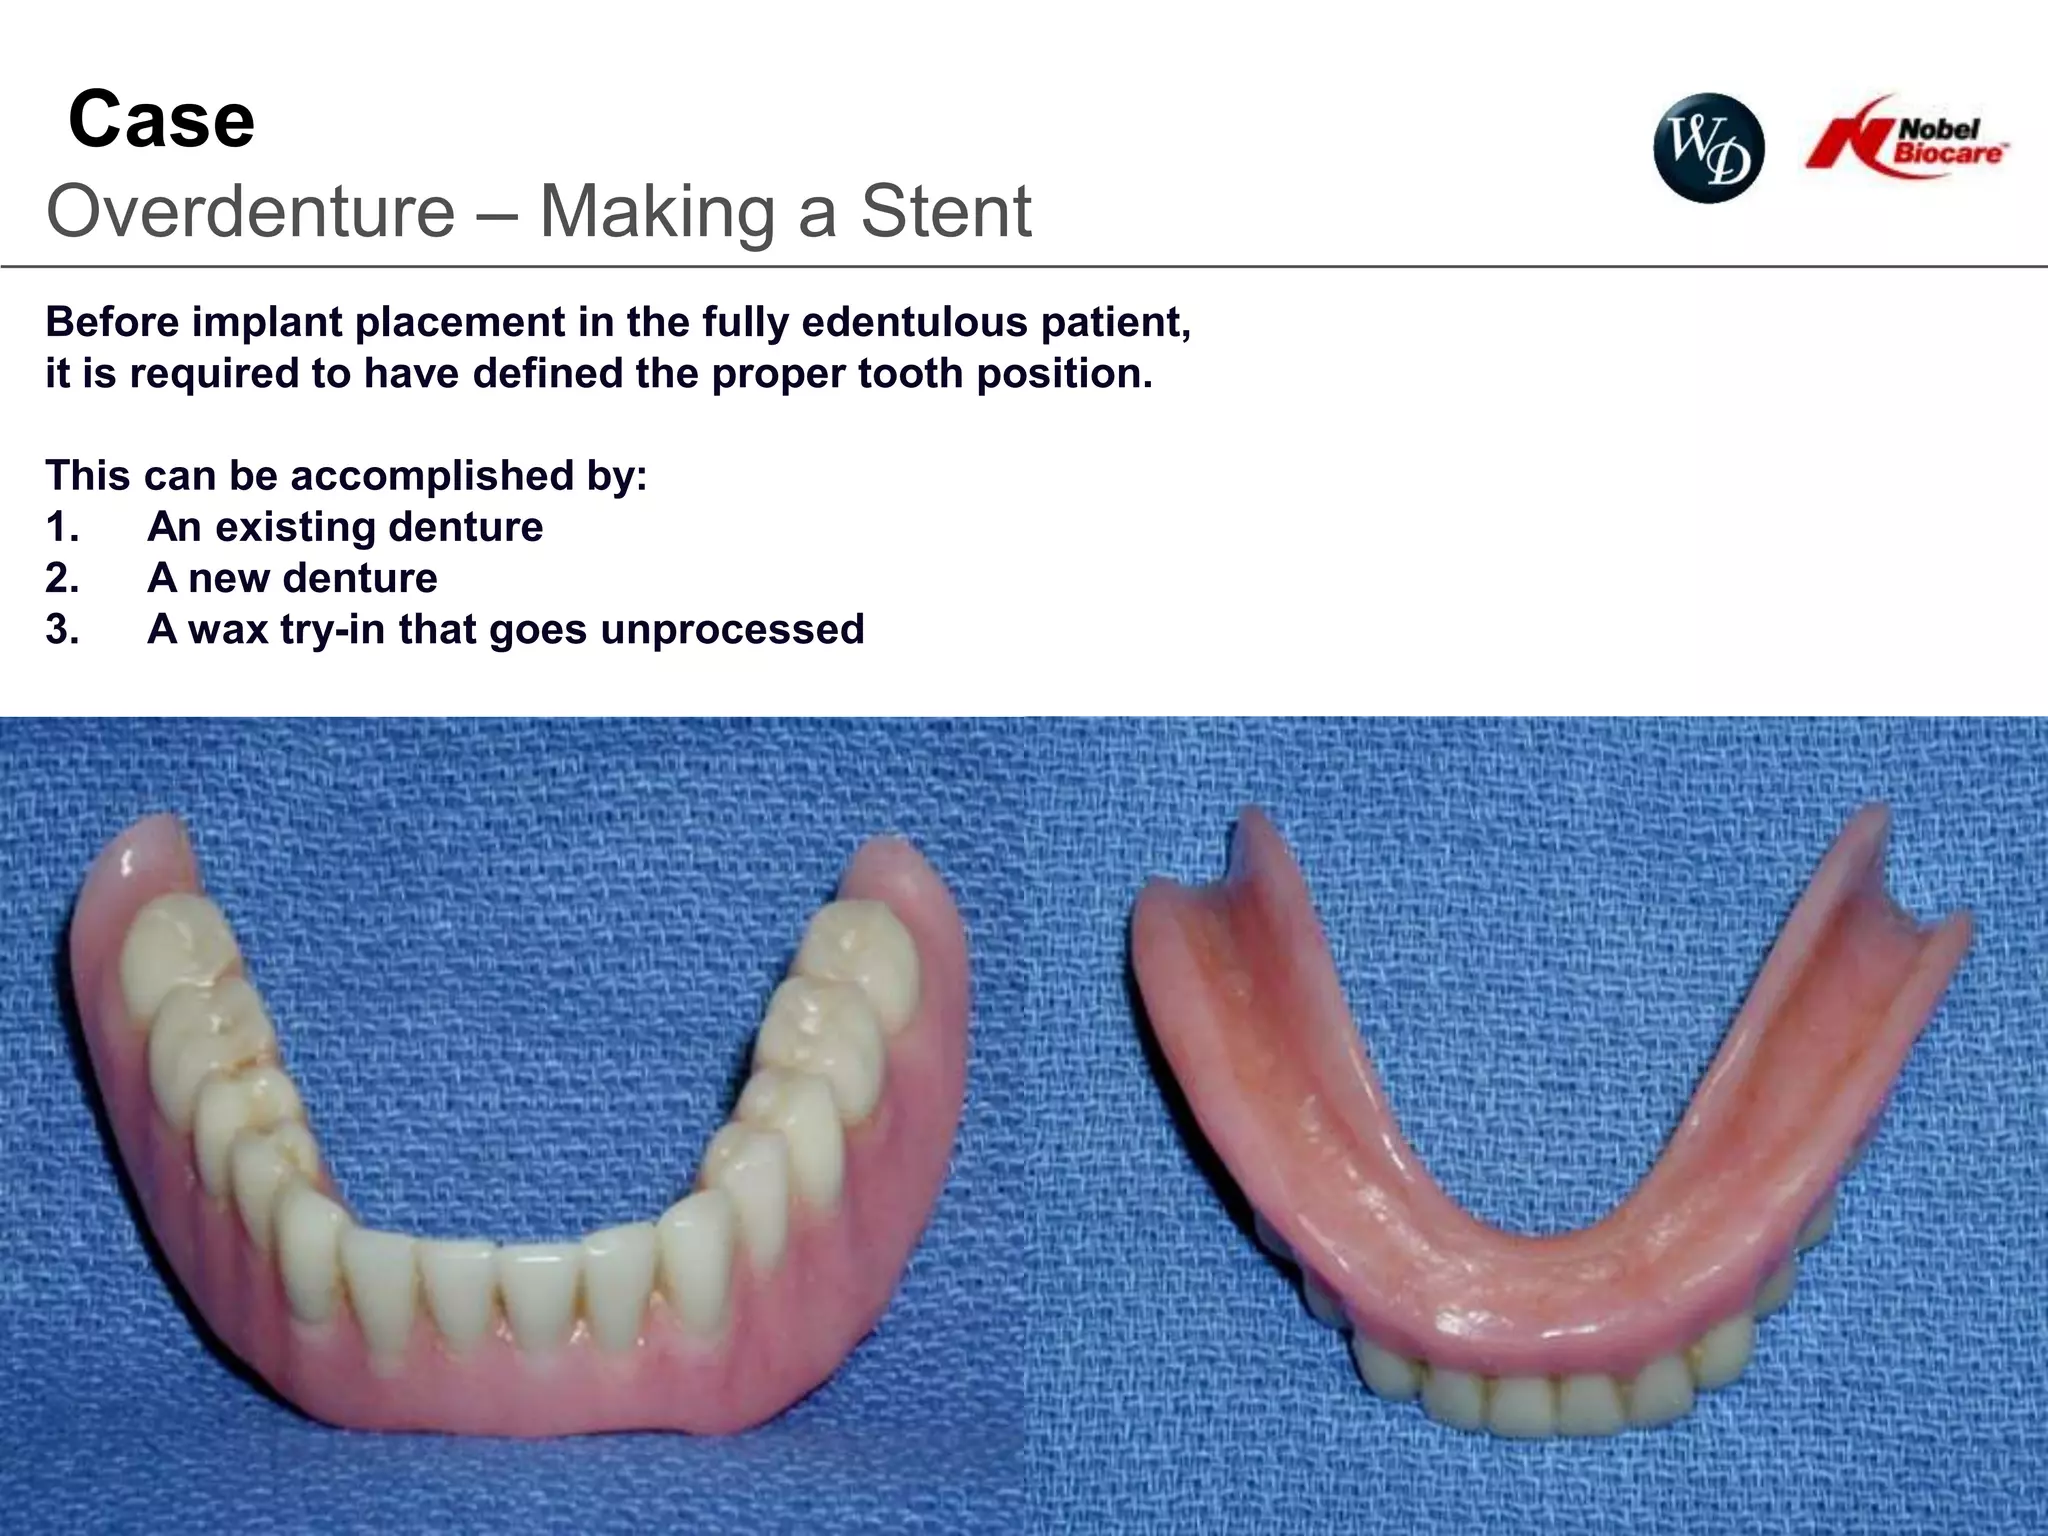


This document provides information about implant retained dentures. It discusses why patients may choose implant retained dentures and shows pictures of patients who could benefit from them. It then demonstrates the clinical process of placing two locator attachments on an existing denture, including selecting the correct abutment height, torquing and X-raying the abutments, adding spacers and processing the attachments into the denture. The document identifies the various parts used in the process and provides tips for techniques like adding a lingual relief hole. It also demonstrates how to select replacement males of different retention levels.


