This document provides a tutorial on using the basic features of the Dips orientation data analysis program. It explains how to open example data files, view data in grid and stereonet plot views, generate different stereonet plot types like pole plots, scatter plots, and contour plots, and customize the stereonet display. It also describes how to interpret stereonet plots and control plotting options through the sidebar.
The document discusses slope mass rating (SMR) and its use in assessing the stability of rock slopes. SMR is calculated based on the basic rock mass rating (RMR) minus adjustment factors (F1, F2, F3) that account for discontinuity orientation plus an additional factor (F4) depending on excavation method. SMR values are used to classify slope stability into five classes, with recommended support measures depending on the class such as bolting, shotcrete, or retaining walls. The document also discusses factors that can affect slope stability and adaptations made to the SMR system for use in different regions.
This document discusses slope monitoring and instrumentation. It begins by explaining that slope movement can be unpredictable, with minor movements sometimes preceding failure. Therefore, monitoring programs are useful for managing slope hazards. It then describes different monitoring strategies, from short-term visual inspections to long-term microseismic monitoring and real-time mobile systems. Various monitoring instruments are also outlined, including conventional total stations and crack meters, as well as automated systems, inclinometers, extensometers, and real-time radar systems that can detect rockfalls. The document concludes by mentioning DGMS guidelines related to slope stability monitoring.
The document discusses stresses around underground openings such as tunnels. It describes how underground openings alter the initial stress state of rocks and how determining stresses is important for design. Different types of tunnels and excavation methods are also outlined. The document then focuses on analyzing stresses around circular underground openings using transformations between rectangular and polar coordinate systems. It presents solutions for circular openings under hydrostatic stress fields and discusses elastic-plastic behavior, including Bray's model for analyzing squeezing tunnels.
Rock mechanics for engineering geology part 1Jyoti Khatiwada
Rock mass classification systems are used to characterize rock masses for engineering design and stability analysis. The key systems discussed include the Rock Mass Rating (RMR) system, Q-system, Slope Mass Rating (SMR), and the New Austrian Tunnelling Method (NATM) classification. These systems aim to identify significant rock mass parameters, divide rock masses into classes of similar quality, and provide guidelines for design and communication between engineers and geologists. The advantages and limitations of each system are reviewed.
This document discusses principles of rock drilling for excavation by blasting. It describes two main drilling methods - rotary drilling and percussive drilling. Rotary drilling can be further divided into rotary cutting and rotary crushing using different drill bits. It is commonly used for large blast holes but has limitations in drilling non-vertical holes. Percussive drilling breaks rock through hammering impacts generated by pneumatic or hydraulic rock drills and transmits energy to the drill bit.
This document discusses structural geology concepts including strike and dip, types of dip, bedding, outcrops, and their dimensions. It defines strike and dip as the orientation of geologic features, with strike being the intersection with a horizontal plane and dip being the angle of inclination. There are different types of dip such as primary from deposition and secondary from tectonic forces. Bedding refers to the deposition of different strata. An outcrop is the exposure of rock at the surface, and its dimensions include width, thickness, and depth which can be measured based on strike and dip.
Techniques for measuring insitu stressesZeeshan Afzal
There are some methods that tells about insitu stresses and these are very important methods in Geology as well as well coring and also digging of well as well as in mining these methods are very helpful. So, main idea about is to information about these methods.
Hand scaling and mechanical scaling are commonly used stabilization methods to remove loose rock from slopes. Scaling is effective for 2-10 years as a temporary measure. Trim blasting can also be used to remove larger sections of rock too big for scaling. Reinforcement systems work to strengthen slopes internally by increasing resistance along fractures, while external systems protect from erosion. The most effective stabilization strategies alter slope geometry or add reinforcement or drainage systems.
This document discusses types of rock slope failures. It describes four main types: plane failure, wedge failure, toppling failure, and rotational failure. For each failure type, it explains the structural conditions and geometry required for that specific failure to occur. Diagrams provide visual examples of how each failure mode appears. The document also briefly discusses methods for stabilizing unstable rock slopes, including drainage, excavation, reinforcement, and protective measures.
insitu stress field in earth crust, stress environment in mines, effects of horizontal stress, control measures of horizontal stress, stress mapping, measurement of insitu stress field
Blast hole drilling is a technique used in mining where holes are drilled into rock, packed with explosives, and detonated. The seminar discusses the blast hole drilling process, which involves drilling holes, loading explosives into the holes, detonating the explosives to blast the rock, ventilating smoke and fumes, removing blasted rock, and installing ground support. Different drill hole patterns, explosives, and the typical drilling and blasting cycle are also covered.
Rock bolting involves installing bolts or cables into rock to improve stability. There are several types of rock bolts including tensioned mechanical bolts, friction bolts, and grouted bolts or cables. Grouted rock bolts are versatile and provide high corrosion resistance by using cement or resin grout to anchor rebar in drilled holes. Cable bolts can also be used as either tensioned (active) reinforcement or non-tensioned (passive) reinforcement that relies on compression in the rock mass for support. Rock bolting is commonly used to stabilize potentially unstable rock areas and blocky rock formations.
Determination of strike and dip and geological cross section Aditya Mistry
This document provides steps for determining strike and dip from outcrop data and for constructing a geological cross section:
1. To determine strike and dip, first measure the map distance and elevation difference between two outcrops to calculate apparent dip. Then use trigonometry to locate the elevation of a third outcrop and mark the strike line. The dip direction is perpendicular to strike toward lower elevations.
2. To construct a geological cross section, first select a representative line of section. Then transfer topographic contours and structural features like faults onto the cross section. Plot bedding measurements and use them to extend lithological boundaries above and below the surface.
The document discusses various geological factors that must be considered when constructing tunnels, including: conducting subsurface exploration using pits, adits, drilling, and pilot tunnels; using core drilling and geophysical investigations to interpret geological features; addressing issues related to joint orientation, weathering, faults, rock bursts, and more. Pilot tunnels can help explore critical geological conditions ahead of main excavation and drain rock. The ideal tunnel cross-section depends on the type of rock and purpose of the tunnel.
Rock Mechanics and Rock Cavern Design_ICE HKAKeith Kong
This document discusses rock mechanics and rock cavern design. It provides details on 20 underground space projects Black & Veatch has been involved with over the past 20 years in Hong Kong and Singapore. These include tunnels, storage tanks, reservoirs, and other underground structures. The document then covers topics such as ground investigation, in-situ rock stresses, joint orientations, rock mass classification, and field testing methods for measuring rock and soil parameters and in-situ stresses.
This lab report describes procedures for determining the slake durability index of rock samples. The test subjects rock pieces to cycles of drying and wetting with abrasion in a rotating drum to see how much weight is retained. A sandstone and dolomite sample were tested, with the dolomite showing very high durability by retaining over 97% of its weight after both cycles, and the sandstone showing medium durability by retaining around 78% after the second cycle. The results allow classification of the rocks' resistance to weathering and disintegration from wetting and drying.
There are four main types of slope failures: plane, wedge, toppling, and rotational. Plane failures occur along planar discontinuities like bedding planes or joints. Wedge failures form when two discontinuity sets intersect perpendicularly to the slope. Toppling failures involve the forward rotation of rock columns about a fixed point. Rotational failures involve movement along a curved failure surface within the soil. Each failure type has specific structural conditions required, such as the dip direction and angle of discontinuities compared to the slope face.
Stress is a concept fundamental to Rock Mechanics principles and applications. There is a pre-existing state in the rock mass and we need to understand it, both directly, and as a stress state applies to analysis and design.
There are several types of slope failures that can occur in open pit mines. Plane failures occur along a planar discontinuity when the dip of the discontinuity is less than the slope angle. Wedge failures result from the intersection of two discontinuity sets dipping out of the slope. Circular failures have a curved failure surface and generally occur in weak soils or rocks. Toppling failures involve the overturning of rock columns formed by steeply dipping discontinuities. Slope stability is influenced by factors that increase shear stress, like excavation, or decrease shear strength, such as weathering. Accurately predicting slope failures is important for safety in open pit mining.
It,s all about Index properties of Rocks.
It can help those students who want to give presentation about this topic.
Also it can give you information about Pocks and very helpful in Geo mechanics.
DESIGN OF SUPPORT SYSTEM IN BORD AND PILLAR MINEAnurag Jha
This document describes a project report submitted by Anurag Kumar Jha for the partial fulfillment of requirements for a dual degree in mining engineering. The report focuses on designing a support system for bord and pillar mines. Currently, CMRI-RMR and NGI-Q systems are commonly used in Indian coal mines to estimate rock load and design support. However, calculations using NGI-Q can be time-consuming. The objective of this project is to use formulas involving only the CMRI-RMR parameter to quickly calculate rock load in development areas, at junctions, in slices, and at goaf edges to facilitate timely support design. The literature review covers the parameters used in CMRI-RMR and N
Rocks mechanics and its application in mining geology.
It aims at enhancing the mining process and higher yielding by reducing the chance of failures by providing information about the rocks of the mining area.
This document discusses different types of rock bolts used in underground mining excavations. It describes mechanically anchored, grouted anchor, and frictional anchor bolts. Mechanically anchored bolts use an expansion shell or resin to anchor into the rock. Grouted anchor bolts are inserted into a borehole and cemented in place with resin or cement. Frictional bolts like split sets are forced into an undersized hole to provide support. The document also outlines the unconfined compression test procedure used to evaluate rock strength in a laboratory.
This thesis analyzes the stability of pillars and subsidence in an underground coal mine. It presents the objectives, methodology, and structure of the thesis. The literature review covers the basic principles of pillar design, including estimating pillar load using tributary area theory, pillar strength formulas, and pillar safety factors. Pillar design aims to maximize coal extraction while maintaining stable pillars. Subsidence from mining needs to be managed. The case study describes the mine site and presents observations of maximum subsidence, subsidence profiles, and how subsidence changes over time and distance from mining panels. Geo-mining parameters, lithology, empirical modeling, and numerical modeling are discussed to analyze pillar stability and subsidence behavior at the mine site. Results and
SLOPE STABILITY RADAR-AN ADVANCED SLOPE MOVEMENT MONITORING SYSTEMRathin Biswas
Pit Slope Monitoring is a vital concern for Geotechnical Engineering. An early warning is required for
safety of the miners; proper selection of the monitoring tool is a vital parameter for miners safety visa-
vis economics. Slope Stability Radar being an advanced monitoring system, gives advance information
for slope movement.
Blasting Vibration Assessment of Slopes_HKIEKeith Kong
This document discusses methods for assessing the impact of blasting vibrations on slope stability. It describes analytical methods like pseudo-static and dynamic approaches for stability analysis. The pseudo-static approach uses a critical acceleration to model vibration effects, while the dynamic approach considers wave propagation principles. An energy approach is also presented for analyzing rock slope stability. The document provides case studies demonstrating the application of these methods. It concludes that pseudo-static and dynamic analyses provide conservative vibration limits, while the energy approach requires detailed rock characterization but may give more reasonable results.
RMR, or Rock Mass Rating, is a method used to design support plans for underground mine workings based on characteristics of the rock mass. It involves assigning ratings for 5 parameters - layer thickness, structural features, weatherability, rock strength, and groundwater - to determine an overall RMR value. This value is then used to classify the roof rock, estimate expected rock loads, determine the required support resistance and number of roof bolts, and calculate support load density and theoretical strata convergence. The document provides examples of how RMR is applied to these design aspects at a depth of 300m for a mine in India.
Dips 7.0 introduces several new features for analyzing structural geology data including 3D stereographic plotting, input and analysis of curved borehole data, kinematic sensitivity analysis, improved joint set analysis tools, contouring of general data values, and displaying traverse orientations on the stereonet. Key capabilities include viewing poles, planes and contours in 3D; entering and processing data from curved boreholes; varying parameters to analyze their effect on failure probabilities; calculating joint spacing, RQD, and joint frequency; contouring any data column; and plotting traverse paths.
This document provides tutorial notes on using the S-GeMS software to analyze and model porosity data from the fictional Zone A area of the Big Bean Oil Field. It summarizes how to load the data, examine histograms and variograms, perform ordinary kriging and sequential Gaussian simulation to generate multiple realizations of porosity. It also briefly describes how to perform sequential indicator simulation of facies data from the Green Goblin Gas Field as an illustrative example.
The document provides steps for basic tasks in ArcGIS including adding data, adding symbology, creating buffers, and migrating data between a shapefile and geodatabase. It outlines 7 steps for adding shapefiles or feature classes to a map, 10 steps for applying symbology, and describes how to use buffer tools and wizards to create buffers around selected features at a specified distance. It also explains how to import and export data between a shapefile and geodatabase using geoprocessing tools.
This document introduces the basic functionality of the PANalytical X'Pert HighScore Plus v3.0 software. It covers selecting user interfaces and program settings, displaying and manipulating data, opening PDF reference patterns, and performing search-match analysis. The last page lists additional features that can be explored using the help section.
This document provides a 3-step process for adding XY data to ArcMap:
1) Convert data from an XYZ format to a CSV format with column headers for X, Y, and Z coordinates
2) Open ArcMap, use the "Add XY Data" tool to browse and select the CSV file
3) Define the coordinate system by selecting the appropriate geographic or projected system to display the points in ArcMap.
This document provides a step-by-step tutorial on using the Diffusion Tensor Imaging (DTI) module in 3D Slicer to analyze DTI data. It covers loading DWI data, converting to tensors, computing fractional anisotropy, generating fiber tracts through tractography, and selectively seeding tracts from regions of interest. The overall goal is to guide users through the basic DTI analysis capabilities in Slicer.
This document describes how to create error bar charts in NCSS statistical software. It includes:
1. Examples of different types of error bar charts that can be produced, including ones with standard deviation, standard error, confidence intervals, data range, or percentiles as the error bars.
2. Information on the data structure needed and options for customizing aspects of the error bar chart like the center line, bars, symbols, error bars, layout, and connecting lines.
3. Four examples showing how to generate different error bar charts using the Fisher iris and Tree datasets, including ones with subgroups, confidence intervals, and plotting medians instead of means.
This document provides instructions for a GIS exercise involving spatial analysis of elevation and precipitation data. The goals are to calculate average watershed elevation and precipitation for subwatersheds of the San Marcos River basin. Slope, aspect, flow direction and hydrologic slope will first be calculated from a sample digital elevation model to demonstrate spatial analysis tools in ArcGIS. A ModelBuilder model is then created to automate these calculations. Finally, the model is applied to real elevation data for the San Marcos basin watersheds to calculate average elevation and interpolate precipitation from station data to estimate watershed precipitation volumes and runoff ratios.
This document provides an overview of using SPSS (Statistical Package for the Social Sciences) software. It discusses installing sample data files, introduces the main interface windows including the data view, variable view and output view. It also covers how to define variable types, enter and modify data, perform basic analyses like frequencies and cross tabulations, and create charts from the output. The document is intended to help new users learn the basics of navigating the SPSS program and conducting initial analyses.
A geographic information system (GIS) is a collection of hardware,
software, geographicdata, and personnel designed to create, store, edit,
manipulate, analyze and display geographically referenced information.
This document provides an overview of the finite element analysis (FEA) software ANSYS. It discusses the different modules and capabilities within ANSYS including structural, thermal, fluid, and electromagnetic analysis. It also describes steps for creating and analyzing models within ANSYS such as creating geometry, meshing, applying loads and boundary conditions, and solving models. Key ANSYS terminology is defined throughout related to these modeling and analysis procedures.
Design Patterns
Christian Behrens
https://www.behance.net/gallery/29576487/The-Form-of-Facts-and-Figures
Christopher Alexander
The term design patterns was originally coined about three decades ago by Christopher Alexander, an architect and critic who envisioned a generic and modular “language” of methods to describe the process of construction and urban planning by means of recurring problems that are well-known in a specific context, and respective solutions that have been proved and tested in the past and can therefore be seen as a safe choice to tackle a certain design challenge. Although it never made its breakthrough in the field of architecture, the basic idea of design patterns was adopted by other engineering disciplines, most notably software development in the early 1990s. A second wave of success seems to have appeared recently, when several projects were launched to build up pattern libraries for digital user interfaces. https://en.wikipedia.org/wiki/Christopher_Alexander
2
Design Patterns
Rejected by Architects, Adopted by Software Engineers,
…and the field of user interface design.
Although Alexander’s book became a bestseller and is a de-facto standard read for architecture students until today, it received much criticism and invoked sceptical reactions among the architecture community. Looking back at it some thirty years later, Alexander’s pattern language can be described as a success story on a detour. While widely rejected by architects and urban planners, the concept was picked up by computer scientist in the late 1980s and became a huge success in the wake of the rise of object-oriented programming languages such as Java
3
Design Patterns
Rejected by Architects, Adopted by Software Engineers,
…and the field of user interface design.
http://zurb.com/patterntap
http://patternry.com/
useful for the general description of common design problems, and provide solutions based on the relationships and behaviors of objects Companies and institutions that deal with interface design problems, have also launched own projects that aim at streamlining the development of new products and services by means of a comprehensive design pattern collection.
Design Patterns can help to tackle commonly known recurring design problems with well-proven solutions. A single pattern provides a brief description of one particular design problem. This problem can be a physical attribute of an application (for instance a dropdown menu), or a functional behavior (e.g. the login dialog of a website). A pattern typically consists of a description of the problem, and a solution that has been proven before and is generally recognized. Usually, a pattern provides additional information like an example of a real-world scenario in which it has been successfully applied as well as a rationale to briefly describe the benefit the usage this patterns bears.
4
Discrete Quantities:
Simple Bar Chart
Snapshot:
they do not display con.
The document describes the features and interface of the Programming Without Coding Technology (PWCT) environment. The PWCT environment allows visual programming through a graphical interface and contains various windows and tools for visual programming, including a server units window to manage server code, a goal designer to create goals to override code, and designers for interactions and transporters. It provides features like visual programming languages, framework extensions, and supports multiple operating systems.
Crystal tr///SAP Design Studio online training by design studio Export-24/7//...venkat training
///SAP Design Studio online training by design studio Export-24/7//
venkat
Contact numbers : +91 9972971235,+91-9663233300(India)
Email Id : Madhukar.dwbi@gmail.com, https://www.youtube.com/watch?v=KK6DxwhYxAI&t=23s
Website:
http://www.sap-bo-online-training.com/
Extract 1 from TEMS Pocket 15.0 User's ManualPeter Eriksson
This document section describes the indoor map view feature of the TEMS Pocket software. It allows importing floor plans and positioning measurements on them. Route pinpointing can be done manually or according to a pre-planned route. Value elements like signal strength can be plotted along the route for visualization. Map sets containing multiple floor plans can be created and layers like the legend and transmitters can be shown or hidden in the indoor map view.
Terrain AnalysisBackgroundAircraft frequently rely on terrain el.pdffeetshoemart
Terrain Analysis
Background
Aircraft frequently rely on terrain elevation data to help navigate in low visibility conditions, to
reduce pilot workload, to help closely follow terrain at low altitude to avoid radar detection
(sometimes called ground-hugging or terrain-following flight), and to plot a course to avoid
extreme sudden altitude changes (e.g., flying around a mountain, rather than over it). Terrain
elevation data is gathered through terrain-following radar, lidar, satellites, and existing terrain
map
elevation information. Elevation data is especially useful radar or communication services are
not operating.
Elevation data is typically broken down into a grid, where each grid cell represents a square
physical area of uniform size. Because elevation varies
within a cell, the highest elevation in the cell is usually used as the elevation value for that cell
on the grid.
To navigate using elevation data, it’s useful to compute locations of peaks (high points), valleys
(low points), and flat areas (which might be at high or low elevations). To
a specific location is a peak, we\'re interested in discovering whether that
location is a local maximum. To do this, we must examine its eight adjacent locations: left, right,
above, below, and the four diagonal neighbors. If the location we’re analyzing has a higher
elevation than all eight surrounding locations, then the location is clearly a peak. We might
choose to loosen our definition of a peak by saying, for example, that a location is a peak if more
than five of the eight surrounding locations have a lower elevation.
Similarly, to decide if a location is a valley, we determine if it\'s a local minimum by checking to
see if all eight neighboring locations are higher than the location we’re analyzing. If all eight are
higher, we clearly have a valley. Again, we might choose to loosen our valley definition to
identify a valley if more than five surrounding locations are higher than the location we’re
analyzing.
Determining if a location is part of a relatively flat area (a plain for our purposes, but it might
also be a plateau in the real world), we would again examine all eight neighboring locations. If
they are all within a small tolerance in elevation, then we would declare the location to be part of
a plain. Once again, we might choose to loosen our definition of a plain, so that a location
surrounded by more than five locations that have a similar elevation is considered a plain.
Your Assignment
You will develop a C program that creates a two-dimensional array of doubles representing an
elevation grid, populates the array it with elevation data read from an instructor-supplied binary
data file, displays the elevation data numerically, analyzes the data in the array to find the peaks,
valleys, and plains, and displays strings indicating where these peaks, valleys, and plains are.
Terrain elevation values are all assumed to be expressed in meters.
When defining your C functions in this pr.
This document provides an overview of geoprocessing, which allows users to define, manage, and analyze spatial information to support decision making. It discusses how geoprocessing works in ArcGIS through tools, models, scripts, and toolboxes. Specific geoprocessing tasks like overlay, proximity, surfaces, and statistics are examined. The document also covers data sources, running tools, and settings. It provides examples of creating a model and script to automate repetitive geoprocessing work.
This document introduces the theory behind geological database processes and provides detailed
examples using the geological database modelling functions in Surpac. By working through this
tutorial you will gain skills in the creation, use, and modification of geological databases.
Surpac is the world’s most popular geology and mine planning software used for ore body evaluation, open pit and u/g mine design.It provides tools for geological modelling, surveying, and mine planning.
This document provides an overview of how to use SPSS to enter and modify data. It discusses defining variable types like numeric, string, date in the variable view. It also covers creating a new dataset, recoding variables to group data into categories, and using the recoding tool to transform continuous variables into categorical variables for analysis. The document demonstrates how to backup original data before recoding and reintroduces the exceptions for recoding special variable types.
Using recycled concrete aggregates (RCA) for pavements is crucial to achieving sustainability. Implementing RCA for new pavement can minimize carbon footprint, conserve natural resources, reduce harmful emissions, and lower life cycle costs. Compared to natural aggregate (NA), RCA pavement has fewer comprehensive studies and sustainability assessments.
Comparative analysis between traditional aquaponics and reconstructed aquapon...bijceesjournal
The aquaponic system of planting is a method that does not require soil usage. It is a method that only needs water, fish, lava rocks (a substitute for soil), and plants. Aquaponic systems are sustainable and environmentally friendly. Its use not only helps to plant in small spaces but also helps reduce artificial chemical use and minimizes excess water use, as aquaponics consumes 90% less water than soil-based gardening. The study applied a descriptive and experimental design to assess and compare conventional and reconstructed aquaponic methods for reproducing tomatoes. The researchers created an observation checklist to determine the significant factors of the study. The study aims to determine the significant difference between traditional aquaponics and reconstructed aquaponics systems propagating tomatoes in terms of height, weight, girth, and number of fruits. The reconstructed aquaponics system’s higher growth yield results in a much more nourished crop than the traditional aquaponics system. It is superior in its number of fruits, height, weight, and girth measurement. Moreover, the reconstructed aquaponics system is proven to eliminate all the hindrances present in the traditional aquaponics system, which are overcrowding of fish, algae growth, pest problems, contaminated water, and dead fish.
Presentation of IEEE Slovenia CIS (Computational Intelligence Society) Chapte...University of Maribor
Slides from talk presenting:
Aleš Zamuda: Presentation of IEEE Slovenia CIS (Computational Intelligence Society) Chapter and Networking.
Presentation at IcETRAN 2024 session:
"Inter-Society Networking Panel GRSS/MTT-S/CIS
Panel Session: Promoting Connection and Cooperation"
IEEE Slovenia GRSS
IEEE Serbia and Montenegro MTT-S
IEEE Slovenia CIS
11TH INTERNATIONAL CONFERENCE ON ELECTRICAL, ELECTRONIC AND COMPUTING ENGINEERING
3-6 June 2024, Niš, Serbia
Using recycled concrete aggregates (RCA) for pavements is crucial to achieving sustainability. Implementing RCA for new pavement can minimize carbon footprint, conserve natural resources, reduce harmful emissions, and lower life cycle costs. Compared to natural aggregate (NA), RCA pavement has fewer comprehensive studies and sustainability assessments.
Introduction- e - waste – definition - sources of e-waste– hazardous substances in e-waste - effects of e-waste on environment and human health- need for e-waste management– e-waste handling rules - waste minimization techniques for managing e-waste – recycling of e-waste - disposal treatment methods of e- waste – mechanism of extraction of precious metal from leaching solution-global Scenario of E-waste – E-waste in India- case studies.
Electric vehicle and photovoltaic advanced roles in enhancing the financial p...IJECEIAES
Climate change's impact on the planet forced the United Nations and governments to promote green energies and electric transportation. The deployments of photovoltaic (PV) and electric vehicle (EV) systems gained stronger momentum due to their numerous advantages over fossil fuel types. The advantages go beyond sustainability to reach financial support and stability. The work in this paper introduces the hybrid system between PV and EV to support industrial and commercial plants. This paper covers the theoretical framework of the proposed hybrid system including the required equation to complete the cost analysis when PV and EV are present. In addition, the proposed design diagram which sets the priorities and requirements of the system is presented. The proposed approach allows setup to advance their power stability, especially during power outages. The presented information supports researchers and plant owners to complete the necessary analysis while promoting the deployment of clean energy. The result of a case study that represents a dairy milk farmer supports the theoretical works and highlights its advanced benefits to existing plants. The short return on investment of the proposed approach supports the paper's novelty approach for the sustainable electrical system. In addition, the proposed system allows for an isolated power setup without the need for a transmission line which enhances the safety of the electrical network
ACEP Magazine edition 4th launched on 05.06.2024Rahul
This document provides information about the third edition of the magazine "Sthapatya" published by the Association of Civil Engineers (Practicing) Aurangabad. It includes messages from current and past presidents of ACEP, memories and photos from past ACEP events, information on life time achievement awards given by ACEP, and a technical article on concrete maintenance, repairs and strengthening. The document highlights activities of ACEP and provides a technical educational article for members.
International Conference on NLP, Artificial Intelligence, Machine Learning an...gerogepatton
International Conference on NLP, Artificial Intelligence, Machine Learning and Applications (NLAIM 2024) offers a premier global platform for exchanging insights and findings in the theory, methodology, and applications of NLP, Artificial Intelligence, Machine Learning, and their applications. The conference seeks substantial contributions across all key domains of NLP, Artificial Intelligence, Machine Learning, and their practical applications, aiming to foster both theoretical advancements and real-world implementations. With a focus on facilitating collaboration between researchers and practitioners from academia and industry, the conference serves as a nexus for sharing the latest developments in the field.
Batteries -Introduction – Types of Batteries – discharging and charging of battery - characteristics of battery –battery rating- various tests on battery- – Primary battery: silver button cell- Secondary battery :Ni-Cd battery-modern battery: lithium ion battery-maintenance of batteries-choices of batteries for electric vehicle applications.
Fuel Cells: Introduction- importance and classification of fuel cells - description, principle, components, applications of fuel cells: H2-O2 fuel cell, alkaline fuel cell, molten carbonate fuel cell and direct methanol fuel cells.
Embedded machine learning-based road conditions and driving behavior monitoringIJECEIAES
Car accident rates have increased in recent years, resulting in losses in human lives, properties, and other financial costs. An embedded machine learning-based system is developed to address this critical issue. The system can monitor road conditions, detect driving patterns, and identify aggressive driving behaviors. The system is based on neural networks trained on a comprehensive dataset of driving events, driving styles, and road conditions. The system effectively detects potential risks and helps mitigate the frequency and impact of accidents. The primary goal is to ensure the safety of drivers and vehicles. Collecting data involved gathering information on three key road events: normal street and normal drive, speed bumps, circular yellow speed bumps, and three aggressive driving actions: sudden start, sudden stop, and sudden entry. The gathered data is processed and analyzed using a machine learning system designed for limited power and memory devices. The developed system resulted in 91.9% accuracy, 93.6% precision, and 92% recall. The achieved inference time on an Arduino Nano 33 BLE Sense with a 32-bit CPU running at 64 MHz is 34 ms and requires 2.6 kB peak RAM and 139.9 kB program flash memory, making it suitable for resource-constrained embedded systems.
DEEP LEARNING FOR SMART GRID INTRUSION DETECTION: A HYBRID CNN-LSTM-BASED MODELgerogepatton
As digital technology becomes more deeply embedded in power systems, protecting the communication
networks of Smart Grids (SG) has emerged as a critical concern. Distributed Network Protocol 3 (DNP3)
represents a multi-tiered application layer protocol extensively utilized in Supervisory Control and Data
Acquisition (SCADA)-based smart grids to facilitate real-time data gathering and control functionalities.
Robust Intrusion Detection Systems (IDS) are necessary for early threat detection and mitigation because
of the interconnection of these networks, which makes them vulnerable to a variety of cyberattacks. To
solve this issue, this paper develops a hybrid Deep Learning (DL) model specifically designed for intrusion
detection in smart grids. The proposed approach is a combination of the Convolutional Neural Network
(CNN) and the Long-Short-Term Memory algorithms (LSTM). We employed a recent intrusion detection
dataset (DNP3), which focuses on unauthorized commands and Denial of Service (DoS) cyberattacks, to
train and test our model. The results of our experiments show that our CNN-LSTM method is much better
at finding smart grid intrusions than other deep learning algorithms used for classification. In addition,
our proposed approach improves accuracy, precision, recall, and F1 score, achieving a high detection
accuracy rate of 99.50%.
DEEP LEARNING FOR SMART GRID INTRUSION DETECTION: A HYBRID CNN-LSTM-BASED MODEL
Dips.pdf
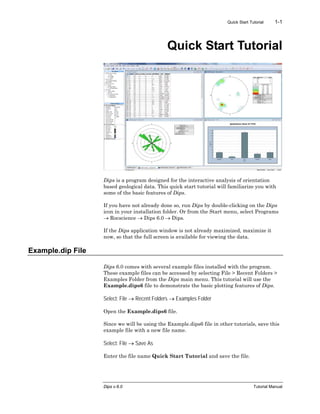
1. Quick Start Tutorial 1-1
Dips v.6.0 Tutorial Manual
Quick Start Tutorial
Dips is a program designed for the interactive analysis of orientation
based geological data. This quick start tutorial will familiarize you with
some of the basic features of Dips.
If you have not already done so, run Dips by double-clicking on the Dips
icon in your installation folder. Or from the Start menu, select Programs
→ Rocscience → Dips 6.0 → Dips.
If the Dips application window is not already maximized, maximize it
now, so that the full screen is available for viewing the data.
Example.dip File
Dips 6.0 comes with several example files installed with the program.
These example files can be accessed by selecting File > Recent Folders >
Examples Folder from the Dips main menu. This tutorial will use the
Example.dips6 file to demonstrate the basic plotting features of Dips.
Select: File → Recent Folders → Examples Folder
Open the Example.dips6 file.
Since we will be using the Example.dips6 file in other tutorials, save this
example file with a new file name.
Select: File → Save As
Enter the file name Quick Start Tutorial and save the file.
2. Quick Start Tutorial 1-2
Dips v.6.0 Tutorial Manual
You should see the stereonet plot view shown in the following figure.
(Note: if the example file has been previously opened and saved, the
screen may show a different view or plot, since Dips saves the most recent
view state when a file is saved).
Sidebar Control Panel
When you are viewing a stereonet plot, the control panel at the side of the
screen allows you to fully customize the data and display options for the
stereonet. This control panel is referred to as the Sidebar. By selecting
the checkboxes and radio buttons you can overlay different types of plots
(e.g. poles, contours, planes) and customize the display (e.g. colours,
visibility).
The sidebar gives you the maximum flexibility in determining the
plotting and display options. We will explore some of these options in this
tutorial. For now leave the default selections in the sidebar.
Toolbar Shortcuts
Shortcuts to commonly used plot types are available in the toolbar:
• Pole / Dip Vector Mode
• Vector Plot
• Symbolic Plot
• Contour Plot
• Major Planes Plot
• Rosette Plot
3. Quick Start Tutorial 1-3
Dips v.6.0 Tutorial Manual
Grid View
Before we discuss the stereonet view, let’s have a look at the input data in
the main Dips spreadsheet. The Dips spreadsheet is also called the Grid
View. Select the Grid view tab at the bottom of the screen.
We won’t worry about the details of this file yet, except to note that it
contains 40 rows, and the following columns:
• Two Orientation Columns
• A Quantity Column
• A Traverse Column
• Three Extra Columns
In the next tutorial, we will discuss how to create the Example.dips6 file
from scratch.
Now switch back to the stereonet plot view by selecting the stereonet plot
tab at the bottom of the screen.
4. Quick Start Tutorial 1-4
Dips v.6.0 Tutorial Manual
Pole Plot
The most basic representation of orientation data on a stereonet is the
Pole Plot. A shortcut to quickly generate a pole plot is to select the
Vector Plot toolbar button.
Select: View → Vector Plot
You should see the following plot.
Each pole on a Pole Plot represents an orientation data pair in the first
two columns of a Dips file.
The Pole Plot can also display feature attribute information, based on the
data in any column of a Dips file, with the Symbolic Plot option. This is
covered later in this tutorial.
5. Quick Start Tutorial 1-5
Dips v.6.0 Tutorial Manual
Dip Vector Plot
Planes can be represented as either pole vectors or dip vectors on the
stereonet. A dip vector represents the maximum dip orientation of a
plane and is orthogonal to the pole vector of a plane.
To view dip vectors select the Dip Vector Mode from the toolbar or the
View menu.
Select: View → Pole / Dip Vector Mode → Dip Vector
The plot should look as follows.
Dip vectors are sometimes preferred for certain types of analyses, in
particular kinematic analysis for planar sliding or toppling.
In general, pole vectors are more commonly used and have more
applications. For example, joint set orientations can only be determined
from pole vector plots not from dip vectors. Return to the pole vector
plotting mode by selecting the Pole Vector Mode toolbar button.
Select: View → Pole / Dip Vector Mode → Pole Vector
6. Quick Start Tutorial 1-6
Dips v.6.0 Tutorial Manual
Show Grid Data Planes
To display the planes (great circles) for all of the planar data in your Dips
file, select the Planes > Grid Data Planes checkbox in the sidebar plot
options.
You will see all great circles displayed for all planar entries in the main
Dips spreadsheet as shown below. Each great circle corresponds to a pole
(or dip vector) on the vector plot.
Turn off the display of Grid Data Planes by de-selecting the Planes > Grid
Data Planes checkbox in the sidebar plot options.
7. Quick Start Tutorial 1-7
Dips v.6.0 Tutorial Manual
Stereonet Legend
Note that the Legend for the Pole Plot (and all stereonet plots in Dips)
indicates the:
• Projection Type (Equal Angle)
• Hemisphere (Lower Hemisphere)
These can be changed using Stereonet Options in the Sidebar control
panel. (Equal Area and Upper Hemisphere options are available).
However, for this tutorial, we will use the default projection options.
Note that the Legend also indicates Vector Count 61 (40 Entries)
• The Example.dips6 file has 40 rows, hence “40 entries”.
• The Quantity Column in this file allows you to record multiple
identical data units in a single row of the file. Hence the 40 data
entries actually represent 61 features, hence the total vector
count of 61 poles.
8. Quick Start Tutorial 1-8
Dips v.6.0 Tutorial Manual
Reporting Convention
As you move the cursor around the stereonet, notice that the cursor
orientation coordinates are displayed in the Status Bar.
The format of these orientation coordinates can be toggled with the
Reporting Convention option in the Edit menu.
• If the Convention is Trend / Plunge, the coordinates will be in
Pole Vector format, and represent the cursor (pole) location
directly.
• If the Convention is Dip/DipDirection or Strike/Dip (right or
left hand rule for strike) the coordinates will be in Plane Vector
format and represent the plane corresponding to the cursor (pole)
location.
TIP: the quickest and most convenient way of toggling the Convention is
to click on the box in the Status Bar to the left of the coordinate display,
with the LEFT mouse button.
The Reporting Convention also affects the format of certain data listings
in Dips (e.g. the Major Planes legend, the Edit Planes and Edit Sets
dialogs), and the format of orientation data input for certain options (e.g.
Add Plane and Add Set Window dialogs).
NOTE: THE CONVENTION OPTION DOES NOT AFFECT THE
PLOTTING OF DATA, OR THE VALUES IN THE GRID IN ANY WAY !!
Poles are ALWAYS plotted using the Trend and Plunge of the pole vector
with respect to the reference sphere, regardless of the setting of the
Convention option.
9. Quick Start Tutorial 1-9
Dips v.6.0 Tutorial Manual
Scatter Plot
While a Pole Plot illustrates orientation data, single pole symbols may
actually represent several unit measurements of similar orientation.
A Scatter Plot allows you to better view the numerical distribution of
measurements, since coincident pole and closely neighbouring pole
measurements are grouped together with quantities plotted symbolically.
The Scatter Plot Legend indicates the number of poles represented by
each symbol. The size and colour of symbol indicates the approximate
pole density at that location.
Select the Scatter Plot option from the View menu or the sidebar plot
options.
Select: View → Scatter Plot
A Scatter plot can be applied to Dip Vectors as well as poles.
Choose Dip Vector Mode from the toolbar and view the effect on the
Scatter Plot.
Now switch back to Pole Vector mode.
Let’s move on to the Contour Plot, which is the main tool for analyzing
pole concentrations on a stereonet.
10. Quick Start Tutorial 1-10
Dips v.6.0 Tutorial Manual
Contour Plot
Select the Contour Plot option from the toolbar or the View menu, and a
Contour Plot will be generated.
Select: View → Contour Plot
The Contour Plot clearly shows the data concentrations. It can be seen
that there are three data clusters in the Example.dips6 file, including one
that wraps around to the opposite side of the stereonet.
Since this file only contains 40 data entries, the data clustering in this
case was apparent even on the Pole Plot. However, in larger Dips files,
which may contain hundreds or even thousands of entries, cluster
recognition will not necessarily be visible on Pole Plots and Contour Plots
are necessary to identify major data concentrations.
Weighted Contour Plot
Since this file contains Traverse information (Traverses are discussed in
the next tutorial), a Terzaghi Weighting can be applied to Contour Plots,
to correct for sampling bias introduced by data collection along Traverses.
To apply the Terzaghi Weighting to the Contour Plot, select the Terzaghi
Weighting checkbox in the sidebar plot options or the View menu.
Select: View → Terzaghi Weighting
11. Quick Start Tutorial 1-11
Dips v.6.0 Tutorial Manual
Note the change in the Contour Plot. Applying the Terzaghi Weighting
may reveal important data concentrations which were not apparent on
the unweighted Contour Plot. The effect of applying the Terzaghi
Weighting will of course be different for each file, and will depend on the
data collected, and the traverse orientations. In this case the Terzaghi
weighting does not significantly change the contour plot.
DO NOT USE WEIGHTED CONTOUR PLOTS FOR APPLICATIONS
UNLESS YOU ARE FAMILIAR WITH THE LIMITATIONS. For a
discussion of sampling bias and the Terzaghi Weighting procedure, see
the Dips Help system.
To remove the Terzaghi Weighting and restore the unweighted Contour
Plot, simply de-select the Terzaghi Weighting checkbox in the sidebar or
View menu dialog.
Select: View → Terzaghi Weighting
The minimum bias angle option allows you to set a minimum bias angle
which prevents the Terzaghi weighting factor from becoming very large.
See the Dips help system for details.
12. Quick Start Tutorial 1-12
Dips v.6.0 Tutorial Manual
Dip Vector Contours
As with pole and scatter plots, a Contour Plot can display either pole or
dip vector contours, according to the setting of the Pole / Dip Vector Mode
option in the toolbar. Select Dip Vector Mode to view the plot, then
switch back to Pole Vector mode.
Contour Options
Many Contour Options are available which allow you to customize the
style, range and number of contour intervals. We will not explore the
Contour Options in this tutorial; however, you are encouraged to
experiment. Contour Options is available in the View menu, or by right-
clicking on a Contour Plot.
Stereonet Options
In the sidebar you will notice the stereonet display options. You may
choose Equal Angle or Equal Area projection; upper or lower hemisphere
projection; and a variety of other display options. Colour selections can be
customized. Again you are encouraged to experiment with these options
after completing the tutorial.
13. Quick Start Tutorial 1-13
Dips v.6.0 Tutorial Manual
Symbolic Pole Plot
We will now demonstrate how feature attribute analysis can be carried
out using the Symbolic Plot and Chart options in Dips.
Select the Symbolic Plot option from the toolbar or the View menu.
Select: View → Symbolic Plot
1. You will see the Symbolic Plot dialog.
2. In the Data Type drop-list select the data (column) you would like
to plot. For example, select TYPE.
3. The data in the TYPE column is Qualitative, which is the default
selection so we do not have to change this. If the data were
Quantitative, i.e. numeric, then we would have to select the
Quantitative Data Type option.
4. Notice that a list of all entries in the TYPE column appears in the
Allocated list area.
5. Select OK, and a Symbolic Plot will be generated, displaying
symbols corresponding to the entries in the TYPE column as
shown in the following figure.
14. Quick Start Tutorial 1-14
Dips v.6.0 Tutorial Manual
TIP: once a Symbolic Plot has been generated, the most recently selected
properties will be “remembered” by the view. If you later switch plot types
(e.g. Contour Plot, Pole Plot) you can quickly recall the current Symbolic
Plot by selecting the Symbolic option in the sidebar vector display plot
options. The Symbolic Plot dialog can be accessed at any time by selecting
the Symbolic Plot toolbar button or the small button beside the
Symbolic option in the sidebar or in the right-click menu.
Symbolic Plot Legend
In the Symbolic Plot legend, you will notice the Quantity of each feature
being plotted. This refers to the total number of poles with that label (i.e.
it accounts for the Quantity Column values). If you add the Quantity
numbers in the legend, you will find that the total is equal to the Vector
Count (number of Poles) listed at the bottom of the legend, in this case,
61.
Symbolic Dip Vector Plot
As with pole, scatter and contour plots, the Symbolic Plot can display
either poles or dip vectors, according to the setting of the Pole / Dip
Vector Mode option in the toolbar. Select Dip Vector Mode to view the
plot, then switch back to Pole Vector mode.
15. Quick Start Tutorial 1-15
Dips v.6.0 Tutorial Manual
Creating a Chart from a Symbolic Plot
Now let’s create a corresponding Histogram, based on our Symbolic Pole
Plot.
1. Right-click on the Symbolic Plot. From the popup menu select
Symbolic > Create Corresponding Chart.
2. You will see a Chart dialog with Data = TYPE pre-selected.
3. Select OK and a new chart view will automatically be generated,
using the same data and settings selected for the Symbolic Plot.
The Chart can then be customized if desired using the various Chart
Settings available in the sidebar (e.g. the Histogram can be converted to a
Pie Chart or a Line graph).
16. Quick Start Tutorial 1-16
Dips v.6.0 Tutorial Manual
Charts can also be generated directly using the Chart option in the
toolbar or the Analysis menu. The above procedure is simply a shortcut
for generating a chart from an existing Symbolic Plot.
Switch back to the stereonet plot view using the tabs at the bottom of the
screen.
17. Quick Start Tutorial 1-17
Dips v.6.0 Tutorial Manual
Plotting Intersections
The intersection of two planes forms a line in 3-dimensional space which
can be plotted as a point on the stereonet. Planar intersections are used
in kinematic stability analysis for wedge sliding and direct toppling
modes.
Several options are available for plotting intersections. In the sidebar:
1. Select the Intersections checkbox. The default option is Grid
Data Planes. This will plot the intersections of all planes in your
Dips file.
2. Turn off the display of pole vectors by de-selecting the Pole Vector
Display checkbox.
3. Intersection points can be contoured. Select the Contours >
Intersection option in the sidebar. Your screen should look as
follows.
Note that the Legend indicates that Intersections are being plotted and
the total number of intersections.
Other intersection plotting options allow you to intersect specified joint
sets, mean set planes, user planes, etc. See the Dips help system for
further information.
18. Quick Start Tutorial 1-18
Dips v.6.0 Tutorial Manual
Rosette Plot
Another widely used technique for representing orientations is the
Rosette Plot.
The conventional rosette plot begins with a horizontal plane (represented
by the equatorial (outer) circle of the plot). A radial histogram (with arc
segments instead of bars) is overlain on this circle, indicating the density
of planes intersecting this horizontal surface. The radial orientation
limits (azimuth) of the arc segments correspond to the range of STRIKE
of the plane or group of planes being represented by the segment. In other
words, the rosette diagram is a radial histogram of strike density or
frequency.
To generate a Rosette Plot, select Rosette Plot from the toolbar or the
View menu.
Select: View → Rosette Plot
If you right-click on the Rosette Plot you can access the Rosette Options
dialog from the popup menu. Experiment with the various Rosette
Options. See the Dips help system for information about the rosette plot
options. Close the dialog when you are finished.
Although the default Rosette
Plot uses a horizontal base
plane, an arbitrary base plane
at any orientation can be
specified in the Rosette
Options dialog. For a non-
horizontal base plane, the
Rosette Plot represents the
APPARENT STRIKE of the
lines of intersection between
the base plane and the planes
in the Dips file.
19. Quick Start Tutorial 1-19
Dips v.6.0 Tutorial Manual
Rosette Applications
The rosette conveys less information than a full stereonet since one
dimension is removed from the diagram. In cases where the planes being
considered form essentially two dimensional geometry (prismatic wedges,
for example) the third dimension may often overcomplicate the problem.
A horizontal rosette diagram may, for example, assist in blast hole design
for a vertical bench where vertical joint sets impact on fragmentation. A
vertical rosette oriented perpendicular to the axis of a long topsill or
tunnel may simplify wedge support design where the structure parallels
the excavation. A vertical rosette which cuts a section through a slope
under investigation can be used to perform quick sliding or toppling
analysis where the structure strikes parallel to the slope face.
From a visualisation point of view and for conveying structural data to
individuals unfamiliar with stereographic projection, rosettes may be
more appropriate when the structural nature of the rock is simple enough
to warrant 2D treatment.
Weighted Rosette Plot
The Terzaghi Weighting option can be applied to Rosette Plots as well as
Contour Plots, to account for sampling bias introduced by data collection
along Traverses.
• If the Terzaghi Weighting is NOT applied, the scale of the Rosette
Plot corresponds to the actual “number of planes” in each bin.
• If the Terzaghi Weighting IS applied, the scale of the Rosette Plot
corresponds to the WEIGHTED number of planes in each bin.
Do not use weighted plots for applications unless you are familiar with
the limitations. See the Dips Help system for more information.
20. Quick Start Tutorial 1-20
Dips v.6.0 Tutorial Manual
Info Viewer
The Info Viewer presents a formatted summary of your Dips file input
data and analysis results.
Select: Analysis → Info Viewer
Scroll down to view the information presented in the Info Viewer.
The sidebar allows you to customize the information shown in the Info
Viewer as well as the appearance (fonts, colours etc).
The Info Viewer information can be copied to the clipboard (Edit > Copy)
or saved to a file (right-click > Save As HTML…) for including in reports.
When Sets are defined all Set statistics can be found listed in the Info
Viewer. Sets are covered in tutorial #3.
21. Quick Start Tutorial 1-21
Dips v.6.0 Tutorial Manual
Working with Multiple Views
Now tile the views. If all views are still open your screen may look similar
to the following figure.
Select: Window → Tile Vertically
Notice that as you click the mouse in each view the sidebar options are
updated for the applicable view.
New stereonet plot views can be generated at any time, by selecting the
New Pole Vector Plot option in the Window menu.
Select: Window → New Pole Vector Plot
Display and visibility options can be customized independently for each
open view. This is left as an optional exercise to explore.
That concludes this quick start tutorial. See tutorial #2 and tutorial #3 for
instructions on how to create a Dips file, and how to create joint sets,
added planes and queries.