Download as PDF, PPTX
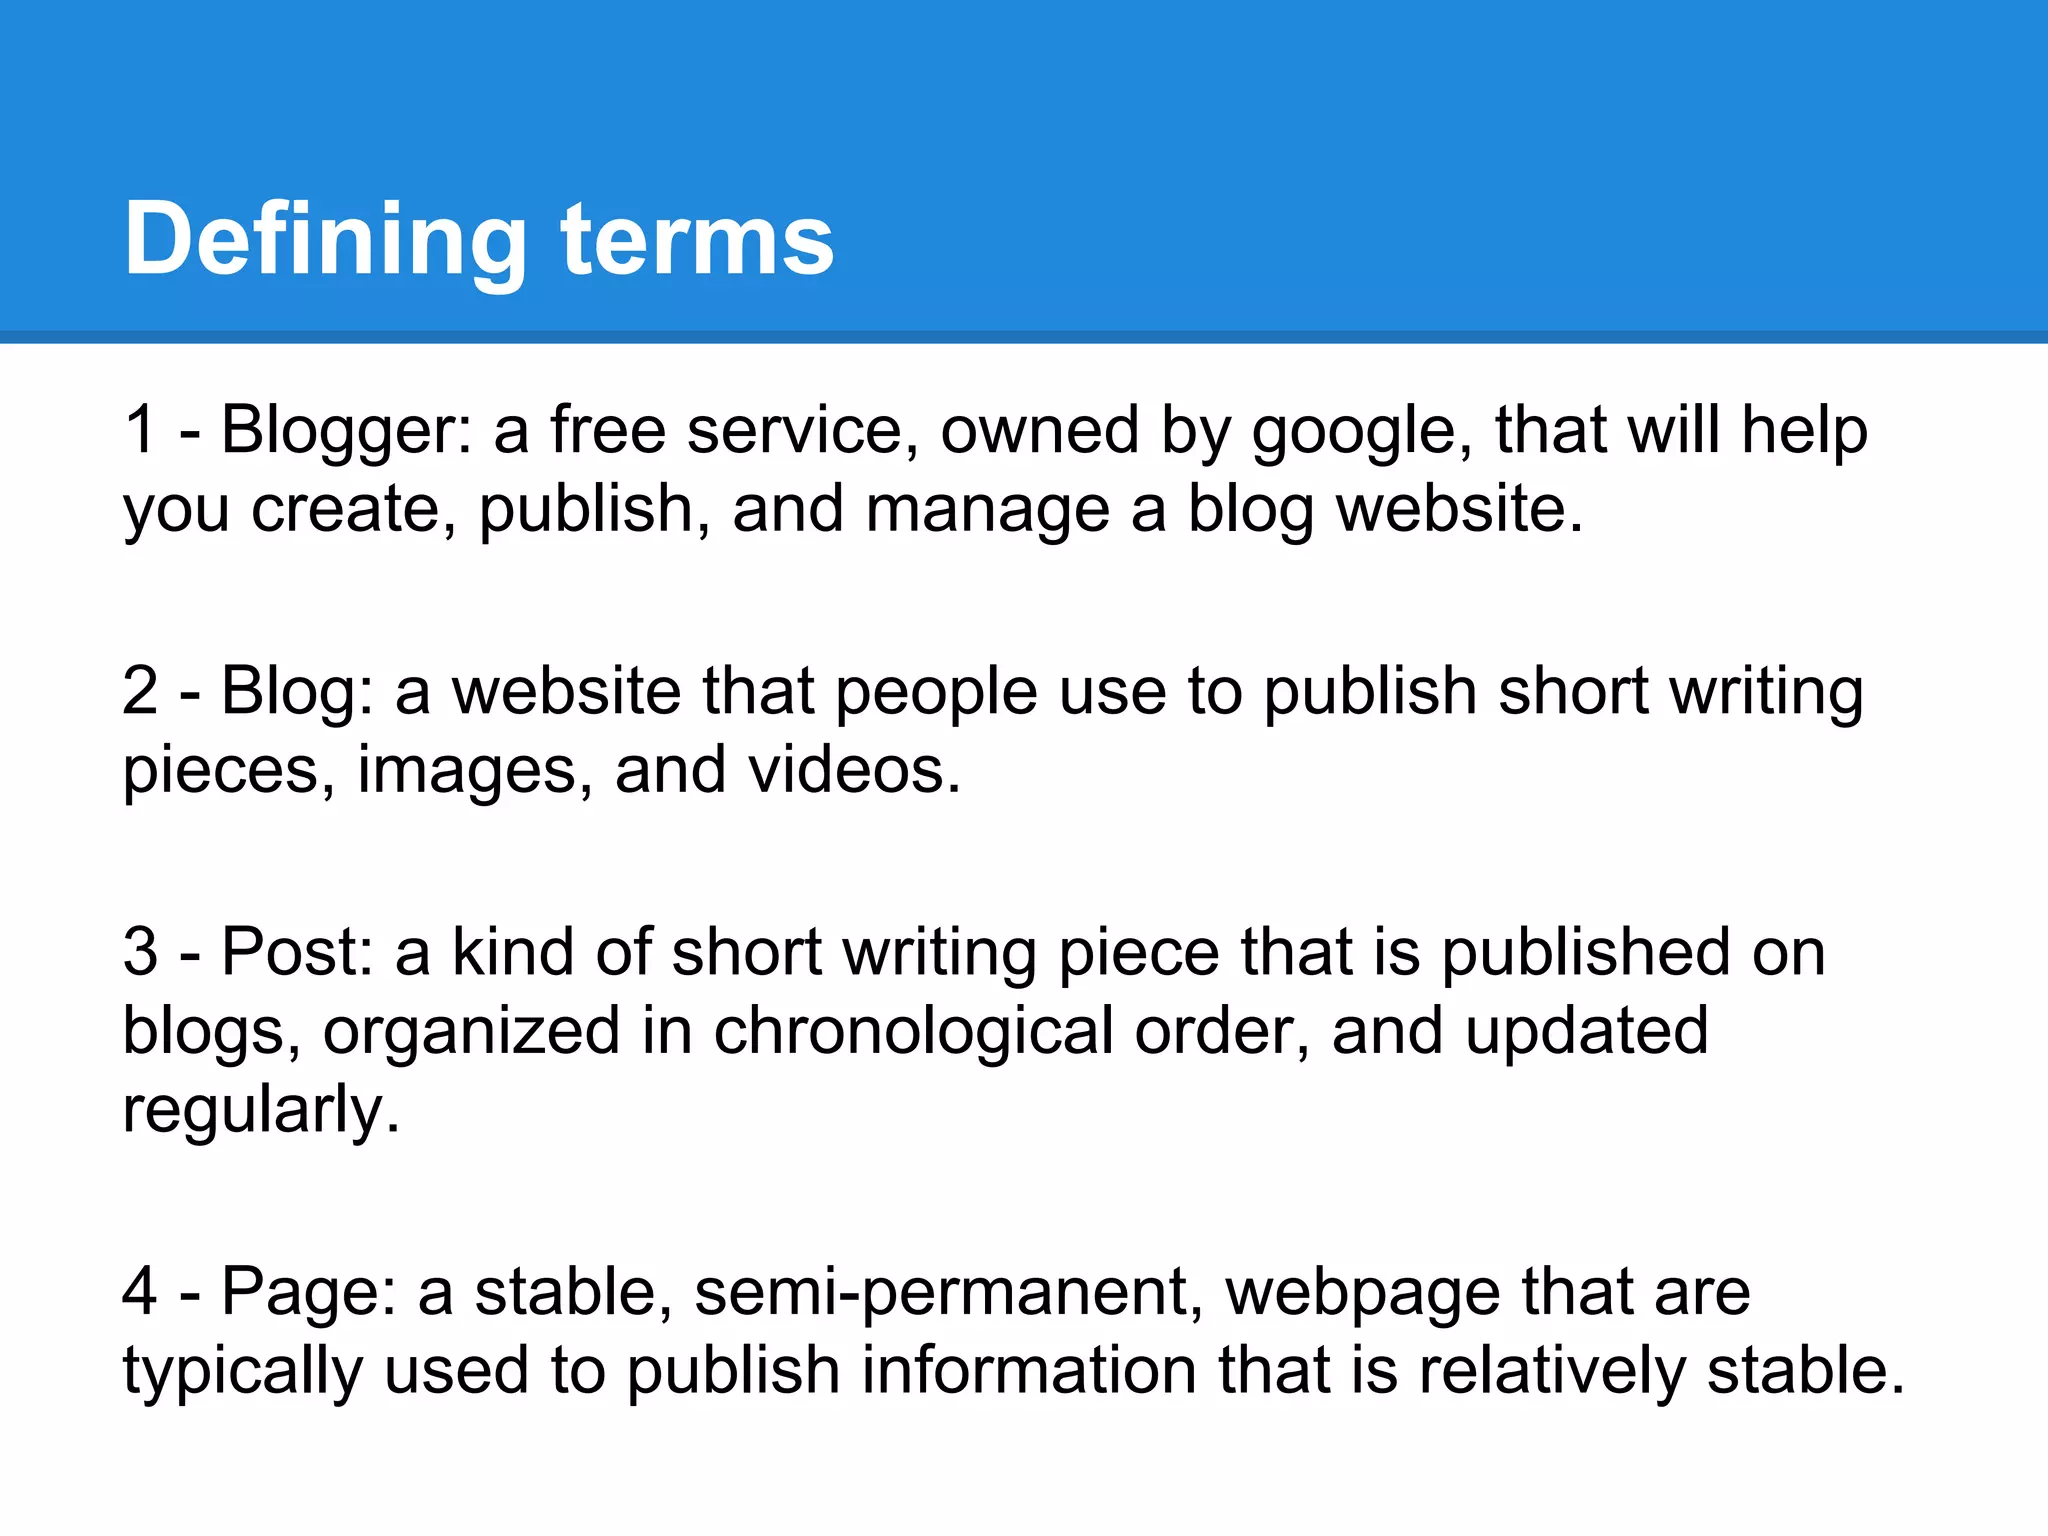
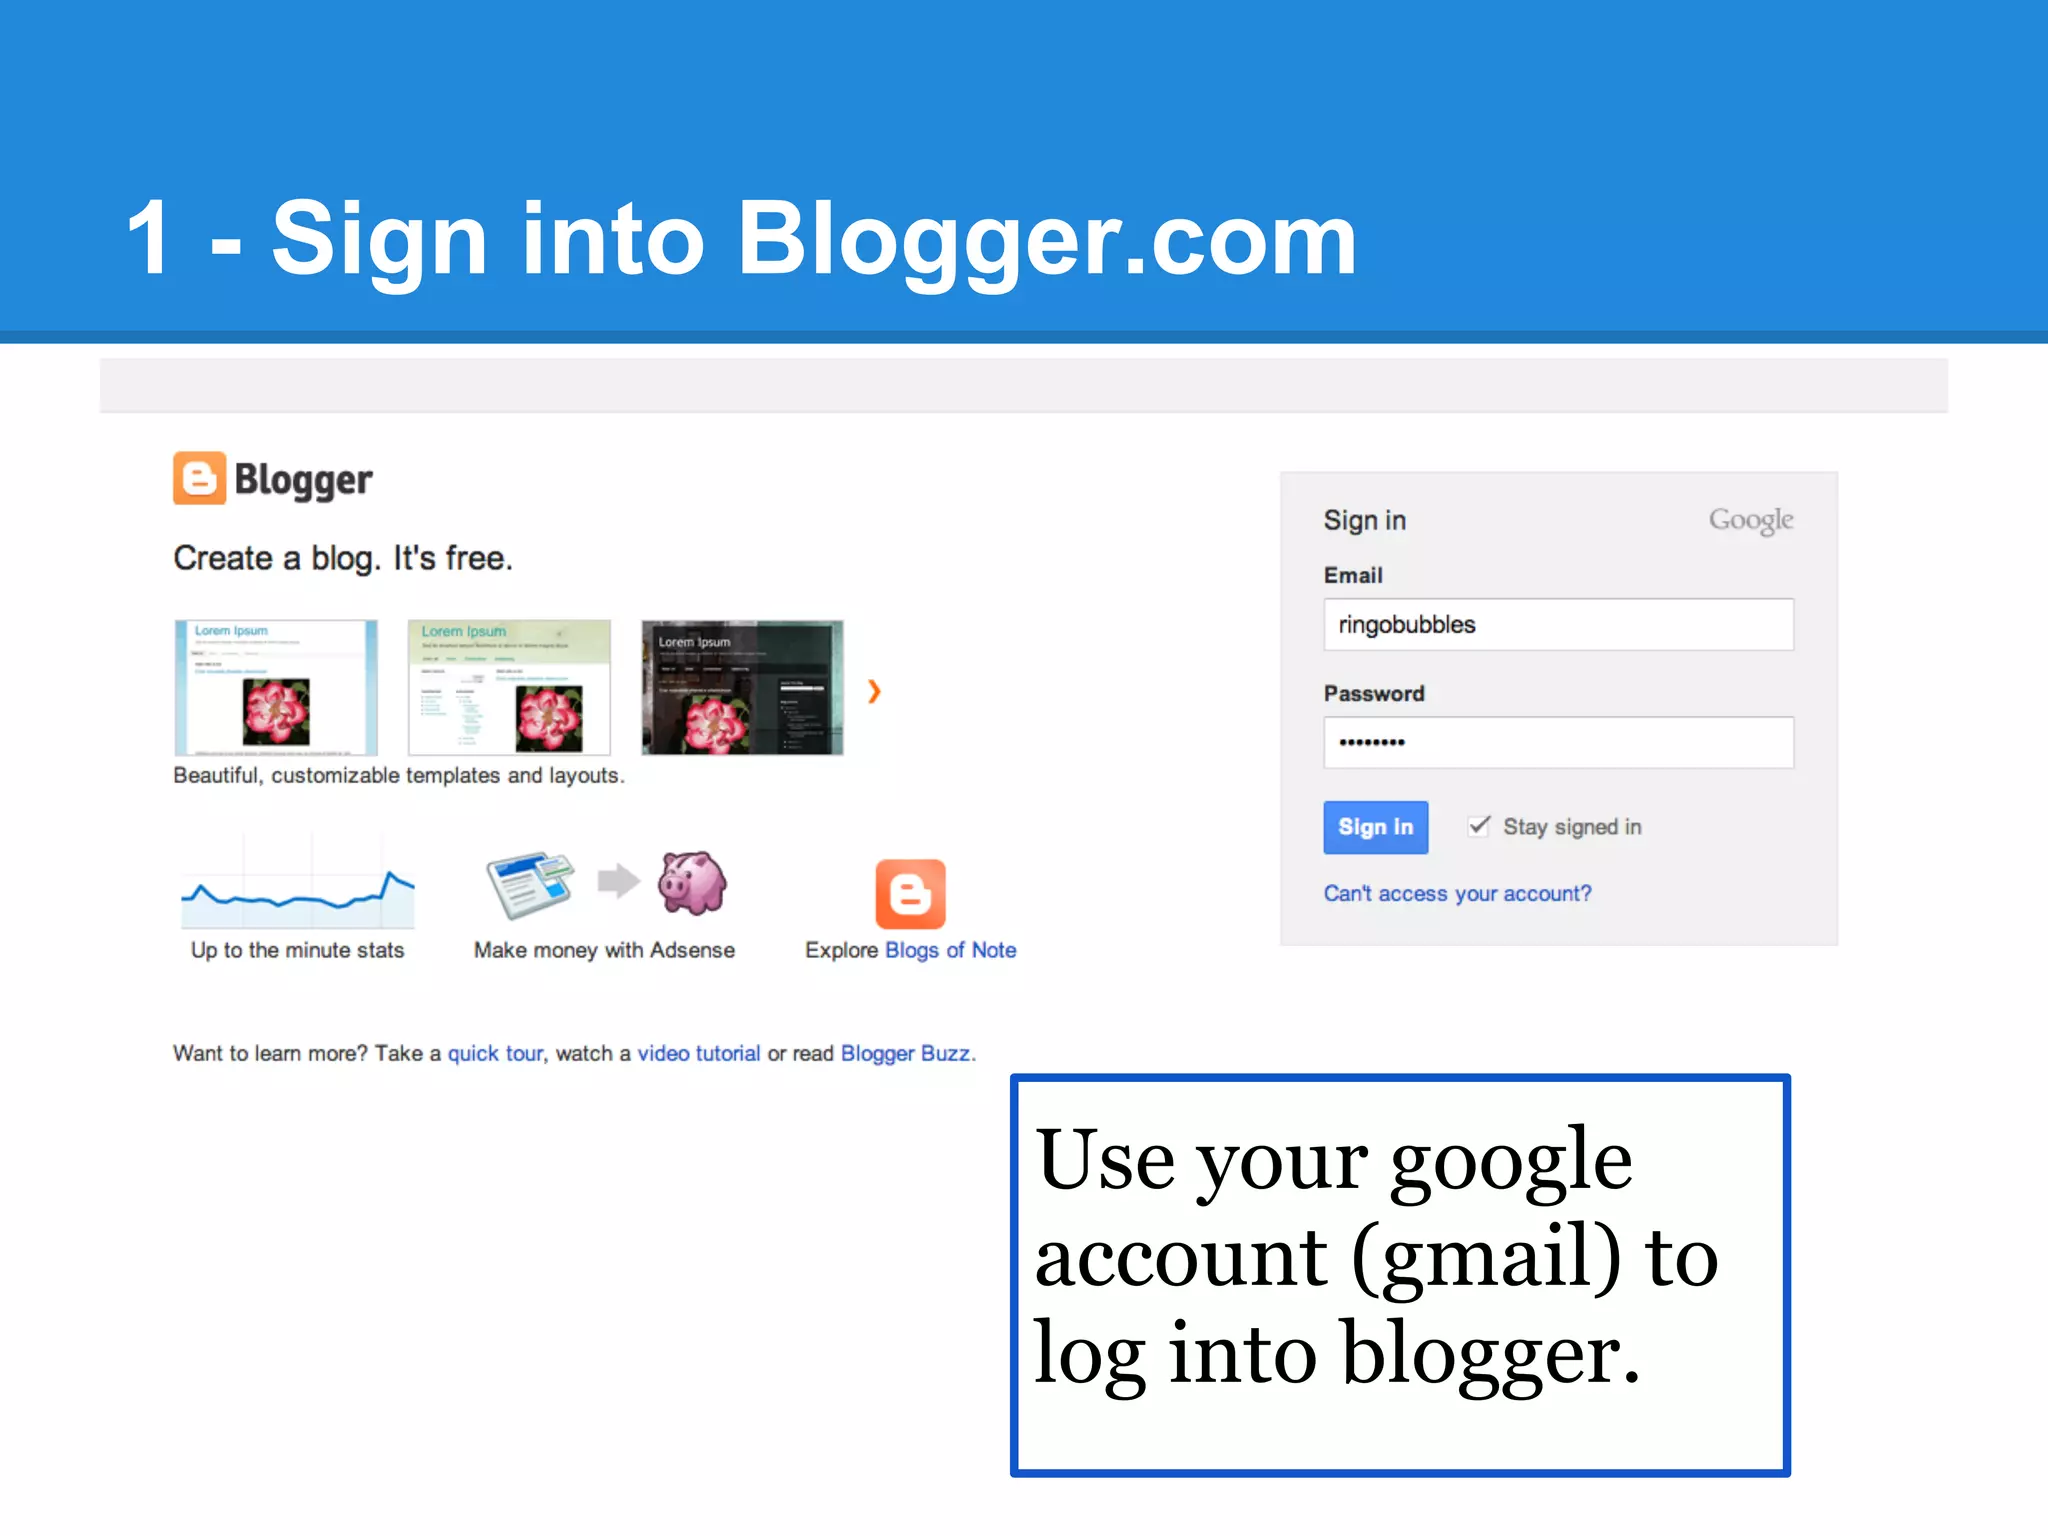
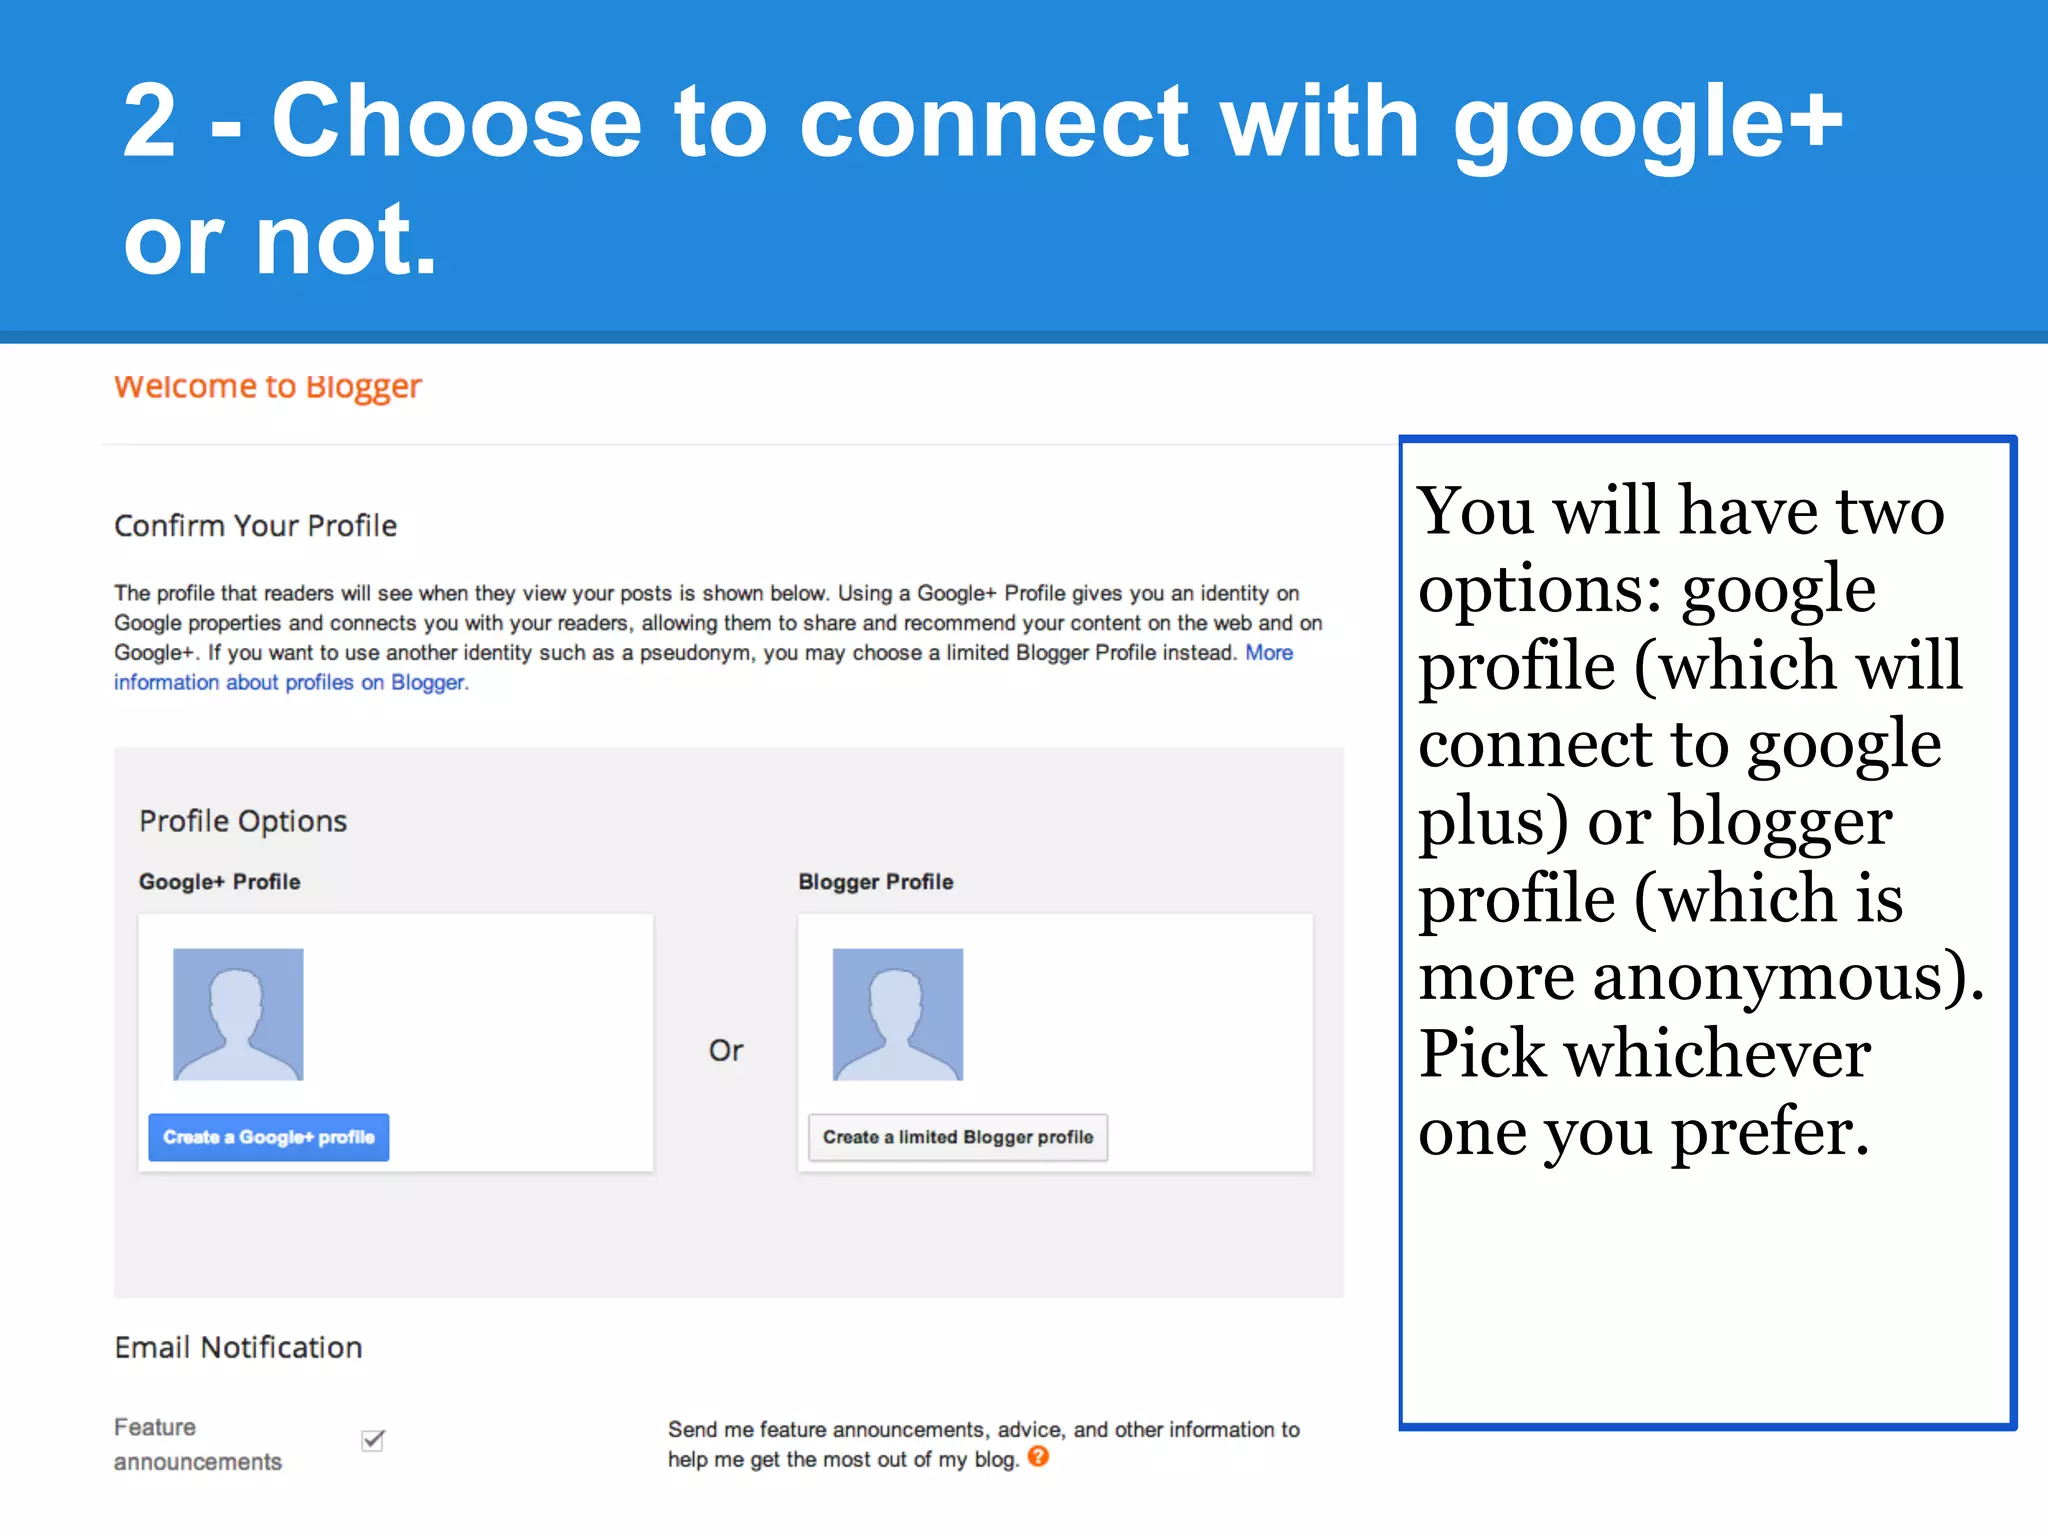
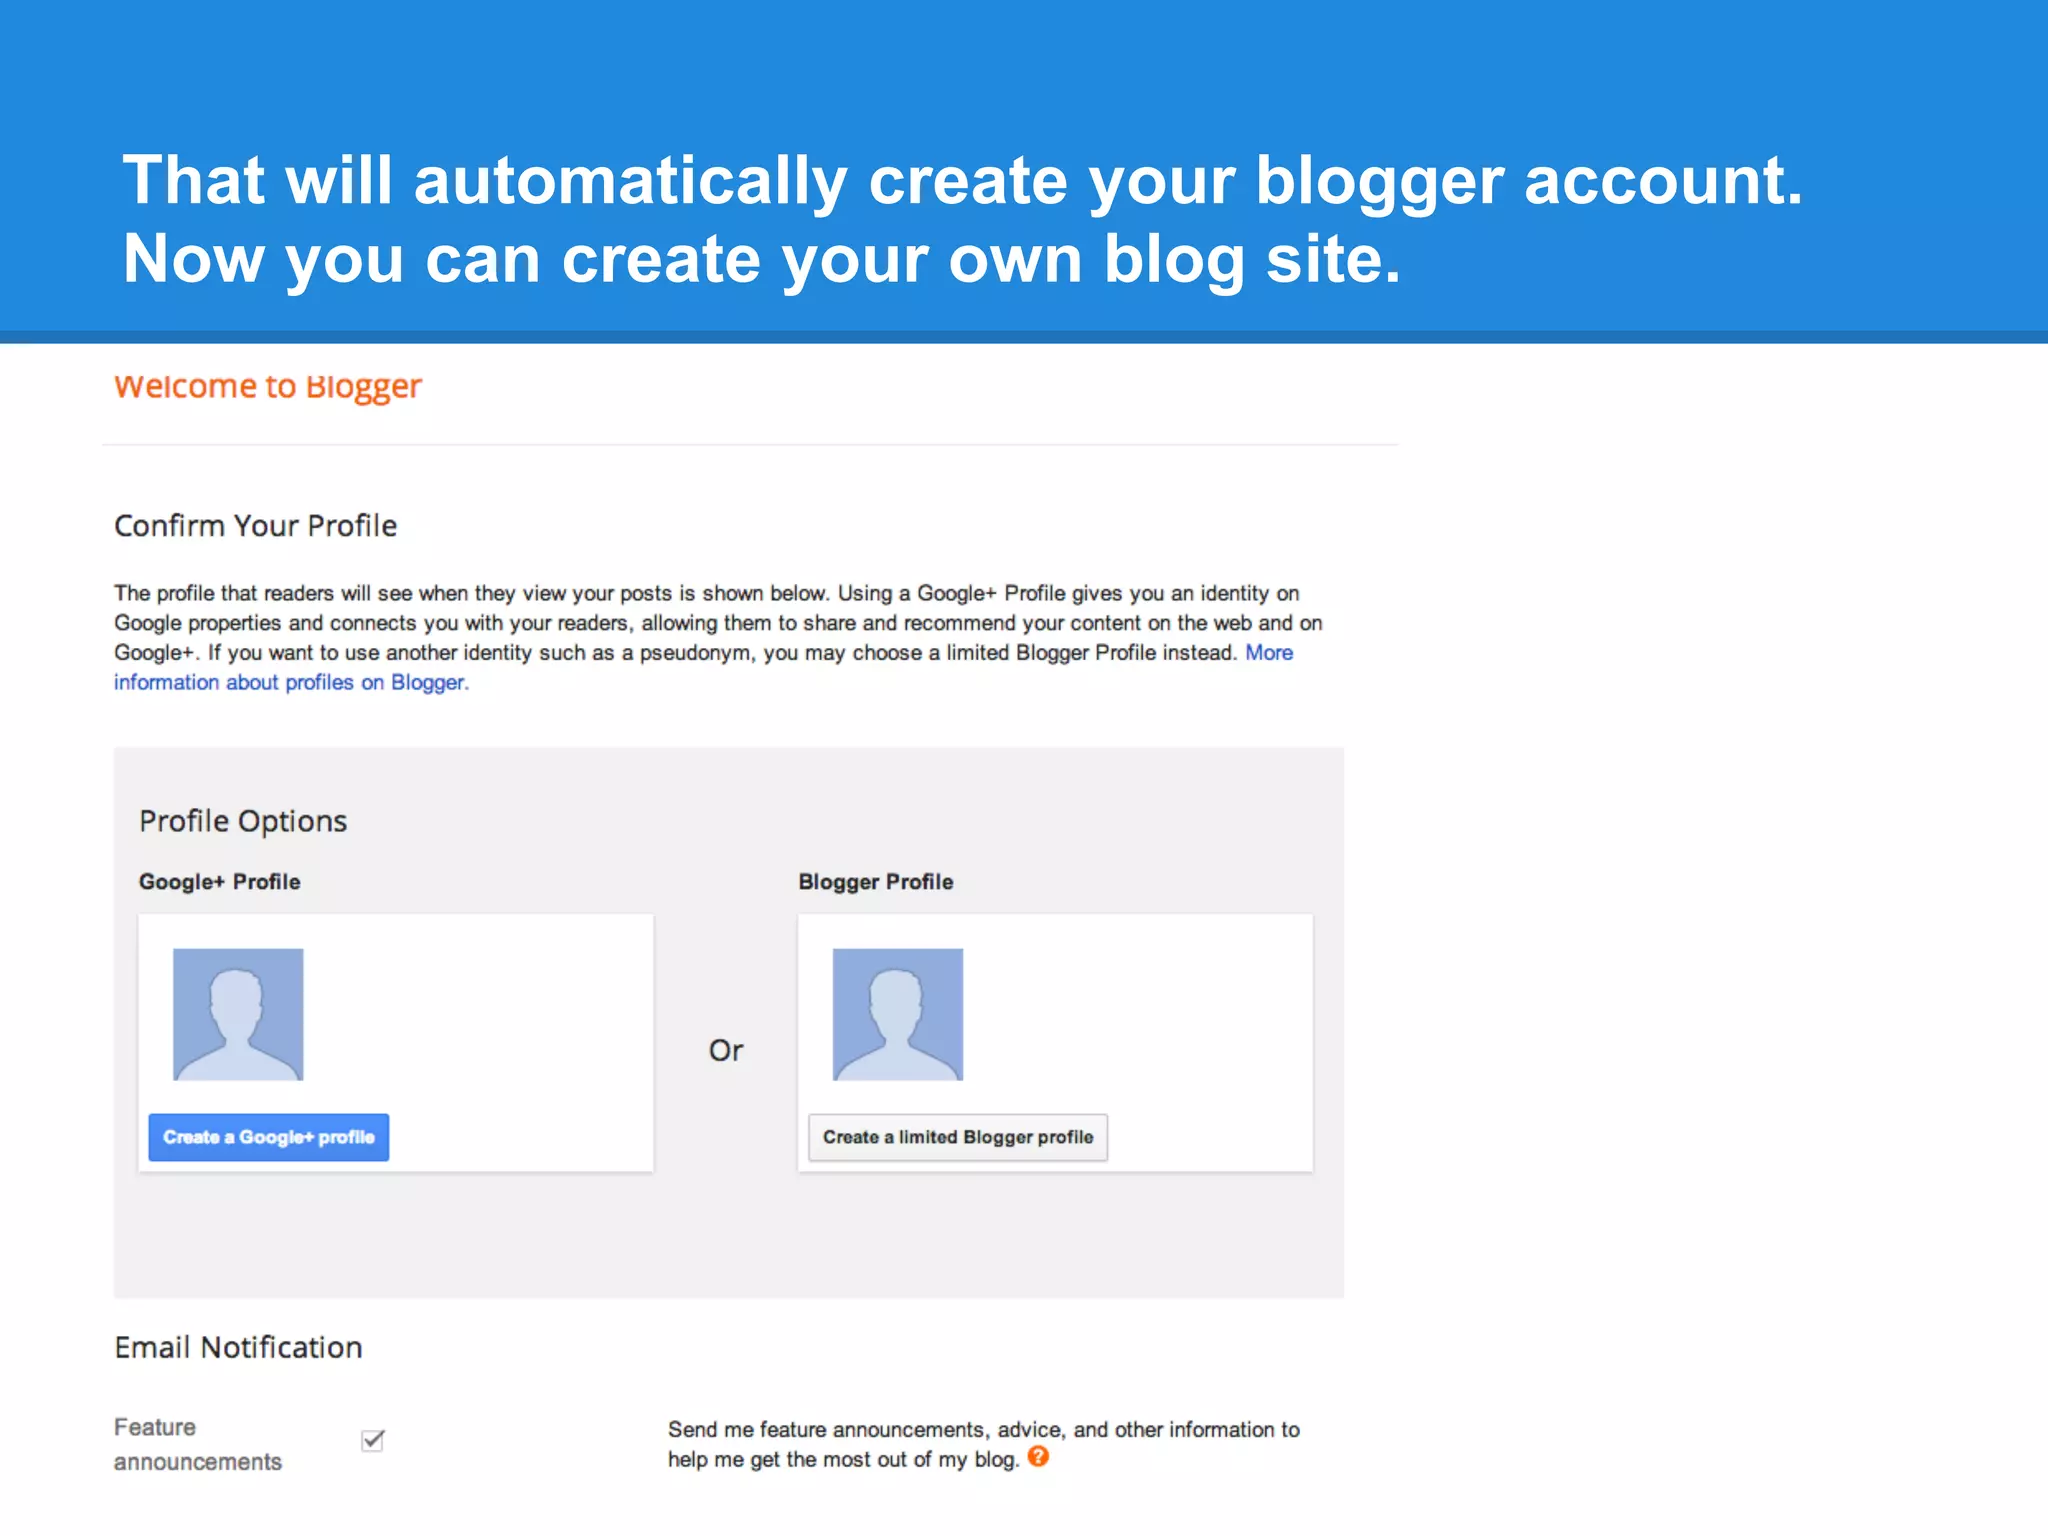
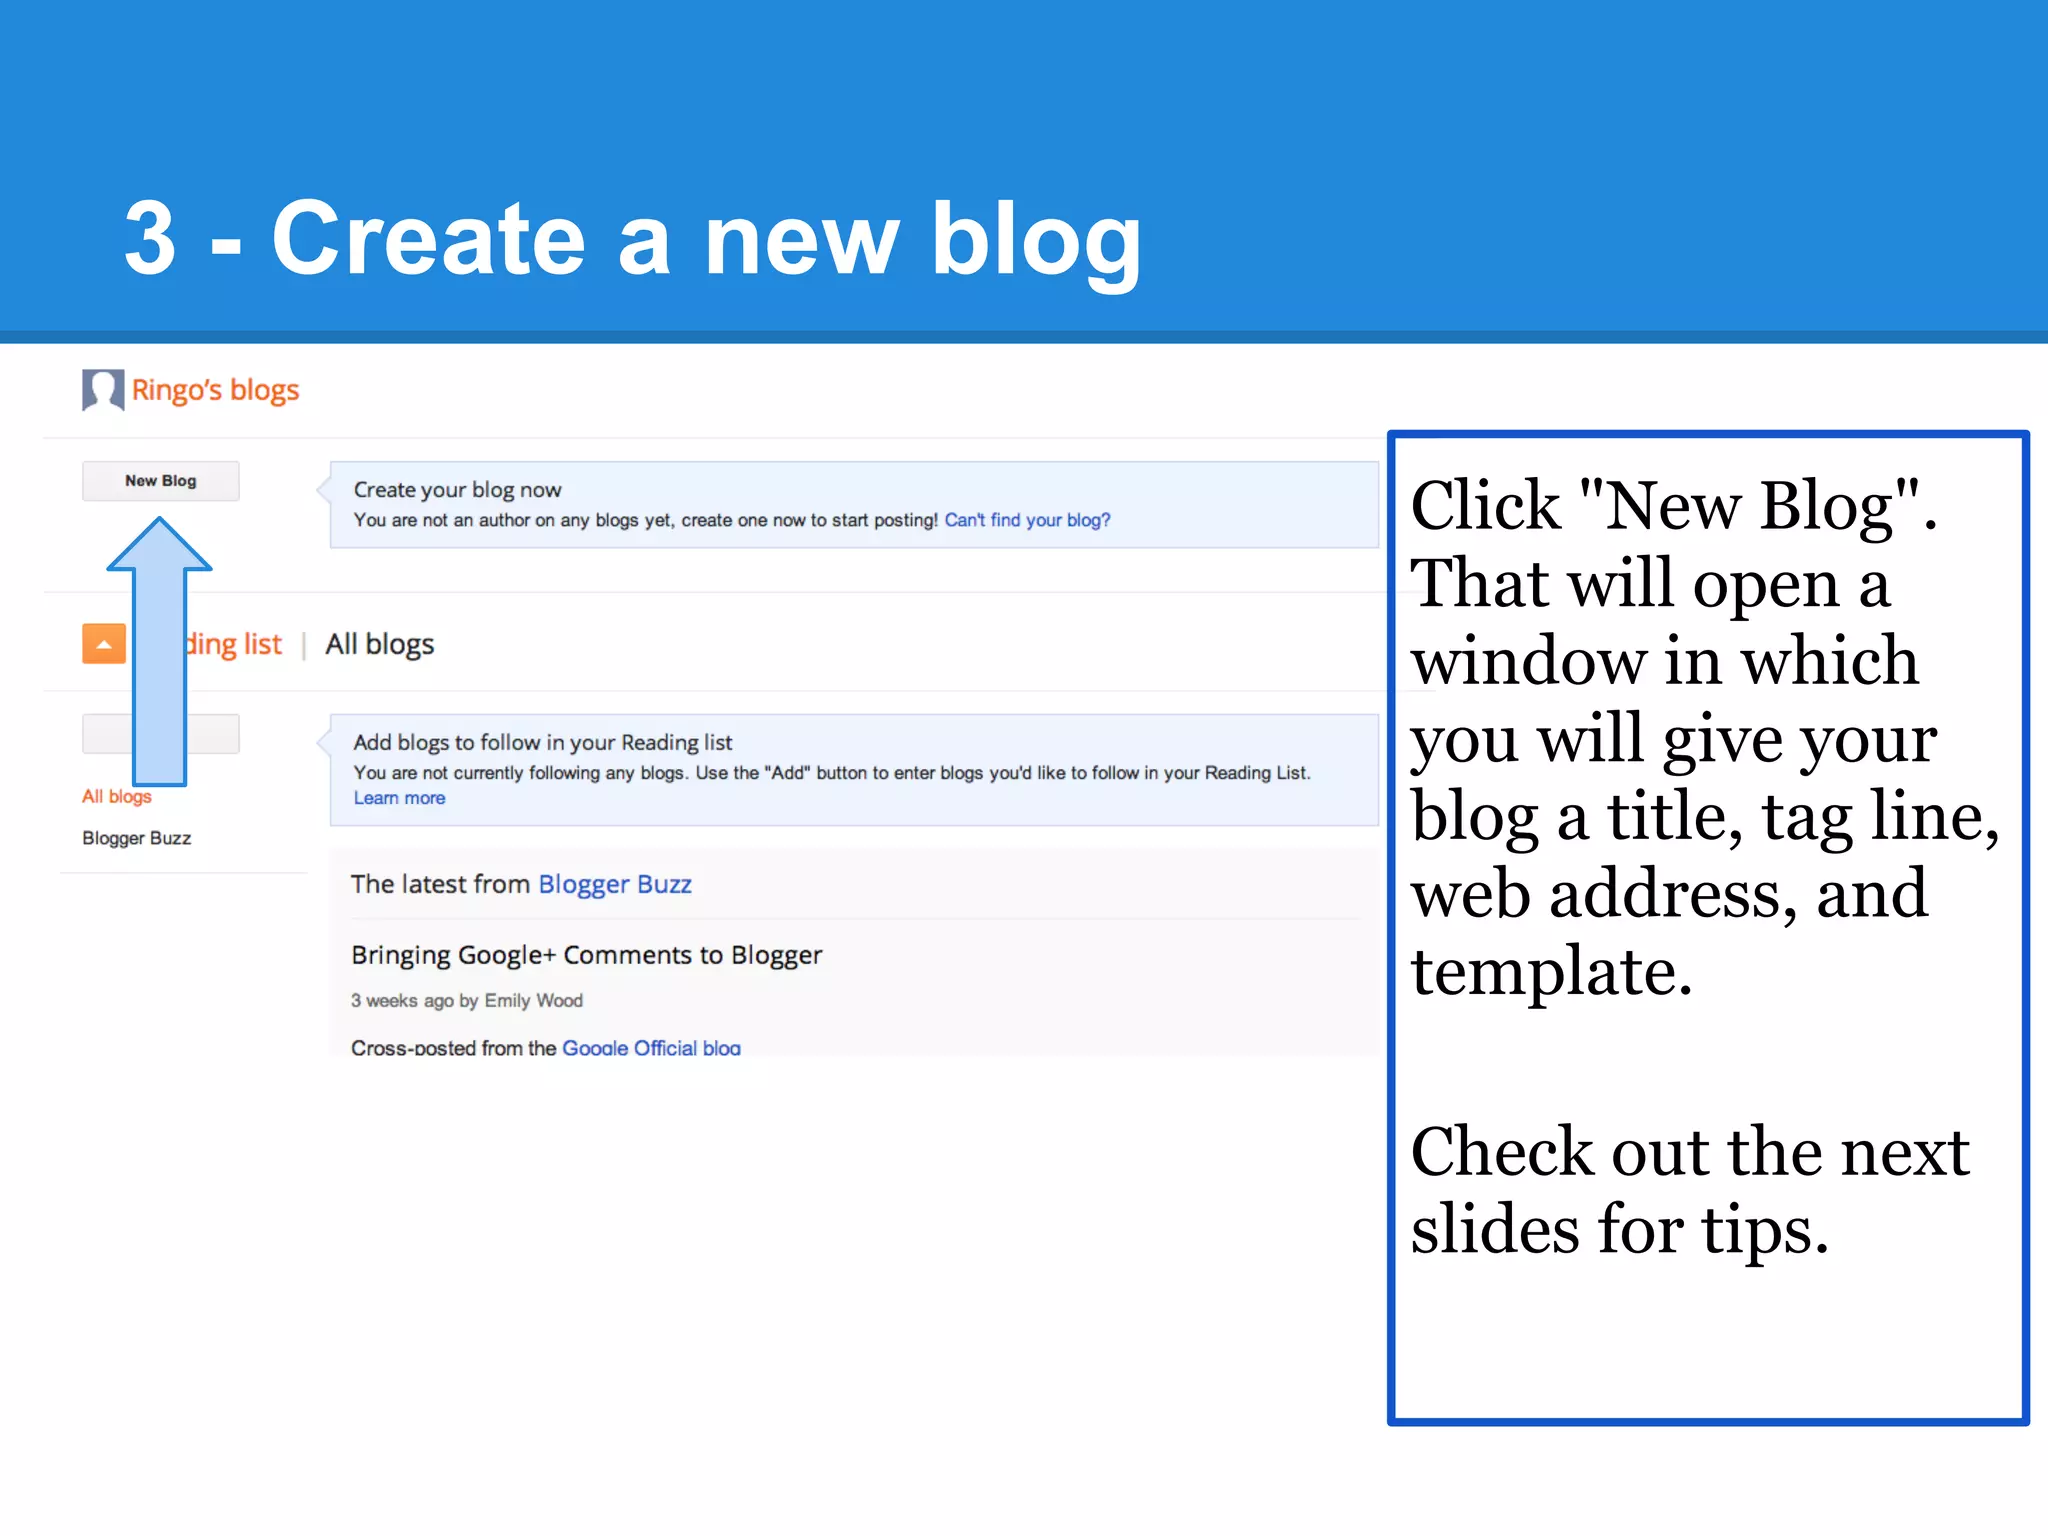
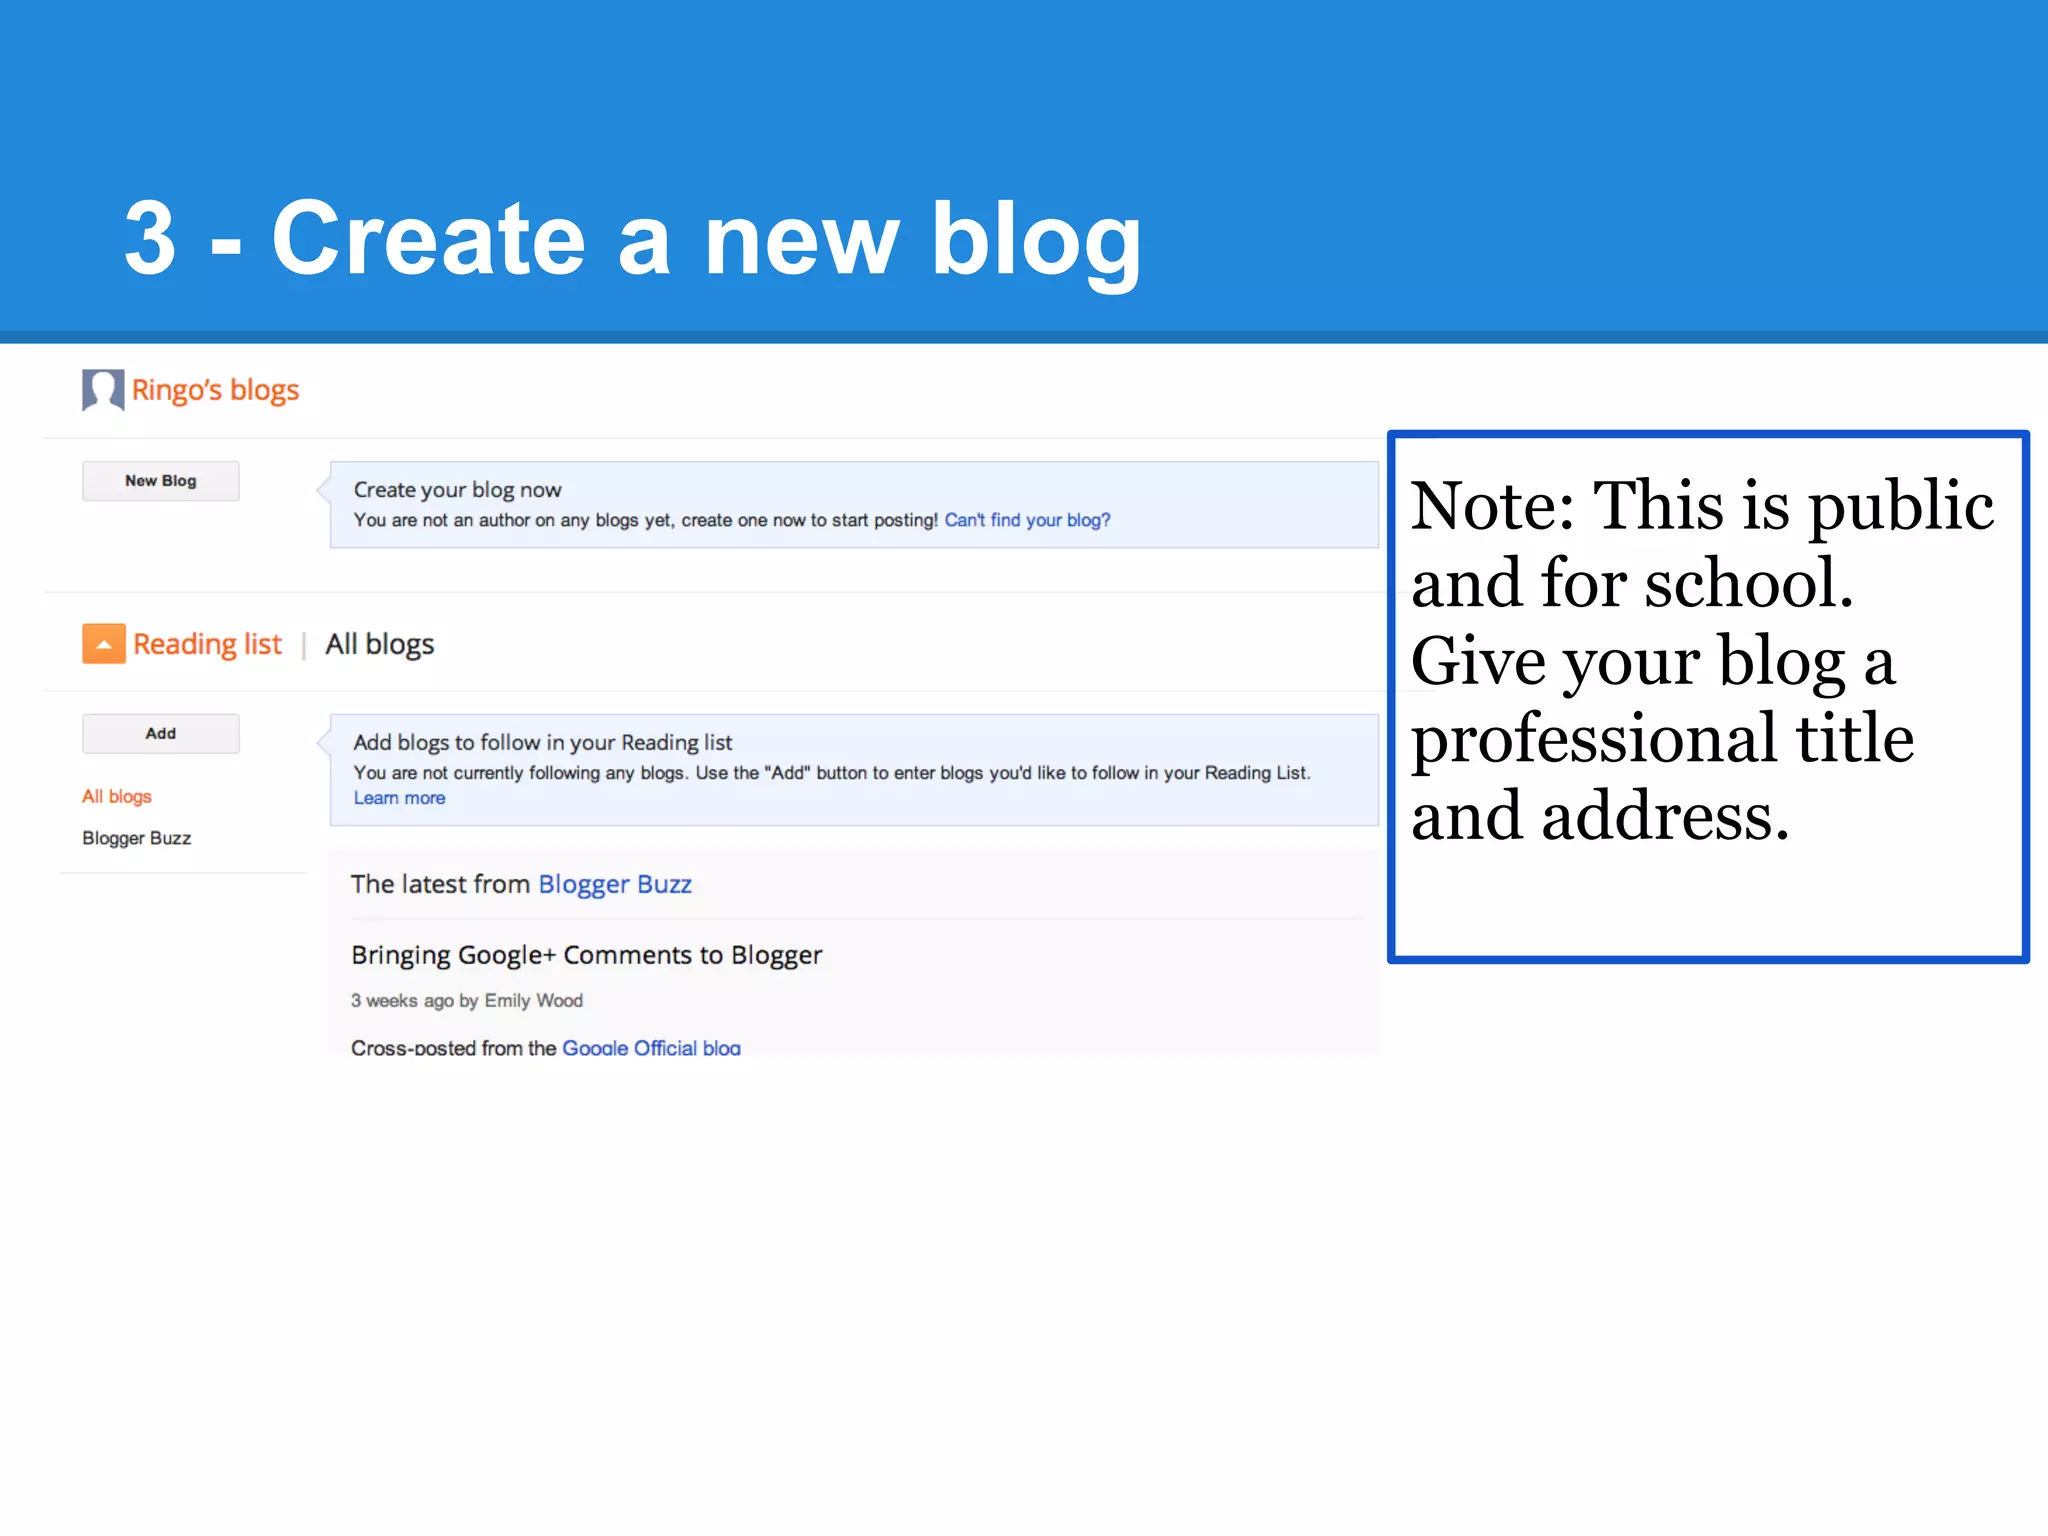
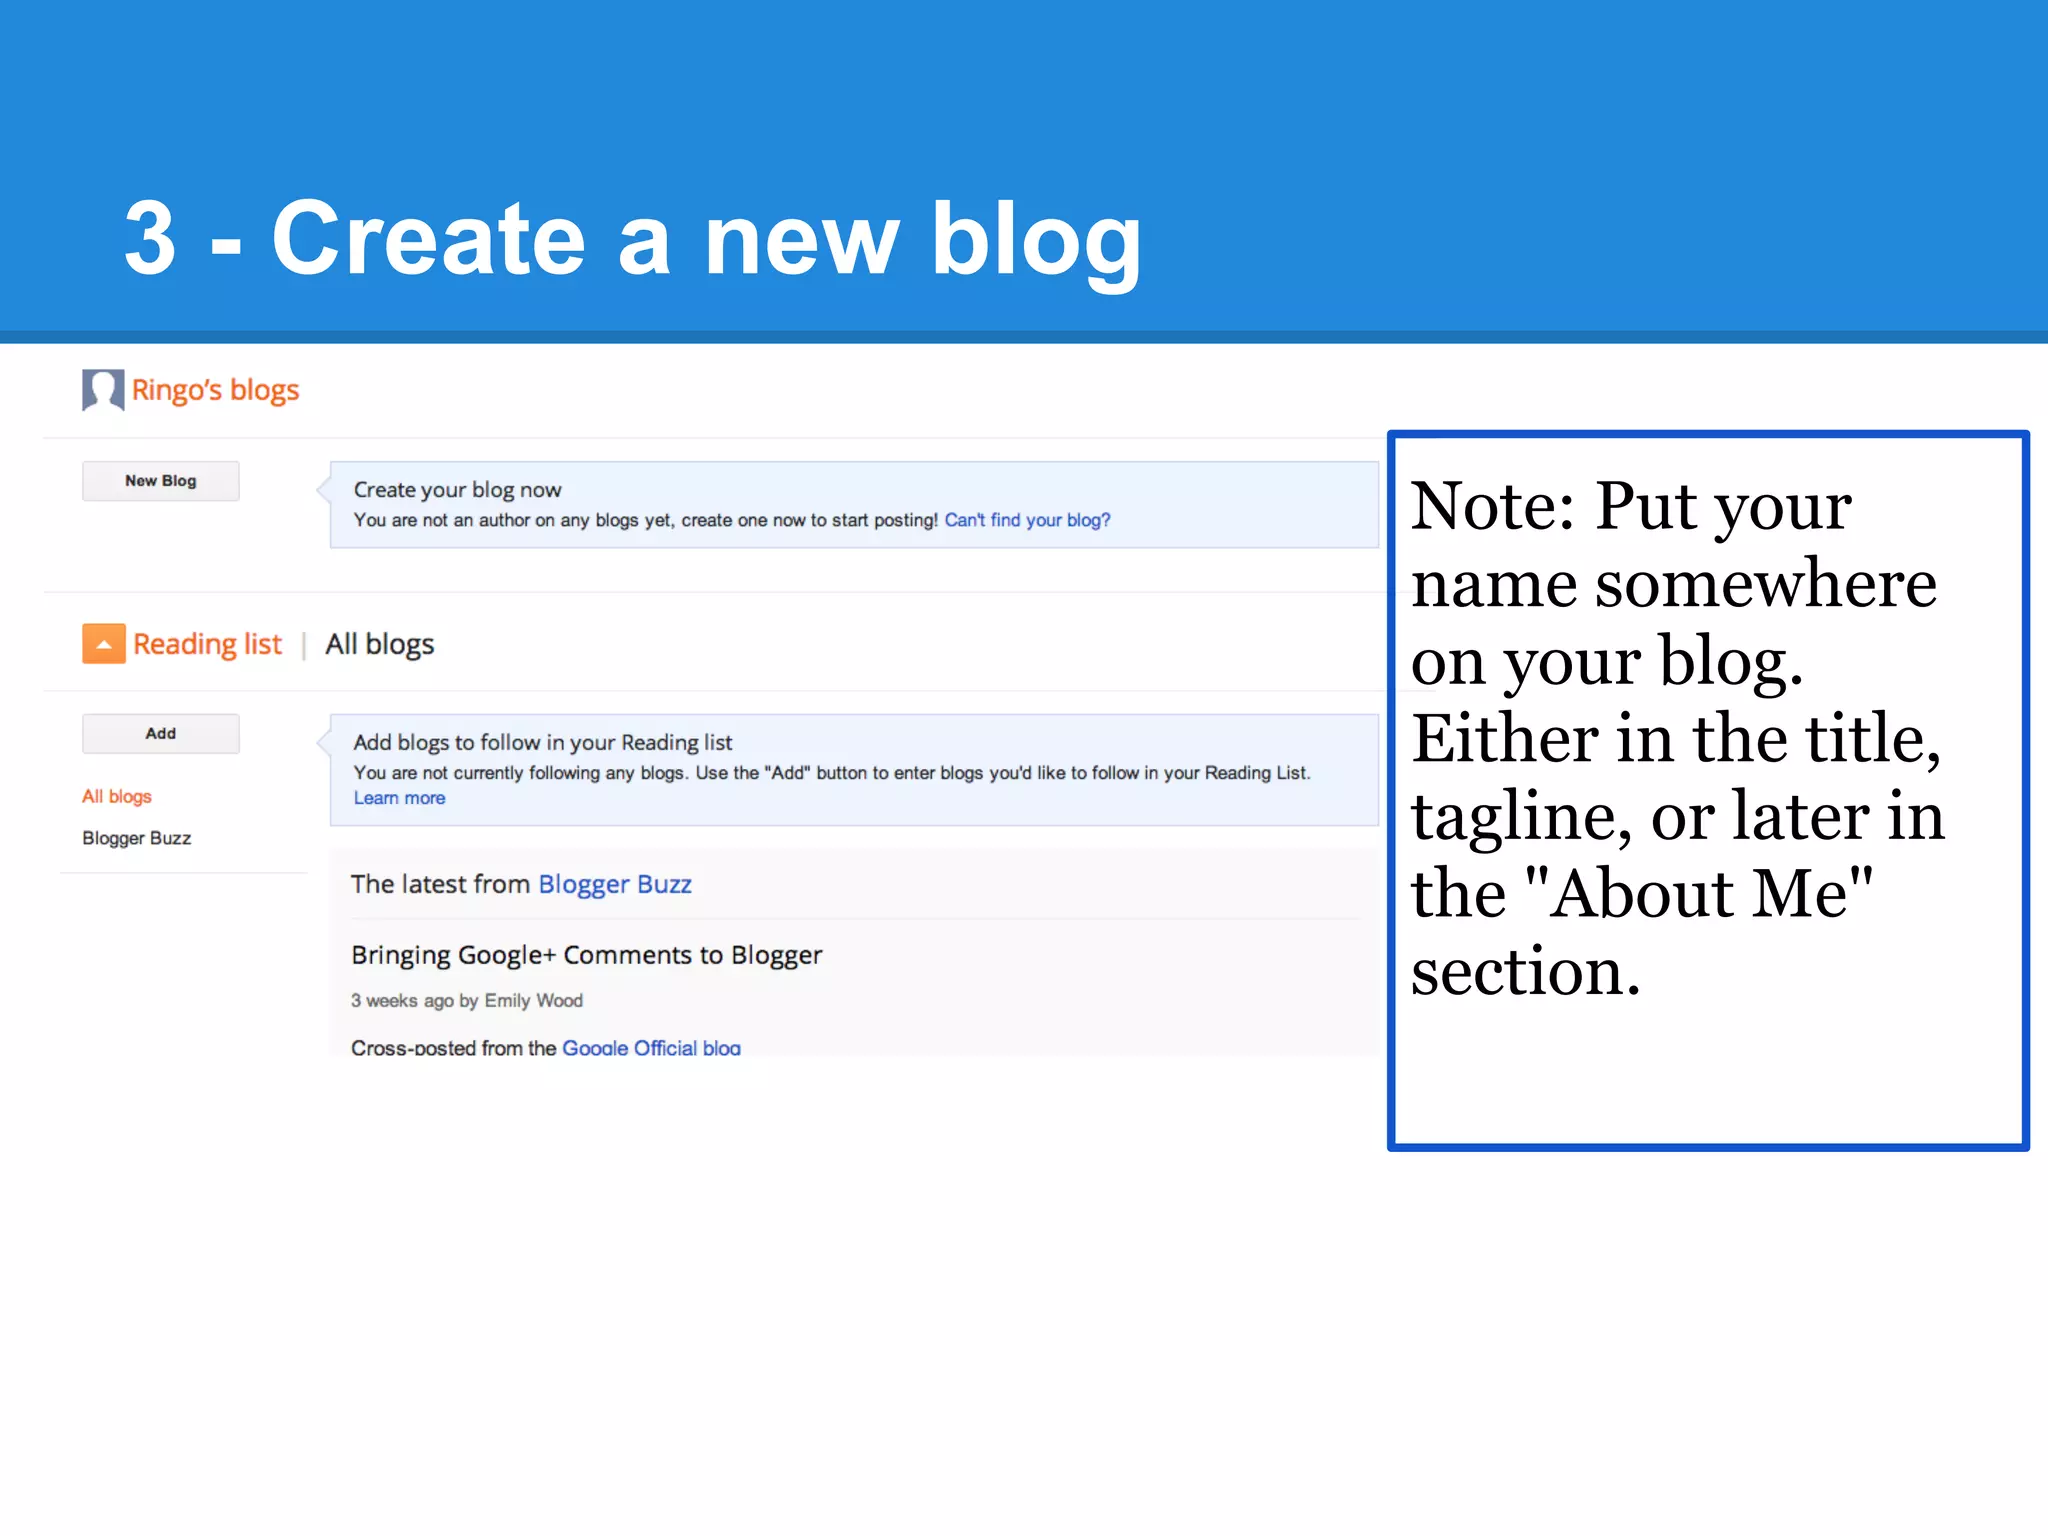
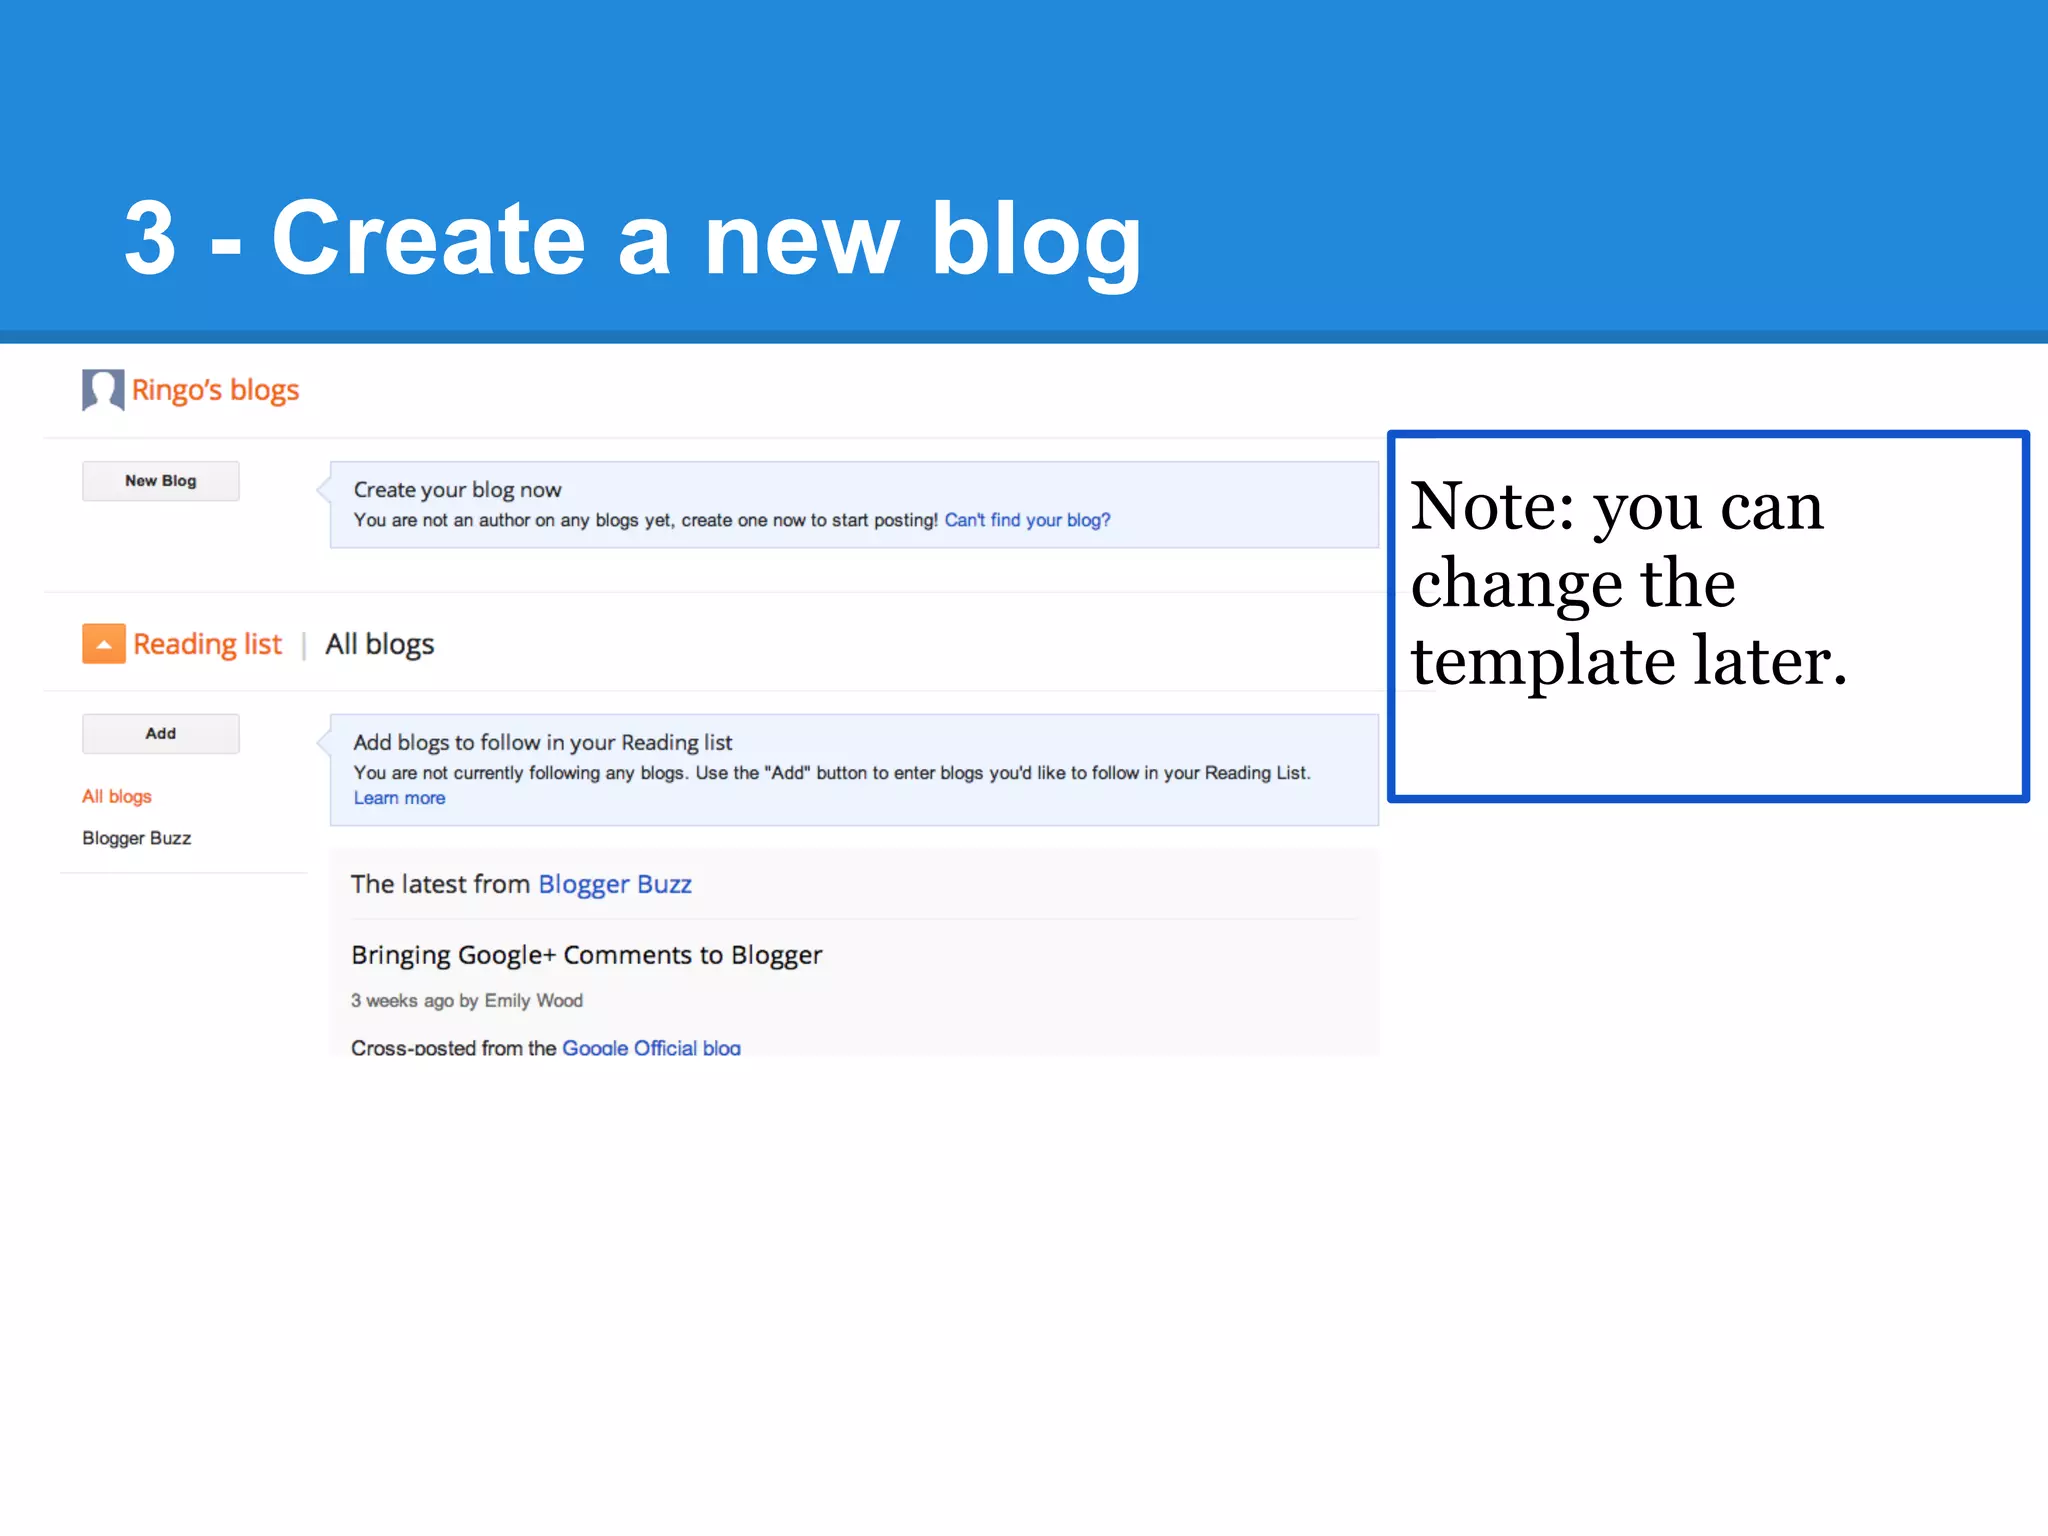

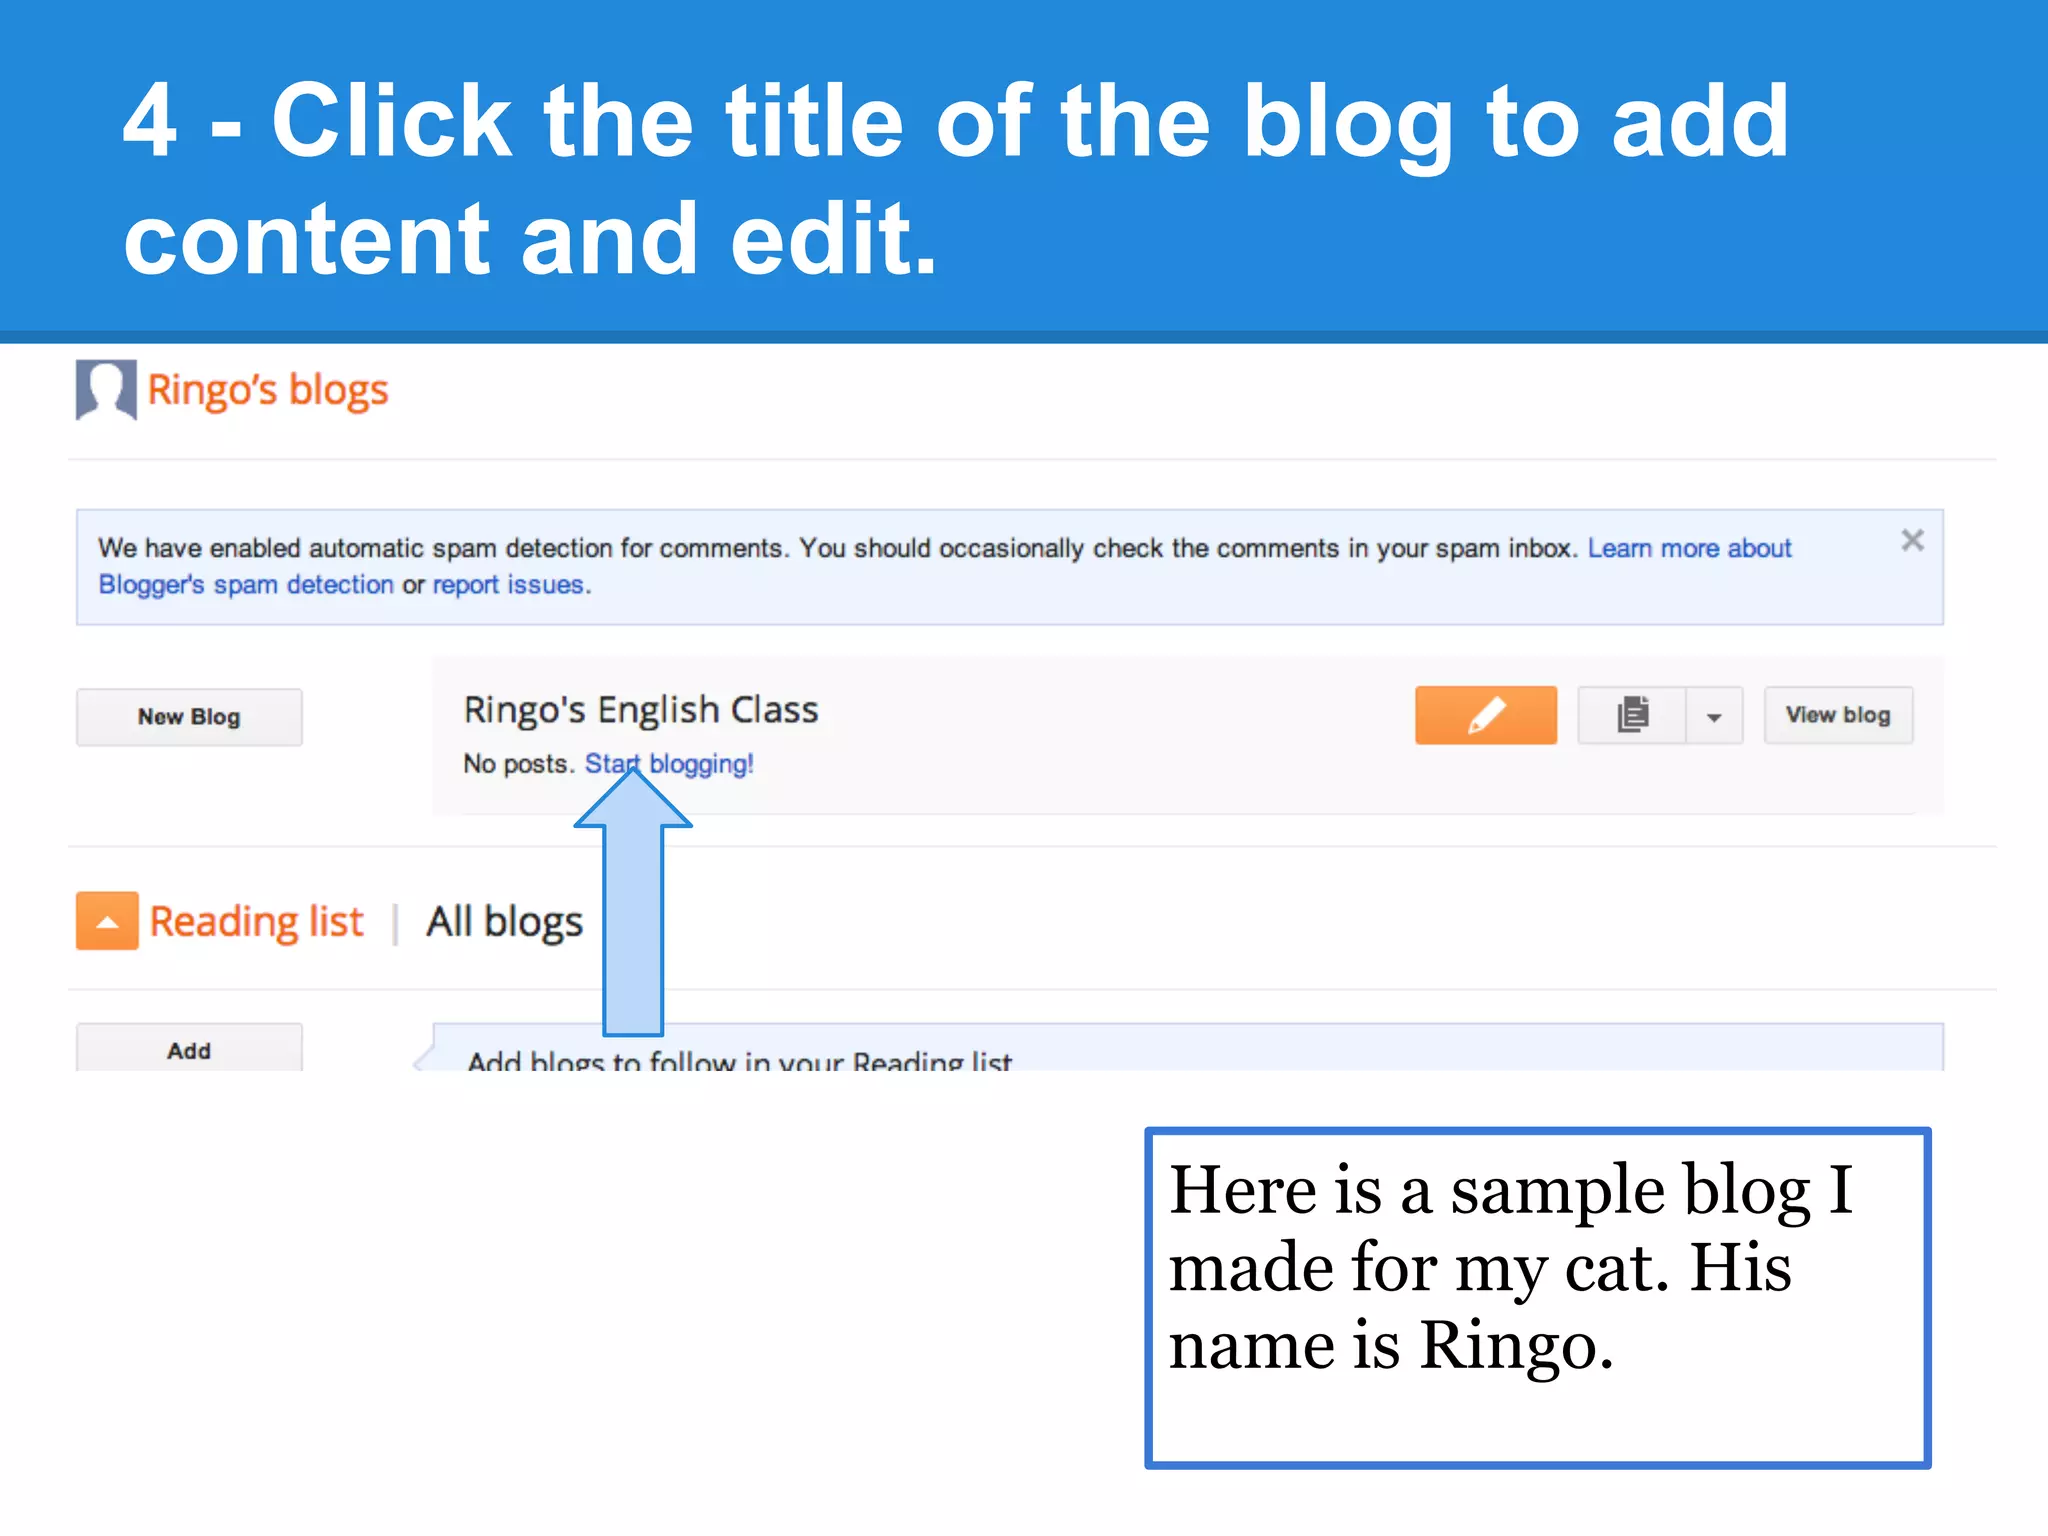
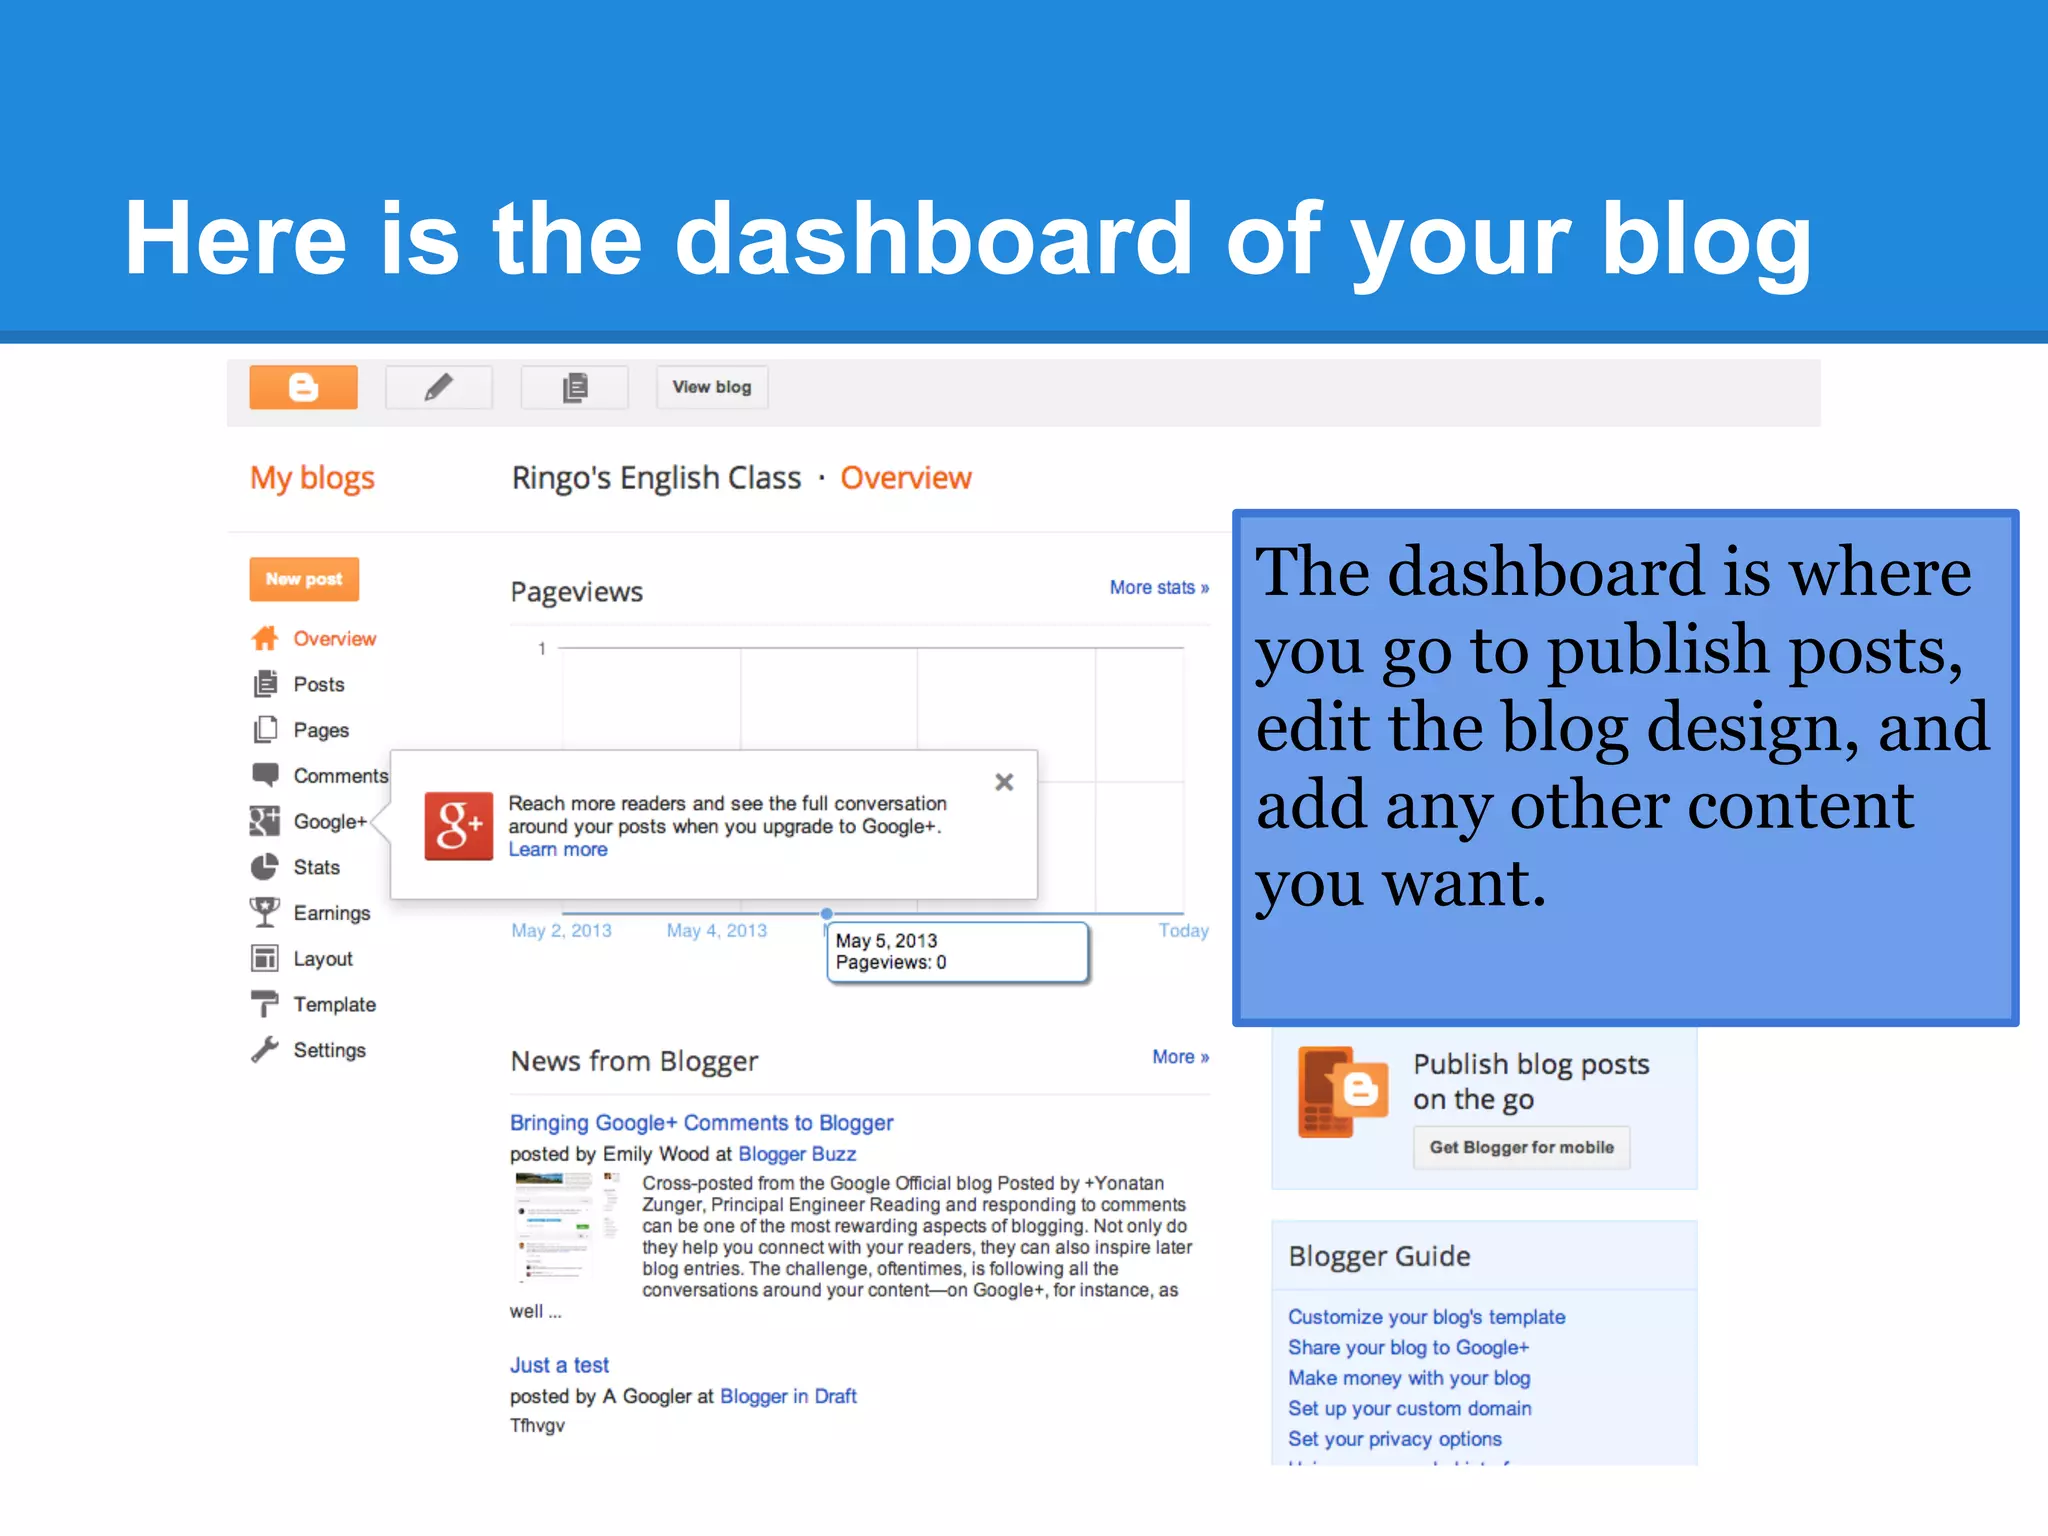
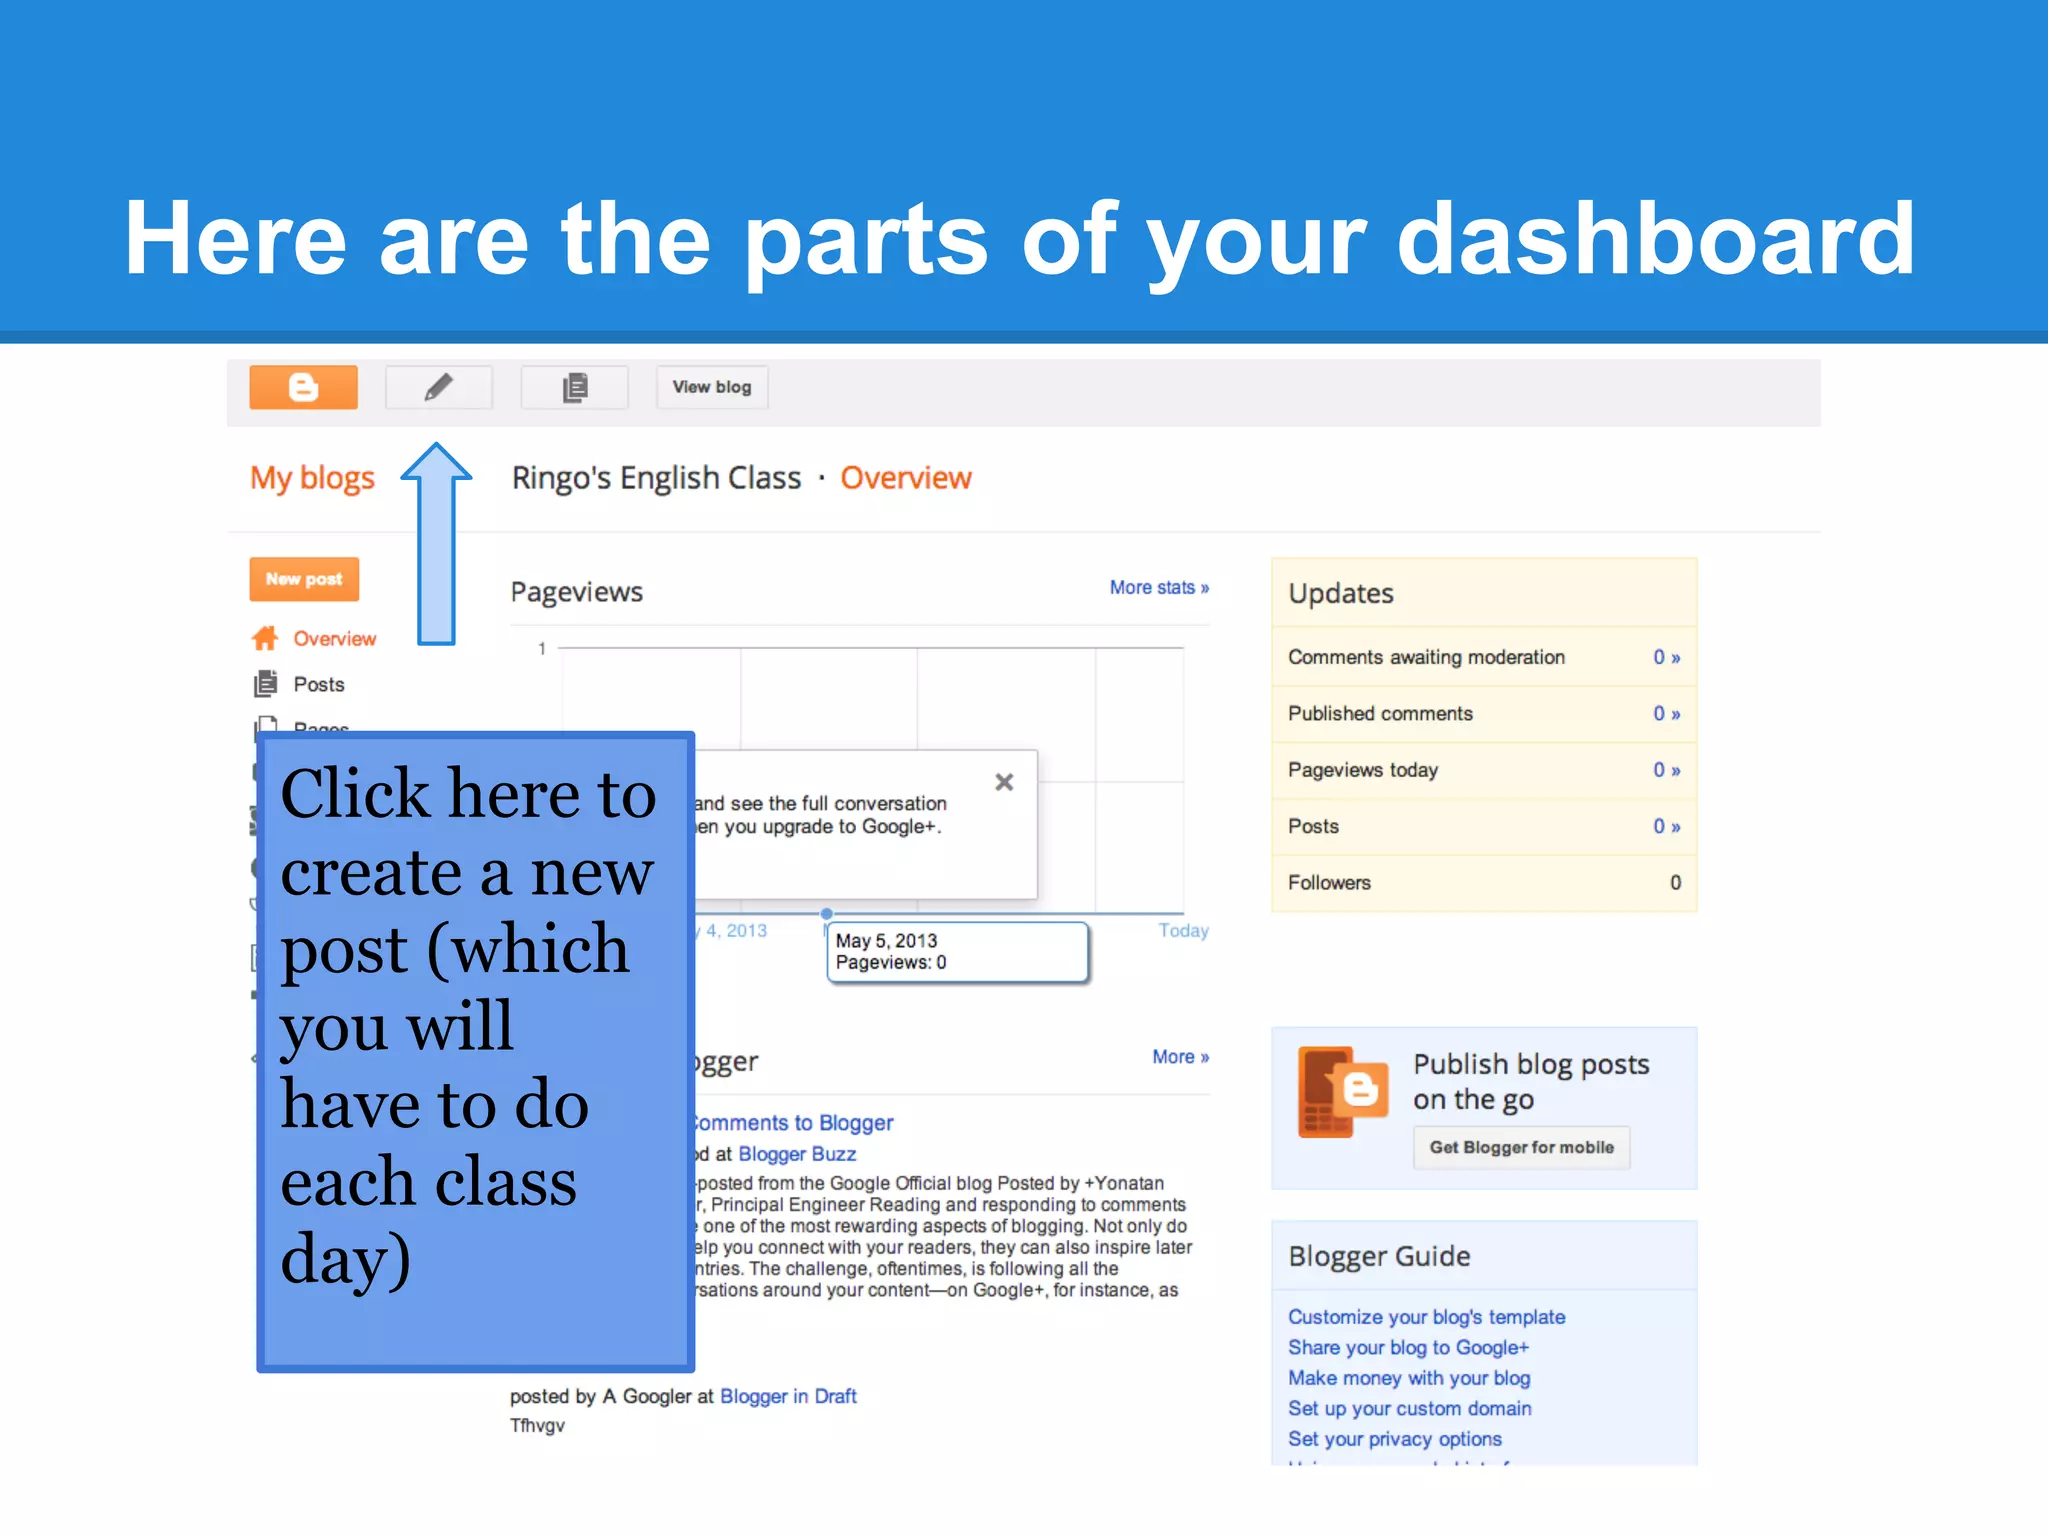
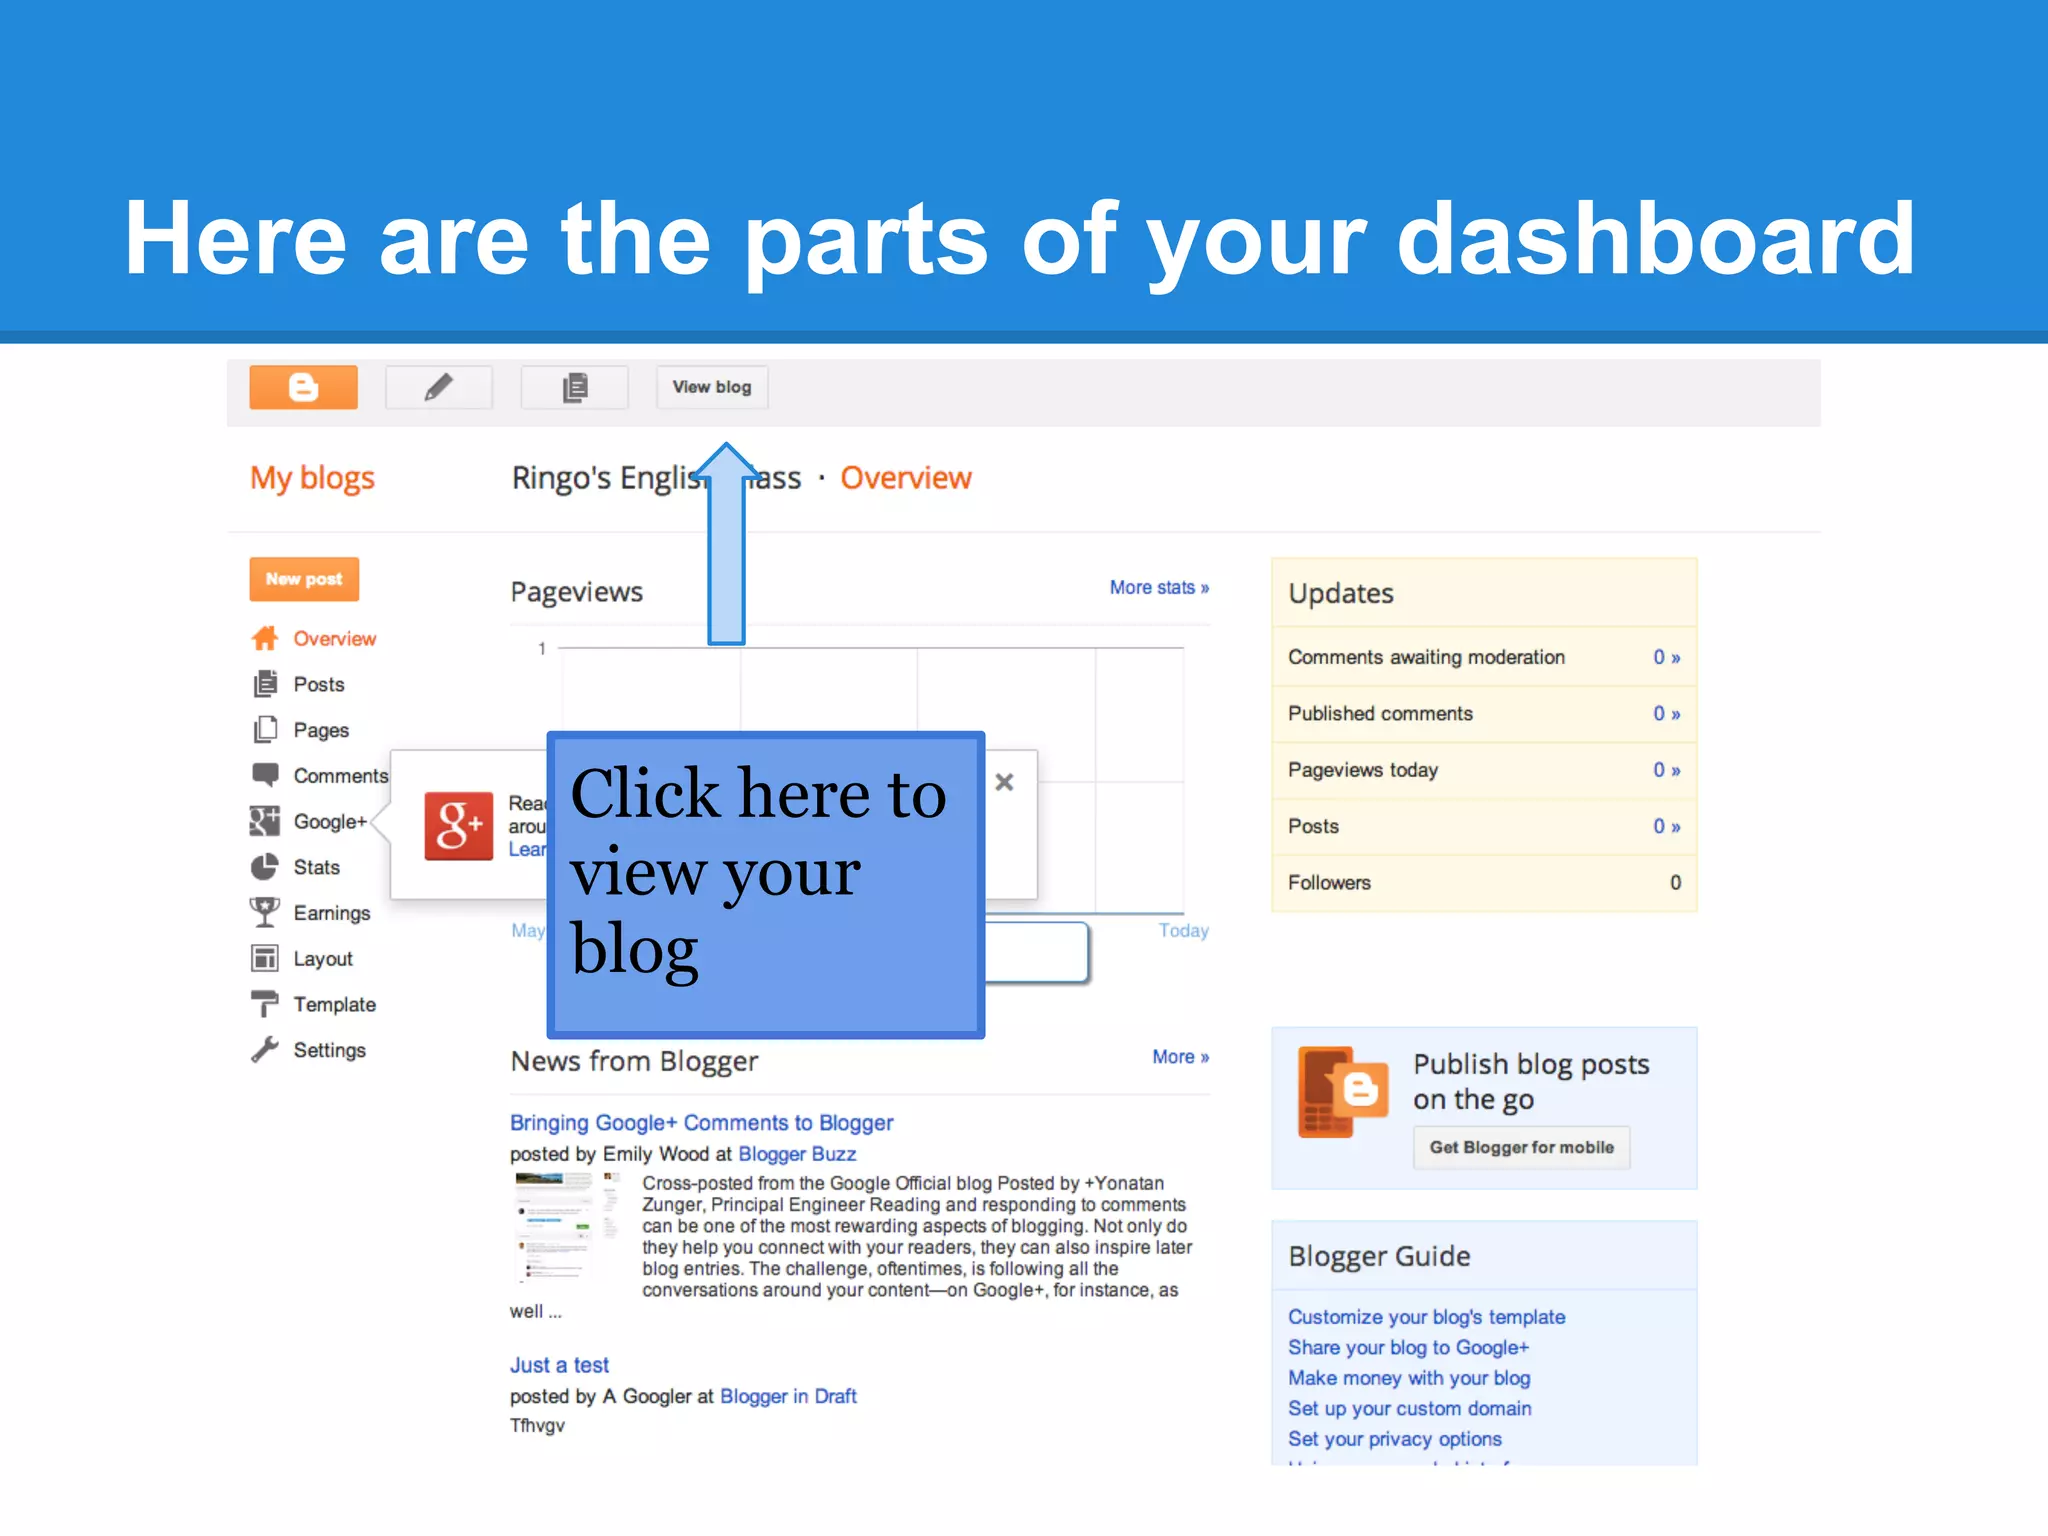
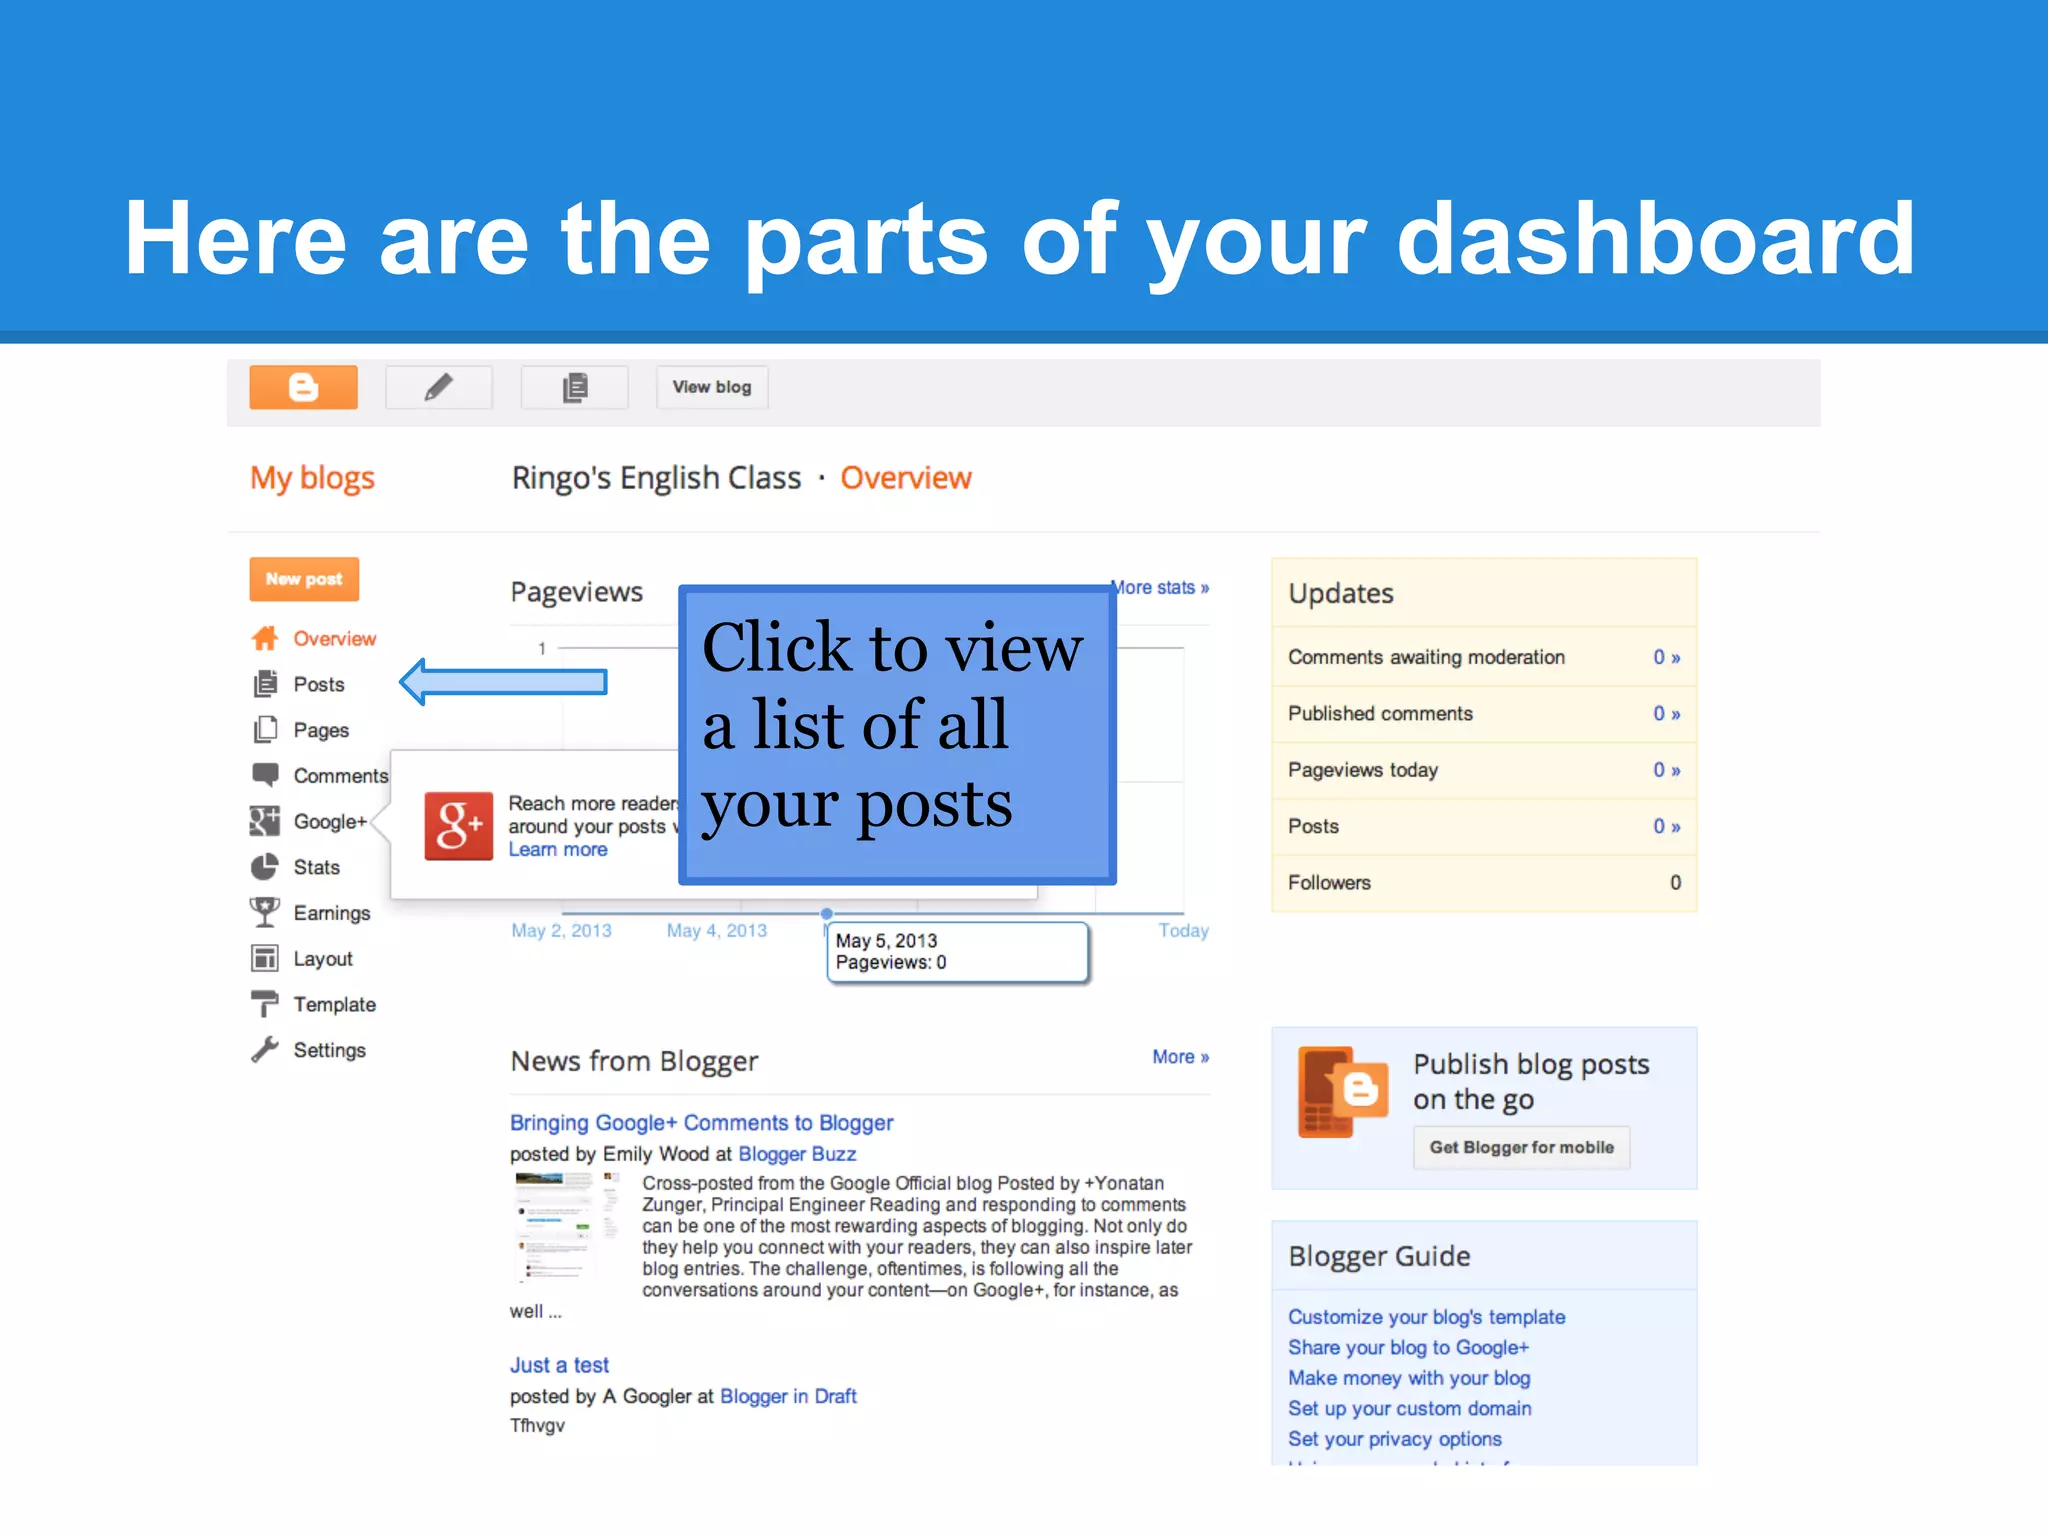
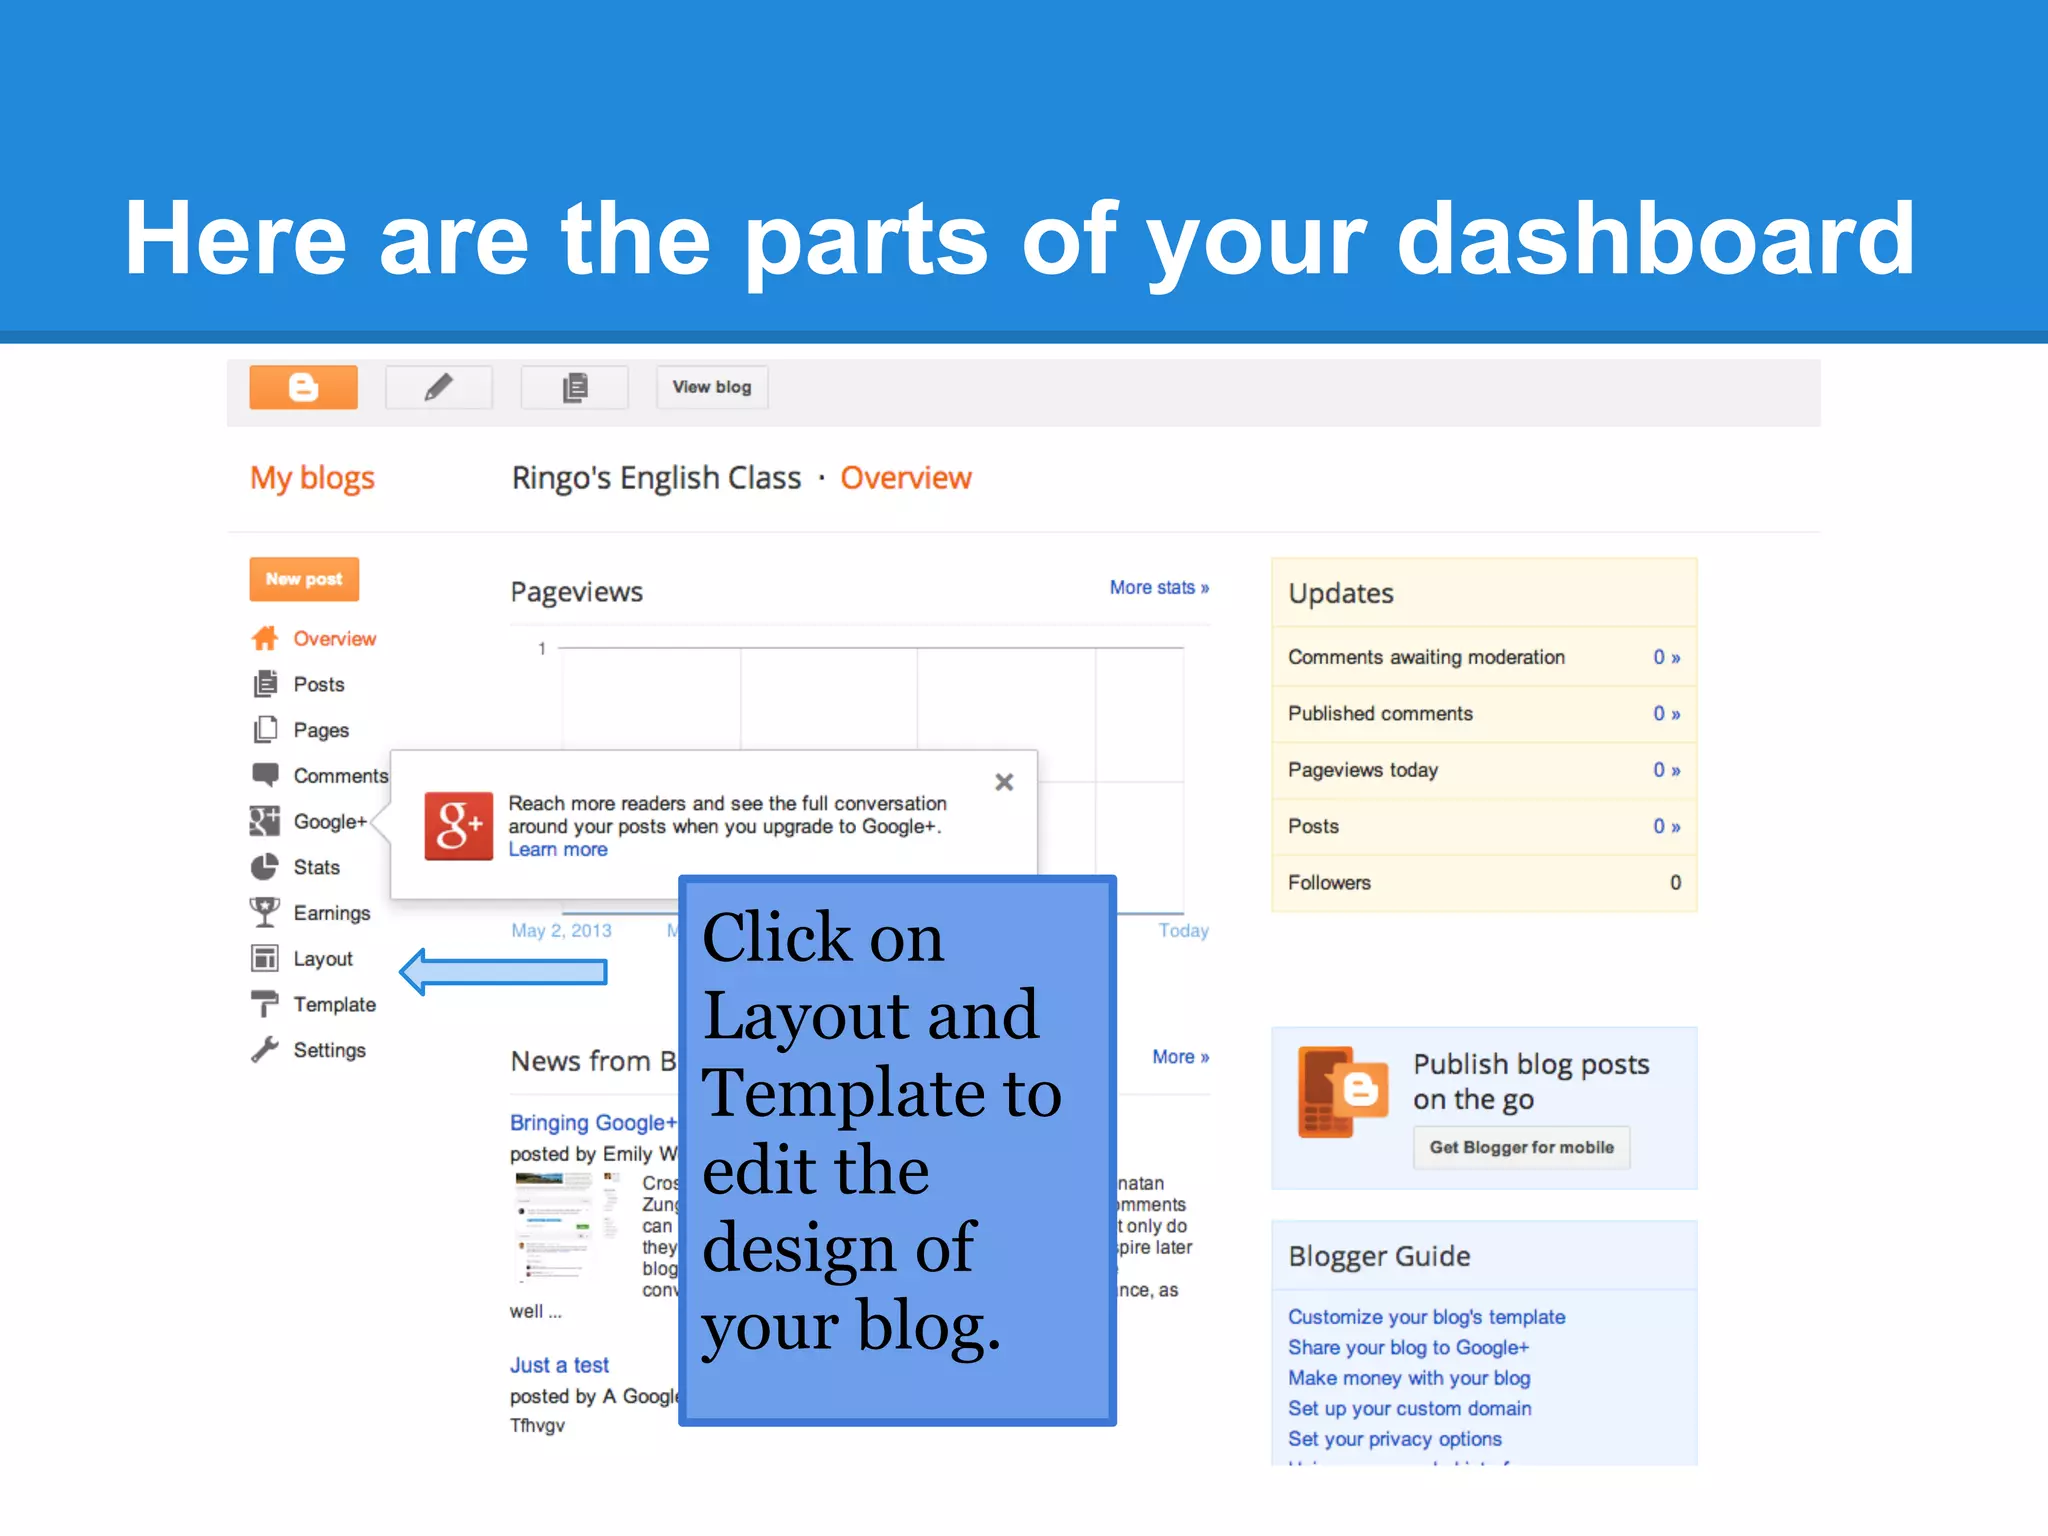


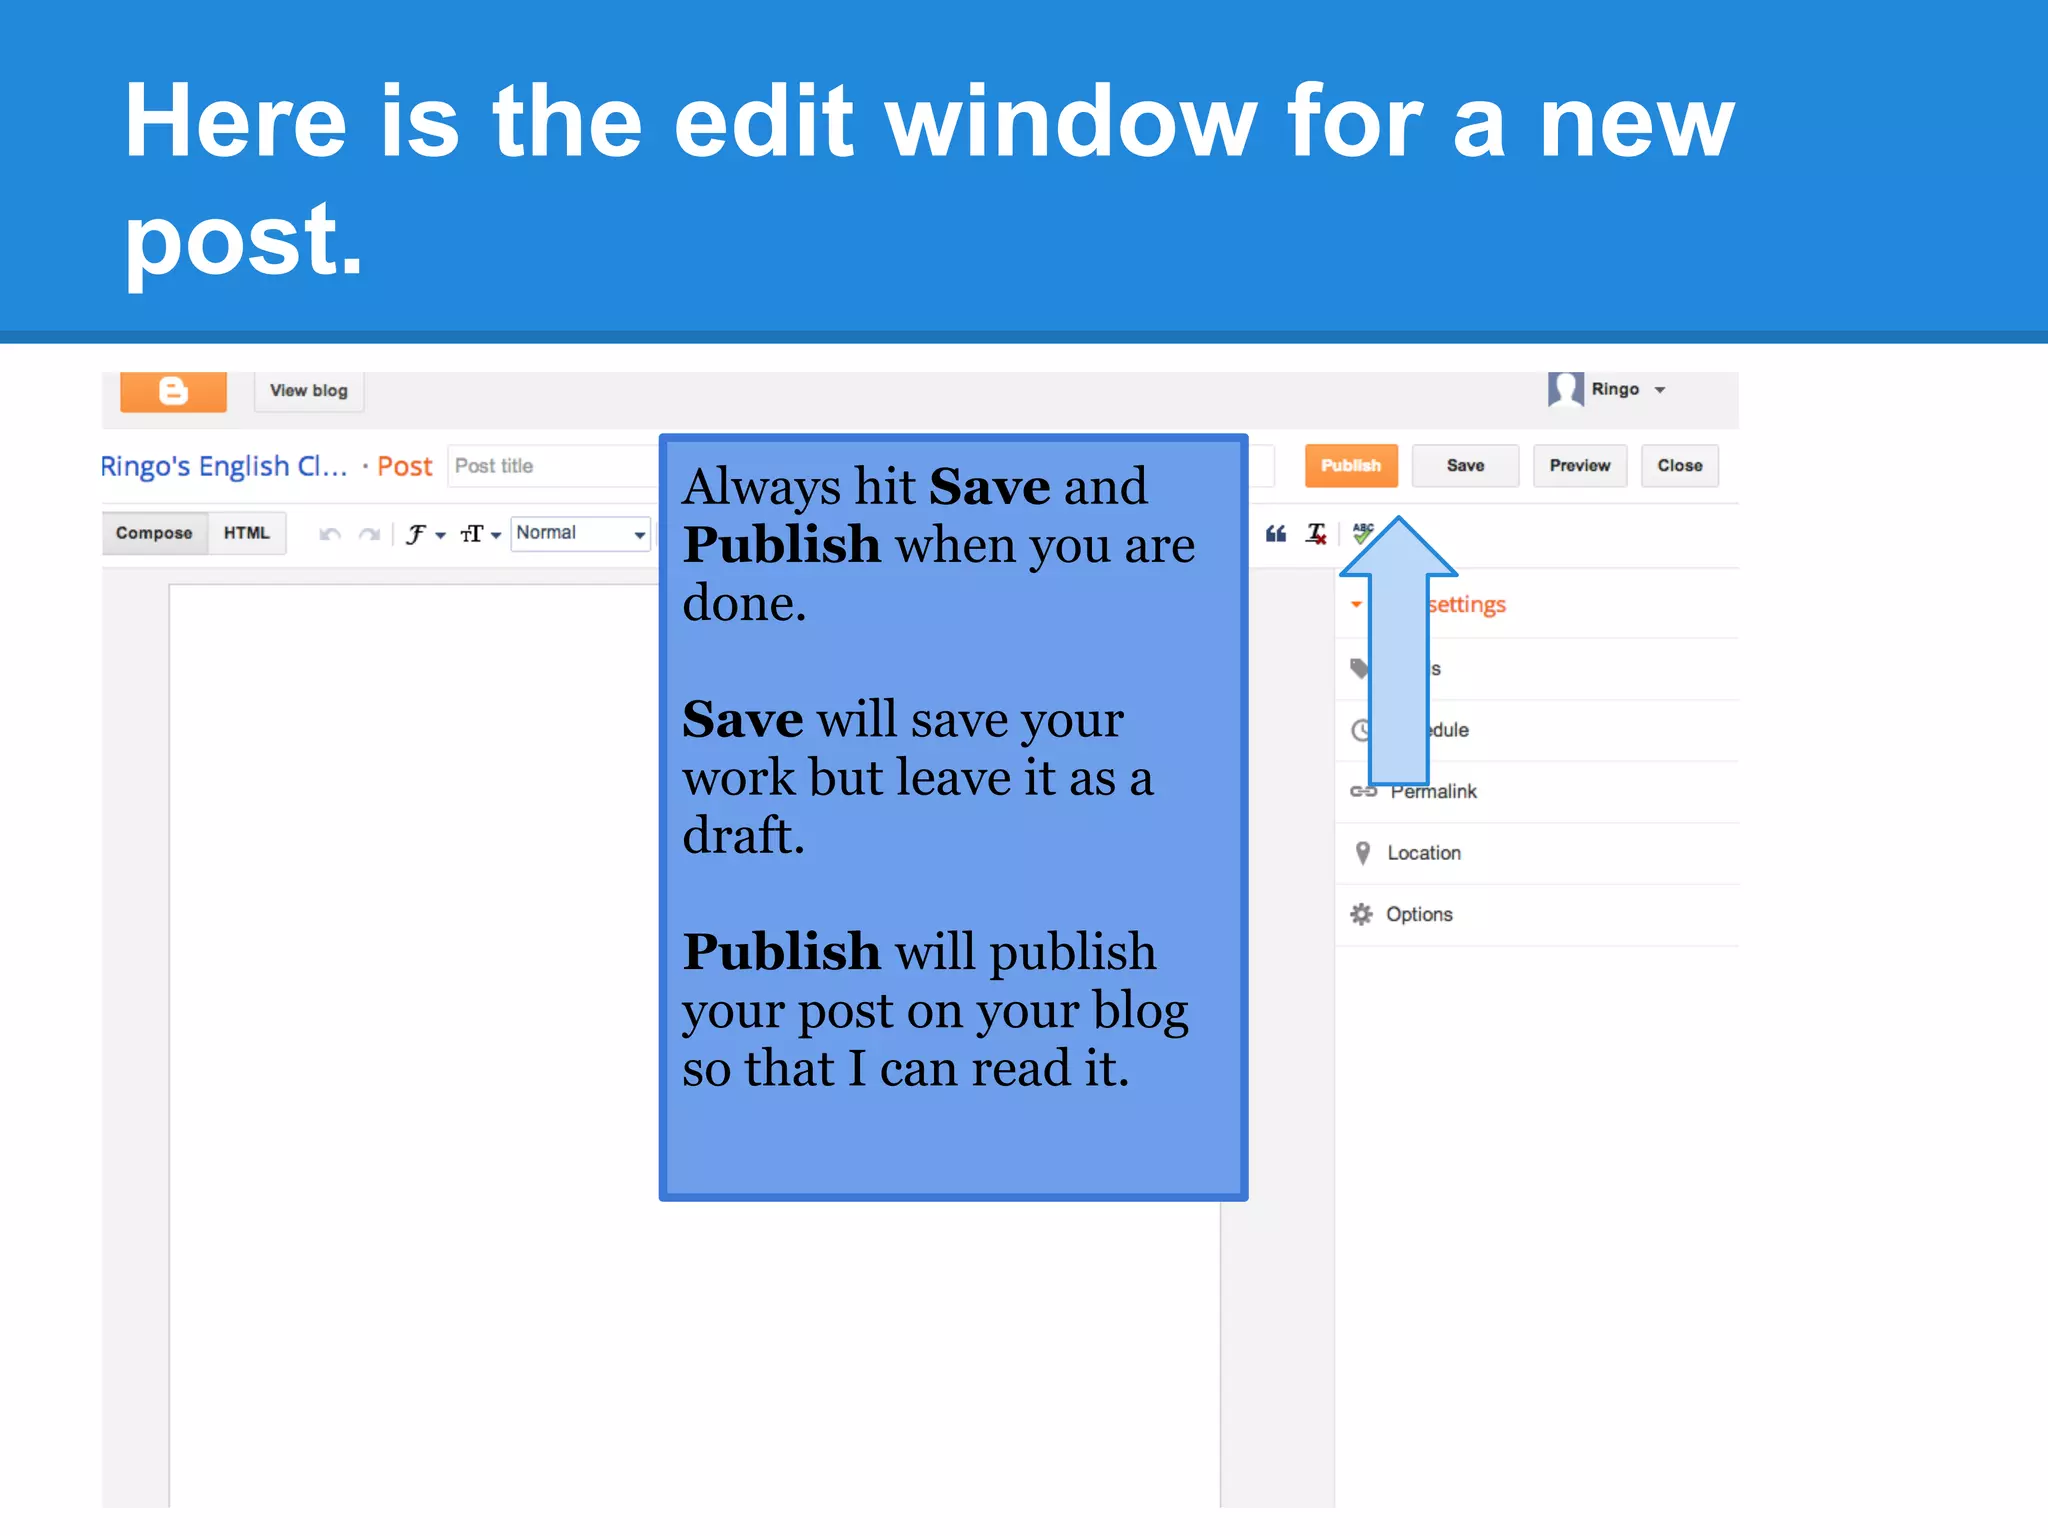


This document provides instructions for creating a blog and first blog post using Blogger.com. It defines key terms like blogger, blog, and post. It then outlines the steps to sign into Blogger using a Google account, choose a profile, and create a new blog by giving it a title, address and template. It notes to include your name. The dashboard is described which is used to publish posts, edit design, and add content. Creating a new post is covered, including adding a title and writing the post, then saving and publishing it.


