Downloaded 5,249 times
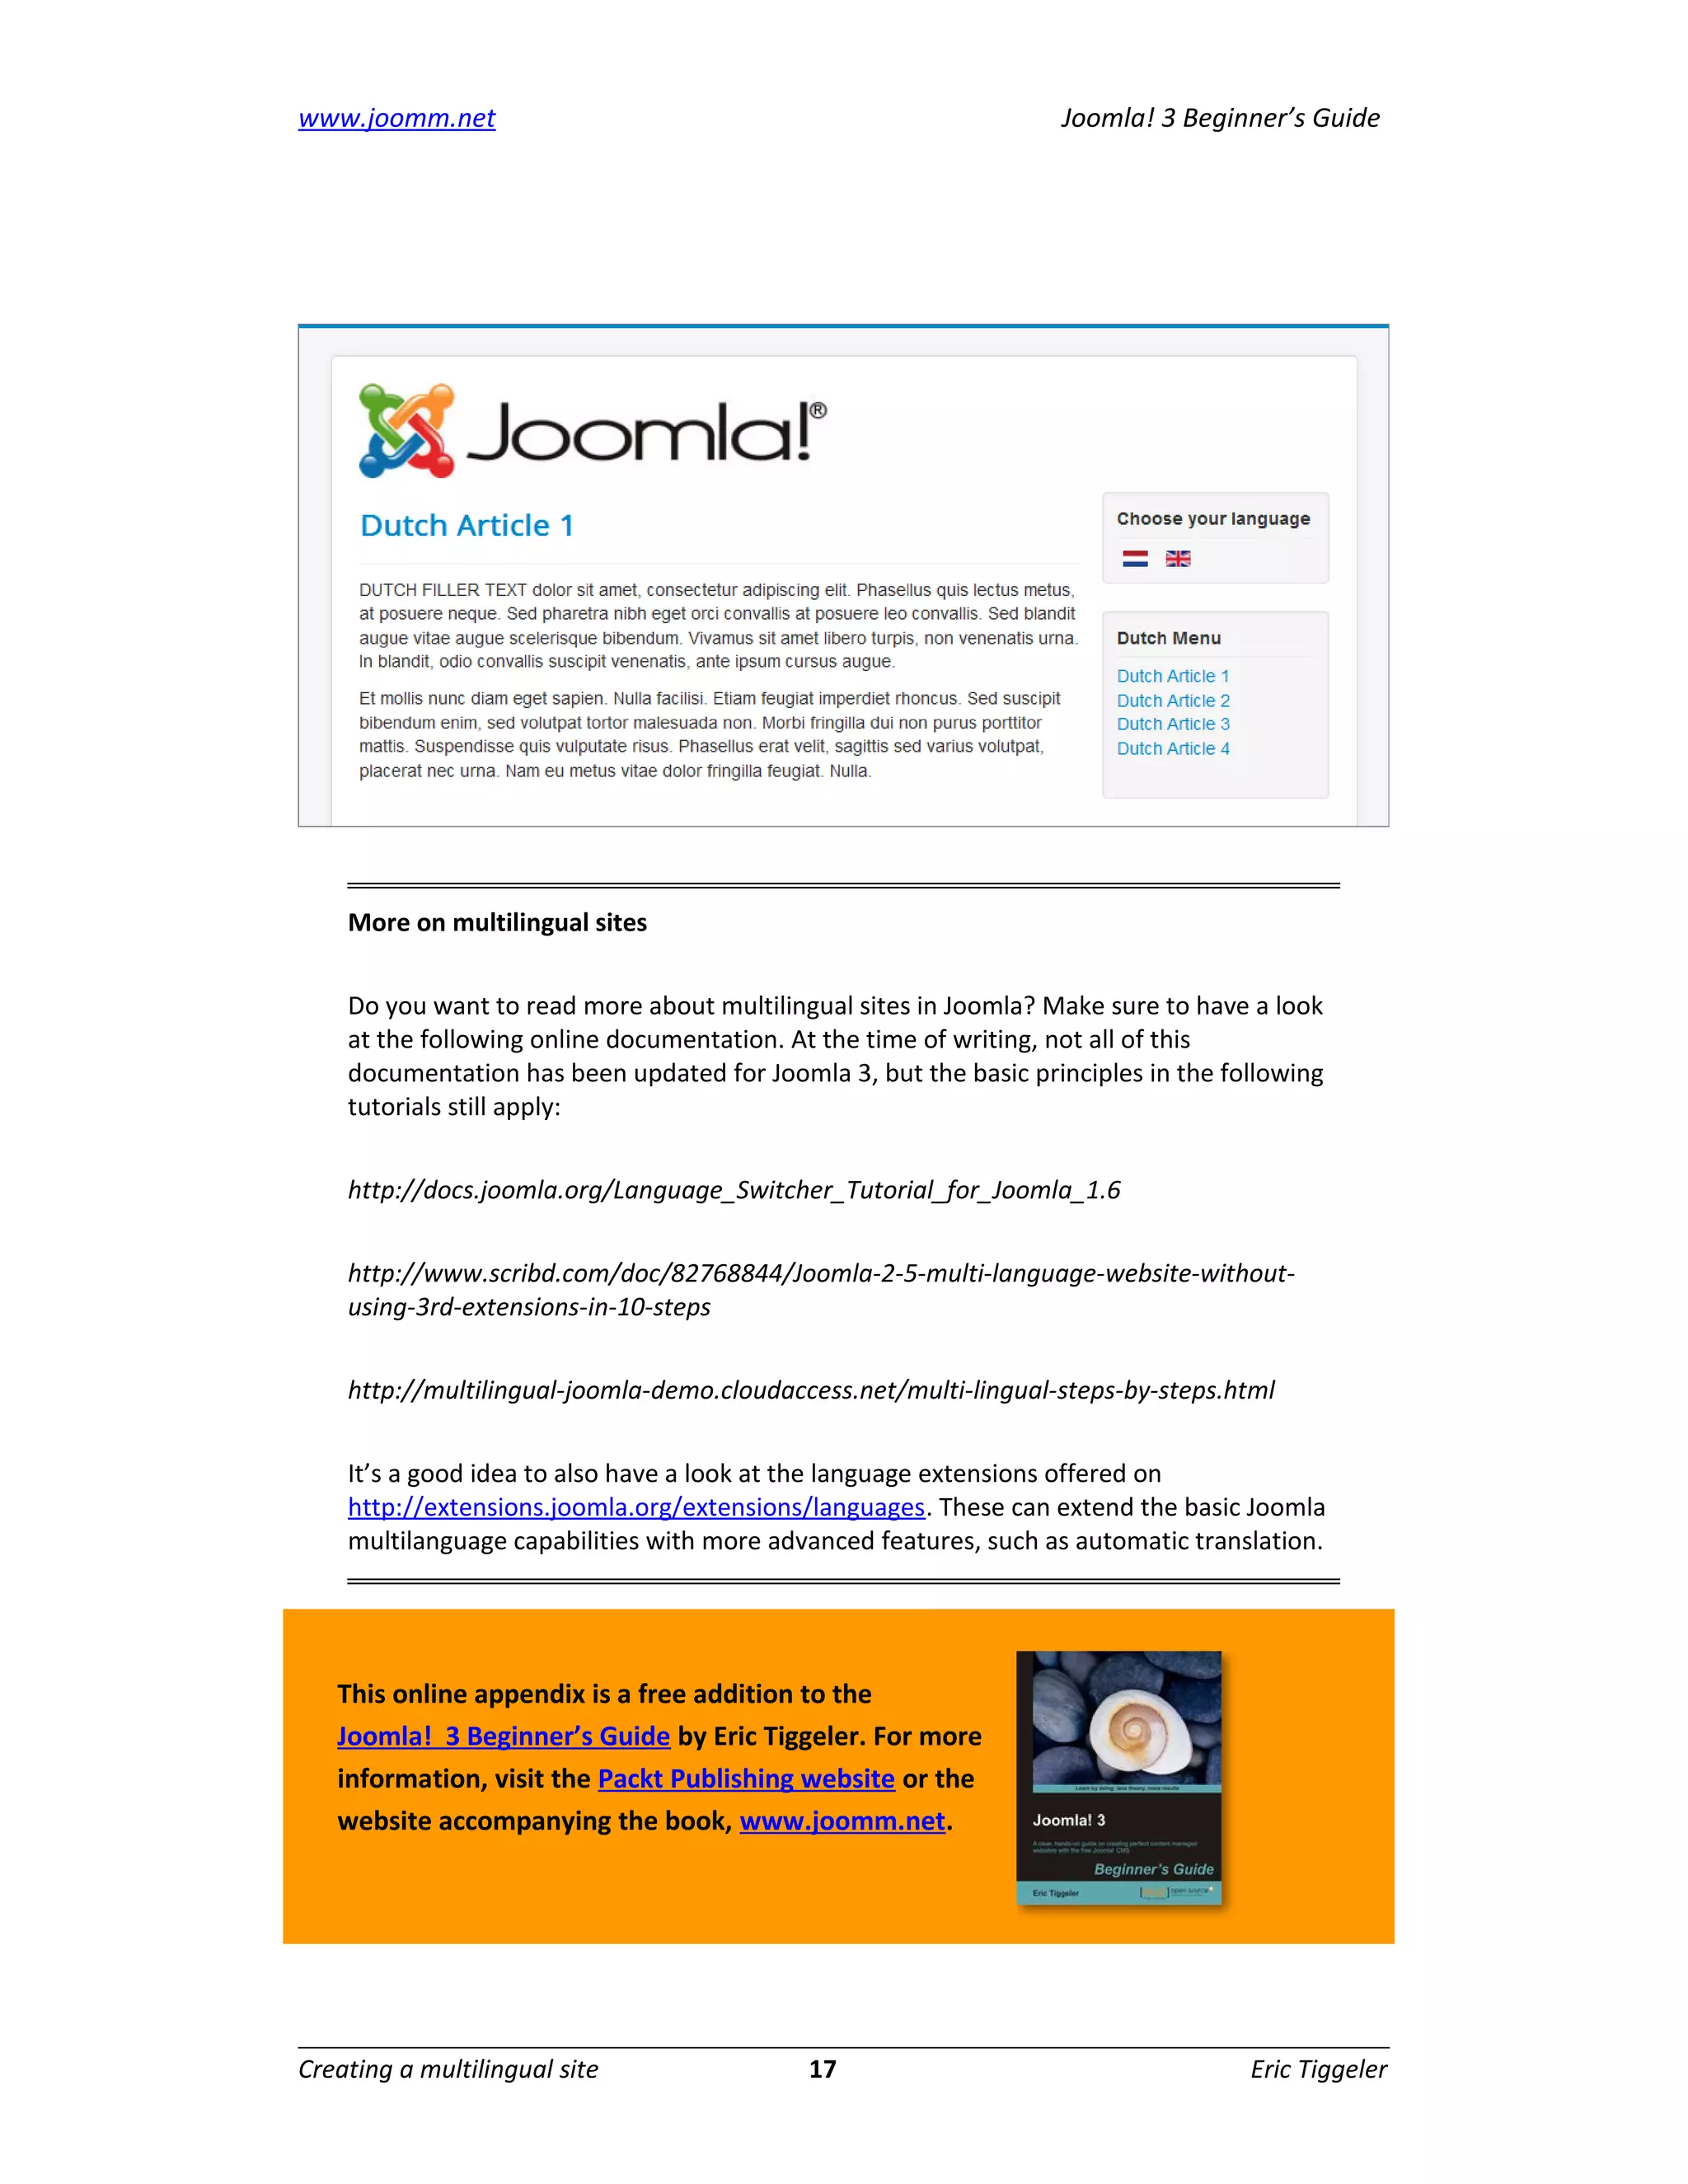


The document provides a step-by-step tutorial for creating a bilingual website in Joomla 3. It outlines 5 key steps: 1) Checking the default language, 2) Adding a new language and content language profile, 3) Enabling the language filter plugin, 4) Adding multilingual content in separate categories, and 5) Creating menus for each language and linking corresponding content. Following these steps allows a Joomla site to display content in two languages to visitors.


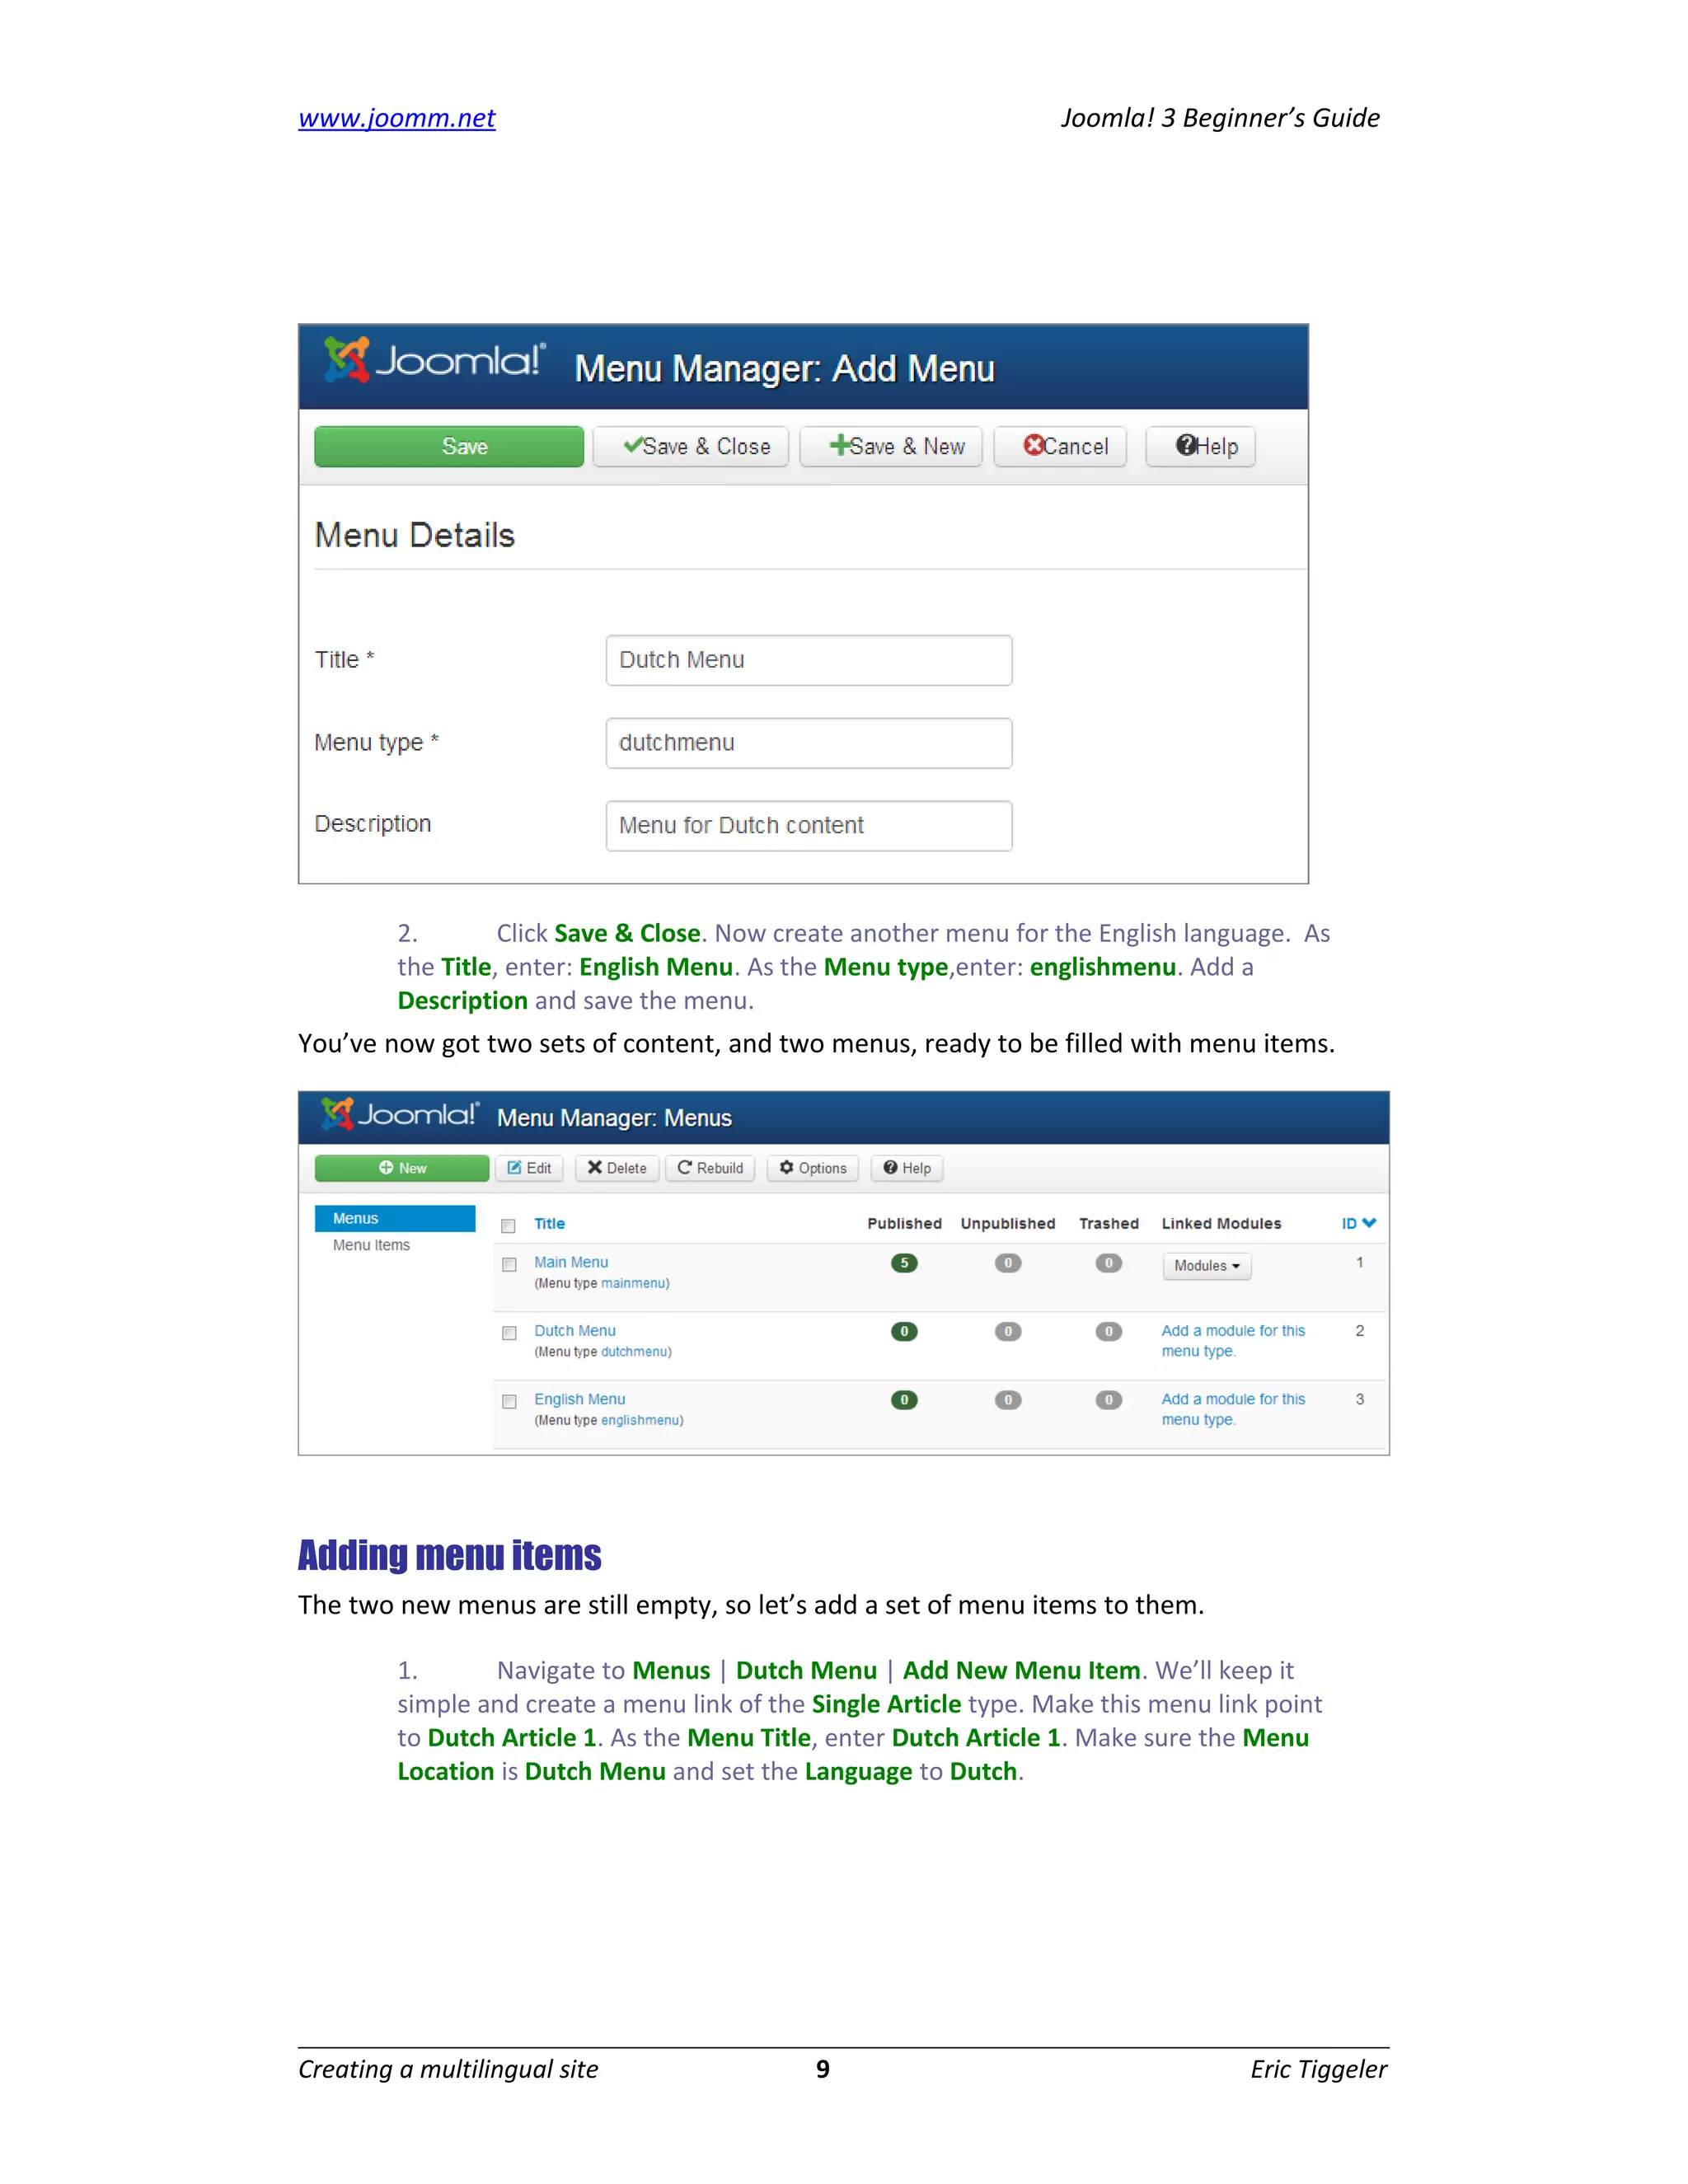
![Tags in joomla 3.1 [Reloaded] - Presentatie voor Joomla Heerenveen](https://cdn.slidesharecdn.com/ss_thumbnails/tagsinjoomla3-130905020636--thumbnail.jpg?width=640&height=640&fit=bounds)


