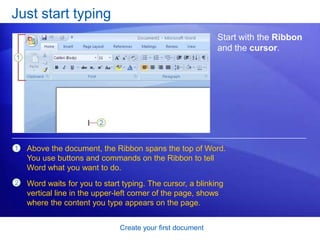
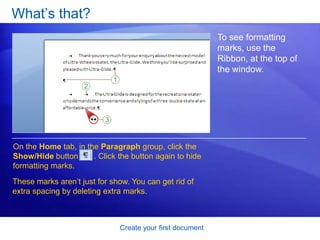
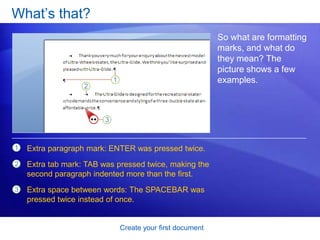
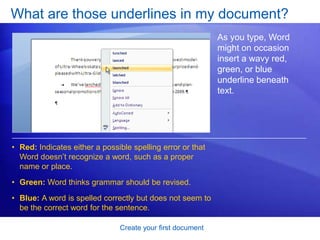
This document provides a training course on creating a first document in Microsoft Word 2007. The course covers how to type text, format paragraphs, change page margins, save documents, and accept or reject spelling and grammar suggestions. It includes lessons on using the ribbon, typing text, identifying formatting marks, adjusting page margins, and saving work. The document concludes with practice suggestions and a short quiz to test the user's understanding.
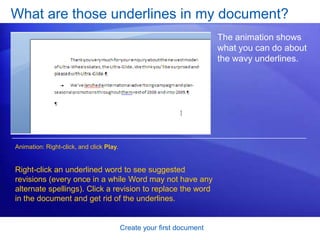
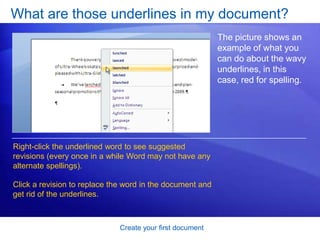
![Blue: A word is spelled correctly but does not seem to be the correct word for the sentence. Create your first documentWhat are those underlines in my document? The animation shows what you can do about the wavy underlines. [Author: .swf gets inserted here; delete this placeholder before inserting .swf file.]Animation: Right-click, and click Play.Right-click an underlined word to see suggested revisions (every once in a while Word may not have any alternate spellings). Click a revision to replace the word in the document and get rid of the underlines.](https://image.slidesharecdn.com/createyourfirstdocument-12519435919609-phpapp02/85/Microsoft-Word-2007-Create-Your-First-Document-18-320.jpg)