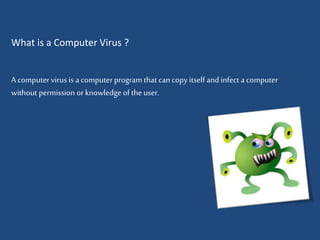
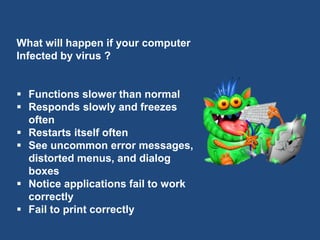
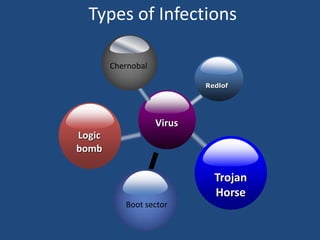
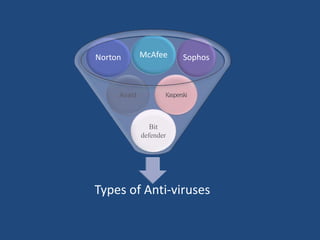
COMPUTER VIRUS
What is a Computer Virus ? 
A computer virus is a computer program that can copy itself and infect a computer 
without permission or knowledge of the user.
Who Creates or Writes Viruses? 
 People Who are looking for 
information's . Like they are trying 
to steal some really important 
information from somewhere . 
 Profit Earners who are looking to 
earn money selling their Antivirus . 
Ex: Virus / Antivirus Market 
 Some Psychos Like for fun , taking 
some revenge or etc.
“Some virus writers consider their creations to be works of art, and see virus writing as a 
creative hobby”
What will happen if your computer 
Infected by virus ? 
 Functions slower than normal 
 Responds slowly and freezes 
often 
 Restarts itself often 
 See uncommon error messages, 
distorted menus, and dialog 
boxes 
 Notice applications fail to work 
correctly 
 Fail to print correctly
Major 
Types of Viruses
Types of Infections 
Virus 
Redlof 
Logic 
bomb 
Trojan 
Horse 
Chernobal 
Boot sector
When it affects the files 
 Becomes active when the program file 
carrying the virus is opened. 
 usually with below extensions 
.BIN .COM .EXE .OVL .DRV
Sources of Virus 
 From Browsing Internet 
 Removable Data Storage
Norton McAfee Sophos 
Avast Kasperski 
Bit 
defender 
Types of Anti-viruses
How does an Anti-Virus work ? 
Scanner: Detects the virus by using a list of existing virus 
signature/definitions. 
Monitors: These are memory resident programs and alert when any 
changes find in executable program. 
INTEGRITY CHECKING PROGRAMS: To execute any virus must 
integrate with a executable program.so it checks for virus code 
integration
Advantages of Anti-Virus 
Protecting Personal Information 
Hackers and viruses go hand in hand. A good anti-virus 
program will protect you while you surf the Internet, 
preventing hackers from gaining access to personal 
things such as credit card information and bank account 
access. The firewall feature included with most anti-virus 
software will block any unauthorized incoming 
connections to your network or computer, preventing 
hackers from digging their hooks into your life and your 
computer.
Computer VIRUS
Computer VIRUS

Computer VIRUS

  • 1.
  • 3.
    What is aComputer Virus ? A computer virus is a computer program that can copy itself and infect a computer without permission or knowledge of the user.
  • 4.
    Who Creates orWrites Viruses?  People Who are looking for information's . Like they are trying to steal some really important information from somewhere .  Profit Earners who are looking to earn money selling their Antivirus . Ex: Virus / Antivirus Market  Some Psychos Like for fun , taking some revenge or etc.
  • 5.
    “Some virus writersconsider their creations to be works of art, and see virus writing as a creative hobby”
  • 6.
    What will happenif your computer Infected by virus ?  Functions slower than normal  Responds slowly and freezes often  Restarts itself often  See uncommon error messages, distorted menus, and dialog boxes  Notice applications fail to work correctly  Fail to print correctly
  • 7.
  • 8.
    Types of Infections Virus Redlof Logic bomb Trojan Horse Chernobal Boot sector
  • 9.
    When it affectsthe files  Becomes active when the program file carrying the virus is opened.  usually with below extensions .BIN .COM .EXE .OVL .DRV
  • 10.
    Sources of Virus  From Browsing Internet  Removable Data Storage
  • 12.
    Norton McAfee Sophos Avast Kasperski Bit defender Types of Anti-viruses
  • 13.
    How does anAnti-Virus work ? Scanner: Detects the virus by using a list of existing virus signature/definitions. Monitors: These are memory resident programs and alert when any changes find in executable program. INTEGRITY CHECKING PROGRAMS: To execute any virus must integrate with a executable program.so it checks for virus code integration
  • 15.
    Advantages of Anti-Virus Protecting Personal Information Hackers and viruses go hand in hand. A good anti-virus program will protect you while you surf the Internet, preventing hackers from gaining access to personal things such as credit card information and bank account access. The firewall feature included with most anti-virus software will block any unauthorized incoming connections to your network or computer, preventing hackers from digging their hooks into your life and your computer.

Editor's Notes

  • #3 Framed pictures in a row in perspective (Intermediate) To reproduce the picture effects on this slide, do the following: On the Home tab, in the Slides group, click Layout and then click Blank. On the Insert tab, in the Illustrations group, click Picture. In the Insert Picture dialog box, select a picture and then click Insert. Under Picture Tools, on the Format tab, in the bottom right corner of the Size group, click the Size and Position dialog box launcher. In the Size and Position dialog box, on the Size tab, resize or crop the picture as needed so that under Size and rotate, the Height box is set to 2” and the Width box is set to 2.67”. Resize the picture under Size and rotate by entering values into the Height and Width boxes. Crop the picture under Crop from by entering values into the Left, Right, Top, and Bottom boxes. Under Picture Tools, on the Format tab, in the Picture Styles group, click Reflected Beveled, Black. Select the picture. On the Home tab, in the Clipboard group, click the arrow under Paste, and then click Duplicate. Right-click the duplicate picture, and then click Change Picture. In the Insert Picture dialog box, select a picture and click Insert. If the inserted picture is a different height and width, adjust the width and height. Under Picture Tools, on the Format tab, in the bottom right corner of the Size group, click the Size and Position dialog box launcher. In the Size and Position dialog box, on the Size tab, resize or crop the picture as needed so that under Size and rotate, the Height box is set to 2” and the Width box is set to 2.67”. Resize the picture under Size and rotate by entering values into the Height and Width boxes. Crop the picture under Crop from by entering values into the Left, Right, Top, and Bottom boxes. Repeat the process in steps 6-8 to create another duplicate picture, for a total of three pictures. Drag the pictures to form a row across the slide. Press and hold SHIFT and select all three pictures. On the Home tab, in the Drawing group, click Arrange, and then do the following: Point to Align, and then click Align to Slide. Point to Align, and then click Align Middle. Point to Align, and then click Distribute Horizontally. Click Group. On the Home tab, in the Drawing group, click Shape Effects, point to 3-D Rotation, and then under Perspective click Perspective Contrasting Left (second row, fourth option from the left). Drag the group to position it above the middle of the slide and also position it slightly to the left. To reproduce the background effects on this slide, do the following: Right-click the slide background area, and then click Format Background. In the Format Background dialog box, click Fill in the left pane, select Gradient fill in the Fill pane, and then do the following: In the Type list, select Linear. Click the button next to Direction, and then click Linear Down (first row, second option from the left). In the Angle text box, enter 90⁰. Under Gradient stops, click Add or Remove until two stops appear in the drop-down list. Also under Gradient stops, customize the gradient stops that you added as follows: Select Stop 1 from the list, and then do the following: In the Stop position box, enter 50%. Click the button next to Color, and then under Theme Colors click Black, Text 1, Lighter 5% (sixth row, second option from the left). Select Stop 2 from the list, and then do the following: In the Stop position box, enter 100%. Click the button next to Color, and then under Theme Colors click Dark Blue, Text 2, Lighter 40% (fourth row, fourth option from the left).
  • #9 Framed pictures in a row in perspective (Intermediate) To reproduce the picture effects on this slide, do the following: On the Home tab, in the Slides group, click Layout and then click Blank. On the Insert tab, in the Illustrations group, click Picture. In the Insert Picture dialog box, select a picture and then click Insert. Under Picture Tools, on the Format tab, in the bottom right corner of the Size group, click the Size and Position dialog box launcher. In the Size and Position dialog box, on the Size tab, resize or crop the picture as needed so that under Size and rotate, the Height box is set to 2” and the Width box is set to 2.67”. Resize the picture under Size and rotate by entering values into the Height and Width boxes. Crop the picture under Crop from by entering values into the Left, Right, Top, and Bottom boxes. Under Picture Tools, on the Format tab, in the Picture Styles group, click Reflected Beveled, Black. Select the picture. On the Home tab, in the Clipboard group, click the arrow under Paste, and then click Duplicate. Right-click the duplicate picture, and then click Change Picture. In the Insert Picture dialog box, select a picture and click Insert. If the inserted picture is a different height and width, adjust the width and height. Under Picture Tools, on the Format tab, in the bottom right corner of the Size group, click the Size and Position dialog box launcher. In the Size and Position dialog box, on the Size tab, resize or crop the picture as needed so that under Size and rotate, the Height box is set to 2” and the Width box is set to 2.67”. Resize the picture under Size and rotate by entering values into the Height and Width boxes. Crop the picture under Crop from by entering values into the Left, Right, Top, and Bottom boxes. Repeat the process in steps 6-8 to create another duplicate picture, for a total of three pictures. Drag the pictures to form a row across the slide. Press and hold SHIFT and select all three pictures. On the Home tab, in the Drawing group, click Arrange, and then do the following: Point to Align, and then click Align to Slide. Point to Align, and then click Align Middle. Point to Align, and then click Distribute Horizontally. Click Group. On the Home tab, in the Drawing group, click Shape Effects, point to 3-D Rotation, and then under Perspective click Perspective Contrasting Left (second row, fourth option from the left). Drag the group to position it above the middle of the slide and also position it slightly to the left. To reproduce the background effects on this slide, do the following: Right-click the slide background area, and then click Format Background. In the Format Background dialog box, click Fill in the left pane, select Gradient fill in the Fill pane, and then do the following: In the Type list, select Linear. Click the button next to Direction, and then click Linear Down (first row, second option from the left). In the Angle text box, enter 90⁰. Under Gradient stops, click Add or Remove until two stops appear in the drop-down list. Also under Gradient stops, customize the gradient stops that you added as follows: Select Stop 1 from the list, and then do the following: In the Stop position box, enter 50%. Click the button next to Color, and then under Theme Colors click Black, Text 1, Lighter 5% (sixth row, second option from the left). Select Stop 2 from the list, and then do the following: In the Stop position box, enter 100%. Click the button next to Color, and then under Theme Colors click Dark Blue, Text 2, Lighter 40% (fourth row, fourth option from the left).
  • #12 Framed pictures in a row in perspective (Intermediate) To reproduce the picture effects on this slide, do the following: On the Home tab, in the Slides group, click Layout and then click Blank. On the Insert tab, in the Illustrations group, click Picture. In the Insert Picture dialog box, select a picture and then click Insert. Under Picture Tools, on the Format tab, in the bottom right corner of the Size group, click the Size and Position dialog box launcher. In the Size and Position dialog box, on the Size tab, resize or crop the picture as needed so that under Size and rotate, the Height box is set to 2” and the Width box is set to 2.67”. Resize the picture under Size and rotate by entering values into the Height and Width boxes. Crop the picture under Crop from by entering values into the Left, Right, Top, and Bottom boxes. Under Picture Tools, on the Format tab, in the Picture Styles group, click Reflected Beveled, Black. Select the picture. On the Home tab, in the Clipboard group, click the arrow under Paste, and then click Duplicate. Right-click the duplicate picture, and then click Change Picture. In the Insert Picture dialog box, select a picture and click Insert. If the inserted picture is a different height and width, adjust the width and height. Under Picture Tools, on the Format tab, in the bottom right corner of the Size group, click the Size and Position dialog box launcher. In the Size and Position dialog box, on the Size tab, resize or crop the picture as needed so that under Size and rotate, the Height box is set to 2” and the Width box is set to 2.67”. Resize the picture under Size and rotate by entering values into the Height and Width boxes. Crop the picture under Crop from by entering values into the Left, Right, Top, and Bottom boxes. Repeat the process in steps 6-8 to create another duplicate picture, for a total of three pictures. Drag the pictures to form a row across the slide. Press and hold SHIFT and select all three pictures. On the Home tab, in the Drawing group, click Arrange, and then do the following: Point to Align, and then click Align to Slide. Point to Align, and then click Align Middle. Point to Align, and then click Distribute Horizontally. Click Group. On the Home tab, in the Drawing group, click Shape Effects, point to 3-D Rotation, and then under Perspective click Perspective Contrasting Left (second row, fourth option from the left). Drag the group to position it above the middle of the slide and also position it slightly to the left. To reproduce the background effects on this slide, do the following: Right-click the slide background area, and then click Format Background. In the Format Background dialog box, click Fill in the left pane, select Gradient fill in the Fill pane, and then do the following: In the Type list, select Linear. Click the button next to Direction, and then click Linear Down (first row, second option from the left). In the Angle text box, enter 90⁰. Under Gradient stops, click Add or Remove until two stops appear in the drop-down list. Also under Gradient stops, customize the gradient stops that you added as follows: Select Stop 1 from the list, and then do the following: In the Stop position box, enter 50%. Click the button next to Color, and then under Theme Colors click Black, Text 1, Lighter 5% (sixth row, second option from the left). Select Stop 2 from the list, and then do the following: In the Stop position box, enter 100%. Click the button next to Color, and then under Theme Colors click Dark Blue, Text 2, Lighter 40% (fourth row, fourth option from the left).