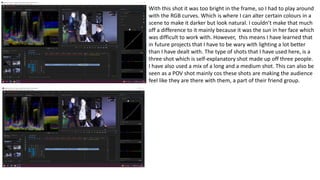
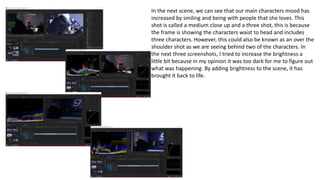
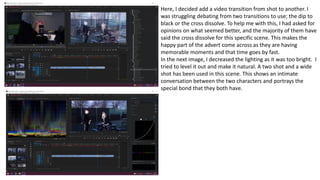
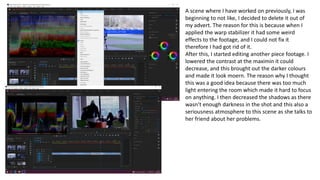
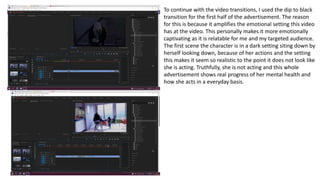
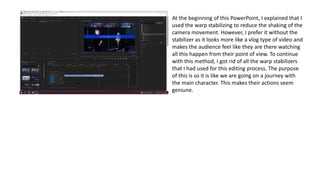
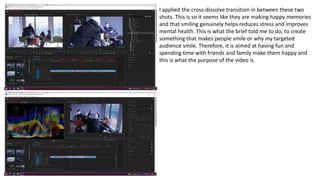
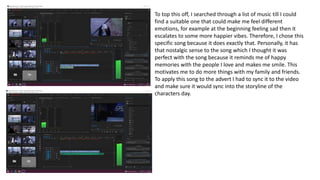
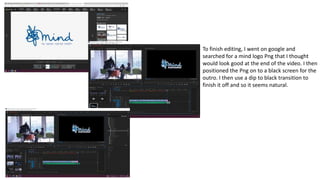
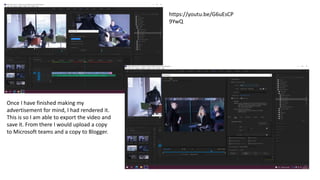
Advert process diary
Jennifer Finnigan
Contact sheet of my footage
I will be using for this
project
To begin editing my advertisement, I used a software called
premier pro. I transferred all my footage that I thought was
useful to this software. Then I began to pick through the
scenes I had taken. I came across this one in particular. This
medium close-up shot was taken mainly because I thought
by taking this the audience would be able to feel more of the
action that has taken place and the emotion she has
portrayed. Rewatching this close up, there was some shaking
with the camera movement, therefore I had to use the warp
stabilizer. This editing technique helps to keep a specific
scene become stable if there is too much movement
becoming distracting towards the viewer such as in this case
shaking. This smoothes out the movement however
sometimes it does not help that much if there is too much
distracting movement within the footage. I am also using a
zoom shot of this character, I done this to help the audience
see what she is doing, and we can see the emotion in her
actions. I then transitioned to a wide shot which I will talk
about in the next couple slides.
Like in the previous slide, I am needing to use the warp
stabilizer yet again to fix the movement. However not only was
it slightly shaky but the camera is aiming upwards half-way
through the recording of this scene. This is a wide shot that I
have used. By using this, it makes the audience feel like that
they are a part of this journey that my actress is on and
personally I can see emotion by how she walks for example
stressed, anxious etc...
This next shot, I used the warp stabilizer once again to make it
play out a lot smoother. I am using a wide shot as she is walking
into the café. This is because this will give the audience a feel of
where she is in this moment of time. It then transitions to a four
shot. A four shot is where there is four characters within the
shot, in this case the female and the three males. In the
advertisement when we watch it, you can see that two of the
characters are having a deep conversation, we can tell this mainly
because of their facial expressions. Personally, this makes me
intrigued to know what they are saying and makes me more
interested as the video goes on. This also comes across as
relatable as by shooting this scene it shows that our friends will
be there for us whenever and we can always talk to someone
about what we are going through. In the screenshots, we can see
that I sharpened a particular part of the scene. The reason for
this is because, I thought that the shot was a bit everywhere, so I
used to the sharpen tool to take control and make objects stand
out a little more.
With this shot it was too bright in the frame, so I had to play around
with the RGB curves. Which is where I can alter certain colours in a
scene to make it darker but look natural. I couldn’t make that much
off a difference to it mainly because it was the sun in her face which
was difficult to work with. However, this means I have learned that
in future projects that I have to be wary with lighting a lot better
than I have dealt with. The type of shots that I have used here, is a
three shot which is self-explanatory shot made up off three people.
I have also used a mix of a long and a medium shot. This can also be
seen as a POV shot mainly cos these shots are making the audience
feel like they are there with them, a part of their friend group.
In the next scene, we can see that our main characters mood has
increased by smiling and being with people that she loves. This
shot is called a medium close up and a three shot, this is because
the frame is showing the characters waist to head and includes
three characters. However, this could also be known as an over the
shoulder shot as we are seeing behind two of the characters. In
the next three screenshots, I tried to increase the brightness a
little bit because in my opinion it was too dark for me to figure out
what was happening. By adding brightness to the scene, it has
brought it back to life.
Here, I decided add a video transition from shot to another. I
was struggling debating from two transitions to use; the dip to
black or the cross dissolve. To help me with this, I had asked for
opinions on what seemed better, and the majority of them have
said the cross dissolve for this specific scene. This makes the
happy part of the advert come across as they are having
memorable moments and that time goes by fast.
In the next image, I decreased the lighting as it was too bright. I
tried to level it out and make it natural. A two shot and a wide
shot has been used in this scene. This shows an intimate
conversation between the two characters and portrays the
special bond that they both have.
Afterwards, I used the faded film tool. This makes the
shot look vintage. This means it has focussed on raising
the black levels to compress the tonal level on the
specific shot. I heightened the mid tones scale, this has
brought out the darker colours. The shadows were also
decreased, this made the blacks pop out more and give
it more depth.
A scene where I have worked on previously, I was
beginning to not like, I decided to delete it out of
my advert. The reason for this is because when I
applied the warp stabilizer it had some weird
effects to the footage, and I could not fix it
therefore I had got rid of it.
After this, I started editing another piece footage. I
lowered the contrast at the maximin it could
decrease, and this brought out the darker colours
and made it look moern. The reason why I thought
this was a good idea because there was too much
light entering the room which made it hard to focus
on anything. I then decreased the shadows as there
wasn’t enough darkness in the shot and this also a
seriousness atmosphere to this scene as she talks to
her friend about her problems.
This scene in particular had difficulties with the lighting
because it kept changing due to the weather. However, I
was able to fix it in premier pro. This took a while
mainly because I had to match it with the most suitable
lighting in the scene and it worked. To edit this, I first
increased the contrast, this makes the blacks a bit
brighter and no as dark. I then decreased the highlights
in the shot and dropped the whites. This makes the
whites not blinding. The lighting is now having a grey,
dull tint to it, I chose to do this because it portrays the
characters emotion within, the frame and makes the
audience connect to it from a personal mindset.
To continue with the video transitions, I used the dip to black
transition for the first half of the advertisement. The reason
for this is because it amplifies the emotional setting this video
has at the video. This personally makes it more emotionally
captivating as it is relatable for me and my targeted audience.
The first scene the character is in a dark setting siting down by
herself looking down, because of her actions and the setting
this makes it seem so realistic to the point it does not look like
she is acting. Truthfully, she is not acting and this whole
advertisement shows real progress of her mental health and
how she acts in a everyday basis.
At the beginning of this PowerPoint, I explained that I
used the warp stabilizing to reduce the shaking of the
camera movement. However, I prefer it without the
stabilizer as it looks more like a vlog type of video and
makes the audience feel like they are there watching
all this happen from their point of view. To continue
with this method, I got rid of all the warp stabilizers
that I had used for this editing process. The purpose
of this is so it is like we are going on a journey with
the main character. This makes their actions seem
geniune.
I applied the cross-dissolve transition in between these two
shots. This is so it seems like they are making happy memories
and that smiling genuinely helps reduces stress and improves
mental health. This is what the brief told me to do, to create
something that makes people smile or why my targeted
audience smile. Therefore, it is aimed at having fun and
spending time with friends and family make them happy and
this is what the purpose of the video is.
To top this off, I searched through a list of music till I could
find a suitable one that could make me feel different
emotions, for example at the beginning feeling sad then it
escalates to some more happier vibes. Therefore, I chose this
specific song because it does exactly that. Personally, it has
that nostalgic sense to the song which I thought it was
perfect with the song because it reminds me of happy
memories with the people I love and makes me smile. This
motivates me to do more things with my family and friends.
To apply this song to the advert I had to sync it to the video
and make sure it would sync into the storyline of the
characters day.
To finish editing, I went on google and
searched for a mind logo Png that I thought
would look good at the end of the video. I then
positioned the Png on to a black screen for the
outro. I then use a dip to black transition to
finish it off and so it seems natural.
Once I have finished making my
advertisement for mind, I had rendered it.
This is so I am able to export the video and
save it. From there I would upload a copy
to Microsoft teams and a copy to Blogger.
https://youtu.be/G6uEsCP
9YwQ

Advert process

  • 1.
  • 2.
    Contact sheet ofmy footage I will be using for this project
  • 3.
    To begin editingmy advertisement, I used a software called premier pro. I transferred all my footage that I thought was useful to this software. Then I began to pick through the scenes I had taken. I came across this one in particular. This medium close-up shot was taken mainly because I thought by taking this the audience would be able to feel more of the action that has taken place and the emotion she has portrayed. Rewatching this close up, there was some shaking with the camera movement, therefore I had to use the warp stabilizer. This editing technique helps to keep a specific scene become stable if there is too much movement becoming distracting towards the viewer such as in this case shaking. This smoothes out the movement however sometimes it does not help that much if there is too much distracting movement within the footage. I am also using a zoom shot of this character, I done this to help the audience see what she is doing, and we can see the emotion in her actions. I then transitioned to a wide shot which I will talk about in the next couple slides.
  • 4.
    Like in theprevious slide, I am needing to use the warp stabilizer yet again to fix the movement. However not only was it slightly shaky but the camera is aiming upwards half-way through the recording of this scene. This is a wide shot that I have used. By using this, it makes the audience feel like that they are a part of this journey that my actress is on and personally I can see emotion by how she walks for example stressed, anxious etc...
  • 5.
    This next shot,I used the warp stabilizer once again to make it play out a lot smoother. I am using a wide shot as she is walking into the café. This is because this will give the audience a feel of where she is in this moment of time. It then transitions to a four shot. A four shot is where there is four characters within the shot, in this case the female and the three males. In the advertisement when we watch it, you can see that two of the characters are having a deep conversation, we can tell this mainly because of their facial expressions. Personally, this makes me intrigued to know what they are saying and makes me more interested as the video goes on. This also comes across as relatable as by shooting this scene it shows that our friends will be there for us whenever and we can always talk to someone about what we are going through. In the screenshots, we can see that I sharpened a particular part of the scene. The reason for this is because, I thought that the shot was a bit everywhere, so I used to the sharpen tool to take control and make objects stand out a little more.
  • 6.
    With this shotit was too bright in the frame, so I had to play around with the RGB curves. Which is where I can alter certain colours in a scene to make it darker but look natural. I couldn’t make that much off a difference to it mainly because it was the sun in her face which was difficult to work with. However, this means I have learned that in future projects that I have to be wary with lighting a lot better than I have dealt with. The type of shots that I have used here, is a three shot which is self-explanatory shot made up off three people. I have also used a mix of a long and a medium shot. This can also be seen as a POV shot mainly cos these shots are making the audience feel like they are there with them, a part of their friend group.
  • 7.
    In the nextscene, we can see that our main characters mood has increased by smiling and being with people that she loves. This shot is called a medium close up and a three shot, this is because the frame is showing the characters waist to head and includes three characters. However, this could also be known as an over the shoulder shot as we are seeing behind two of the characters. In the next three screenshots, I tried to increase the brightness a little bit because in my opinion it was too dark for me to figure out what was happening. By adding brightness to the scene, it has brought it back to life.
  • 8.
    Here, I decidedadd a video transition from shot to another. I was struggling debating from two transitions to use; the dip to black or the cross dissolve. To help me with this, I had asked for opinions on what seemed better, and the majority of them have said the cross dissolve for this specific scene. This makes the happy part of the advert come across as they are having memorable moments and that time goes by fast. In the next image, I decreased the lighting as it was too bright. I tried to level it out and make it natural. A two shot and a wide shot has been used in this scene. This shows an intimate conversation between the two characters and portrays the special bond that they both have.
  • 9.
    Afterwards, I usedthe faded film tool. This makes the shot look vintage. This means it has focussed on raising the black levels to compress the tonal level on the specific shot. I heightened the mid tones scale, this has brought out the darker colours. The shadows were also decreased, this made the blacks pop out more and give it more depth.
  • 10.
    A scene whereI have worked on previously, I was beginning to not like, I decided to delete it out of my advert. The reason for this is because when I applied the warp stabilizer it had some weird effects to the footage, and I could not fix it therefore I had got rid of it. After this, I started editing another piece footage. I lowered the contrast at the maximin it could decrease, and this brought out the darker colours and made it look moern. The reason why I thought this was a good idea because there was too much light entering the room which made it hard to focus on anything. I then decreased the shadows as there wasn’t enough darkness in the shot and this also a seriousness atmosphere to this scene as she talks to her friend about her problems.
  • 11.
    This scene inparticular had difficulties with the lighting because it kept changing due to the weather. However, I was able to fix it in premier pro. This took a while mainly because I had to match it with the most suitable lighting in the scene and it worked. To edit this, I first increased the contrast, this makes the blacks a bit brighter and no as dark. I then decreased the highlights in the shot and dropped the whites. This makes the whites not blinding. The lighting is now having a grey, dull tint to it, I chose to do this because it portrays the characters emotion within, the frame and makes the audience connect to it from a personal mindset.
  • 12.
    To continue withthe video transitions, I used the dip to black transition for the first half of the advertisement. The reason for this is because it amplifies the emotional setting this video has at the video. This personally makes it more emotionally captivating as it is relatable for me and my targeted audience. The first scene the character is in a dark setting siting down by herself looking down, because of her actions and the setting this makes it seem so realistic to the point it does not look like she is acting. Truthfully, she is not acting and this whole advertisement shows real progress of her mental health and how she acts in a everyday basis.
  • 13.
    At the beginningof this PowerPoint, I explained that I used the warp stabilizing to reduce the shaking of the camera movement. However, I prefer it without the stabilizer as it looks more like a vlog type of video and makes the audience feel like they are there watching all this happen from their point of view. To continue with this method, I got rid of all the warp stabilizers that I had used for this editing process. The purpose of this is so it is like we are going on a journey with the main character. This makes their actions seem geniune.
  • 14.
    I applied thecross-dissolve transition in between these two shots. This is so it seems like they are making happy memories and that smiling genuinely helps reduces stress and improves mental health. This is what the brief told me to do, to create something that makes people smile or why my targeted audience smile. Therefore, it is aimed at having fun and spending time with friends and family make them happy and this is what the purpose of the video is.
  • 15.
    To top thisoff, I searched through a list of music till I could find a suitable one that could make me feel different emotions, for example at the beginning feeling sad then it escalates to some more happier vibes. Therefore, I chose this specific song because it does exactly that. Personally, it has that nostalgic sense to the song which I thought it was perfect with the song because it reminds me of happy memories with the people I love and makes me smile. This motivates me to do more things with my family and friends. To apply this song to the advert I had to sync it to the video and make sure it would sync into the storyline of the characters day.
  • 16.
    To finish editing,I went on google and searched for a mind logo Png that I thought would look good at the end of the video. I then positioned the Png on to a black screen for the outro. I then use a dip to black transition to finish it off and so it seems natural.
  • 17.
    Once I havefinished making my advertisement for mind, I had rendered it. This is so I am able to export the video and save it. From there I would upload a copy to Microsoft teams and a copy to Blogger. https://youtu.be/G6uEsCP 9YwQ