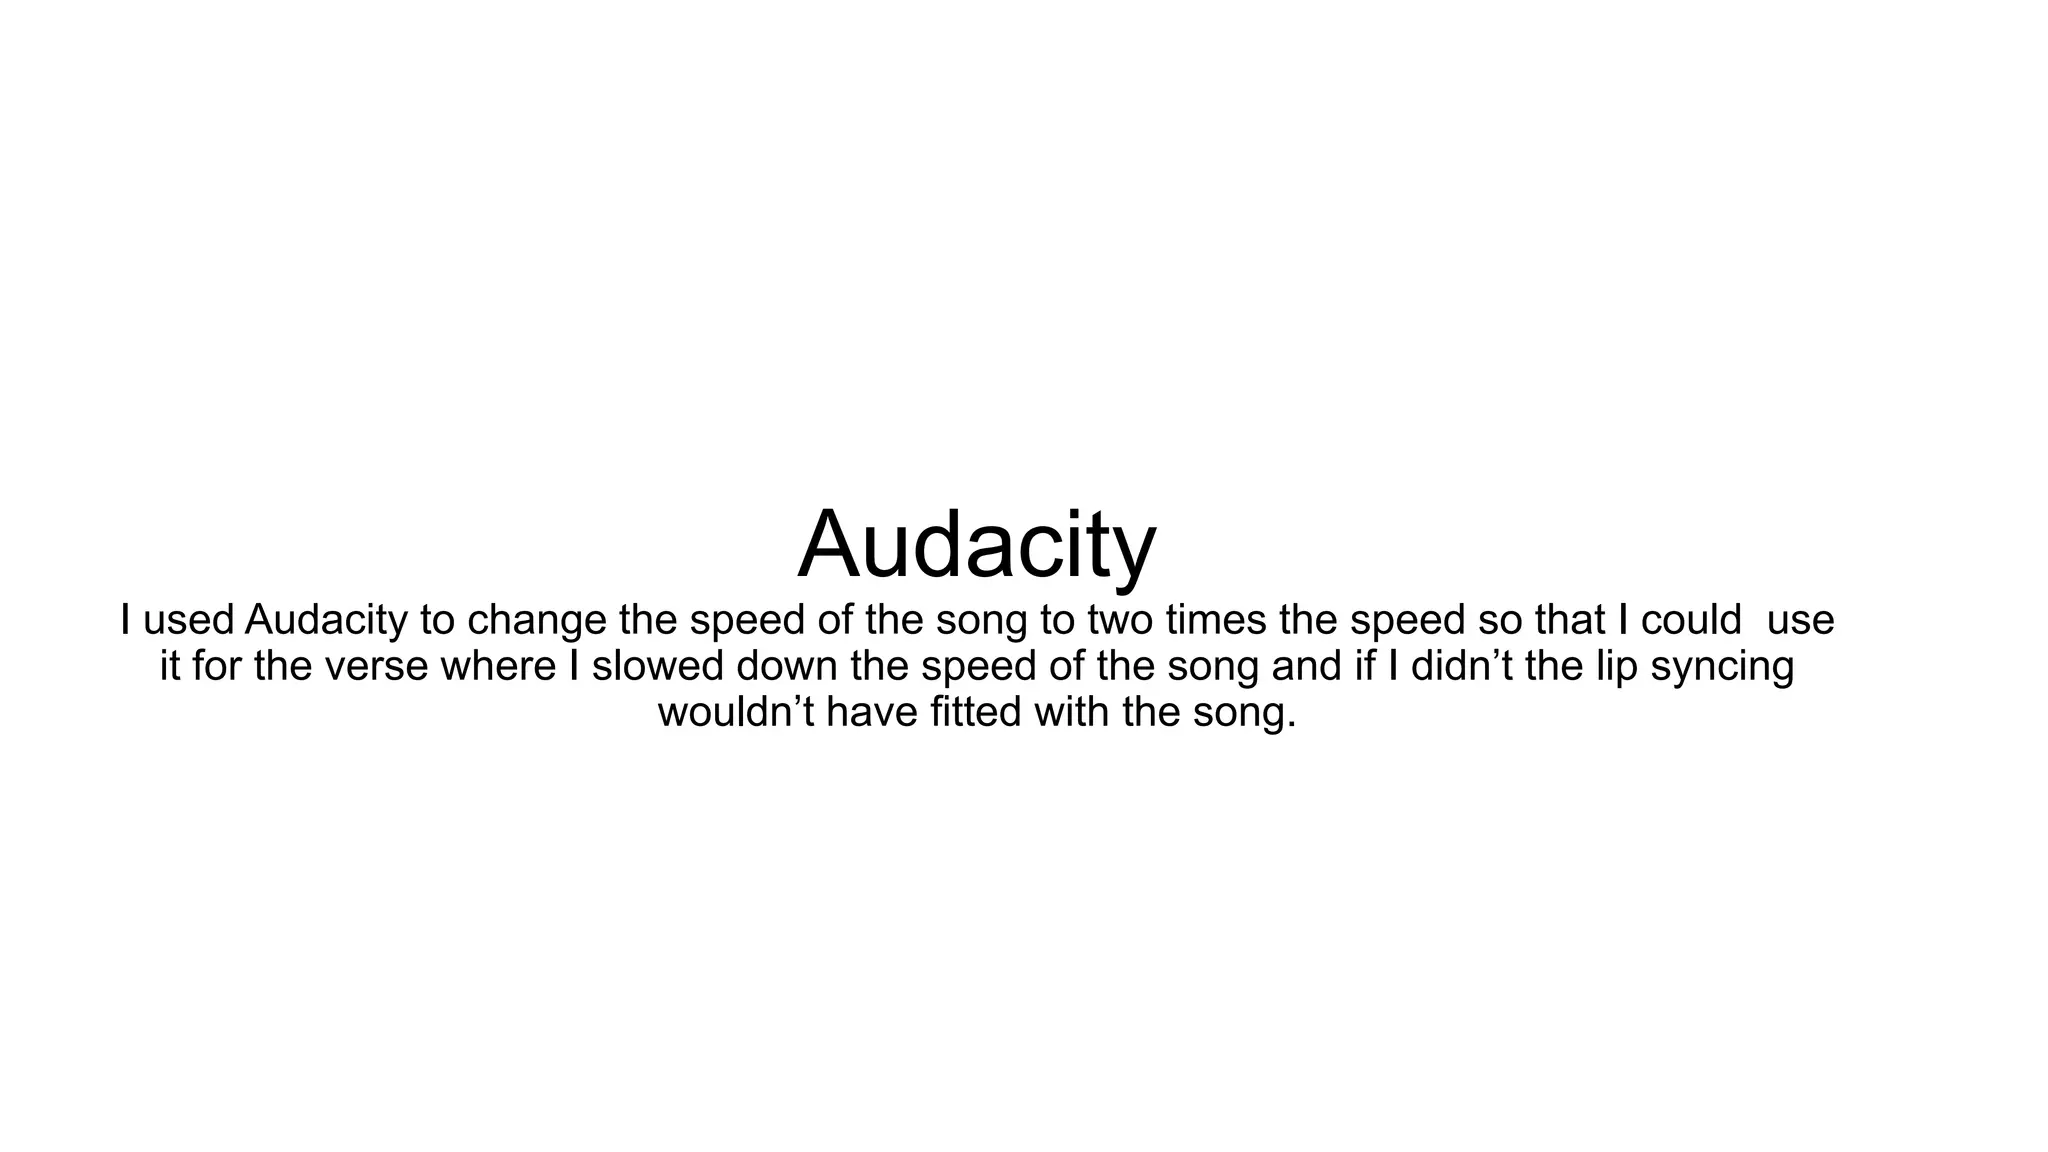
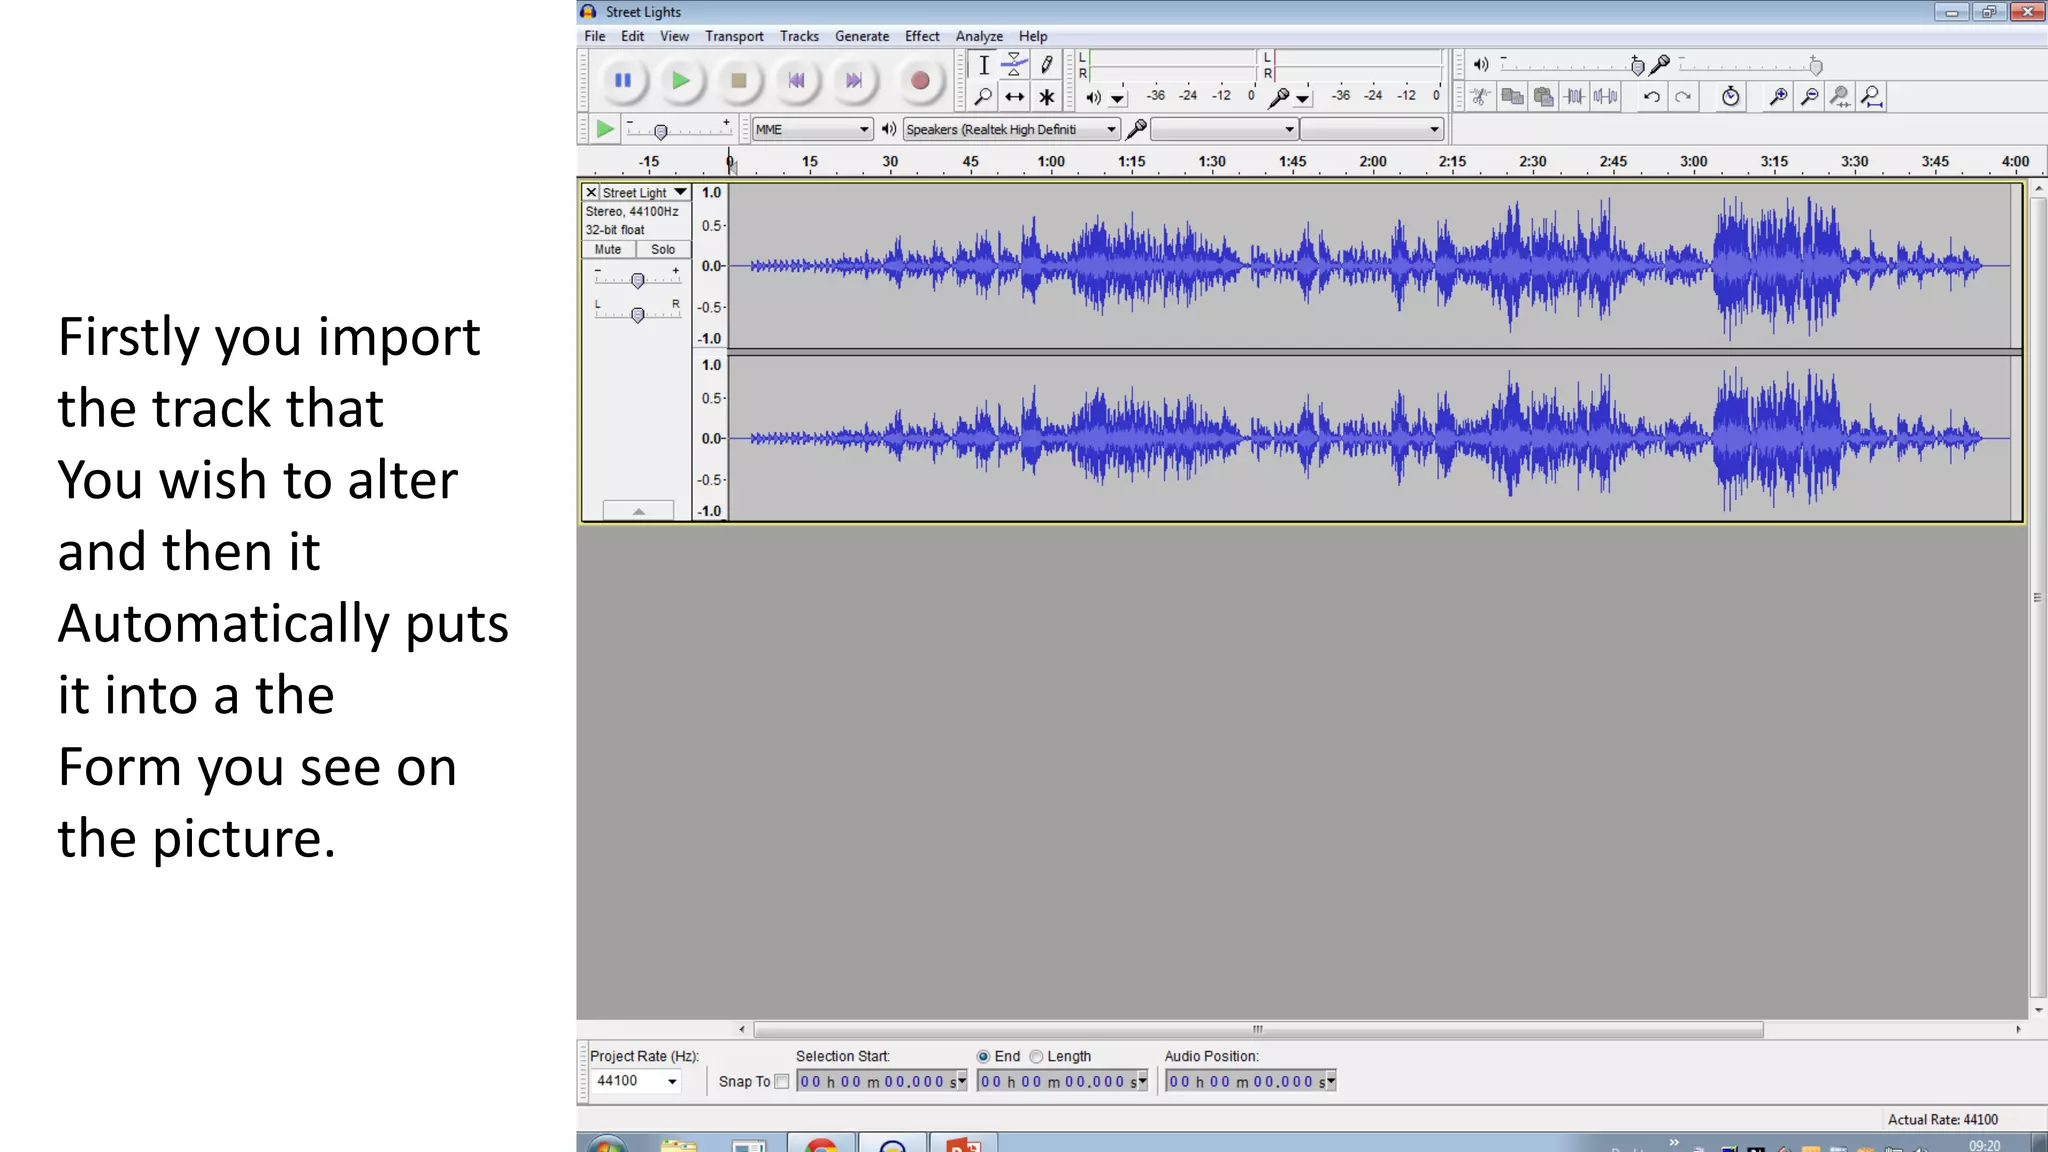
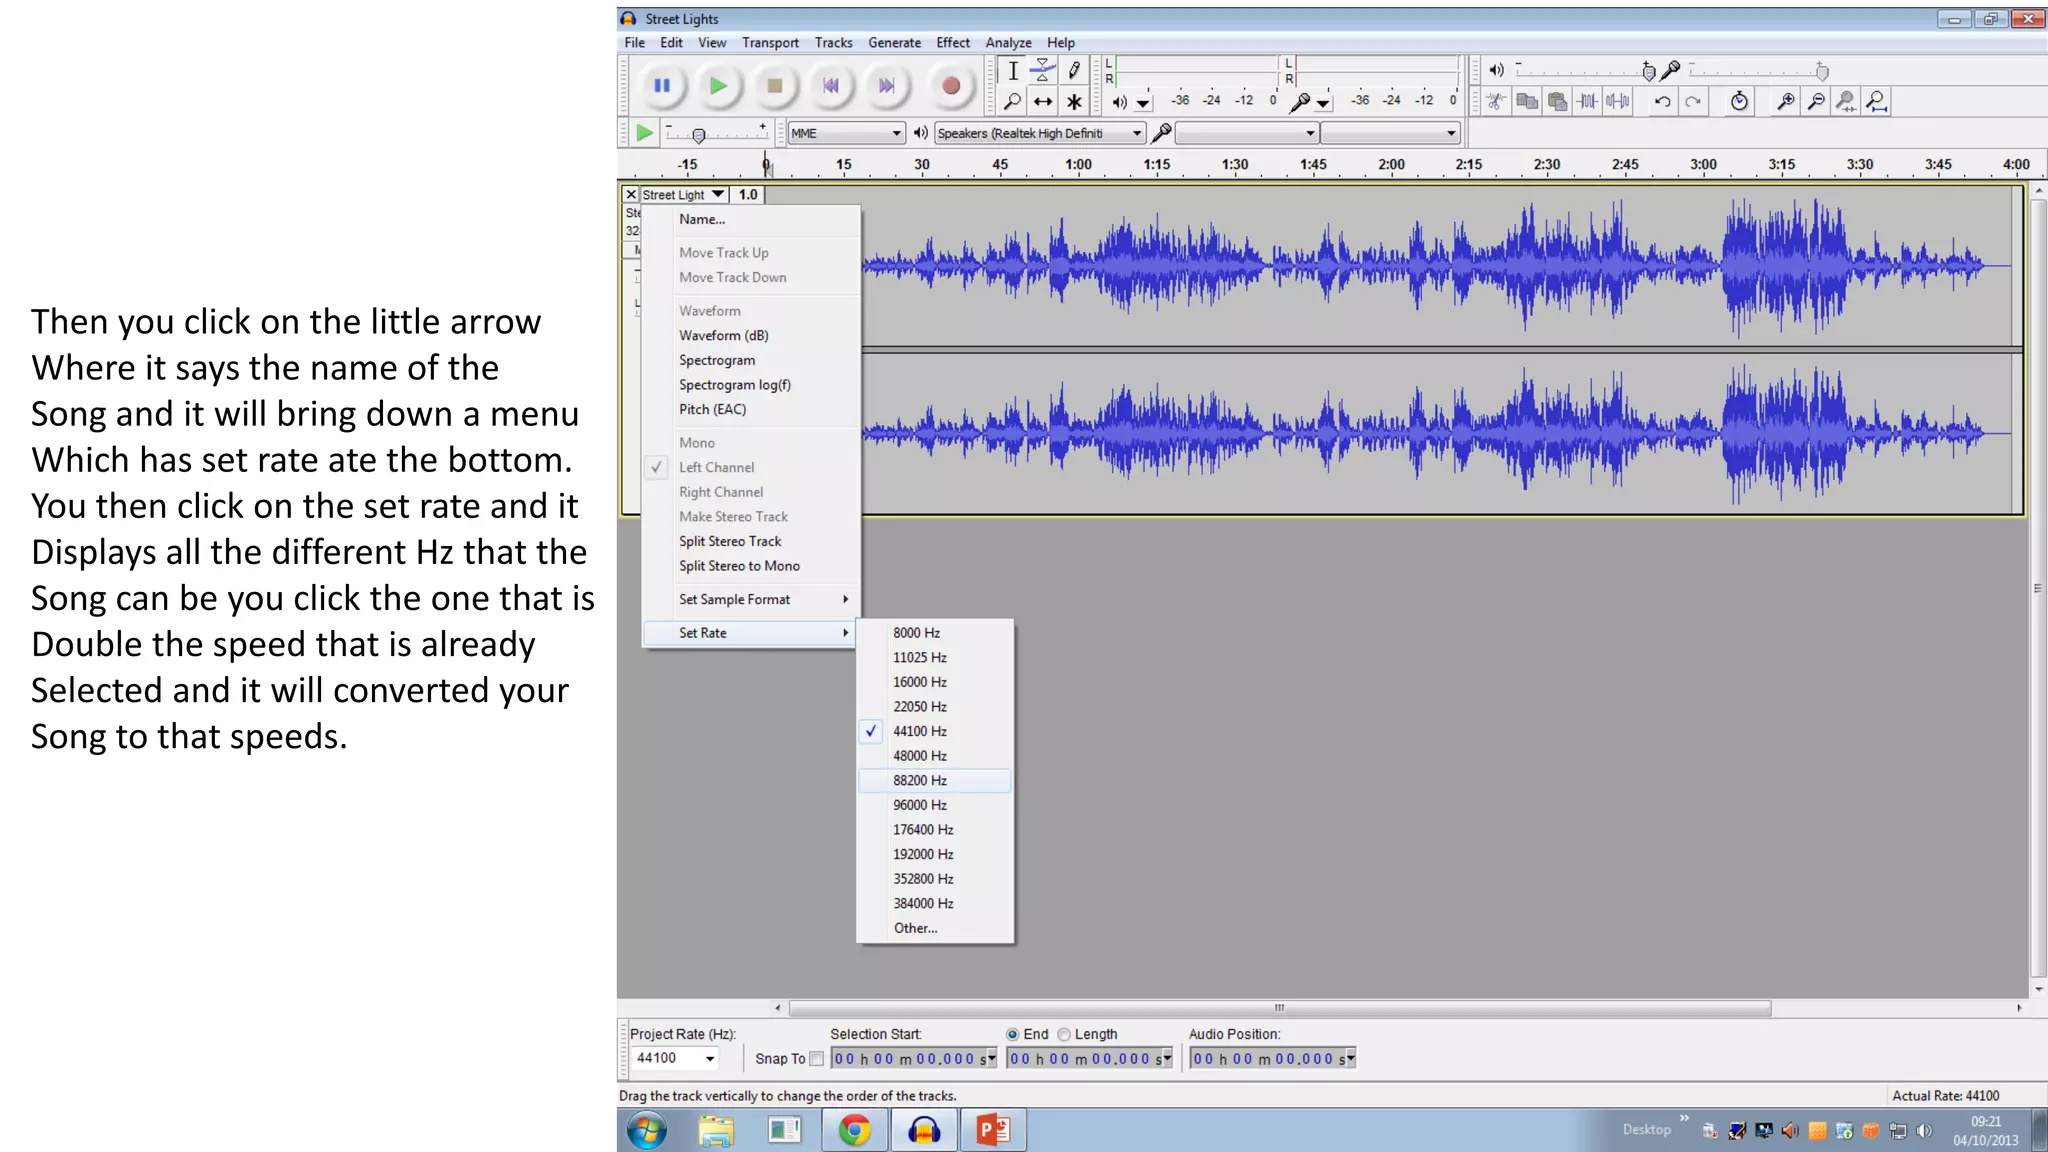
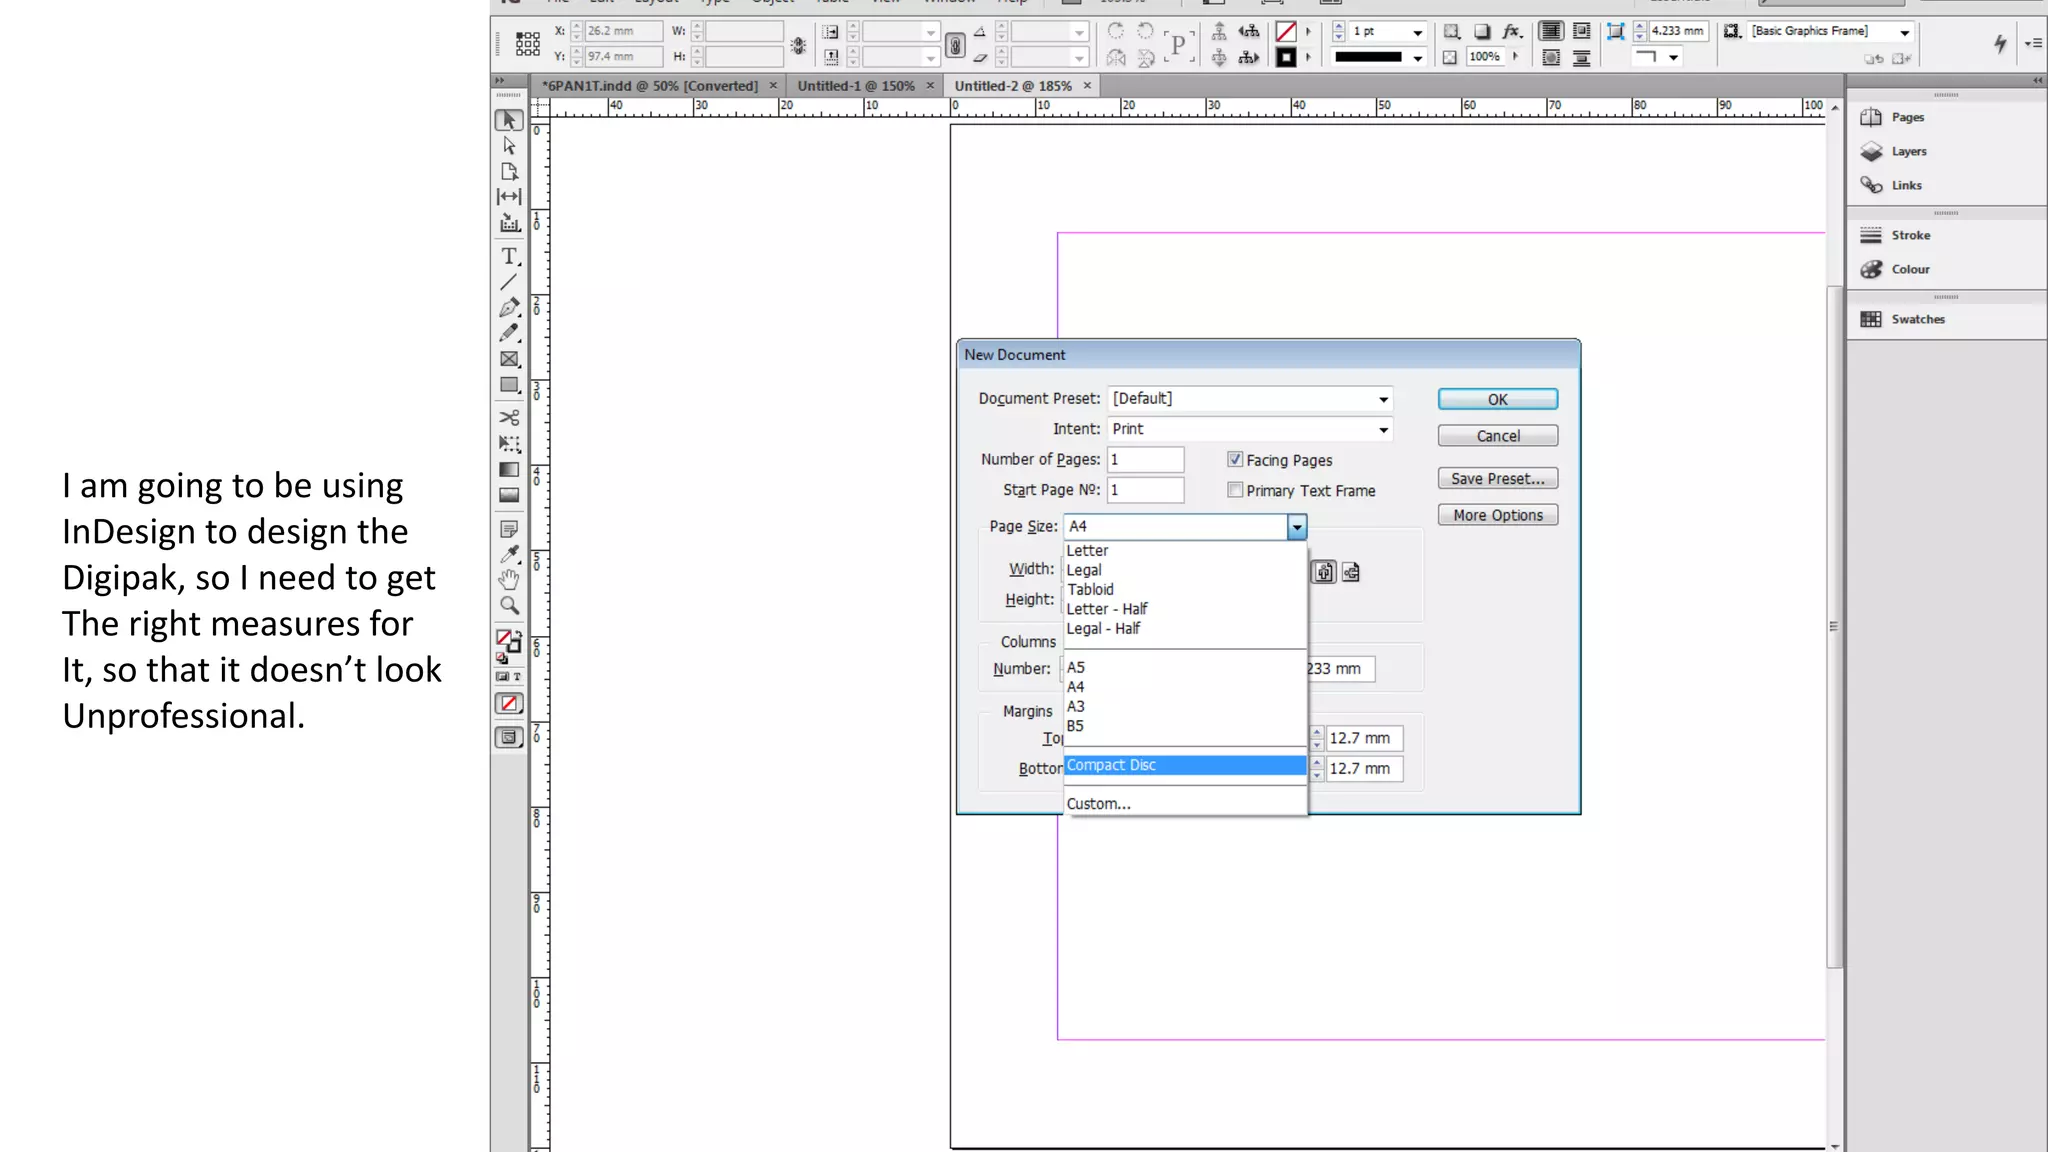
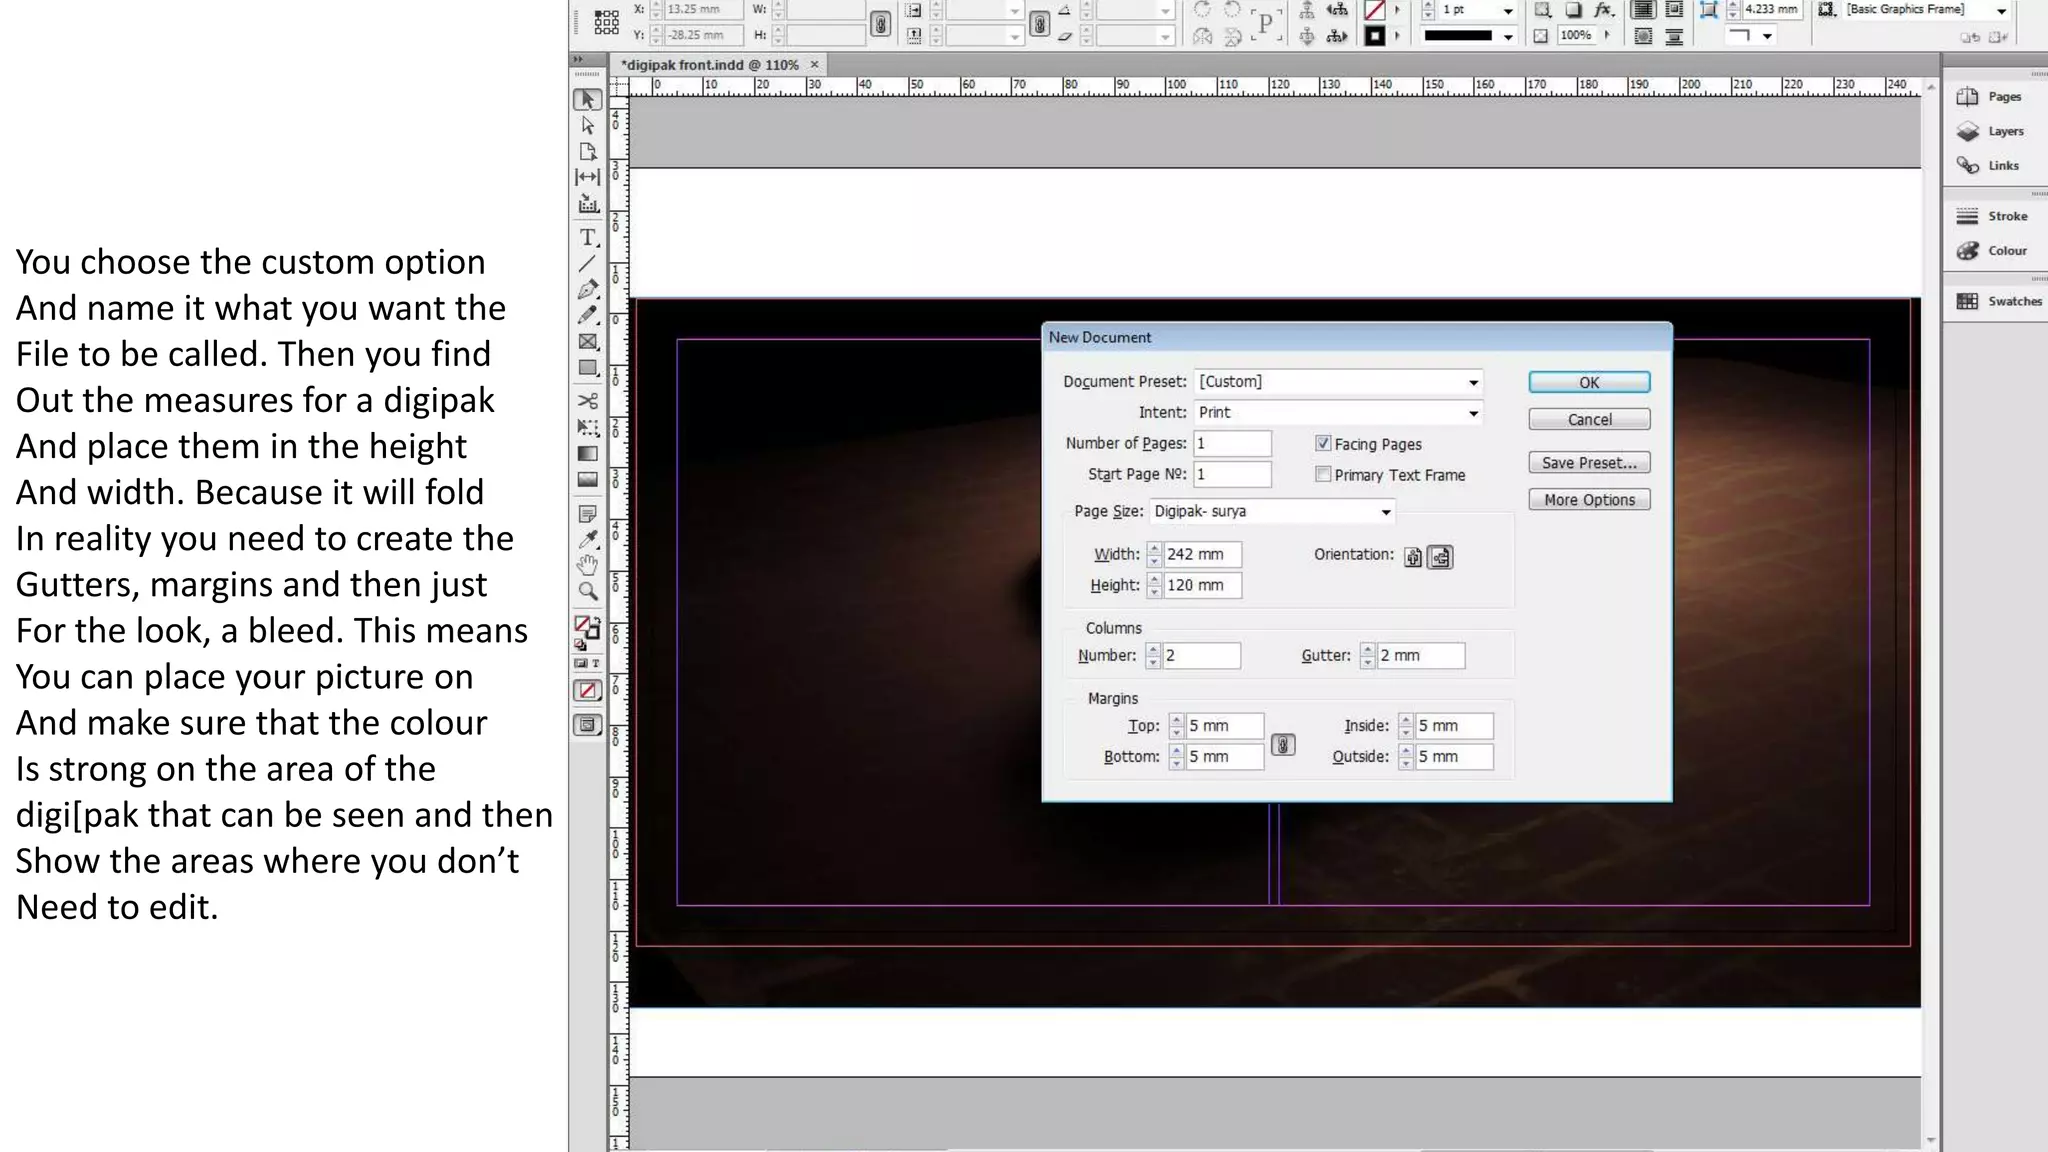
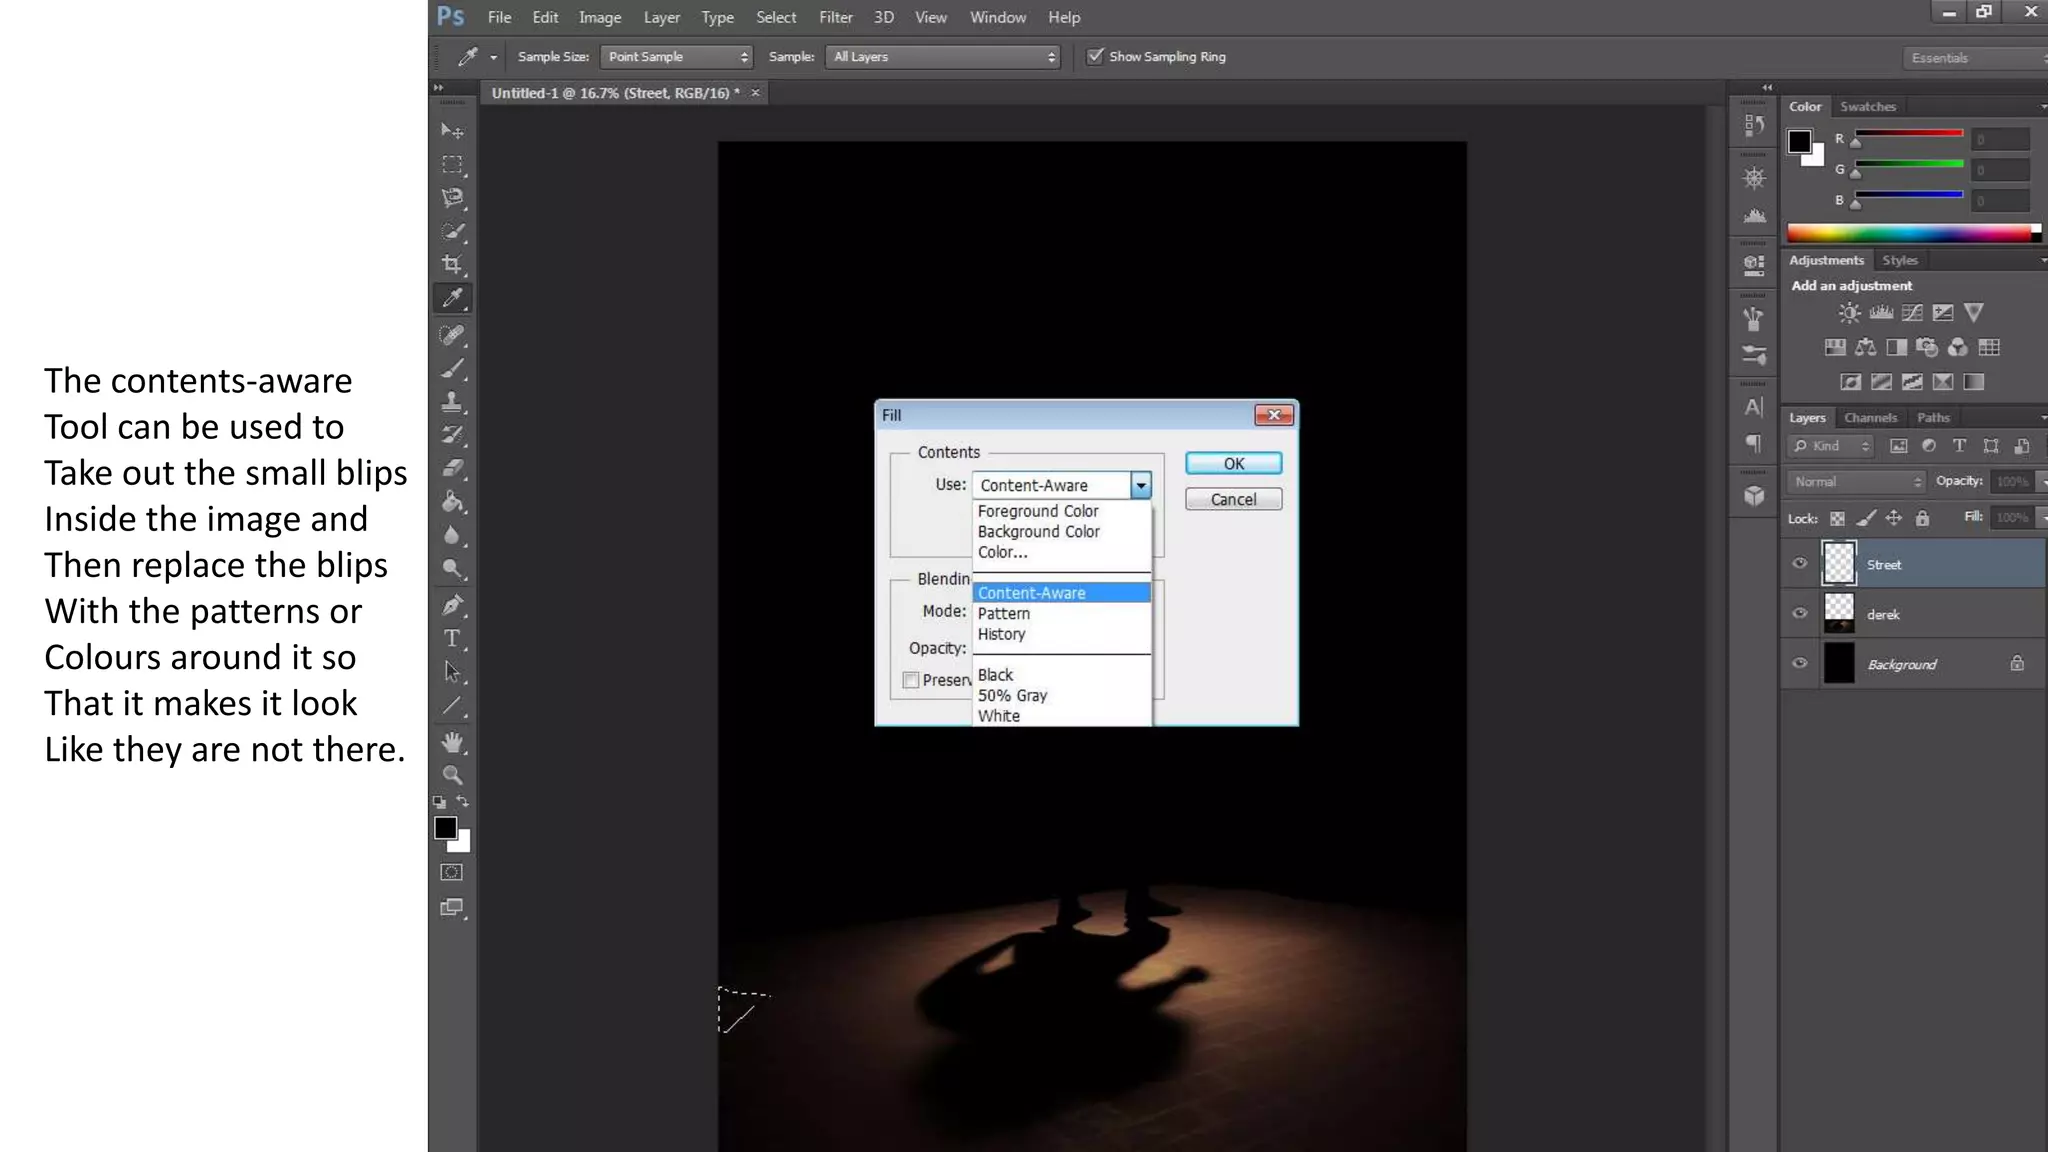
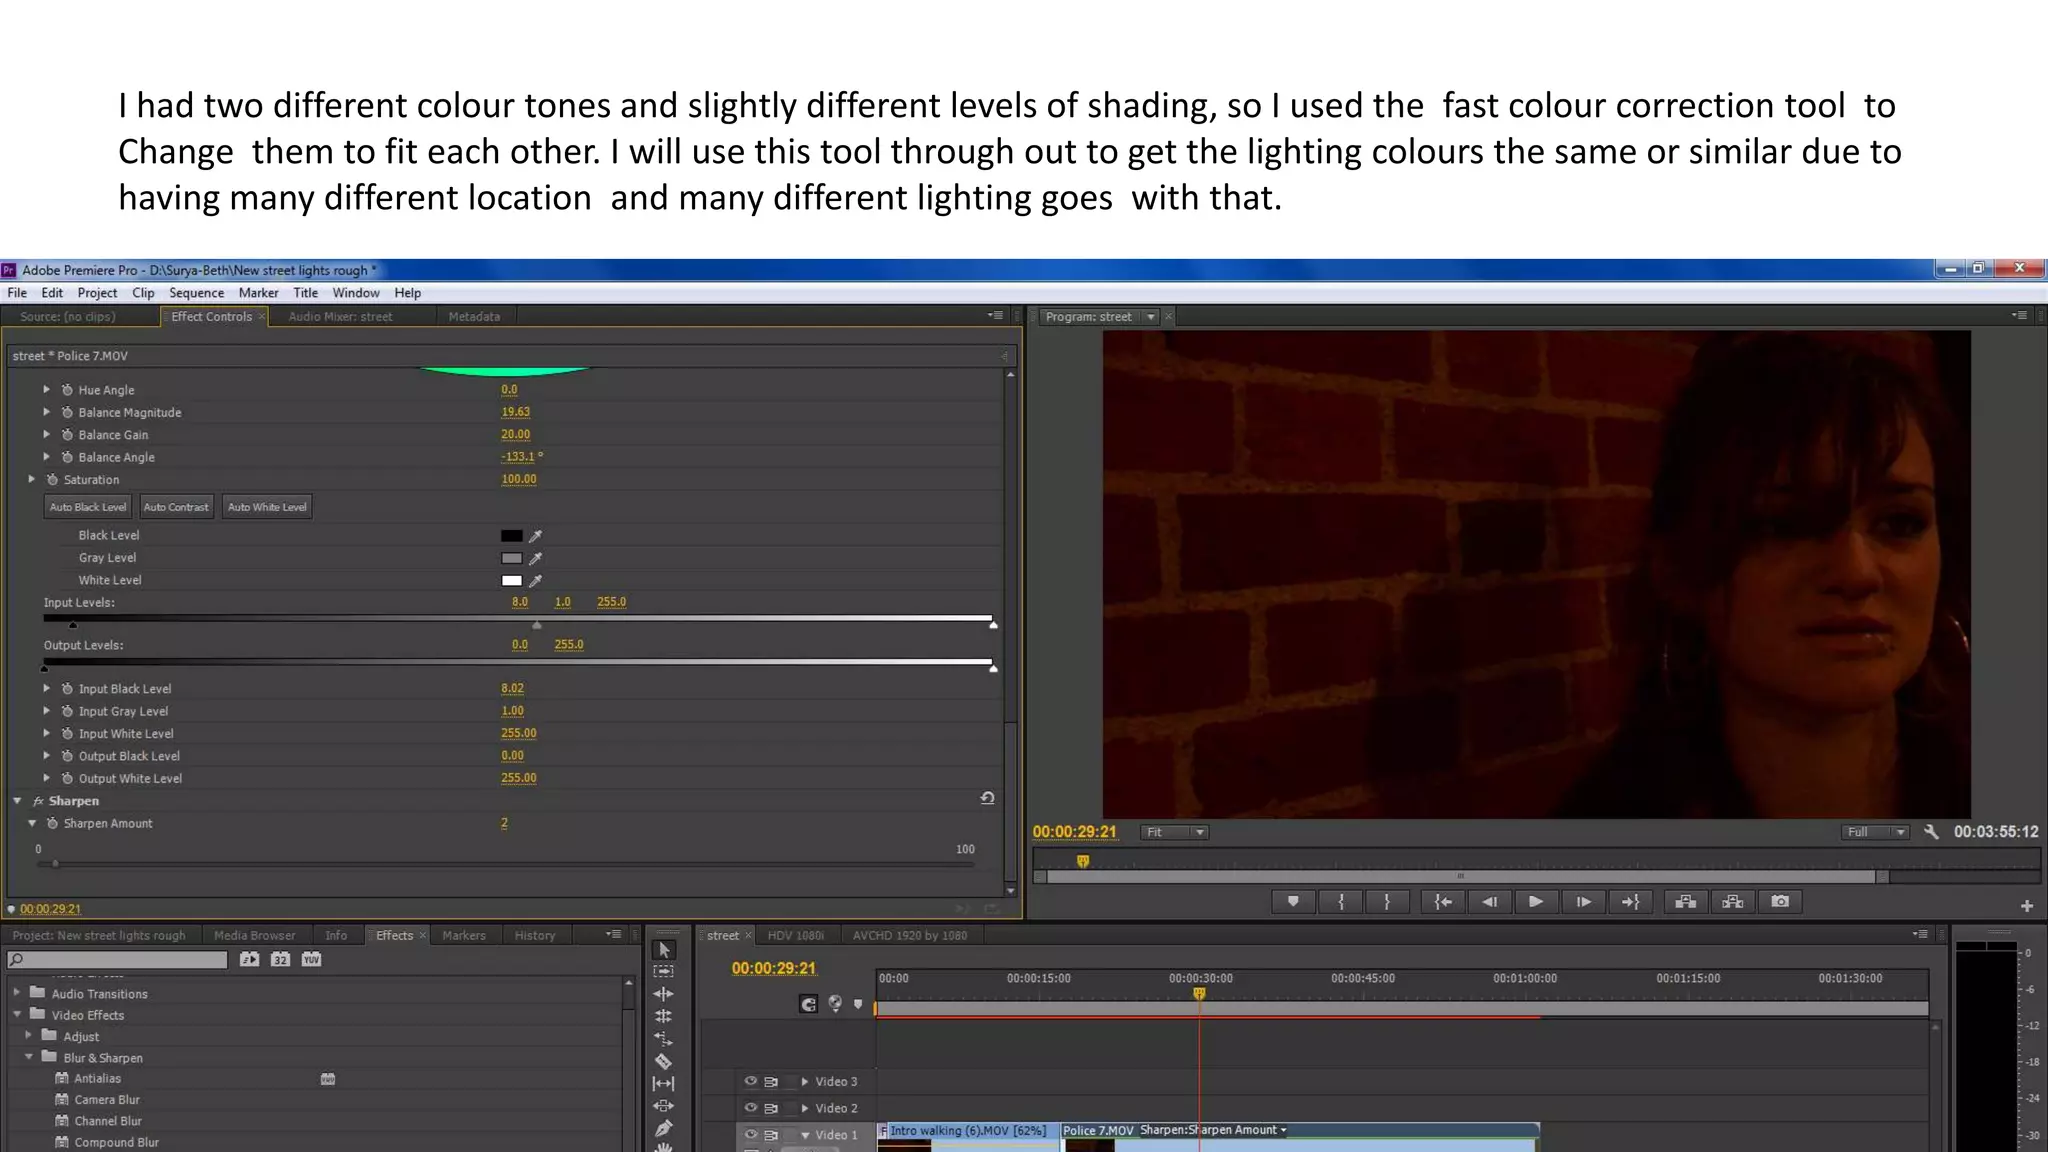
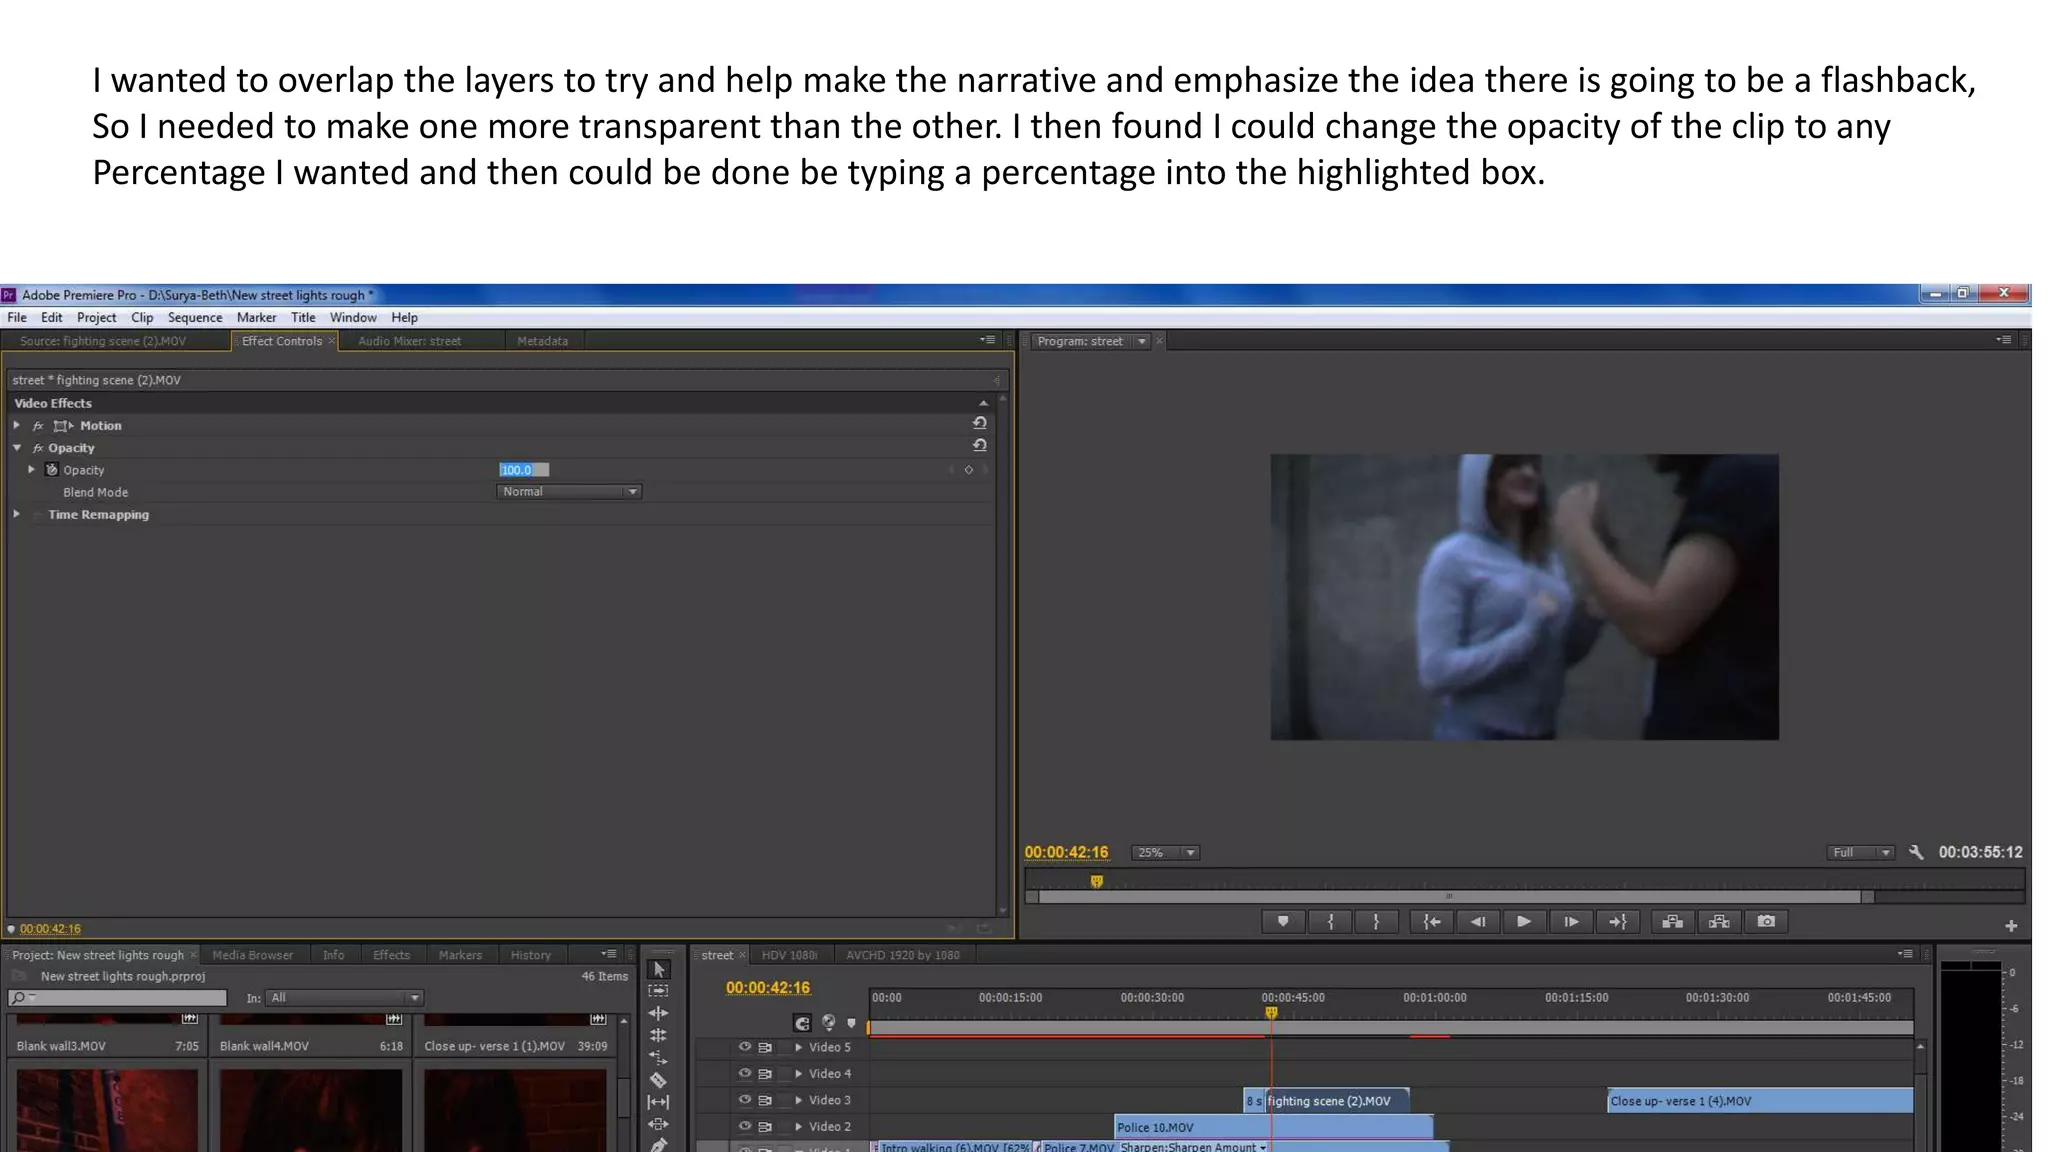
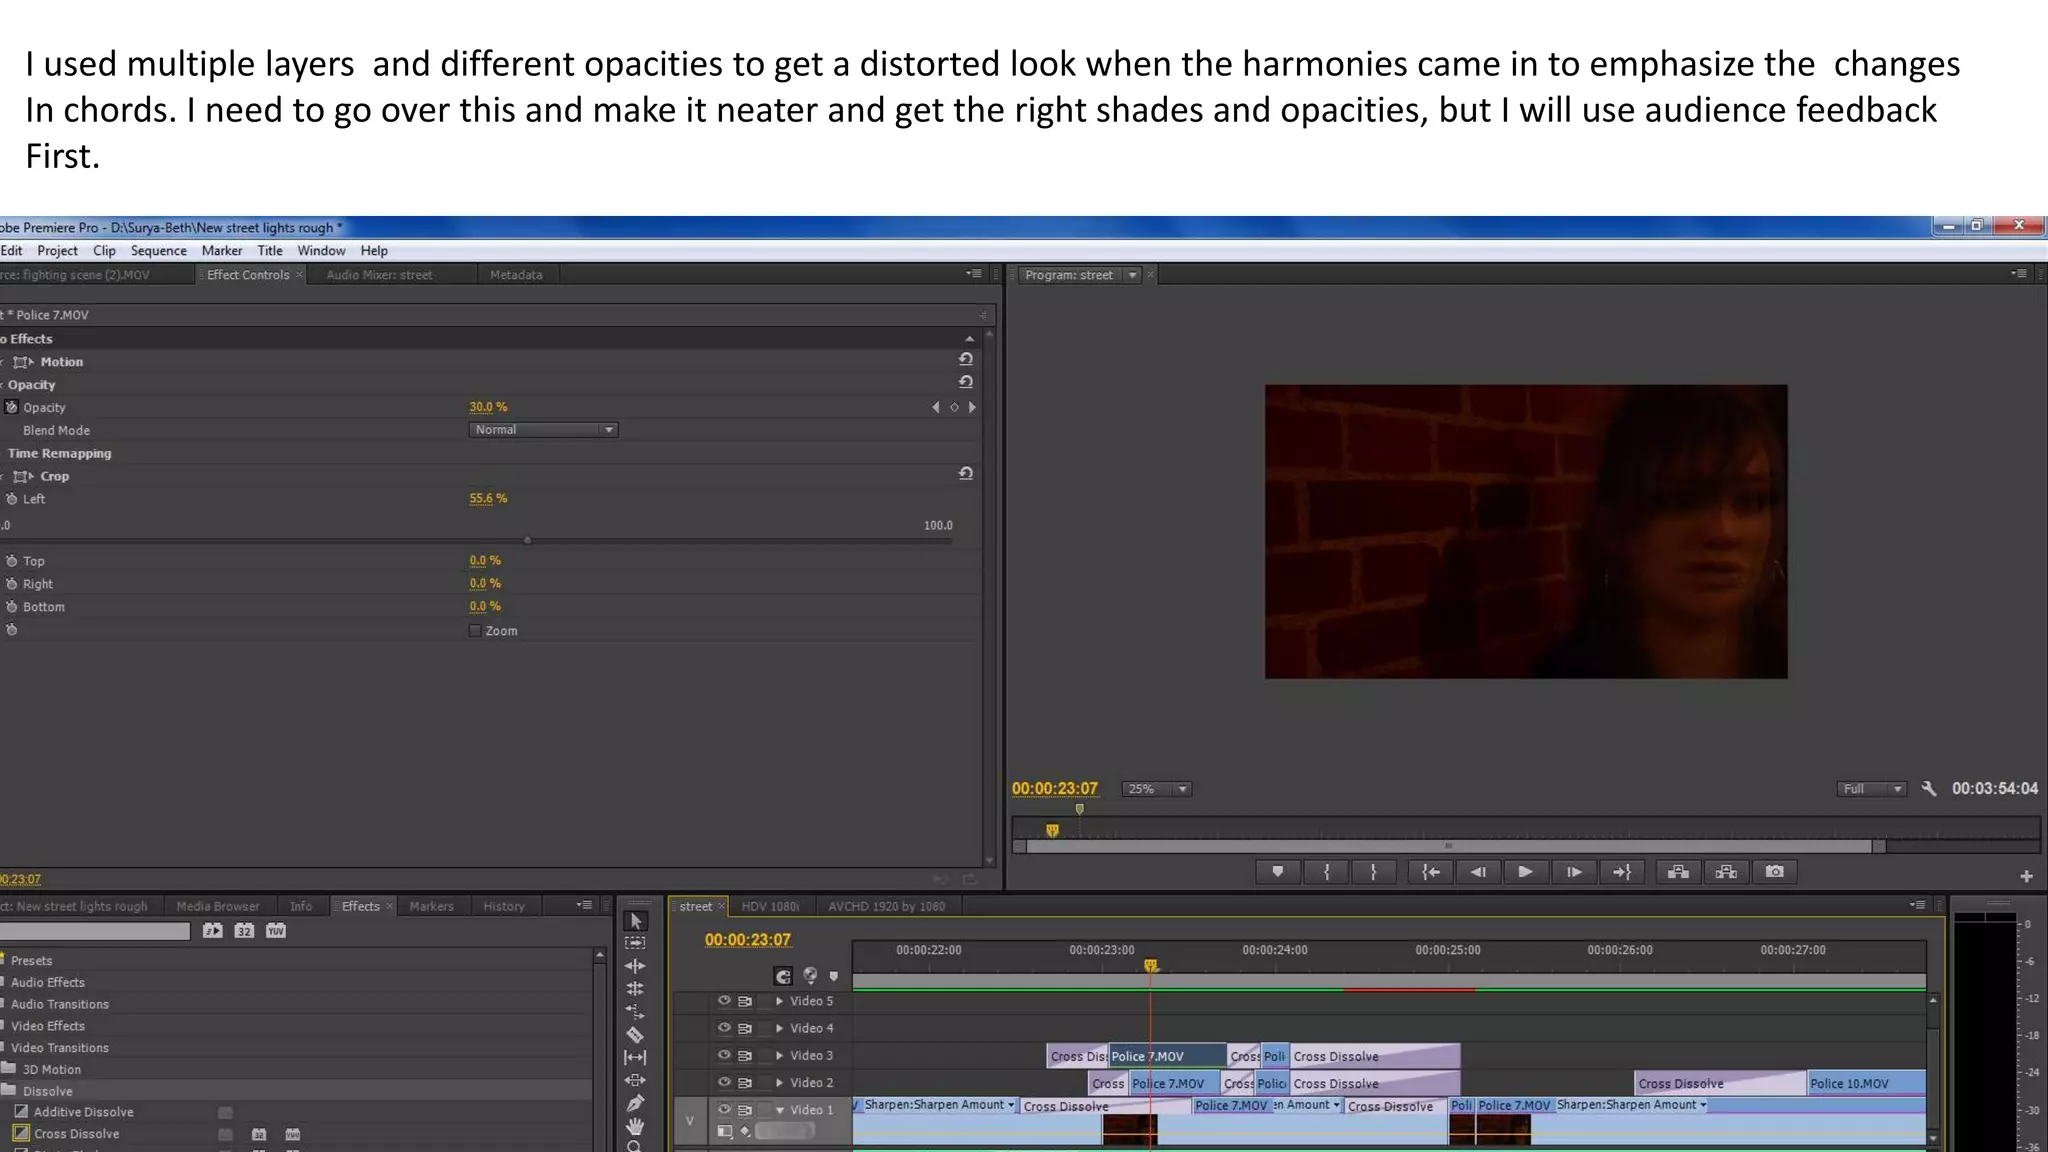
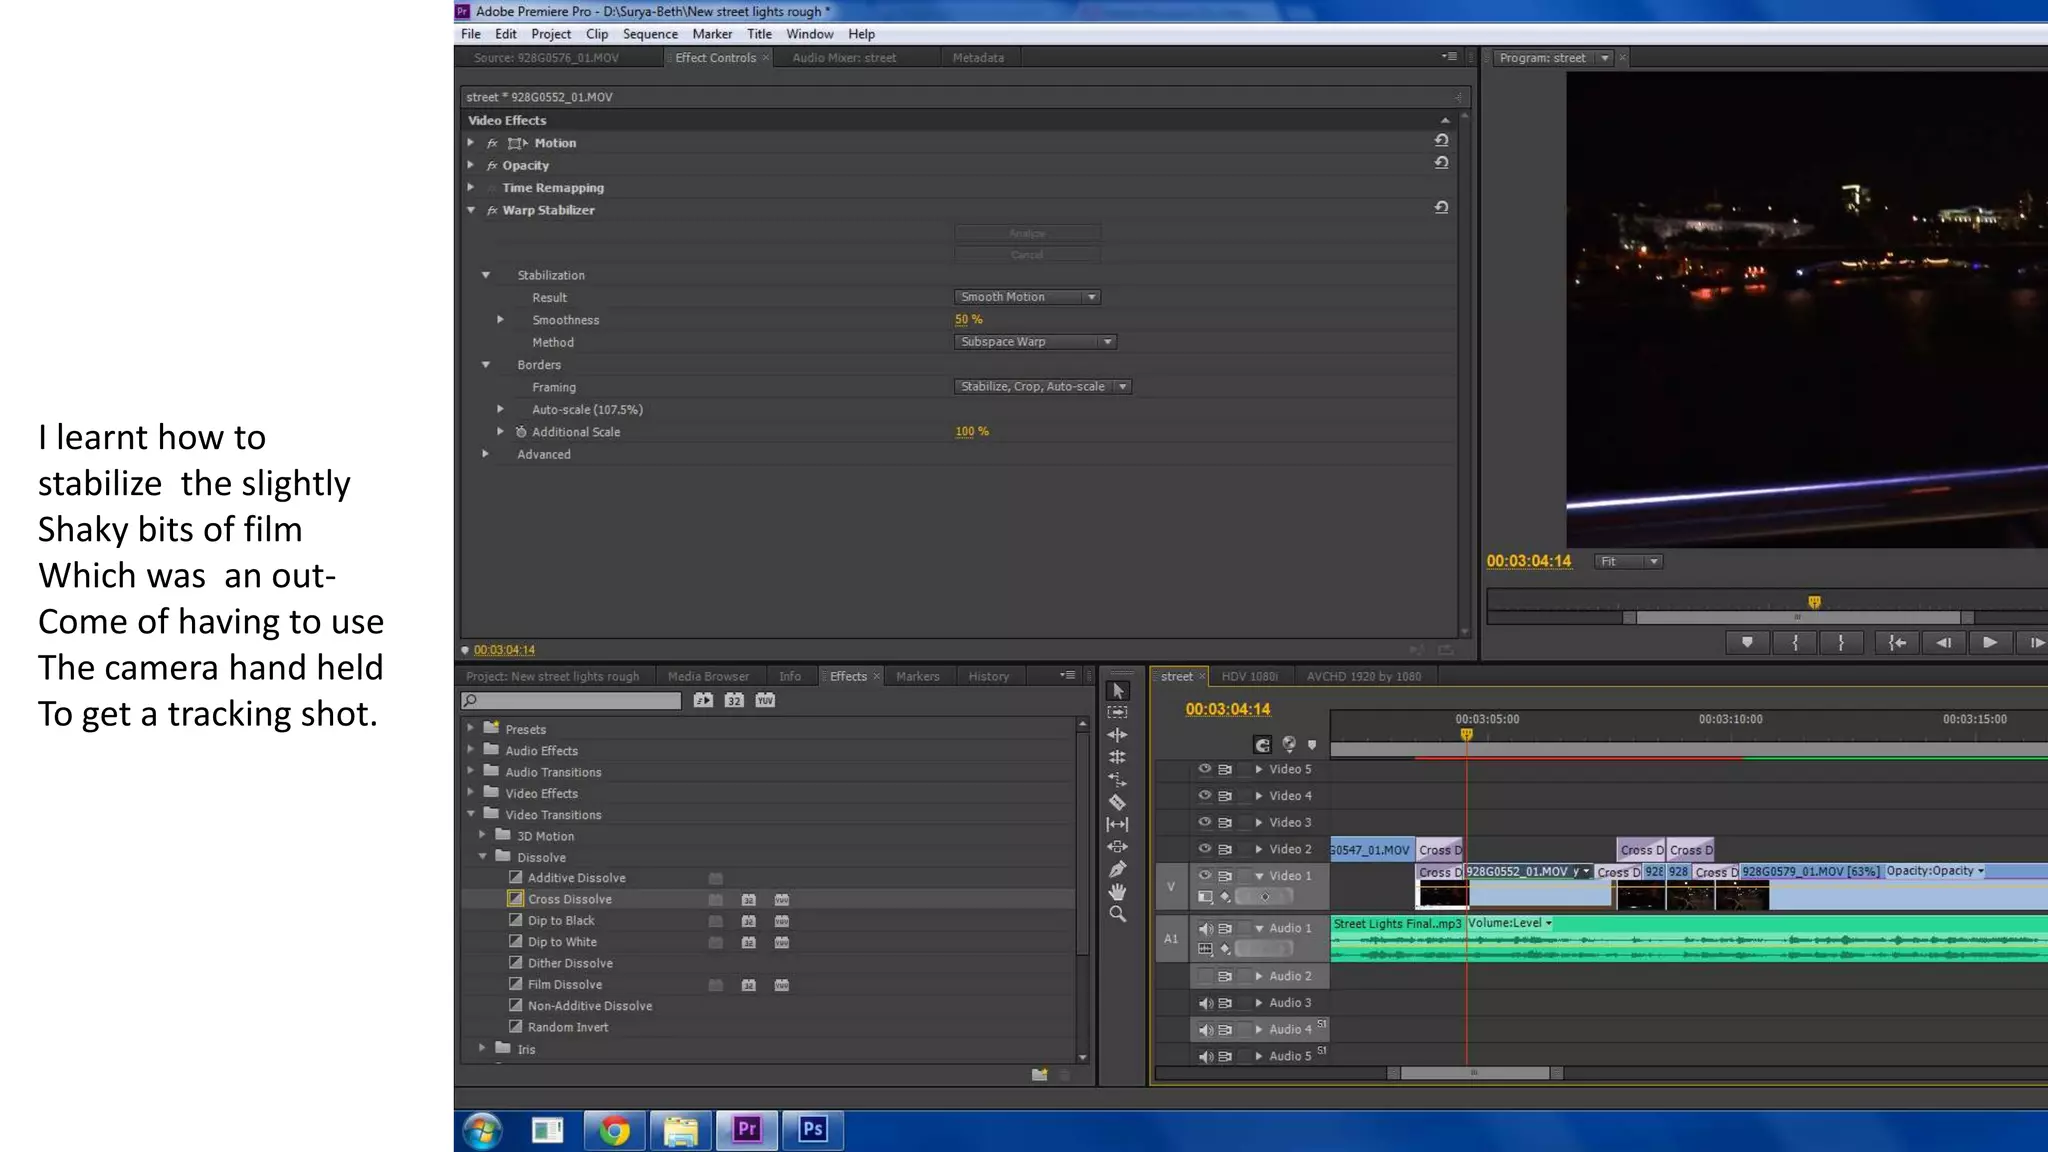
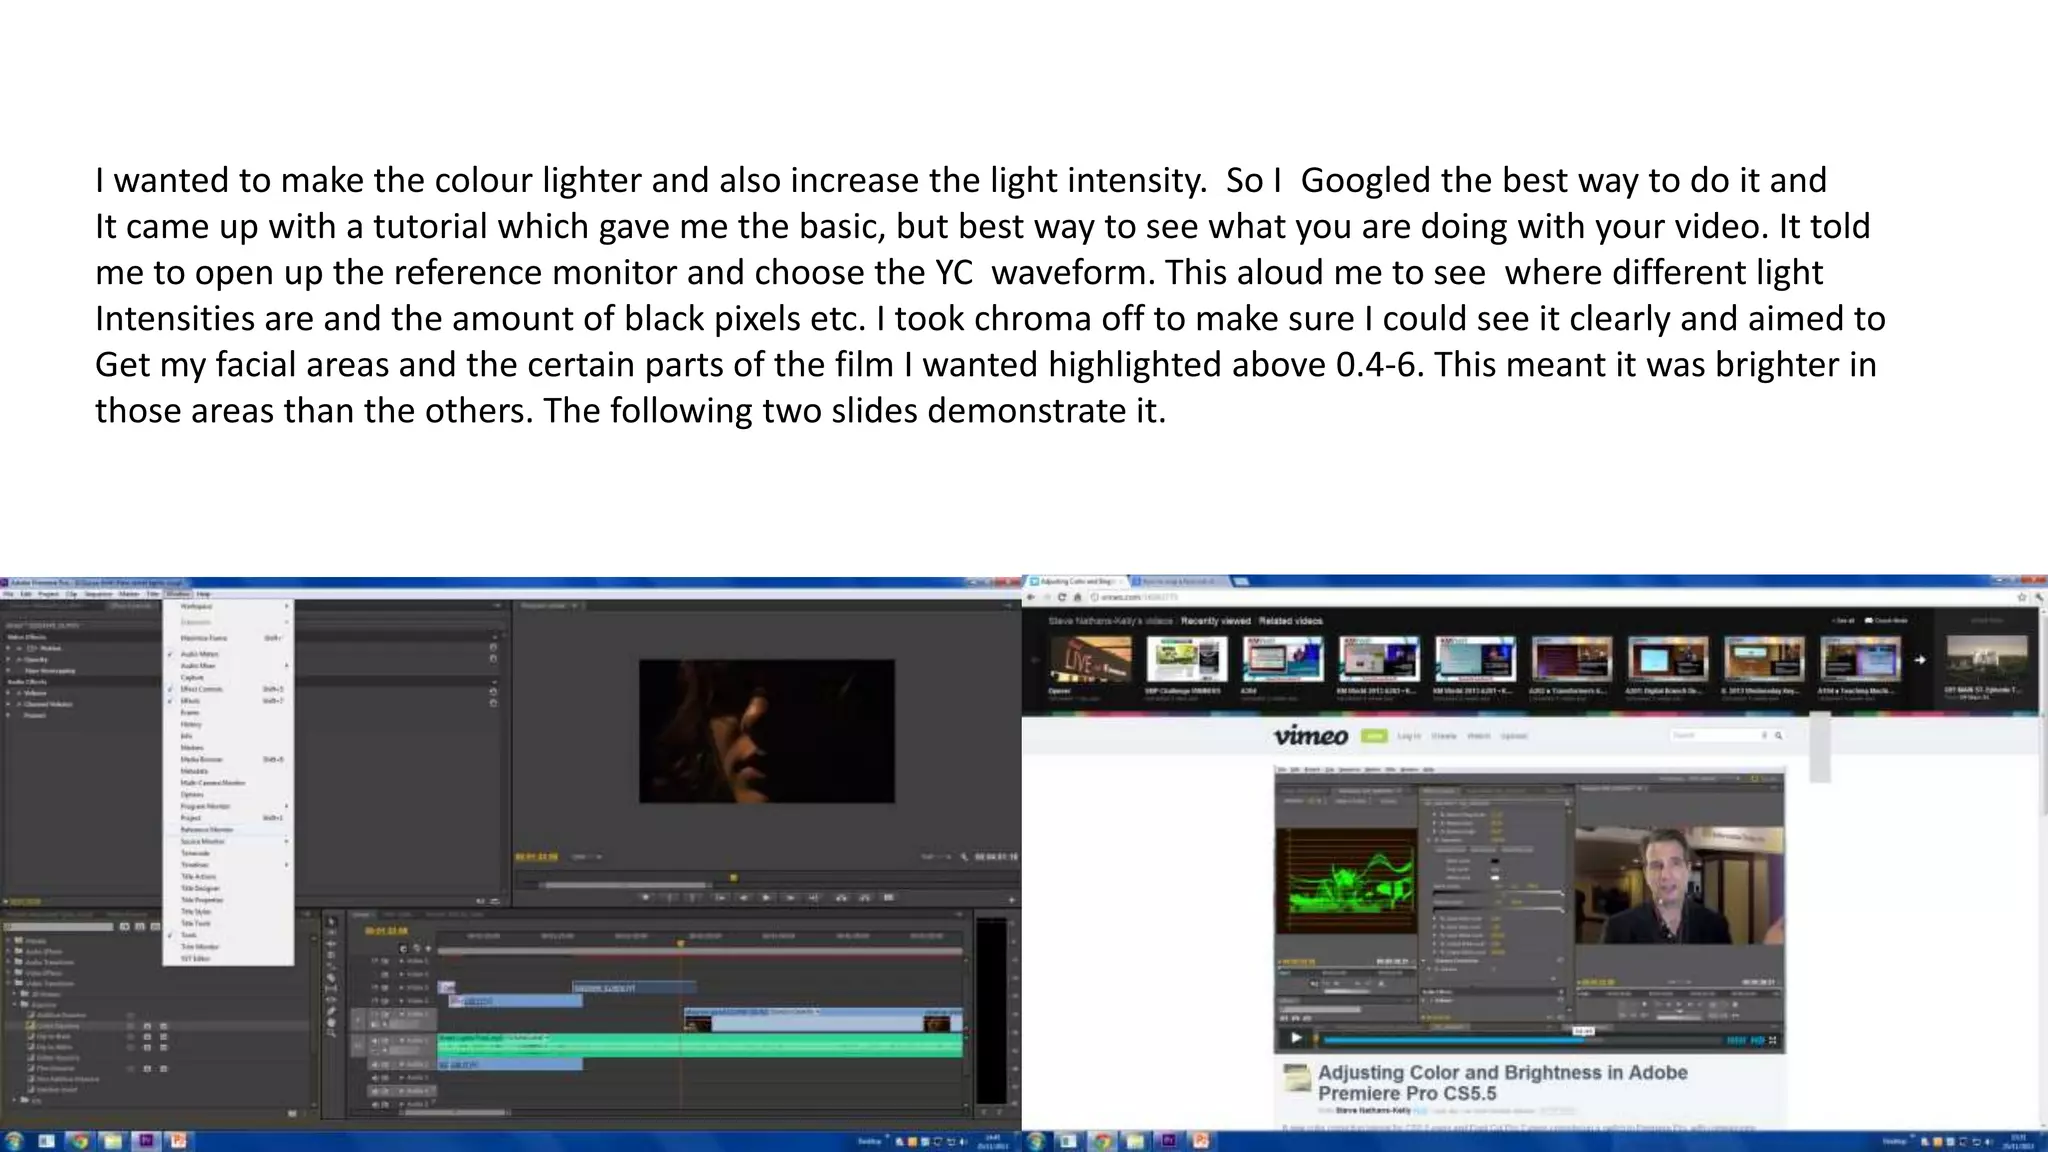
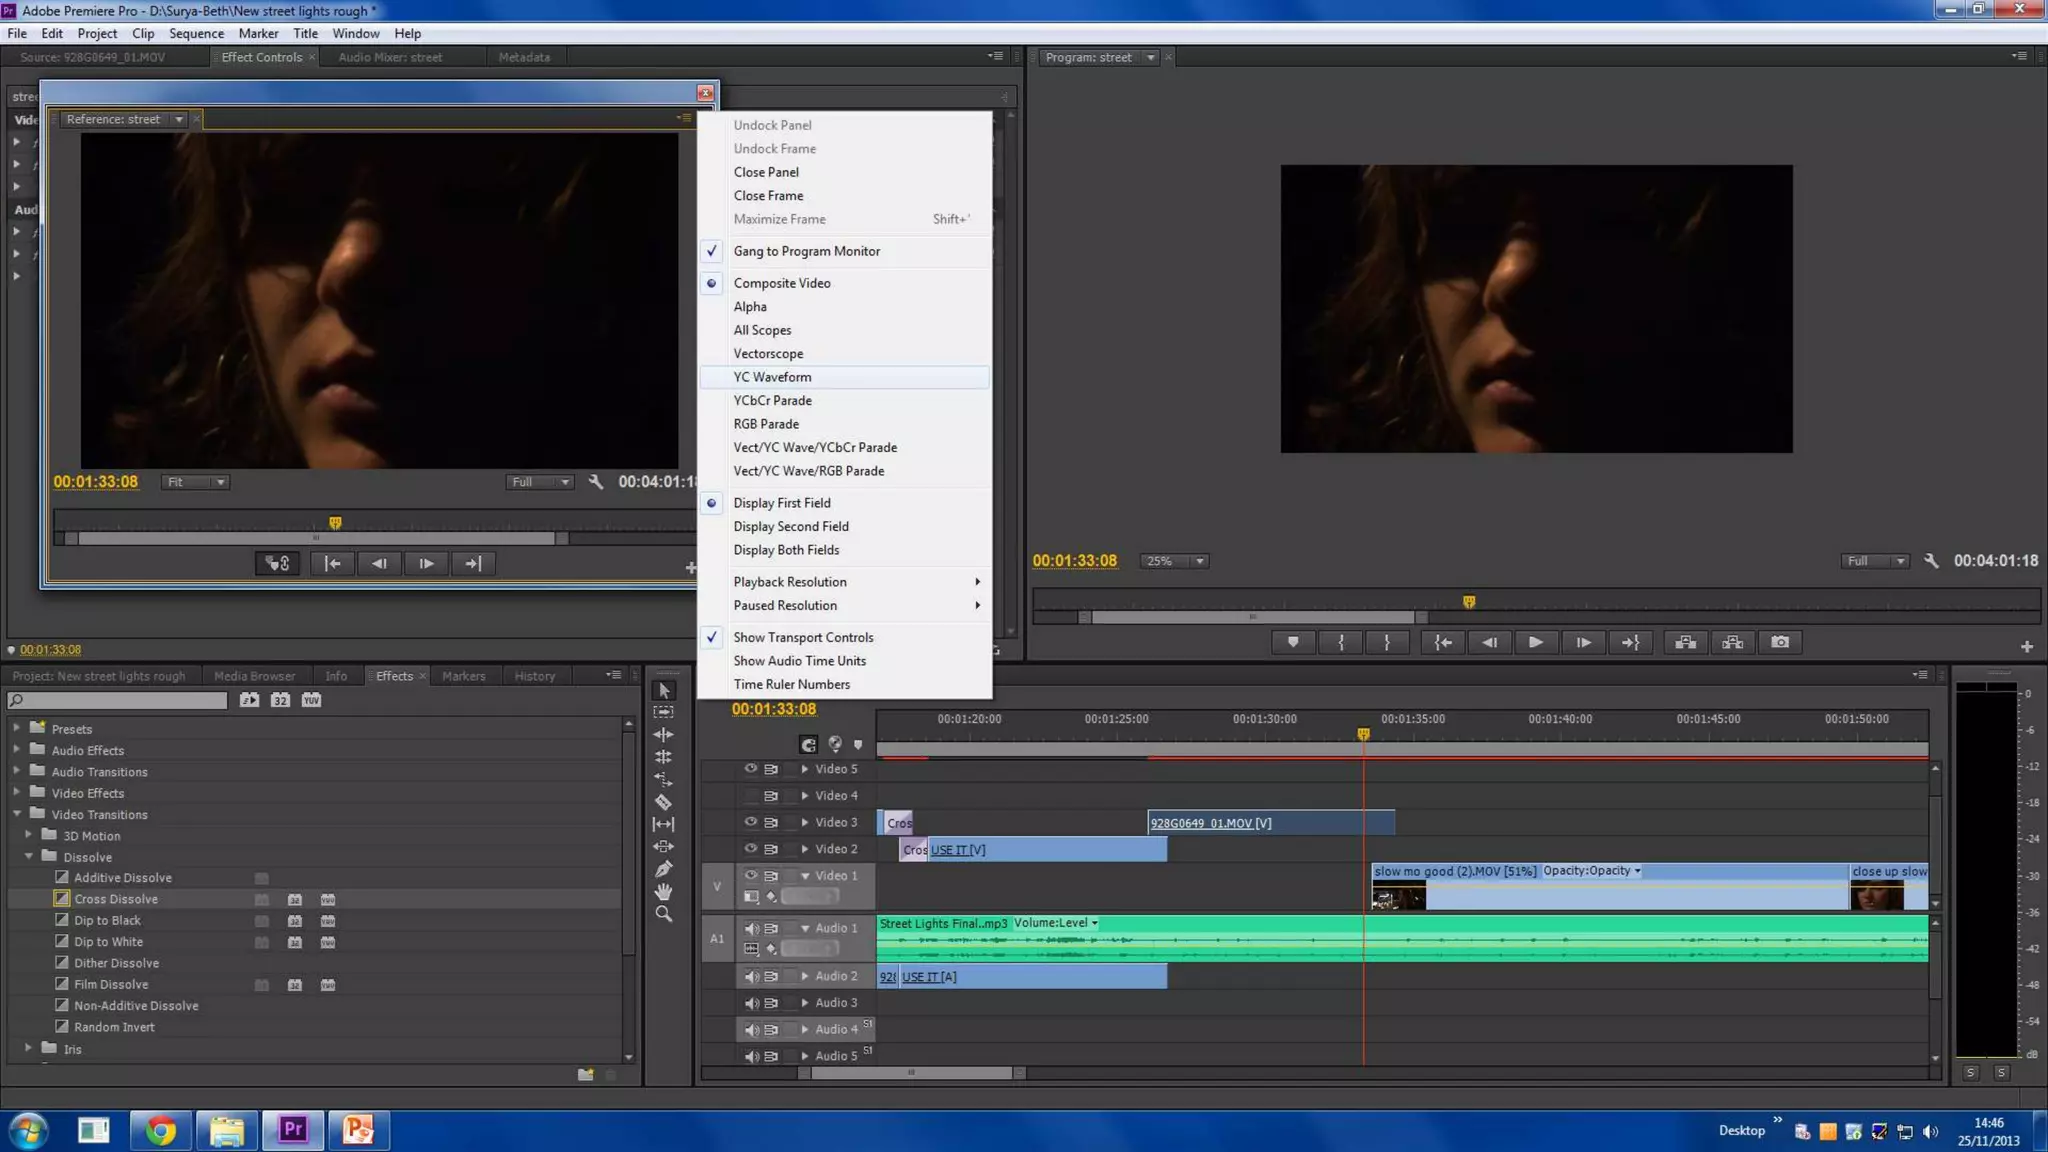
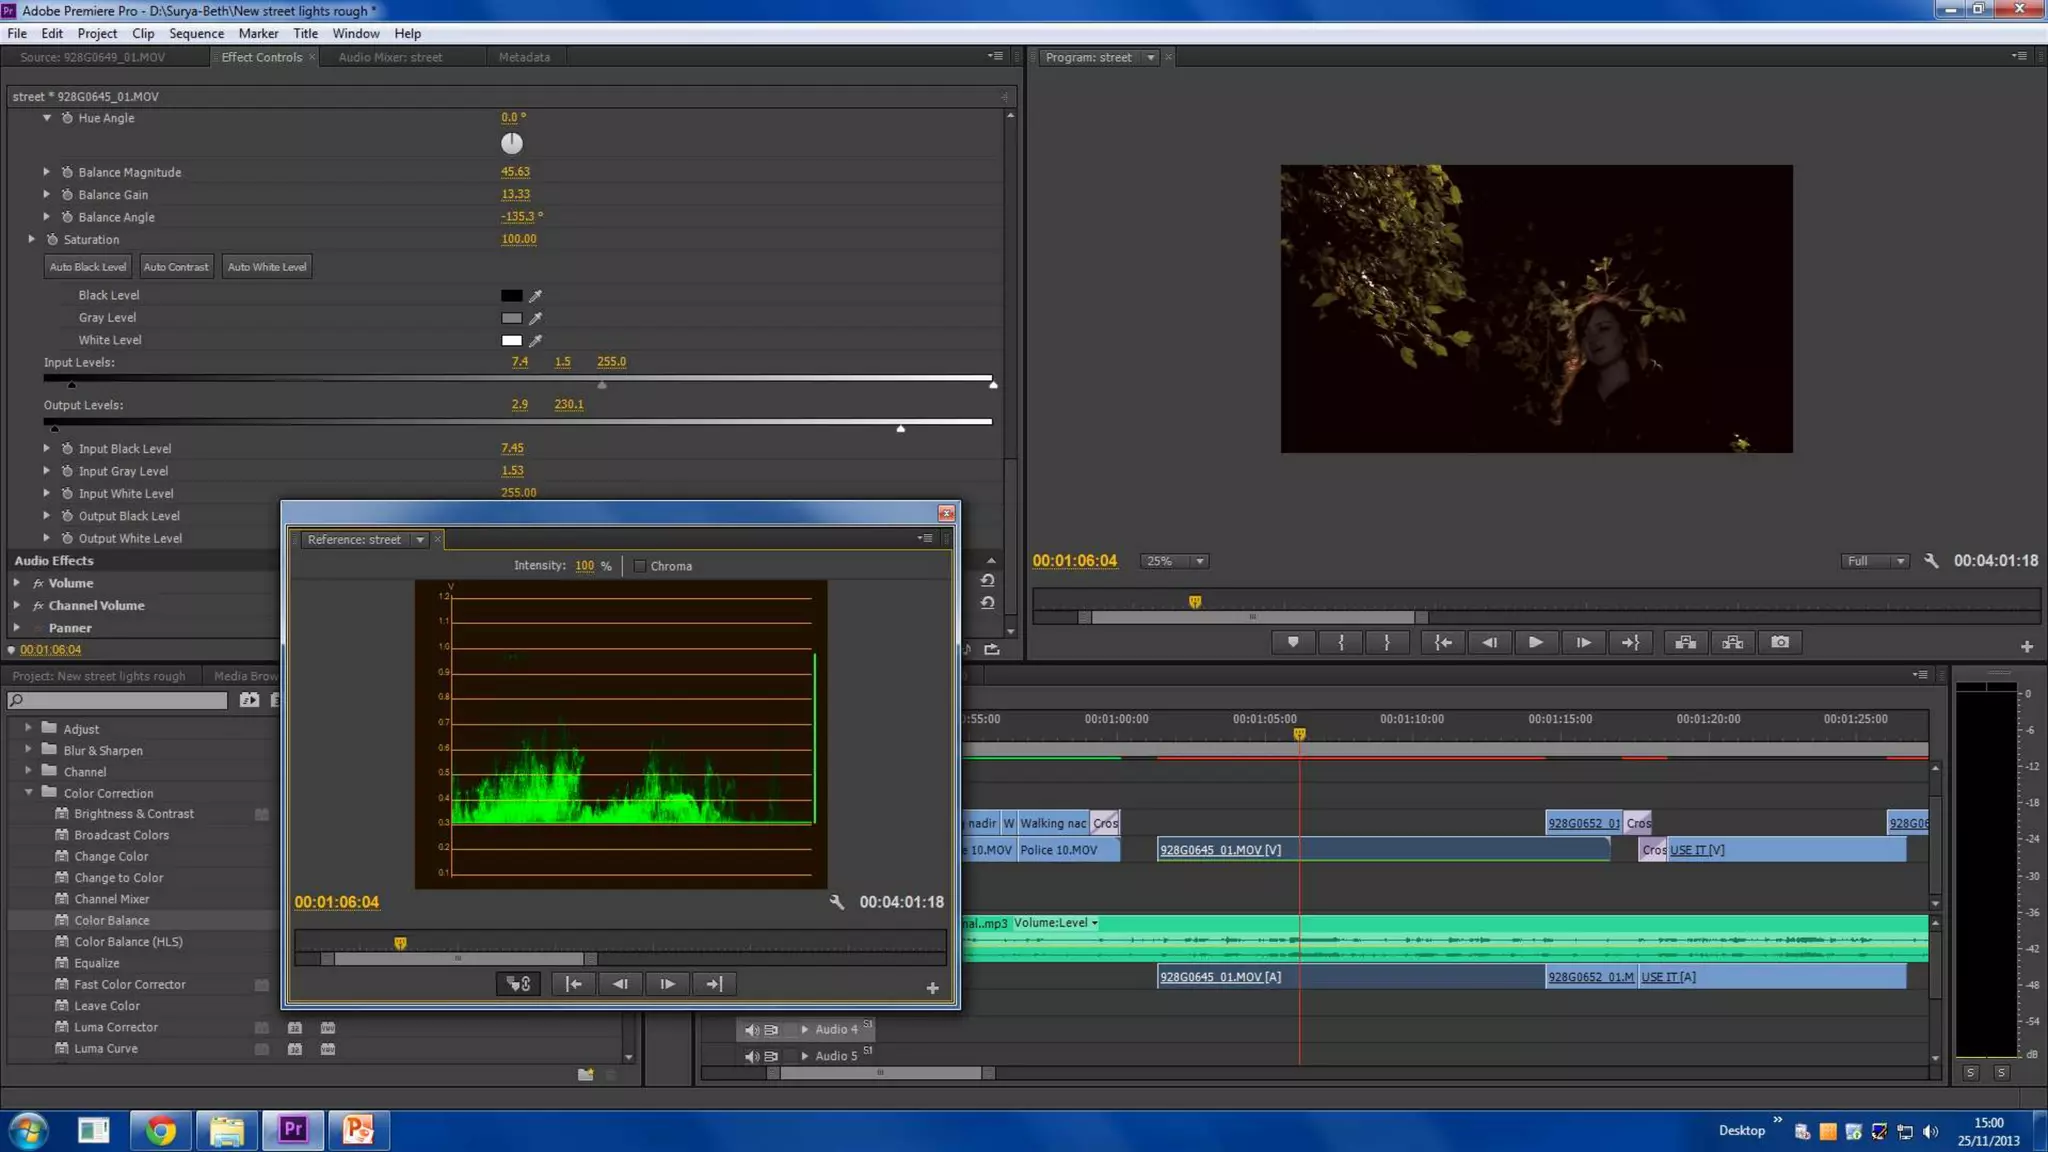
The document outlines various skills developed in Audacity, Adobe Photoshop, Adobe Premiere Pro, and Adobe InDesign CS6 including changing the speed of songs in Audacity, using layering and opacity controls in Premiere Pro, removing unwanted elements from images using content-aware tools in Photoshop, and properly formatting layouts for digipaks in InDesign. Stabilizing shaky footage, color correcting, adding titles, and using audio fades are also summarized as skills developed during video editing in Premiere Pro.
2. Audacity
I used Audacity to change the speed of the song to two times the speed so that I could use
it for the verse where I slowed down the speed of the song and if I didn’t the lip syncing
wouldn’t have fitted with the song.
3. Firstly you import
the track that
You wish to alter
and then it
Automatically puts
it into a the
Form you see on
the picture.
4. Then you click on the little arrow
Where it says the name of the
Song and it will bring down a menu
Which has set rate ate the bottom.
You then click on the set rate and it
Displays all the different Hz that the
Song can be you click the one that is
Double the speed that is already
Selected and it will converted your
Song to that speeds.
5.
6. You can the choose to export
Your product and it will bring
Up a box with all the
information about the song you
wish to fill.
Then once you have filled it up
You select okay and it will begin
To export it.
9. I am going to be using
InDesign to design the
Digipak, so I need to get
The right measures for
It, so that it doesn’t look
Unprofessional.
10. You choose the custom option
And name it what you want the
File to be called. Then you find
Out the measures for a digipak
And place them in the height
And width. Because it will fold
In reality you need to create the
Gutters, margins and then just
For the look, a bleed. This means
You can place your picture on
And make sure that the colour
Is strong on the area of the
digi[pak that can be seen and then
Show the areas where you don’t
Need to edit.
12. The contents-aware
Tool can be used to
Take out the small blips
Inside the image and
Then replace the blips
With the patterns or
Colours around it so
That it makes it look
Like they are not there.
14. I had two different colour tones and slightly different levels of shading, so I used the fast colour correction tool to
Change them to fit each other. I will use this tool through out to get the lighting colours the same or similar due to
having many different location and many different lighting goes with that.
15. I wanted to overlap the layers to try and help make the narrative and emphasize the idea there is going to be a flashback,
So I needed to make one more transparent than the other. I then found I could change the opacity of the clip to any
Percentage I wanted and then could be done be typing a percentage into the highlighted box.
16. I used multiple layers and different opacities to get a distorted look when the harmonies came in to emphasize the changes
In chords. I need to go over this and make it neater and get the right shades and opacities, but I will use audience feedback
First.
17.
18. I learnt how to
stabilize the slightly
Shaky bits of film
Which was an out-
Come of having to use
The camera hand held
To get a tracking shot.
19. I wanted to make the colour lighter and also increase the light intensity. So I Googled the best way to do it and
It came up with a tutorial which gave me the basic, but best way to see what you are doing with your video. It told
me to open up the reference monitor and choose the YC waveform. This aloud me to see where different light
Intensities are and the amount of black pixels etc. I took chroma off to make sure I could see it clearly and aimed to
Get my facial areas and the certain parts of the film I wanted highlighted above 0.4-6. This meant it was brighter in
those areas than the others. The following two slides demonstrate it.
20.
21.
22. Although this is not a skill I developed while making any of my auxiliary products nor my music video, I feel I should put it in my
Skills development. While editing my focus group footage I felt although they didn’t hint to take the visuals from the clip, I
should just so that my focus group feel comfortable, because this footage will be posted on the internet for public viewing.
Due to taking the visuals out
From the clip, I was just left
With the audio. I wanted to
Instruct the viewer of what
The focus is for the focus group
And how many people were
There. So I clicked on the title
option and picked still title, to be
As clear as possible for the
viewer. Then a box opens and
allows you to pick the colours of
the text and the size/font etc. So
after you have decided you can
click where you want the text to
appear and add it.
23. When I was listening to the audio clips I realised that the voices (my voice) was very loud at the start of each audio
clip. So I found on the audio transitions there was a fade transition which aloud me to fade in and out of the voice,
So that the audience won’t get a shock.