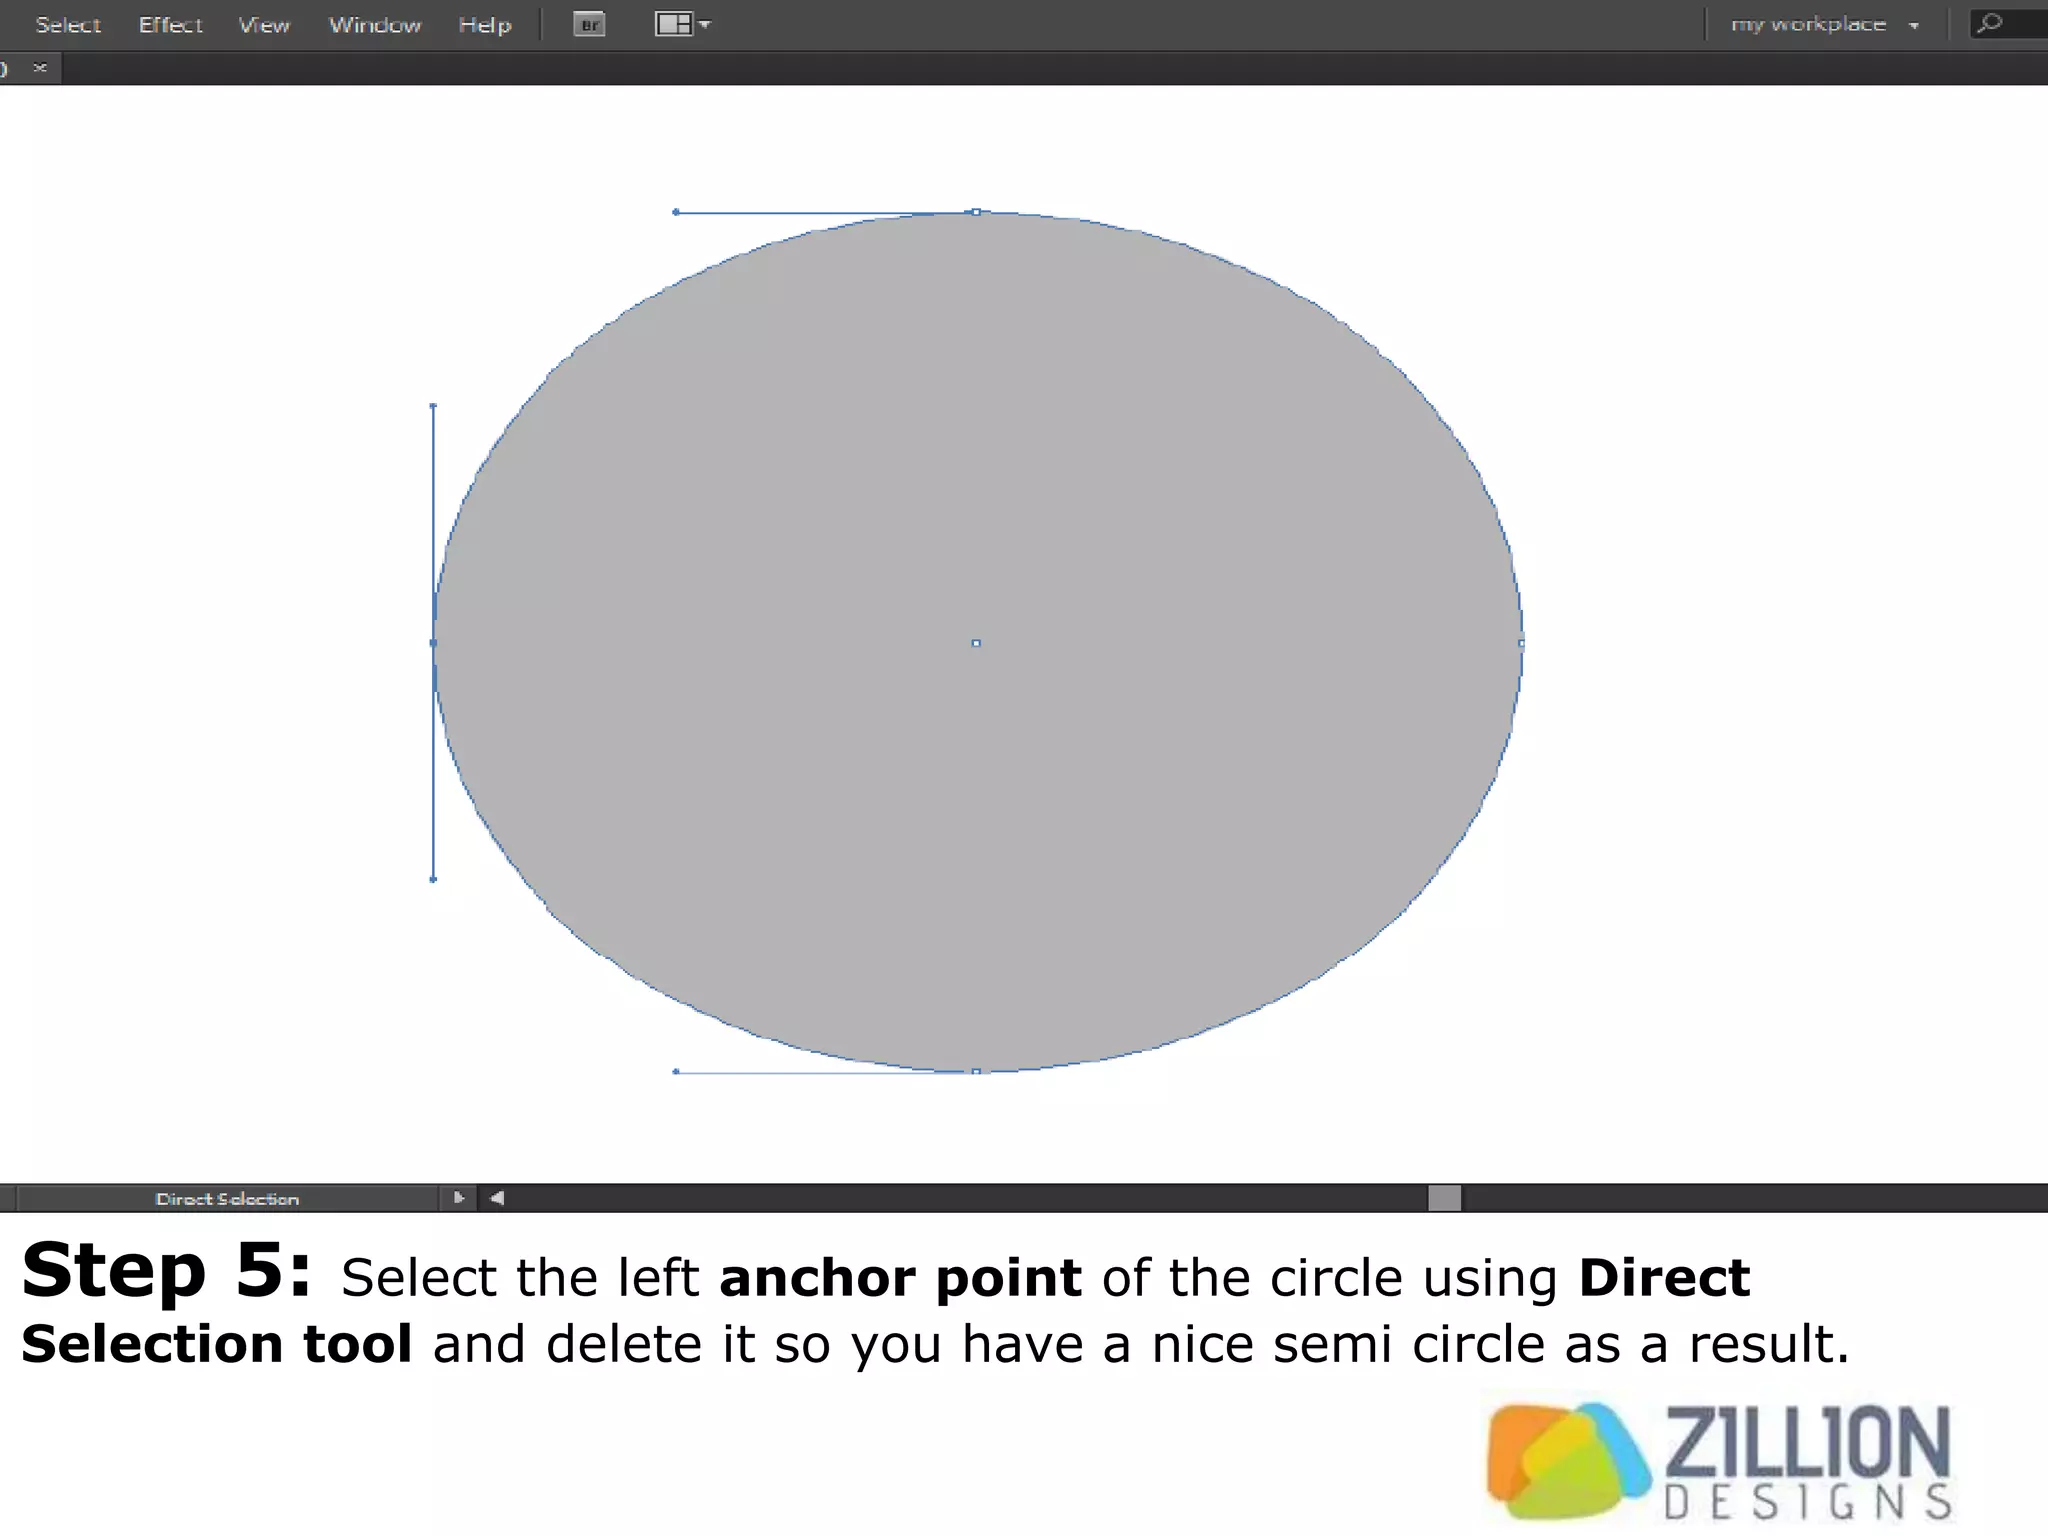
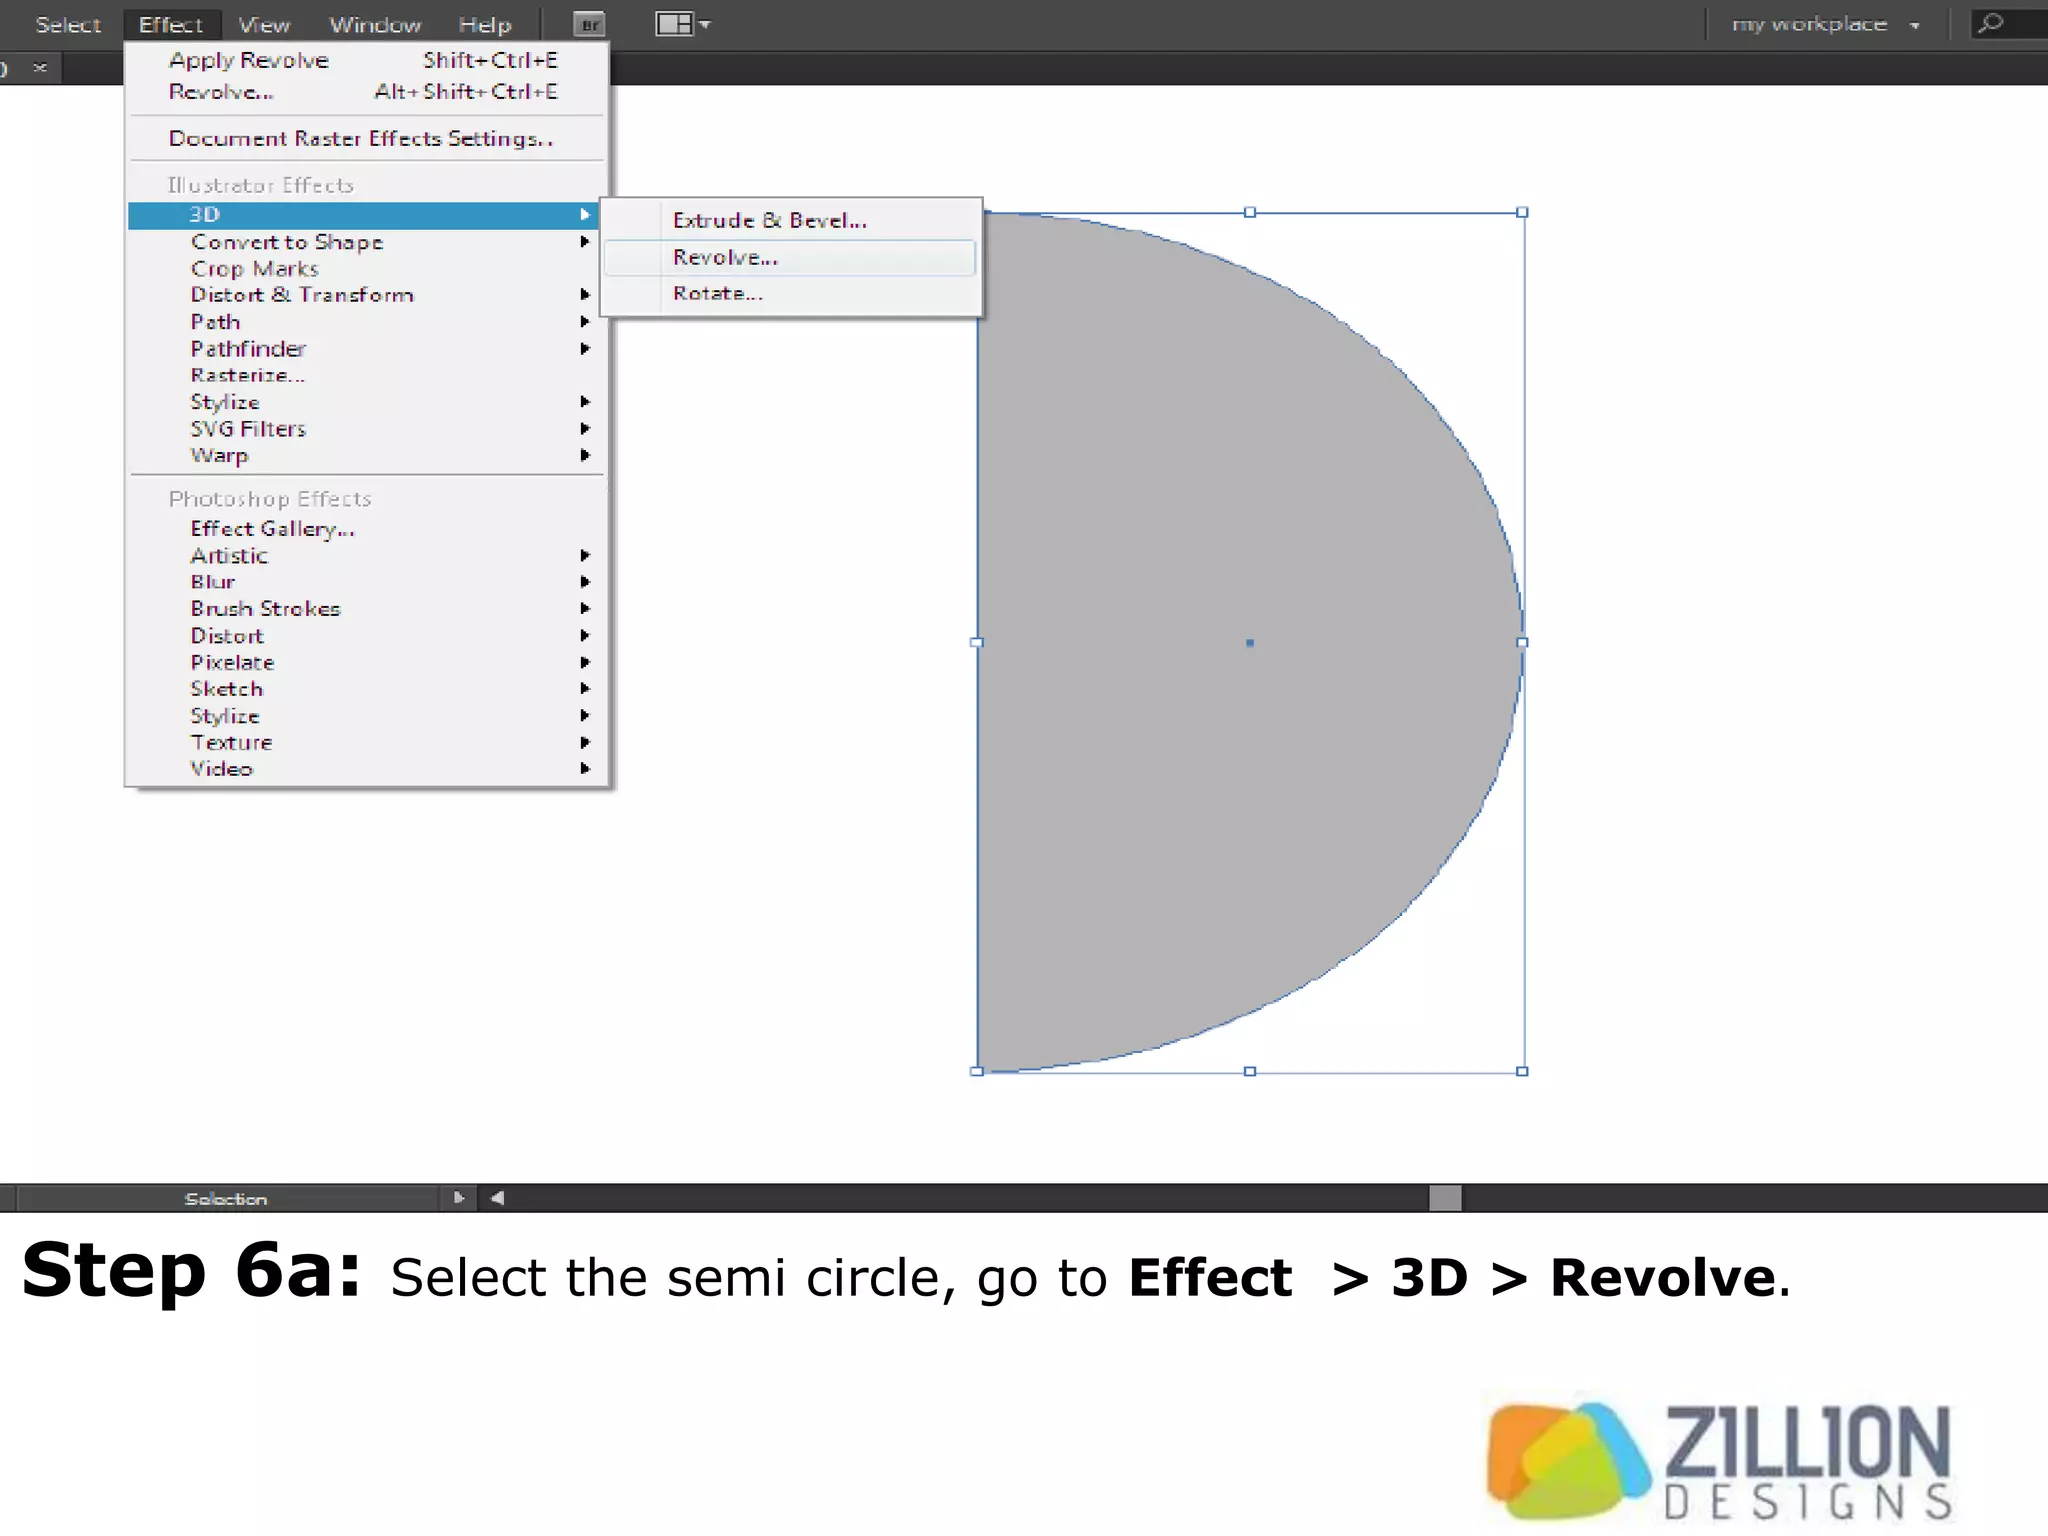
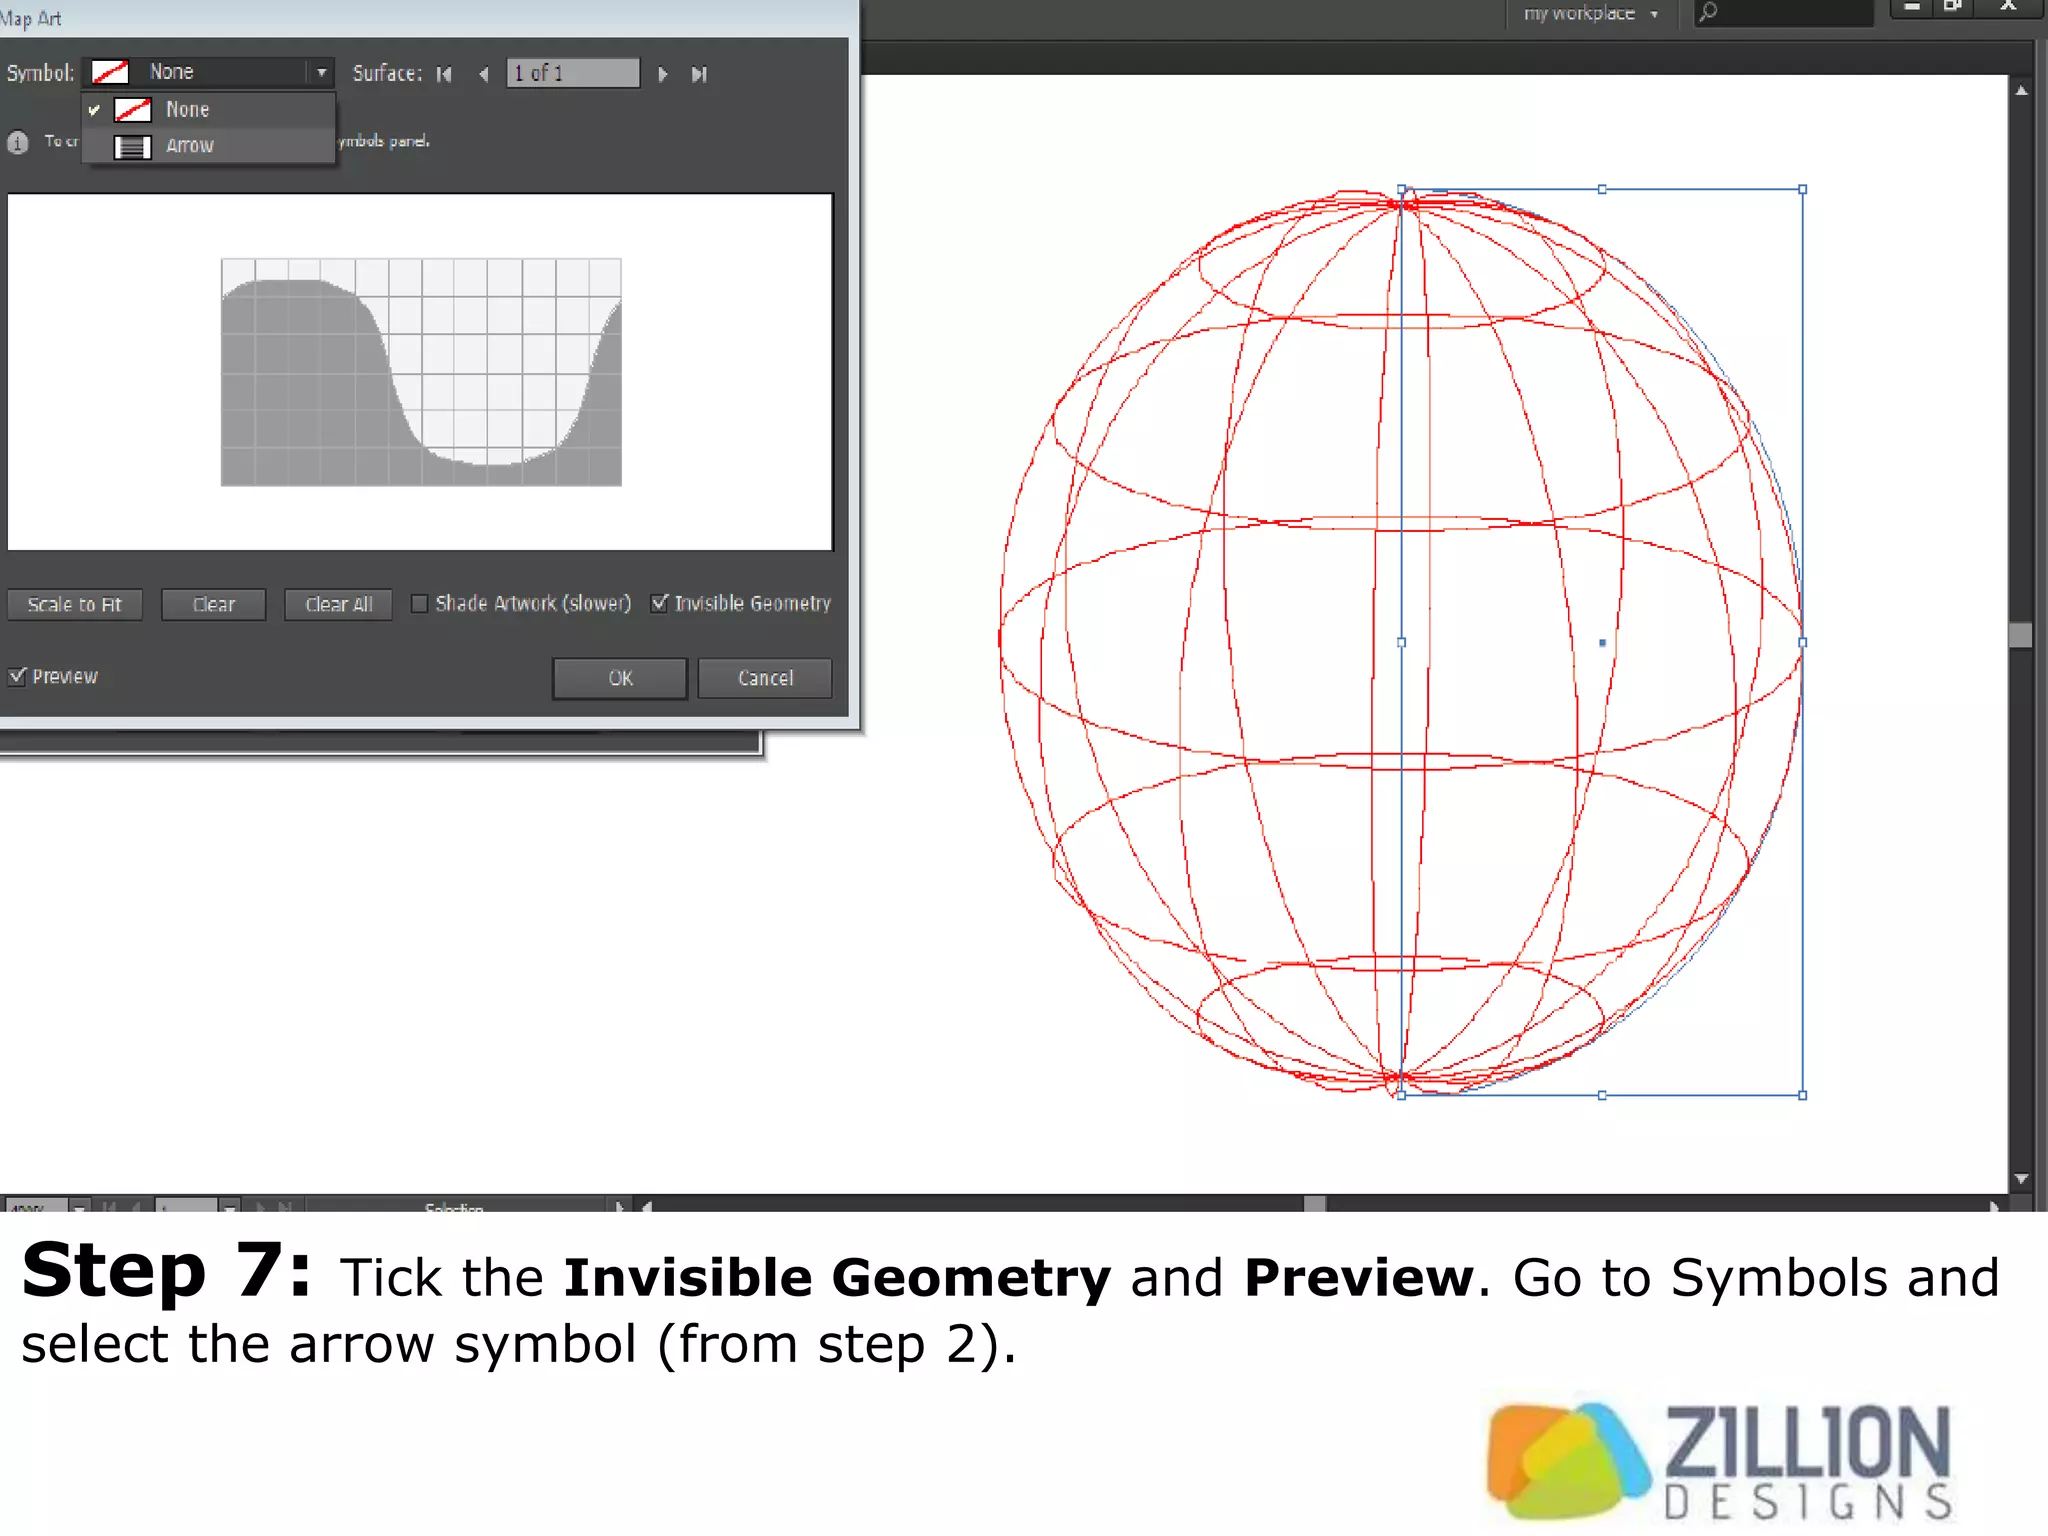
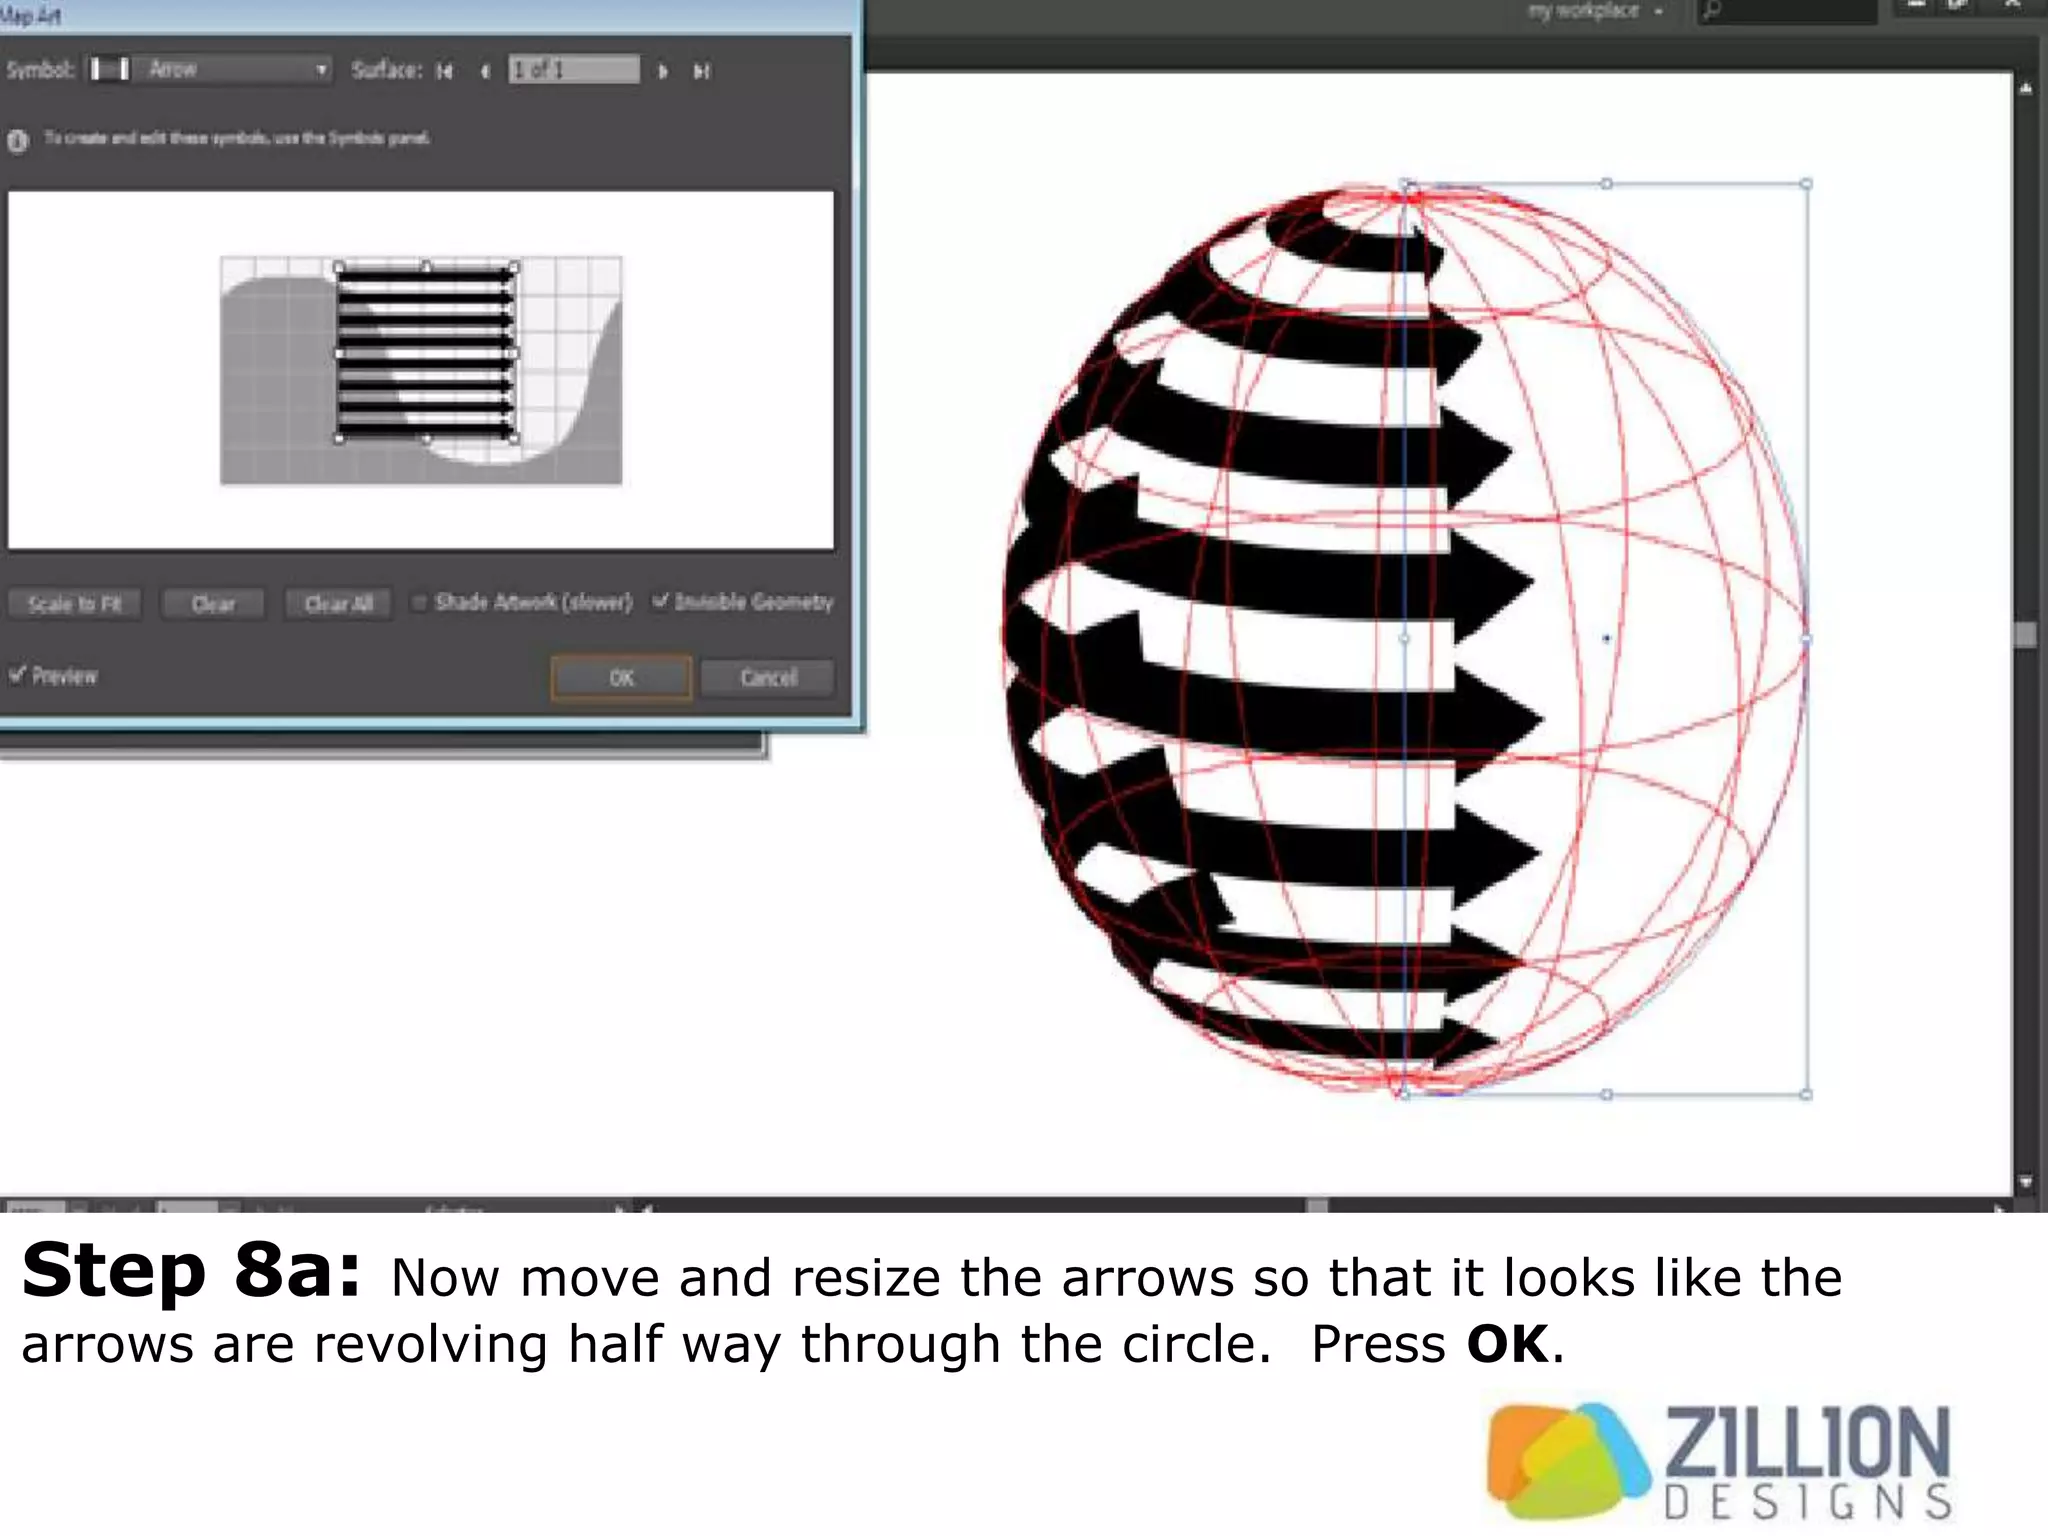
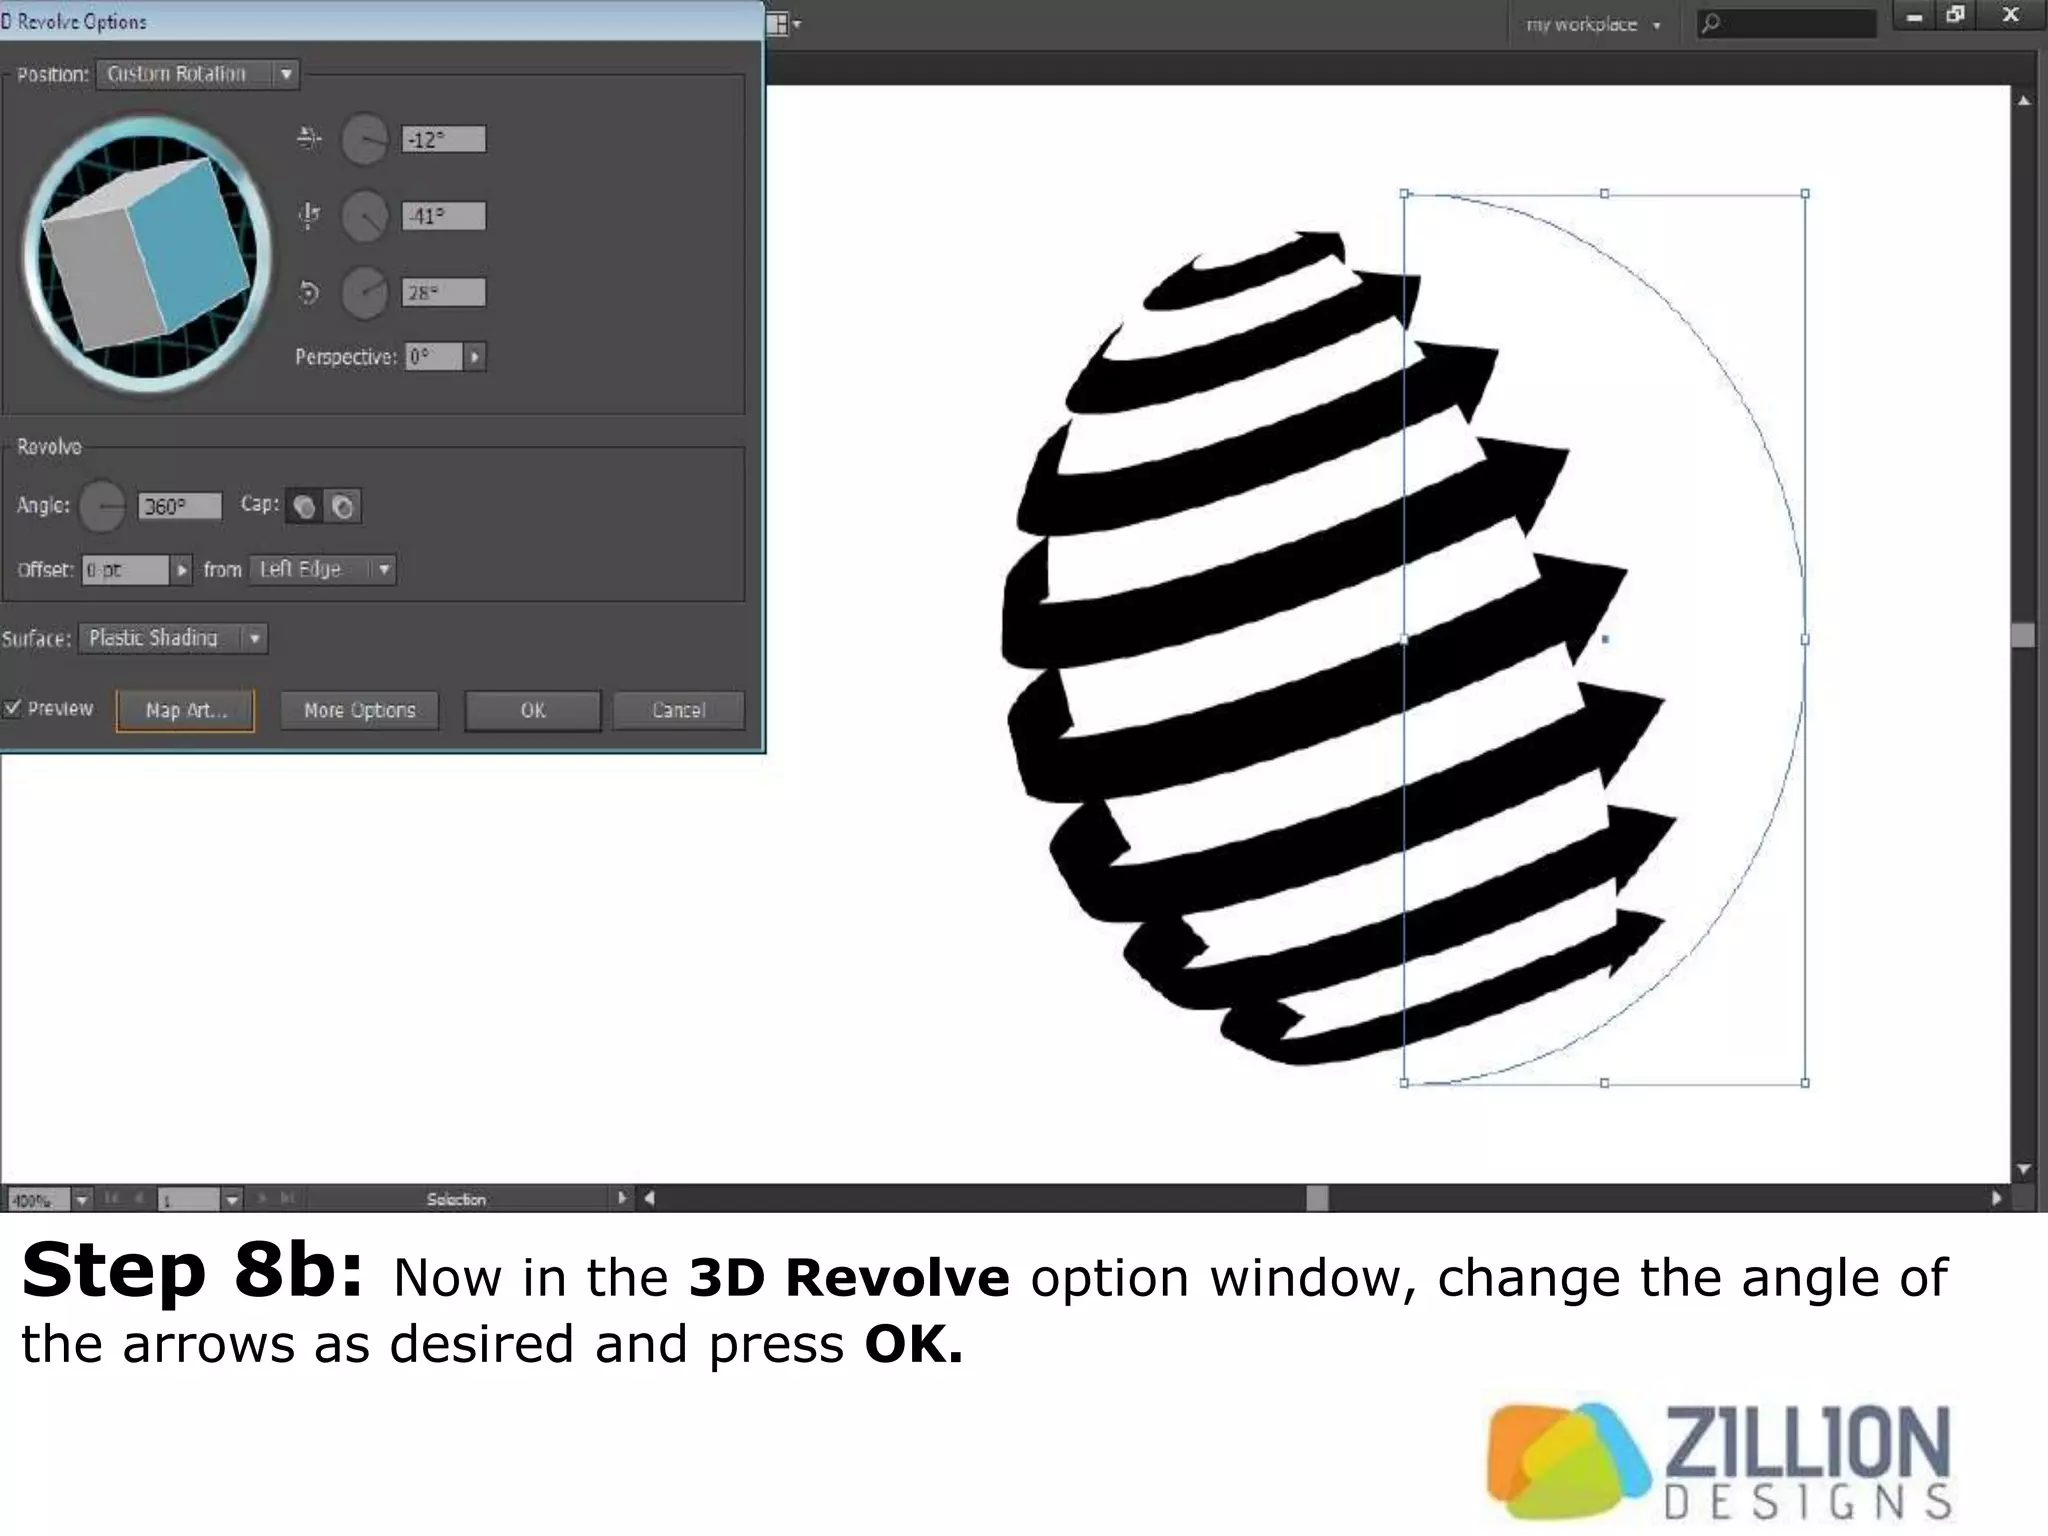
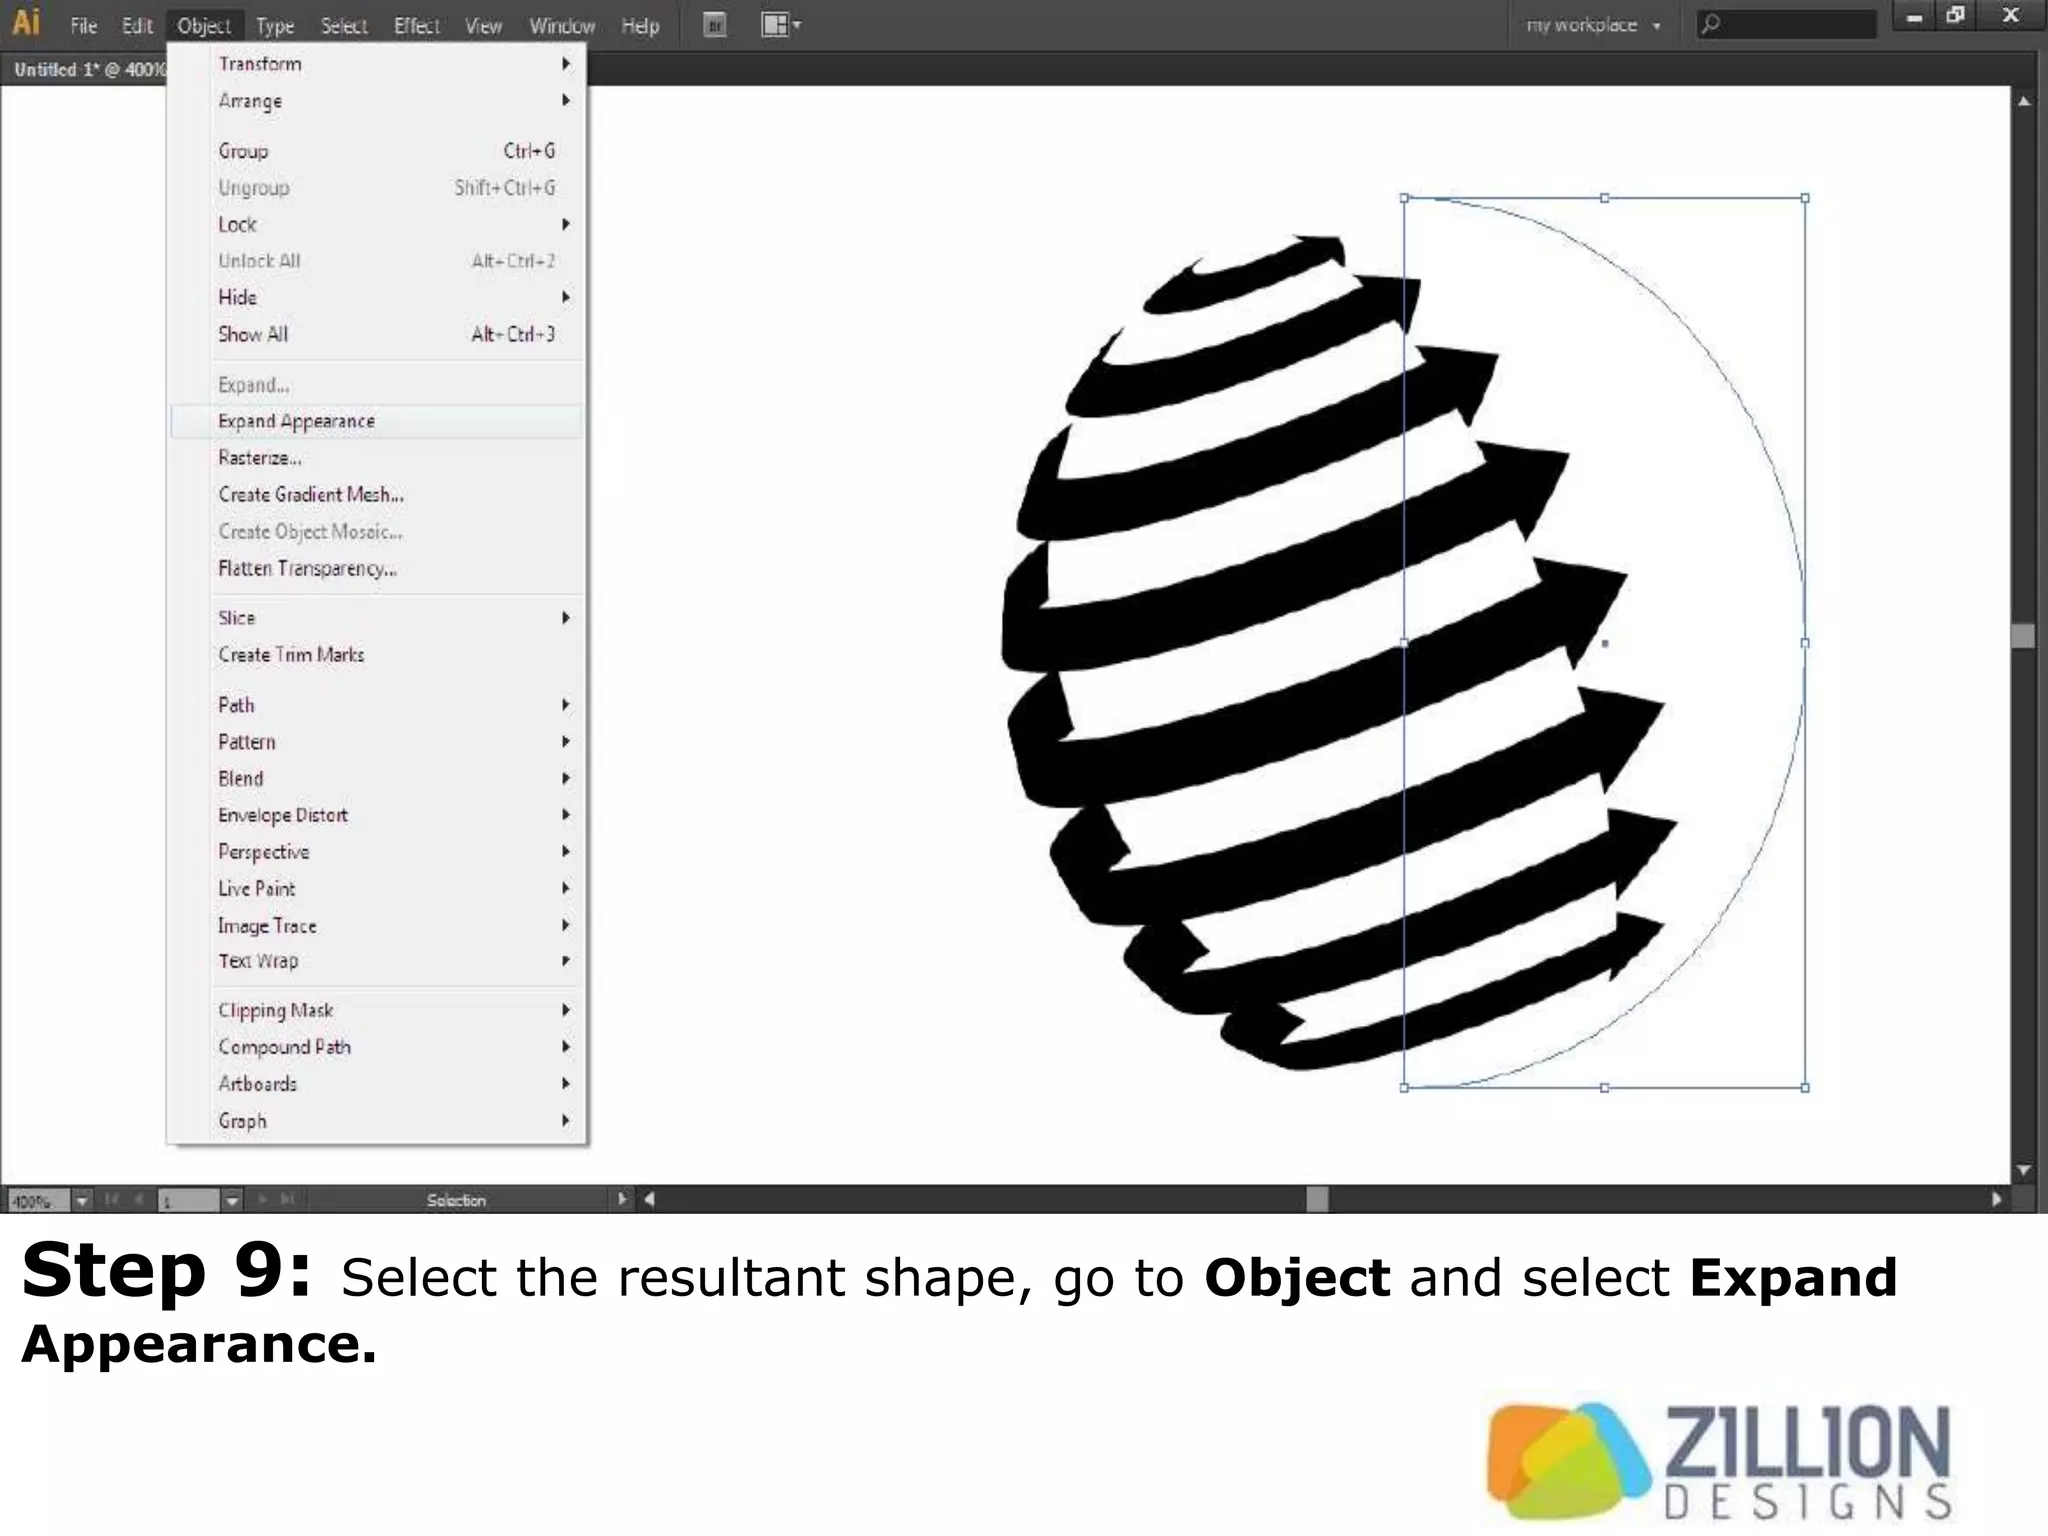
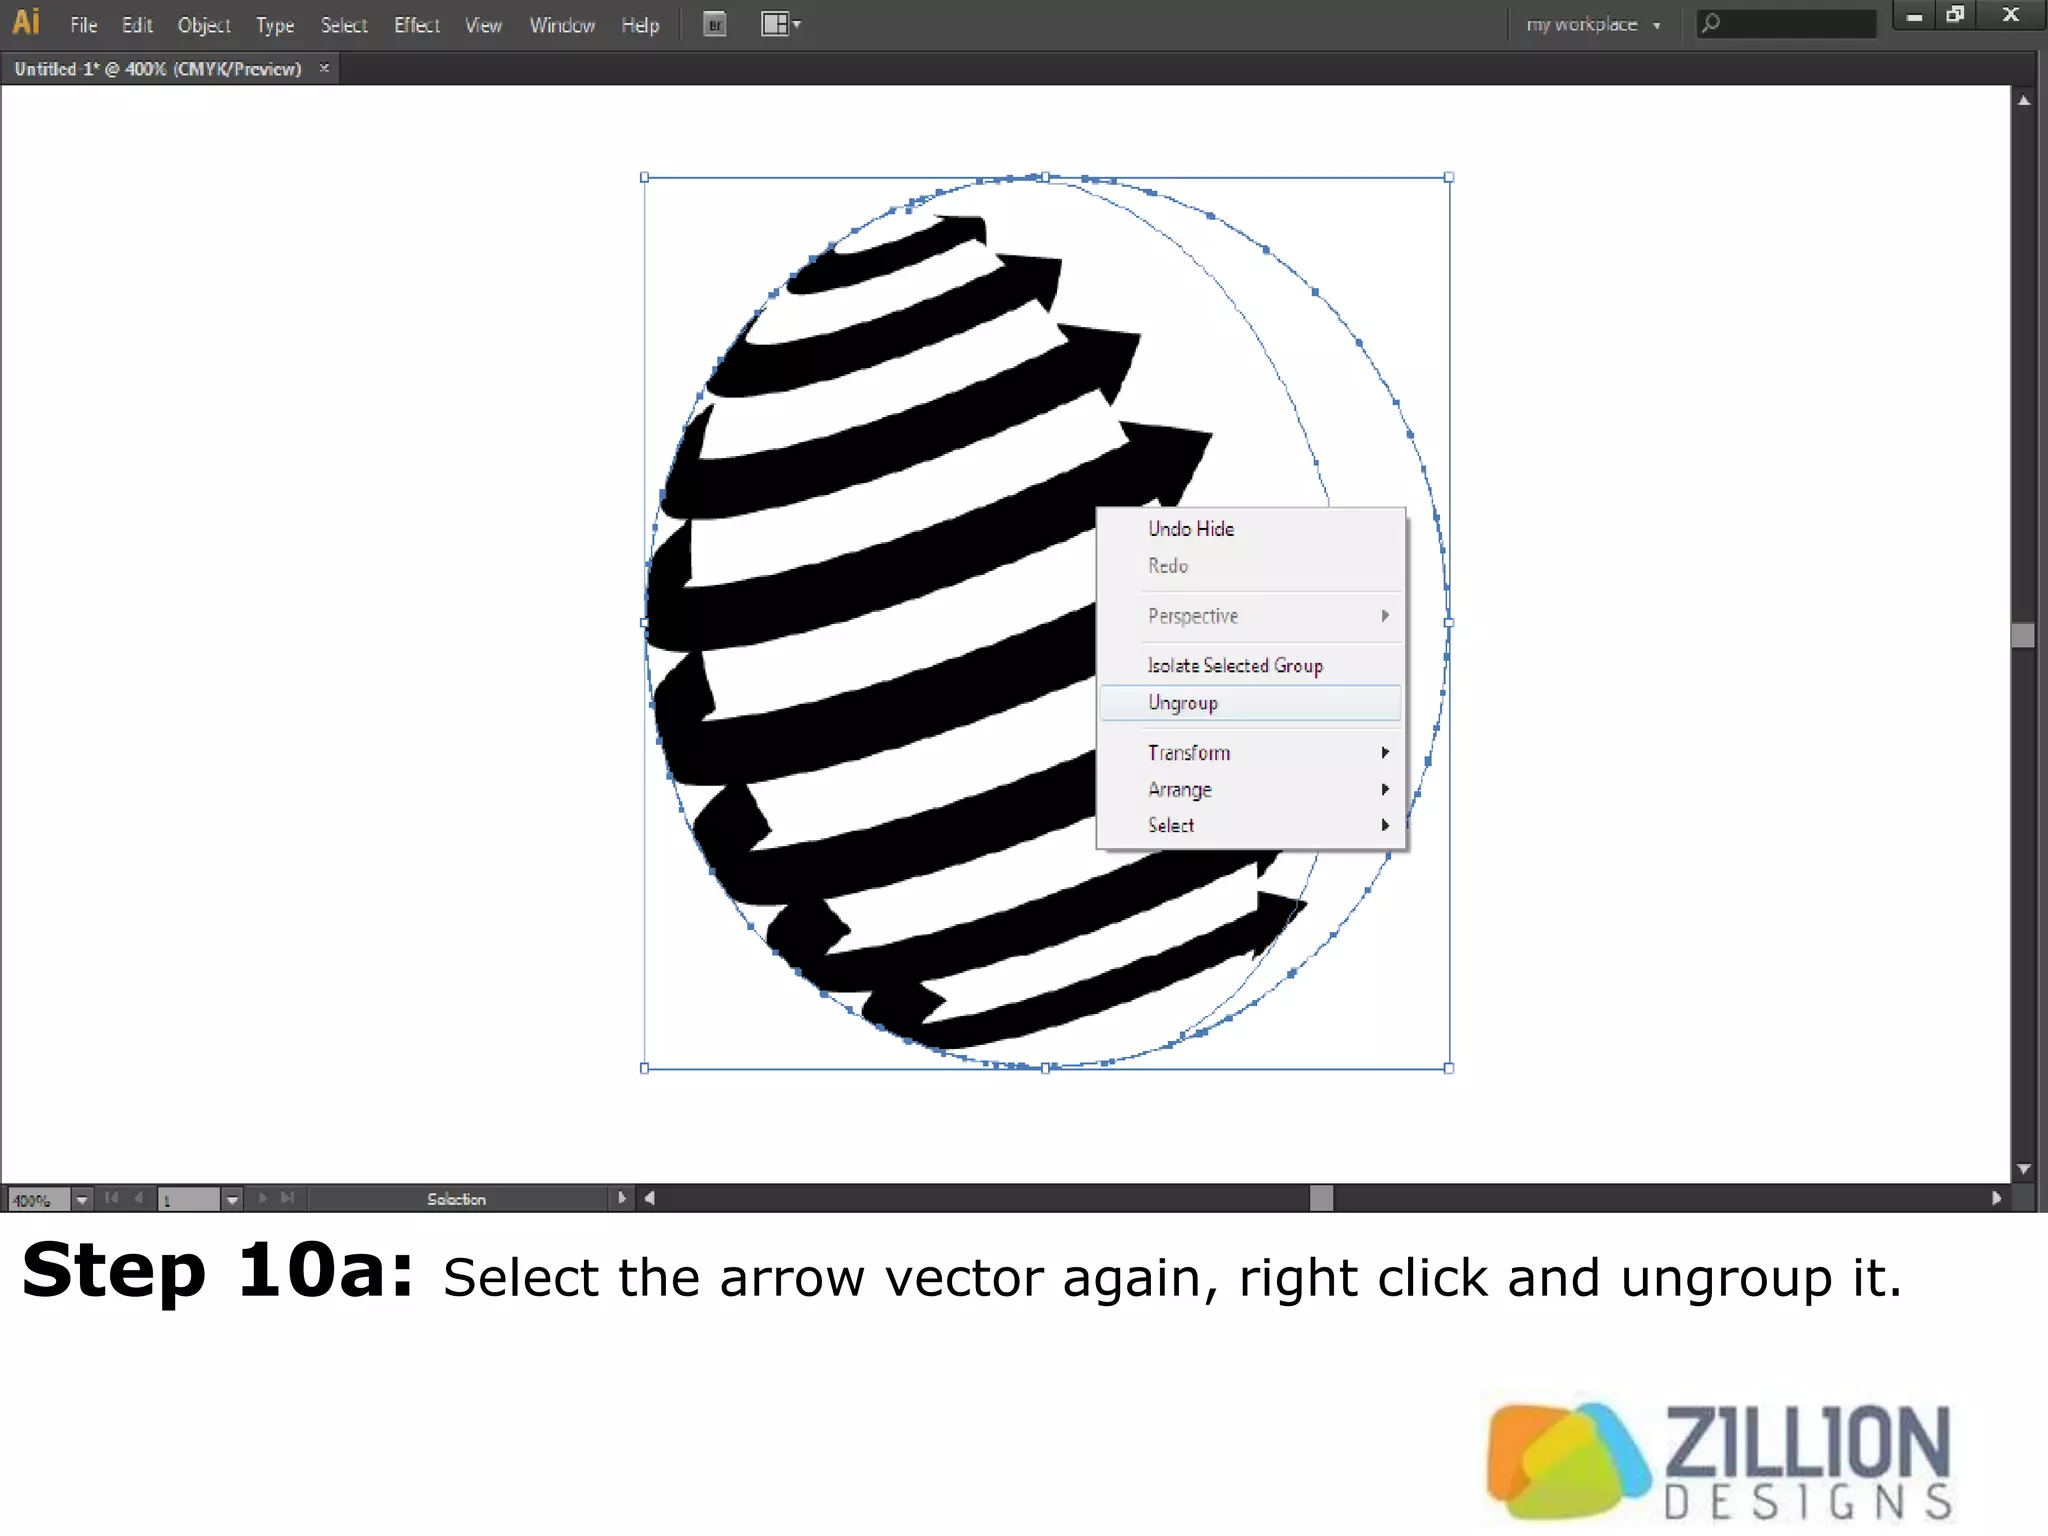
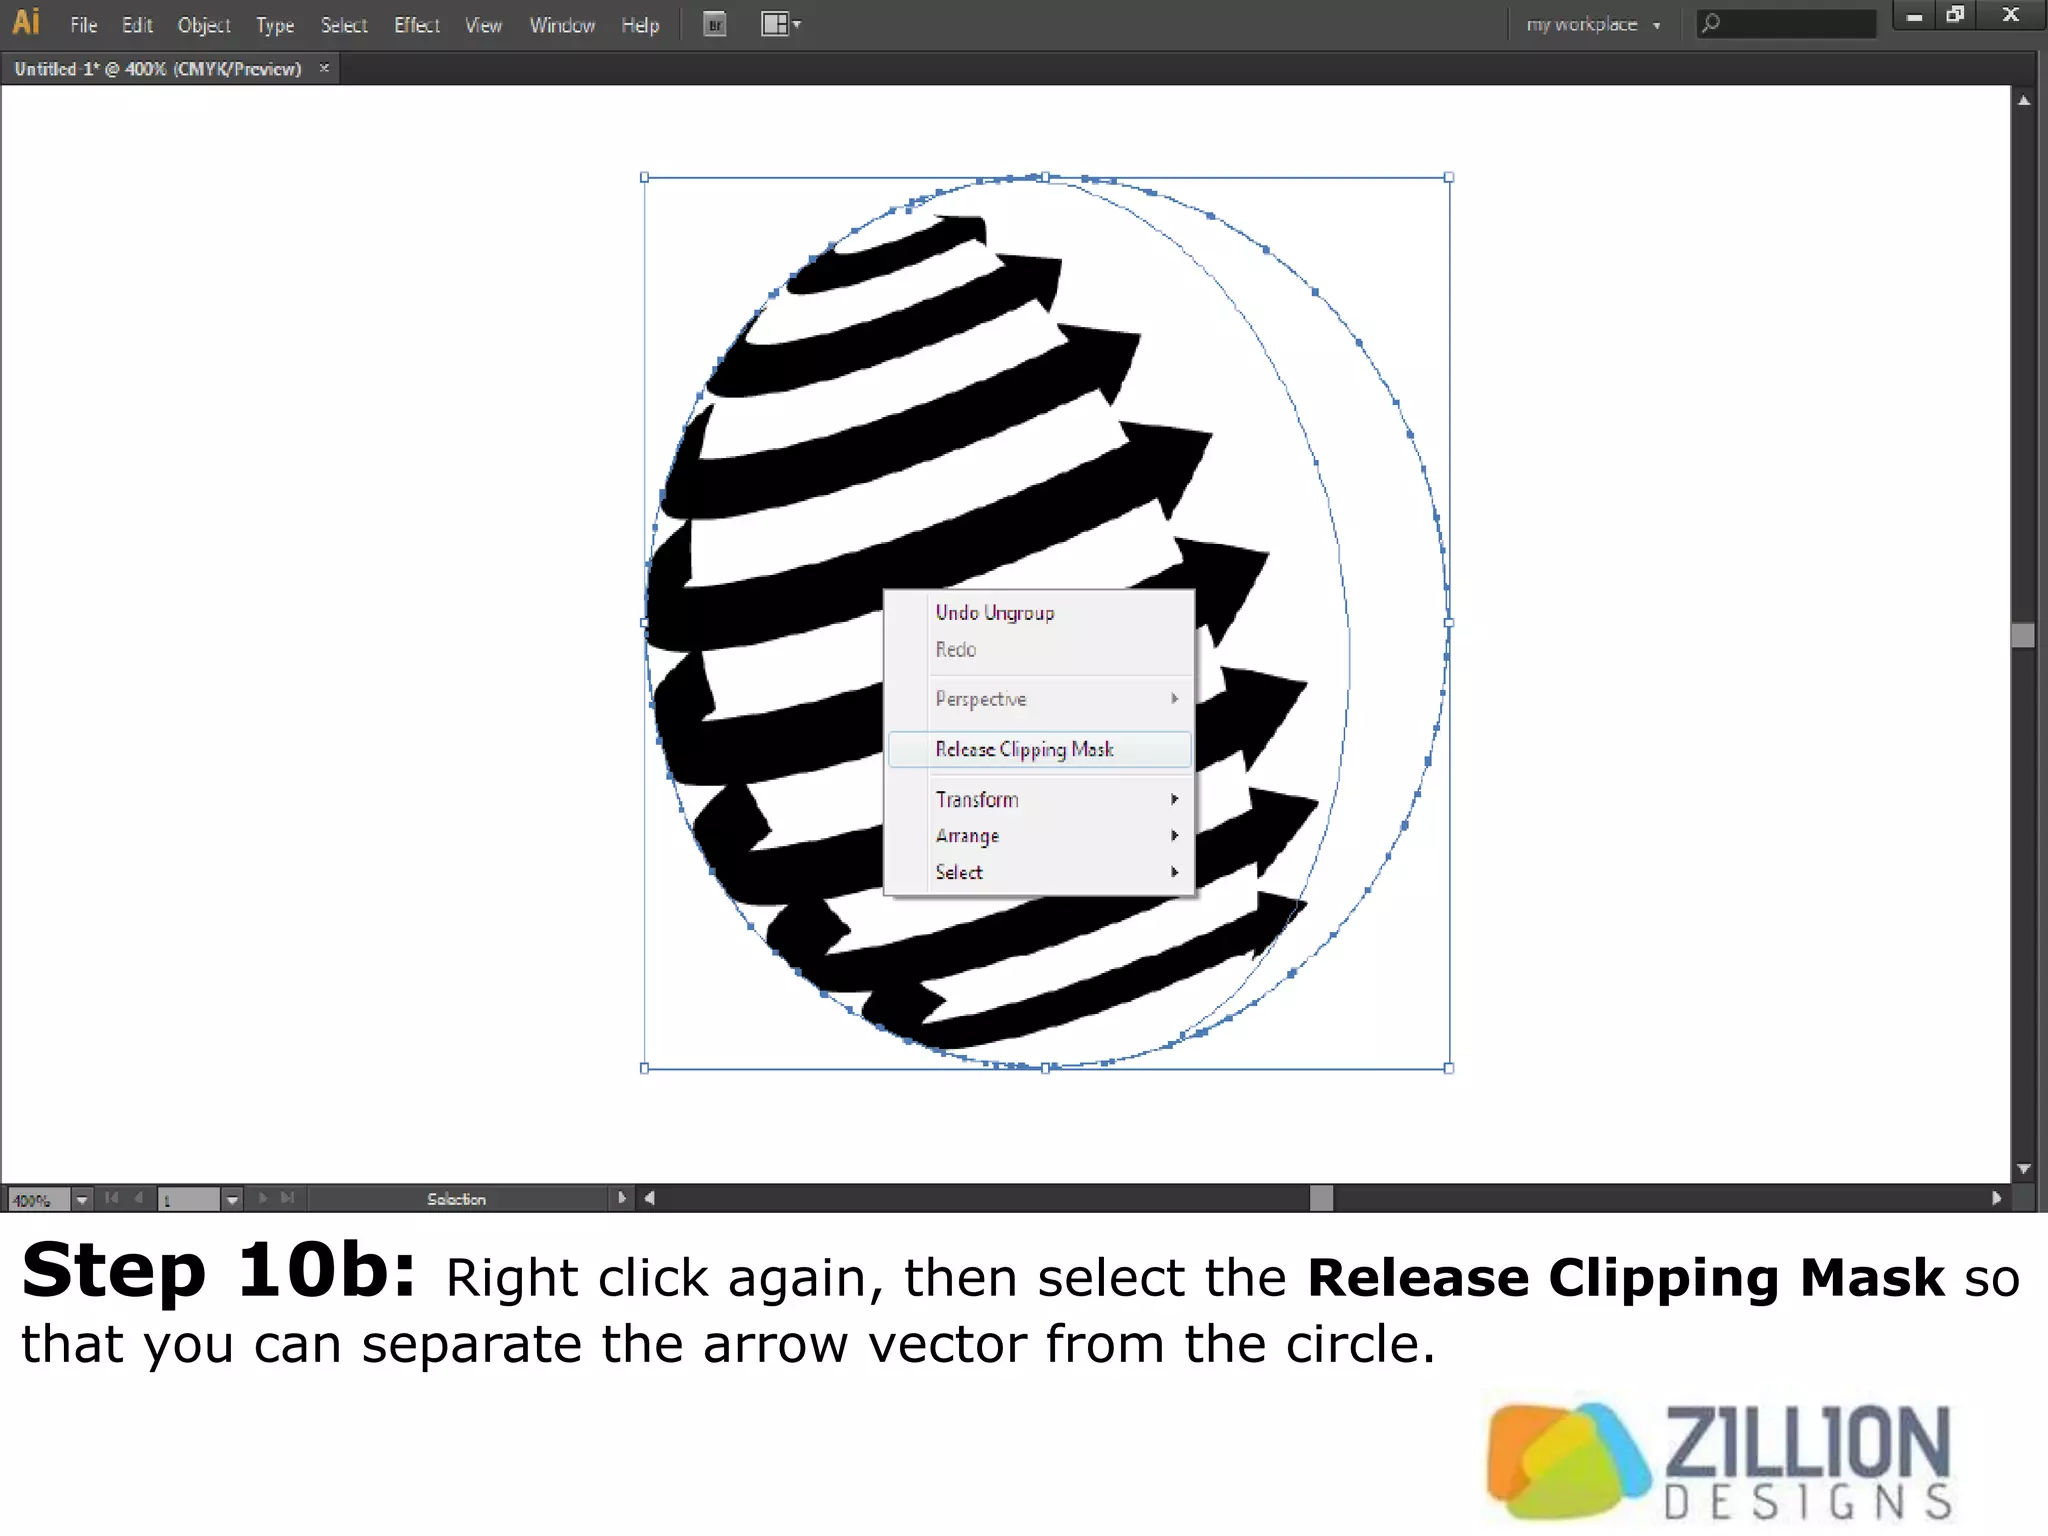
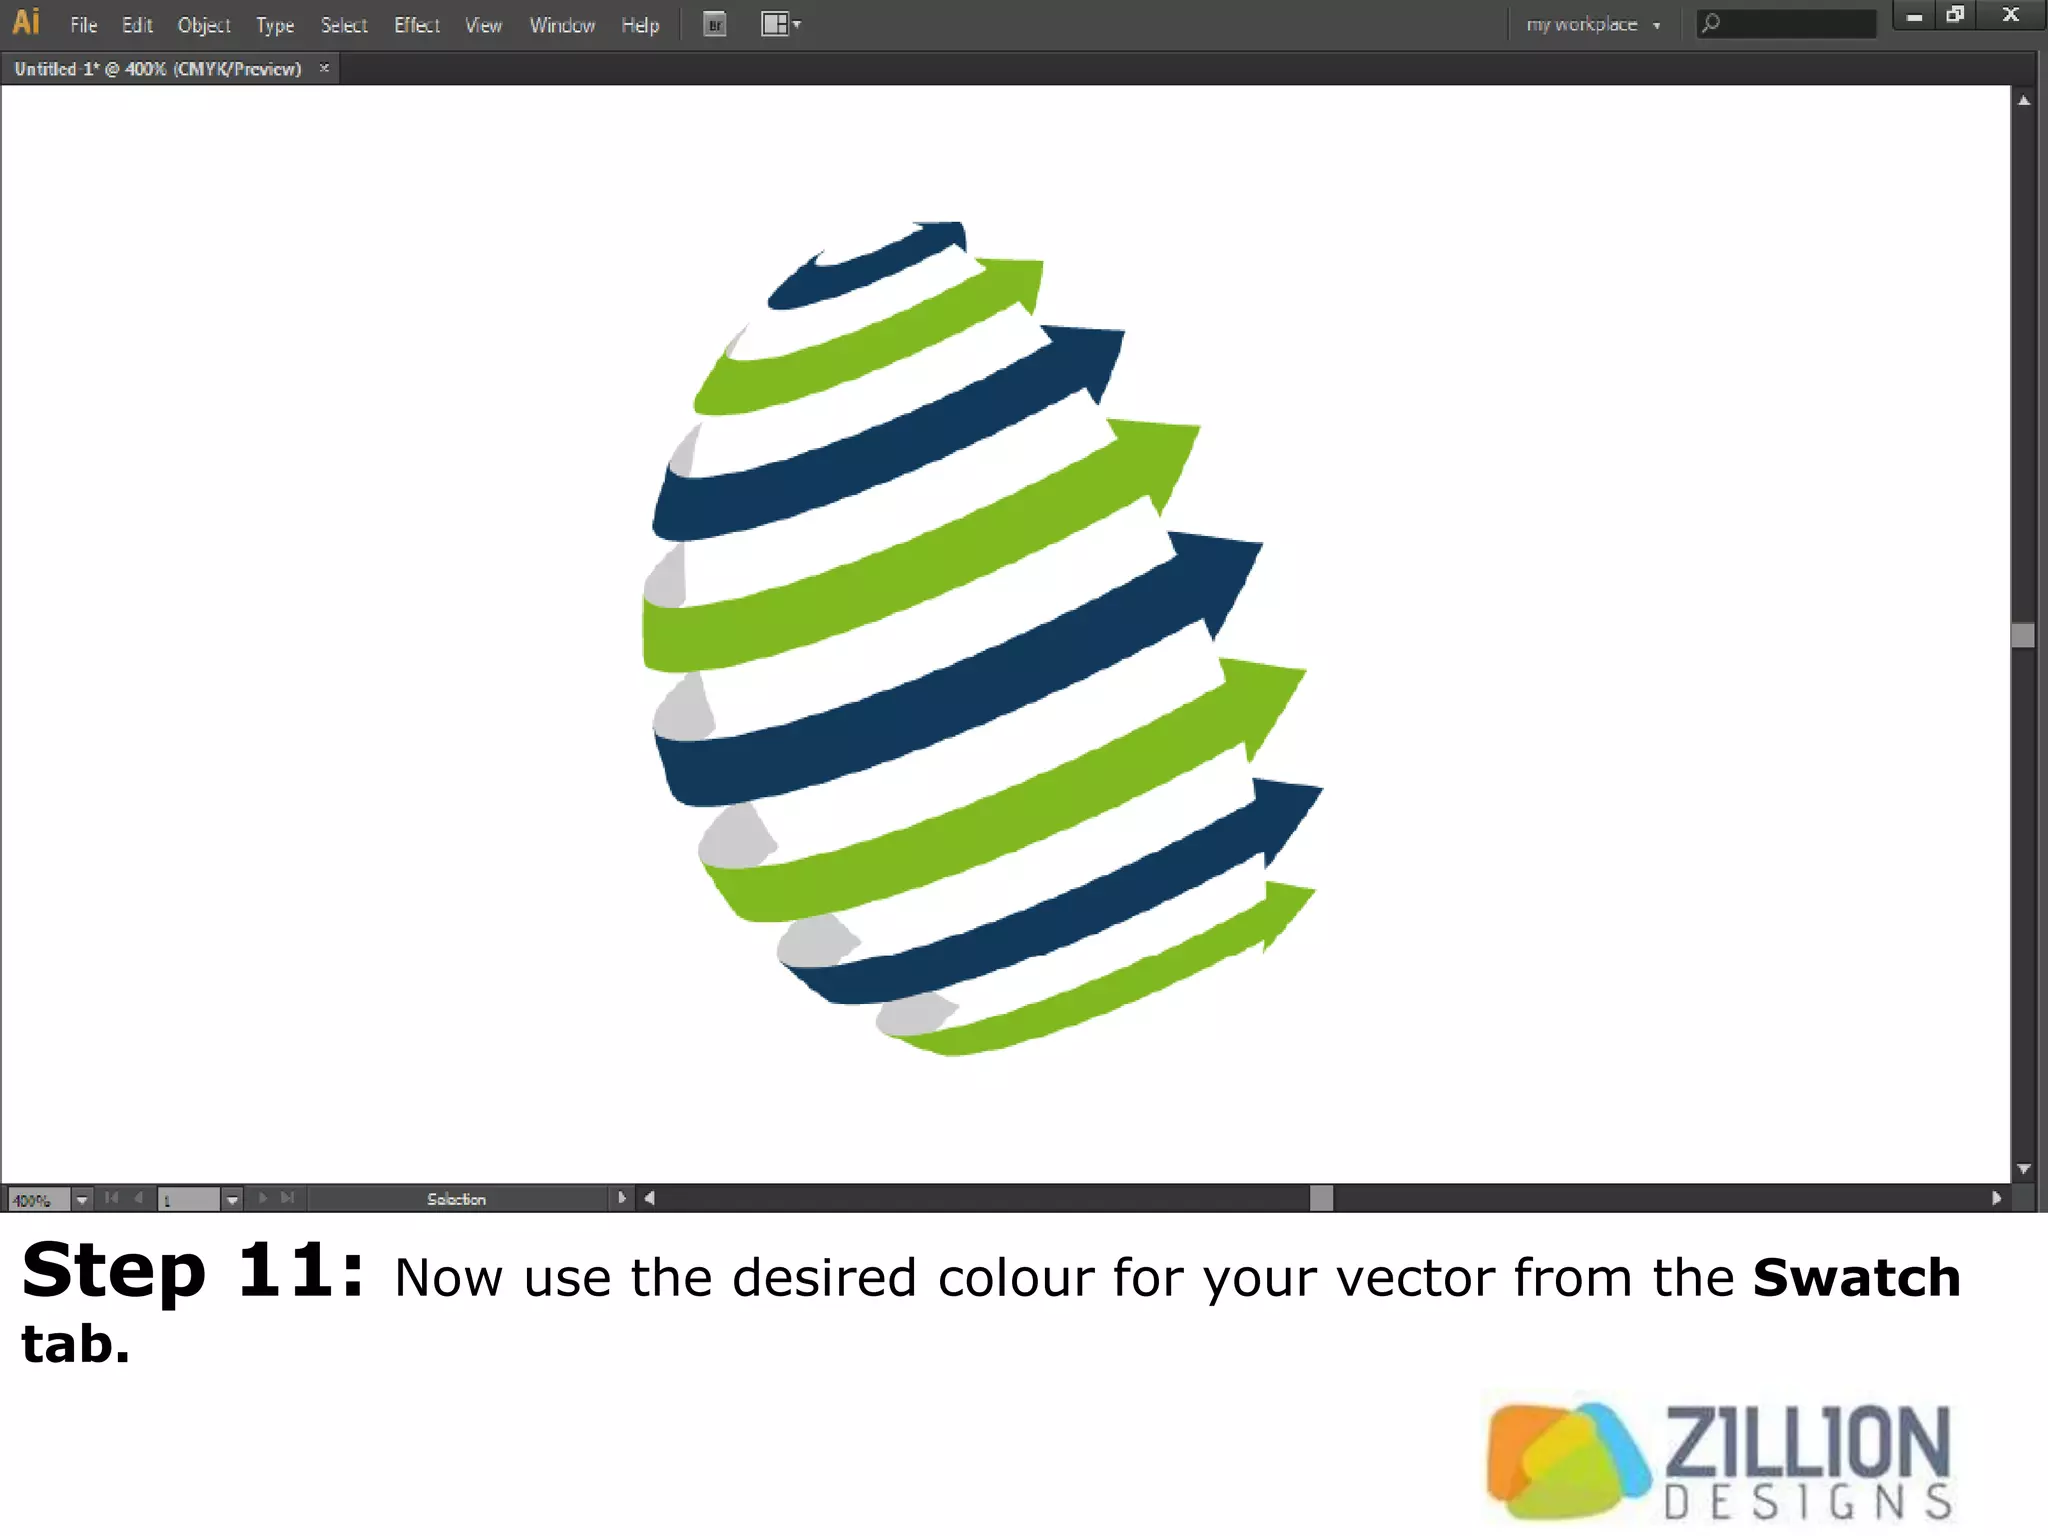
11 Steps: How to Make Revolve Arrows
in Adobe Illustrator Using 3D Effect
Step 1: Make an arrow using the Rectangular and Star tool (for the
arrow head). Don’t worry about colors at this point. You can easily change
those later.
Step 2: Copy the arrows directly under each other, as shown in the
image. I have used 8 arrows, but you may use as many as you like,
depending on the size of the circle.
Step 3: Open the Symbols window and drag all the arrows into it, so
all the arrows become one single symbol. This will make it easier for you to
work with them as you can select them as one image.
Step 4: Create a circle using the Ellipse tool (Shift +Ellipse Tool).
Again, the size of the circle depends on what you would like.
Step 5: Select the left anchor point of the circle using Direct
Selection tool and delete it so you have a nice semi circle as a result.
Step 6a: Select the semi circle, go to Effect > 3D > Revolve.
Step 6b: Select Map Art at the bottom left of the window. A Map Art
window will pop up.
Step 7: Tick the Invisible Geometry and Preview. Go to Symbols and
select the arrow symbol (from step 2).
Step 8a: Now move and resize the arrows so that it looks like the
arrows are revolving half way through the circle. Press OK.
Step 8b: Now in the 3D Revolve option window, change the angle of
the arrows as desired and press OK.
Step 9: Select the resultant shape, go to Object and select Expand
Appearance.
Step 10a: Select the arrow vector again, right click and ungroup it.
Step 10b: Right click again, then select the Release Clipping Mask so
that you can separate the arrow vector from the circle.
Step 11: Now use the desired colour for your vector from the Swatch
tab.

11 Steps: How to Make Revolve Arrows in Adobe Illustrator Using 3D Effect

  • 1.
    11 Steps: Howto Make Revolve Arrows in Adobe Illustrator Using 3D Effect
  • 2.
    Step 1: Makean arrow using the Rectangular and Star tool (for the arrow head). Don’t worry about colors at this point. You can easily change those later.
  • 3.
    Step 2: Copythe arrows directly under each other, as shown in the image. I have used 8 arrows, but you may use as many as you like, depending on the size of the circle.
  • 4.
    Step 3: Openthe Symbols window and drag all the arrows into it, so all the arrows become one single symbol. This will make it easier for you to work with them as you can select them as one image.
  • 5.
    Step 4: Createa circle using the Ellipse tool (Shift +Ellipse Tool). Again, the size of the circle depends on what you would like.
  • 6.
    Step 5: Selectthe left anchor point of the circle using Direct Selection tool and delete it so you have a nice semi circle as a result.
  • 7.
    Step 6a: Selectthe semi circle, go to Effect > 3D > Revolve.
  • 8.
    Step 6b: SelectMap Art at the bottom left of the window. A Map Art window will pop up.
  • 9.
    Step 7: Tickthe Invisible Geometry and Preview. Go to Symbols and select the arrow symbol (from step 2).
  • 10.
    Step 8a: Nowmove and resize the arrows so that it looks like the arrows are revolving half way through the circle. Press OK.
  • 11.
    Step 8b: Nowin the 3D Revolve option window, change the angle of the arrows as desired and press OK.
  • 12.
    Step 9: Selectthe resultant shape, go to Object and select Expand Appearance.
  • 13.
    Step 10a: Selectthe arrow vector again, right click and ungroup it.
  • 14.
    Step 10b: Rightclick again, then select the Release Clipping Mask so that you can separate the arrow vector from the circle.
  • 15.
    Step 11: Nowuse the desired colour for your vector from the Swatch tab.