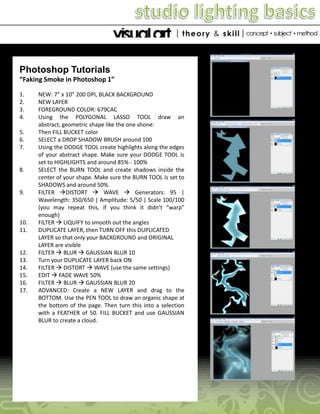
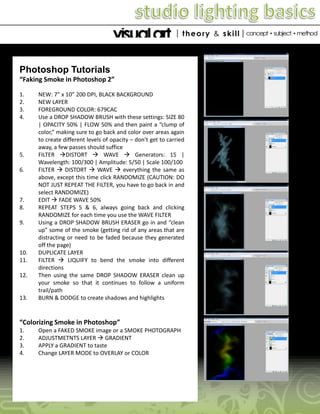
Here are the steps I would take to recreate the outcomes described in the case study:
1. Set up a studio lighting system with at least two lights to photograph models. Experiment with lighting ratios and placements to create dramatic S-curves in the models' poses.
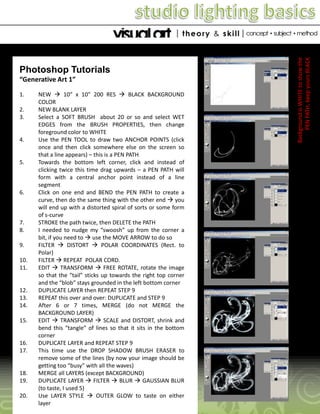
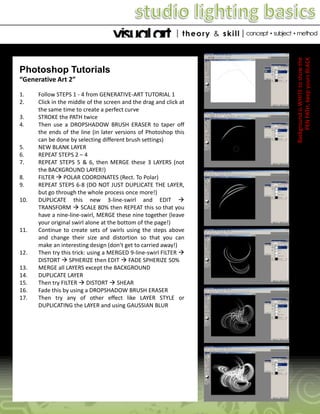
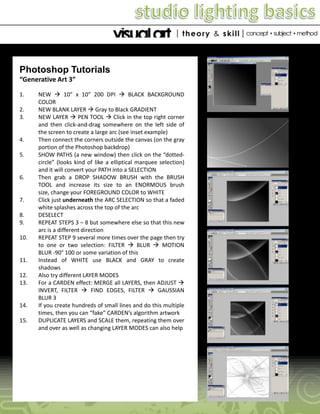
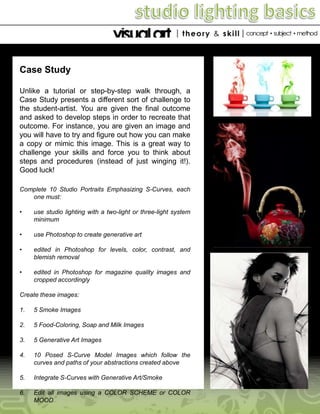
2. Create abstract shapes and patterns using the techniques described for smoke, food coloring/soap/milk, and generative art tools in Photoshop. Pay attention to organic S-curves and flowing lines.
3. Photograph models posing to mimic the abstract shapes and curves created. Consider body positioning, arm placements, head tilts etc.
4. Import images into Photoshop and edit for levels, color, contrast, blemish removal


![Steps to work_on_photoshop[1]](https://cdn.slidesharecdn.com/ss_thumbnails/stepstoworkonphotoshop1-110902192646-phpapp02-thumbnail.jpg?width=640&height=640&fit=bounds)
![Steps to work_on_photoshop[1]](https://cdn.slidesharecdn.com/ss_thumbnails/stepstoworkonphotoshop1-110902192923-phpapp01-thumbnail.jpg?width=640&height=640&fit=bounds)