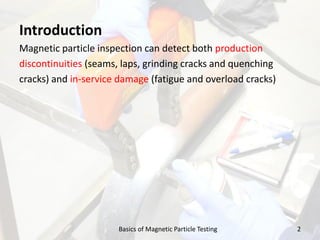
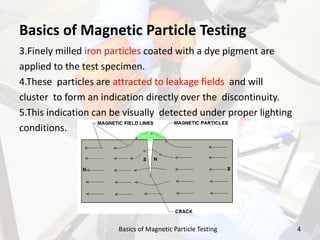
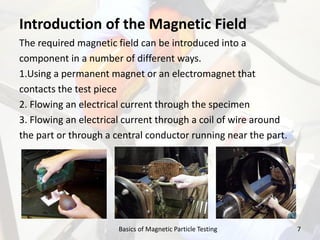
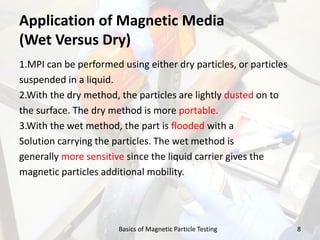
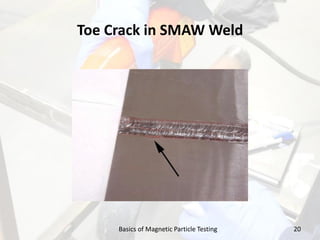
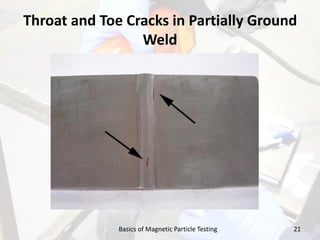
Module-2 Surface NDE Methods
Lecture 4 of 5 - Basics of Magnetic Particle Testing
Prepared by
Mr.M.Mani Vannan
Assistant Professor
Department of Mechanical Engineering 1
Introduction
Magnetic particle inspection can detect both production
discontinuities (seams, laps, grinding cracks and quenching
cracks) and in-service damage (fatigue and overload cracks)
Basics of Magnetic Particle Testing 2
Basics of Magnetic Particle Testing
1.A ferromagnetic test specimen is magnetized with a strong
magnetic field created by a magnet or Special equipment.
2.If the specimen has a discontinuity, the discontinuity will
interrupt the magnetic field flowing through the specimen
and a leakage field will occur.
3Basics of Magnetic Particle Testing
Basics of Magnetic Particle Testing
3.Finely milled iron particles coated with a dye pigment are
applied to the test specimen.
4.These particles are attracted to leakage fields and will
cluster to form an indication directly over the discontinuity.
5.This indication can be visually detected under proper lighting
conditions.
4Basics of Magnetic Particle Testing
Basic Procedure of MPT
1. Component pre-cleaning
2. Introduction of magnetic field
3. Application of magnetic media
4. Interpretation of magnetic particle indications
5Basics of Magnetic Particle Testing
Pre-cleaning
Contaminants such as oil, grease, or scale may not only
prevent particles from being attracted to leakage fields, they
may also interfere with Interpretation of indications.
6Basics of Magnetic Particle Testing
Introduction of the Magnetic Field
The required magnetic field can be introduced into a
component in a number of different ways.
1.Using a permanent magnet or an electromagnet that
contacts the test piece
2. Flowing an electrical current through the specimen
3. Flowing an electrical current through a coil of wire around
the part or through a central conductor running near the part.
7Basics of Magnetic Particle Testing
Application of Magnetic Media
(Wet Versus Dry)
1.MPI can be performed using either dry particles, or particles
suspended in a liquid.
2.With the dry method, the particles are lightly dusted on to
the surface. The dry method is more portable.
3.With the wet method, the part is flooded with a
Solution carrying the particles. The wet method is
generally more sensitive since the liquid carrier gives the
magnetic particles additional mobility.
8Basics of Magnetic Particle Testing
Dry Magnetic Particles
1.Magnetic particles come in a variety of colors.
2.A color that produces a high level of contrast against the
background should be used.
9Basics of Magnetic Particle Testing
Wet Magnetic Particles
1.Wet particles are typically supplied as visible or fluorescent.
2.Visible particles are viewed under normal white light and
fluorescent particles are viewed under black light.
10Basics of Magnetic Particle Testing
Interpretation of Indications
1.After applying the magnetic field, indications that form must
interpreted.
2.This process requires that the inspector distinguish
between relevant and non-relevant indications.
11
11
Basics of Magnetic Particle Testing
Crane Hook with Service Induced Crack
12Basics of Magnetic Particle Testing
Gear with Service Induced Crack
13Basics of Magnetic Particle Testing
Drive Shaft with Heat Treatment Induced
Cracks
14Basics of Magnetic Particle Testing
Splined Shaft with Service Induced Cracks
15Basics of Magnetic Particle Testing
Threaded Shaft with Service Induced
Crack
16Basics of Magnetic Particle Testing
Large Bolt with Service Induced Crack
17Basics of Magnetic Particle Testing
Crank Shaft with Service Induced Crack
Near Lube Hole
18
18
Basics of Magnetic Particle Testing
Lack of Fusion in SMAW Weld
19Basics of Magnetic Particle Testing
Toe Crack in SMAW Weld
20Basics of Magnetic Particle Testing
Throat and Toe Cracks in Partially Ground
Weld
21Basics of Magnetic Particle Testing
THANK YOU
Basics of Magnetic Particle Testing 22

Magnetic Particle Testing

  • 1.
    Module-2 Surface NDEMethods Lecture 4 of 5 - Basics of Magnetic Particle Testing Prepared by Mr.M.Mani Vannan Assistant Professor Department of Mechanical Engineering 1
  • 2.
    Introduction Magnetic particle inspectioncan detect both production discontinuities (seams, laps, grinding cracks and quenching cracks) and in-service damage (fatigue and overload cracks) Basics of Magnetic Particle Testing 2
  • 3.
    Basics of MagneticParticle Testing 1.A ferromagnetic test specimen is magnetized with a strong magnetic field created by a magnet or Special equipment. 2.If the specimen has a discontinuity, the discontinuity will interrupt the magnetic field flowing through the specimen and a leakage field will occur. 3Basics of Magnetic Particle Testing
  • 4.
    Basics of MagneticParticle Testing 3.Finely milled iron particles coated with a dye pigment are applied to the test specimen. 4.These particles are attracted to leakage fields and will cluster to form an indication directly over the discontinuity. 5.This indication can be visually detected under proper lighting conditions. 4Basics of Magnetic Particle Testing
  • 5.
    Basic Procedure ofMPT 1. Component pre-cleaning 2. Introduction of magnetic field 3. Application of magnetic media 4. Interpretation of magnetic particle indications 5Basics of Magnetic Particle Testing
  • 6.
    Pre-cleaning Contaminants such asoil, grease, or scale may not only prevent particles from being attracted to leakage fields, they may also interfere with Interpretation of indications. 6Basics of Magnetic Particle Testing
  • 7.
    Introduction of theMagnetic Field The required magnetic field can be introduced into a component in a number of different ways. 1.Using a permanent magnet or an electromagnet that contacts the test piece 2. Flowing an electrical current through the specimen 3. Flowing an electrical current through a coil of wire around the part or through a central conductor running near the part. 7Basics of Magnetic Particle Testing
  • 8.
    Application of MagneticMedia (Wet Versus Dry) 1.MPI can be performed using either dry particles, or particles suspended in a liquid. 2.With the dry method, the particles are lightly dusted on to the surface. The dry method is more portable. 3.With the wet method, the part is flooded with a Solution carrying the particles. The wet method is generally more sensitive since the liquid carrier gives the magnetic particles additional mobility. 8Basics of Magnetic Particle Testing
  • 9.
    Dry Magnetic Particles 1.Magneticparticles come in a variety of colors. 2.A color that produces a high level of contrast against the background should be used. 9Basics of Magnetic Particle Testing
  • 10.
    Wet Magnetic Particles 1.Wetparticles are typically supplied as visible or fluorescent. 2.Visible particles are viewed under normal white light and fluorescent particles are viewed under black light. 10Basics of Magnetic Particle Testing
  • 11.
    Interpretation of Indications 1.Afterapplying the magnetic field, indications that form must interpreted. 2.This process requires that the inspector distinguish between relevant and non-relevant indications. 11 11 Basics of Magnetic Particle Testing
  • 12.
    Crane Hook withService Induced Crack 12Basics of Magnetic Particle Testing
  • 13.
    Gear with ServiceInduced Crack 13Basics of Magnetic Particle Testing
  • 14.
    Drive Shaft withHeat Treatment Induced Cracks 14Basics of Magnetic Particle Testing
  • 15.
    Splined Shaft withService Induced Cracks 15Basics of Magnetic Particle Testing
  • 16.
    Threaded Shaft withService Induced Crack 16Basics of Magnetic Particle Testing
  • 17.
    Large Bolt withService Induced Crack 17Basics of Magnetic Particle Testing
  • 18.
    Crank Shaft withService Induced Crack Near Lube Hole 18 18 Basics of Magnetic Particle Testing
  • 19.
    Lack of Fusionin SMAW Weld 19Basics of Magnetic Particle Testing
  • 20.
    Toe Crack inSMAW Weld 20Basics of Magnetic Particle Testing
  • 21.
    Throat and ToeCracks in Partially Ground Weld 21Basics of Magnetic Particle Testing
  • 22.
    THANK YOU Basics ofMagnetic Particle Testing 22