
Recommended
More Related Content
What's hot
Similar to Final content page and double spread article designs
Similar to Final content page and double spread article designs (20)
More from IllyaBoyko1
More from IllyaBoyko1 (20)
Recently uploaded
Recently uploaded (20)
Final content page and double spread article designs
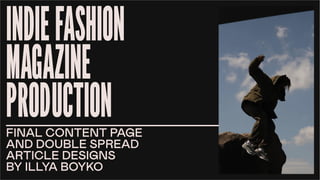
- 1. INDIEFASHION MAGAZINE PRODUCTION FINAL CONTENT PAGE AND DOUBLE SPREAD ARTICLE DESIGNS BY ILLYA BOYKO
- 3. I created a photoshop document of the same exact size as for the front cover and the same grid with bleedmarks is present to keep the designs consis- tent from page to page. I have pasted four photos, which I chose earlier. Each one of them is going to il- lustrate an article in my magazine. The background is plain white once again, because as much as I like designing interesting stuff, I still think that two most important features of a fashion magazine are photos and text and I do not want them to get lost because of colorful or backrounds filled with pat- terns. I colorgraded and edited pictures tolook more consistent with each other and a bit more ret- ro by applying a slight Halftone Effect to them and playing with brightness and contrast. Then I made the layout look logical - there is a certain hi- erarchy now - the biggest picture represents the most important and interesting article. To make it look less plain and more appealing, I have creat- ed a rectabgle, rounded one corner of it, placed it behind the biggest photo and created a clipping mask, so that the photo will be cropped by the boundaries of the shape.
- 4. I decided to make the main image a tad bit smaller to fit the de- scriptive text about the article. Then, I have added a few ele- ments: placed the title, colored the first letters in other col- ors, which is a constant feature of my magazine and extended the lower dash of the letter “E” to place the “contents” in it. This is a step that I rarely see in other magazines, so I thought it would help to interest people to read further into the maga- zine. I have also added a small, hand-drawn icon of a smiling sun, which I am planning to add throughout the pages of the mag- zine to make it look more friendly and positive. And, as a divid- ed between the title and the actual content of the page, I am using a pattern made out of smiley faces, which I drew., which I created in light blue color, so it would not stand out, but still separate the parts of the page. This was an interesting step, in which I took a screenshot of what I had so far and placed it into illustrator for the purpose of creating a textbox which will go around the curved part of the image by adding more anchor points to the text box and making it fit the image. I then added the title of the article, the page number and a short description of it.
- 5. In this step, I pasted the curved text- box back into photoshop and you can see that it goes around the photo nicely. I then added a short editor’s letter to greet the readers and tell them a bit about the magazine and what they will find here. As my final step, I pasted the pattern which I mentioned before between the photos to separate them and added page number/ar- ticle title duos below each photo, so read- ers would know where to find the said arti- cles. I also added a thin, light blue line beside the editor’s letter to separate the photo from the letter. Page number is colored in one of the brand colors, placed by the stan- dards, but I added the zero before three be- cause most magazines do not do it, so it is one more distinctive feature of this mag.
- 6. Denotation/connotation The use of blue, red and yellow colors in text represents the youth, kindness and playful- ness of the magazine whilst honoring the clas- sic features of 80s and 90s posters and flyers. The connotations on the main image are sup- posed to interest the audience, whose atten- tion caught the plug on the front cover. Use of text Font sizes are different between different ele- ments, but still are connected. The upper part of the page has each weight of font in the same size, whilst the lower part has smaller sizes due to those articles being not as important. The text next to the main image is done so that it perfectly follows the curve of the image. Main image It features a spoonful of turmeric, which will let readers know, that the main article with instruc- tions for a natural tie-dye process is easy to replicate at home with common household items. It purposely does not show the final result to intrigue the readers to get to the article them- selves and find out how it will look! Main image It features a spoonful of turmeric, which will let readers know, that the main article with instruc- tions for a natural tie-dye process is easy to replicate at home with common household items. It purposely does not show the final result to intrigue the readers to get to the article them- selves and find out how it will look! Selling line The top of the content page does not feature the date, magazine name or issue number due to them have already been displayed on the front cover and it is wiser to locate another informa- tion there, such as the “In This Issue” phrase with “contents” incorporated in it. It gives the reader an immediate idea on what is going to be presented on this page. Direct mode The image from the same photoshoot as on the front cover features a model making eye contact with a camera, therefore with the reader, this way encouraging them to find out more and read the article. Editor’s letter It is a great way to greet the first-time readers and tell them a bit about the magazine and what they will wind here.
- 8. I started out by creating a photoshop document double the width of the previous one, so I would have two pages fit in one document. I then placed the title of the artcile, previous- ly turned every letter in different direction for it to match the tie-dye aesthetic, which is something fun and hand-done. I then added a rounded star with a smiley face in it and text around it, which informs the reader that this craft will not take up much of their time. And, as usual, added the pattern in light blue color to divide the title and the actual content of the page. Then, I added the ingredients and first two steps with pictures illustrating the steps. I edited the photos to make them look more consistent with each other and a little bit retro, which my target audience appreciates a lot. To mimic the aesthetic of fan-zines and other give my magazine more of an artsy, more eclectic feel to it, the elements are sometimes rotated by a few degrees and I also added arrows to link the steps to the pictures.
- 9. I felt like there was a lot of blank space between the ar- ticle and a photo so I decid- ed to place a little plug in it. I went into adobe illustator, created an oval, applied zig- zag effect to it, rounded the corners and put some hand-rotated text inside, which will encourage the reader to carry on with the craft and make the magazine more friendly. Then I placed the plug into the photoshop doc- ument and it all seems in place now. I also slight- ly rotated it for the reasons I outlined earlier.
- 10. To make the reader really interested in this double spread article, and for something to catch their eye I cut out the long sleeve, duplicated it and slightly missplaced it outside of the original image border to create an il- lusion as if it slid out of the picture. My finishing touches were creating the fi- nal three steps and properly adjusting the text boxes, editing the pictures and aligning the bits of the article with each other. Also added arrows to match the pictures with the steps.
- 12. Images Images are quitean essential feature of this article, since they are supposed to illustrate the steps to suc- cesfully complete the craft. Hence why they were carefully chosen and edited to look consistent be- tween each other. For them not to get boring to the reader, I edited the last one in a rather unusual fashion, meaning that I cut out the t-shirt to slide out of the image which gives the article an interesting feel. Language It is neutral whilst having bits of informal, modern and appealing to younger audiences language. Some bits of the text are supportive and friendle to better commu- nicate the message of the magazine. All these combina- tions result in perfect appeal to the target audience. Text It was carefully measured out for all the text boxes to fit together perfectly and be of identical font size and weight. It corresponds to the images and is additional- ly linked to them with hand-drawn arrows. It is usually aligned left to make it readable and legible for every- body. Some first letters are colored in different color as a new take on the mgazine design convention, where the first letter is larger, whereas in the case of this magazine it is just colored differently to make it more fun and playful. Features This double spread has a few plugs in it. They are here to entartain, catch attention and encourage readers to actually go ahead and tie de their garments. It also has a few features of the brand pattern as dividers be- tween important blocks of content.