1. Image Manipulation
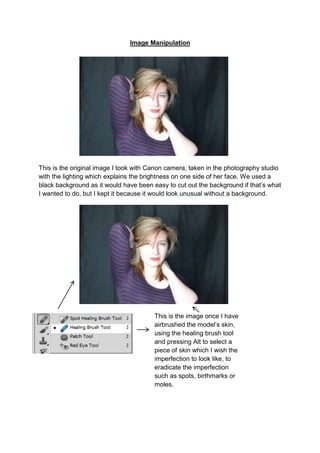
This is the original image I took with Canon camera, taken in the photography studio
with the lighting which explains the brightness on one side of her face. We used a
black background as it would have been easy to cut out the background if that’s what
I wanted to do, but I kept it because it would look unusual without a background.
This is the image once I have
airbrushed the model’s skin,
using the healing brush tool
and pressing Alt to select a
piece of skin which I wish the
imperfection to look like, to
eradicate the imperfection
such as spots, birthmarks or
moles.
2. After I airbrushed the model’s
skin, I adjusted the hue and
saturation of the image by
going to Image, Adjustments
and then Hue and Saturations
to make the highlights in her
hair and the red stripes in her
dress, stand out.
3. After airbrushing the model’s
skin and changing the hue and
saturation levels, I then
adjusted the level of
brightness so the lighting we
used didn’t look as brash as it
did in the original image. I also
adjusted the levels of contrast
to balance and compliment the
brightness levels.
4. After this, I then cropped the
image so it would fit on an A4
page, and I then placed it into
another Photoshop document
and started to build my front
cover. This is the final image
that I used for my front cover.