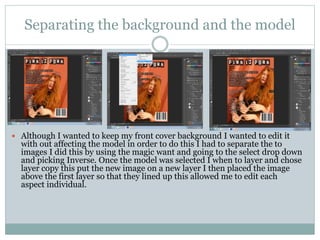
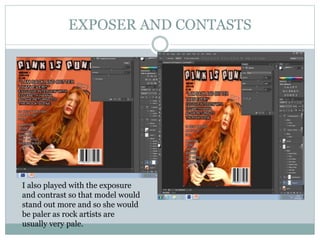
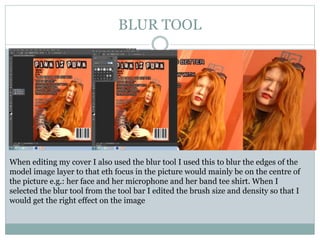
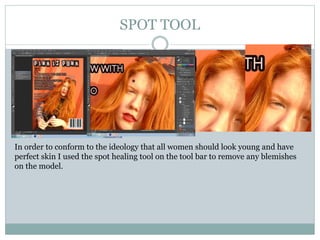
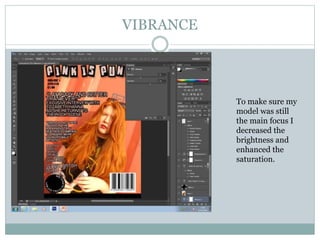
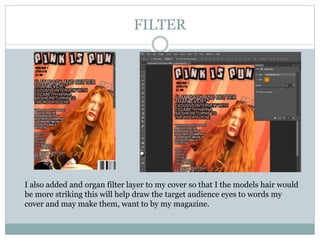
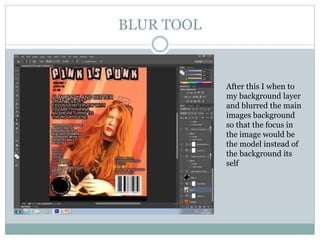
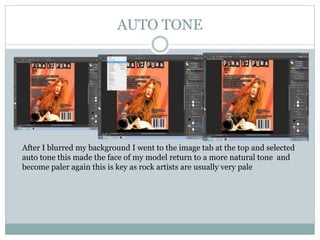
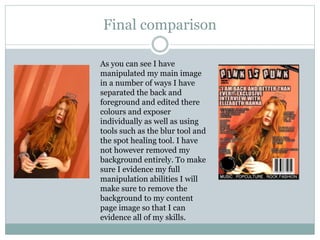
PRINTS SCREENS FOR
COVER
Separating the background and the model
 Although I wanted to keep my front cover background I wanted to edit it
with out affecting the model in order to do this I had to separate the to
images I did this by using the magic want and going to the select drop down
and picking Inverse. Once the model was selected I when to layer and chose
layer copy this put the new image on a new layer I then placed the image
above the first layer so that they lined up this allowed me to edit each
aspect individual.
brightness
After the layers where separated I
increased both of the layers
brightness using eth brightness
tool in the layers adjustments tool
bar this made the picture brighter
and will make it stand out more
eon the shelf's.
EXPOSER AND CONTASTS
I also played with the exposure
and contrast so that model would
stand out more and so she would
be paler as rock artists are
usually very pale.
BLUR TOOL
When editing my cover I also used the blur tool I used this to blur the edges of the
model image layer to that eth focus in the picture would mainly be on the centre of
the picture e.g.: her face and her microphone and her band tee shirt. When I
selected the blur tool from the tool bar I edited the brush size and density so that I
would get the right effect on the image
SPOT TOOL
In order to conform to the ideology that all women should look young and have
perfect skin I used the spot healing tool on the tool bar to remove any blemishes
on the model.
AUTO SHAPE
I also imput a auto shape on to my cover using the auto shape tool in the tool
bar. I used this to make a puff that will help my competiton stand out and
may attract my target audience as I know (because of the data I collected in
my questionnaire and focus group) that my audience likes competitions.
VIBRANCE
To make sure my
model was still
the main focus I
decreased the
brightness and
enhanced the
saturation.
FILTER
I also added and organ filter layer to my cover so that I the models hair would
be more striking this will help draw the target audience eyes to words my
cover and may make them, want to by my magazine.
BLUR TOOL
After this I when to
my background layer
and blurred the main
images background
so that the focus in
the image would be
the model instead of
the background its
self
AUTO TONE
After I blurred my background I went to the image tab at the top and selected
auto tone this made the face of my model return to a more natural tone and
become paler again this is key as rock artists are usually very pale
Final comparison
As you can see I have
manipulated my main image
in a number of ways I have
separated the back and
foreground and edited there
colours and exposer
individually as well as using
tools such as the blur tool and
the spot healing tool. I have
not however removed my
background entirely. To make
sure I evidence my full
manipulation abilities I will
make sure to remove the
background to my content
page image so that I can
evidence all of my skills.

Prints screens for cover

  • 1.
  • 2.
    Separating the backgroundand the model  Although I wanted to keep my front cover background I wanted to edit it with out affecting the model in order to do this I had to separate the to images I did this by using the magic want and going to the select drop down and picking Inverse. Once the model was selected I when to layer and chose layer copy this put the new image on a new layer I then placed the image above the first layer so that they lined up this allowed me to edit each aspect individual.
  • 3.
    brightness After the layerswhere separated I increased both of the layers brightness using eth brightness tool in the layers adjustments tool bar this made the picture brighter and will make it stand out more eon the shelf's.
  • 4.
    EXPOSER AND CONTASTS Ialso played with the exposure and contrast so that model would stand out more and so she would be paler as rock artists are usually very pale.
  • 5.
    BLUR TOOL When editingmy cover I also used the blur tool I used this to blur the edges of the model image layer to that eth focus in the picture would mainly be on the centre of the picture e.g.: her face and her microphone and her band tee shirt. When I selected the blur tool from the tool bar I edited the brush size and density so that I would get the right effect on the image
  • 6.
    SPOT TOOL In orderto conform to the ideology that all women should look young and have perfect skin I used the spot healing tool on the tool bar to remove any blemishes on the model.
  • 7.
    AUTO SHAPE I alsoimput a auto shape on to my cover using the auto shape tool in the tool bar. I used this to make a puff that will help my competiton stand out and may attract my target audience as I know (because of the data I collected in my questionnaire and focus group) that my audience likes competitions.
  • 8.
    VIBRANCE To make suremy model was still the main focus I decreased the brightness and enhanced the saturation.
  • 9.
    FILTER I also addedand organ filter layer to my cover so that I the models hair would be more striking this will help draw the target audience eyes to words my cover and may make them, want to by my magazine.
  • 10.
    BLUR TOOL After thisI when to my background layer and blurred the main images background so that the focus in the image would be the model instead of the background its self
  • 11.
    AUTO TONE After Iblurred my background I went to the image tab at the top and selected auto tone this made the face of my model return to a more natural tone and become paler again this is key as rock artists are usually very pale
  • 12.
    Final comparison As youcan see I have manipulated my main image in a number of ways I have separated the back and foreground and edited there colours and exposer individually as well as using tools such as the blur tool and the spot healing tool. I have not however removed my background entirely. To make sure I evidence my full manipulation abilities I will make sure to remove the background to my content page image so that I can evidence all of my skills.