Dual Booting Win7 and ubuntu
•Download as DOCX, PDF•
1 like•769 views

This upload shows how to dual boot computers using win7 and Ubuntu step bt step.

Recommended
More Related Content
What's hot
What's hot (19)
Viewers also liked
Viewers also liked (17)
Similar to Dual Booting Win7 and ubuntu
Similar to Dual Booting Win7 and ubuntu (20)
More from Ravi Malik
More from Ravi Malik (6)
Recently uploaded
Recently uploaded (20)
Dual Booting Win7 and ubuntu
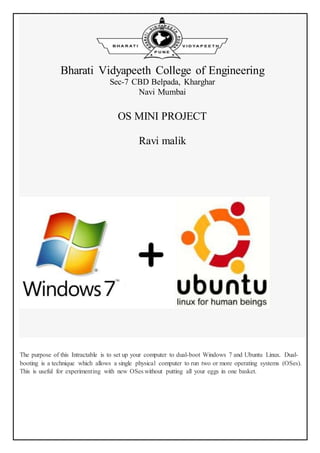
- 1. Bharati Vidyapeeth College of Engineering Sec-7 CBD Belpada, Kharghar Navi Mumbai OS MINI PROJECT Ravi malik The purpose of this Intractable is to set up your computer to dual-boot Windows 7 and Ubuntu Linux. Dual- booting is a technique which allows a single physical computer to run two or more operating systems (OSes). This is useful for experimenting with new OSes without putting all your eggs in one basket.
- 2. Step 1: Getting Prepared Prerequisites: 1. A PC running Windows 7, with at least 30 GB of free hard-drive space. 2. A CD/DVD burner and blank CD/ DVD or a USB drive with a capacity of 1GB or more 3. An external Harddrive big enough to backup your Windows installation 4. Administrative access to the PC 5. Internet Connectivity Most PCs sold in the last three years should meet the criteria for number 1. To confirm what version of Windows you are running, go to My Computer and click on “System properties.” The listed version should be Windows 7. From that same screen, you should see how much free space you have left, which is underneath the blue bar for each disk. In the example image, there is "8.49 GB free of 55.7GB". NOTE: The 8.49GB shown in the example is not enough space for most people. While you can install Ubuntu to a partition this size, you will typically want more space store documents and applications. 20GB is probably the minimum size you would want.
- 3. Step 2: Select a Linux Distro Linux comes in many flavors. Some distributions are aimed at full configurability for advanced users (Arch Linux, Gentoo), others at fulfulling simple hardware requirements (Puppy Linux, DSL), while others aim at being as easy to use and accessible as posible (Mint, Ubuntu). These different flavors, or distributions, are commonly called “distros” by the Linux community. There are hundreds if not thousands of distros available. However, in this instructions set, we will use Ubuntu Linux. Ubuntu is one of the most widely used Linux distros and has a very helpful community and good user interface for new users. Step 3: Prepare Installation Media Go to the ubuntu website, http://www.ubuntu.com/ and select download. As of this writing, the current version of Ubuntu is 12.04. Depending on your internet connection, the ISO download may take a while. The 32-bit version should be sufficient unless you are running specific applications that require a 64-bit variant of the OS. ISO files are disk images which have been stored for easy distribution and replication. After the ISO has downloaded, navigate to the folder it was downloaded to. Right-click and choose “Burn disk image.” This will launch a tool to burn the image to a CD or DVD. Once the disk is burned, remove it from the disk drive and label it for your future reference. WARNING: Be sure to backup your USB data before running UNetbootin, as it will reformat the drive and destroy any data previously on the USB drive.
- 4. Step 4: Backup Windows This is perhaps the most important step. If anything goes wrong with the next few steps, this will allow you to restore your computer to its current state. You will need an external hard drive or enough disk media to hold your files. If you have already backed up your system, you can either update your backup or proceed to the next step. To use the Windows backup, open the start menu, type “backup” and select “backup and restore.” This opens the backup and restore center. Choose “set up backup” and follow the wizard to create your first windows backup.
- 5. Step 5: Partition the Hard Drive
- 6. The safest and simplest way to partition your drive is to use the Windows 7 “Disk Management” program, to shrink your existing windows partition. To access this program, click the Windows icon in the bottom left and in the text box which says “Search programs and files”, type in “Disk Management” (without quotes) in this box, and press enter. In the new window that pops up, you’ll be able to see all of your partitions. In windows, these are typically labeled with letters, such as “C:” or “D:”. Check your partitions - there are two common setups. Either you will have one very large drive (“C:”) or you will have a smaller drive for your operating system (“C:”) plus a larger one for data or programs (“C:”). On your larger partition, ensure that at least 30GB of free space available. Next, right click on this drive and select “Shrink Volume.” It will take a little while for windows to analyze available free space, so be patient. Next, it asks how many MB you would like to shrink your volume. For a typical Linux OS install 30GB should be plenty if you’re not planning on using it to store large files such as movies. So, to shrink by 30GB, convert this to MB (multiply 30 x 1000) and enter this value (30000) into the appropriate field. Next, click “Shrink”. You should now see a black bar which says "Unallocated" underneath (see picture 2). If you see this, you are ready to go, and can close the Disk Management window. Step 6: Boot from Removable Media Note, this step will vary slightly depending you your computer’s make and model. If your computer’s documentation makes reference to an option to change the boot order, use that method to set the computer to boot from the disk drive or USB drive, depending on what media you used in step three. Reboot and boot into the Linux media, and proceed to step seven.
- 7. If you cannot find such a reference, you will need to alter the boot order via BIOS. BIOS stands for Basic Input Output System. It is a low-level environment the computer goes to before it loads the operating system. From here, many variables relating to the system’s hardware can be modified, so it is important not to make accidental changes as they may have dramatic effects on the computer as a whole. Reboot the computer. As it powers up, watch for a screen which says “Settings” or something similar. You will need to press one of the function keys, usually F5 or F12. This will get you into the system’s BIOS and allow you to change the boot priorities.If you miss BIOS, the system will continue booting as usual. If you end up in Windows, shut down and try this step again. Using the keyboard, navigate in BIOS to “boot options” and select the primary boot device to be the CD drive or USB media, depending on what you burned the ISO to in the previous step. Save your changes, insert the media into the drive, and reboot. Step 7: Install OS
- 8. Next, select "Try Ubuntu without Installing". From here you can explore and get used to Ubuntu, as well as confirm that your network connections are working. If for some reason they do not work (you cannot access the internet), please consult official Ubuntu documentation, as these settings may vary based on your system. Otherwise, If you're ready to proceed, simply double-click the "Install Ubuntu" icon on the desktop to enter the install wizard. Choose your installation language, then on the next screen check the box that says "Install this third-party software". This software is necessary to use MP3s. From that point, follow the defaults in the install wizard. Be sure that when it asks you where you want to install Ubuntu, you select the option to install side-by-side with your other OS, using the free space available. Continue installing until you receive a message that your installation is complete. It may take a while to get to this point so please be patient. When it's down, shutdown your computer and remove the installation media. When you boot back up, you should have a choice between Ubuntu Linux or Windows!
- 9. Step 8: Change Boot Device (again) If you changed the device boot order in the step six, you will need to repeat that process here. Set your BIOS boot order such that once again the hard drive is the primary boot device. Note that if you skip this step, your system will try to load an operating system from removable media before looking for Windows. If there is not a disk in the drive, it should proceed to boot into Windows. Step 9: Reboot and Configure Upon bootup, you will now see a choice between Windows and Ubuntu Linux. Go ahead and select Linux, and get yourself familiarized with this great OS.