Windows is a graphical operating system made by Microsoft that controls hardware and allows users to run multiple programs simultaneously. The latest version is Windows 10. Windows uses icons, menus, and pointing devices like mice to provide a graphical user interface (GUI). It includes features like file management, networking, graphics, internet access, gaming, and productivity applications. Users can customize aspects of Windows like the desktop background, screen saver, and taskbar. Files and folders can be created, opened, copied, deleted, renamed and organized using Windows Explorer.
Ms Word 2010 Training In Ambala ! Batra Computer Centrejatin batra
Batra Computer Centre is An ISO certified 9001:2008 training Centre in Ambala.
We Provide Best Ms Word 2010 Training in Ambala. BATRA COMPUTER CENTRE provides best training in C, C++, S.E.O, Web Designing, Web Development and So many other courses are available.
Microsoft Word, Page layout, cross reference, screenshot ,home tab , insert tab, view tab, save as, save, mailings, it's applications, it's features, it's versions, shortcut keys used in Ms word, header & footer, clipart tab, insert tab, print setup and many more features of MS Word
Step by Step Microsoft Word 2010.
-Explore Word 2010 & Customize Ribbon
-Change the Look of Text
-Organize Information in Columns and Tables
-Insert and Modify Charts
-Use Other Visual Elements - Adding Watermarks
-Adding Bookmarks
-Work with Mail Merge
Making your improvements last ckmf 2015 Laura Lennox
Presentation for the Canadian Knowledge Mobilisation Forum 2015. Theme of the session was sustainability and this presentation detailed work done to develop a reflective tool for improvement teams to influence their projects sustainability and create lasting impact on patient care.
Key achievements:
• The Renewable Energy Advocate and the NSW Department of Industry provided support
for 17 large-scale renewable energy projects, totalling a potential 4,500 megawatts of new
capacity and $6 billion of investment.
• The $440 million Solar Flagships projects progressed with the Nyngan Solar Plant achieving
its maximum designed generation capacity and over half of the photovoltaic modules at the
Broken Hill Solar Plant are generating electricity.
• Over the past year, three large-scale renewable energy projects, including Nyngan Solar Plant,
came online, representing over $900 million of investment, 380 megawatts of capacity and
enough output to power 140,000 homes each year.
• The NSW Government sponsored the Network Opportunity Mapping project led by the
Institute of Sustainable Futures, which will highlight opportunities for renewable energy to
meet network constraints.
BCM Institute MTE Dr Goh Moh Heng - Holistic Approach to Implementing Busines...BCM Institute
BCM Institute MTE Series: http://www.worldcontinuitycongress.com/wcc08/mte.html
As part of the C3 Program in the region, BCM Institute has brought together experts to assist businesses and organisations to be resilient. Partnering with various global experts the program ensures that each program receives holistic support from Training (Competency) to Implementation (Capability) to Certification (Capacity) for both organisations and personnel.
This presentation will look at ways for using the Amazon Mechanical Turk system for conducting UX Research, with an emphasis on Specialized Techniques, and how to work around some of Mechanical Turk's inherent limitations. The intended tone is to provide an "Insider's Guide" to using Mechanical Turk ethically and effectively.
The speaker will share his experiences, including both challenges and successes, in working with Amazon's Mechanical Turk, along with gleaned incites.
Amazon Mechanical Turk is an online tool for recruiting and paying human subjects for completing specific work tasks. User Experience Professionals have been using Mechanical Turk for data gathering activities. It has been designed to link to supplemental tools and resources, such as the Qualtrics Survey Management system.
Kyria prides itself on building excellent relationships with all of their customers and suppliers. As a national supplier to over 50 active accounts and 200 doors, Kyria’s customers include major department stores, ready-to-wear stores, gift shops and independent specialty boutiques.
Tbwa corporate lance une offre présidentielle 2017TBWA\Corporate
Les candidats qui entrent en lice pour participer à une élection présidentielle sont des marathoniens. Comme pour les sportifs, la
phase de préparation est essentielle : fixer un cap, adopter une stratégie, s’entourer d’une équipe habile et réactive. Une phase
de préparation qui nécessite, à l’instar de celle des marathoniens, plusieurs mois voire plusieurs années de travail.
3 Module - Operating Systems Configuration and Use by Mark John LadoMark John Lado, MIT
3 Module - Operating Systems Configuration and Use
More on https://www.markjohn.cf/courses
This course will deliberate on the basics of an operating system, which may include Computer Memory, the Operating System, its Graphical User Interface, The Windows Operating System, and Desktop, Operating System Installation.
Falcon stands out as a top-tier P2P Invoice Discounting platform in India, bridging esteemed blue-chip companies and eager investors. Our goal is to transform the investment landscape in India by establishing a comprehensive destination for borrowers and investors with diverse profiles and needs, all while minimizing risk. What sets Falcon apart is the elimination of intermediaries such as commercial banks and depository institutions, allowing investors to enjoy higher yields.
Memorandum Of Association Constitution of Company.pptseri bangash
www.seribangash.com
A Memorandum of Association (MOA) is a legal document that outlines the fundamental principles and objectives upon which a company operates. It serves as the company's charter or constitution and defines the scope of its activities. Here's a detailed note on the MOA:
Contents of Memorandum of Association:
Name Clause: This clause states the name of the company, which should end with words like "Limited" or "Ltd." for a public limited company and "Private Limited" or "Pvt. Ltd." for a private limited company.
https://seribangash.com/article-of-association-is-legal-doc-of-company/
Registered Office Clause: It specifies the location where the company's registered office is situated. This office is where all official communications and notices are sent.
Objective Clause: This clause delineates the main objectives for which the company is formed. It's important to define these objectives clearly, as the company cannot undertake activities beyond those mentioned in this clause.
www.seribangash.com
Liability Clause: It outlines the extent of liability of the company's members. In the case of companies limited by shares, the liability of members is limited to the amount unpaid on their shares. For companies limited by guarantee, members' liability is limited to the amount they undertake to contribute if the company is wound up.
https://seribangash.com/promotors-is-person-conceived-formation-company/
Capital Clause: This clause specifies the authorized capital of the company, i.e., the maximum amount of share capital the company is authorized to issue. It also mentions the division of this capital into shares and their respective nominal value.
Association Clause: It simply states that the subscribers wish to form a company and agree to become members of it, in accordance with the terms of the MOA.
Importance of Memorandum of Association:
Legal Requirement: The MOA is a legal requirement for the formation of a company. It must be filed with the Registrar of Companies during the incorporation process.
Constitutional Document: It serves as the company's constitutional document, defining its scope, powers, and limitations.
Protection of Members: It protects the interests of the company's members by clearly defining the objectives and limiting their liability.
External Communication: It provides clarity to external parties, such as investors, creditors, and regulatory authorities, regarding the company's objectives and powers.
https://seribangash.com/difference-public-and-private-company-law/
Binding Authority: The company and its members are bound by the provisions of the MOA. Any action taken beyond its scope may be considered ultra vires (beyond the powers) of the company and therefore void.
Amendment of MOA:
While the MOA lays down the company's fundamental principles, it is not entirely immutable. It can be amended, but only under specific circumstances and in compliance with legal procedures. Amendments typically require shareholder
Skye Residences | Extended Stay Residences Near Toronto Airportmarketingjdass
Experience unparalleled EXTENDED STAY and comfort at Skye Residences located just minutes from Toronto Airport. Discover sophisticated accommodations tailored for discerning travelers.
Website Link :
https://skyeresidences.com/
https://skyeresidences.com/about-us/
https://skyeresidences.com/gallery/
https://skyeresidences.com/rooms/
https://skyeresidences.com/near-by-attractions/
https://skyeresidences.com/commute/
https://skyeresidences.com/contact/
https://skyeresidences.com/queen-suite-with-sofa-bed/
https://skyeresidences.com/queen-suite-with-sofa-bed-and-balcony/
https://skyeresidences.com/queen-suite-with-sofa-bed-accessible/
https://skyeresidences.com/2-bedroom-deluxe-queen-suite-with-sofa-bed/
https://skyeresidences.com/2-bedroom-deluxe-king-queen-suite-with-sofa-bed/
https://skyeresidences.com/2-bedroom-deluxe-queen-suite-with-sofa-bed-accessible/
#Skye Residences Etobicoke, #Skye Residences Near Toronto Airport, #Skye Residences Toronto, #Skye Hotel Toronto, #Skye Hotel Near Toronto Airport, #Hotel Near Toronto Airport, #Near Toronto Airport Accommodation, #Suites Near Toronto Airport, #Etobicoke Suites Near Airport, #Hotel Near Toronto Pearson International Airport, #Toronto Airport Suite Rentals, #Pearson Airport Hotel Suites
Taurus Zodiac Sign_ Personality Traits and Sign Dates.pptxmy Pandit
Explore the world of the Taurus zodiac sign. Learn about their stability, determination, and appreciation for beauty. Discover how Taureans' grounded nature and hardworking mindset define their unique personality.
What is the TDS Return Filing Due Date for FY 2024-25.pdfseoforlegalpillers
It is crucial for the taxpayers to understand about the TDS Return Filing Due Date, so that they can fulfill your TDS obligations efficiently. Taxpayers can avoid penalties by sticking to the deadlines and by accurate filing of TDS. Timely filing of TDS will make sure about the availability of tax credits. You can also seek the professional guidance of experts like Legal Pillers for timely filing of the TDS Return.
Discover the innovative and creative projects that highlight my journey throu...dylandmeas
Discover the innovative and creative projects that highlight my journey through Full Sail University. Below, you’ll find a collection of my work showcasing my skills and expertise in digital marketing, event planning, and media production.
Explore our most comprehensive guide on lookback analysis at SafePaaS, covering access governance and how it can transform modern ERP audits. Browse now!
Remote sensing and monitoring are changing the mining industry for the better. These are providing innovative solutions to long-standing challenges. Those related to exploration, extraction, and overall environmental management by mining technology companies Odisha. These technologies make use of satellite imaging, aerial photography and sensors to collect data that might be inaccessible or from hazardous locations. With the use of this technology, mining operations are becoming increasingly efficient. Let us gain more insight into the key aspects associated with remote sensing and monitoring when it comes to mining.
RMD24 | Retail media: hoe zet je dit in als je geen AH of Unilever bent? Heid...BBPMedia1
Grote partijen zijn al een tijdje onderweg met retail media. Ondertussen worden in dit domein ook de kansen zichtbaar voor andere spelers in de markt. Maar met die kansen ontstaan ook vragen: Zelf retail media worden of erop adverteren? In welke fase van de funnel past het en hoe integreer je het in een mediaplan? Wat is nu precies het verschil met marketplaces en Programmatic ads? In dit half uur beslechten we de dilemma's en krijg je antwoorden op wanneer het voor jou tijd is om de volgende stap te zetten.
Putting the SPARK into Virtual Training.pptxCynthia Clay
This 60-minute webinar, sponsored by Adobe, was delivered for the Training Mag Network. It explored the five elements of SPARK: Storytelling, Purpose, Action, Relationships, and Kudos. Knowing how to tell a well-structured story is key to building long-term memory. Stating a clear purpose that doesn't take away from the discovery learning process is critical. Ensuring that people move from theory to practical application is imperative. Creating strong social learning is the key to commitment and engagement. Validating and affirming participants' comments is the way to create a positive learning environment.
India Orthopedic Devices Market: Unlocking Growth Secrets, Trends and Develop...Kumar Satyam
According to TechSci Research report, “India Orthopedic Devices Market -Industry Size, Share, Trends, Competition Forecast & Opportunities, 2030”, the India Orthopedic Devices Market stood at USD 1,280.54 Million in 2024 and is anticipated to grow with a CAGR of 7.84% in the forecast period, 2026-2030F. The India Orthopedic Devices Market is being driven by several factors. The most prominent ones include an increase in the elderly population, who are more prone to orthopedic conditions such as osteoporosis and arthritis. Moreover, the rise in sports injuries and road accidents are also contributing to the demand for orthopedic devices. Advances in technology and the introduction of innovative implants and prosthetics have further propelled the market growth. Additionally, government initiatives aimed at improving healthcare infrastructure and the increasing prevalence of lifestyle diseases have led to an upward trend in orthopedic surgeries, thereby fueling the market demand for these devices.
Buy Verified PayPal Account | Buy Google 5 Star Reviewsusawebmarket
Buy Verified PayPal Account
Looking to buy verified PayPal accounts? Discover 7 expert tips for safely purchasing a verified PayPal account in 2024. Ensure security and reliability for your transactions.
PayPal Services Features-
🟢 Email Access
🟢 Bank Added
🟢 Card Verified
🟢 Full SSN Provided
🟢 Phone Number Access
🟢 Driving License Copy
🟢 Fasted Delivery
Client Satisfaction is Our First priority. Our services is very appropriate to buy. We assume that the first-rate way to purchase our offerings is to order on the website. If you have any worry in our cooperation usually You can order us on Skype or Telegram.
24/7 Hours Reply/Please Contact
usawebmarketEmail: support@usawebmarket.com
Skype: usawebmarket
Telegram: @usawebmarket
WhatsApp: +1(218) 203-5951
USA WEB MARKET is the Best Verified PayPal, Payoneer, Cash App, Skrill, Neteller, Stripe Account and SEO, SMM Service provider.100%Satisfection granted.100% replacement Granted.
Cracking the Workplace Discipline Code Main.pptxWorkforce Group
Cultivating and maintaining discipline within teams is a critical differentiator for successful organisations.
Forward-thinking leaders and business managers understand the impact that discipline has on organisational success. A disciplined workforce operates with clarity, focus, and a shared understanding of expectations, ultimately driving better results, optimising productivity, and facilitating seamless collaboration.
Although discipline is not a one-size-fits-all approach, it can help create a work environment that encourages personal growth and accountability rather than solely relying on punitive measures.
In this deck, you will learn the significance of workplace discipline for organisational success. You’ll also learn
• Four (4) workplace discipline methods you should consider
• The best and most practical approach to implementing workplace discipline.
• Three (3) key tips to maintain a disciplined workplace.
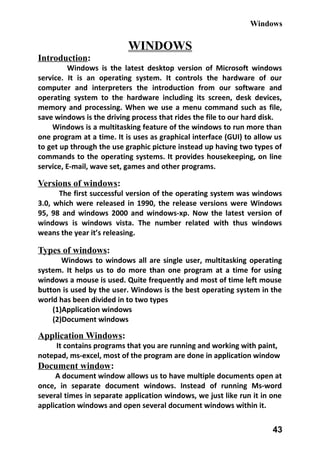
1. Windows
WINDOWS
Introduction:
Windows is the latest desktop version of Microsoft windows
service. It is an operating system. It controls the hardware of our
computer and interpreters the introduction from our software and
operating system to the hardware including its screen, desk devices,
memory and processing. When we use a menu command such as file,
save windows is the driving process that rides the file to our hard disk.
Windows is a multitasking feature of the windows to run more than
one program at a time. It is uses as graphical interface (GUI) to allow us
to get up through the use graphic picture instead up having two types of
commands to the operating systems. It provides housekeeping, on line
service, E-mail, wave set, games and other programs.
Versions of windows:
The first successful version of the operating system was windows
3.0, which were released in 1990, the release versions were Windows
95, 98 and windows 2000 and windows-xp. Now the latest version of
windows is windows vista. The number related with thus windows
weans the year it’s releasing.
Types of windows:
Windows to windows all are single user, multitasking operating
system. It helps us to do more than one program at a time for using
windows a mouse is used. Quite frequently and most of time left mouse
button is used by the user. Windows is the best operating system in the
world has been divided in to two types
(1)Application windows
(2)Document windows
Application Windows:
It contains programs that you are running and working with paint,
notepad, ms-excel, most of the program are done in application window
Document window:
A document window allows us to have multiple documents open at
once, in separate document windows. Instead of running Ms-word
several times in separate application windows, we just like run it in one
application windows and open several document windows within it.
43
2. Windows
Features of windows-xp:-
After opening the computer windows-xp screen will appear that
screen is known as “desktop”. The computer boot that means it installs
windows-xp successfully. It helps or co-ordinates between the user and
the computer. In the desktop, different types of icons, start button,
system tools and taskbar display on it.
Basic components of windows:
The basic components of windows are divided into 8 types.
• Title bar
• Control icon
• Menu bar
• Minimize button
• Close button
• Maximize button
• Scroll bar
• Status bar
Title bar:
It is a colored bar on the top of the screen. It contains the name or
title of the windows which is currently open. It moved around the
desktop using this title bar.
Control icon:
A control icon is situated on the top left side of the screen.
When we click on this icon, it contains the some command or
menu such as restore, move, and size, minimize, maximize,
minimize and close. Through these commands, we can move, resized
and closed.
Menu bar:It is located right under the title bar. It contains names of
various menu options. Clicking on one of the names in this bar causes
the drop-down menus to appear. These drop-down menus have
44
3. Windows
different command relevant to the contents or selected items in the
window.
Minimize button:
It helps us to minimize or reduce the window desktop.
Close button:
By clicking the close button, the current window can be
closed or shutdown.
Maximize and restore button:
By clicking the maximize button enlarges the active window so
that it fills the entire desktop. The restore button replaces the maximize
button after the window is enlarged. Clicking the restore button returns
the window to its previous size.
Restore button maximize button
Scroll bar:
Scroll bar are provided on right side and/or button of the window, if
there is data more than one screen of the window. The desktop can
display two types of scroll bar such as horizontal scroll bar and vertical
scroll bar. By Vertical scroll bar, we can move up or down to the
document. By horizontal scroll bar, we can move to the right or left to
the document.
Status bar: It contains information or message related or active of the
window. It shows the information or the current position of the data
feed by a user.
45
Vertical scroll bar
Horizontal
scroll bar
Scroll point
4. Windows
Combo box:
It appears initially as a rectangular box containing the current
selection. It is used give the user the list of choice from which a user can
select any one choice. It is used at places where they are many items
from which user select any one item. It is also known as drop-down list
box. It is not accepting some parameter like file name or path from the
user.
Text box:
This control is generally found on a dialog box. It is used accept
some parameter like file
name or path from the
user.
List box:
It is used to give the user a least of choice from
which user can select one or more choice. If there are
more choices than can fit in the box, scroll bars are
provided so we can through the list. Clicking on a
particular choice makes the selection out of the given
choices at a particular time.
Command button:
Command button initiates action. The most command buttons are
ok and cancel. To confirm what is being displayed in the window, we
click the ok button and to discard click cancel.
Dialog box:
In the windows the dialog box is very useful and inserting
components which perform a small
task of a specific program. The
windows we use while making
changes to settings are called dialog
box.
46
5. Windows
Message box:
The windows that display some message from the system are called
message box. A message box is similar to a dialog box but it expects the
user input in the form of clicking only one of its command buttons such
as ok, yes, no and cancel.
Option buttons:
They represent a group of mutually exclusive options. It expects us
to select only one of the options from the listed ones. If we already have
one option selected, we current selection replaces it. The selected
option button contains a black dot. This button also known as radio
button.
Check box:It is used to give the user a list of choice from which user
can may or may not select one or multiple choice. When a check box is
selected, it contains a tick mark.
Note:
To select the option click on the check box or press the space box.
To clear the box (i.e. to remove the tick mark) , click again in the check
box or press the space bar.
Desktop area:
47
6. Windows
Desktop area is defined by size of the screen area. Depending on
the resolution set 640x480 is the default screen setting. All icons
shortcut taskbar and new channel bar are in the desktop area. In
windows the desktop by default consist of different.
My computer
My document
Recycle bin
Internet
Network neighbor
hood
My computer:
It is an icon found on the desktop which when opened display the
currently available drive of the system.
My document:
It is special type of folder which stored the file created by
Microsoft applications like ms word, ms power point, ms excel, ms
point.
Recycle bin:
It is an application of windows which hold the file and folder
deleted by the user. This facility is available in windows to prevent
accidental deletion of file. When we delete the file or folder it gets
temporary delete and stored in the recycle bin. If we went to recover
the file then we have to open the recycle bin and restore it. But we went
to delete the file permanently then empty it.
Network places:
This application allows us to access the computer connected to
the LAN. (Local area networking)
Internet:
It is the browser which each freely provided by the Microsoft by
the Microsoft corporation with windows operating system. Browser is a
special type of application system using which we can access the
internet.
48
7. Windows
Task bar:
The task bar is a very important window object. It contains the start
button, application button, system tools and other tools that can also
contain quick lunch bar.
Start Menu:
Start button is used to display the start menu and then execute a
program. When the programs begin, the taskbar display a button with
an icon along with a description of running program. If you click the start
menu the program as display cascading manner support, run, log off and
turn off etc. The main functions of start menu are like.
1. It always available even if we are opening the application.
2. It displays the program on your system.
3. It provides easy access to recently open data document.
4. It Actifed the windows-xp and helps us to working with it
Application button:
When an application button is launched windows with display
corresponding application button on the taskbar. An active application
will have its button repressed.
Icon and shortcut:
Icons are small bit map picture which represents a file or a folder or
an application. When icons are lunched program or applications are
lunched the icons in the desktop are and quick lunch are called
shortcut in cons easily created. On the basis of what the icons
represented, there are three different type of icon in windows.
Group option(internet, game, accessories )
Program icon(windows media player, DVD, calculator, paint
box)
General icon (folder, shortcut)
Customizing task bar:
To make the taskbar customizing, right click on taskbar button
choose properties. The customizing taskbar so sent dialog box which
contains these properties.
Lock the taskbar: It locks the taskbar it doesn’t allow only program
for quick lunch.
49
8. Windows
Customize taskbar: This option automatic hide the taskbar while
running any program. The task bar will be displayed while we move the
cursor of the mouse towards the position of the taskbar.
Click the taskbar on top of the window: It is a default option and
the taskbar allows shown to user.
Group similar taskbar button: This option makes more than one
opened window in a group.
Show quick lunch: Application can turn easily from quick lunch bar.
As the name suggest by user out having to go down to levels of start
menu. This option is used to show the quick lunch icons on the taskbar.
Show the clock: This option is used to show the clock on taskbar.
Hide inactive icons: This option is used to hide
the active icons which are on the taskbar.
1. Change the desktop screen:
Right click on the desktop blank area.(display
the refresh dialog box)
Then click on properties.
Display the properties dialog box.
Then click on desktop tab button.
Then select the only one item from
the background list box.
Then click on apply and ok button.
Screen Saver:
A screen saver is primarily a running program that keeps the
screens characters for getting turn in screen. A screen saver display and
mates fun screen during the computer ideal times. To select the screen
saver that comes windows-xp as follows.
1. Right click on desktop, then select programs.
2. In properties selected screen saver tap.
3. Select screen saver from the list of box.
4. Select the preview button to see the screen, and then move the
mouse goes to dialogue box.
Folder:
50
9. Windows
It is just like a container which contains different sub folders and
files. We can’t write any important information in the folder. A folder is
nothing but a directory which can contain of zero, one or more file and
subfolder. The maximum length of a folder name can be up to 256
characters. The minimum length of a folder name can be up to 1
character. It is used to store similar type of files. It doesn’t have any
extension name. Every folder has a name.
Subfolder:
When folders present inside another folder, then it is called
subfolder.
File:
It is named memory location stored an external storage device. It is
used to store a huge amount of data for future reference. The
information is written in a specific format as a file. The maximum length
of a file name is 256 characters. The minimum length of a file name is 1
character. It can consist of ‘A’ to ‘Z’, ‘a’ to ‘z’, 0 to 9 and all special
character except /, , *, :,?, “, >, <, |. It stores all of our data,
presentation; graphics in specific formats may be a.doc, a.txt or a.bmp.
Drive:
A drive is a logical division of a disk. It may cover the entire disk or a
position of disk. Sometime one disk is logically divided into two or more
of drives. Every drive has got a name which is called drive name or drive
letters.
Creating Shortcut:
It provides easy access to the program and file that we use most. A
short cut does not change the documents location. It just let’s see you
open it quickly. We can create a short cut to for desktop and other
devices etc.
Windows explorer:
Windows explorer provides a graphical way to organize our file or
folder. It enables us to explorer our network, recycle bin, configuration
folders and others. The explorer is a much improved version as compare
to the other previous window versions. Window explorer gives earliest
and quickest way of viewing and accessing files and folders. The default
explorer screen is divided and panel. It is two types.
Left panel
51
10. Windows
Right panel
Left panel contains all files and folders while clicking a file and
folder in left panel, the contents of the file or folder will be displayed on
right panel.
2. How to start windows explorer.
Right click on the start button.
Go to explorer and select it.
Or press Windows key+ E.
3. Create a folder:
Right click on the blank area where we want to create a folder.
Display the refresh dialog box.
Then click newfolder.
It will display a folder icon with cursor clicking after the default name
new folder.
Give a new name and then click on it.
52
11. Windows
4. Create a file:
Right click on the blank area where we want to create a file.
Display the refresh dialog box.
Then click new and then choose a specific file that we want to create
and click on it.
It will display a file icon with cursor clicking after the default name
new file.
Give a new name and then click on it.
5. How to open any folder or file.
Right click on the item what you want
to open.
Select open option using left click of
mouse.
Or Double click on it.
6. Delete to the file or folder.
Right click on the file or folder which we want
to delete.
Display the dialog box.
Then select and click to the delete option.
The system displays a message box having yes or no questions.
If we want to delete, then click on yes button otherwise no button.
After deleting any file or folder from recycle bin .if we want to delete
the file or folder from recycle bin go thorough above maintained
process.
If we want to delete a file or folder directly file from memory then
press shift +delete.
7. Rename to the file or folder.
Right click on the folder or file to which we want to rename.
Display the dialog box.
Then select and click to the rename option.
We will see cursor blinking after the name.
Give a new name and then click on it.
8. To Copy to the file or folder.
Right click on the folder or file which we want to copy.
Display this dialog box.
53
12. Windows
Then select and click to the copy option.
Or
The short cut key for copy is ctrl+c.
9. To Paste to the file or folder.
Right click on the blank area where we want to paste file or folder.
Display the dialog box.
Then select and click to the paste option.
Or
The short cut key for copy is ctrl+v.
10. Arrange the files or folders.
Right click on the blank area where we want to arrange files or
folders and click on arrange icon by option.
It displays a list of menus containing name, size, type, modified,
showing groups, auto arrange.
Selecting name options the files or folders are arranged according to
their name.(A to Z)
Selecting type options the files or folders are arranged according to
their types.
Selecting size options the files or folders are arranged according to
their size.
Selecting modified options the files or folders are arranged according
when it is modified or constructed.
Selecting show in group options it arranged the files or folders in
group.
11. Set the time and date:
Click on start buttoncontrol panel--> date, time, language and
regional optionsdate and time. Or
54
13. Windows
Right click on right click on the system tool button and click on
adjust date and time.
Display the date and time properties dialog box.
Set the date and time.
Then click on ok
button.
12. Create a shortcut:
Right click on the
blank area where we want to create a create shortcut.
Display the refresh dialog box.
Then click
newshortcut.
(display the creating
shortcut dialog box)
Type the file name which you want to create a short cut.
Or
Click on browse button then choice the file name and click on ok
button.
Click on next command button.
Then click on finish command button.
13. Step to the file search:
Click on start buttonsearch. (Display the search dialog box).
Or Short key use press on windows key+f.
55
14. Windows
Choice the option all files and folders from the explore bar.
Then type the file name in the all or part of the file name text box.
Click on search command button.
14. Step to make a file or folder read only and hidden:
Right click on the particular file and folder.
Click on the properties.
See the properties dialog box.
Click on read only or hidden check box which we want to active.
Click apply and ok command button.
15.Working shutdown:
Click on start button.
Then start menu is displayed.
Click on the turn off or shutdown so that a box will be displayed has
three options.
56
15. Windows
Stand By: clicking on this the system is going to stand by that
means the system can’t be turn off. The user can open it system at
any time quickly.
Turn off: clicking on this the system is going to turn off that means
the system totally closed.
Restart: it takes the system automatically turn off and again.
NOTEPAD
Notepad is application software and a simple text editor. The
default extension notepad file name is .txt. It is present under the
accessories group. It is used to store same text for feature reference.
Parts of notepad are title bar, menu bar, status bar, scroll bar and work
area.
16. Step to open the notepad.
Click on start buttonall program
Accessoriesnotepad.
New: create a new text file.
Open: open an existing text file.
Save: save the current text file.
Page setup: it is used to customize the printing page.
Print: To print currently open text file.
17. Open to existing
notepad file.
Click fileopen.
(Display the open
dialog box)
57
Work
area
16. Windows
Then write the file name in file name text box.
Select the location which the file saved from the look in drop down
list box.
Then click open command button.
18. Save to the current document.
Write the content of our current document.
click the filesave.(display the save as dialog box)
Write the file name at file name combo box inside save as dialog
box.
Click save command button.
Edit menu:
Undo (ctrl+z): this command used for delete the text entity and reverses
the running command.
Redo (ctrl+y): this command reports the previous command.
Cut (ctrl+x): it cuts the selected text.
Copy (ctrl+c): it copies the selected text.
Paste (ctrl+v): it pastes the cut or copied item. It inserts the recently cut
or copied item.
19. For cut the text.
Select the first paragraph or text to which you want to cut.
Click editcut.
58
17. Windows
20. For copy, pastes the text.
Select the first paragraph or text to which you want to copy.
Clicks editcopy.
Then select the area where you want to paste our text or
paragraph.
Then again click editpaste.
Delete: This command used for clear the content of a selected text.
Find (ctrl+f/f5): it used for search a specific text inside the document.
Replace (ctrl+h): it replaces the finding text.
Go to (ctrl+g /f5): it reaches the user at specific page no which one you
want to be enter.
21. To finds and replaces the text.
click editreplace.(display the find and replace dialog box)
Write find word in the find word text box.
Press tab to go to the replace with text box.
Write replace word in the replace with text box.
Click find next.
Click replaces.
Click ok when word flashes a message box saying that “word has
finished searching the document “.
Click close.
Select all (ctrl+a): it selected all the indents of the current document.
Date /time: insert the current date and time.
Word wrap: When it is on then notepad automatically move the cursor
to he next line and not display the status bar option. It is used to
activate the word wrap and allow the user to write in the single line.
59
18. Windows
Font: by this command we can insert the font page, font style, font size.
22. Change font style.
Select the title.
click formatfont.(display the font dialog box)
Click in font list box to select the font for the text.
Click in font style list box to select the font style for the text.
Click in font size list box to select the font size for the text.
Click ok command button.
View menu:
To access the submenus of the view menu click on view and click
on particular submenu or press “alt+v”. In this menu there is only on e
submenu named as status bar.
Status bar: It is used to active or inactive the status bar which is present
in the bottom of the editor however we can active when ward wrap is
inactive mode.
60
19. Windows
WORDPAD
It is application software. It supports file management editing and
formation of text. It supports three different files such as Document file
(.doc), Rich text file and Text file. Parts of WordPad are title bar, menu
bar, status bar, scroll bar, tool bar, formatting bar, ruler and work area.
Feature of WordPad:
Alignment of paragraphs
Formatted the characters in to any font, size, style and also any
character to insert.
Provide facility to view the document before the printing
Use of tab setting in the text
Create document in different format
23. Step to open the WordPad:
Click on start button.
Click on the all programs or programs.
Go to accessories.
Click on WordPad.
File menu:
Print preview: it is used to show the current page in a printing paper
format before printing.
Send: it is used to send the current document through e-mail.
Edit menu:
Paste special: it is used to paste the copied or the cut text in a specific
format. This format may be word pad document, picture format, rich
text document format and unformed text document.
61
Tool bar
Formatting bar
Ruler barWork area
20. Windows
24. Step to use paste special:
Copy some text.
Go to edit menu and then
click on paste special option.
Then select paste link option button.
Then we have to select any one of the above 4 format from the
format list box and then click on ok command button.
View menu:
This menu has fallowing submenus such as tool bar, Format bar,
ruler, status bar, option. The tool bar, Format bar, ruler, status bar
submenus are used to hide and unhide specific bars presents in the
WordPad document.
Option: this submenu is used to active and inactive different tool bars
and word wrap.
25. How insert the date and time to the current opened document.
Click on insertdate and
time.
Display the date and time
dialog box.
Then choose only one format from the format list box.
Then click ok button.
Font:
62
21. Windows
This is as similar to the font present in the notepad, but it contains
some extra features like effect and color. Through effect we can make
our statement strikeout and underline and combo box we can change
color of the text.
Bullet style: It adds the bullets to the specific text or paragraph.
Paragraph:
Through paragraph sub menu, we can indentation of the current
page that means we can give margins, spacing to a specific paragraph.
By using this paragraph sub menu, we can set alignment. In WordPad
there are three alignments such as left, right and central.
Tabs:
It is used to set the tabs position so that it creates some column.
PAINT
Through paint we can create, edit and view pictures using paint.
We can draw pictures and graphics designs. We can paste a paint picture
63
22. Windows
into another document that we have created or used it as our desktop
background. The extension name of paint file is .bmp.
26. Step to open the paint.
Click on start button.
Click on the all programs or programs.
Go to accessories.
Click on paint.
Tools description:
Free form select tool: it is used for free style selection of area.
Select tool: it is used to select a rectangle area draw the convex.
Eraser/color eraser tool: it is used to erase a portion of drawing.
Fill with color tool: it is used to fill a bounded area with a specific color.
Pick color tool: it is used pick a color from one area of convex to another
convex.
Magnifier tool: it is used to increase or decrease the size of the convex.
Pencil tool: it is used for drawing.
Brush tool: it is used for brushing.
Air brush tool: it is used for spray color.
Text tool: it is used to write a text on the convex.
Line tool: it is used for draw a line.
Curve tool: it is used for draw a curve.
Rectangle tool: it is used for draw a rectangle.
Polygon tool: it is used for draw a polygon.
Ellipse tool: it is used for draw an ellipse.
Rounder Rectangle tool: it is used for draw a rounded rectangle.
64
Drawing sheet
Tool box
Color box
23. Windows
27. To use a picture as your desktop background
Save the picture.
On the File menu, click either of the following commands:
Set as Background (Tiled) covers the desktop with repetitions of
your picture.
Set as Background (Centered) places your picture in the center of
the desktop.
28. To change the size of your picture
On the Image menu, click Attributes.
Under Units, click the unit of measurement you want to use for the
width and height.
Type the measurements in Width and Height.
29. To display gridlines
On the View menu, point to Zoom, and then click Custom.
Under Zoom to, click a percentage of zoom greater than 200
percent, and then click OK.
On the View menu, point to Zoom, and then click Show Grid.
30. To enlarge the size of the viewing area
On the View menu, click View Bitmap.
Your picture fills the entire viewing area. To return to your former
view, click anywhere in the picture.
31. To flip or rotate a picture or object
In the toolbox, click Select to select a rectangular area or click
Free-Form Select to select a freeform area.
Draw a box around the item you want to flip or rotate.
Below the toolbox, select one of the following:
Click to apply an opaque background.
Click to apply a transparent background.
On the Image menu, click Flip/Rotate.
Click one of the options under Flip or rotate.
32. To copy color from one area or object to another
In the toolbox, click Pick Color.
Click the area containing the color you want to copy.
65
24. Windows
In the toolbox, click Fill with Color.
Click the object or area where you want the new color.
33. To show or hide the toolbox
To show the toolbox, on the View menu, click Tool Box.
A check mark appears when the toolbox is shown. To hide the
toolbox, on the View menu, click to clear the check mark.
34. To use black and white instead of color
On the Image menu, click Attributes.
Under Colors, click Black and white.
Note:
If you change back to color, only new work will be in color.
35. To erase an entire image
If any part of the image is selected, click outside of the selected
area.
On the Image menu, click Clear Image.
36. To create custom colors
In the color box, click the color you want to change.
On the Colors menu, click Edit Colors.
Click Define Custom Colors.
Click the color swatch to change the Hue and saturation (Sat), and
then move the slider in the color gradient to change the
luminescence (Lum).
Click Add to Custom Colors.
37. To erase a small area
In the toolbox, click Eraser.
Below the toolbox, click an eraser size.
Right-click a color in the color box if the color you want to erase
with is different from the current background color.
Drag the pointer over the area you want to erase.
66