Download as PDF, PPTX

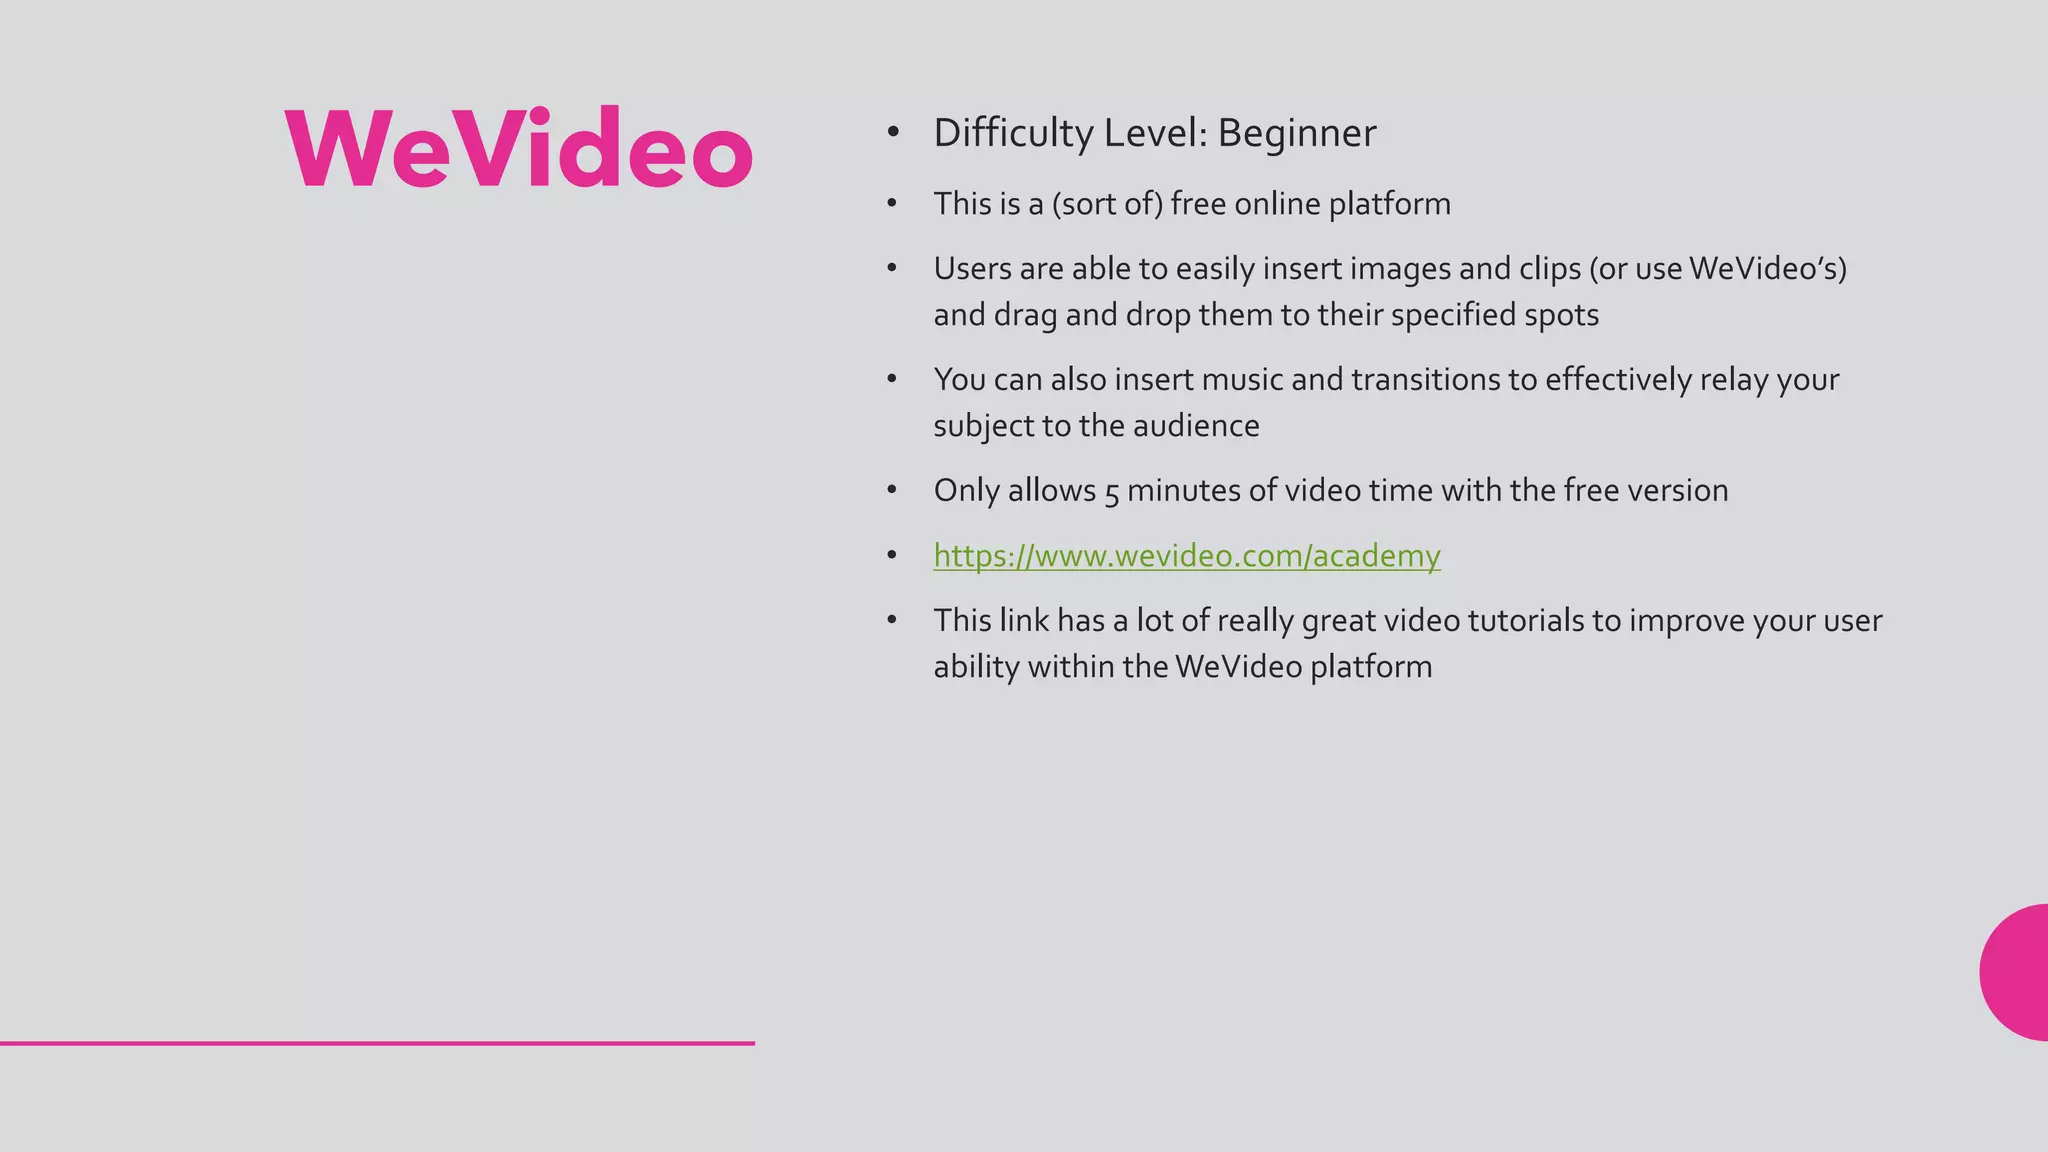


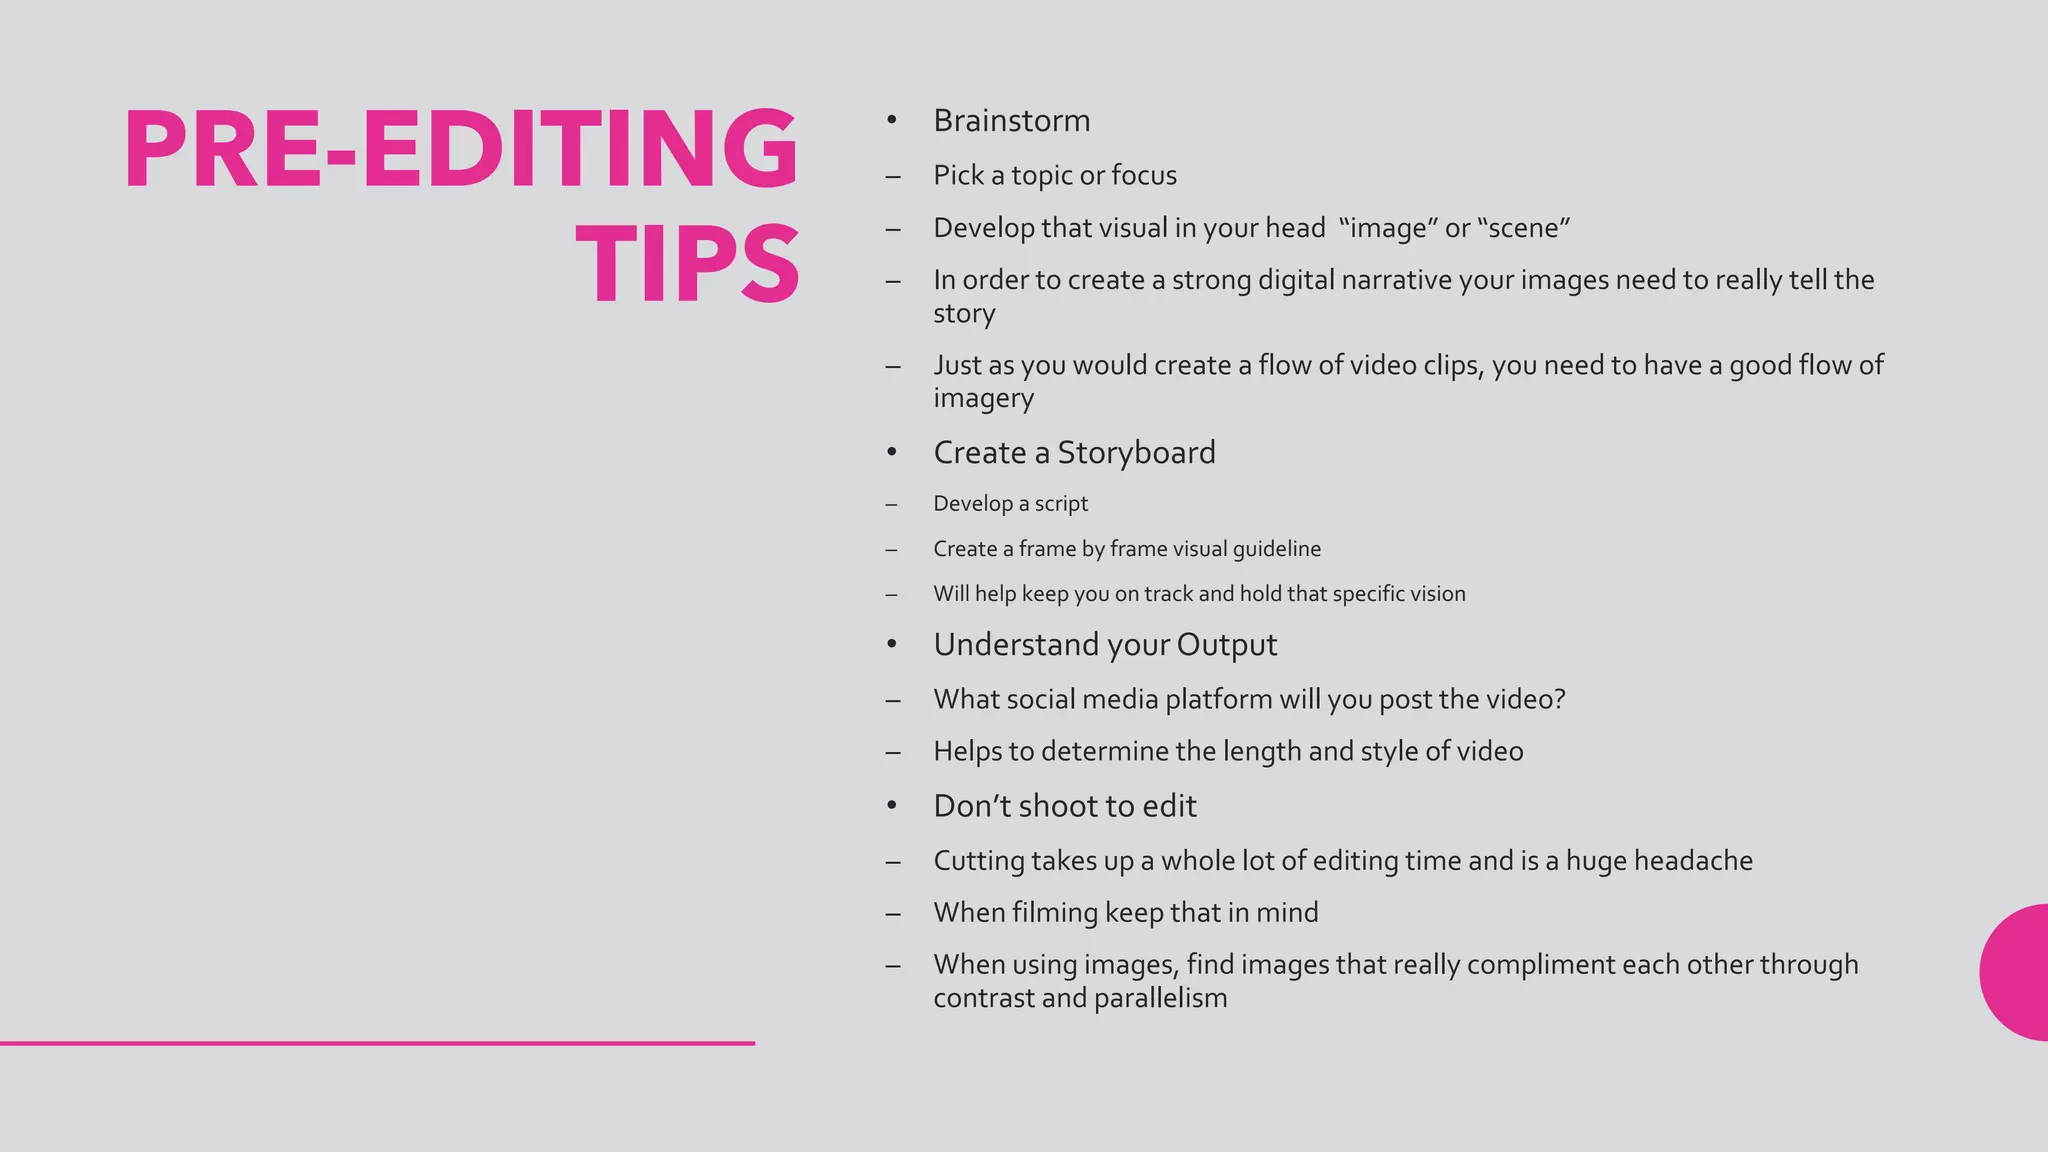


This document provides an overview of basic video editing principles and platforms for beginners. It discusses choosing between online platforms like WeVideo and Biteable or desktop programs like iMovie and Adobe Premiere. The document then covers pre-editing tips like brainstorming, storyboarding, and understanding output format. It provides guidance on effective use of transitions, music, and text in videos as well as links to additional resources.


