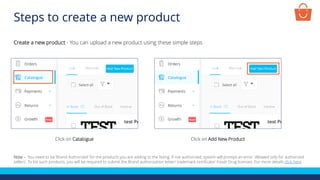
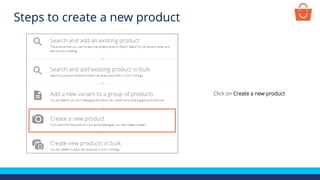
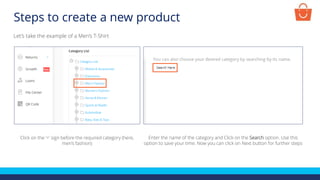
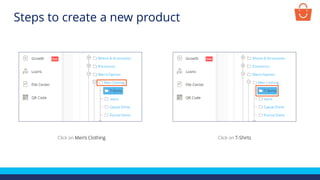
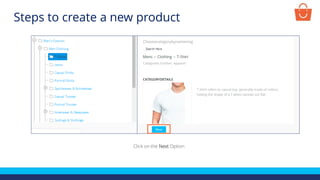
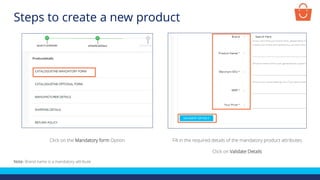
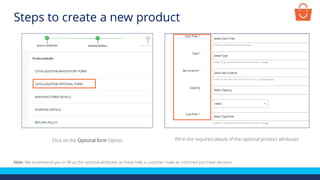
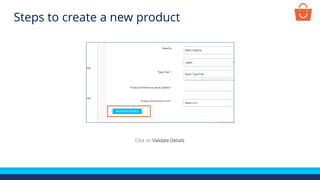
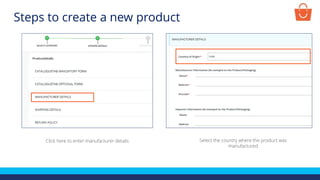
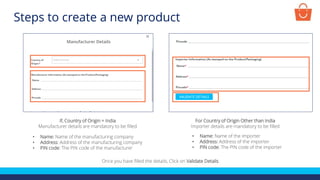
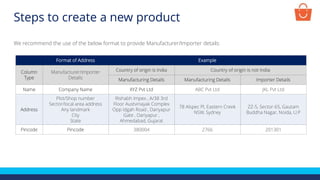
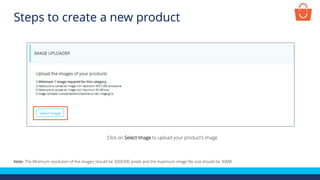
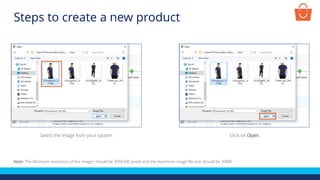
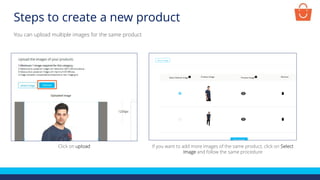
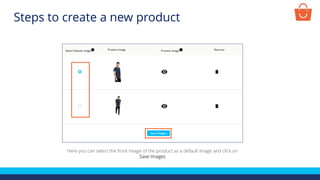
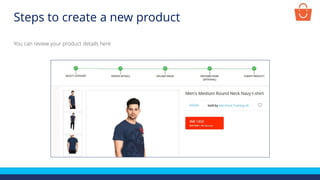
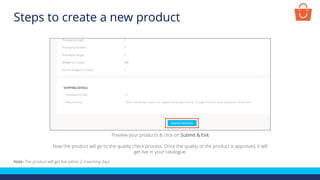
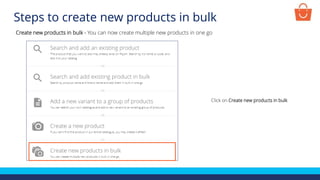
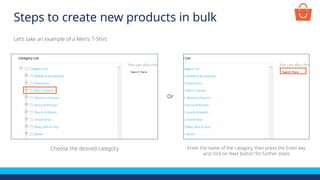
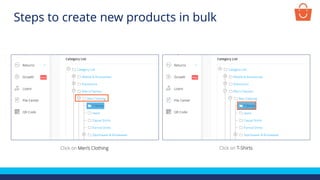
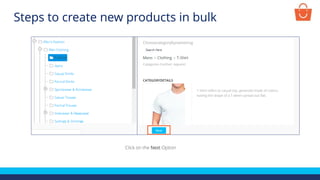
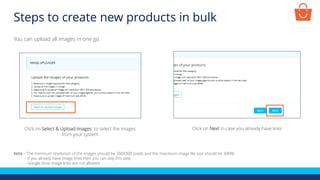
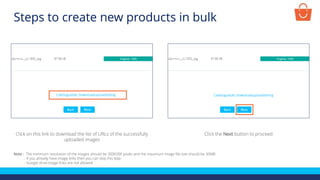
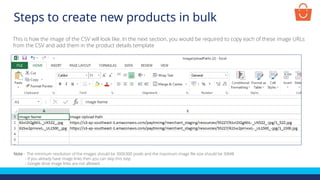
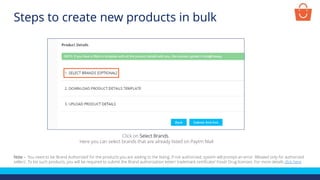
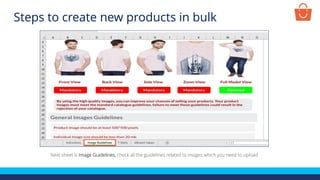
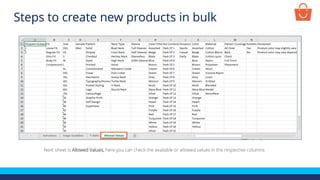
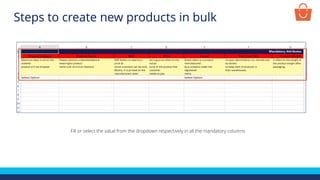
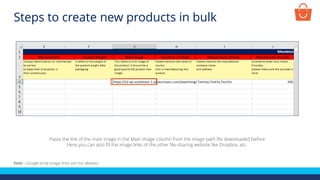
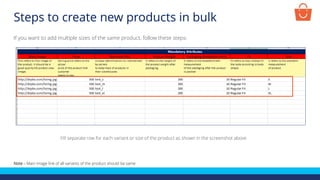
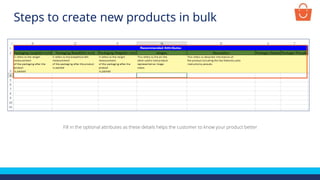
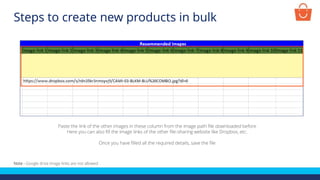
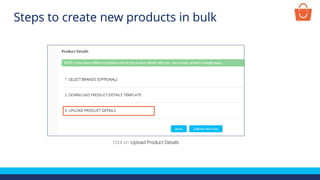
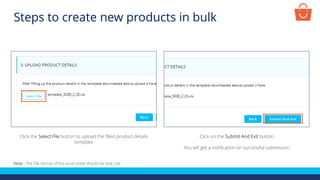
1. The document discusses how to create new products individually or in bulk on Paytm Mall, including uploading images and filling out required and optional product details.
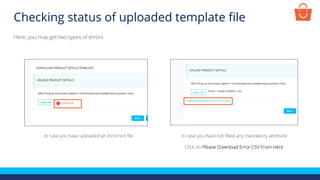
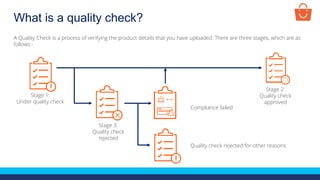
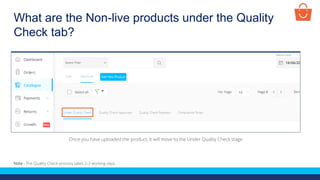
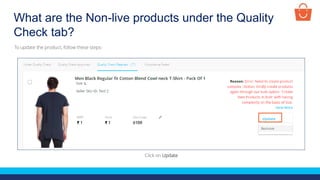
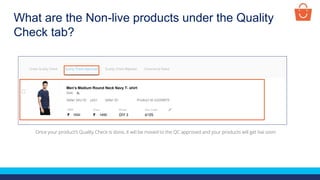
2. It explains that after products are uploaded, they go through a quality check process that can approve them to go live on the site or reject them with reasons for correction.
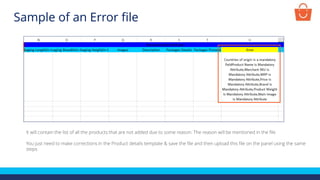
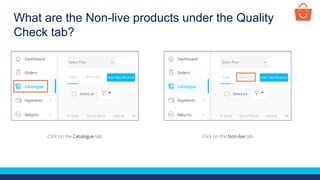
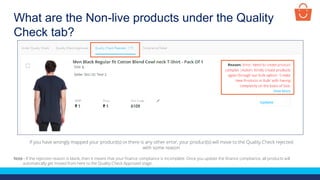
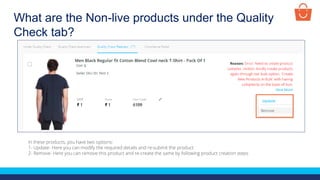
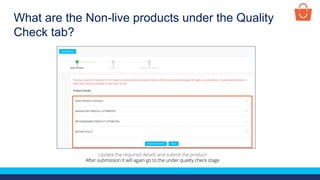
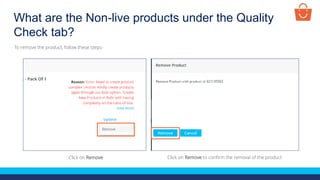
3. Rejected products can be updated or removed, and the status of products undergoing quality check can be seen on the non-live products tab.