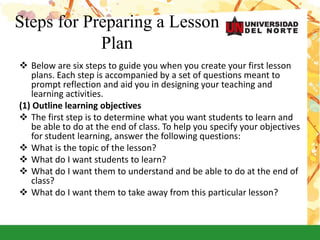
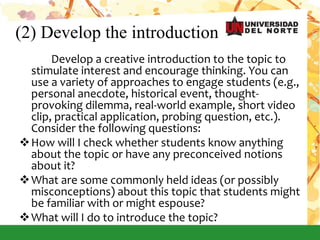
Strategies for Effective Lesson
Planning
Master Yuranis Pedrozo -
Strategies for Effective
Lesson Planning
 Stiliana Milkova
Center for Research on Learning and Teaching
 A lesson plan is the instructor’s road map of what
students need to learn and how it will be done effectively
during the class time. Before you plan your lesson, you
will first need to identify the learning objectives for the
class meeting. Then, you can design appropriate learning
activities and develop strategies to obtain feedback on
student learning. A successful lesson plan addresses and
integrates these three key components:
 Objectives for student learning
 Teaching/learning activities
 Strategies to check student understanding
Steps for Preparing a Lesson
Plan
 Below are six steps to guide you when you create your first lesson
plans. Each step is accompanied by a set of questions meant to
prompt reflection and aid you in designing your teaching and
learning activities.
(1) Outline learning objectives
 The first step is to determine what you want students to learn and
be able to do at the end of class. To help you specify your objectives
for student learning, answer the following questions:
 What is the topic of the lesson?
 What do I want students to learn?
 What do I want them to understand and be able to do at the end of
class?
 What do I want them to take away from this particular lesson?
(2) Develop the introduction
Develop a creative introduction to the topic to
stimulate interest and encourage thinking. You can
use a variety of approaches to engage students (e.g.,
personal anecdote, historical event, thought-
provoking dilemma, real-world example, short video
clip, practical application, probing question, etc.).
Consider the following questions:
How will I check whether students know anything
about the topic or have any preconceived notions
about it?
What are some commonly held ideas (or possibly
misconceptions) about this topic that students might
be familiar with or might espouse?
What will I do to introduce the topic?
(3) Plan the specific learning
activities
 Prepare several different ways of explaining the material
(real-life examples, analogies, visuals, etc.) to catch the
attention of more students and appeal to different
learning styles. As you plan your examples and activities,
estimate how much time you will spend on each. These
questions would help you design the learning activities
you will use:
 What will I do to explain the topic?
 What will I do to illustrate the topic in a different way?
 How can I engage students in the topic?
 What are some relevant real-life examples, analogies, or
situations that can help students understand the topic?
 What will students need to do to help them understand
the topic better?
(4) Plan to check for
understanding
 Now that you have explained the topic and illustrated it with
different examples, you need to check for student understanding –
how will you know that students are learning? Think about specific
questions you can ask students in order to check for understanding,
write them down, and then paraphrase them so that you are
prepared to ask the questions in different ways, you can also ask
yourself these questions:
 What questions will I ask students to check for understanding?
 What will I have students do to demonstrate that they are
following?
 Going back to my list of learning objectives, what activity can I
have students do to check whether each of those has been
accomplished?
(5) Develop a conclusion and a preview
(6) Create a realistic timeline
 Estimate how much time each of the activities will take, then plan
some extra time for each
 When you prepare your lesson plan, next to each activity indicate
how much time you expect it will take
 Plan a few minutes at the end of class to answer any remaining
questions and to sum up key points
 Plan an extra activity or discussion question in case you have time
left
 Be flexible –djust your lesson plan to students’ needs
Conclusion
 To be effective, the lesson plan does not have to be an
exhaustive document that describes each and every
possible classroom scenario. Nor does it have to
anticipate each and every student’s response or
question. Instead, it should provide you with a general
outline of your teaching goals, learning objectives, and
means to accomplish them. It is a reminder of what you
want to do and how you want to do it.
Your turn
Submit a lesson plan, using one of the
templates provided in the hand out. You can
collaborate with a partner or as a group.
Feel free and enjoy planning!!!!
Strategies for effective lesson planning

Strategies for effective lesson planning

  • 1.
    Strategies for EffectiveLesson Planning Master Yuranis Pedrozo -
  • 2.
    Strategies for Effective LessonPlanning  Stiliana Milkova Center for Research on Learning and Teaching  A lesson plan is the instructor’s road map of what students need to learn and how it will be done effectively during the class time. Before you plan your lesson, you will first need to identify the learning objectives for the class meeting. Then, you can design appropriate learning activities and develop strategies to obtain feedback on student learning. A successful lesson plan addresses and integrates these three key components:  Objectives for student learning  Teaching/learning activities  Strategies to check student understanding
  • 3.
    Steps for Preparinga Lesson Plan  Below are six steps to guide you when you create your first lesson plans. Each step is accompanied by a set of questions meant to prompt reflection and aid you in designing your teaching and learning activities. (1) Outline learning objectives  The first step is to determine what you want students to learn and be able to do at the end of class. To help you specify your objectives for student learning, answer the following questions:  What is the topic of the lesson?  What do I want students to learn?  What do I want them to understand and be able to do at the end of class?  What do I want them to take away from this particular lesson?
  • 4.
    (2) Develop theintroduction Develop a creative introduction to the topic to stimulate interest and encourage thinking. You can use a variety of approaches to engage students (e.g., personal anecdote, historical event, thought- provoking dilemma, real-world example, short video clip, practical application, probing question, etc.). Consider the following questions: How will I check whether students know anything about the topic or have any preconceived notions about it? What are some commonly held ideas (or possibly misconceptions) about this topic that students might be familiar with or might espouse? What will I do to introduce the topic?
  • 5.
    (3) Plan thespecific learning activities  Prepare several different ways of explaining the material (real-life examples, analogies, visuals, etc.) to catch the attention of more students and appeal to different learning styles. As you plan your examples and activities, estimate how much time you will spend on each. These questions would help you design the learning activities you will use:  What will I do to explain the topic?  What will I do to illustrate the topic in a different way?  How can I engage students in the topic?  What are some relevant real-life examples, analogies, or situations that can help students understand the topic?  What will students need to do to help them understand the topic better?
  • 6.
    (4) Plan tocheck for understanding  Now that you have explained the topic and illustrated it with different examples, you need to check for student understanding – how will you know that students are learning? Think about specific questions you can ask students in order to check for understanding, write them down, and then paraphrase them so that you are prepared to ask the questions in different ways, you can also ask yourself these questions:  What questions will I ask students to check for understanding?  What will I have students do to demonstrate that they are following?  Going back to my list of learning objectives, what activity can I have students do to check whether each of those has been accomplished?
  • 7.
    (5) Develop aconclusion and a preview (6) Create a realistic timeline  Estimate how much time each of the activities will take, then plan some extra time for each  When you prepare your lesson plan, next to each activity indicate how much time you expect it will take  Plan a few minutes at the end of class to answer any remaining questions and to sum up key points  Plan an extra activity or discussion question in case you have time left  Be flexible –djust your lesson plan to students’ needs
  • 8.
    Conclusion  To beeffective, the lesson plan does not have to be an exhaustive document that describes each and every possible classroom scenario. Nor does it have to anticipate each and every student’s response or question. Instead, it should provide you with a general outline of your teaching goals, learning objectives, and means to accomplish them. It is a reminder of what you want to do and how you want to do it.
  • 9.
    Your turn Submit alesson plan, using one of the templates provided in the hand out. You can collaborate with a partner or as a group. Feel free and enjoy planning!!!!