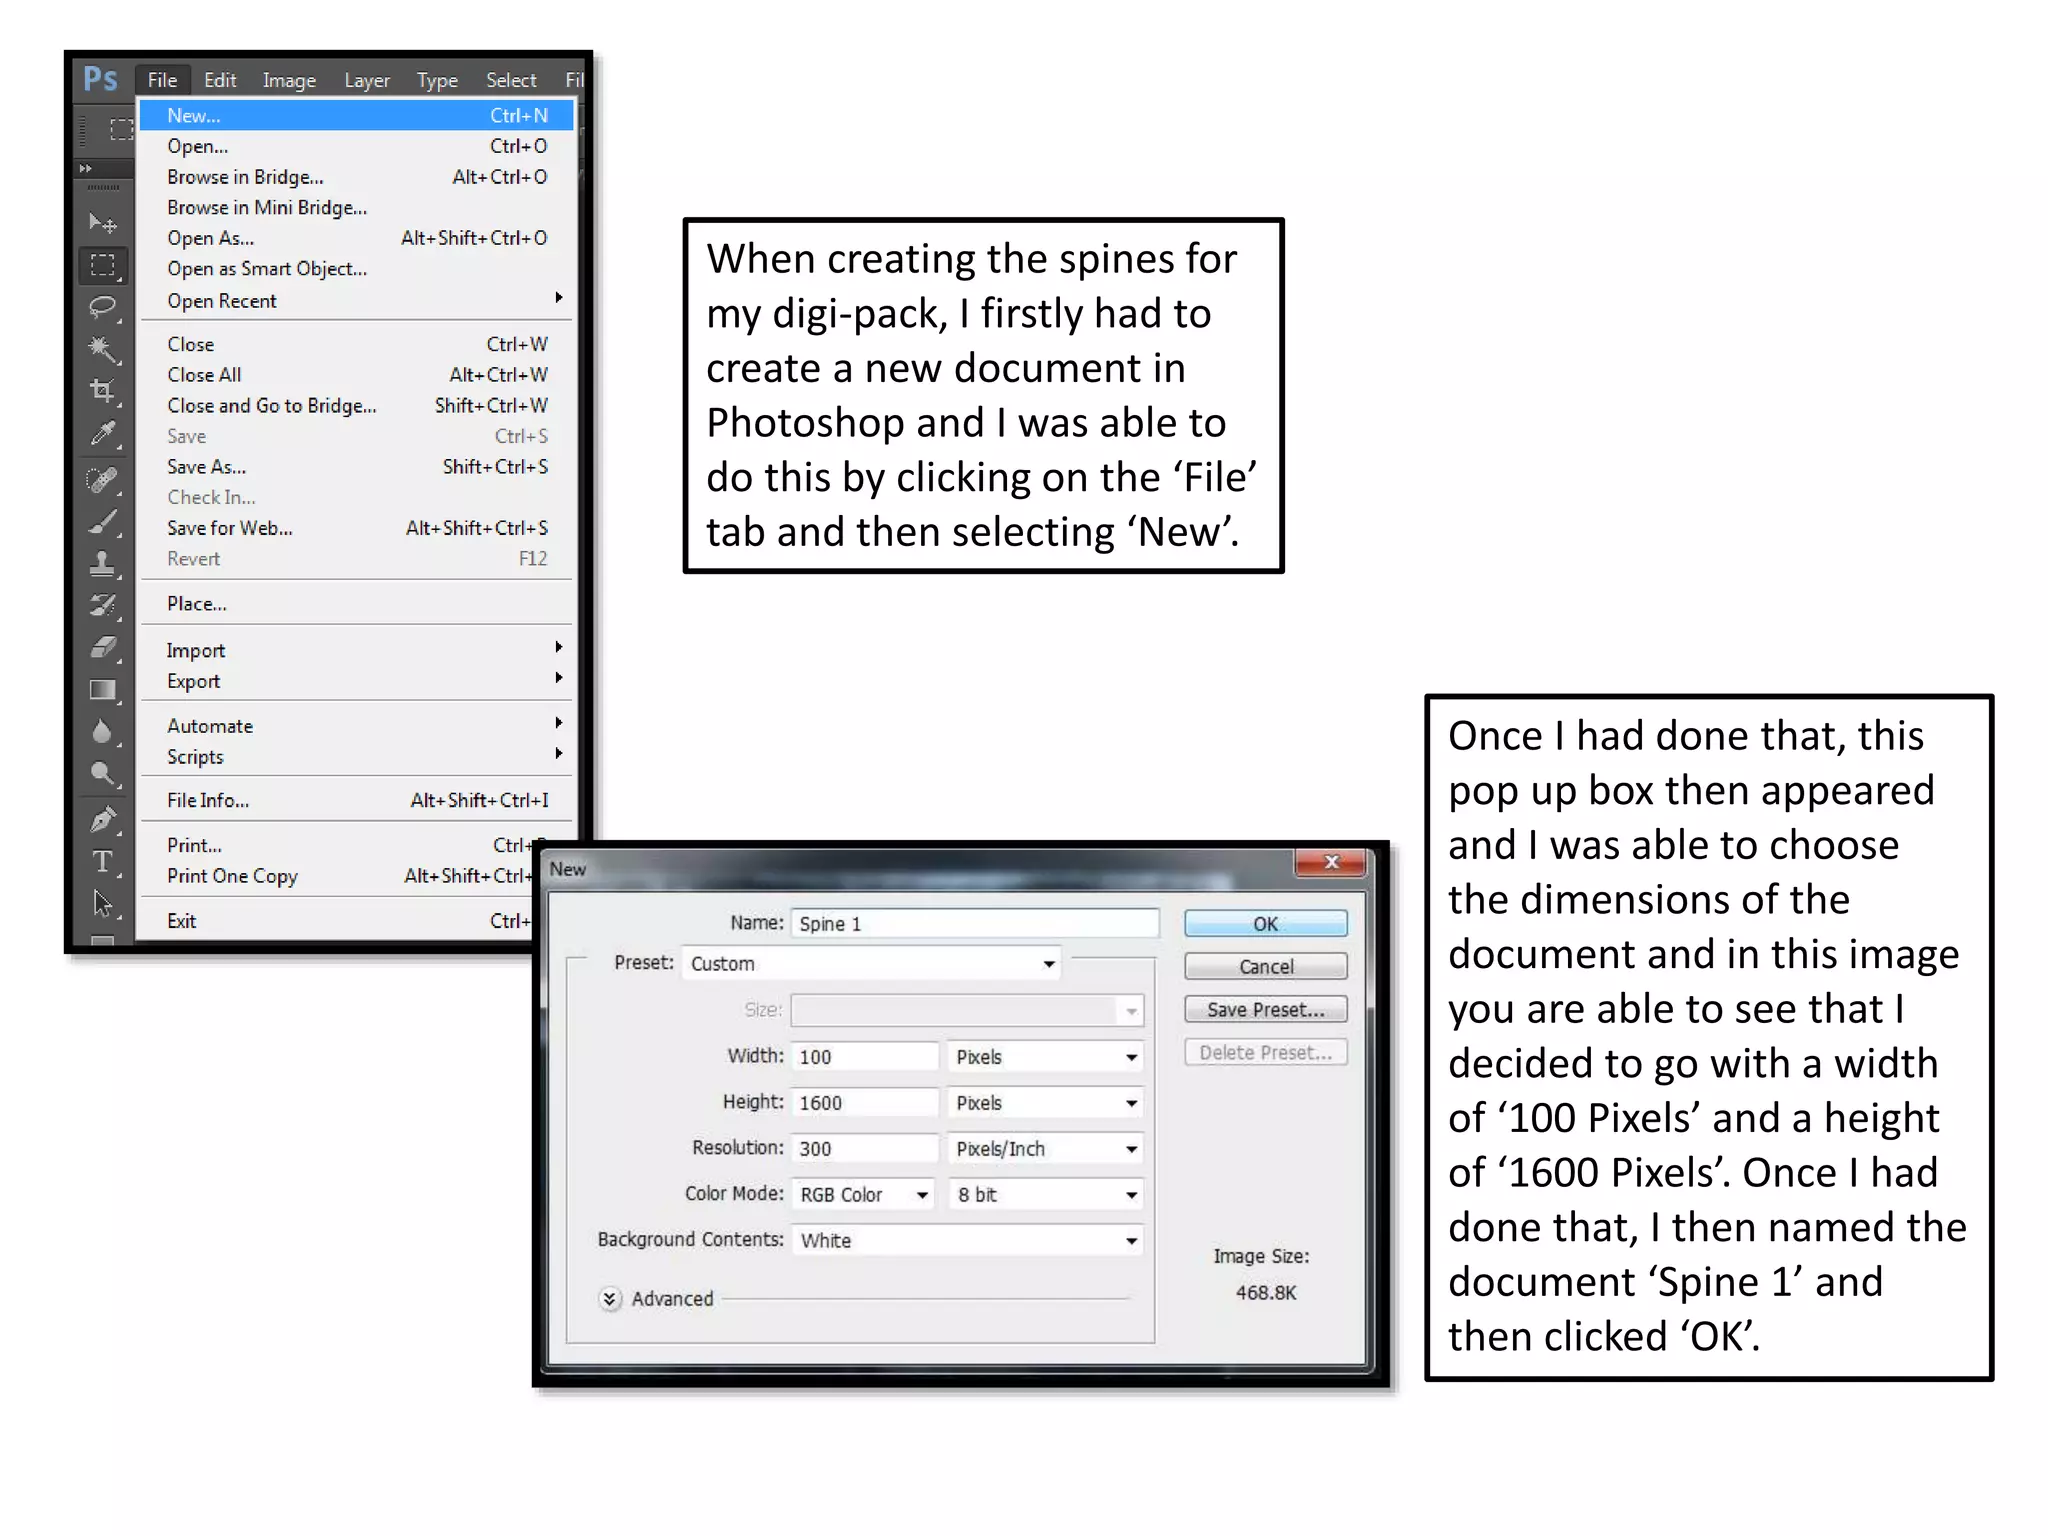
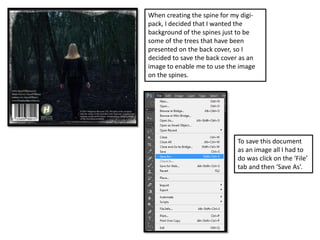
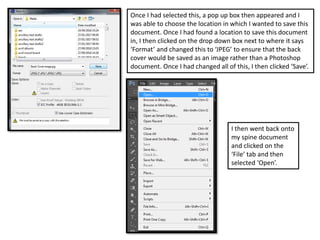
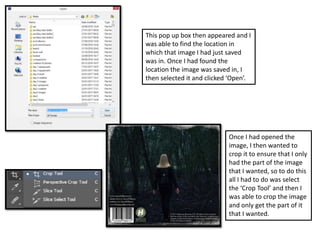
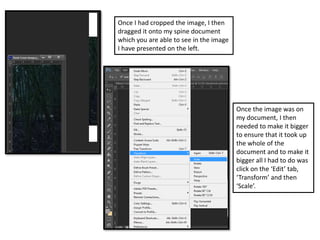
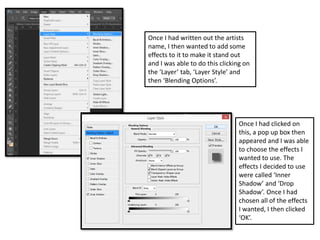
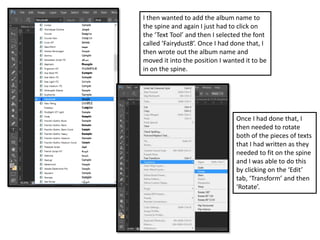
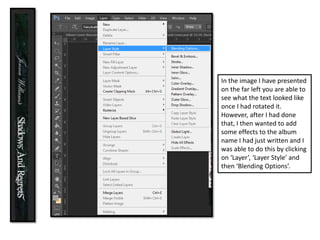
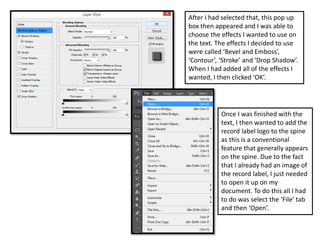
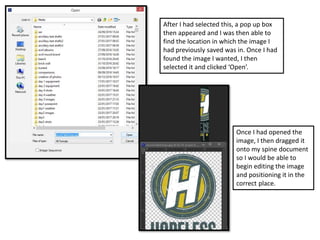
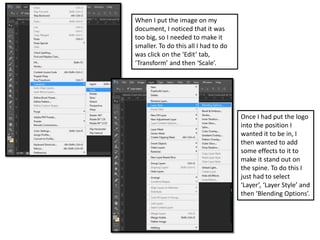
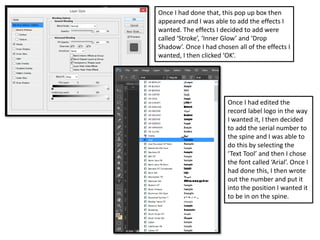
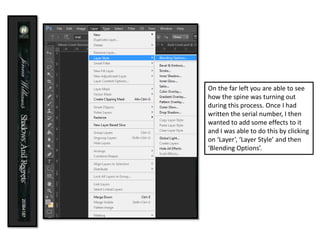
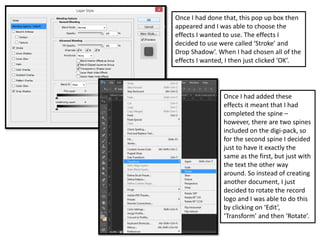
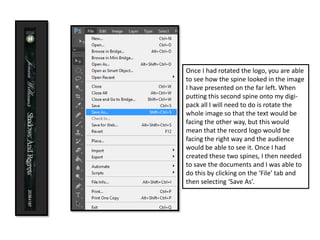
SlideShare a Scribd company logo
When creating the spines for
my digi-pack, I firstly had to
create a new document in
Photoshop and I was able to
do this by clicking on the ‘File’
tab and then selecting ‘New’.
Once I had done that, this
pop up box then appeared
and I was able to choose
the dimensions of the
document and in this image
you are able to see that I
decided to go with a width
of ‘100 Pixels’ and a height
of ‘1600 Pixels’. Once I had
done that, I then named the
document ‘Spine 1’ and
then clicked ‘OK’.
When creating the spine for my digi-
pack, I decided that I wanted the
background of the spines just to be
some of the trees that have been
presented on the back cover, so I
decided to save the back cover as an
image to enable me to use the image
on the spines.
To save this document
as an image all I had to
do was click on the ‘File’
tab and then ‘Save As’.
Once I had selected this, a pop up box then appeared and I
was able to choose the location in which I wanted to save this
document. Once I had found a location to save this document
in, I then clicked on the drop down box next to where it says
‘Format’ and changed this to ‘JPEG’ to ensure that the back
cover would be saved as an image rather than a Photoshop
document. Once I had changed all of this, I then clicked ‘Save’.
I then went back onto
my spine document
and clicked on the
‘File’ tab and then
selected ‘Open’.
This pop up box then appeared and I
was able to find the location in
which that image I had just saved
was in. Once I had found the
location the image was saved in, I
then selected it and clicked ‘Open’.
Once I had opened the
image, I then wanted to
crop it to ensure that I only
had the part of the image
that I wanted, so to do this
all I had to do was select
the ‘Crop Tool’ and then I
was able to crop the image
and only get the part of it
that I wanted.
Once I had cropped the image, I then
dragged it onto my spine document
which you are able to see in the image
I have presented on the left.
Once the image was on
my document, I then
needed to make it bigger
to ensure that it took up
the whole of the
document and to make it
bigger all I had to do was
click on the ‘Edit’ tab,
‘Transform’ and then
‘Scale’.
Once I had changed the size of the
image, you are then able to see how
the spine turned out in the image I
have presented on the left.
When I had the image I wanted
in place, I then wanted to add
the artists name to the spine and
to do this I selected the ‘Text
Tool’ and then chose the font
called ‘Palace Script MT’. Once I
had done that, I then wrote out
the artists name and put it into
the position I wanted it to be in.
Once I had written out the artists
name, I then wanted to add some
effects to it to make it stand out
and I was able to do this clicking on
the ‘Layer’ tab, ‘Layer Style’ and
then ‘Blending Options’.
Once I had clicked on
this, a pop up box then
appeared and I was able
to choose the effects I
wanted to use. The
effects I decided to use
were called ‘Inner
Shadow’ and ‘Drop
Shadow’. Once I had
chosen all of the effects
I wanted, I then clicked
‘OK’.
I then wanted to add the album name to
the spine and again I just had to click on
the ‘Text Tool’ and then I selected the font
called ‘Fairydust8’. Once I had done that, I
then wrote out the album name and
moved it into the position I wanted it to be
in on the spine.
Once I had done that, I
then needed to rotate
both of the pieces of texts
that I had written as they
needed to fit on the spine
and I was able to do this
by clicking on the ‘Edit’
tab, ‘Transform’ and then
‘Rotate’.
In the image I have presented
on the far left you are able to
see what the text looked like
once I had rotated it.
However, after I had done
that, I then wanted to add
some effects to the album
name I had just written and I
was able to do this by clicking
on ‘Layer’, ‘Layer Style’ and
then ‘Blending Options’.
After I had selected that, this pop up
box then appeared and I was able to
choose the effects I wanted to use on
the text. The effects I decided to use
were called ‘Bevel and Emboss’,
‘Contour’, ‘Stroke’ and ‘Drop Shadow’.
When I had added all of the effects I
wanted, I then clicked ‘OK’.
Once I was finished with the
text, I then wanted to add the
record label logo to the spine
as this is a conventional
feature that generally appears
on the spine. Due to the fact
that I already had an image of
the record label, I just needed
to open it up on my
document. To do this all I had
to do was select the ‘File’ tab
and then ‘Open’.
After I had selected this, a pop up box
then appeared and I was then able to
find the location in which the image I
had previously saved was in. Once I had
found the image I wanted, I then
selected it and clicked ‘Open’.
Once I had opened the
image, I then dragged it
onto my spine document
so I would be able to
begin editing the image
and positioning it in the
correct place.
When I put the image on my
document, I noticed that it was
too big, so I needed to make it
smaller. To do this all I had to do
was click on the ‘Edit’ tab,
‘Transform’ and then ‘Scale’.
Once I had put the logo
into the position I
wanted it to be in, I
then wanted to add
some effects to it to
make it stand out on
the spine. To do this I
just had to select
‘Layer’, ‘Layer Style’ and
then ‘Blending Options’.
Once I had done that, this pop up box then
appeared and I was able to add the effects I
wanted. The effects I decided to add were
called ‘Stroke’, ‘Inner Glow’ and ‘Drop
Shadow’. Once I had chosen all of the effects I
wanted, I then clicked ‘OK’.
Once I had edited the
record label logo in the way
I wanted it, I then decided
to add the serial number to
the spine and I was able to
do this by selecting the
‘Text Tool’ and then I chose
the font called ‘Arial’. Once I
had done this, I then wrote
out the number and put it
into the position I wanted it
to be in on the spine.
On the far left you are able to see
how the spine was turning out
during this process. Once I had
written the serial number, I then
wanted to add some effects to it
and I was able to do this by clicking
on ‘Layer’, ‘Layer Style’ and then
‘Blending Options’.
Once I had done that, this pop up box then
appeared and I was able to choose the
effects I wanted to use. The effects I
decided to use were called ‘Stroke’ and
Drop Shadow’. When I had chosen all of the
effects I wanted, I then just clicked ‘OK’.
Once I had added these
effects it meant that I had
completed the spine –
however, there are two spines
included on the digi-pack, so
for the second spine I decided
just to have it exactly the
same as the first, but just with
the text the other way
around. So instead of creating
another document, I just
decided to rotate the record
logo and I was able to do this
by clicking on ‘Edit’,
‘Transform’ and then ‘Rotate’.
Once I had rotated the logo, you are able
to see how the spine looked in the image
I have presented on the far left. When
putting this second spine onto my digi-
pack all I will need to do is rotate the
whole image so that the text would be
facing the other way, but this would
mean that the record logo would be
facing the right way and the audience
would be able to see it. Once I had
created these two spines, I then needed
to save the documents and I was able to
do this by clicking on the ‘File’ tab and
then selecting ‘Save As’.
This pop up box then appeared and
I was able to save the document in
the location I wanted it to be saved
in. Once I had found somewhere to
save the document, I then clicked
on the drop down box next to
where it says ‘Format’ and again I
changed it to ‘JPEG’ and this was to
ensure that the spine would be
saved as an image rather than a
Photoshop document. Once I had
made these changes, I then clicked
‘Save’. I went through this process
twice as I saved both the first spine
and the second spine as different
documents and images.

More Related Content

What's hot (13)

How to use picmonkey
How to use picmonkeyHow to use picmonkey
How to use picmonkey
 
Development diary front cover
Development diary front coverDevelopment diary front cover
Development diary front cover
 
Skills 3 p1
Skills 3 p1Skills 3 p1
Skills 3 p1
 
Editing images used in the Production of my magazine- Showing Technologies
Editing images used in the Production of my magazine- Showing TechnologiesEditing images used in the Production of my magazine- Showing Technologies
Editing images used in the Production of my magazine- Showing Technologies
 
3D game engine work flow
3D game engine work flow3D game engine work flow
3D game engine work flow
 
Digi-Pack Development Diary
Digi-Pack Development DiaryDigi-Pack Development Diary
Digi-Pack Development Diary
 
Question 4
Question 4Question 4
Question 4
 
Making the front cover (screenshots)
Making the front cover (screenshots)Making the front cover (screenshots)
Making the front cover (screenshots)
 
Skills development
Skills developmentSkills development
Skills development
 
How to Use Evernote
How to Use EvernoteHow to Use Evernote
How to Use Evernote
 
Unit 73- Criteria 4: Programming Sounds Into a Video Game.
Unit 73- Criteria 4: Programming Sounds Into a Video Game.Unit 73- Criteria 4: Programming Sounds Into a Video Game.
Unit 73- Criteria 4: Programming Sounds Into a Video Game.
 
Flickr tutorial
Flickr tutorialFlickr tutorial
Flickr tutorial
 
Picture manager
Picture managerPicture manager
Picture manager
 

Viewers also liked (20)

Written Answers
Written AnswersWritten Answers
Written Answers
 
Real world
Real worldReal world
Real world
 
Liiar analysis of music video
Liiar analysis of music videoLiiar analysis of music video
Liiar analysis of music video
 
Liiar analysis of ancillary texts
Liiar analysis of ancillary textsLiiar analysis of ancillary texts
Liiar analysis of ancillary texts
 
Feedback
FeedbackFeedback
Feedback
 
Last survey answers
Last survey answersLast survey answers
Last survey answers
 
Punk Responses
Punk ResponsesPunk Responses
Punk Responses
 
Hardware used evaluation
Hardware used evaluationHardware used evaluation
Hardware used evaluation
 
Survey monkey results
Survey monkey resultsSurvey monkey results
Survey monkey results
 
Digipack Images
Digipack ImagesDigipack Images
Digipack Images
 
Narrative
Narrative Narrative
Narrative
 
Audience Theory
Audience TheoryAudience Theory
Audience Theory
 
Personal Albums
Personal Albums Personal Albums
Personal Albums
 
Yellowcard conventions
Yellowcard conventionsYellowcard conventions
Yellowcard conventions
 
Paramore conventions
Paramore conventionsParamore conventions
Paramore conventions
 
From Under The Cork Tree Conventions
From Under The Cork Tree ConventionsFrom Under The Cork Tree Conventions
From Under The Cork Tree Conventions
 
Record label info
Record label infoRecord label info
Record label info
 
Fav photoshoot pics
Fav photoshoot picsFav photoshoot pics
Fav photoshoot pics
 
Day 4 Equipment
Day 4 Equipment Day 4 Equipment
Day 4 Equipment
 
Song Upload Onto Phone
Song Upload Onto PhoneSong Upload Onto Phone
Song Upload Onto Phone
 

Similar to Spines process

Evidence of Front Cover
Evidence of Front CoverEvidence of Front Cover
Evidence of Front Cover
TiaMaletta
 
Magazine task 8
Magazine task 8Magazine task 8
Magazine task 8
kannkarry
 
6. What have you learnt about technologies from the process of constructing t...
6. What have you learnt about technologies from the process of constructing t...6. What have you learnt about technologies from the process of constructing t...
6. What have you learnt about technologies from the process of constructing t...
caitlinhulse
 
Print screens of making my poster
Print screens of making my posterPrint screens of making my poster
Print screens of making my poster
fatemajohara
 
Front cover development diary
Front cover development diaryFront cover development diary
Front cover development diary
Liamattridge
 

Similar to Spines process (20)

Experiments
ExperimentsExperiments
Experiments
 
Evidence of Front Cover
Evidence of Front CoverEvidence of Front Cover
Evidence of Front Cover
 
Magazine task 8
Magazine task 8Magazine task 8
Magazine task 8
 
3. production experiments (fmp)
3. production experiments (fmp)3. production experiments (fmp)
3. production experiments (fmp)
 
Screenshots of music magazine ( first draft )
Screenshots of music magazine ( first draft )Screenshots of music magazine ( first draft )
Screenshots of music magazine ( first draft )
 
Fanzine evaluation
Fanzine evaluationFanzine evaluation
Fanzine evaluation
 
6. What have you learnt about technologies from the process of constructing t...
6. What have you learnt about technologies from the process of constructing t...6. What have you learnt about technologies from the process of constructing t...
6. What have you learnt about technologies from the process of constructing t...
 
Final Production
Final ProductionFinal Production
Final Production
 
Print screens of making my poster
Print screens of making my posterPrint screens of making my poster
Print screens of making my poster
 
How To Use PowerPoint and SlideShare To Upload Your Sims 2 Stories
How To Use PowerPoint and SlideShare To Upload Your Sims 2 StoriesHow To Use PowerPoint and SlideShare To Upload Your Sims 2 Stories
How To Use PowerPoint and SlideShare To Upload Your Sims 2 Stories
 
How I created my digipak
How I created my digipakHow I created my digipak
How I created my digipak
 
Magazine step guide
Magazine step guideMagazine step guide
Magazine step guide
 
Front cover development diary
Front cover development diaryFront cover development diary
Front cover development diary
 
Using photoshop
Using photoshopUsing photoshop
Using photoshop
 
Photoshop Elements Tutorial
Photoshop Elements TutorialPhotoshop Elements Tutorial
Photoshop Elements Tutorial
 
Editing Images
Editing ImagesEditing Images
Editing Images
 
Screenshots
ScreenshotsScreenshots
Screenshots
 
Screenshots of final poster
Screenshots of final posterScreenshots of final poster
Screenshots of final poster
 
4 photoshop (2)
4 photoshop (2)4 photoshop (2)
4 photoshop (2)
 
Fashion spread 4
Fashion spread 4Fashion spread 4
Fashion spread 4
 

More from Rebecca Witty (9)

Game Environment Survey
Game Environment Survey Game Environment Survey
Game Environment Survey
 
Final Character Design Feedback Survey
Final Character Design Feedback SurveyFinal Character Design Feedback Survey
Final Character Design Feedback Survey
 
Character Sketches Feedback Survey
Character Sketches Feedback SurveyCharacter Sketches Feedback Survey
Character Sketches Feedback Survey
 
Character Design - Survey Responses
Character Design - Survey ResponsesCharacter Design - Survey Responses
Character Design - Survey Responses
 
Final
FinalFinal
Final
 
Day3 images
Day3 imagesDay3 images
Day3 images
 
Day2 images
Day2 imagesDay2 images
Day2 images
 
Day1 images
Day1 imagesDay1 images
Day1 images
 
Day 1 equipment
Day 1 equipmentDay 1 equipment
Day 1 equipment
 

Recently uploaded

Industrial Training Report- AKTU Industrial Training Report
Industrial Training Report- AKTU Industrial Training ReportIndustrial Training Report- AKTU Industrial Training Report
Industrial Training Report- AKTU Industrial Training Report
Avinash Rai
 

Recently uploaded (20)

MARUTI SUZUKI- A Successful Joint Venture in India.pptx
MARUTI SUZUKI- A Successful Joint Venture in India.pptxMARUTI SUZUKI- A Successful Joint Venture in India.pptx
MARUTI SUZUKI- A Successful Joint Venture in India.pptx
 
Basic phrases for greeting and assisting costumers
Basic phrases for greeting and assisting costumersBasic phrases for greeting and assisting costumers
Basic phrases for greeting and assisting costumers
 
aaaaaaaaaaaaaaaaaaaaaaaaaaaaaaaaaaaaaaaaa
aaaaaaaaaaaaaaaaaaaaaaaaaaaaaaaaaaaaaaaaaaaaaaaaaaaaaaaaaaaaaaaaaaaaaaaaaaaaaaaaaa
aaaaaaaaaaaaaaaaaaaaaaaaaaaaaaaaaaaaaaaaa
 
Industrial Training Report- AKTU Industrial Training Report
Industrial Training Report- AKTU Industrial Training ReportIndustrial Training Report- AKTU Industrial Training Report
Industrial Training Report- AKTU Industrial Training Report
 
Salient features of Environment protection Act 1986.pptx
Salient features of Environment protection Act 1986.pptxSalient features of Environment protection Act 1986.pptx
Salient features of Environment protection Act 1986.pptx
 
B.ed spl. HI pdusu exam paper-2023-24.pdf
B.ed spl. HI pdusu exam paper-2023-24.pdfB.ed spl. HI pdusu exam paper-2023-24.pdf
B.ed spl. HI pdusu exam paper-2023-24.pdf
 
Overview on Edible Vaccine: Pros & Cons with Mechanism
Overview on Edible Vaccine: Pros & Cons with MechanismOverview on Edible Vaccine: Pros & Cons with Mechanism
Overview on Edible Vaccine: Pros & Cons with Mechanism
 
GIÁO ÁN DẠY THÊM (KẾ HOẠCH BÀI BUỔI 2) - TIẾNG ANH 8 GLOBAL SUCCESS (2 CỘT) N...
GIÁO ÁN DẠY THÊM (KẾ HOẠCH BÀI BUỔI 2) - TIẾNG ANH 8 GLOBAL SUCCESS (2 CỘT) N...GIÁO ÁN DẠY THÊM (KẾ HOẠCH BÀI BUỔI 2) - TIẾNG ANH 8 GLOBAL SUCCESS (2 CỘT) N...
GIÁO ÁN DẠY THÊM (KẾ HOẠCH BÀI BUỔI 2) - TIẾNG ANH 8 GLOBAL SUCCESS (2 CỘT) N...
 
How libraries can support authors with open access requirements for UKRI fund...
How libraries can support authors with open access requirements for UKRI fund...How libraries can support authors with open access requirements for UKRI fund...
How libraries can support authors with open access requirements for UKRI fund...
 
Students, digital devices and success - Andreas Schleicher - 27 May 2024..pptx
Students, digital devices and success - Andreas Schleicher - 27 May 2024..pptxStudents, digital devices and success - Andreas Schleicher - 27 May 2024..pptx
Students, digital devices and success - Andreas Schleicher - 27 May 2024..pptx
 
The approach at University of Liverpool.pptx
The approach at University of Liverpool.pptxThe approach at University of Liverpool.pptx
The approach at University of Liverpool.pptx
 
Danh sách HSG Bộ môn cấp trường - Cấp THPT.pdf
Danh sách HSG Bộ môn cấp trường - Cấp THPT.pdfDanh sách HSG Bộ môn cấp trường - Cấp THPT.pdf
Danh sách HSG Bộ môn cấp trường - Cấp THPT.pdf
 
The geography of Taylor Swift - some ideas
The geography of Taylor Swift - some ideasThe geography of Taylor Swift - some ideas
The geography of Taylor Swift - some ideas
 
How to Create Map Views in the Odoo 17 ERP
How to Create Map Views in the Odoo 17 ERPHow to Create Map Views in the Odoo 17 ERP
How to Create Map Views in the Odoo 17 ERP
 
INU_CAPSTONEDESIGN_비밀번호486_업로드용 발표자료.pdf
INU_CAPSTONEDESIGN_비밀번호486_업로드용 발표자료.pdfINU_CAPSTONEDESIGN_비밀번호486_업로드용 발표자료.pdf
INU_CAPSTONEDESIGN_비밀번호486_업로드용 발표자료.pdf
 
Embracing GenAI - A Strategic Imperative
Embracing GenAI - A Strategic ImperativeEmbracing GenAI - A Strategic Imperative
Embracing GenAI - A Strategic Imperative
 
NLC-2024-Orientation-for-RO-SDO (1).pptx
NLC-2024-Orientation-for-RO-SDO (1).pptxNLC-2024-Orientation-for-RO-SDO (1).pptx
NLC-2024-Orientation-for-RO-SDO (1).pptx
 
50 ĐỀ LUYỆN THI IOE LỚP 9 - NĂM HỌC 2022-2023 (CÓ LINK HÌNH, FILE AUDIO VÀ ĐÁ...
50 ĐỀ LUYỆN THI IOE LỚP 9 - NĂM HỌC 2022-2023 (CÓ LINK HÌNH, FILE AUDIO VÀ ĐÁ...50 ĐỀ LUYỆN THI IOE LỚP 9 - NĂM HỌC 2022-2023 (CÓ LINK HÌNH, FILE AUDIO VÀ ĐÁ...
50 ĐỀ LUYỆN THI IOE LỚP 9 - NĂM HỌC 2022-2023 (CÓ LINK HÌNH, FILE AUDIO VÀ ĐÁ...
 
Home assignment II on Spectroscopy 2024 Answers.pdf
Home assignment II on Spectroscopy 2024 Answers.pdfHome assignment II on Spectroscopy 2024 Answers.pdf
Home assignment II on Spectroscopy 2024 Answers.pdf
 
Palestine last event orientationfvgnh .pptx
Palestine last event orientationfvgnh .pptxPalestine last event orientationfvgnh .pptx
Palestine last event orientationfvgnh .pptx
 

Spines process

  • 1. When creating the spines for my digi-pack, I firstly had to create a new document in Photoshop and I was able to do this by clicking on the ‘File’ tab and then selecting ‘New’. Once I had done that, this pop up box then appeared and I was able to choose the dimensions of the document and in this image you are able to see that I decided to go with a width of ‘100 Pixels’ and a height of ‘1600 Pixels’. Once I had done that, I then named the document ‘Spine 1’ and then clicked ‘OK’.
  • 2. When creating the spine for my digi- pack, I decided that I wanted the background of the spines just to be some of the trees that have been presented on the back cover, so I decided to save the back cover as an image to enable me to use the image on the spines. To save this document as an image all I had to do was click on the ‘File’ tab and then ‘Save As’.
  • 3. Once I had selected this, a pop up box then appeared and I was able to choose the location in which I wanted to save this document. Once I had found a location to save this document in, I then clicked on the drop down box next to where it says ‘Format’ and changed this to ‘JPEG’ to ensure that the back cover would be saved as an image rather than a Photoshop document. Once I had changed all of this, I then clicked ‘Save’. I then went back onto my spine document and clicked on the ‘File’ tab and then selected ‘Open’.
  • 4. This pop up box then appeared and I was able to find the location in which that image I had just saved was in. Once I had found the location the image was saved in, I then selected it and clicked ‘Open’. Once I had opened the image, I then wanted to crop it to ensure that I only had the part of the image that I wanted, so to do this all I had to do was select the ‘Crop Tool’ and then I was able to crop the image and only get the part of it that I wanted.
  • 5. Once I had cropped the image, I then dragged it onto my spine document which you are able to see in the image I have presented on the left. Once the image was on my document, I then needed to make it bigger to ensure that it took up the whole of the document and to make it bigger all I had to do was click on the ‘Edit’ tab, ‘Transform’ and then ‘Scale’.
  • 6. Once I had changed the size of the image, you are then able to see how the spine turned out in the image I have presented on the left. When I had the image I wanted in place, I then wanted to add the artists name to the spine and to do this I selected the ‘Text Tool’ and then chose the font called ‘Palace Script MT’. Once I had done that, I then wrote out the artists name and put it into the position I wanted it to be in.
  • 7. Once I had written out the artists name, I then wanted to add some effects to it to make it stand out and I was able to do this clicking on the ‘Layer’ tab, ‘Layer Style’ and then ‘Blending Options’. Once I had clicked on this, a pop up box then appeared and I was able to choose the effects I wanted to use. The effects I decided to use were called ‘Inner Shadow’ and ‘Drop Shadow’. Once I had chosen all of the effects I wanted, I then clicked ‘OK’.
  • 8. I then wanted to add the album name to the spine and again I just had to click on the ‘Text Tool’ and then I selected the font called ‘Fairydust8’. Once I had done that, I then wrote out the album name and moved it into the position I wanted it to be in on the spine. Once I had done that, I then needed to rotate both of the pieces of texts that I had written as they needed to fit on the spine and I was able to do this by clicking on the ‘Edit’ tab, ‘Transform’ and then ‘Rotate’.
  • 9. In the image I have presented on the far left you are able to see what the text looked like once I had rotated it. However, after I had done that, I then wanted to add some effects to the album name I had just written and I was able to do this by clicking on ‘Layer’, ‘Layer Style’ and then ‘Blending Options’.
  • 10. After I had selected that, this pop up box then appeared and I was able to choose the effects I wanted to use on the text. The effects I decided to use were called ‘Bevel and Emboss’, ‘Contour’, ‘Stroke’ and ‘Drop Shadow’. When I had added all of the effects I wanted, I then clicked ‘OK’. Once I was finished with the text, I then wanted to add the record label logo to the spine as this is a conventional feature that generally appears on the spine. Due to the fact that I already had an image of the record label, I just needed to open it up on my document. To do this all I had to do was select the ‘File’ tab and then ‘Open’.
  • 11. After I had selected this, a pop up box then appeared and I was then able to find the location in which the image I had previously saved was in. Once I had found the image I wanted, I then selected it and clicked ‘Open’. Once I had opened the image, I then dragged it onto my spine document so I would be able to begin editing the image and positioning it in the correct place.
  • 12. When I put the image on my document, I noticed that it was too big, so I needed to make it smaller. To do this all I had to do was click on the ‘Edit’ tab, ‘Transform’ and then ‘Scale’. Once I had put the logo into the position I wanted it to be in, I then wanted to add some effects to it to make it stand out on the spine. To do this I just had to select ‘Layer’, ‘Layer Style’ and then ‘Blending Options’.
  • 13. Once I had done that, this pop up box then appeared and I was able to add the effects I wanted. The effects I decided to add were called ‘Stroke’, ‘Inner Glow’ and ‘Drop Shadow’. Once I had chosen all of the effects I wanted, I then clicked ‘OK’. Once I had edited the record label logo in the way I wanted it, I then decided to add the serial number to the spine and I was able to do this by selecting the ‘Text Tool’ and then I chose the font called ‘Arial’. Once I had done this, I then wrote out the number and put it into the position I wanted it to be in on the spine.
  • 14. On the far left you are able to see how the spine was turning out during this process. Once I had written the serial number, I then wanted to add some effects to it and I was able to do this by clicking on ‘Layer’, ‘Layer Style’ and then ‘Blending Options’.
  • 15. Once I had done that, this pop up box then appeared and I was able to choose the effects I wanted to use. The effects I decided to use were called ‘Stroke’ and Drop Shadow’. When I had chosen all of the effects I wanted, I then just clicked ‘OK’. Once I had added these effects it meant that I had completed the spine – however, there are two spines included on the digi-pack, so for the second spine I decided just to have it exactly the same as the first, but just with the text the other way around. So instead of creating another document, I just decided to rotate the record logo and I was able to do this by clicking on ‘Edit’, ‘Transform’ and then ‘Rotate’.
  • 16. Once I had rotated the logo, you are able to see how the spine looked in the image I have presented on the far left. When putting this second spine onto my digi- pack all I will need to do is rotate the whole image so that the text would be facing the other way, but this would mean that the record logo would be facing the right way and the audience would be able to see it. Once I had created these two spines, I then needed to save the documents and I was able to do this by clicking on the ‘File’ tab and then selecting ‘Save As’.
  • 17. This pop up box then appeared and I was able to save the document in the location I wanted it to be saved in. Once I had found somewhere to save the document, I then clicked on the drop down box next to where it says ‘Format’ and again I changed it to ‘JPEG’ and this was to ensure that the spine would be saved as an image rather than a Photoshop document. Once I had made these changes, I then clicked ‘Save’. I went through this process twice as I saved both the first spine and the second spine as different documents and images.