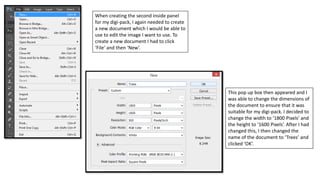
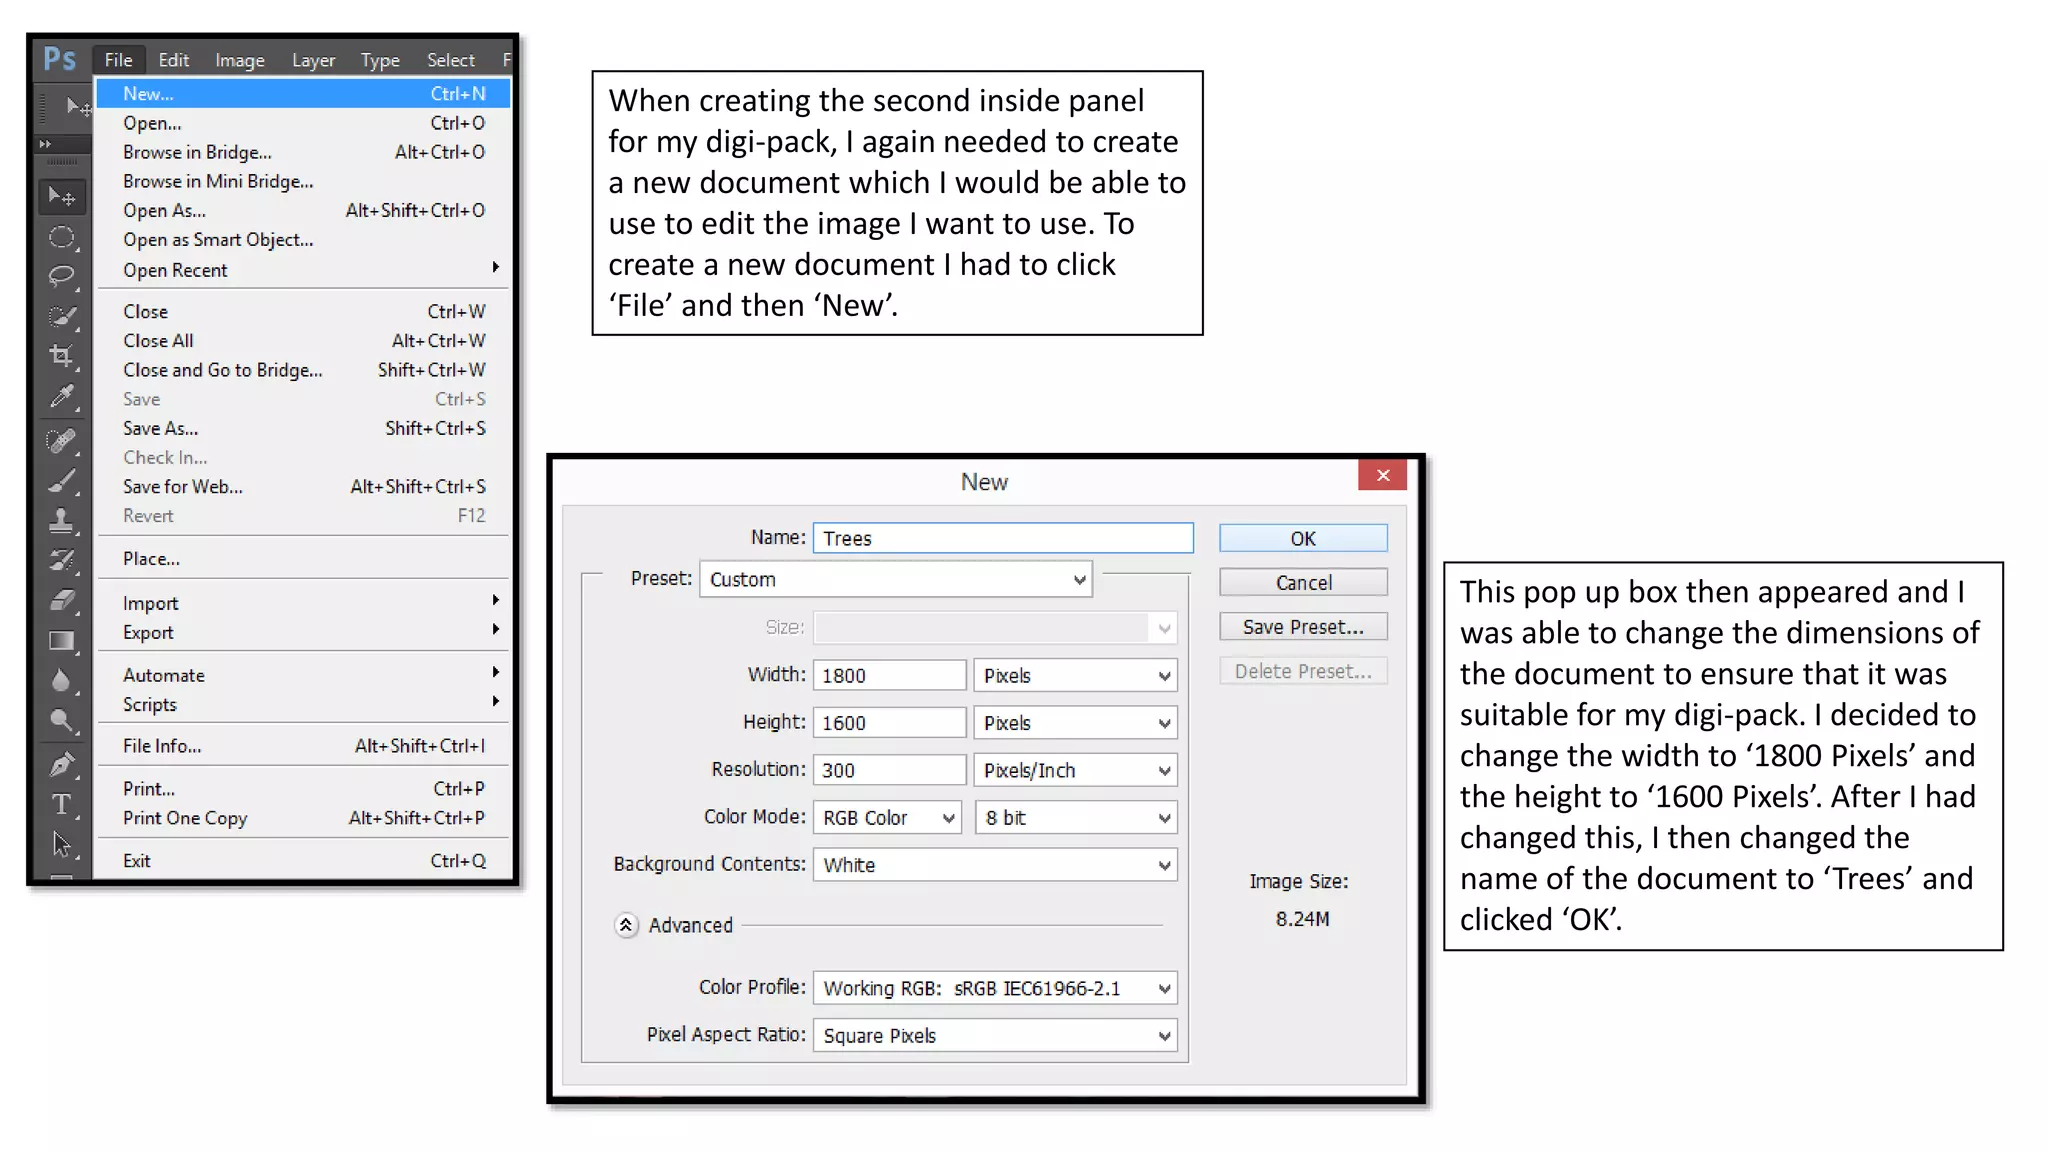
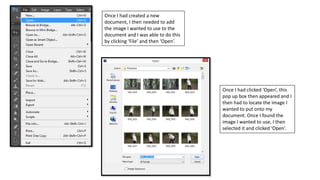
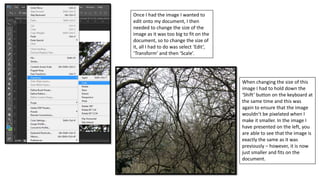
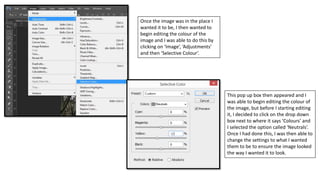
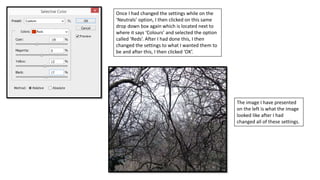
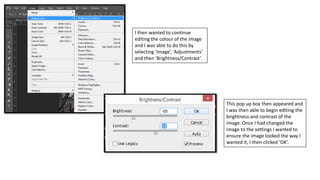
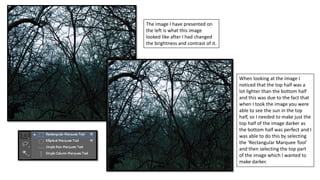
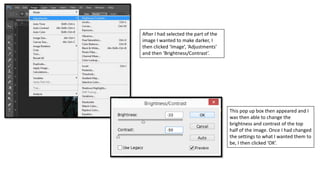
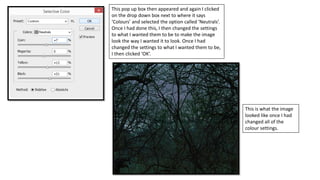
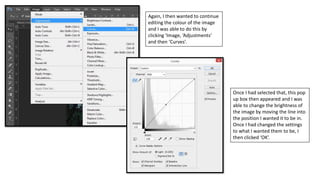
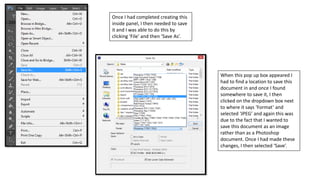
When creating the second inside panel
for my digi-pack, I again needed to create
a new document which I would be able to
use to edit the image I want to use. To
create a new document I had to click
‘File’ and then ‘New’.
This pop up box then appeared and I
was able to change the dimensions of
the document to ensure that it was
suitable for my digi-pack. I decided to
change the width to ‘1800 Pixels’ and
the height to ‘1600 Pixels’. After I had
changed this, I then changed the
name of the document to ‘Trees’ and
clicked ‘OK’.
Once I had created a new
document, I then needed to add
the image I wanted to use to the
document and I was able to do this
by clicking ‘File’ and then ‘Open’.
Once I had clicked ‘Open’, this
pop up box then appeared and I
then had to locate the image I
wanted to put onto my
document. Once I found the
image I wanted to use, I then
selected it and clicked ‘Open’.
Once I had the image I wanted to
edit onto my document, I then
needed to change the size of the
image as it was too big to fit on the
document, so to change the size of
it, all I had to do was select ‘Edit’,
‘Transform’ and then ‘Scale’.
When changing the size of this
image I had to hold down the
‘Shift’ button on the keyboard at
the same time and this was
again to ensure that the image
wouldn’t be pixelated when I
make it smaller. In the image I
have presented on the left, you
are able to see that the image is
exactly the same as it was
previously – however, it is now
just smaller and fits on the
document.
Once the image was in the place I
wanted it to be, I then wanted to
begin editing the colour of the
image and I was able to do this by
clicking on ‘Image’, ‘Adjustments’
and then ‘Selective Colour’.
This pop up box then appeared and I
was able to begin editing the colour of
the image, but before I starting editing
it, I decided to click on the drop down
box next to where it says ‘Colours’ and
I selected the option called ‘Neutrals’.
Once I had done this, I was then able to
change the settings to what I wanted
them to be to ensure the image looked
the way I wanted it to look.
Once I had changed the settings while on the
‘Neutrals’ option, I then clicked on this same
drop down box again which is located next to
where it says ‘Colours’ and selected the option
called ‘Reds’. After I had done this, I then
changed the settings to what I wanted them to
be and after this, I then clicked ‘OK’.
The image I have presented
on the left is what the image
looked like after I had
changed all of these settings.
I then wanted to continue
editing the colour of the image
and I was able to do this by
selecting ‘Image’, ‘Adjustments’
and then ‘Brightness/Contrast’.
This pop up box then appeared and
I was then able to begin editing the
brightness and contrast of the
image. Once I had changed the
image to the settings I wanted to
ensure the image looked the way I
wanted it, I then clicked ‘OK’.
The image I have presented on
the left is what this image
looked like after I had changed
the brightness and contrast of it.
When looking at the image I
noticed that the top half was a
lot lighter than the bottom half
and this was due to the fact that
when I took the image you were
able to see the sun in the top
half, so I needed to make just the
top half of the image darker as
the bottom half was perfect and I
was able to do this by selecting
the ‘Rectangular Marquee Tool’
and then selecting the top part
of the image which I wanted to
make darker.
After I had selected the part of the
image I wanted to make darker, I
then clicked ‘Image’, ‘Adjustments’
and then ‘Brightness/Contrast’.
This pop up box then appeared and I
was then able to change the
brightness and contrast of the top
half of the image. Once I had changed
the settings to what I wanted them to
be, I then clicked ‘OK’.
In the image on the left you are
able to see what the image looked
like after I had changed the
brightness and contrast of it.
I then wanted to continue
editing the colour of the top
half of the image and I was
able to do this by clicking
‘Image’, ‘Adjustments’ and
then ‘Selective Colour’.
This pop up box then appeared and again I clicked
on the drop down box next to where it says
‘Colours’ and selected the option called ‘Neutrals’.
Once I had done this, I then changed the settings
to what I wanted them to be to make the image
look the way I wanted it to look. Once I had
changed the settings to what I wanted them to be,
I then clicked ‘OK’.
This is what the image
looked like once I had
changed all of the
colour settings.
Again, I then wanted to continue
editing the colour of the image
and I was able to do this by
clicking ‘Image, ‘Adjustments’
and then ‘Curves’.
Once I had selected that, this pop
up box then appeared and I was
able to change the brightness of
the image by moving the line into
the position I wanted it to be in.
Once I had changed the settings
to what I wanted them to be, I
then clicked ‘OK’.
Once I had completed creating this
inside panel, I then needed to save
it and I was able to do this by
clicking ‘File’ and then ‘Save As’.
When this pop up box appeared I
had to find a location to save this
document in and once I found
somewhere to save it, I then
clicked on the dropdown box next
to where it says ‘Format’ and
selected ‘JPEG’ and again this was
due to the fact that I wanted to
save this document as an image
rather than as a Photoshop
document. Once I had made these
changes, I then selected ‘Save’.

Trees process

  • 1.
    When creating thesecond inside panel for my digi-pack, I again needed to create a new document which I would be able to use to edit the image I want to use. To create a new document I had to click ‘File’ and then ‘New’. This pop up box then appeared and I was able to change the dimensions of the document to ensure that it was suitable for my digi-pack. I decided to change the width to ‘1800 Pixels’ and the height to ‘1600 Pixels’. After I had changed this, I then changed the name of the document to ‘Trees’ and clicked ‘OK’.
  • 2.
    Once I hadcreated a new document, I then needed to add the image I wanted to use to the document and I was able to do this by clicking ‘File’ and then ‘Open’. Once I had clicked ‘Open’, this pop up box then appeared and I then had to locate the image I wanted to put onto my document. Once I found the image I wanted to use, I then selected it and clicked ‘Open’.
  • 3.
    Once I hadthe image I wanted to edit onto my document, I then needed to change the size of the image as it was too big to fit on the document, so to change the size of it, all I had to do was select ‘Edit’, ‘Transform’ and then ‘Scale’. When changing the size of this image I had to hold down the ‘Shift’ button on the keyboard at the same time and this was again to ensure that the image wouldn’t be pixelated when I make it smaller. In the image I have presented on the left, you are able to see that the image is exactly the same as it was previously – however, it is now just smaller and fits on the document.
  • 4.
    Once the imagewas in the place I wanted it to be, I then wanted to begin editing the colour of the image and I was able to do this by clicking on ‘Image’, ‘Adjustments’ and then ‘Selective Colour’. This pop up box then appeared and I was able to begin editing the colour of the image, but before I starting editing it, I decided to click on the drop down box next to where it says ‘Colours’ and I selected the option called ‘Neutrals’. Once I had done this, I was then able to change the settings to what I wanted them to be to ensure the image looked the way I wanted it to look.
  • 5.
    Once I hadchanged the settings while on the ‘Neutrals’ option, I then clicked on this same drop down box again which is located next to where it says ‘Colours’ and selected the option called ‘Reds’. After I had done this, I then changed the settings to what I wanted them to be and after this, I then clicked ‘OK’. The image I have presented on the left is what the image looked like after I had changed all of these settings.
  • 6.
    I then wantedto continue editing the colour of the image and I was able to do this by selecting ‘Image’, ‘Adjustments’ and then ‘Brightness/Contrast’. This pop up box then appeared and I was then able to begin editing the brightness and contrast of the image. Once I had changed the image to the settings I wanted to ensure the image looked the way I wanted it, I then clicked ‘OK’.
  • 7.
    The image Ihave presented on the left is what this image looked like after I had changed the brightness and contrast of it. When looking at the image I noticed that the top half was a lot lighter than the bottom half and this was due to the fact that when I took the image you were able to see the sun in the top half, so I needed to make just the top half of the image darker as the bottom half was perfect and I was able to do this by selecting the ‘Rectangular Marquee Tool’ and then selecting the top part of the image which I wanted to make darker.
  • 8.
    After I hadselected the part of the image I wanted to make darker, I then clicked ‘Image’, ‘Adjustments’ and then ‘Brightness/Contrast’. This pop up box then appeared and I was then able to change the brightness and contrast of the top half of the image. Once I had changed the settings to what I wanted them to be, I then clicked ‘OK’.
  • 9.
    In the imageon the left you are able to see what the image looked like after I had changed the brightness and contrast of it. I then wanted to continue editing the colour of the top half of the image and I was able to do this by clicking ‘Image’, ‘Adjustments’ and then ‘Selective Colour’.
  • 10.
    This pop upbox then appeared and again I clicked on the drop down box next to where it says ‘Colours’ and selected the option called ‘Neutrals’. Once I had done this, I then changed the settings to what I wanted them to be to make the image look the way I wanted it to look. Once I had changed the settings to what I wanted them to be, I then clicked ‘OK’. This is what the image looked like once I had changed all of the colour settings.
  • 11.
    Again, I thenwanted to continue editing the colour of the image and I was able to do this by clicking ‘Image, ‘Adjustments’ and then ‘Curves’. Once I had selected that, this pop up box then appeared and I was able to change the brightness of the image by moving the line into the position I wanted it to be in. Once I had changed the settings to what I wanted them to be, I then clicked ‘OK’.
  • 12.
    Once I hadcompleted creating this inside panel, I then needed to save it and I was able to do this by clicking ‘File’ and then ‘Save As’. When this pop up box appeared I had to find a location to save this document in and once I found somewhere to save it, I then clicked on the dropdown box next to where it says ‘Format’ and selected ‘JPEG’ and again this was due to the fact that I wanted to save this document as an image rather than as a Photoshop document. Once I had made these changes, I then selected ‘Save’.