Downloaded 133 times

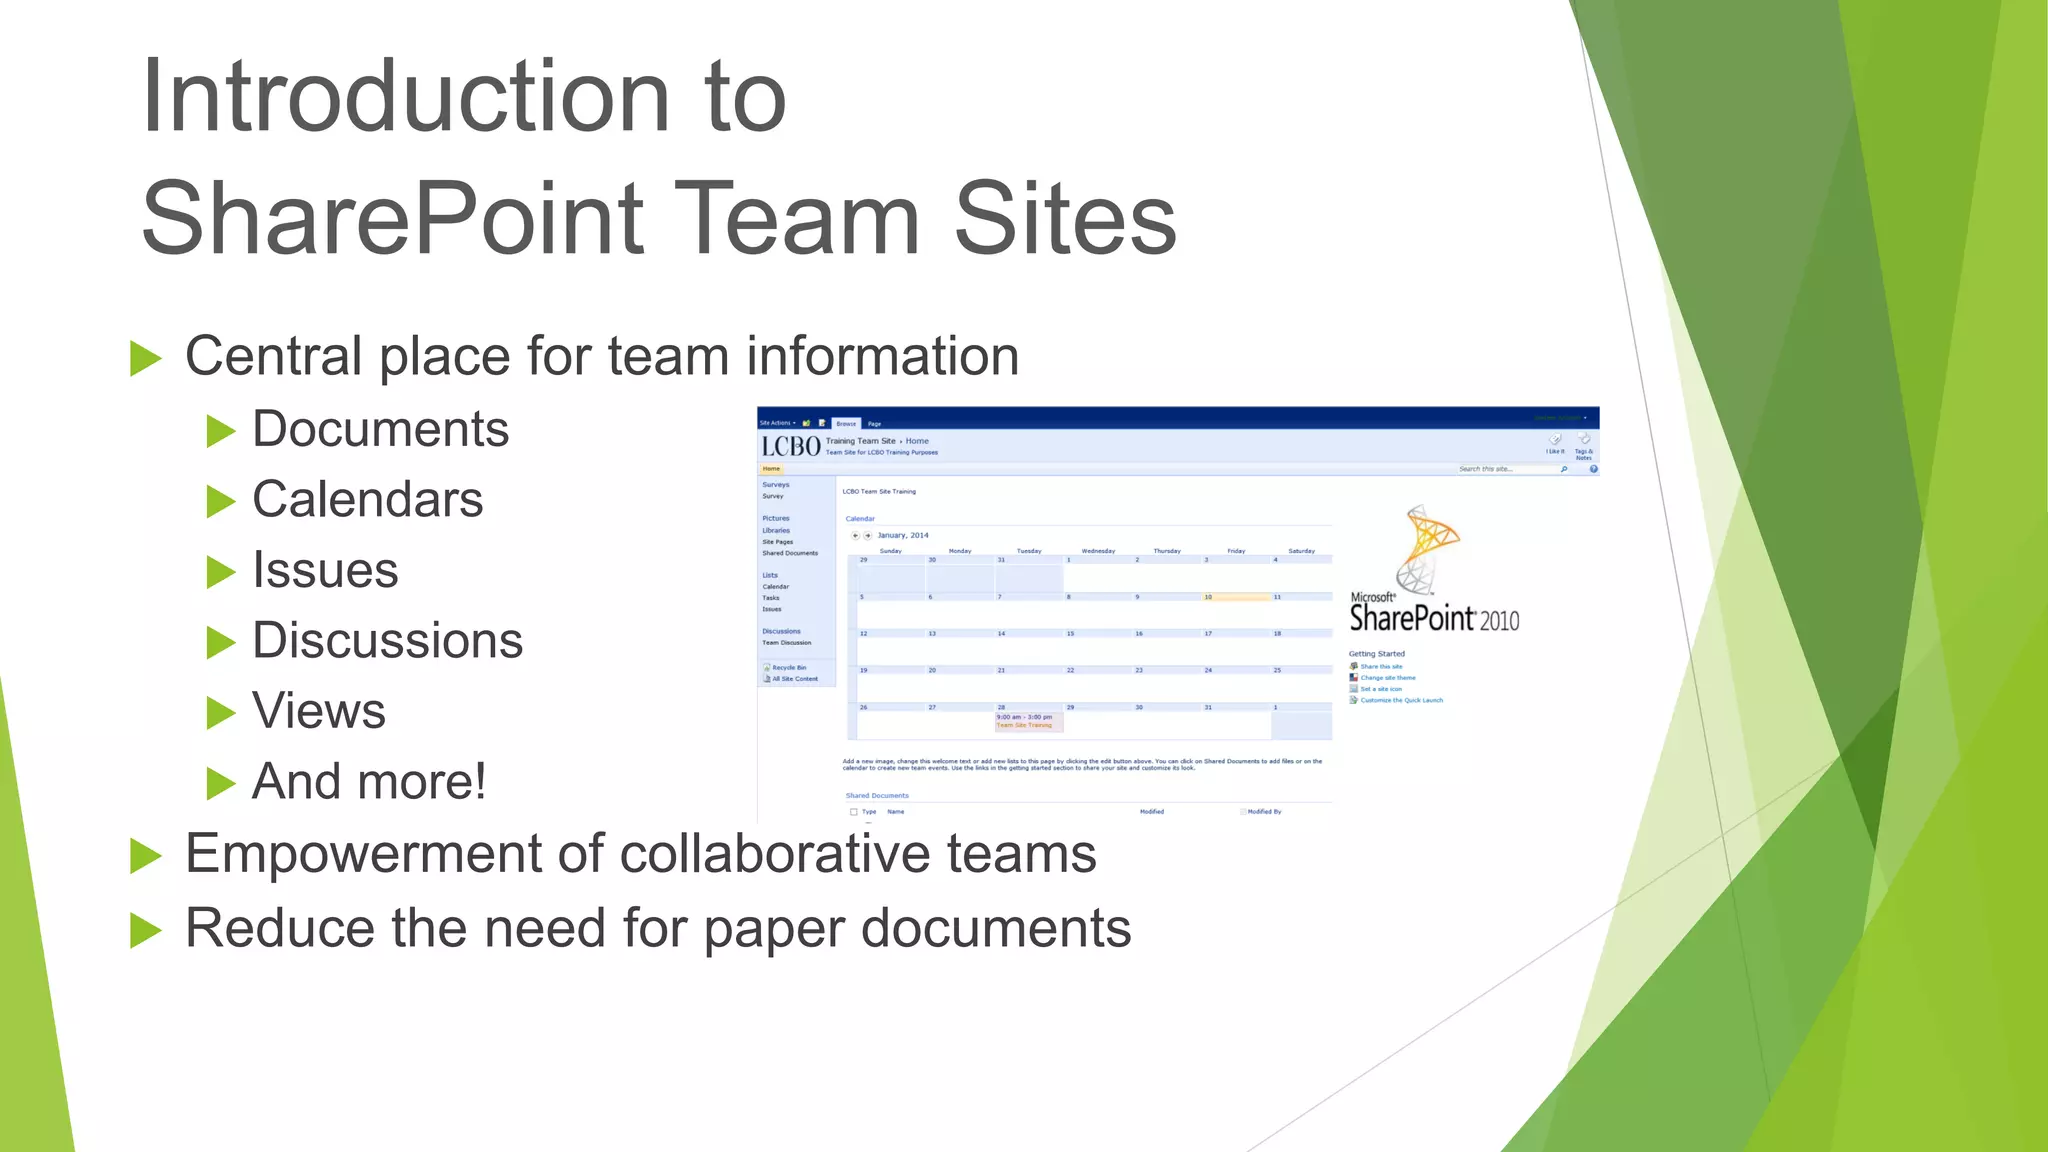

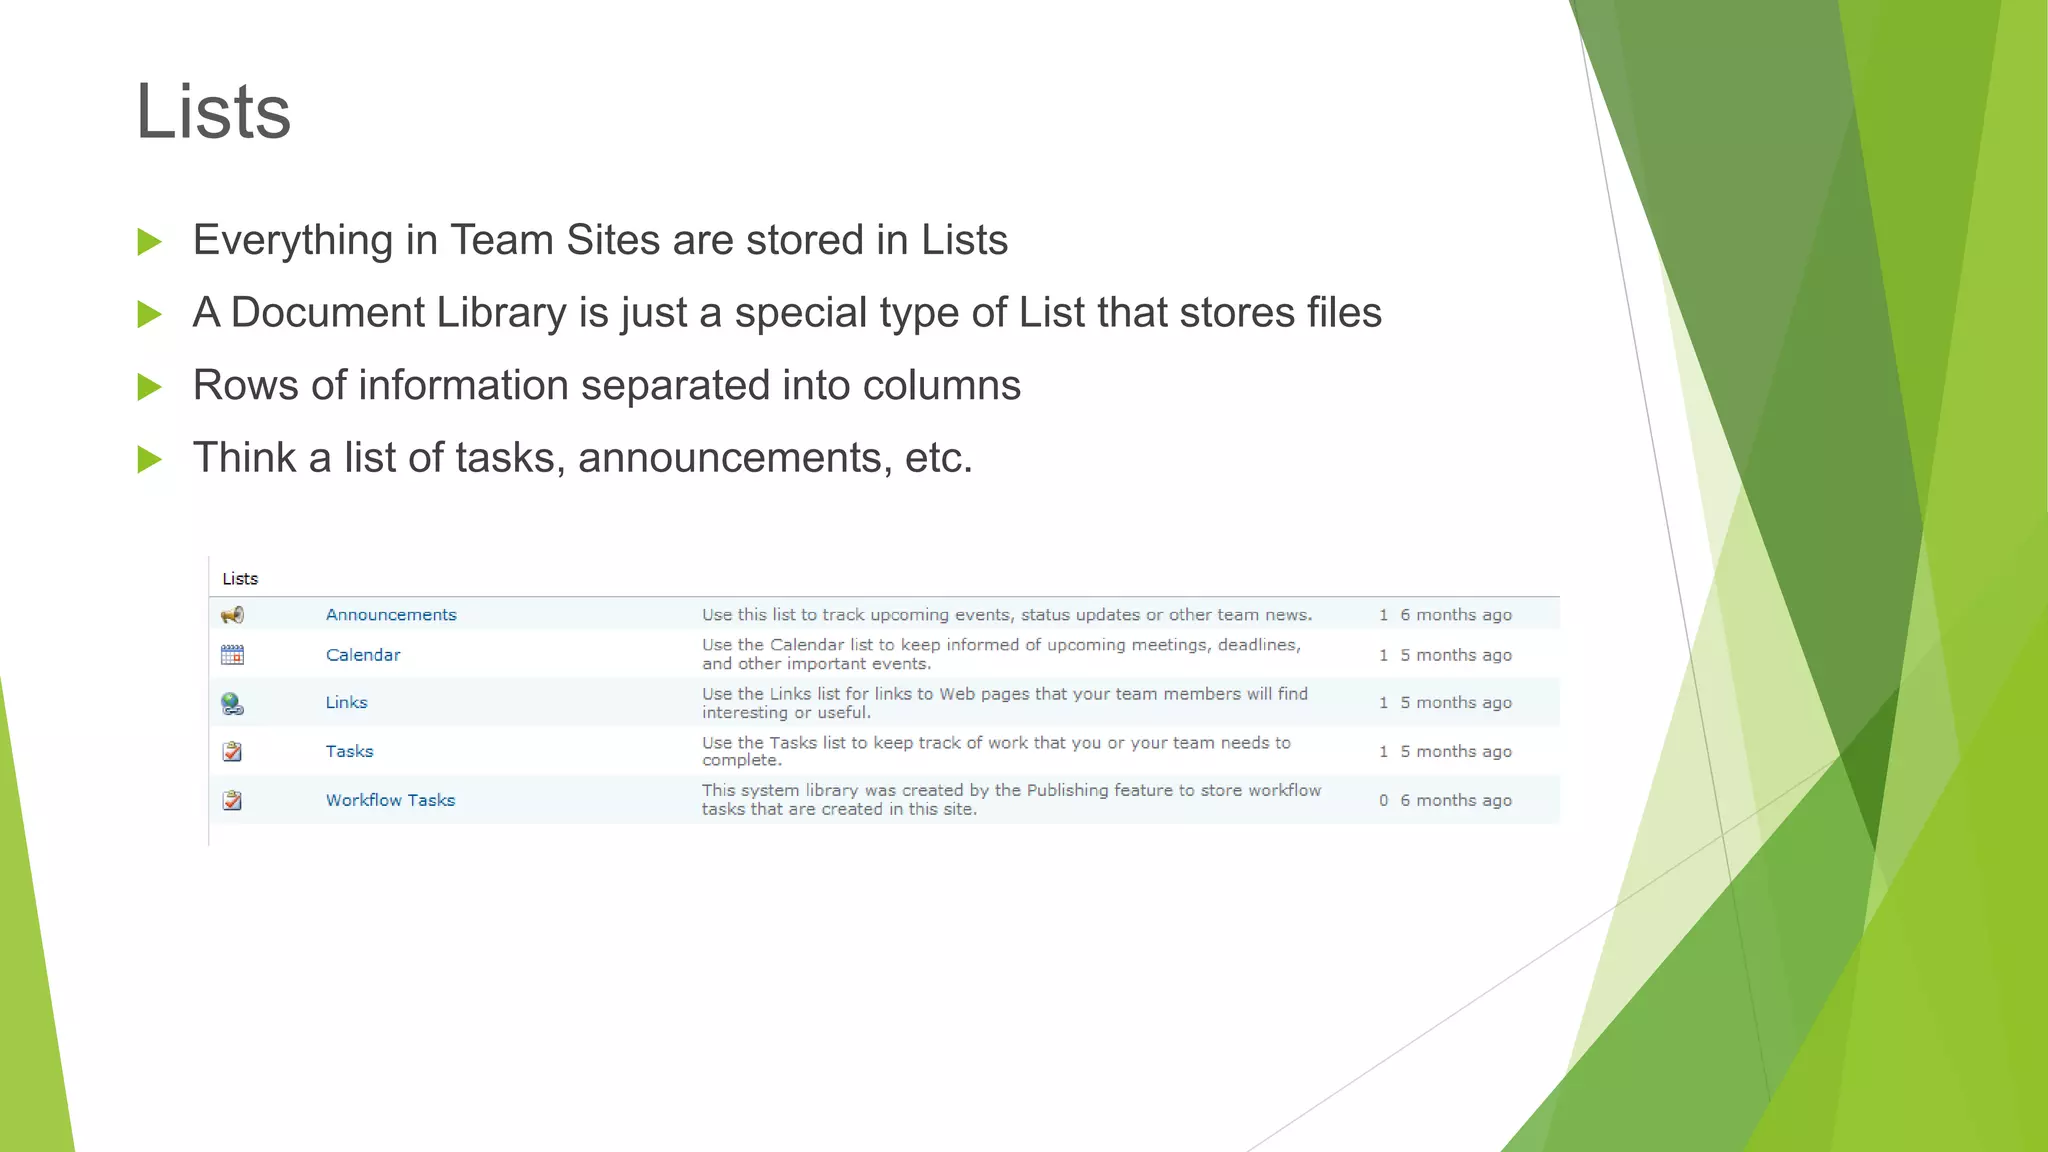


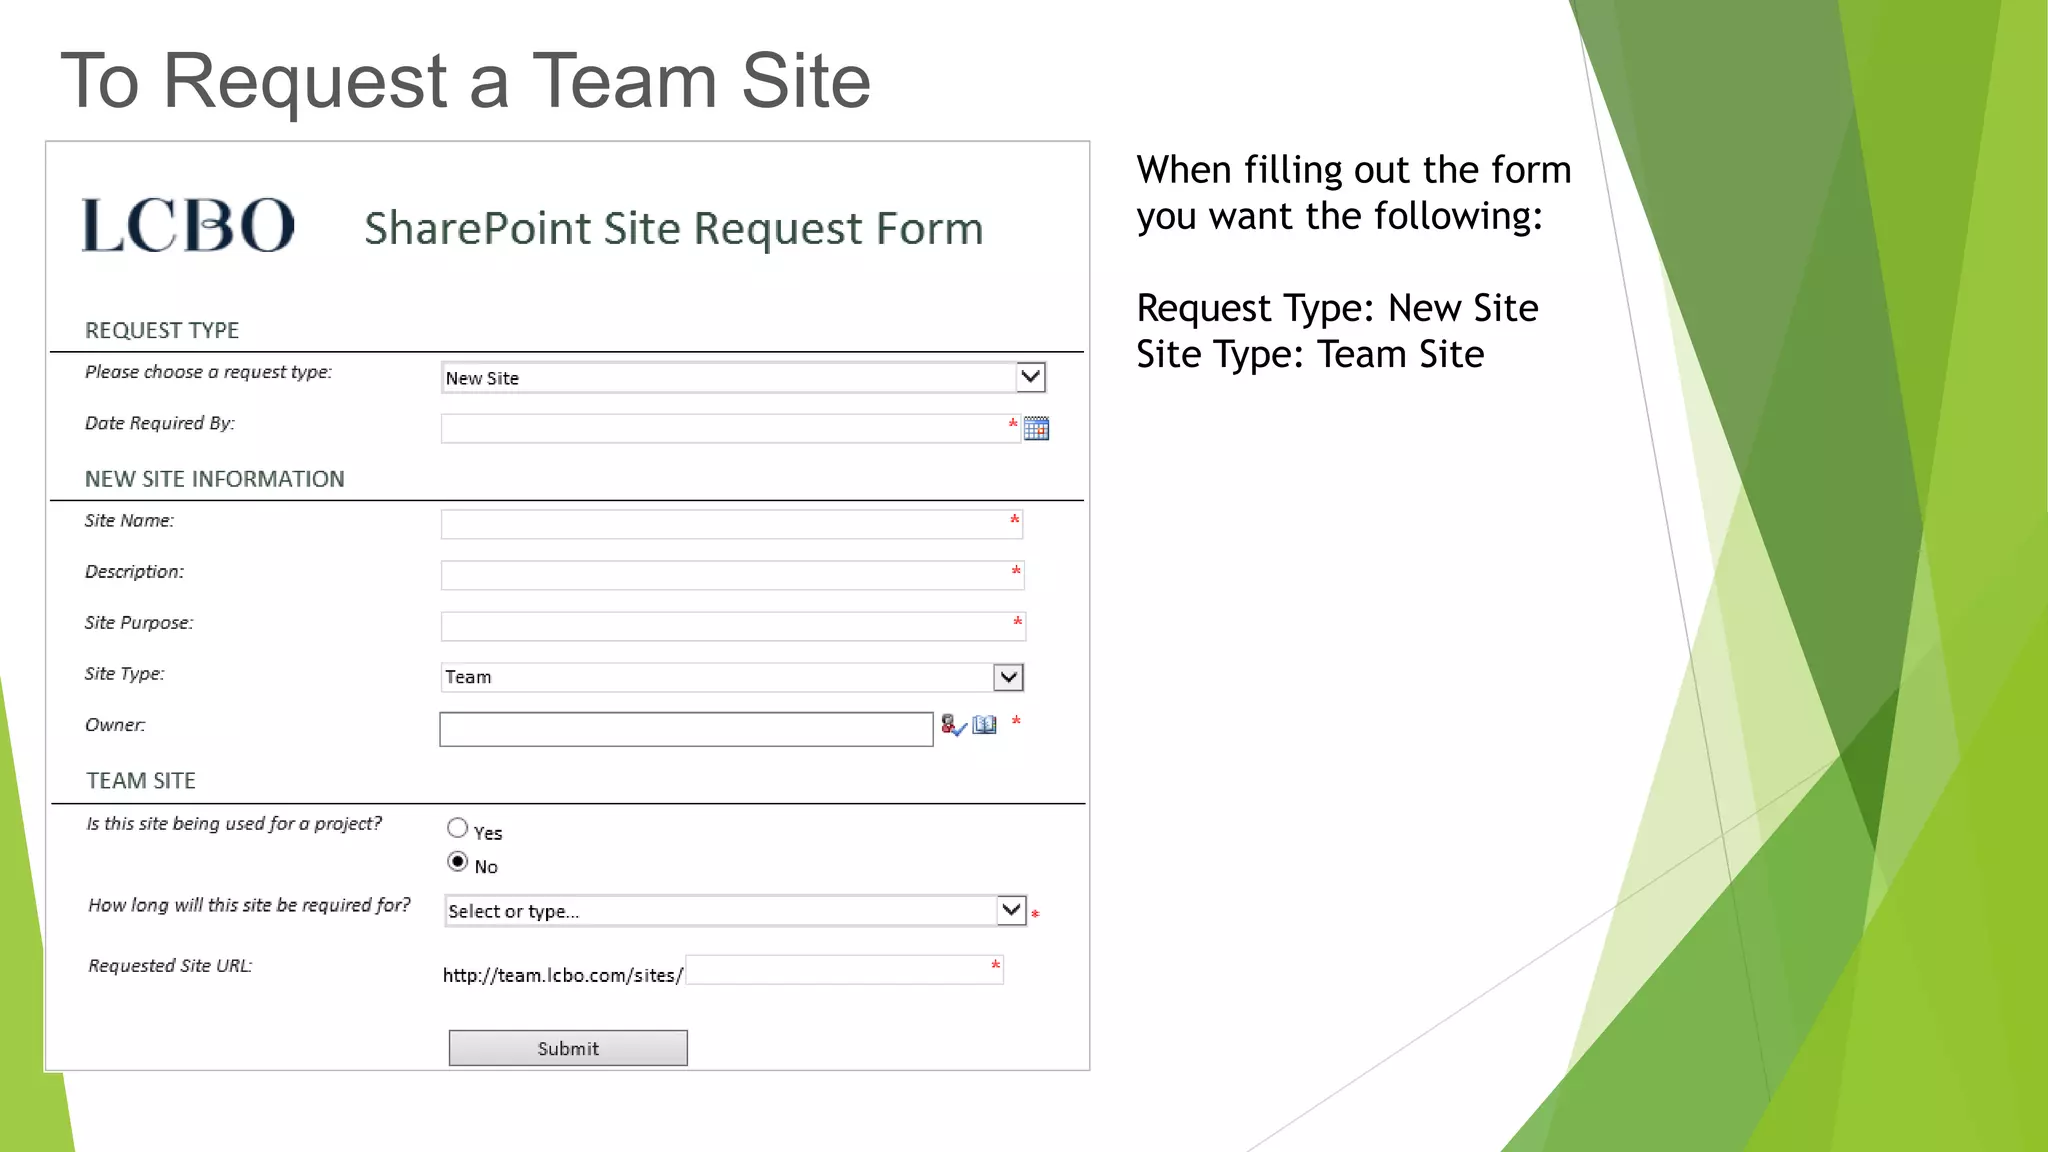

The document provides an overview of SharePoint 2010 team sites, detailing features such as working with lists, libraries, and discussion boards, as well as site creation and maintenance. It emphasizes the empowerment of collaborative teams by reducing paper usage and enhancing information management through calendars, announcements, and task assignments. The concluding sections outline the process for requesting a team site and offer additional resources for guidance.


![Share point training_guide[1]](https://cdn.slidesharecdn.com/ss_thumbnails/sharepointtrainingguide1-140115085321-phpapp01-thumbnail.jpg?width=640&height=640&fit=bounds)


