Download as PDF, PPTX


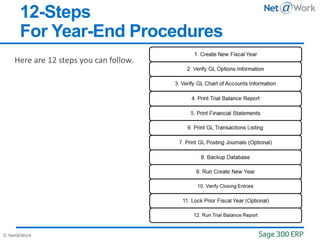
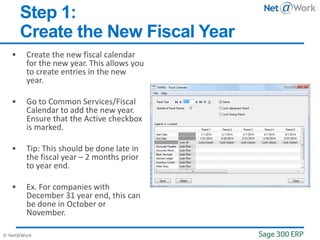

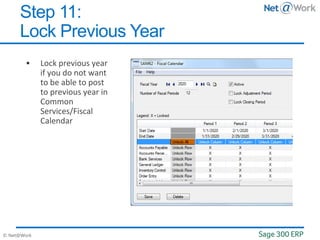
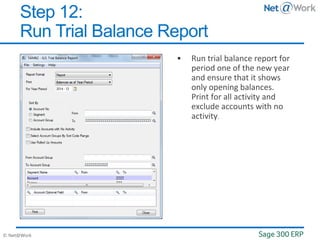

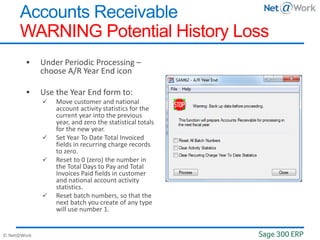
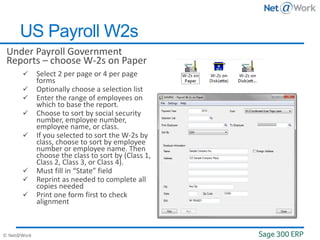
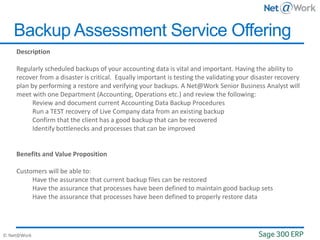

The document provides a detailed guide on the year-end procedures for Sage 300 ERP, emphasizing essential steps like creating a new fiscal year, verifying general ledger options, and backing up databases. It outlines 12 specific steps, which include printing financial statements and running various year-end reports to ensure accurate accounting records. Additionally, it highlights the importance of proper backup and recovery processes for accounting data.