
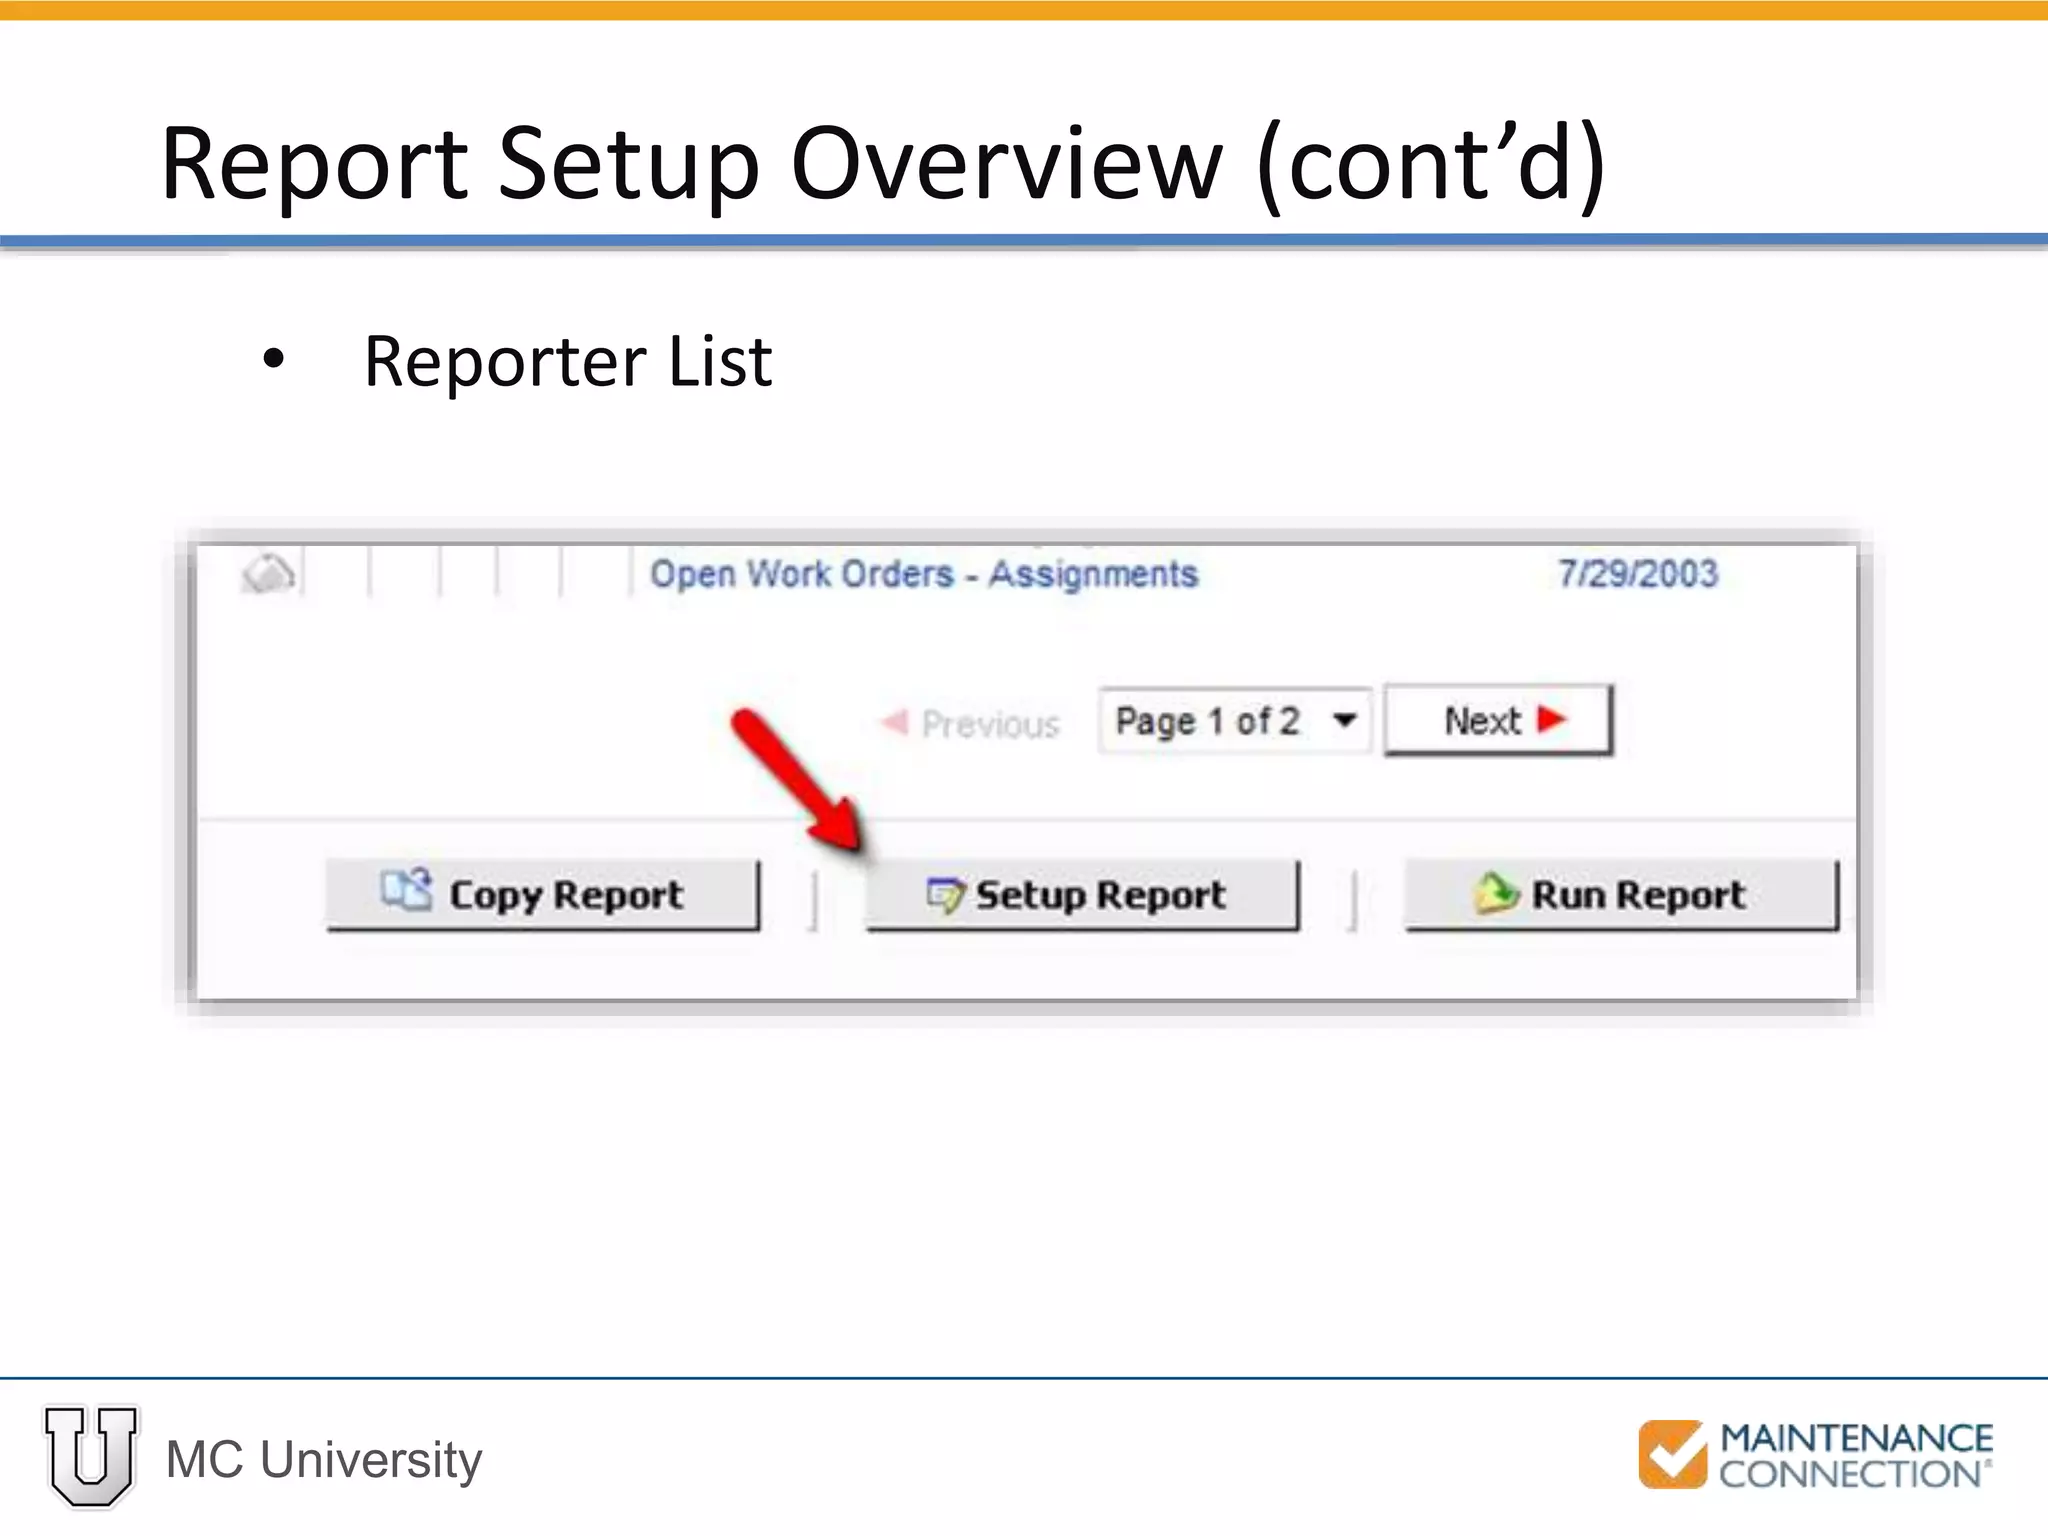


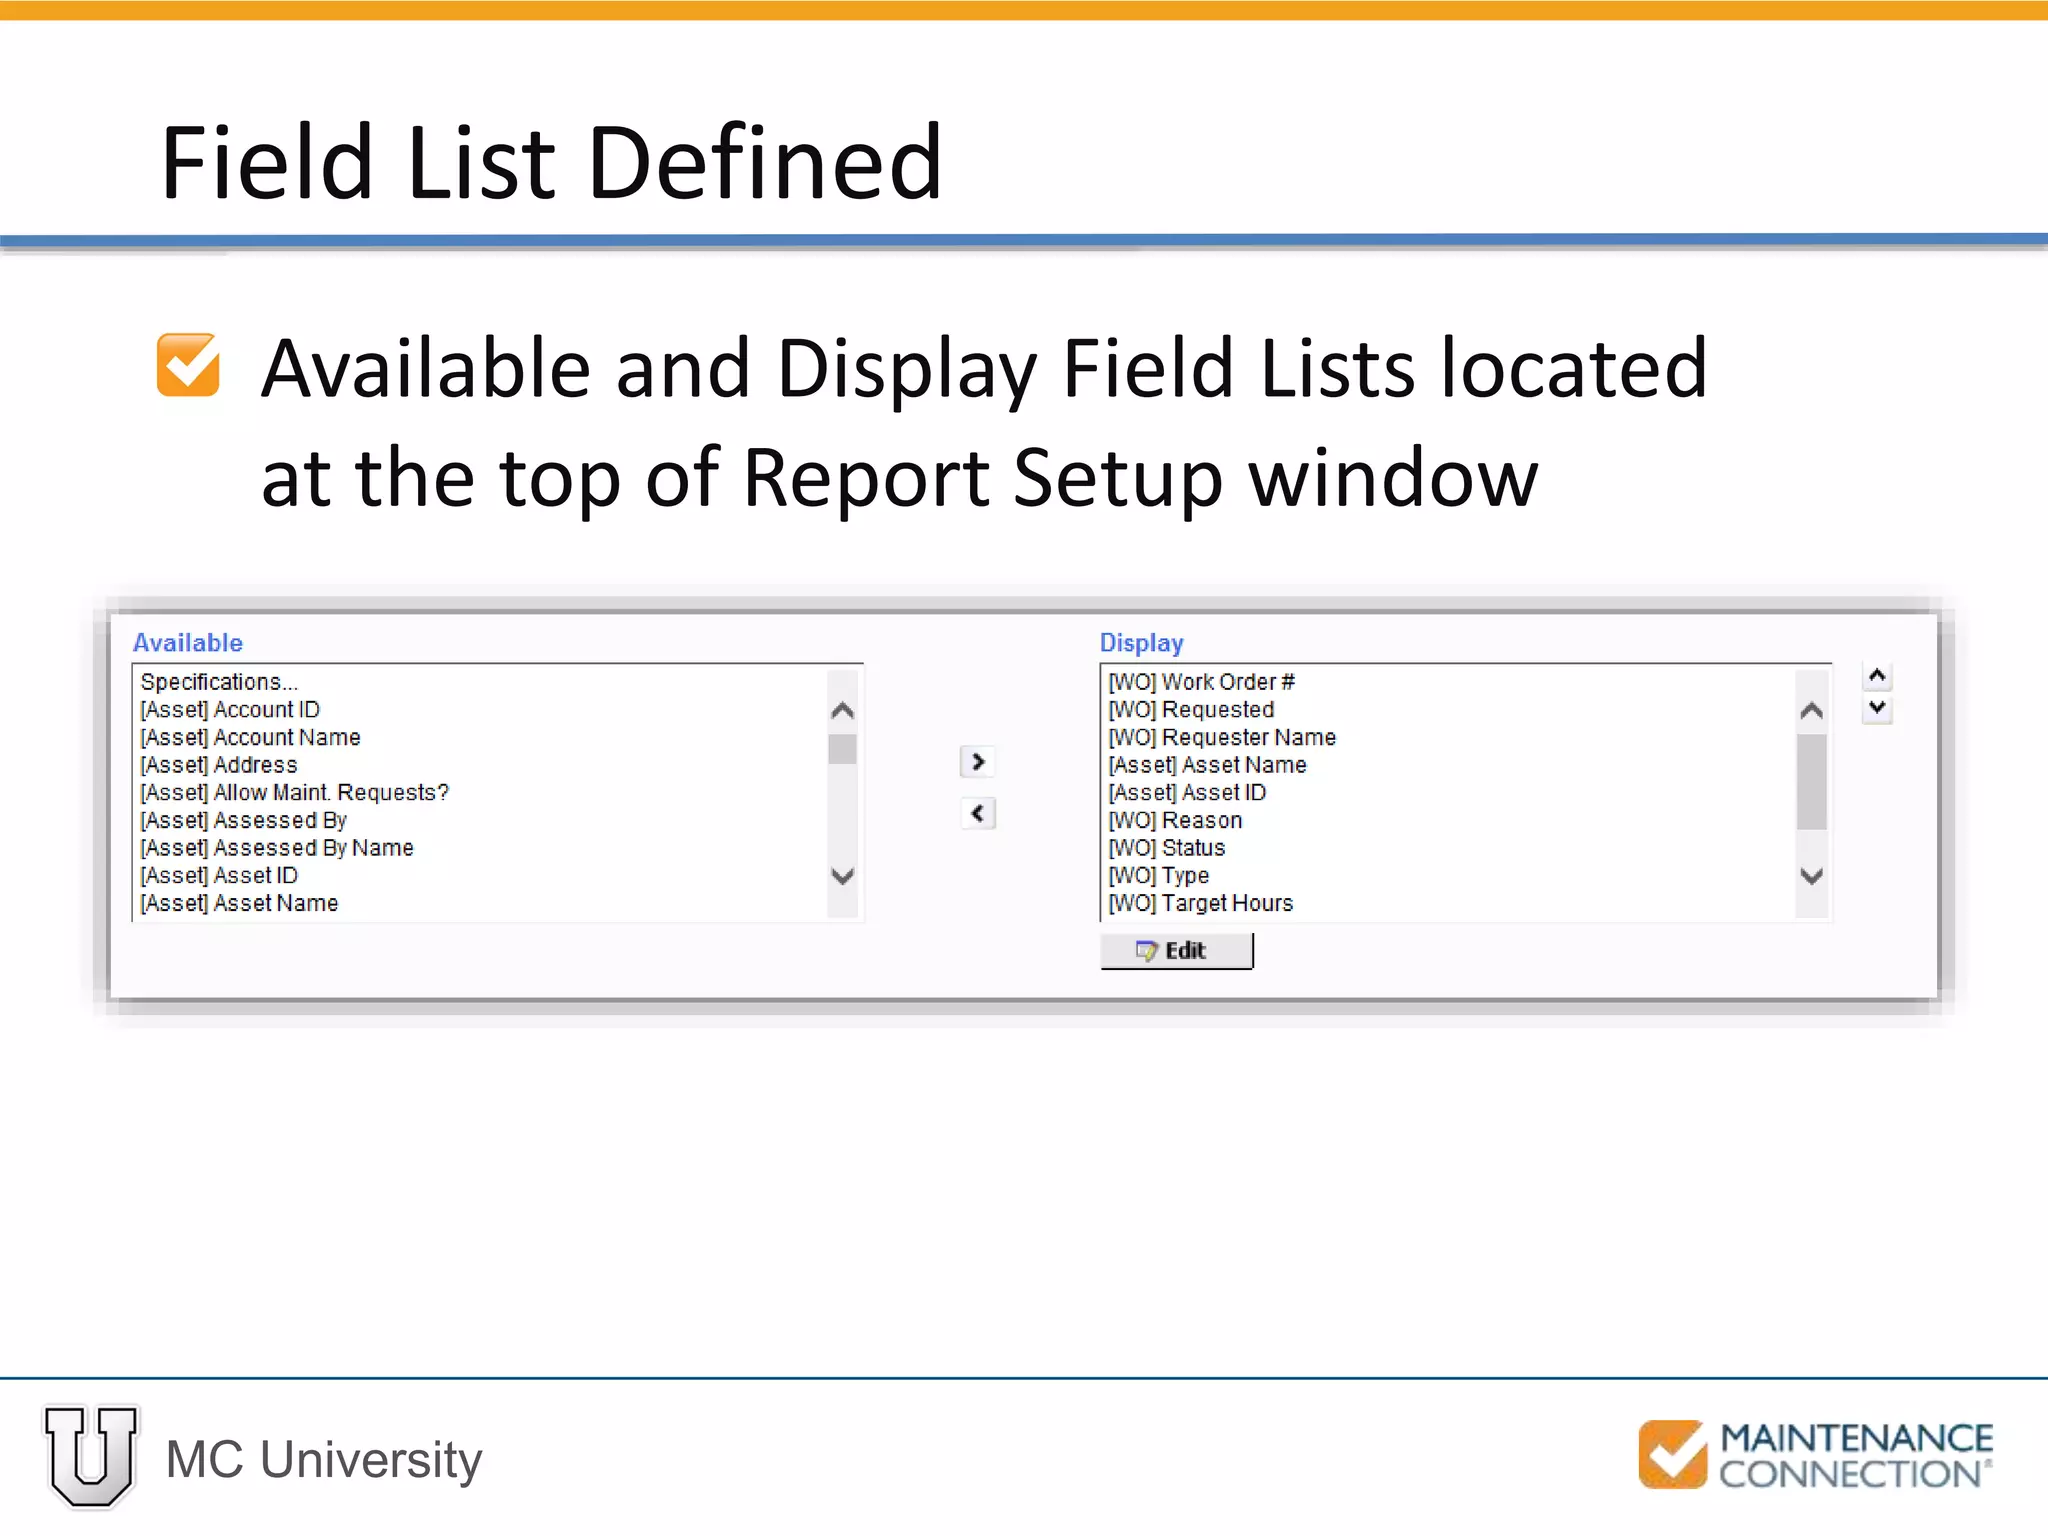
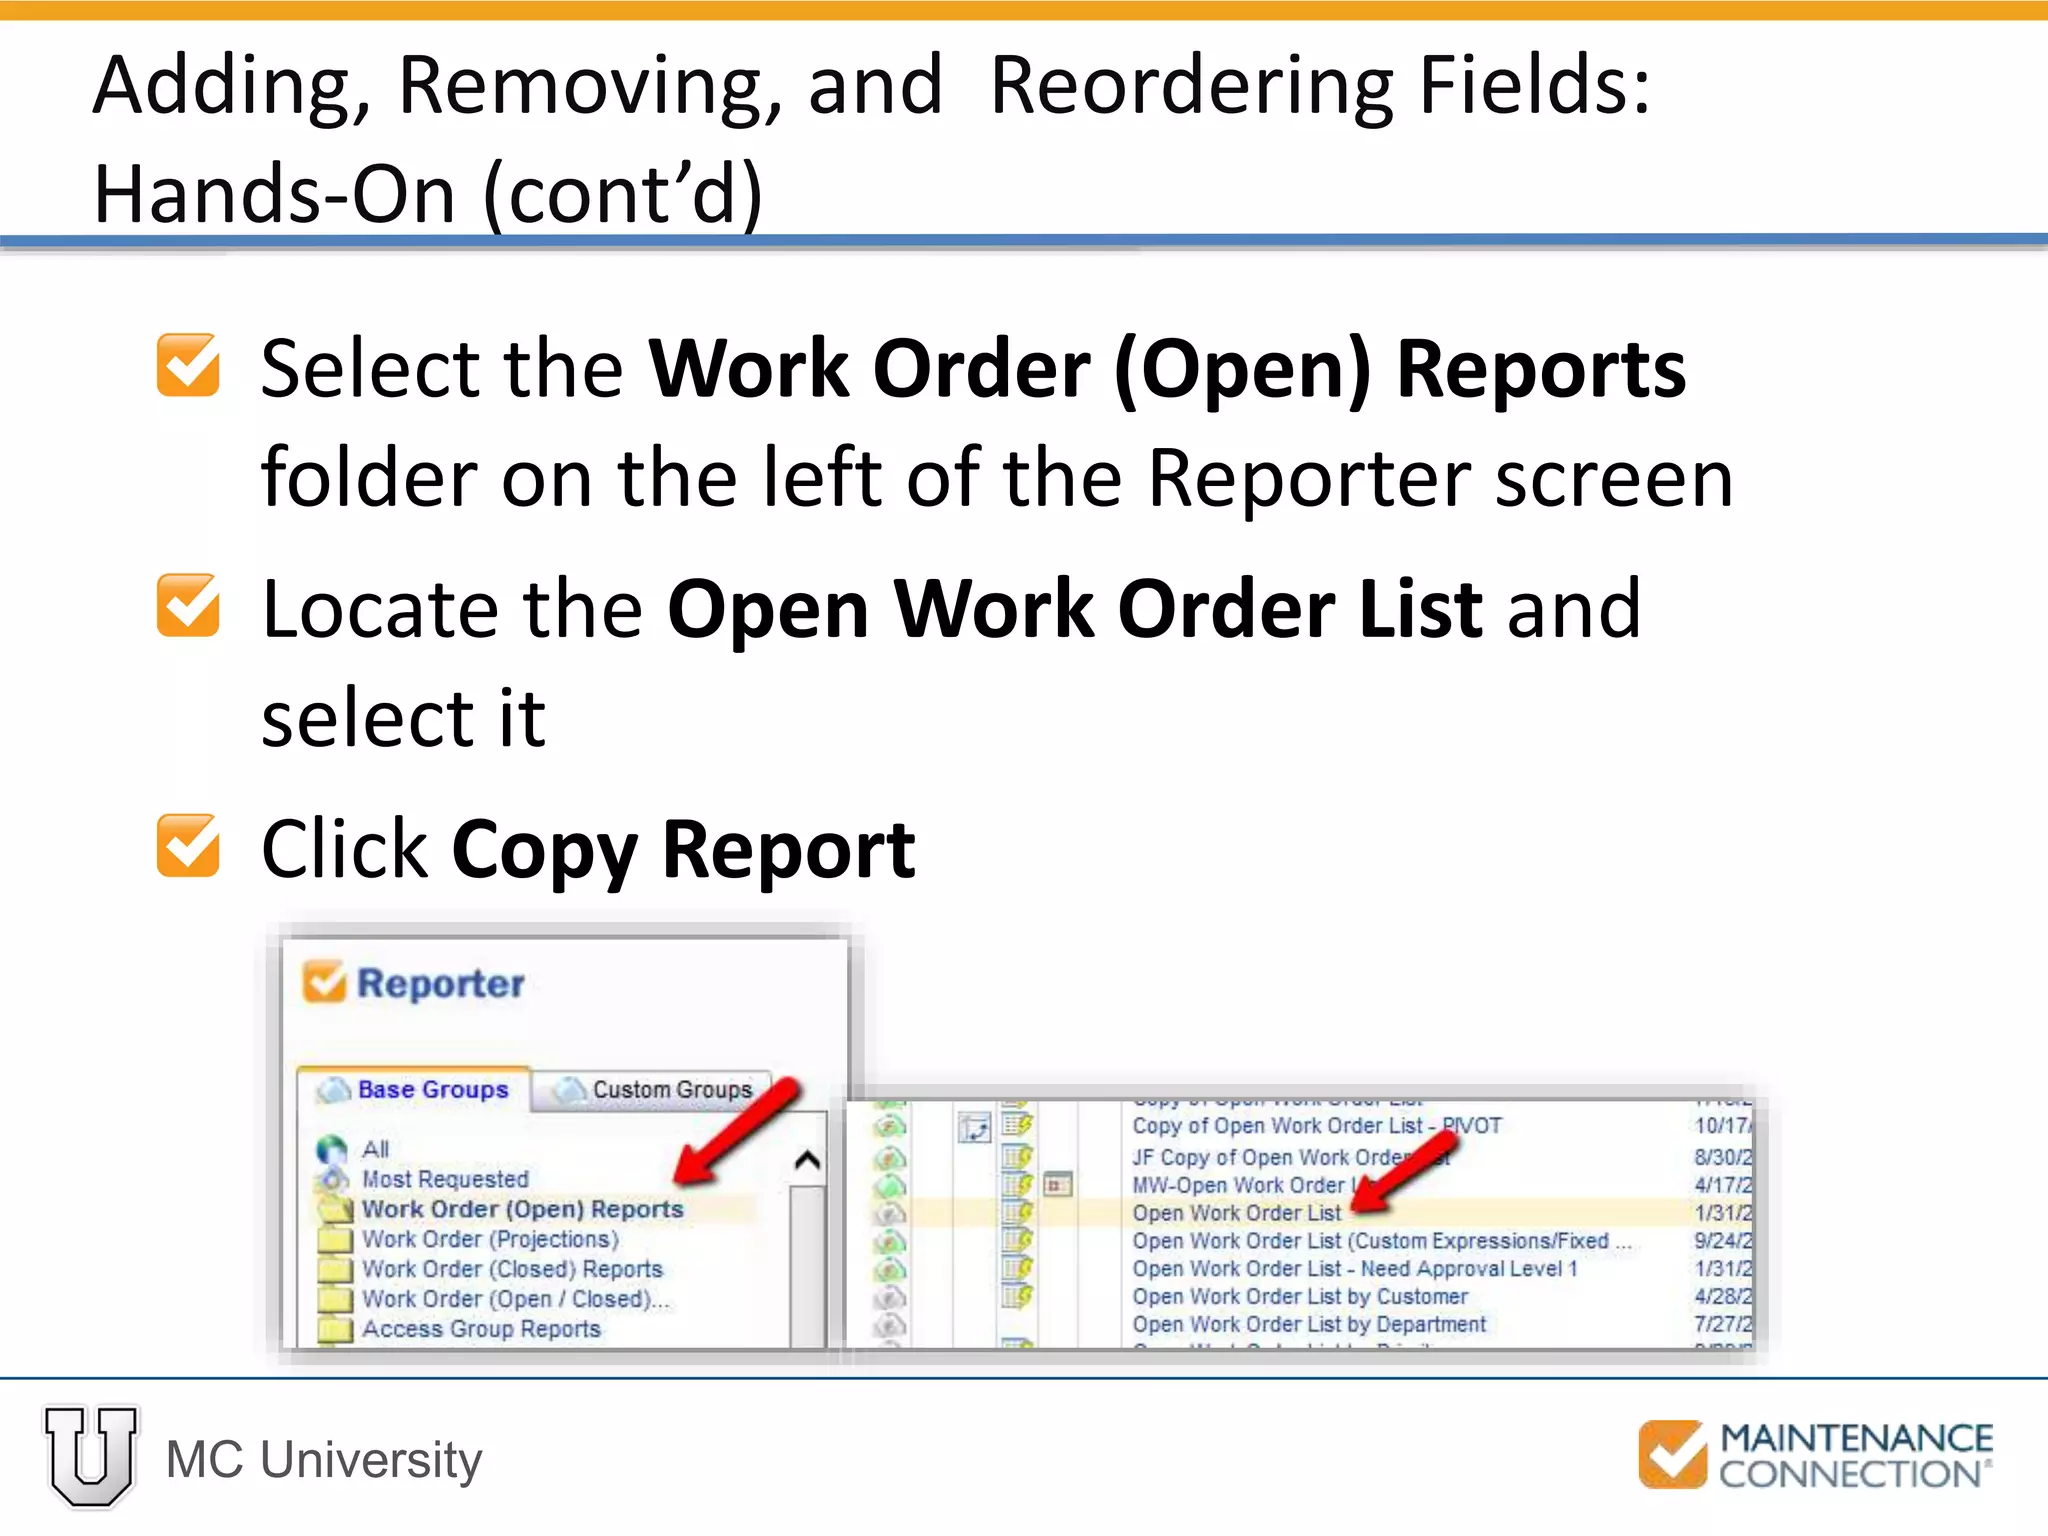
![MC University
Locate your Report in the Report List
Open the Report Setup
Scroll down Available field list and find
[WO] Requester Name
Adding, Removing, and Reordering Fields:
Hands-On (cont’d)](https://image.slidesharecdn.com/r03basicsofreportingreportsetuppart1mcu-141226170030-conversion-gate01/75/R03-Basics-of-Reporting-Report-Setup-Part-1-MCU-22-2048.jpg)
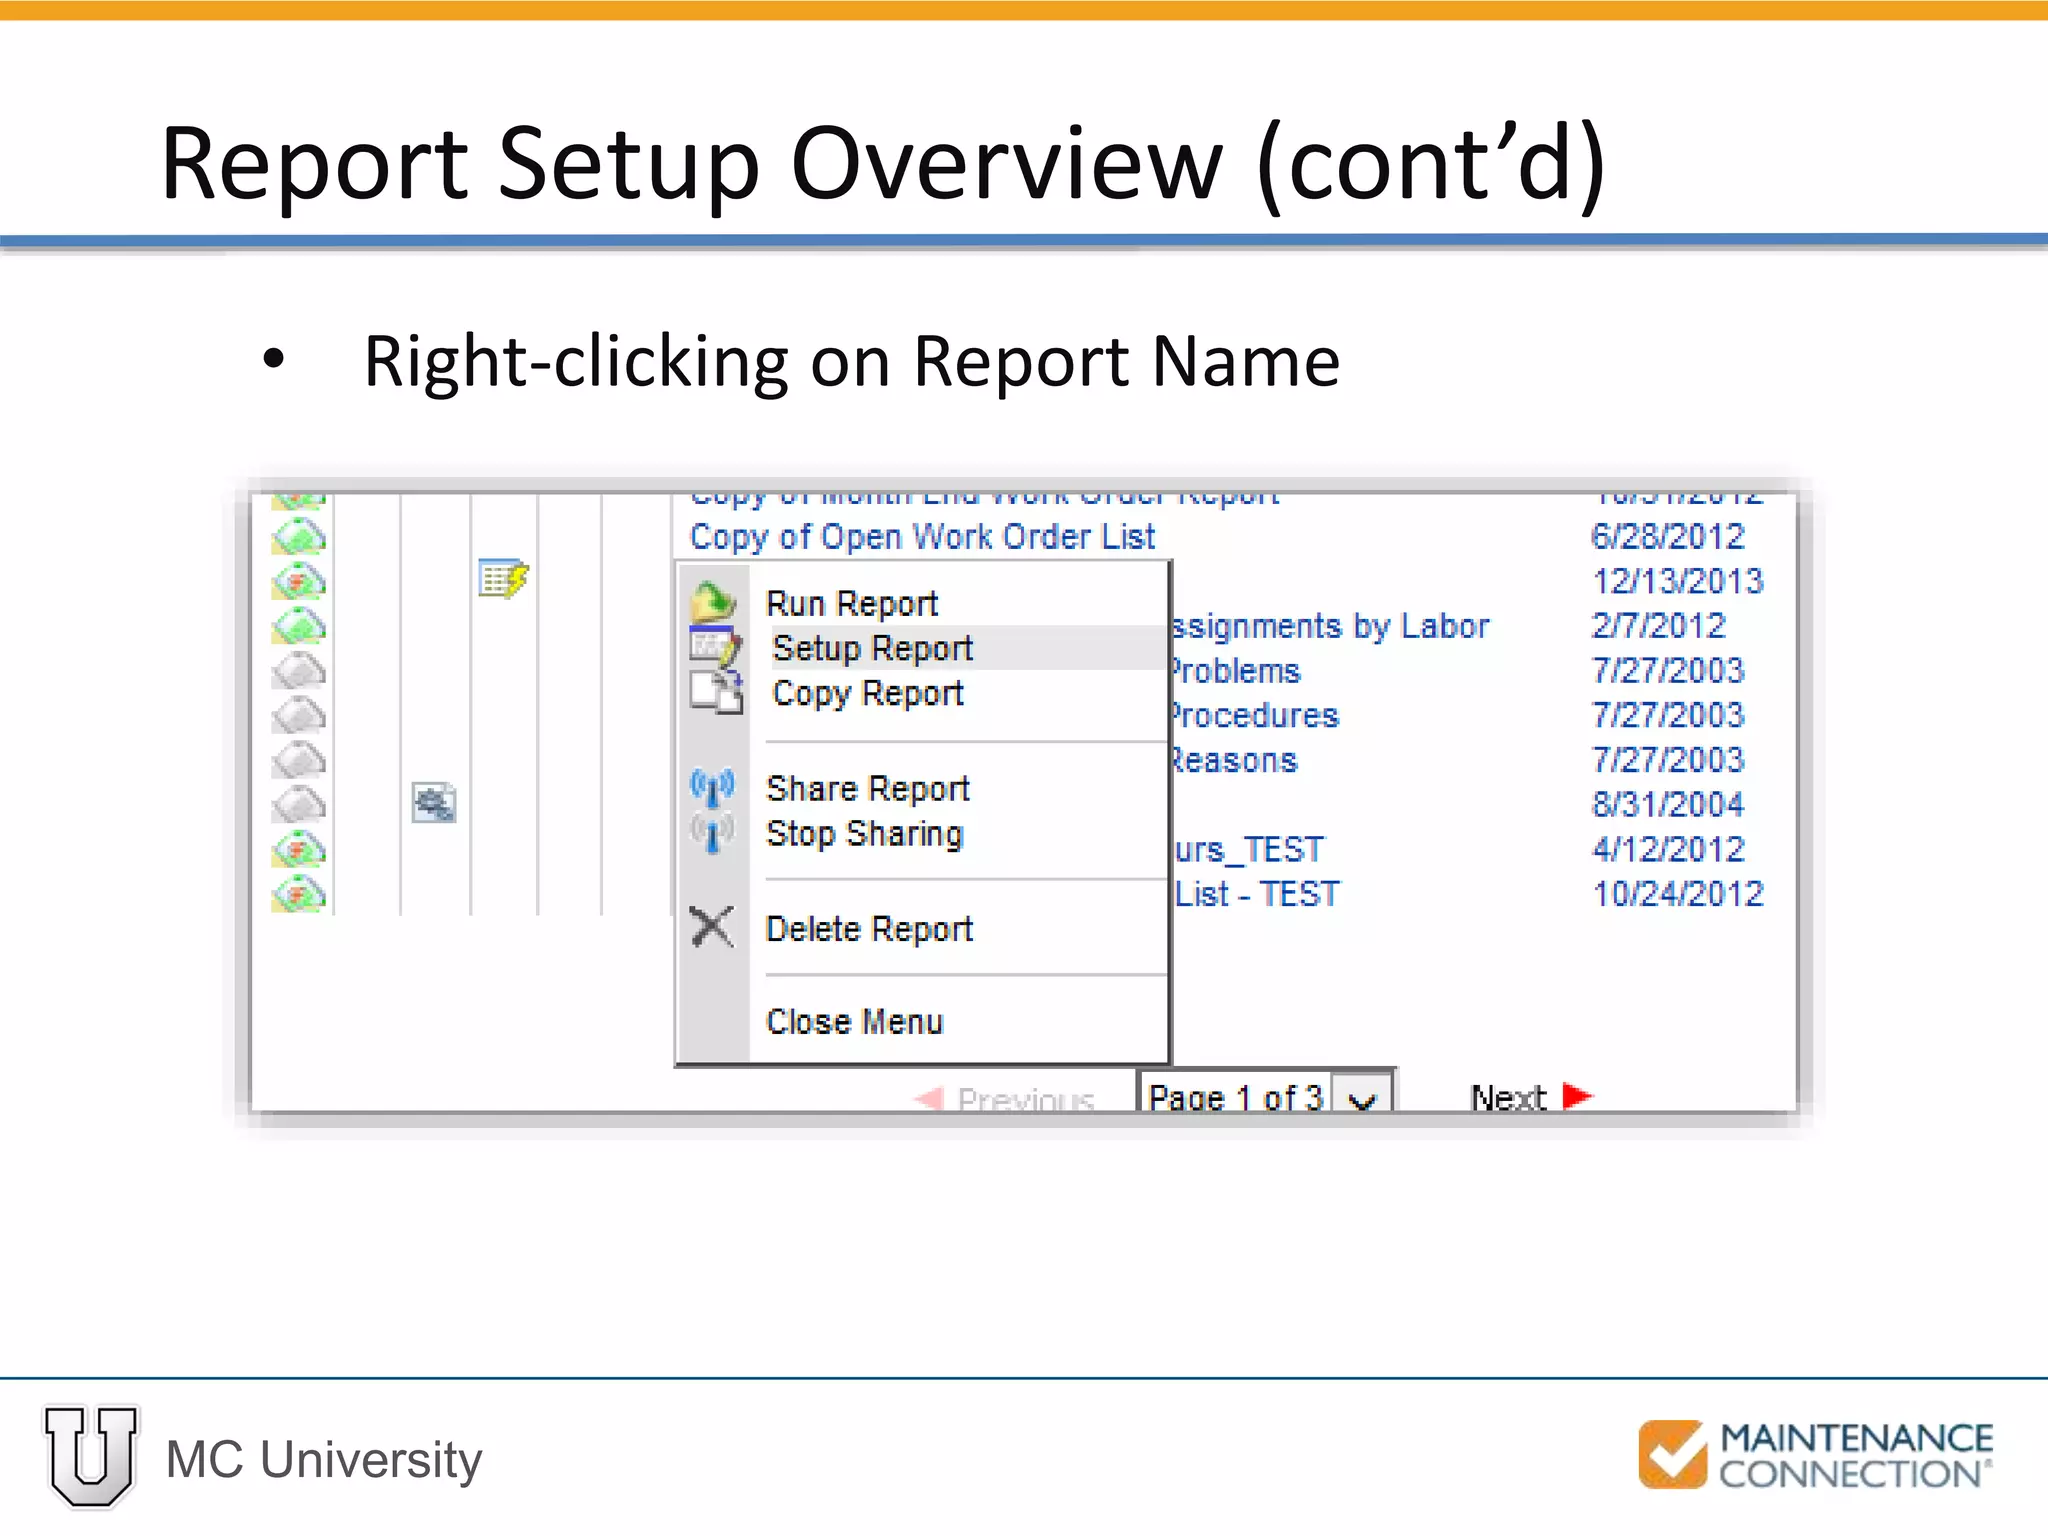
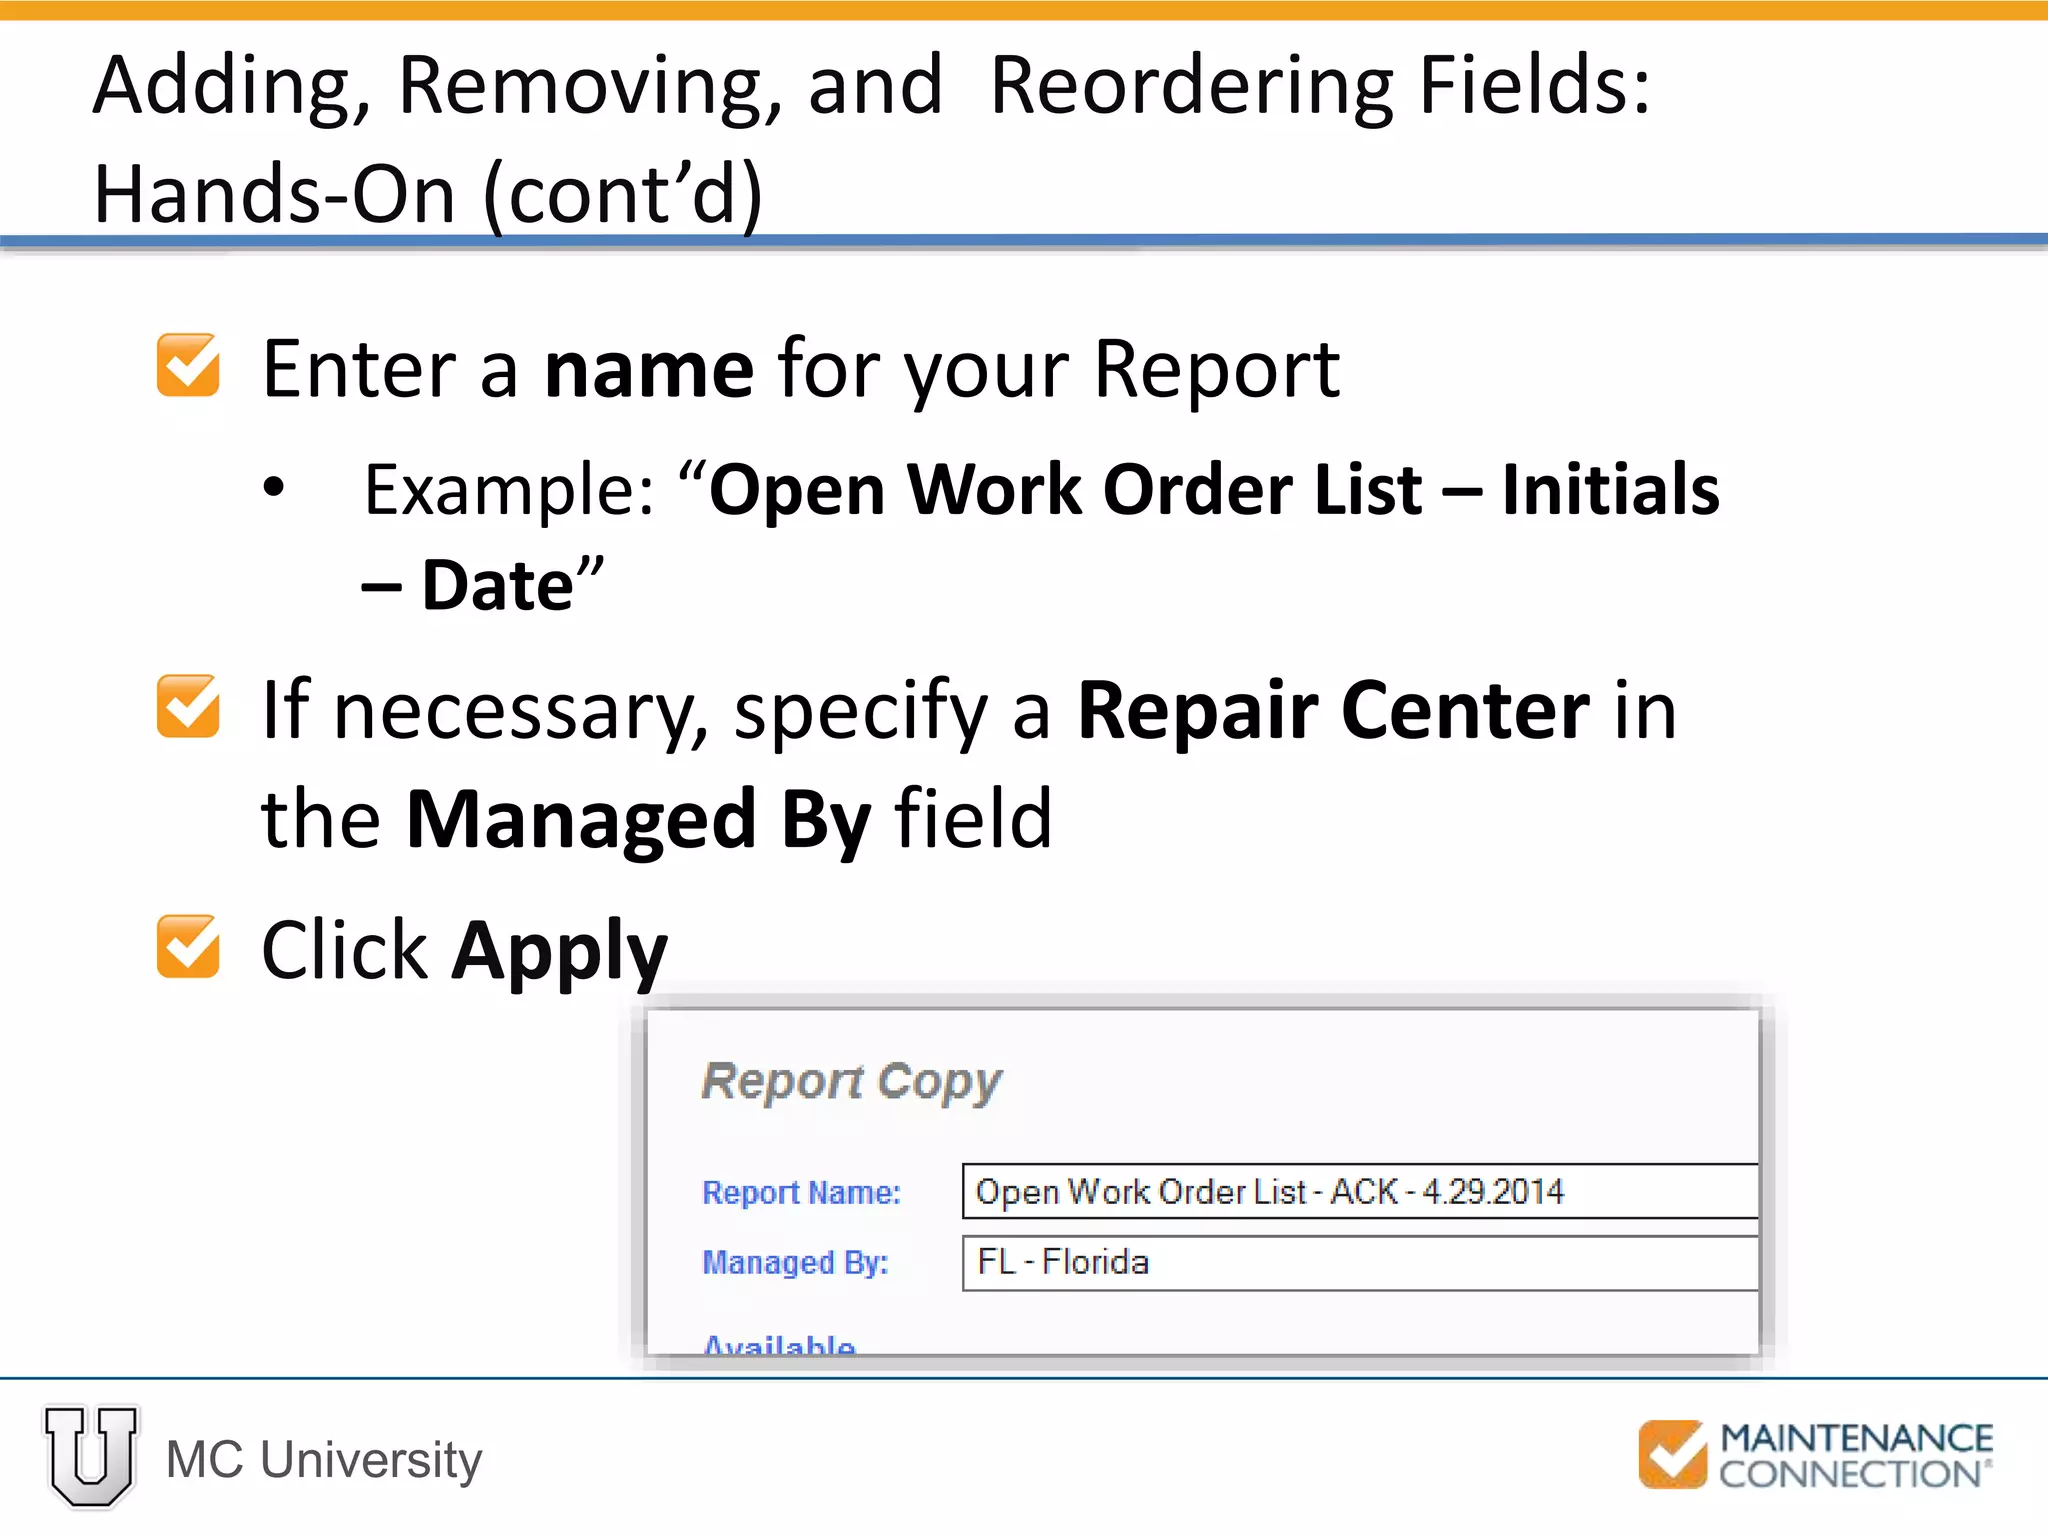
![MC University
Click on the [WO] Requester Name
field and click on the right arrow
The [WO] Requester Name field will
move to the Display list
Adding, Removing, and Reordering Fields:
Hands-On (cont’d)](https://image.slidesharecdn.com/r03basicsofreportingreportsetuppart1mcu-141226170030-conversion-gate01/75/R03-Basics-of-Reporting-Report-Setup-Part-1-MCU-23-2048.jpg)
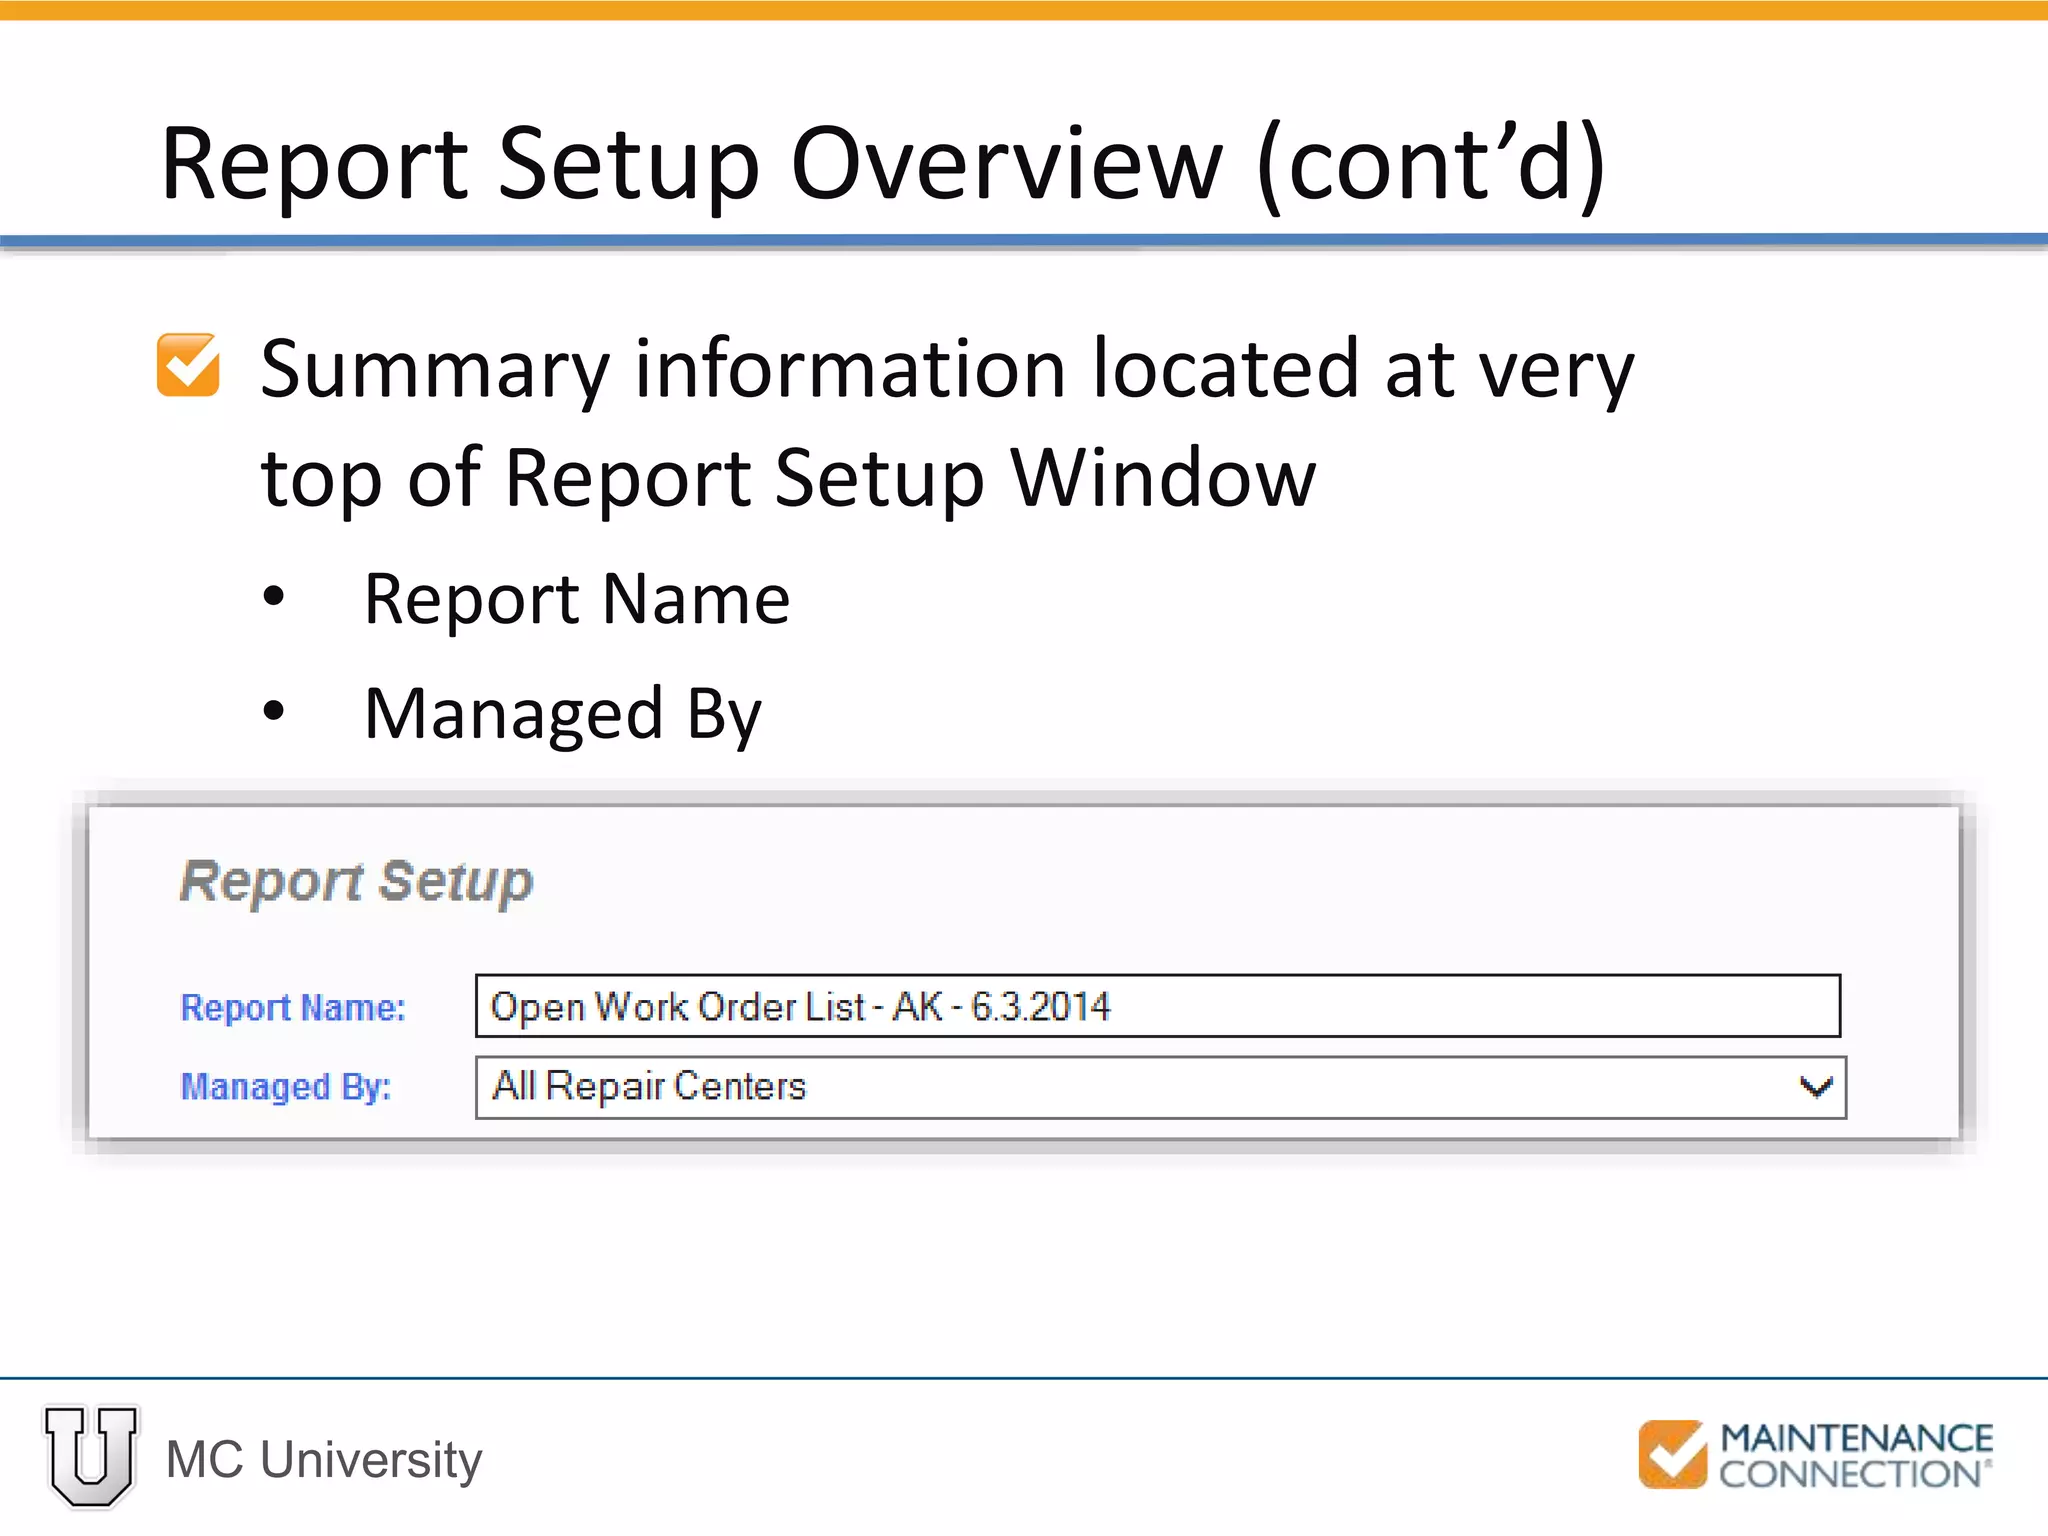
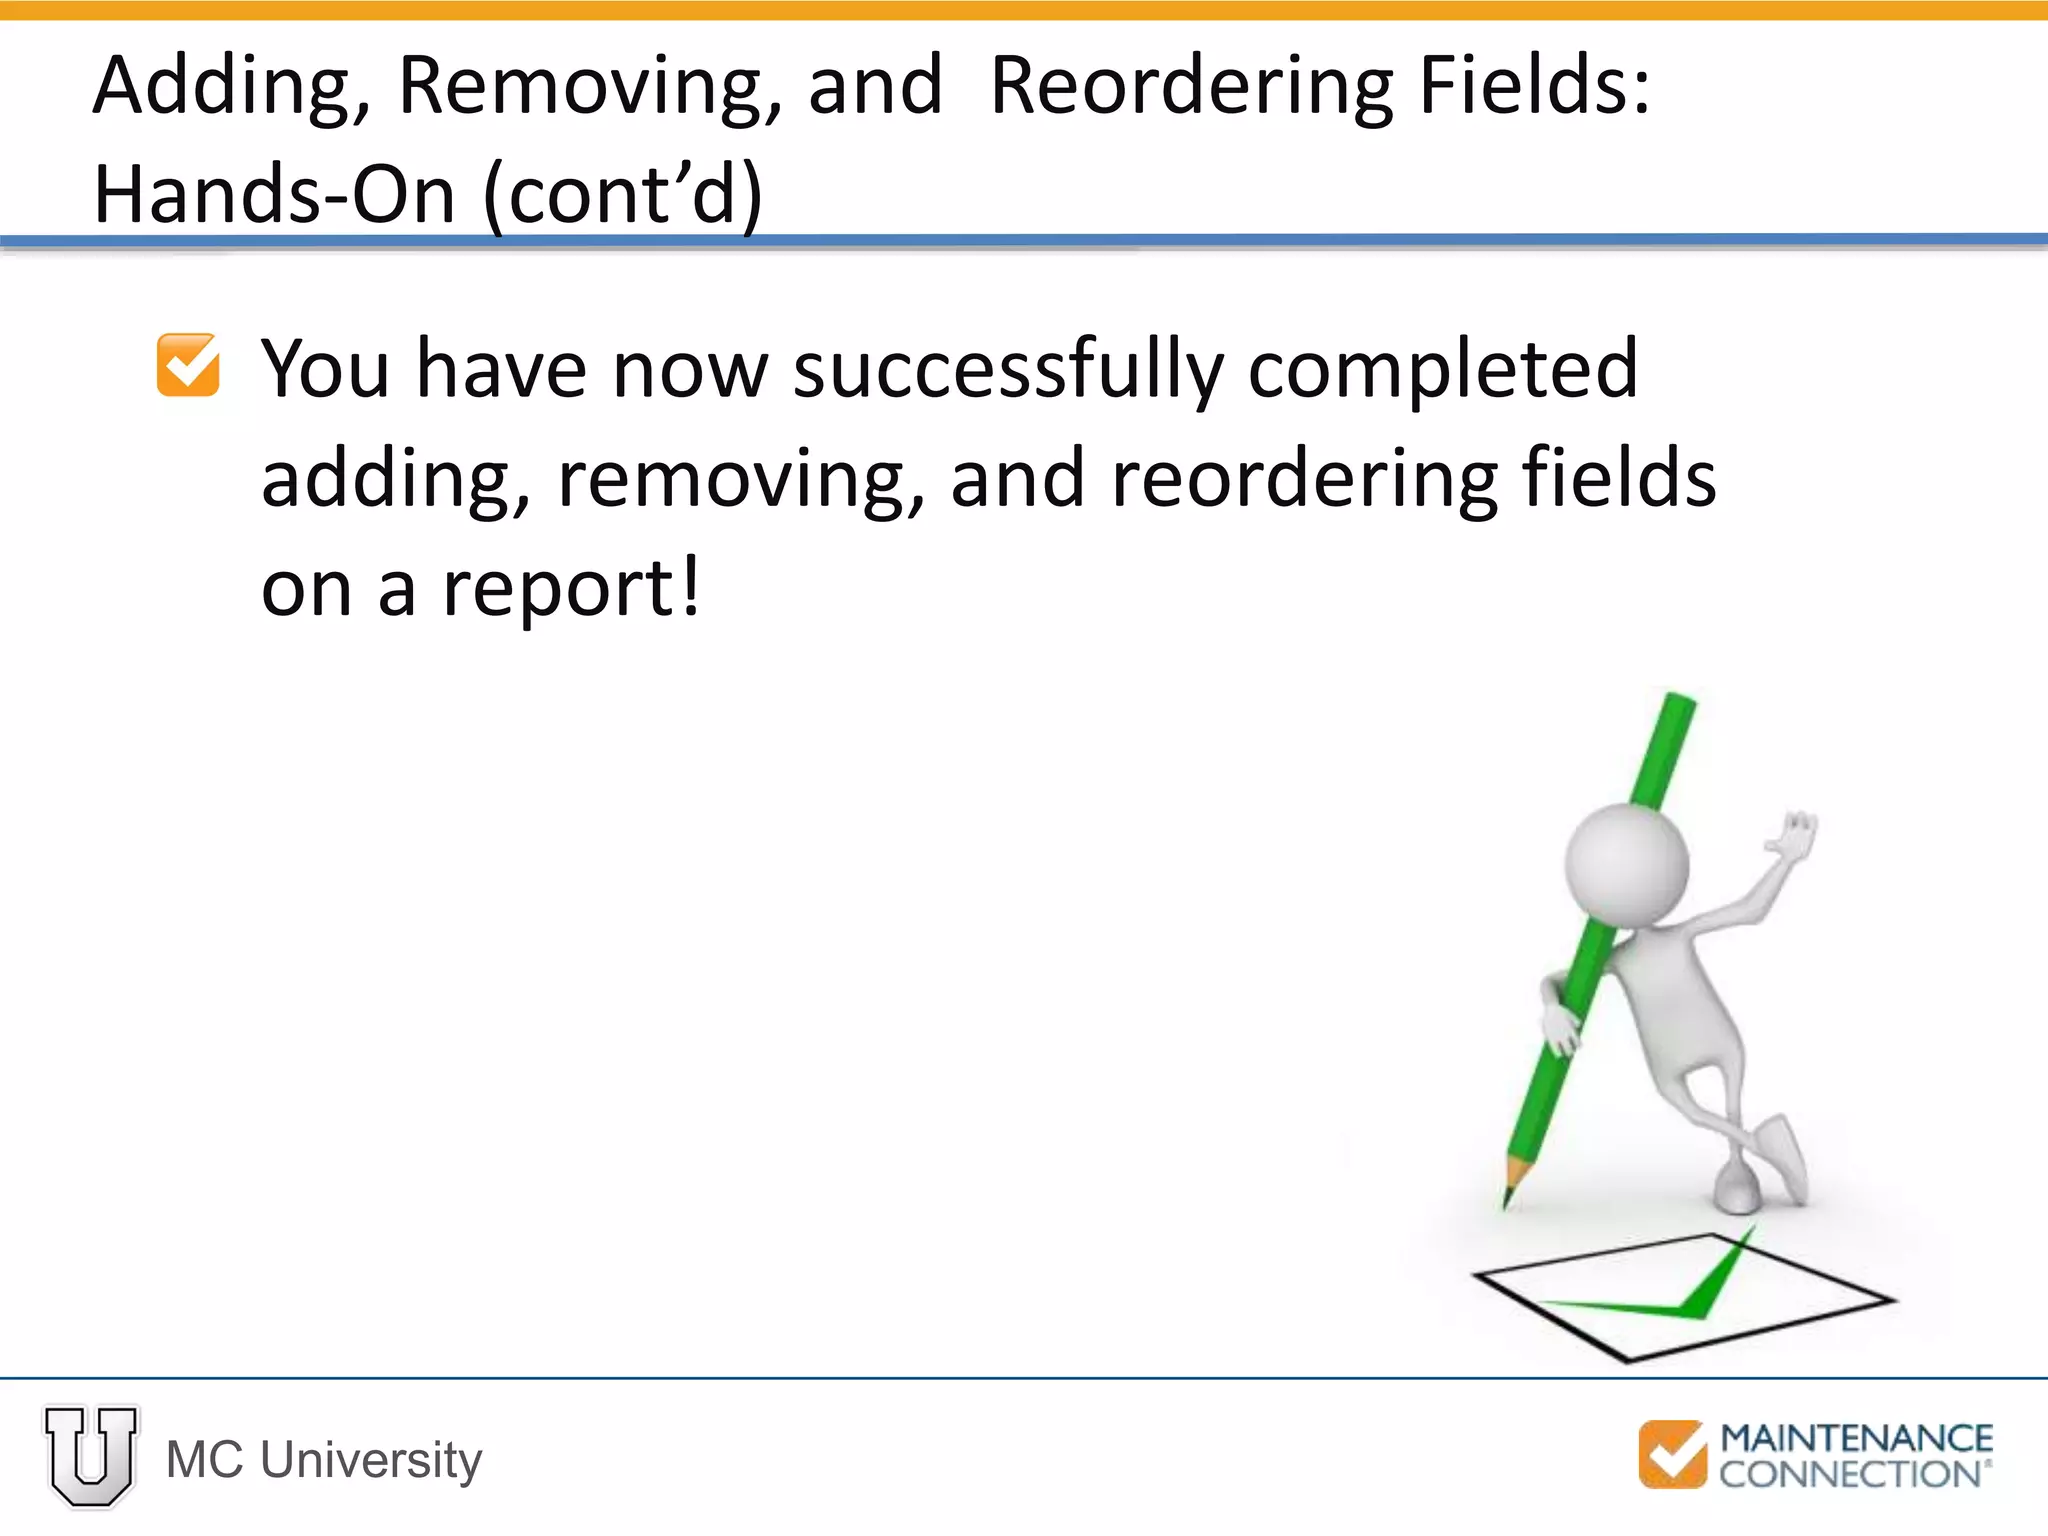
![MC University
Locate the [Asset] Asset ID field in the
Display fields list
Select the [Asset] Asset ID field and
select the left arrow
The [Asset] Asset ID field will be
removed from the Display List
Adding, Removing, and Reordering Fields:
Hands-On (cont’d)](https://image.slidesharecdn.com/r03basicsofreportingreportsetuppart1mcu-141226170030-conversion-gate01/75/R03-Basics-of-Reporting-Report-Setup-Part-1-MCU-24-2048.jpg)
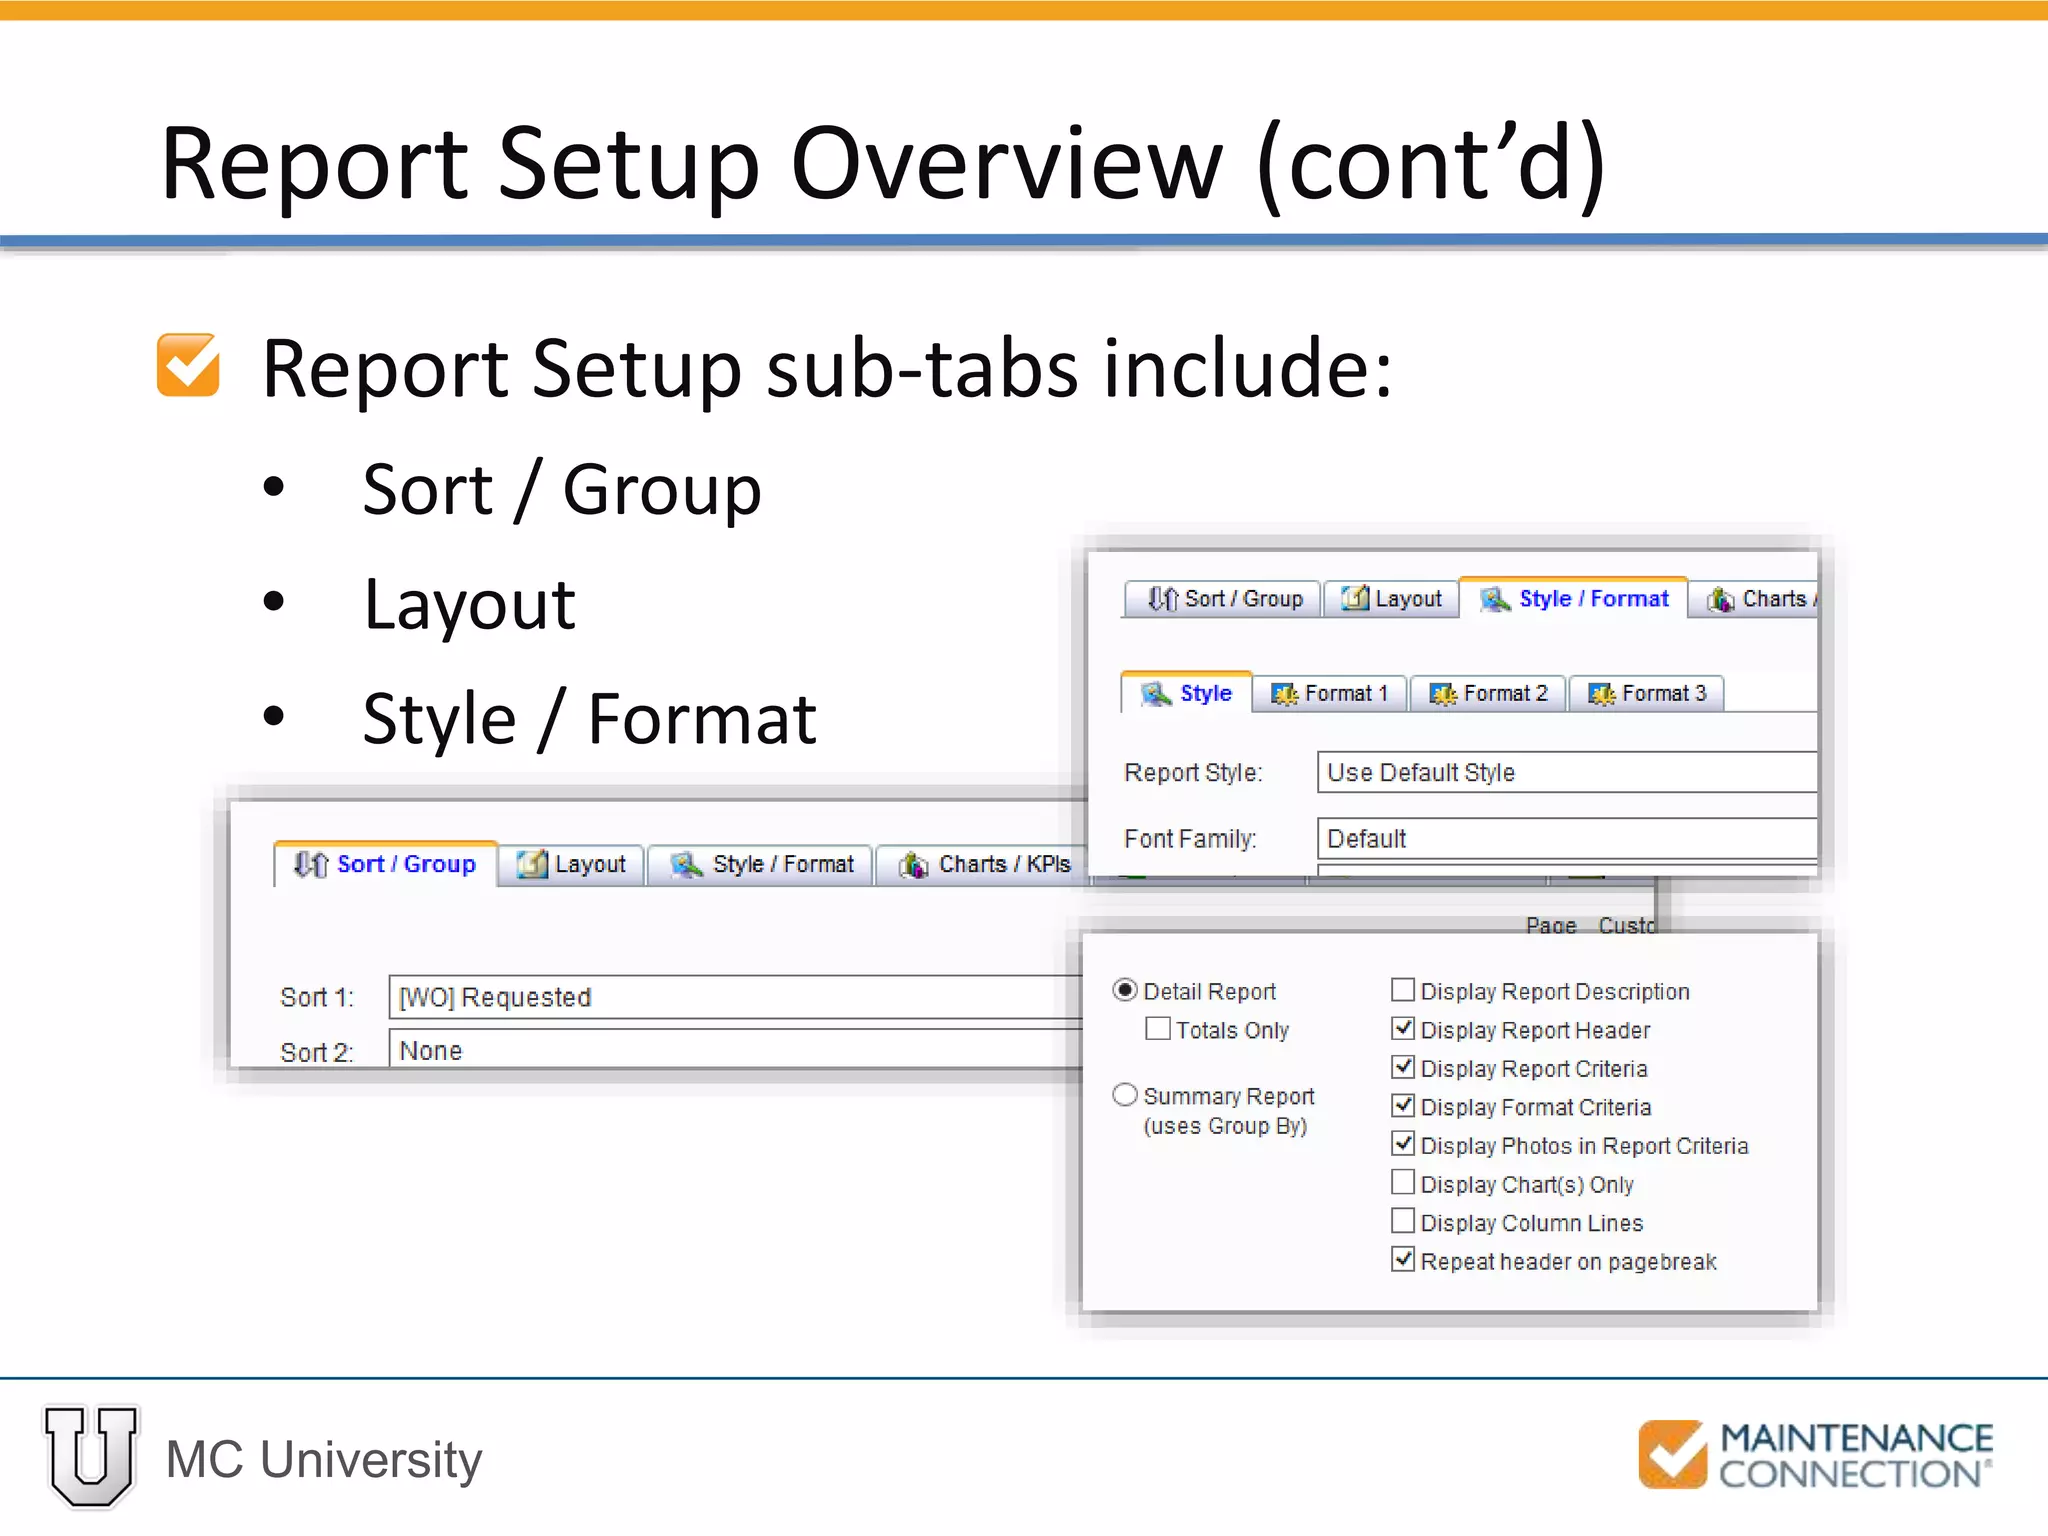
![MC University
Find the [Asset] Asset Name field in the
Available field list
Double-click on the [Asset] Asset
Name field to move to the Display
fields
Adding, Removing, and Reordering Fields:
Hands-On (cont’d)](https://image.slidesharecdn.com/r03basicsofreportingreportsetuppart1mcu-141226170030-conversion-gate01/75/R03-Basics-of-Reporting-Report-Setup-Part-1-MCU-25-2048.jpg)
![MC University
Find and select the [Asset] Asset Name
field in the Display List
Click the up arrow until the field is
displayed above the Parent Location
Adding, Removing, and Reordering Fields:
Hands-On (cont’d)](https://image.slidesharecdn.com/r03basicsofreportingreportsetuppart1mcu-141226170030-conversion-gate01/75/R03-Basics-of-Reporting-Report-Setup-Part-1-MCU-26-2048.jpg)
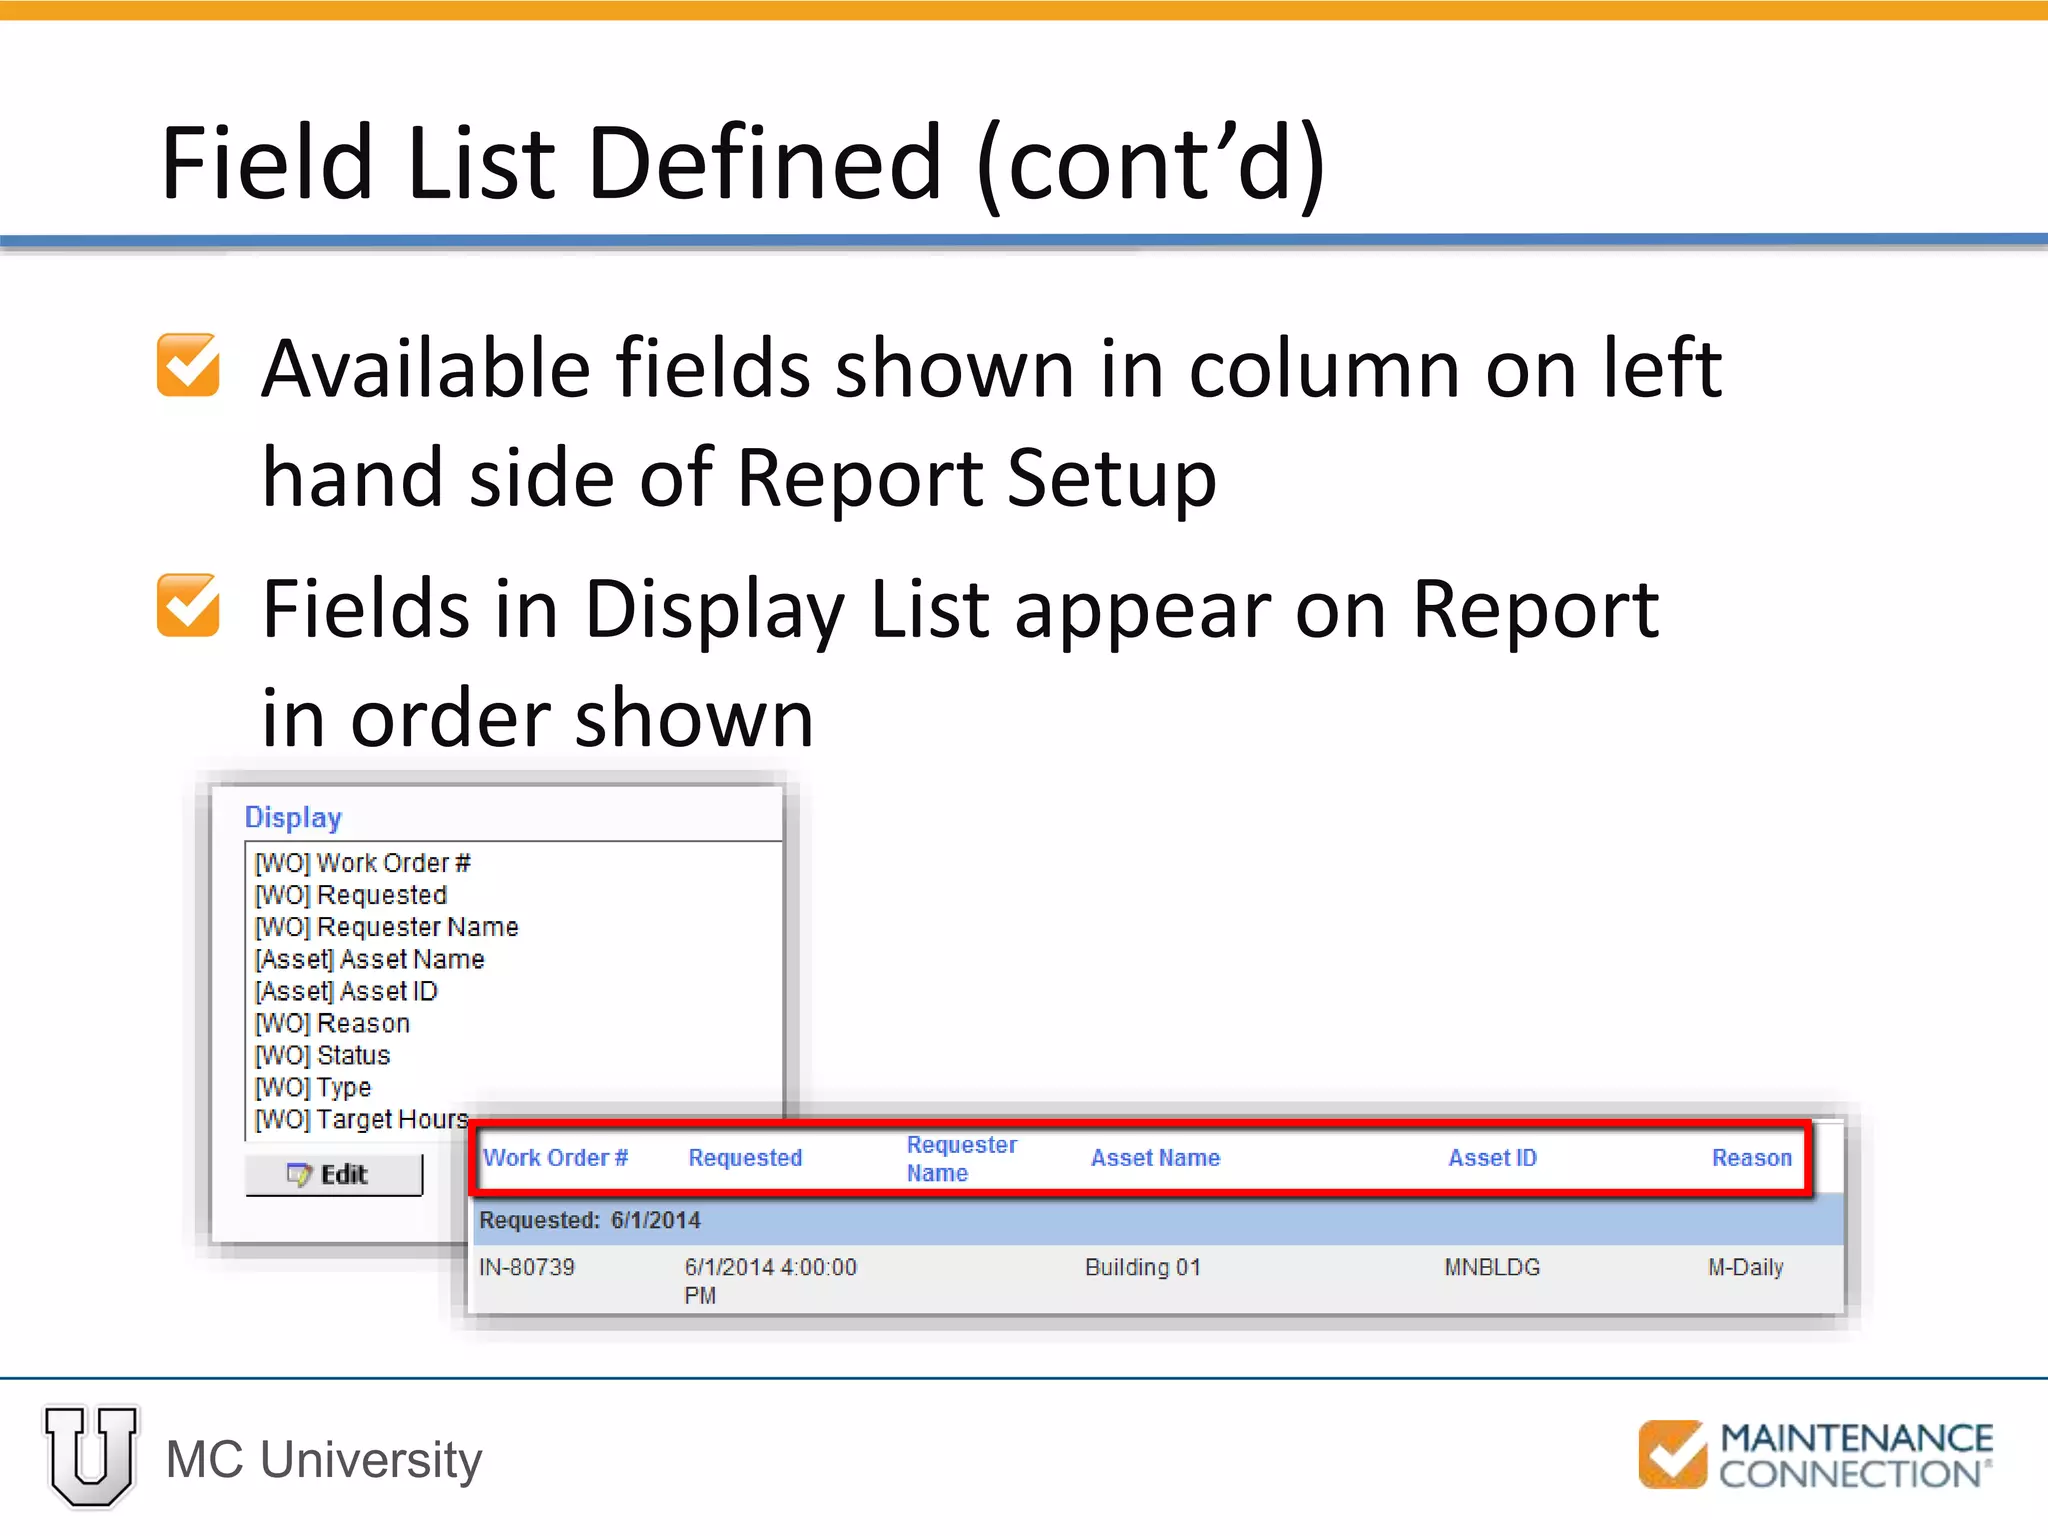
![MC University
Move the [WO] Requester Name field
to just below the [WO] Work Order #
field
Apply the Report Setup changes
Adding, Removing, and Reordering Fields:
Hands-On (cont’d)](https://image.slidesharecdn.com/r03basicsofreportingreportsetuppart1mcu-141226170030-conversion-gate01/75/R03-Basics-of-Reporting-Report-Setup-Part-1-MCU-27-2048.jpg)


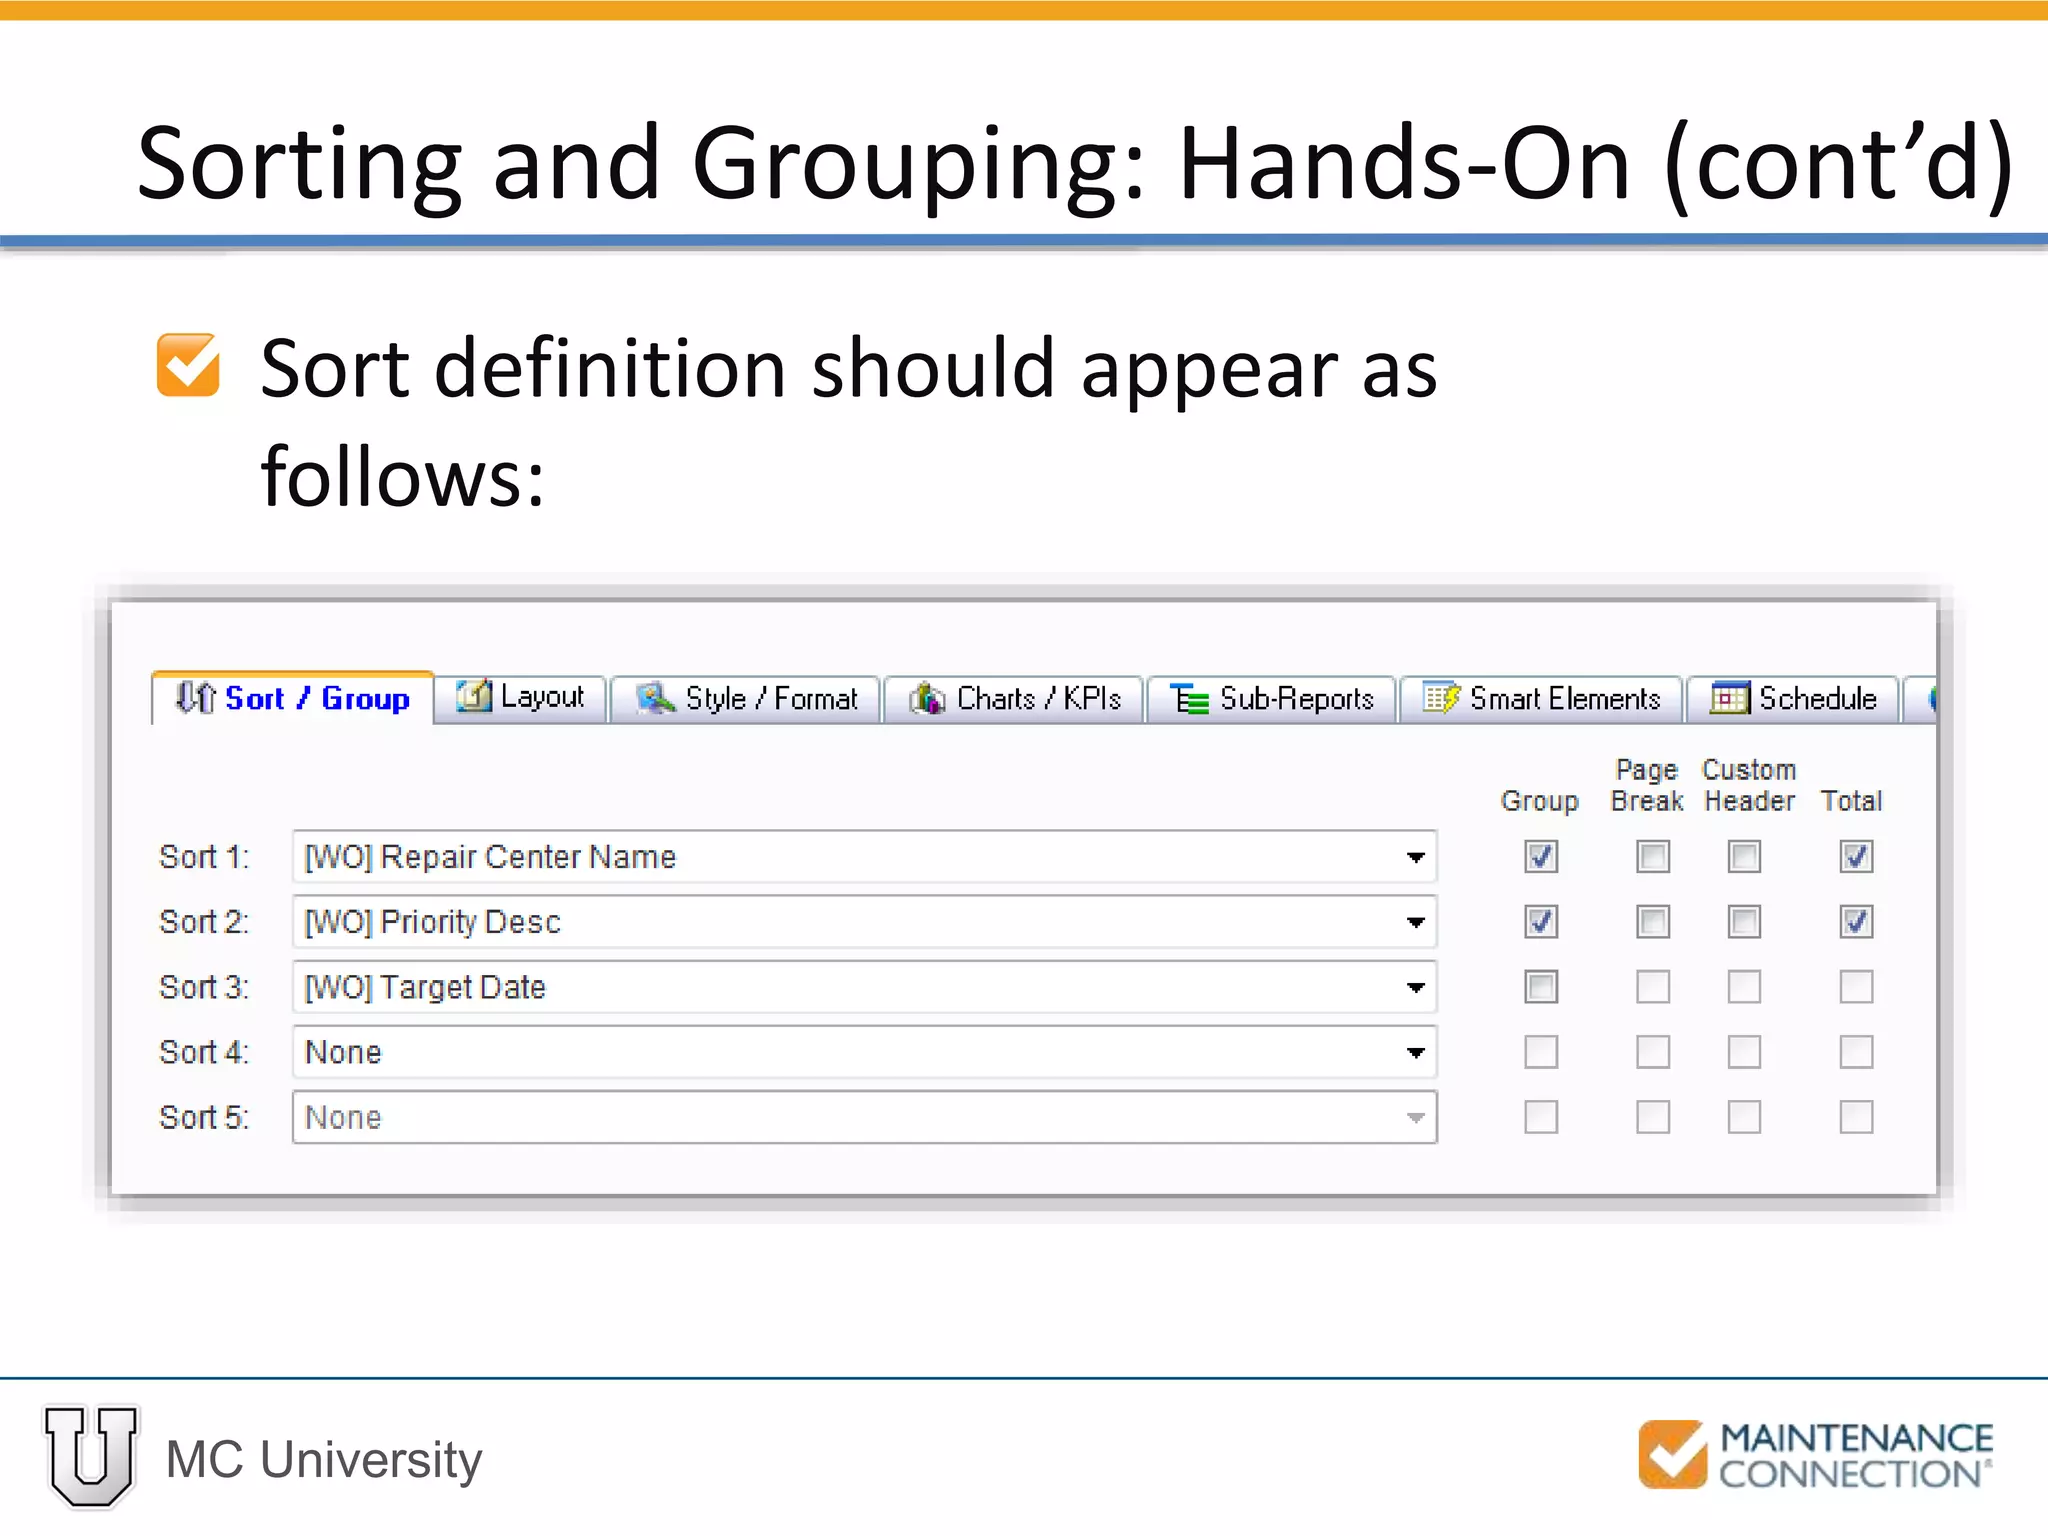
![MC University
Navigate to the Report Setup
Select None from the Sort 1 dropdown
Click on the Sort 1 dropdown and find
the [WO] Repair Center Name field
Select [WO] Repair Center Name
Sorting and Grouping: Hands-On (cont’d)](https://image.slidesharecdn.com/r03basicsofreportingreportsetuppart1mcu-141226170030-conversion-gate01/75/R03-Basics-of-Reporting-Report-Setup-Part-1-MCU-39-2048.jpg)
![MC University
Click on the Sort 2 dropdown and scroll
down to the [WO] Priority Desc field
Select [WO] Priority Desc
Sorting and Grouping: Hands-On (cont’d)](https://image.slidesharecdn.com/r03basicsofreportingreportsetuppart1mcu-141226170030-conversion-gate01/75/R03-Basics-of-Reporting-Report-Setup-Part-1-MCU-40-2048.jpg)
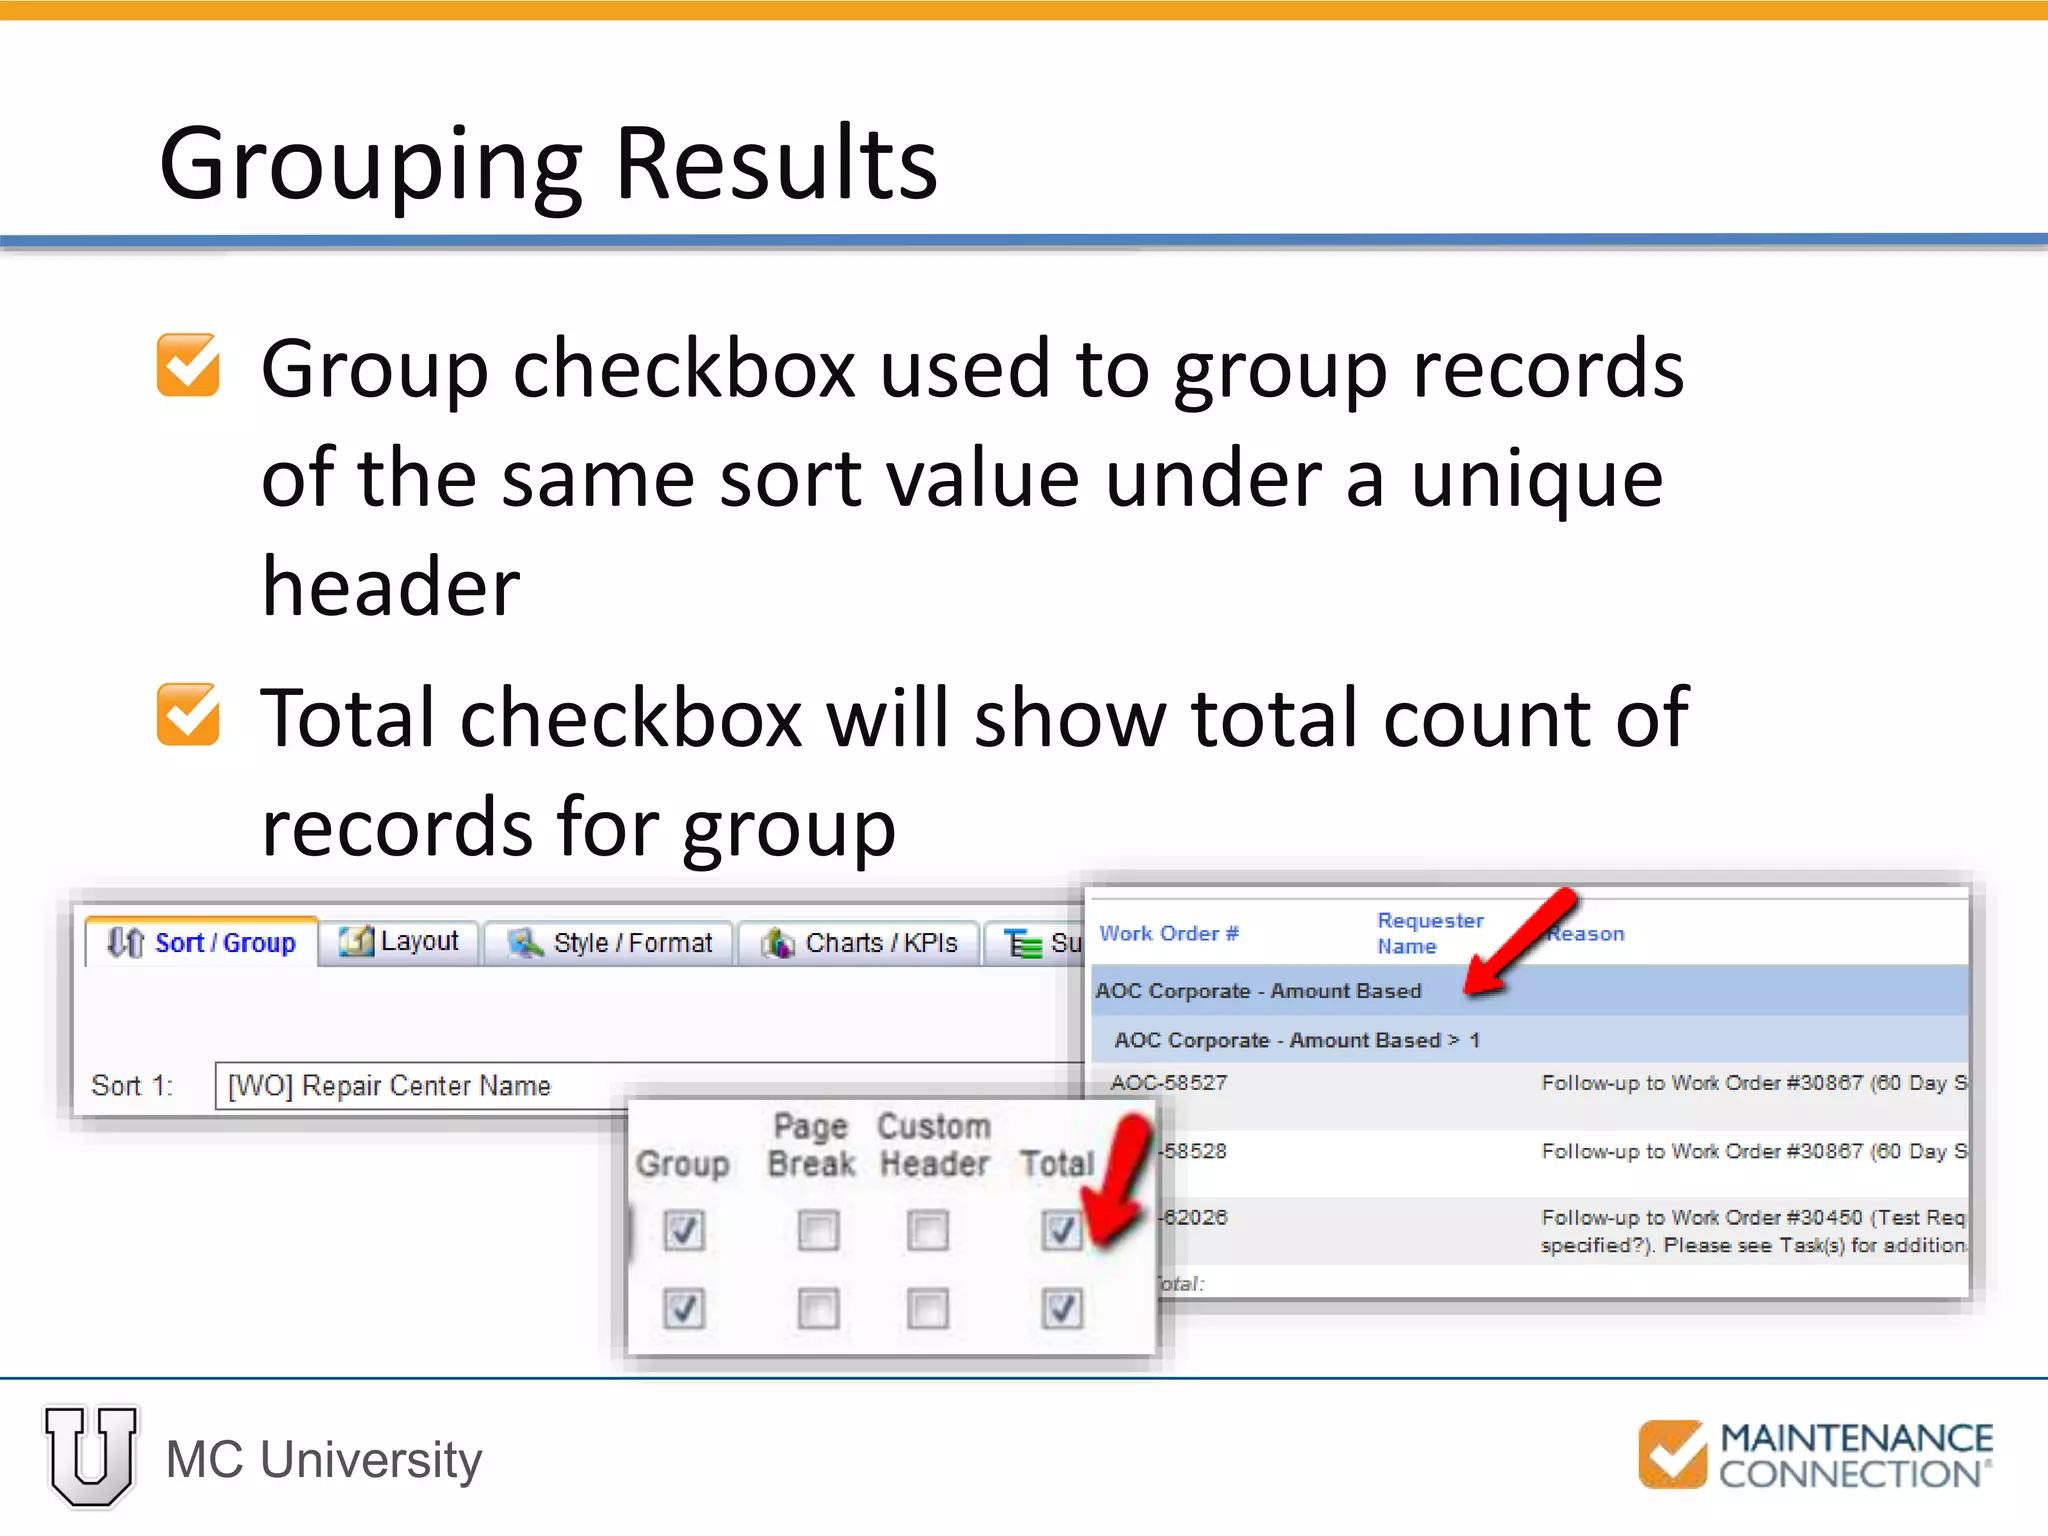
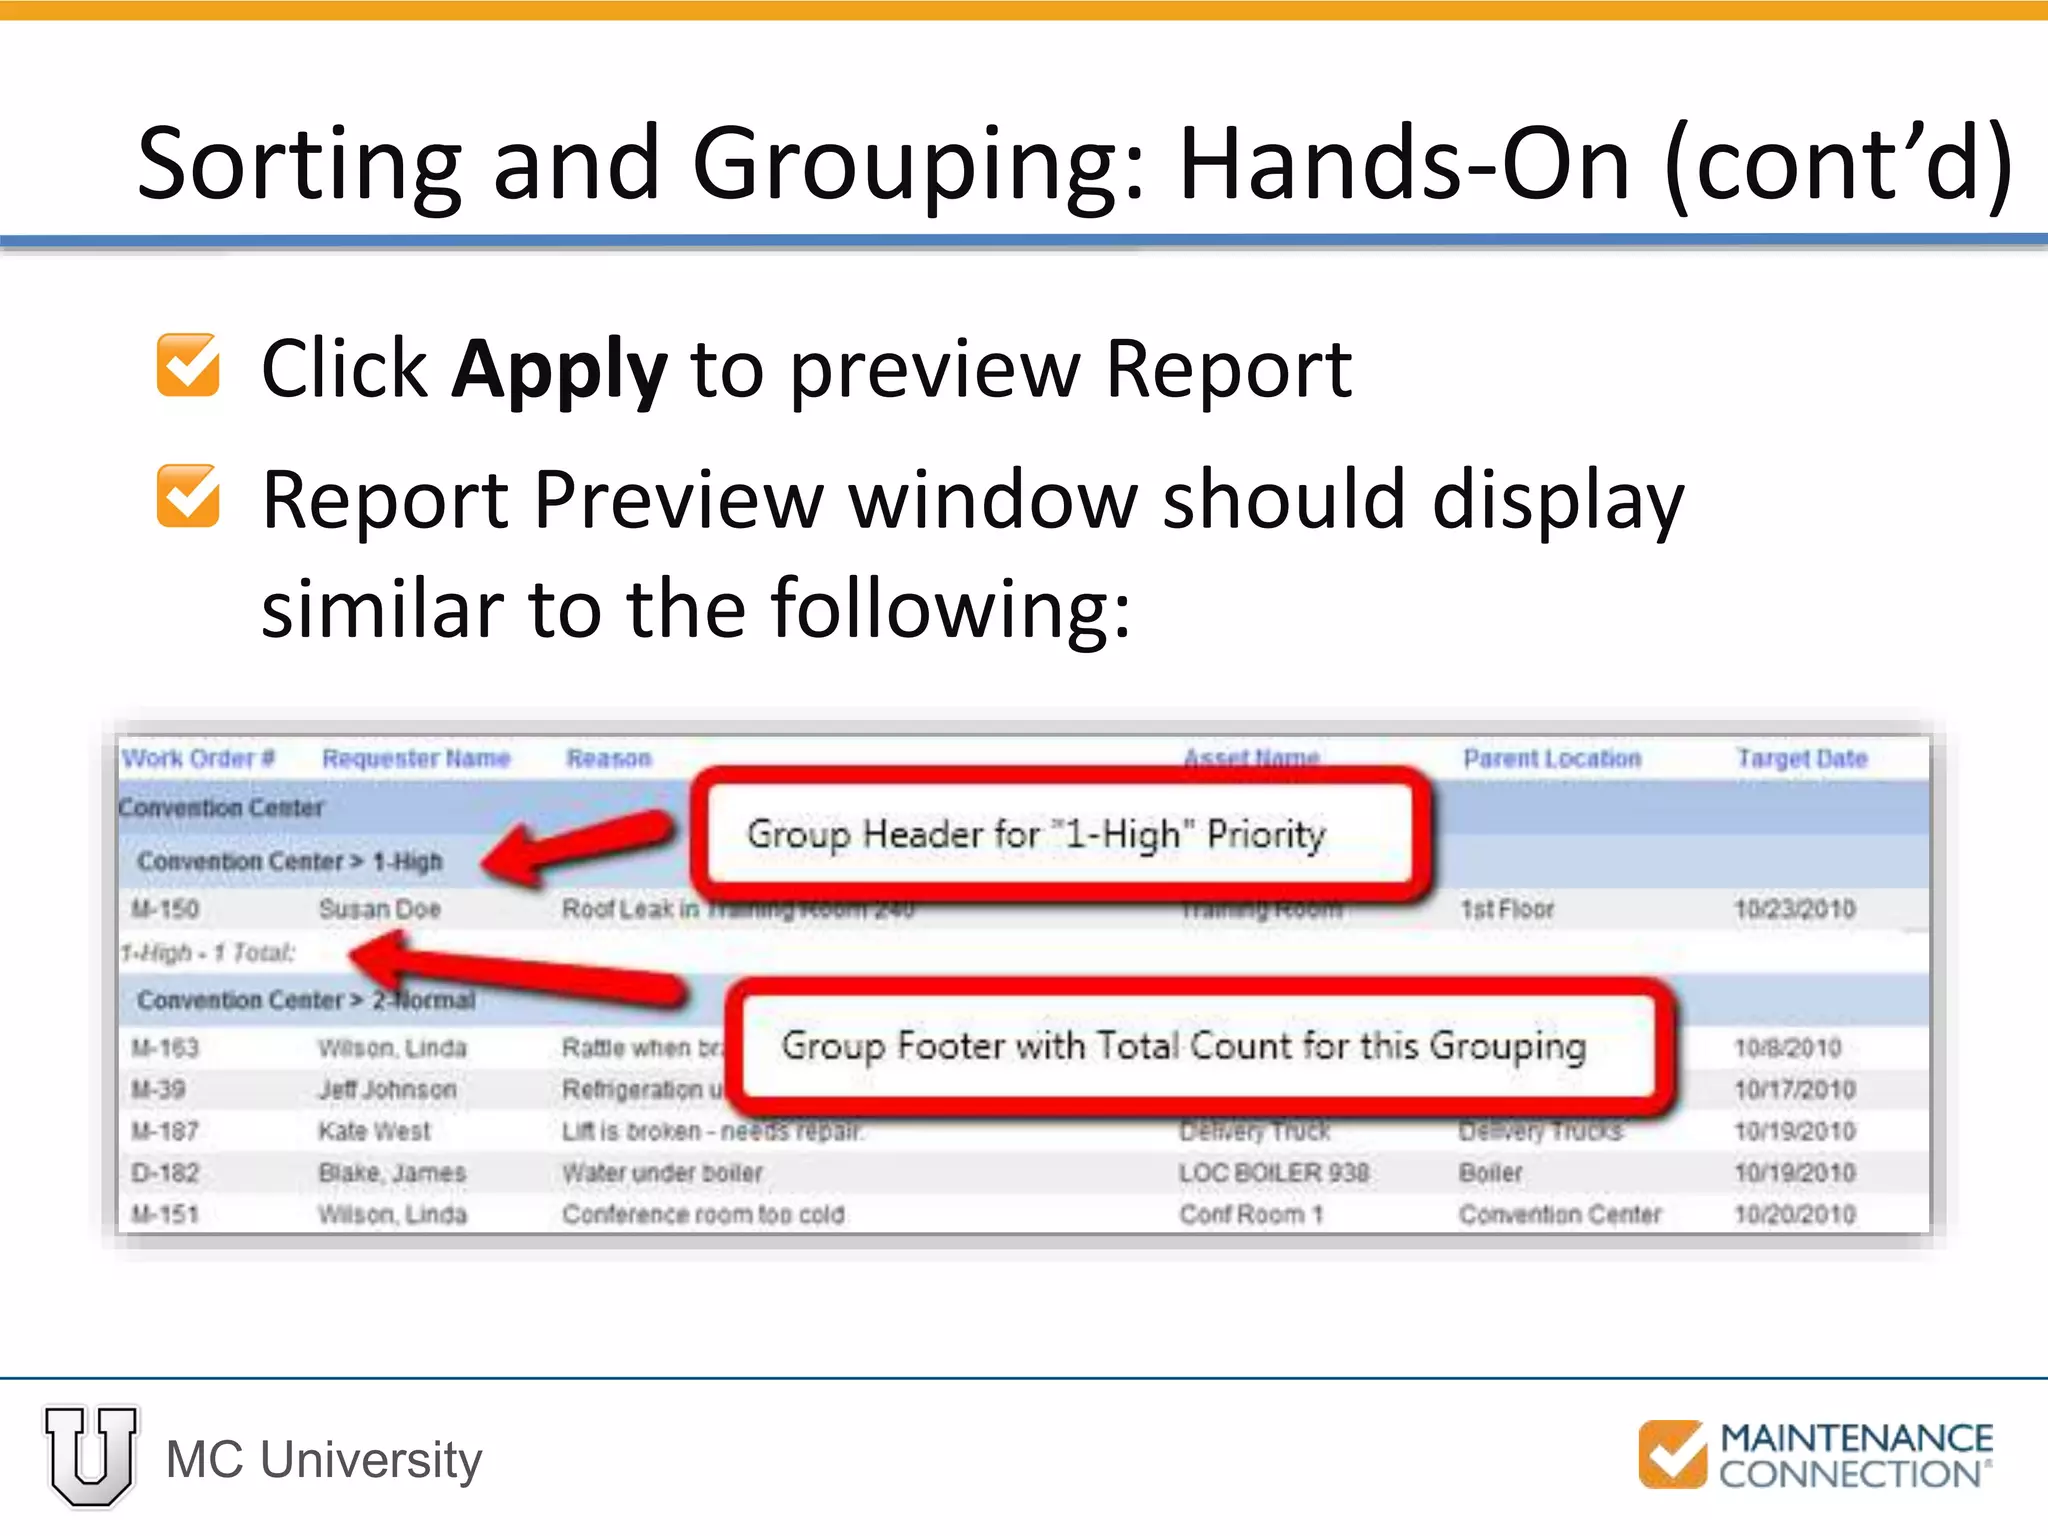
![MC University
Mark indicators for Group and Total for
both Sort 1 and Sort 2
Select the [WO] Target Date field for
the Sort 3 prompt
Sorting and Grouping: Hands-On (cont’d)](https://image.slidesharecdn.com/r03basicsofreportingreportsetuppart1mcu-141226170030-conversion-gate01/75/R03-Basics-of-Reporting-Report-Setup-Part-1-MCU-41-2048.jpg)


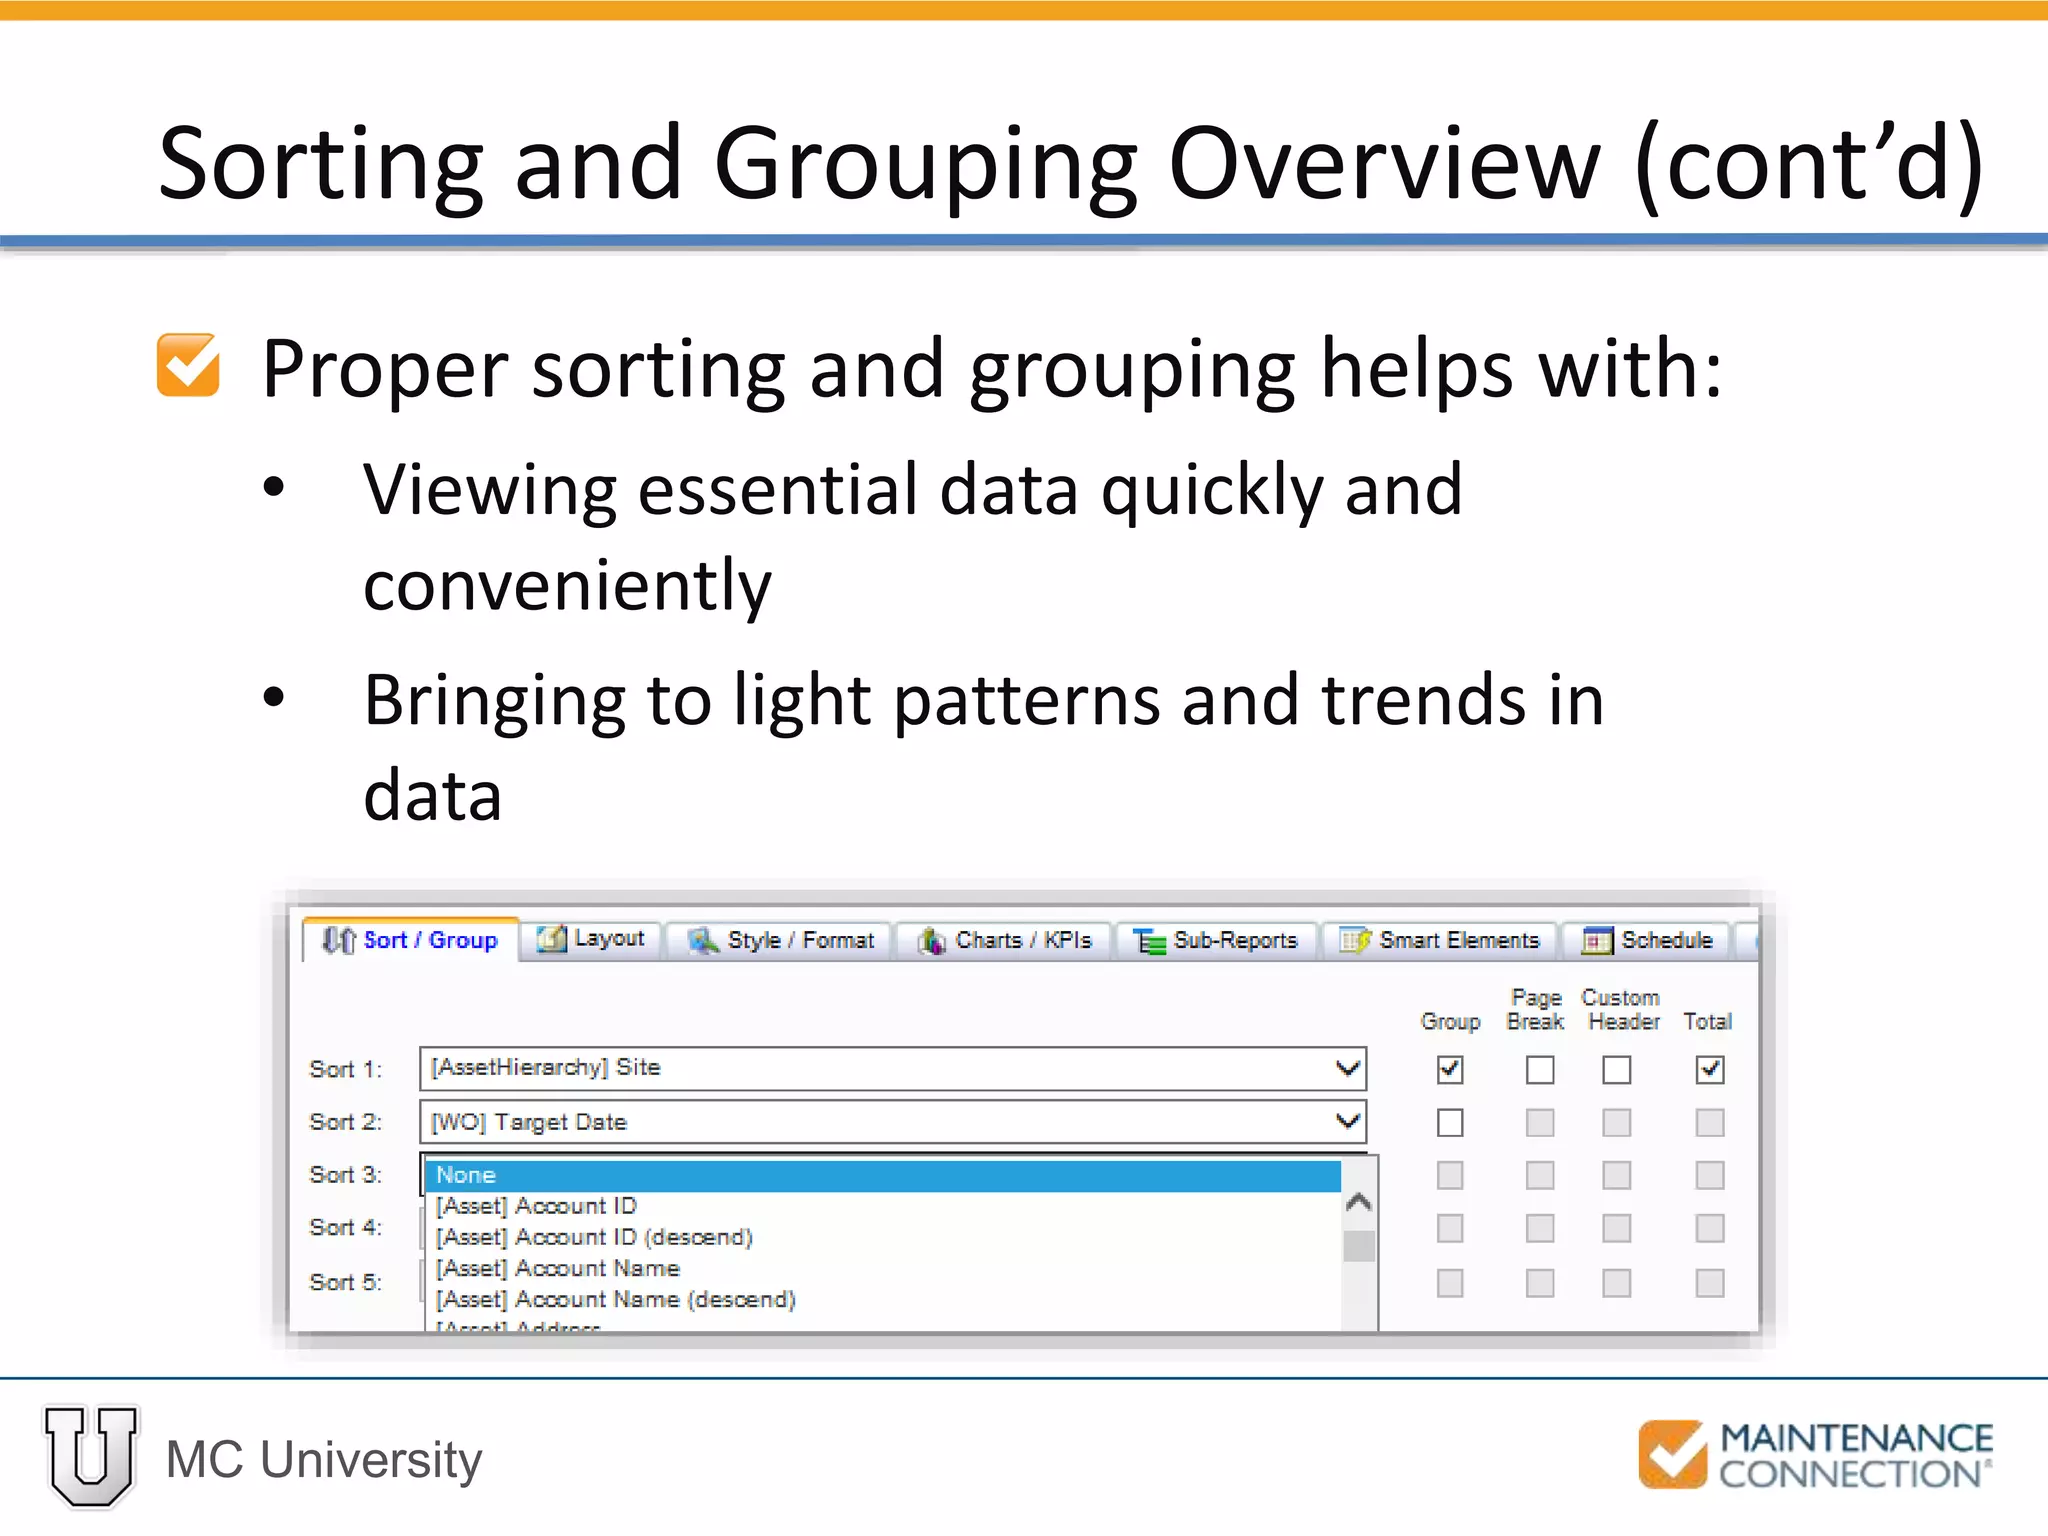
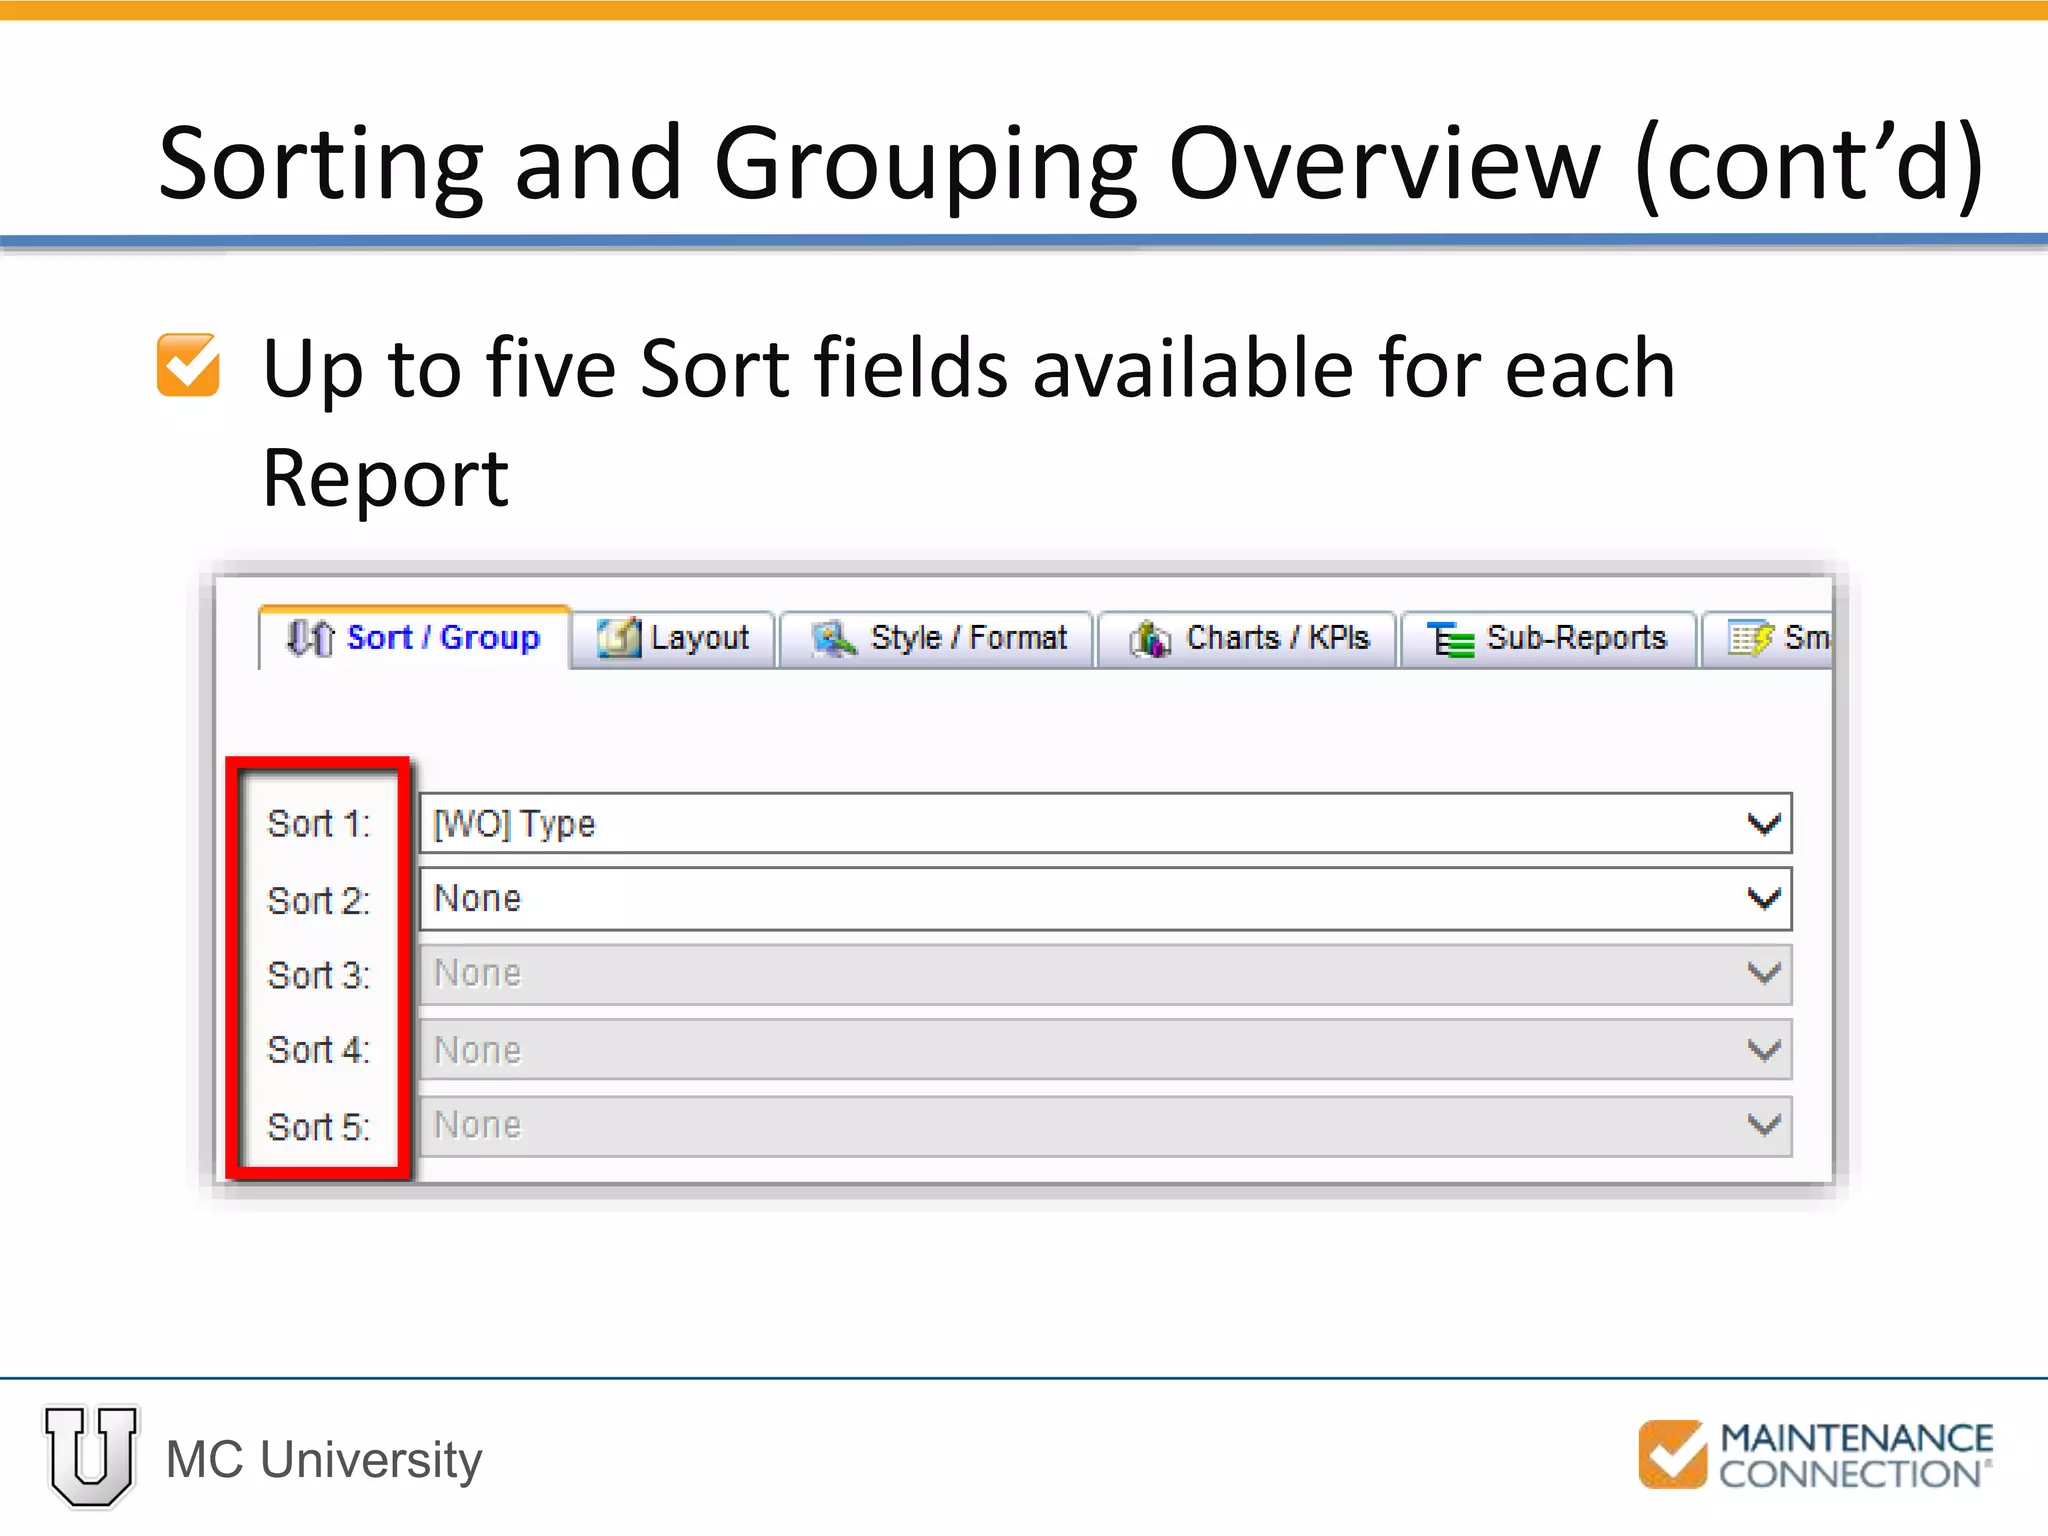
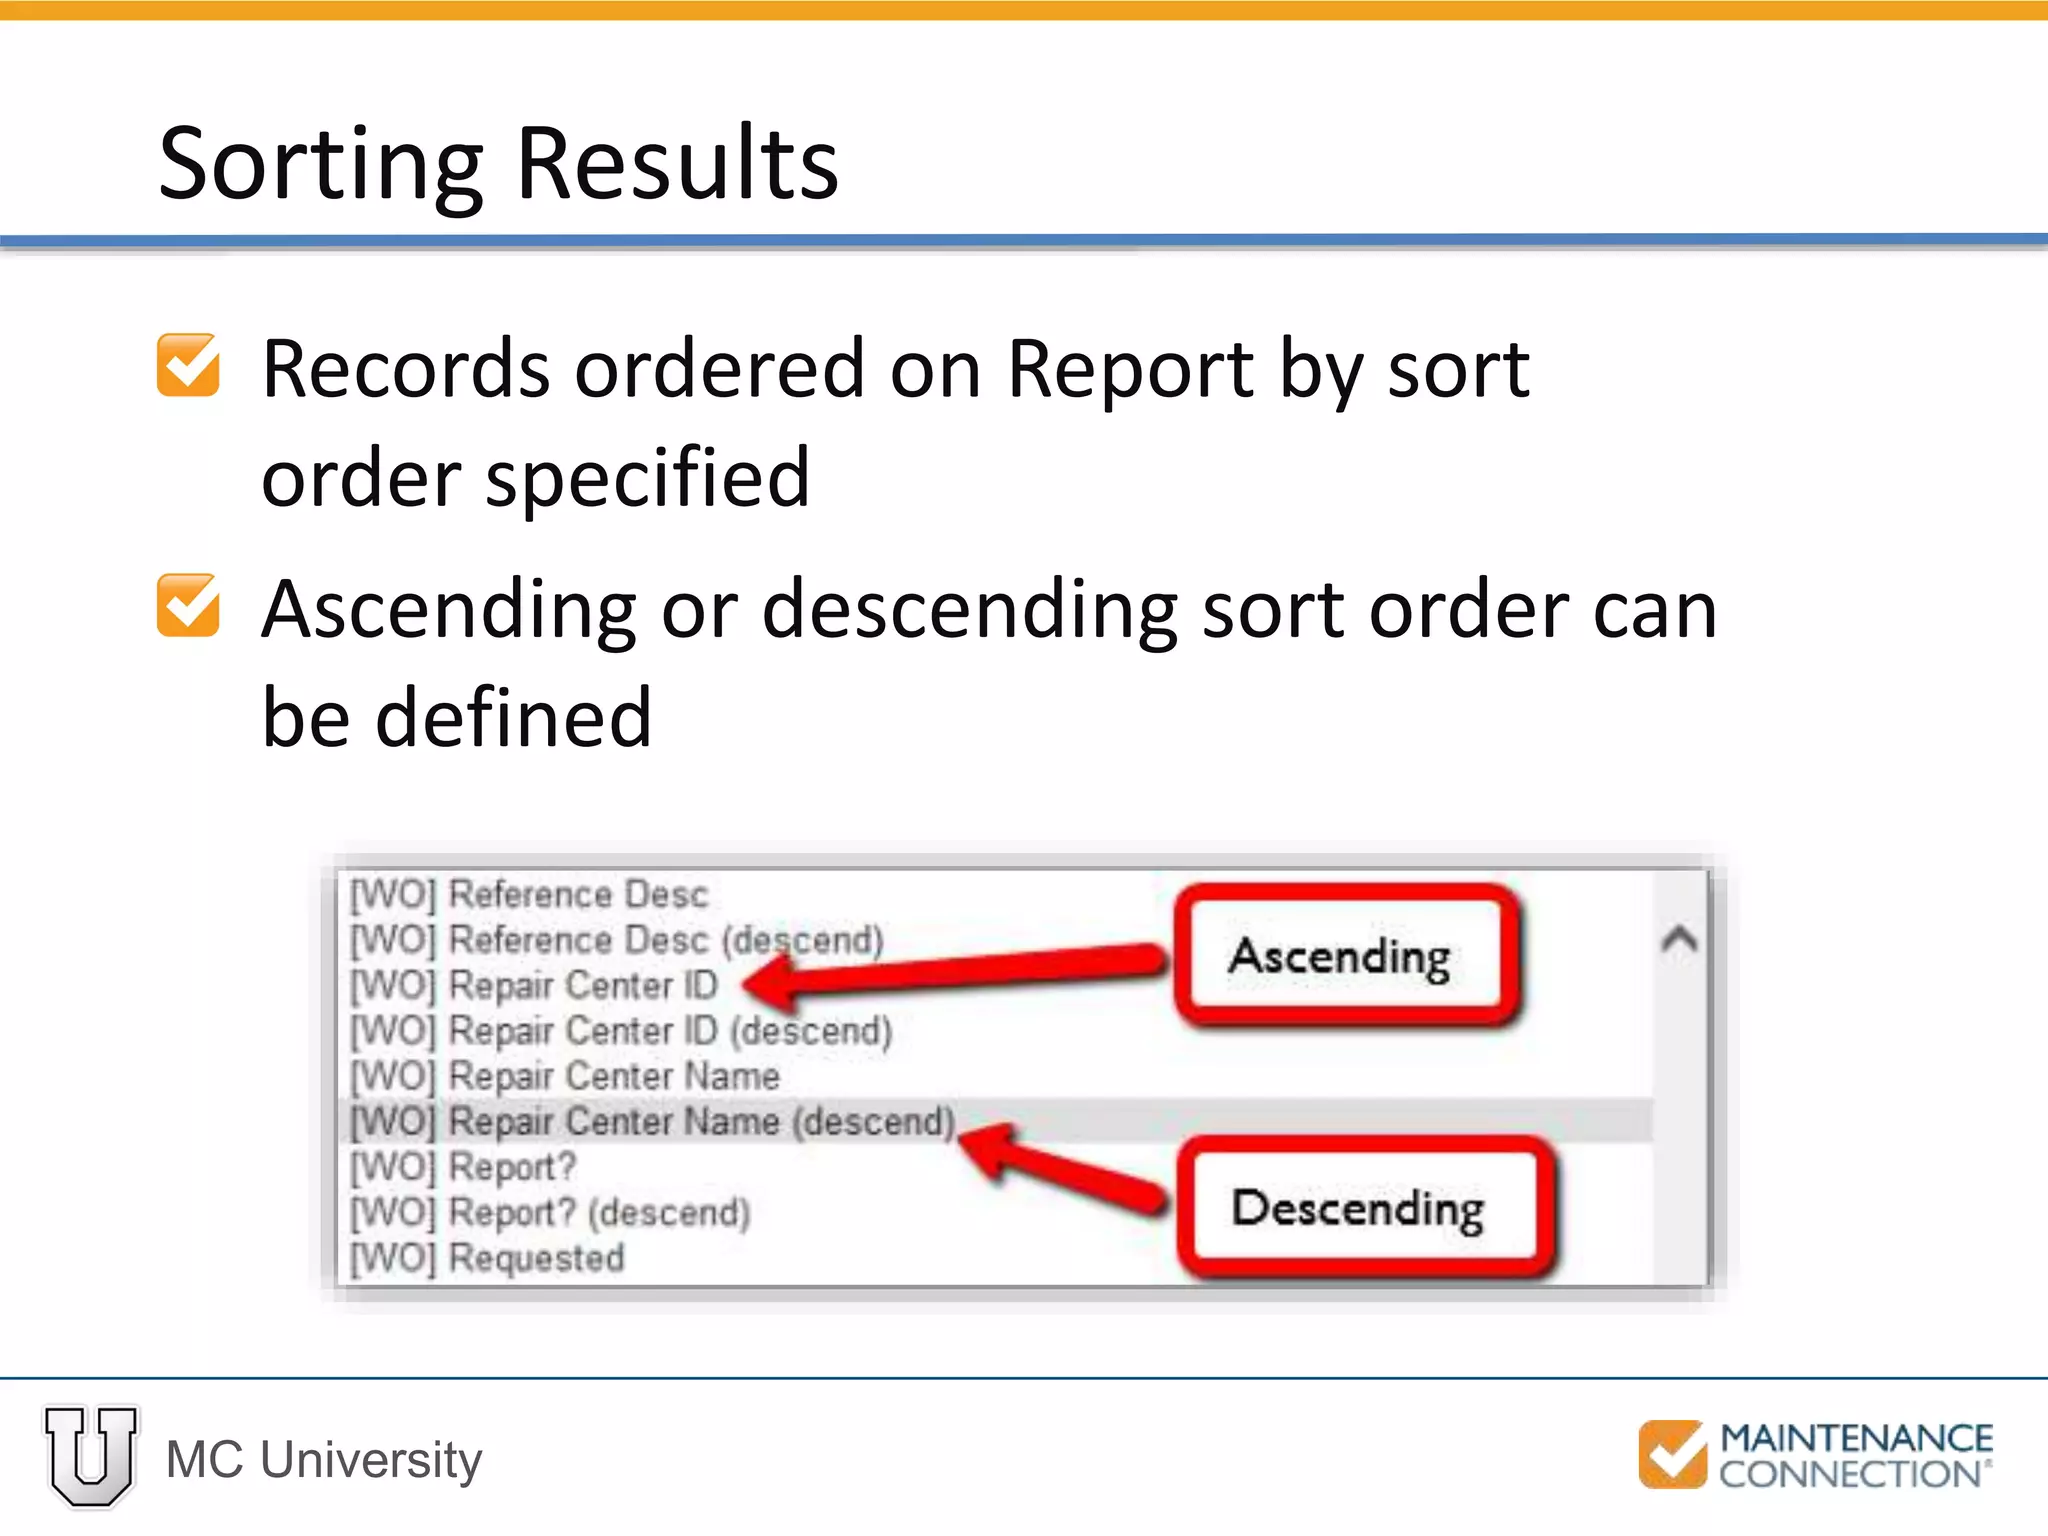
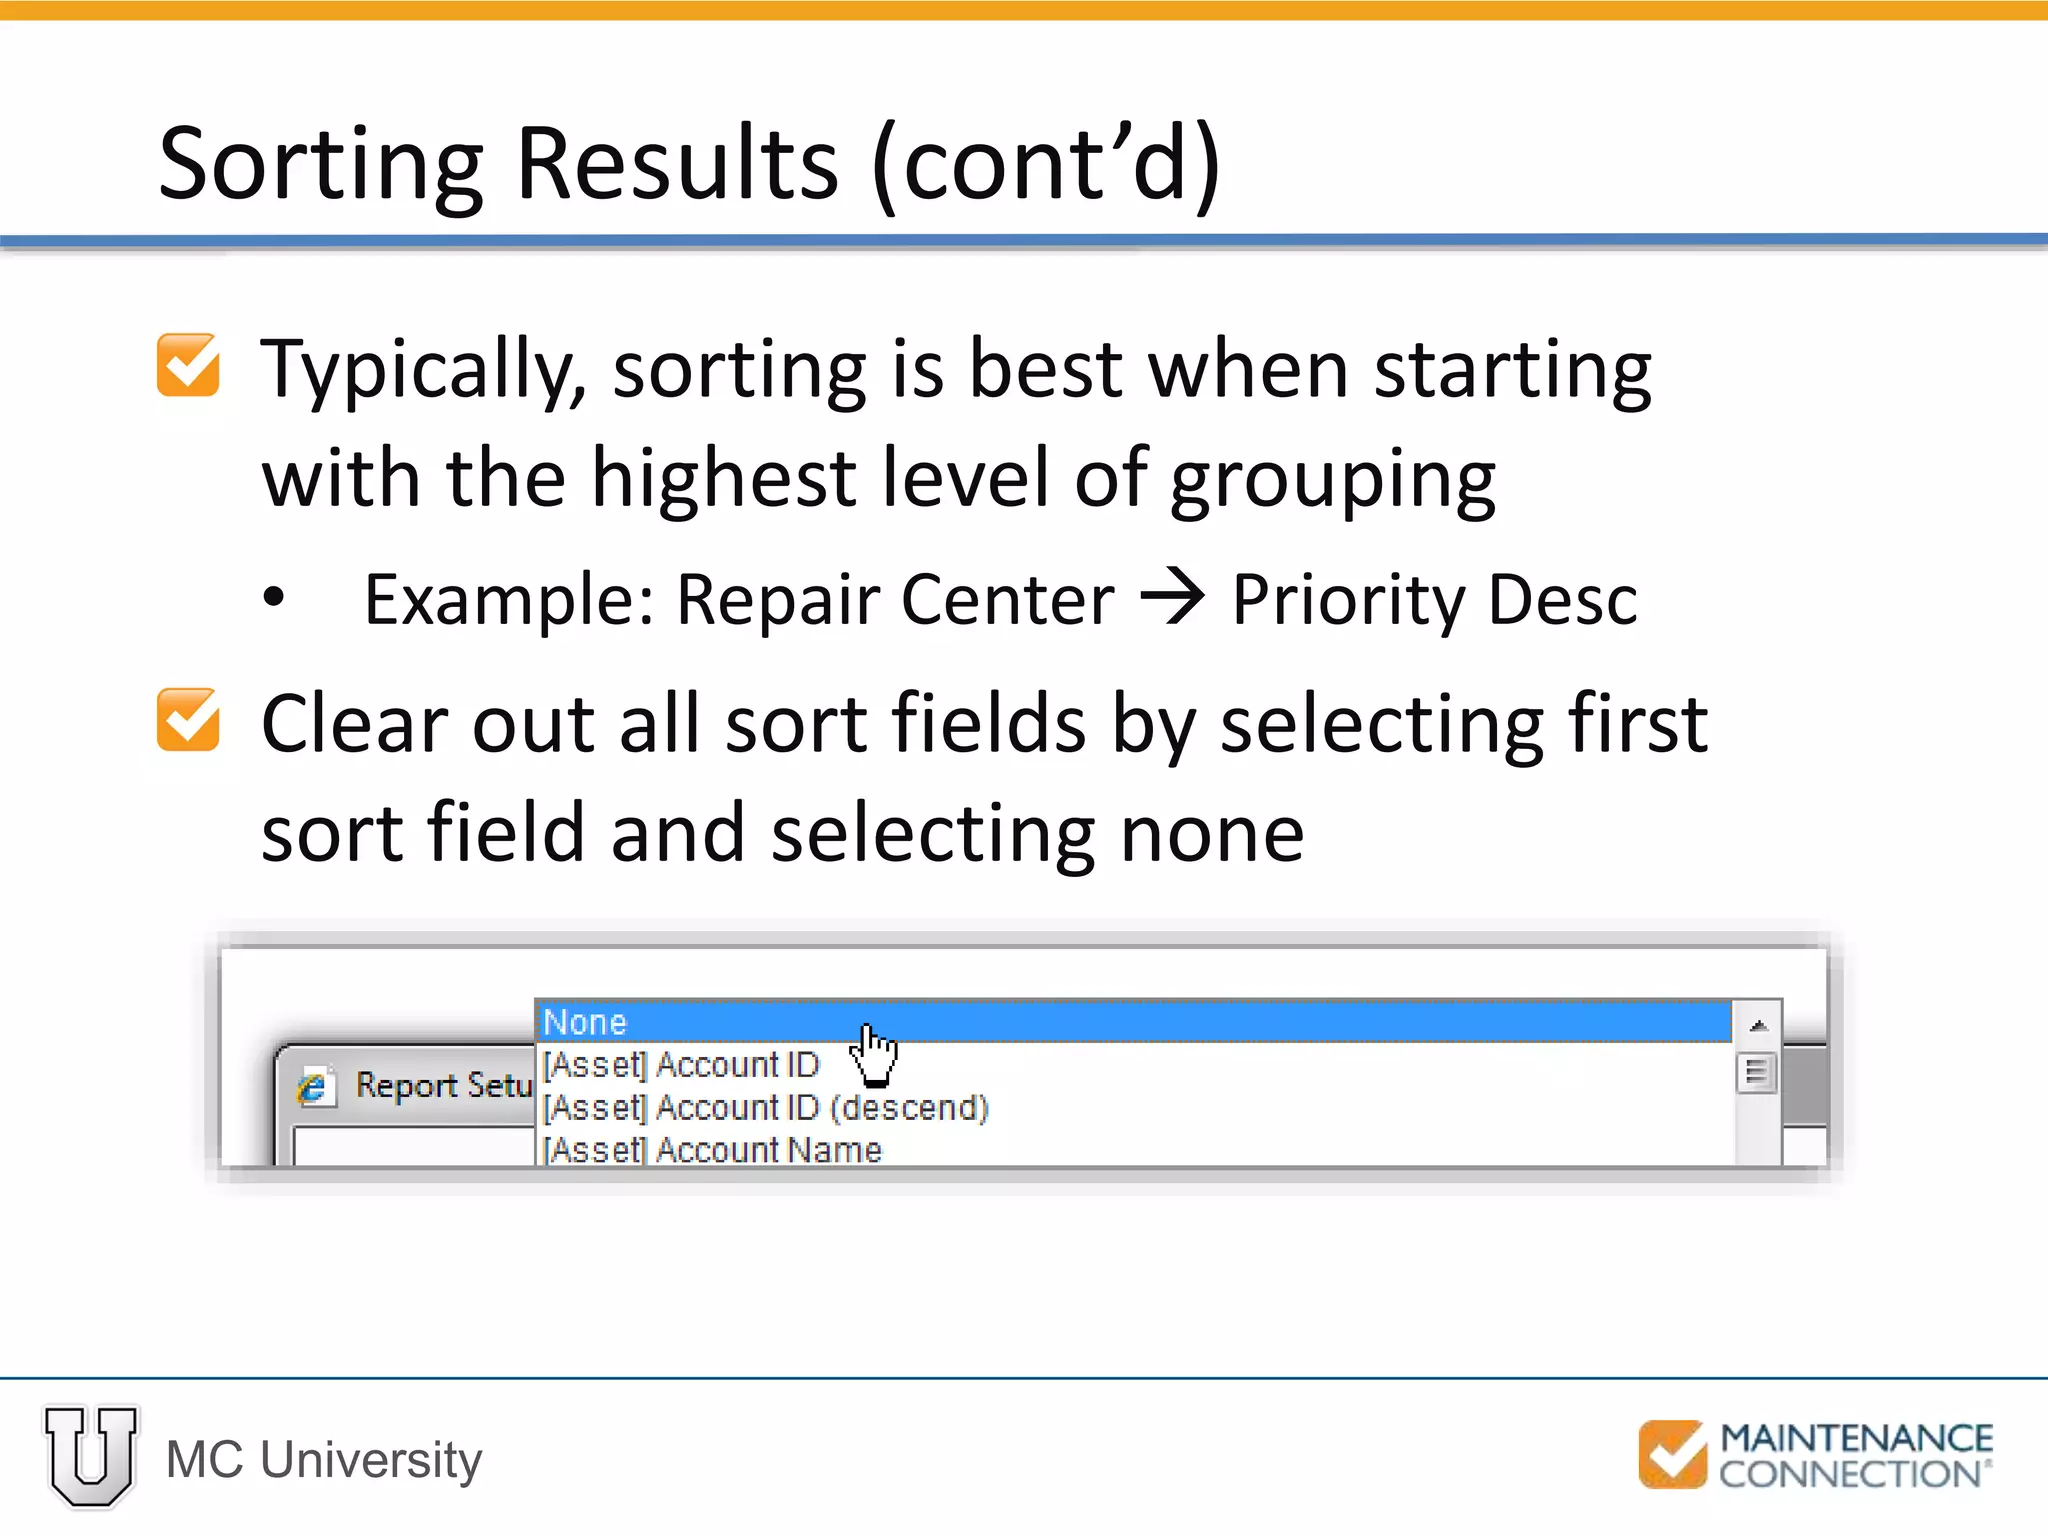
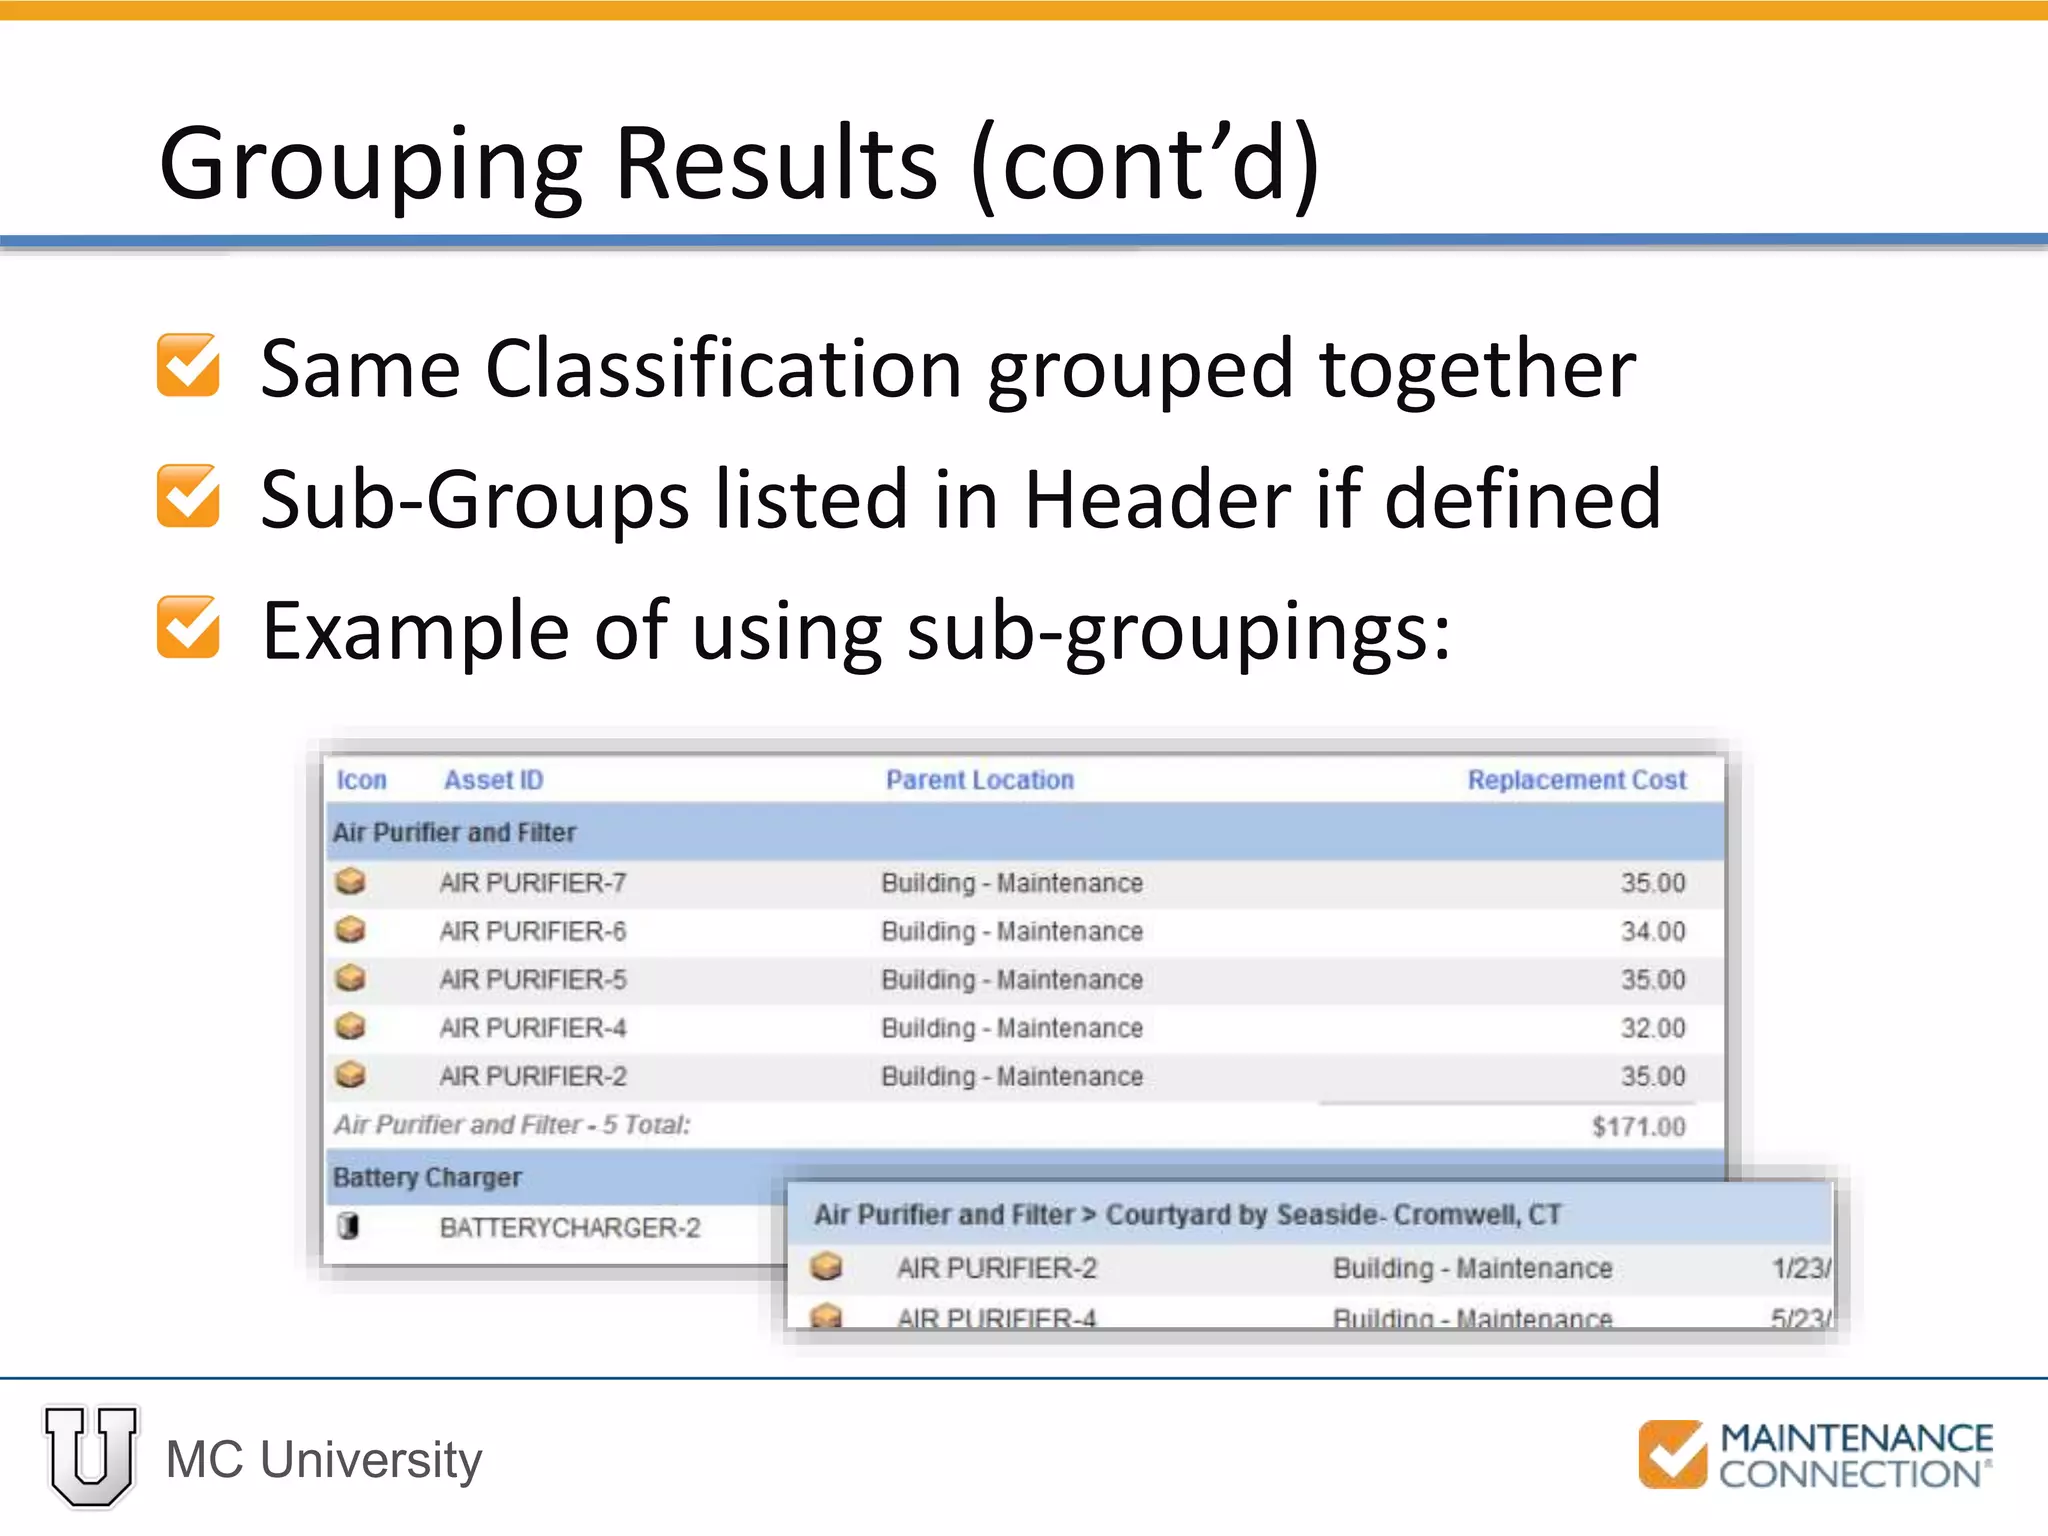
The document outlines the basics of report setup in MC University, detailing how to configure reports including sorting, grouping, and field management. It provides a step-by-step guide on adding, removing, and reordering fields, as well as techniques for sorting and grouping data for better visibility. Hands-on practice sections help users apply their learning effectively.


