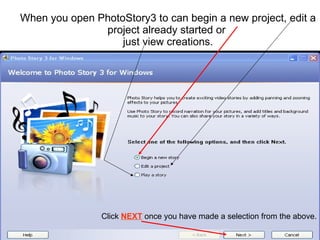
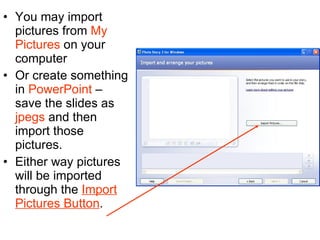
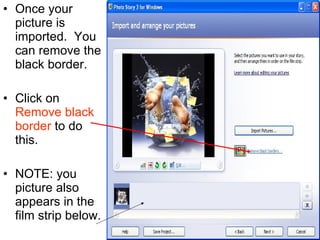
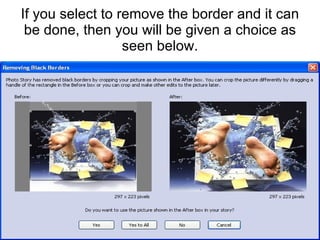
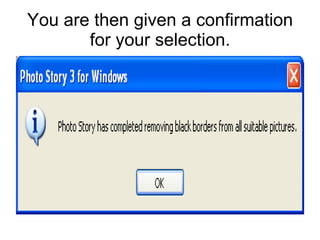
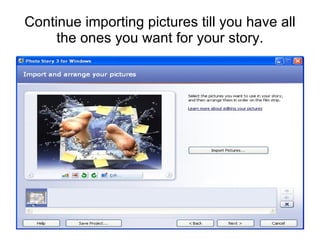
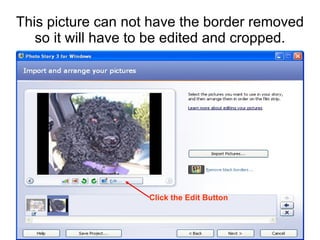
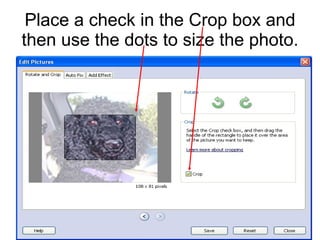
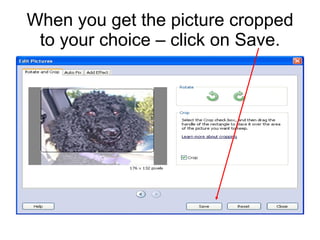
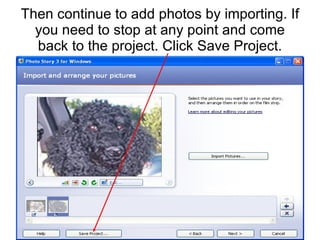
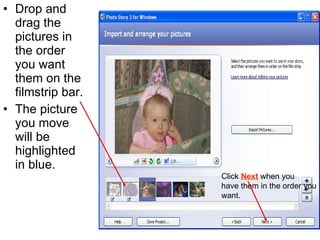
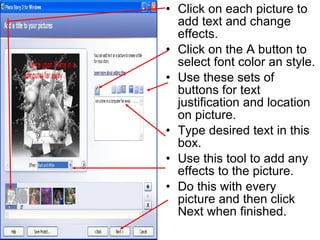
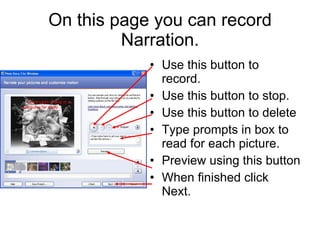
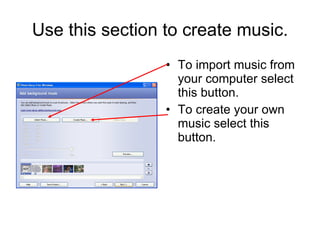
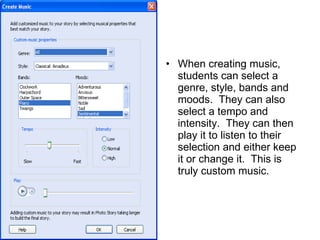
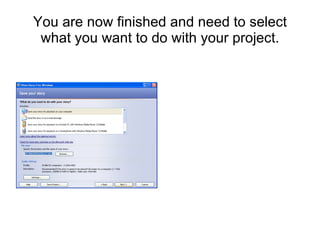
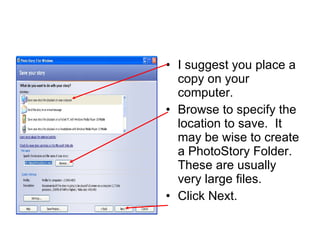
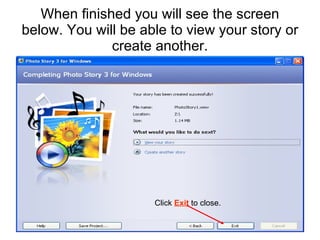
PhotoStory 3 Tutorial Created 1/5/10
When you open PhotoStory3 to can begin a new project, edit a project already started or  just view creations. Click  NEXT  once you have made a selection from the above.
You may import pictures from  My Pictures  on your computer  Or create something in  PowerPoint  – save the slides as  jpegs  and then import those pictures. Either way pictures will be imported through the  Import Pictures Button .
Once your picture is imported.  You can remove the black border. Click on  Remove black border  to do this. NOTE: you picture also appears in the film strip below.
If you select to remove the border and it can be done, then you will be given a choice as seen below.
You are then given a confirmation for your selection.
Continue importing pictures till you have all the ones you want for your story.
This picture can not have the border removed so it will have to be edited and cropped. Click the Edit Button
Place a check in the Crop box and then use the dots to size the photo.
When you get the picture cropped to your choice – click on Save.
Then continue to add photos by importing. If you need to stop at any point and come back to the project. Click Save Project.
Drop and drag the pictures in the order you want them on the filmstrip bar. The picture you move will be highlighted in blue. Click  Next  when you  have them in the order you want.
Click on each picture to add text and change effects. Click on the A button to select font color an style. Use these sets of buttons for text justification and location on picture. Type desired text in this box. Use this tool to add any effects to the picture. Do this with every picture and then click Next when finished.
On this page you can record Narration. Use this button to record. Use this button to stop. Use this button to delete Type prompts in box to read for each picture. Preview using this button When finished click Next.
Use this section to create music. To import music from your computer select this button. To create your own music select this button.
When creating music, students can select a genre, style, bands and moods.  They can also select a tempo and intensity.  They can then play it to listen to their selection and either keep it or change it.  This is truly custom music.
You are now finished and need to select what you want to do with your project.
I suggest you place a copy on your computer. Browse to specify the location to save.  It may be wise to create a PhotoStory Folder.  These are usually very large files. Click Next.
Your saveing process will begin.
When finished you will see the screen below. You will be able to view your story or create another. Click  Exit  to close.
Download PhotoStory 3 at: http://www.microsoft.com/windowsxp/using/digitalphotography/PhotoStory/default.mspx

Photo Story 3 Tutorial

  • 1.
    PhotoStory 3 TutorialCreated 1/5/10
  • 2.
    When you openPhotoStory3 to can begin a new project, edit a project already started or just view creations. Click NEXT once you have made a selection from the above.
  • 3.
    You may importpictures from My Pictures on your computer Or create something in PowerPoint – save the slides as jpegs and then import those pictures. Either way pictures will be imported through the Import Pictures Button .
  • 4.
    Once your pictureis imported. You can remove the black border. Click on Remove black border to do this. NOTE: you picture also appears in the film strip below.
  • 5.
    If you selectto remove the border and it can be done, then you will be given a choice as seen below.
  • 6.
    You are thengiven a confirmation for your selection.
  • 7.
    Continue importing picturestill you have all the ones you want for your story.
  • 8.
    This picture cannot have the border removed so it will have to be edited and cropped. Click the Edit Button
  • 9.
    Place a checkin the Crop box and then use the dots to size the photo.
  • 10.
    When you getthe picture cropped to your choice – click on Save.
  • 11.
    Then continue toadd photos by importing. If you need to stop at any point and come back to the project. Click Save Project.
  • 12.
    Drop and dragthe pictures in the order you want them on the filmstrip bar. The picture you move will be highlighted in blue. Click Next when you have them in the order you want.
  • 13.
    Click on eachpicture to add text and change effects. Click on the A button to select font color an style. Use these sets of buttons for text justification and location on picture. Type desired text in this box. Use this tool to add any effects to the picture. Do this with every picture and then click Next when finished.
  • 14.
    On this pageyou can record Narration. Use this button to record. Use this button to stop. Use this button to delete Type prompts in box to read for each picture. Preview using this button When finished click Next.
  • 15.
    Use this sectionto create music. To import music from your computer select this button. To create your own music select this button.
  • 16.
    When creating music,students can select a genre, style, bands and moods. They can also select a tempo and intensity. They can then play it to listen to their selection and either keep it or change it. This is truly custom music.
  • 17.
    You are nowfinished and need to select what you want to do with your project.
  • 18.
    I suggest youplace a copy on your computer. Browse to specify the location to save. It may be wise to create a PhotoStory Folder. These are usually very large files. Click Next.
  • 19.
  • 20.
    When finished youwill see the screen below. You will be able to view your story or create another. Click Exit to close.
  • 21.
    Download PhotoStory 3at: http://www.microsoft.com/windowsxp/using/digitalphotography/PhotoStory/default.mspx