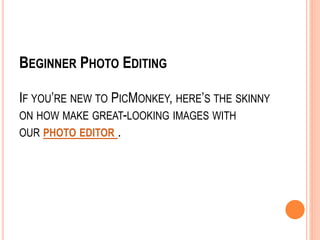
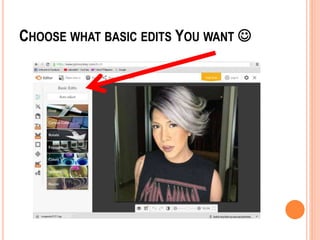
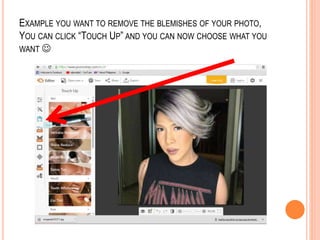
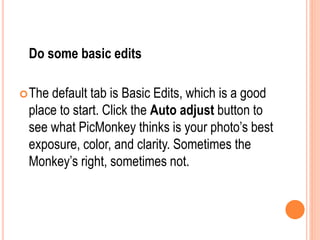
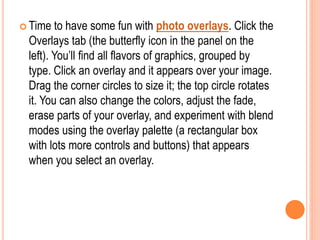
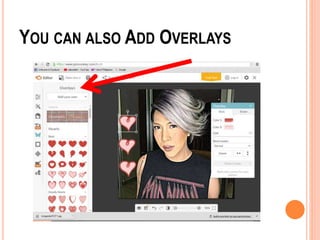
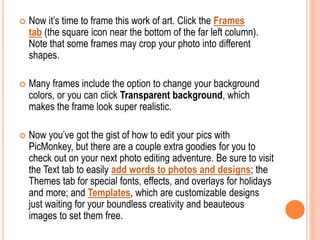
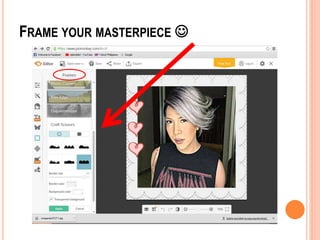
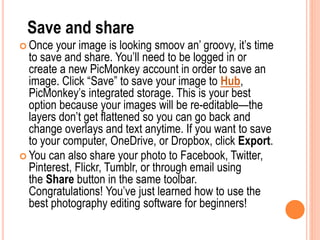
TUTORIAL PHOTO EDITING FOR BEGINNERS
(PICMONKEY TUTORIAL)
BEGINNER PHOTO EDITING
IF YOU’RE NEW TO PICMONKEY, HERE’S THE SKINNY
ON HOW MAKE GREAT-LOOKING IMAGES WITH
OUR PHOTO EDITOR .
CHOOSE WHAT BASIC EDITS YOU WANT 
EXAMPLE YOU WANT TO REMOVE THE BLEMISHES OF YOUR PHOTO,
YOU CAN CLICK “TOUCH UP” AND YOU CAN NOW CHOOSE WHAT YOU
WANT 
Do some basic edits
The default tab is Basic Edits, which is a good
place to start. Click the Auto adjust button to
see what PicMonkey thinks is your photo’s best
exposure, color, and clarity. Sometimes the
Monkey’s right, sometimes not.
Get to know the bottom toolbar
 Notice the toolbar that sits directly below your photo.
Your best friend is the Undo button, the curvy arrow
icon that points to the left. This is how you undo any
action or any effect once it’s been applied. For
example, if you didn’t like what Auto adjust did to
your photo, click Undo. You can also take a look at
the changes with the Before/after button, which looks
like a half-filled-in rectangle. Click and hold it to see
your image before the changes, and release to see it
after edits.
Click the Effects tab (the magic wand icon in
the far left column), and you’ll find photo effects
that can dramatically change the mood of your
photo in one click. The effects in the Tried and
True group are some of PicMonkeyers’ faves.
We used Intrepid to create an artsy vibe with
some darkened edges. 
 Time to have some fun with photo overlays. Click the
Overlays tab (the butterfly icon in the panel on the
left). You’ll find all flavors of graphics, grouped by
type. Click an overlay and it appears over your image.
Drag the corner circles to size it; the top circle rotates
it. You can also change the colors, adjust the fade,
erase parts of your overlay, and experiment with blend
modes using the overlay palette (a rectangular box
with lots more controls and buttons) that appears
when you select an overlay.
YOU CAN ALSO ADD OVERLAYS
 Now it’s time to frame this work of art. Click the Frames
tab (the square icon near the bottom of the far left column).
Note that some frames may crop your photo into different
shapes.
 Many frames include the option to change your background
colors, or you can click Transparent background, which
makes the frame look super realistic.
 Now you’ve got the gist of how to edit your pics with
PicMonkey, but there are a couple extra goodies for you to
check out on your next photo editing adventure. Be sure to visit
the Text tab to easily add words to photos and designs; the
Themes tab for special fonts, effects, and overlays for holidays
and more; and Templates, which are customizable designs
just waiting for your boundless creativity and beauteous
images to set them free.
FRAME YOUR MASTERPIECE 
Save and share
 Once your image is looking smoov an’ groovy, it’s time
to save and share. You’ll need to be logged in or
create a new PicMonkey account in order to save an
image. Click “Save” to save your image to Hub,
PicMonkey’s integrated storage. This is your best
option because your images will be re-editable—the
layers don’t get flattened so you can go back and
change overlays and text anytime. If you want to save
to your computer, OneDrive, or Dropbox, click Export.
 You can also share your photo to Facebook, Twitter,
Pinterest, Flickr, Tumblr, or through email using
the Share button in the same toolbar.
Congratulations! You’ve just learned how to use the
best photography editing software for beginners!
Congratulations!

Tutorial photo-editing-for-beginners

  • 1.
    TUTORIAL PHOTO EDITINGFOR BEGINNERS (PICMONKEY TUTORIAL)
  • 2.
    BEGINNER PHOTO EDITING IFYOU’RE NEW TO PICMONKEY, HERE’S THE SKINNY ON HOW MAKE GREAT-LOOKING IMAGES WITH OUR PHOTO EDITOR .
  • 4.
    CHOOSE WHAT BASICEDITS YOU WANT 
  • 5.
    EXAMPLE YOU WANTTO REMOVE THE BLEMISHES OF YOUR PHOTO, YOU CAN CLICK “TOUCH UP” AND YOU CAN NOW CHOOSE WHAT YOU WANT 
  • 6.
    Do some basicedits The default tab is Basic Edits, which is a good place to start. Click the Auto adjust button to see what PicMonkey thinks is your photo’s best exposure, color, and clarity. Sometimes the Monkey’s right, sometimes not.
  • 7.
    Get to knowthe bottom toolbar  Notice the toolbar that sits directly below your photo. Your best friend is the Undo button, the curvy arrow icon that points to the left. This is how you undo any action or any effect once it’s been applied. For example, if you didn’t like what Auto adjust did to your photo, click Undo. You can also take a look at the changes with the Before/after button, which looks like a half-filled-in rectangle. Click and hold it to see your image before the changes, and release to see it after edits.
  • 8.
    Click the Effectstab (the magic wand icon in the far left column), and you’ll find photo effects that can dramatically change the mood of your photo in one click. The effects in the Tried and True group are some of PicMonkeyers’ faves. We used Intrepid to create an artsy vibe with some darkened edges. 
  • 10.
     Time tohave some fun with photo overlays. Click the Overlays tab (the butterfly icon in the panel on the left). You’ll find all flavors of graphics, grouped by type. Click an overlay and it appears over your image. Drag the corner circles to size it; the top circle rotates it. You can also change the colors, adjust the fade, erase parts of your overlay, and experiment with blend modes using the overlay palette (a rectangular box with lots more controls and buttons) that appears when you select an overlay.
  • 11.
    YOU CAN ALSOADD OVERLAYS
  • 12.
     Now it’stime to frame this work of art. Click the Frames tab (the square icon near the bottom of the far left column). Note that some frames may crop your photo into different shapes.  Many frames include the option to change your background colors, or you can click Transparent background, which makes the frame look super realistic.  Now you’ve got the gist of how to edit your pics with PicMonkey, but there are a couple extra goodies for you to check out on your next photo editing adventure. Be sure to visit the Text tab to easily add words to photos and designs; the Themes tab for special fonts, effects, and overlays for holidays and more; and Templates, which are customizable designs just waiting for your boundless creativity and beauteous images to set them free.
  • 13.
  • 14.
    Save and share Once your image is looking smoov an’ groovy, it’s time to save and share. You’ll need to be logged in or create a new PicMonkey account in order to save an image. Click “Save” to save your image to Hub, PicMonkey’s integrated storage. This is your best option because your images will be re-editable—the layers don’t get flattened so you can go back and change overlays and text anytime. If you want to save to your computer, OneDrive, or Dropbox, click Export.  You can also share your photo to Facebook, Twitter, Pinterest, Flickr, Tumblr, or through email using the Share button in the same toolbar. Congratulations! You’ve just learned how to use the best photography editing software for beginners!
  • 15.