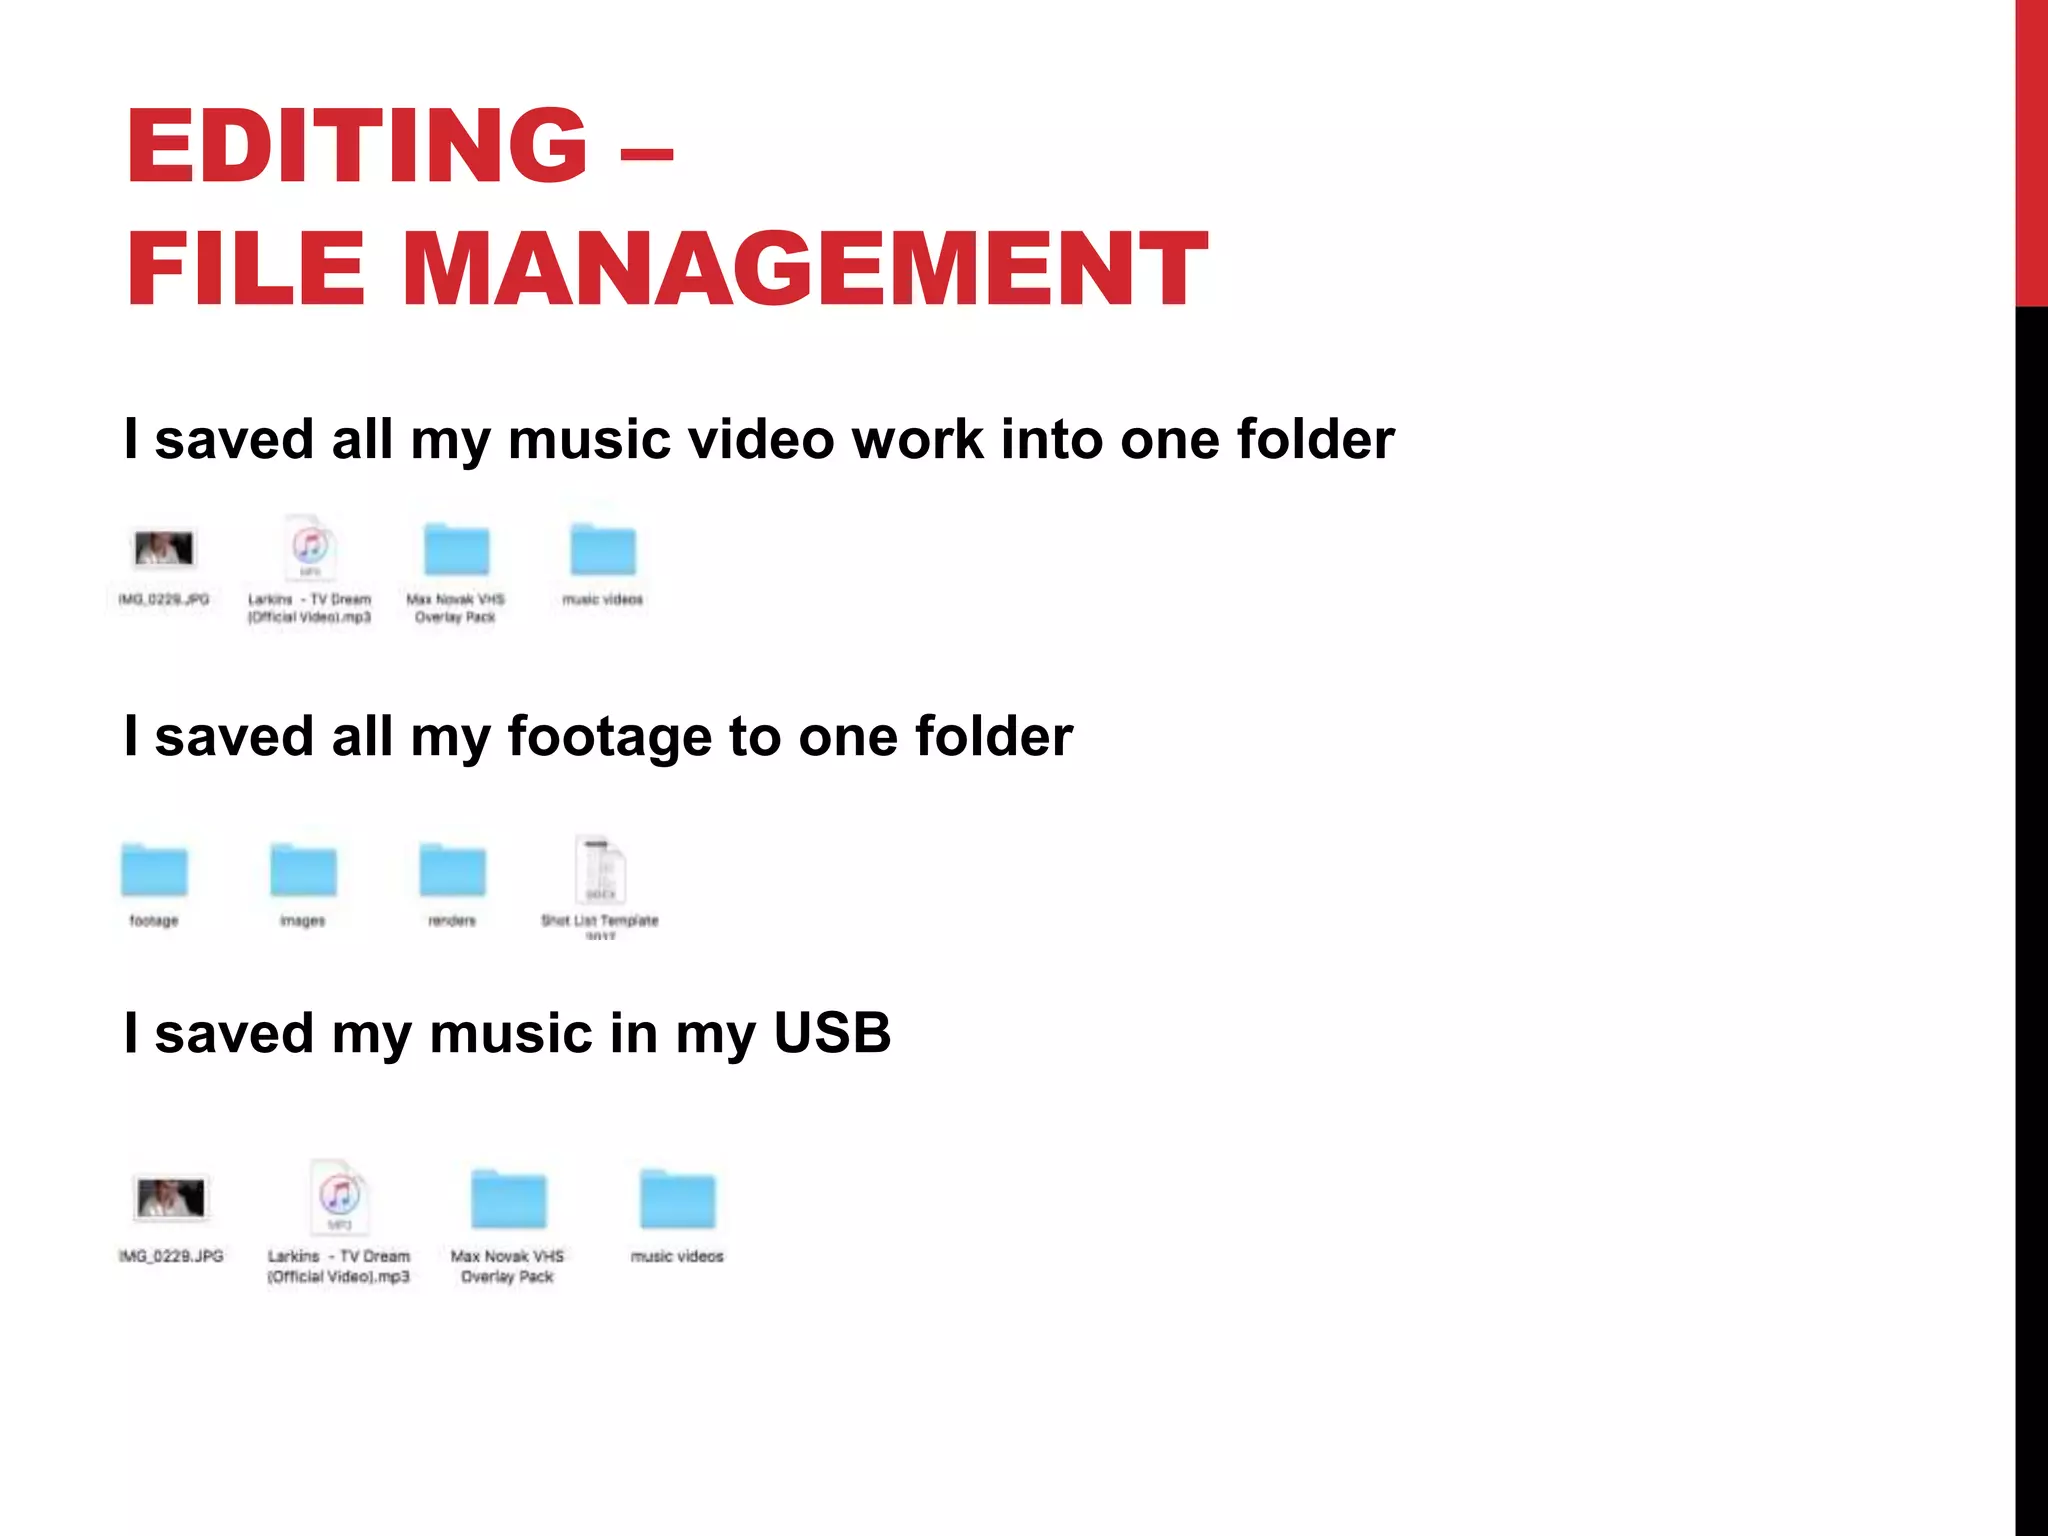
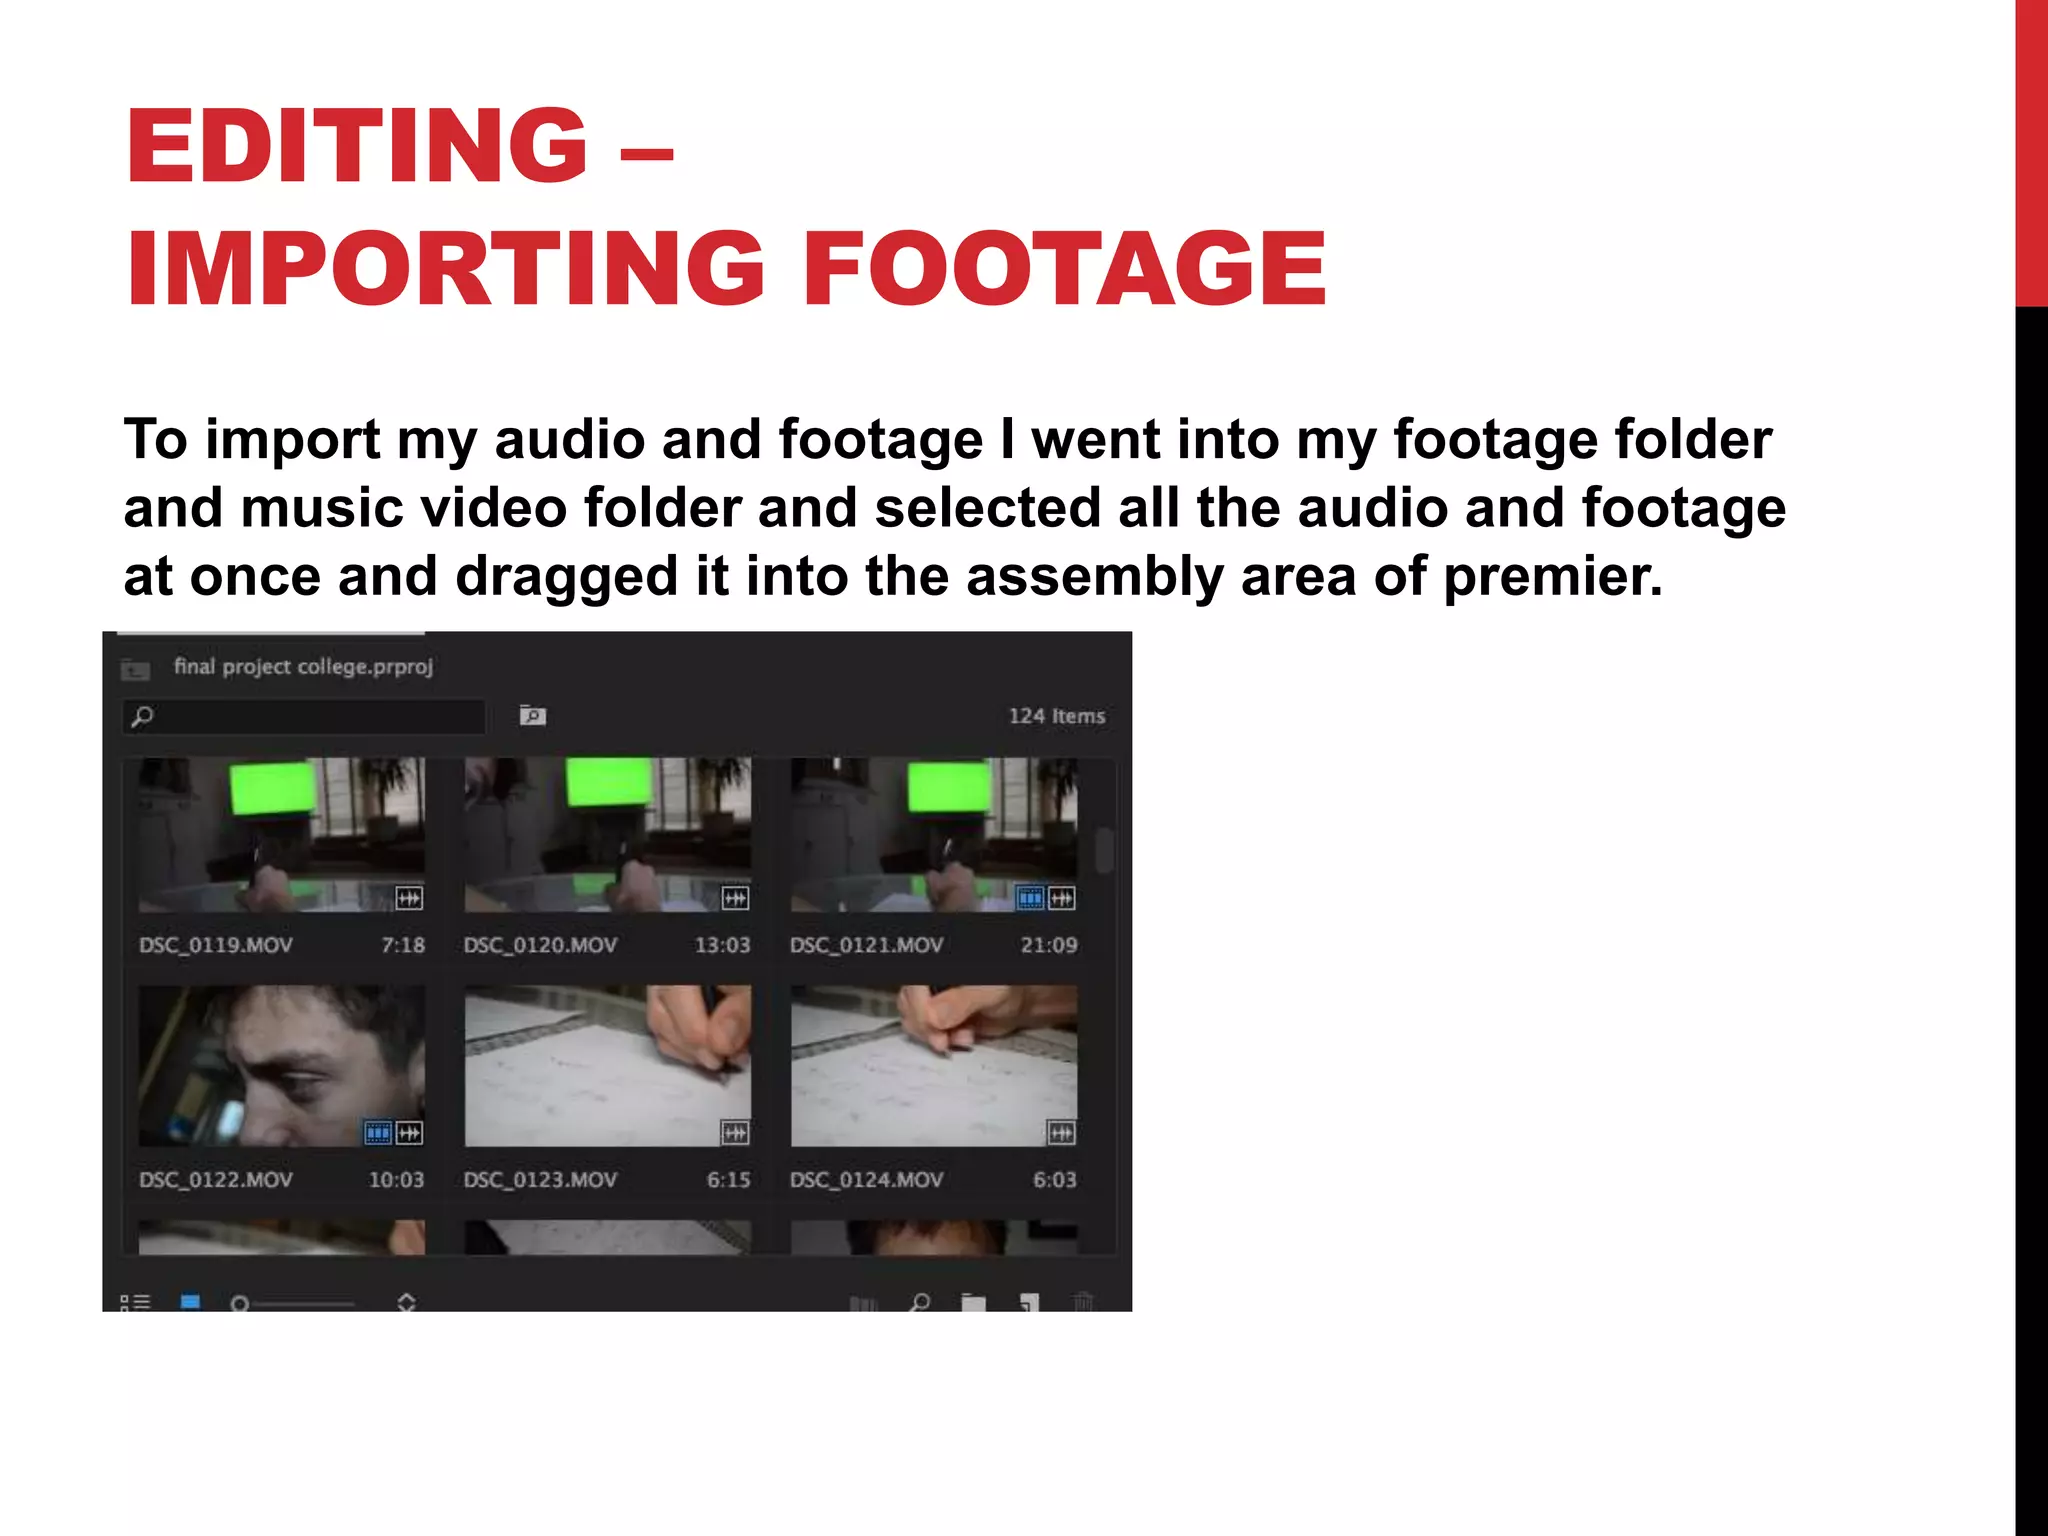
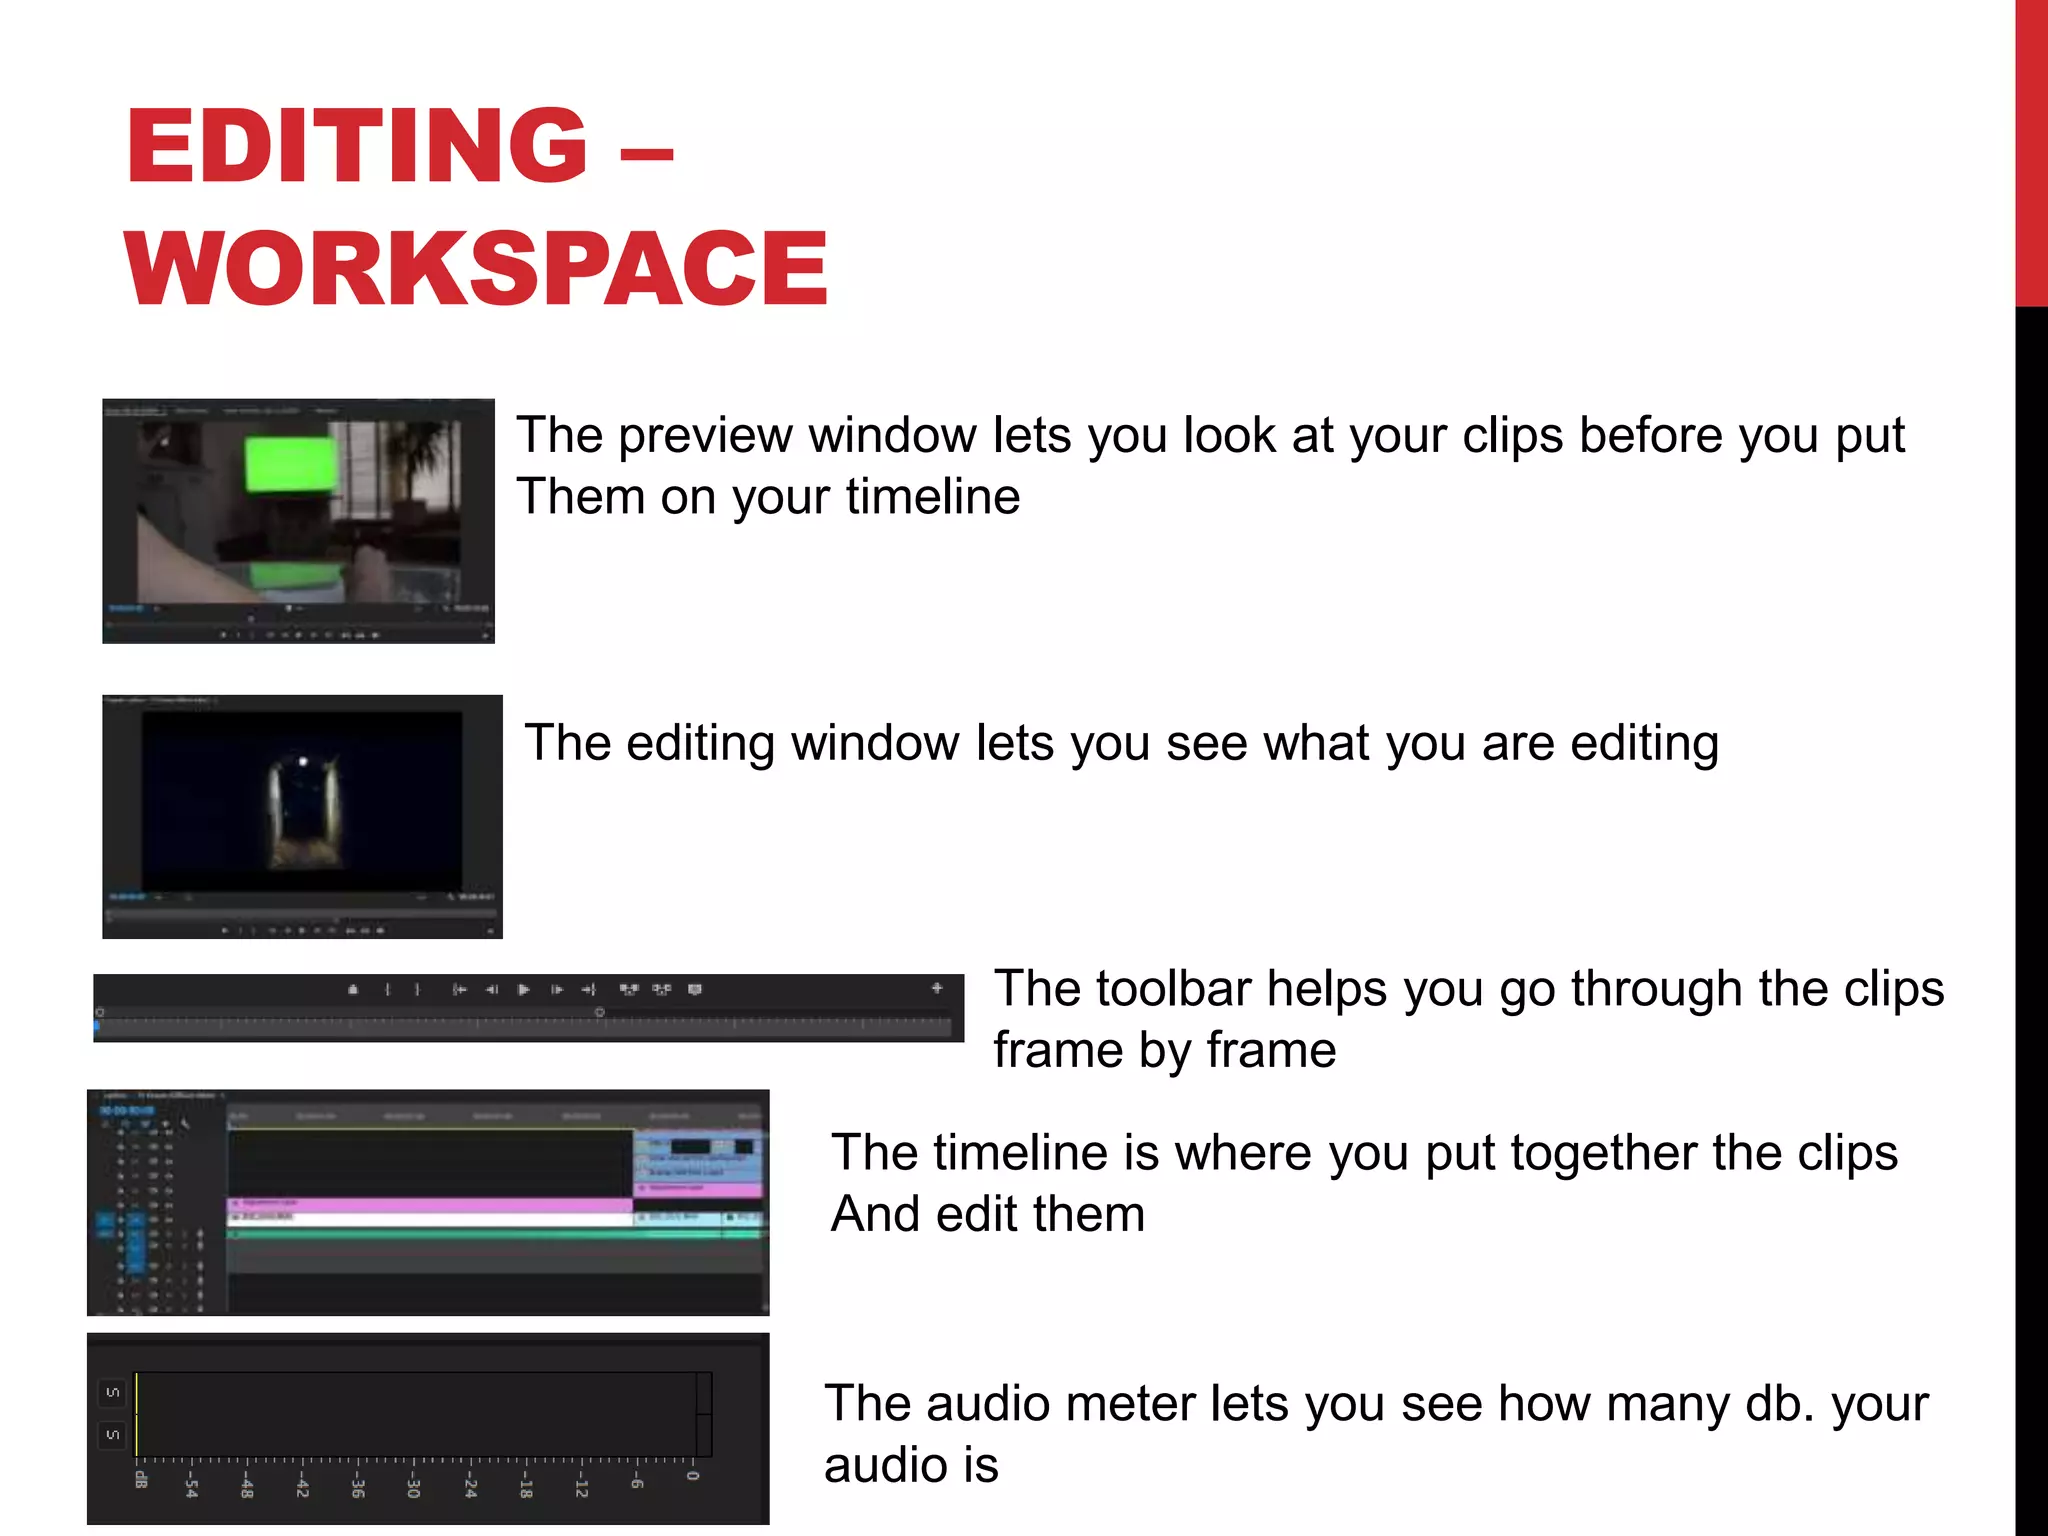
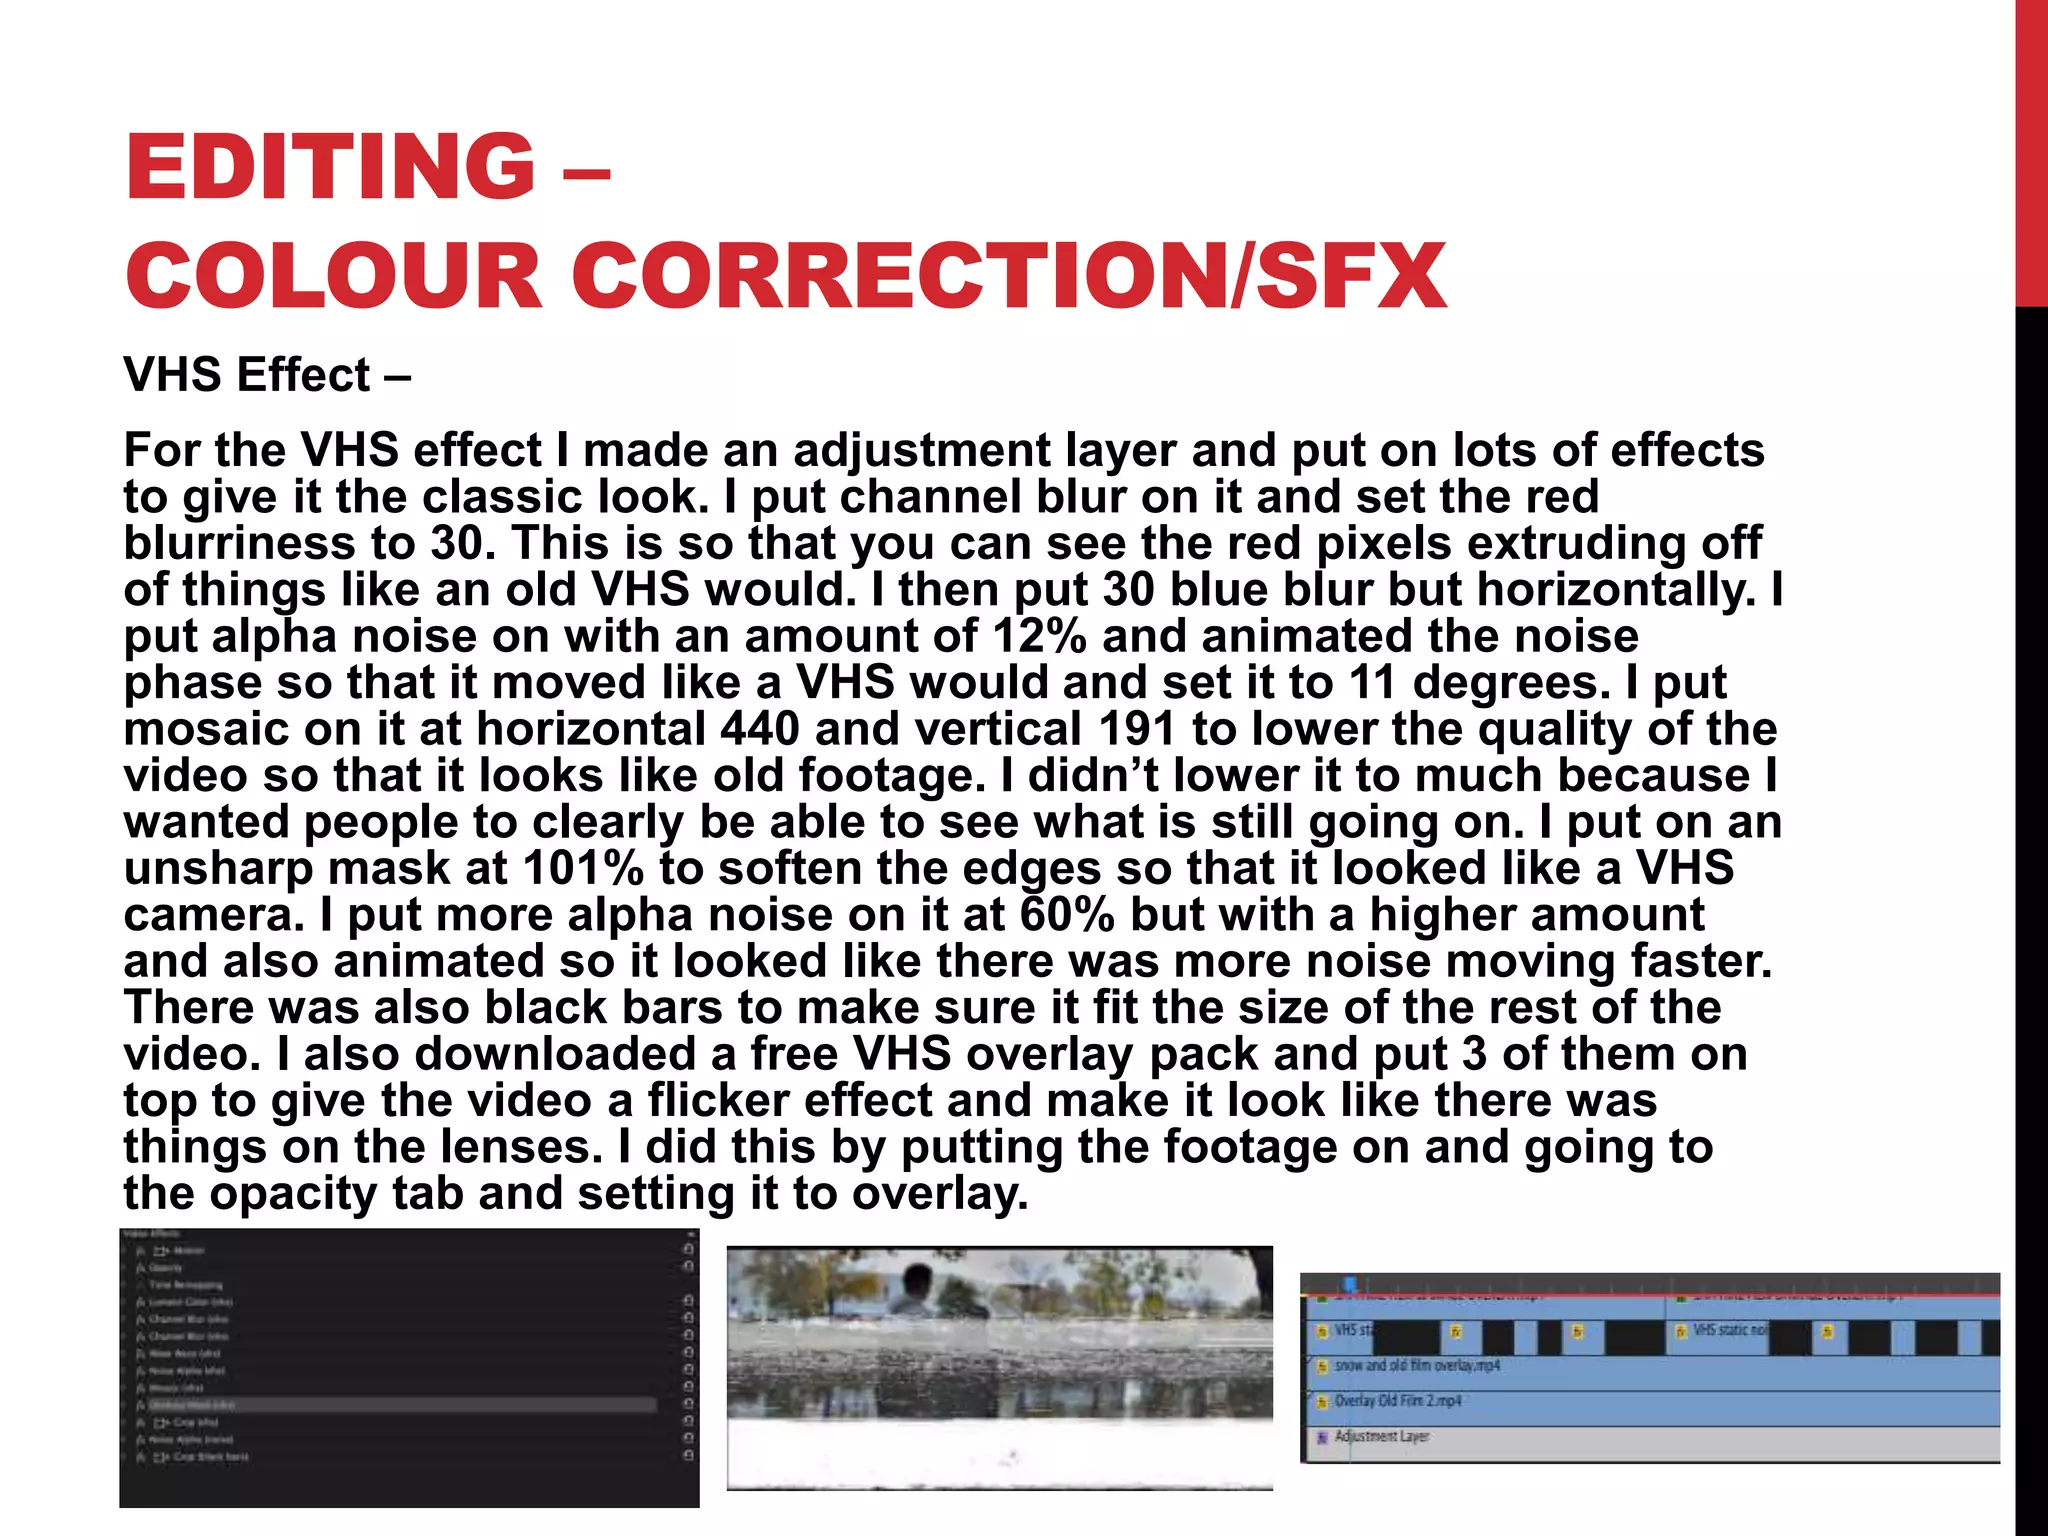
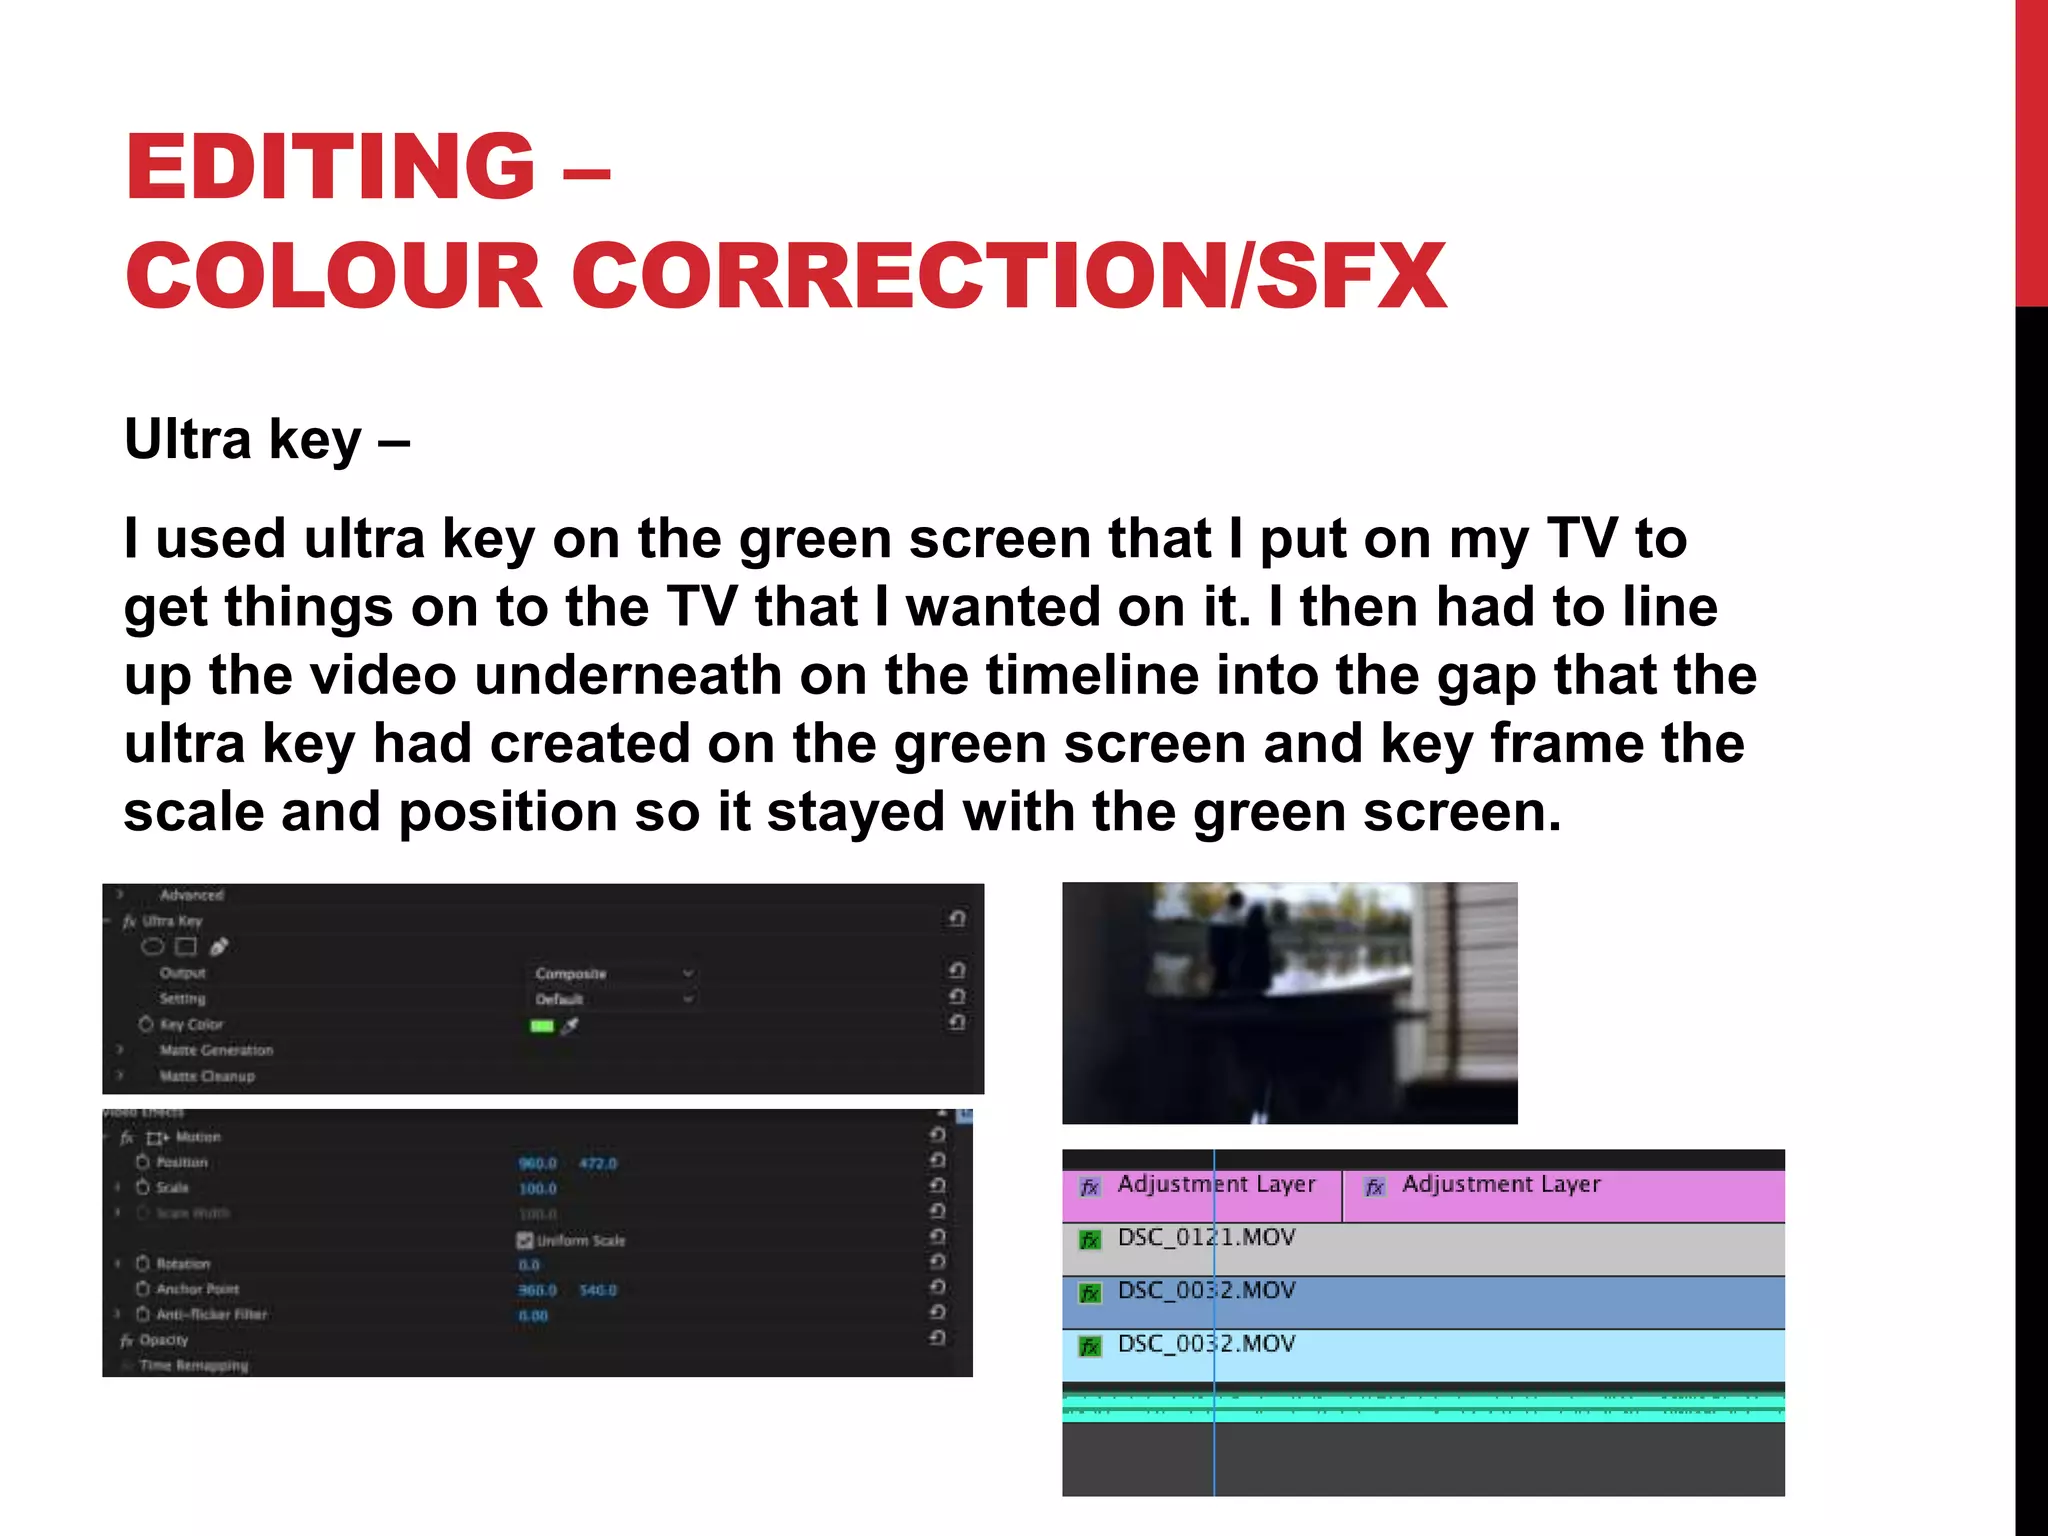
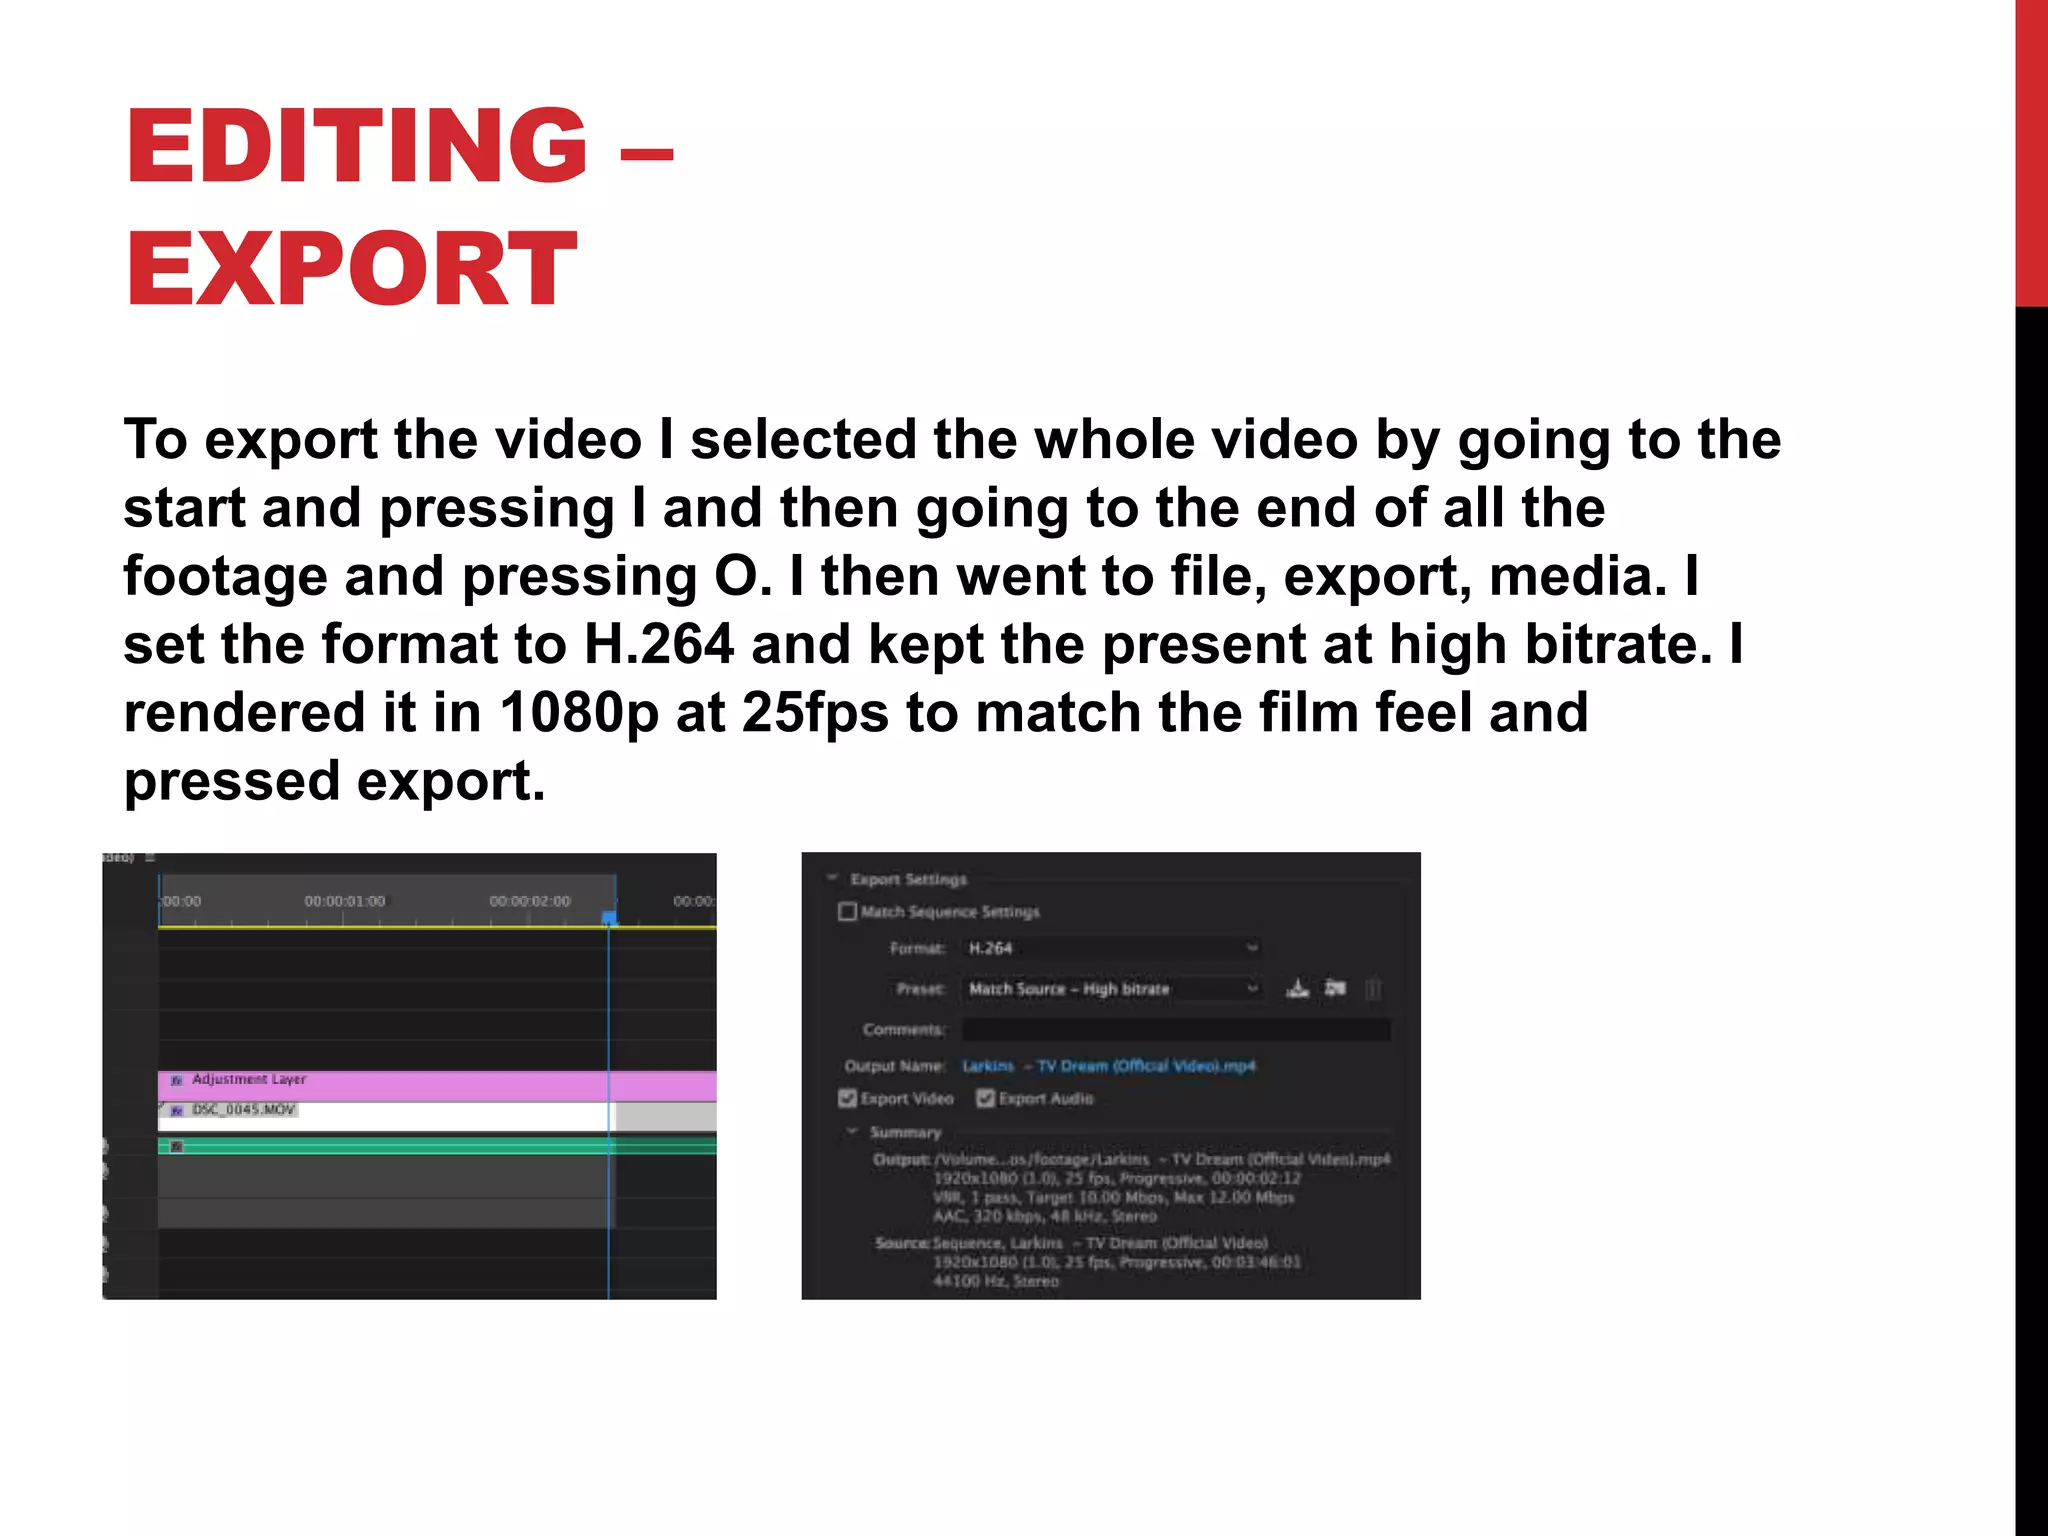
2. PRODUCTION LOG:
GUIDANCE
• This document is for you to track the progress of your
production – filming, editing and post-production.
• This is so you can track what you did and how you did it,
explaining and amendments and changes you made and
tracking the decisions that have shaped the practical
creation of your music video.
• The more detail you include about how you made your music
video, the better. The document is broken down in to two
sections, Filming and Editing, each of these is then made of
specific elements that occur in both.
• For each slide there is a prompt detailing what you should
include, delete the prompt after you have complete the slide.
• Remember, images often show what you’ve done more
effectively than words. Use text to explain an illustration.
3. FILMING
Explain what worked and didn’t work about your filming and how you
managed this covering the following areas:
• Technical – using the cameras and any technical equipment; this could
be how you did your lip sync, used the green screen, dealt with problems
with batteries, etc
• Logistical – did your locations work? Did you have any access
problems? Did it rain?
• Personnel – how were your cast/crew? Did anyone let you down? How
did you manage this?
• Planning – did your planning help? Do you think it could have worked
better? How?
• Next steps – do you need to re-film? Film more? Have you changed your
video? How/why?
*If you make any drastic changes to your video you MUST
add this to your planning documentation and state how and
why this has happened
4. TECHNICAL
For filming I did most of it handheld apart from the part in my
house within the first verse which was filmed with a tripod. I
did this because I found that I liked the look with the
handheld filming with stabilization I felt like it fit the theme of
the song better. When filming York the second time that we
went in my camera battery was very close to dying so we had
to speed up filming because I only had one camera battery.
For all of the footage filmed in the house an LED light was
used because it was too dark in the house and all the house
lights made the footage look grainy so I tried to use the light
to light up the subjects but without casting a strong shadow
or having it too bright to look unnatural.
5. LOGISTICAL
I initially planned to film on Lendel bridge or near it. I found
that Lendel bridge was too busy to film on so I filmed on the
path and by the river right next to it because you could still
see the bridge in some of the clips. The weather didn’t matter
to me the first time I went in because it could be any weather
but the second time we went in the weather had to be the
same (cloudy) so that it looked like the same day. It ended up
being sunny and cloudy which worked well because in all the
footage it looked like the same day. The rest of the footage
was filmed at home and the street next to my house which I
could do at any time because it was inside and the street
shots could be any weather because it’s supposed to be a
different day in the music video.
6. PERSONNEL
My cast crew were my sister and my friend. My sister was not
in a lot of the video and was only in the parts when we had to
go into York but she was always free so I didn’t have to worry
about planning dates to go in. However, I would sometimes
plan dates with my friend and he would cancel or be very late
so the times we did go in we were pushed for time. It was
also very hard to get them both to focus on filming so we
ended up having to make two full day trips just to get a few
clips but in the end the clips ended up being very good. It
was also easy to get my friend to come to my house to film
as he lived very close and in the same village.
7. PLANNING
My planning really helped because when I have done projects
in the past I haven’t had a plan and I have done it in the
moment and I end up not doing anything because I have
nothing to follow but this helped me to just get on with
filming because I could look at my phone and see what the
next shot was. I think I could of planned times to go to
filming locations better so that it was less busy. I think I
could of also planned when to edit and do the whole projects
so that I could set aside days. But I am very happing with my
planning.
8. NEXT STEPS
My video is completely finished and I don’t need to change
anything about it
9. EDITING
• Record your edit progress, decisions, problems, etc. in
this section
• Include screenshots with annotations, statements, etc.
• Try to explain how you worked and justify why you chose
to work the way you did.
• Follow the structure and what to include on each slide as
this is necessary for evidence for assessment
10. EDITING –
FILE MANAGEMENT
I saved all my music video work into one folder
I saved all my footage to one folder
I saved my music in my USB
11. EDITING –
SETTING UP PREMIERE
My timeline was in 1080p because that’s what I filmed in and
it was in 25fps because that’s what I filmed in for most of it
and I want it to have a standard film feel.
12. EDITING –
IMPORTING FOOTAGE
To import my audio and footage I went into my footage folder
and music video folder and selected all the audio and footage
at once and dragged it into the assembly area of premier.
13. EDITING –
WORKSPACE
The preview window lets you look at your clips before you put
Them on your timeline
The editing window lets you see what you are editing
The toolbar helps you go through the clips
frame by frame
The timeline is where you put together the clips
And edit them
The audio meter lets you see how many db. your
audio is
14. The clip preview window lets you see all of the clips that
you have in premier and you can drag them onto your
timeline
The effects panel lets you put all of your effects on
your clips and change the effects
The color panel lets you change how your clips look and
color grade them and change the color of the video
15. EDITING –
ASSEMBLY EDIT
I put the clips in the preview window and then pressed
the icon beneath to drag them onto the timeline without
any sound.
I used the cut to too trim the clips to that part that I wanted I then dragged
them together and where I needed them on the timeline
16. EDITING –
REFINEMENT
I put all of my color grading onto one adjustment
layer so that I didn’t have to do it on each clip.
I made some of the video in a different premier
project so that I could render it and put it in the
main one and there wouldn’t be lots of layers.
17. EDITING –
COLOUR CORRECTION/SFX
I put all of my color grading and color correction on
adjustment layers. I made different layers for inside shots
and outside shots because they were differently exposed.
I then slightly lowered the exposure for outside shots and
brought up the contrast and the highlights, but darkened
the shadows and brought up the whites and lowered the black
I did this because it darkens shadows and makes everything
brighter and makes it looks more cinematic.
For the color grading I upped the blue in the shadows but
balanced this by making the midtones yellow this was to
make the shadows look darker. But then I give it a slightly
Blue cinematic tone by adding blue to the highlights. I
chose blue because I wanted the whole theme to be
undyingly cold and dark because the story is supposed to
all be in their head.
18. EDITING –
COLOUR CORRECTION/SFX
VHS Effect –
For the VHS effect I made an adjustment layer and put on lots of effects
to give it the classic look. I put channel blur on it and set the red
blurriness to 30. This is so that you can see the red pixels extruding off
of things like an old VHS would. I then put 30 blue blur but horizontally. I
put alpha noise on with an amount of 12% and animated the noise
phase so that it moved like a VHS would and set it to 11 degrees. I put
mosaic on it at horizontal 440 and vertical 191 to lower the quality of the
video so that it looks like old footage. I didn’t lower it to much because I
wanted people to clearly be able to see what is still going on. I put on an
unsharp mask at 101% to soften the edges so that it looked like a VHS
camera. I put more alpha noise on it at 60% but with a higher amount
and also animated so it looked like there was more noise moving faster.
There was also black bars to make sure it fit the size of the rest of the
video. I also downloaded a free VHS overlay pack and put 3 of them on
top to give the video a flicker effect and make it look like there was
things on the lenses. I did this by putting the footage on and going to
the opacity tab and setting it to overlay.
19. EDITING –
COLOUR CORRECTION/SFX
Ultra key –
I used ultra key on the green screen that I put on my TV to
get things on to the TV that I wanted on it. I then had to line
up the video underneath on the timeline into the gap that the
ultra key had created on the green screen and key frame the
scale and position so it stayed with the green screen.
20. EDITING –
EXPORT
To export the video I selected the whole video by going to the
start and pressing I and then going to the end of all the
footage and pressing O. I then went to file, export, media. I
set the format to H.264 and kept the present at high bitrate. I
rendered it in 1080p at 25fps to match the film feel and
pressed export.