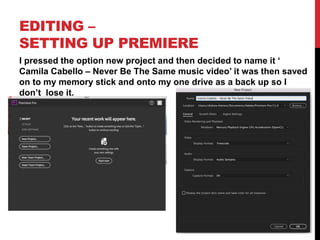
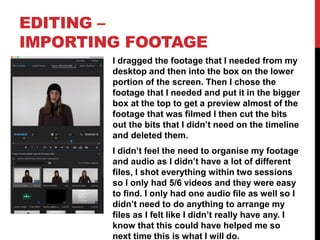
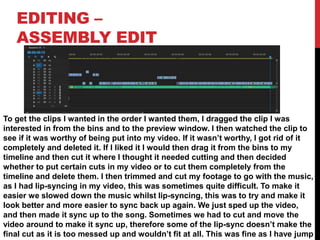
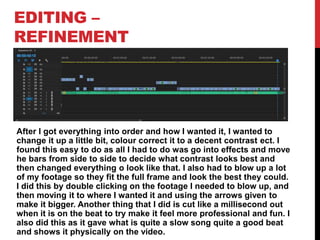
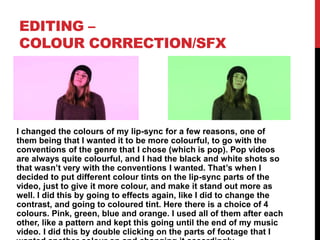
The document provides details about Chelsea Kierans' process for filming and editing a music video for the song "Never Be The Same" by Camila Cabello. For filming, Chelsea struggled with camera setup initially but learned quickly. She slowed down the song during lip syncing to make it easier and sped it back up in editing. For editing in Adobe Premiere, she imported footage, organized it on the timeline, trimmed clips, added color filters during lip syncing for variety, and exported the final video to YouTube format for backup. Planning was helpful but could have been more specific to improve storyline flow.
Students, digital devices and success - Andreas Schleicher - 27 May 2024..pptxEduSkills OECD
Andreas Schleicher presents at the OECD webinar ‘Digital devices in schools: detrimental distraction or secret to success?’ on 27 May 2024. The presentation was based on findings from PISA 2022 results and the webinar helped launch the PISA in Focus ‘Managing screen time: How to protect and equip students against distraction’ https://www.oecd-ilibrary.org/education/managing-screen-time_7c225af4-en and the OECD Education Policy Perspective ‘Students, digital devices and success’ can be found here - https://oe.cd/il/5yV
This is a presentation by Dada Robert in a Your Skill Boost masterclass organised by the Excellence Foundation for South Sudan (EFSS) on Saturday, the 25th and Sunday, the 26th of May 2024.
He discussed the concept of quality improvement, emphasizing its applicability to various aspects of life, including personal, project, and program improvements. He defined quality as doing the right thing at the right time in the right way to achieve the best possible results and discussed the concept of the "gap" between what we know and what we do, and how this gap represents the areas we need to improve. He explained the scientific approach to quality improvement, which involves systematic performance analysis, testing and learning, and implementing change ideas. He also highlighted the importance of client focus and a team approach to quality improvement.
2024.06.01 Introducing a competency framework for languag learning materials ...Sandy Millin
http://sandymillin.wordpress.com/iateflwebinar2024
Published classroom materials form the basis of syllabuses, drive teacher professional development, and have a potentially huge influence on learners, teachers and education systems. All teachers also create their own materials, whether a few sentences on a blackboard, a highly-structured fully-realised online course, or anything in between. Despite this, the knowledge and skills needed to create effective language learning materials are rarely part of teacher training, and are mostly learnt by trial and error.
Knowledge and skills frameworks, generally called competency frameworks, for ELT teachers, trainers and managers have existed for a few years now. However, until I created one for my MA dissertation, there wasn’t one drawing together what we need to know and do to be able to effectively produce language learning materials.
This webinar will introduce you to my framework, highlighting the key competencies I identified from my research. It will also show how anybody involved in language teaching (any language, not just English!), teacher training, managing schools or developing language learning materials can benefit from using the framework.
Welcome to TechSoup New Member Orientation and Q&A (May 2024).pdfTechSoup
In this webinar you will learn how your organization can access TechSoup's wide variety of product discount and donation programs. From hardware to software, we'll give you a tour of the tools available to help your nonprofit with productivity, collaboration, financial management, donor tracking, security, and more.
Operation “Blue Star” is the only event in the history of Independent India where the state went into war with its own people. Even after about 40 years it is not clear if it was culmination of states anger over people of the region, a political game of power or start of dictatorial chapter in the democratic setup.
The people of Punjab felt alienated from main stream due to denial of their just demands during a long democratic struggle since independence. As it happen all over the word, it led to militant struggle with great loss of lives of military, police and civilian personnel. Killing of Indira Gandhi and massacre of innocent Sikhs in Delhi and other India cities was also associated with this movement.
How to Create Map Views in the Odoo 17 ERPCeline George
The map views are useful for providing a geographical representation of data. They allow users to visualize and analyze the data in a more intuitive manner.
How to Split Bills in the Odoo 17 POS ModuleCeline George
Bills have a main role in point of sale procedure. It will help to track sales, handling payments and giving receipts to customers. Bill splitting also has an important role in POS. For example, If some friends come together for dinner and if they want to divide the bill then it is possible by POS bill splitting. This slide will show how to split bills in odoo 17 POS.
2. FILMING
Explain what worked and didn’t work about your filming and how you managed this covering
the following areas:
• Technical – I struggled to understand how to set up the cameras, but then caught on and
learnt after a few times of being around someone using one. I liked filming the lip sync as
that worked quite well. I slowed down the song for Jodie as it then made it easier for her to
lip-sync to the song, then I sped it up afterwards so it fit with the actual song. When there
was a problem such as the SD card running out of room, we put everything on to the
computer and deleted it all off the SD card and then went back to filming again.
• Logistical – I only filmed in the studio, so I didn’t have any issues with rain or anything.
The only thing I struggled with was who was going to be in the video, but 2 of my friends
volunteered to be in it. My locations worked because my idea was just to change colour of
the different shots to make it look more fun rather than film outside and risking people not
showing up as it was raining etc.
• Personnel –No one let me down as it was done in class time, inside the studio, mainly to
aviod these things. My cast were really good as they did as I asked them to and there
performance was really good.
• Planning – My planning did help, but I could've planned it a bit more specifically as I felt a
a loss at some points as I did plan it well but I could have been more specific. It would
have worked better if it was more specific, as it would have had more of a storyline and
made the video flow more than it does.
3. EDITING –
FILE MANAGEMENT I have saved my work
on my memory stick in
the folder “music
video’. It is easy to find
as it is labelled, and
everything I need for
my video is in the same
place so it is easy to
find. I have also saved
everything on the
onedrive as a back up
just in case I lose or
break my memory
stick.
4. EDITING –
SETTING UP PREMIERE
I pressed the option new project and then decided to name it ‘
Camila Cabello – Never Be The Same music video’ it was then saved
on to my memory stick and onto my one drive as a back up so I
don’t lose it.
5. EDITING –
IMPORTING FOOTAGE
I dragged the footage that I needed from my
desktop and then into the box on the lower
portion of the screen. Then I chose the
footage that I needed and put it in the bigger
box at the top to get a preview almost of the
footage that was filmed I then cut the bits
out the bits that I didn’t need on the timeline
and deleted them.
I didn’t feel the need to organise my footage
and audio as I didn’t have a lot of different
files, I shot everything within two sessions
so I only had 5/6 videos and they were easy
to find. I only had one audio file as well so I
didn’t need to do anything to arrange my
files as I felt like I didn’t really have any. I
know that this could have helped me so
next time this is what I will do.
6. EDITING –
WORKSPACE
Preview window –
This is where you can
see and pick apart
your footage and
delete and cut things
that you do not want.
You can see your
footage quite close
up so you can see
what you prefer and
don’t want.
Bins – this is where
you drag your
footage and audio
(anything you will use
within the video) from
here you can put it
anywhere you like on
your timeline and
Timeline – This is where you can see physically what you are doing and make sure no
footage overlaps with different cuts that may not be the audio. This would make the video
look unprofessional and messy. I used this as I wanted to put my lip-sync in first, and cut it
on the beat, so then I knew where to put in the other bits of footage so then my music video
looked good. The timeline was helpful because it gave my something to physically look at as
to where I needed to put in the different bits of footage to make it look good.
Playback window – The playback window is for
looking at the work you have completed and makes it
easier to spot things that you may want to change.
For example, maybe you think that you have finished
and you look through and watch your work, then you
decide you want more cuts with maybe a black
millisecond to give it a bit more ‘jazz’.
Tool bar – this is
where you find all
the tools you
need such as the
razor that you
need to cut your
footage to maybe
get rid of
something you do
not want, or to
separate
something that
you don’t want
together.
Audio levels –
this is so you
can see how
loud or quiet
your audio is,
you can tell as if
its green its
good, if It goes
into the red then
you know you
need to make it
so it is a little
quieter and
change it so it is
listenable.
7. EDITING –
ASSEMBLY EDIT
To get the clips I wanted in the order I wanted them, I dragged the clip I was
interested in from the bins and to the preview window. I then watched the clip to
see if it was worthy of being put into my video. If it wasn’t worthy, I got rid of it
completely and deleted it. If I liked it I would then drag it from the bins to my
timeline and then cut it where I thought it needed cutting and then decided
whether to put certain cuts in my video or to cut them completely from the
timeline and delete them. I then trimmed and cut my footage to go with the music,
as I had lip-syncing in my video, this was sometimes quite difficult. To make it
easier we slowed down the music whilst lip-syncing, this was to try and make it
look better and more easier to sync back up again. We just sped up the video,
and then made it sync up to the song. Sometimes we had to cut and move the
video around to make it sync up, therefore some of the lip-sync doesn’t make the
final cut as it is too messed up and wouldn’t fit at all. This was fine as I have jump
8. EDITING –
REFINEMENT
After I got everything into order and how I wanted it, I wanted to
change it up a little bit, colour correct it to a decent contrast ect. I
found this easy to do as all I had to do was go into effects and move
he bars from side to side to decide what contrast looks best and
then changed everything o look like that. I also had to blow up a lot
of my footage so they fit the full frame and look the best they could.
I did this by double clicking on the footage I needed to blow up, and
then moving it to where I wanted it and using the arrows given to
make it bigger. Another thing that I did is cut like a millisecond out
when it is on the beat to try make it feel more professional and fun. I
also did this as it gave what is quite a slow song quite a good beat
and shows it physically on the video.
9. EDITING –
COLOUR CORRECTION/SFX
I changed the colours of my lip-sync for a few reasons, one of
them being that I wanted it to be more colourful, to go with the
conventions of the genre that I chose (which is pop). Pop videos
are always quite colourful, and I had the black and white shots so
that wasn’t very with the conventions I wanted. That’s when I
decided to put different colour tints on the lip-sync parts of the
video, just to give it more colour, and make it stand out more as
well. I did this by going to effects again, like I did to change the
contrast, and going to coloured tint. Here there is a choice of 4
colours. Pink, green, blue and orange. I used all of them after each
other, like a pattern and kept this going until the end of my music
video. I did this by double clicking on the parts of footage that I
10. EDITING –
EXPORT
I exported my music video by going to file, export and then media.
After I did that I chose the settings H264, and then YouTube 720p I
then named it Camila Cabello – Never Be the Same Video. I then
saved onto my One Drive and my memory stick, just to make sure I
have a backup.