MEASUREMENTWEARNOISEFUEL CONSUMPTIONVIBRATIONSPEEDACCELERATION
WEARWear is the removal of material from the component due to friction or contact with other component.It is necessary to measure the wear of a part because excessive wear may cause the failure of the component and accident may take place.
MEASUREMENT OF WEARThe parts having wear is measure by different gauges.Internal wear of a component is measure by depth gauge.External wear of any part can be measure by height gauges.
MEASUREMENT OF WEARThe wear between two surfaces which are very close to each other, can be measured by slip gauges as shown in fig.The wear of cylindrical part is measured by bore gauges.
HEIGHT GAUGE5
DEPTH GAUGE6
A-67
MEASUREMENT OF NOISENoise is any unpleasant sound such as booming, buzzing, whistling.While driving or in idle position if there is some undesirable noise of vehicle component, it should be checked.This noise is due to undesirable contact with other part or vibration.Hence we need to check these noises so we can avoid damage of vehicle component.8
MEASUREMENT OF NOISETo check the noise we use “Db Meter”.Decibel Meter is designed for situations where small size, simple operation and high performance are all required.It allows noise levels to be checked quickly and simply with the large LCD digital display showing Sound Level in decibels. 9
MEASUREMENT OF NOISEFOR THE TRAFFIC NOISE MEASUREMENT AND ENGINE NOISE MEASUREMENT,  THIS METER IS USED.10
11
12
Using automotive  stethoscope to locate the source of engine noise.13
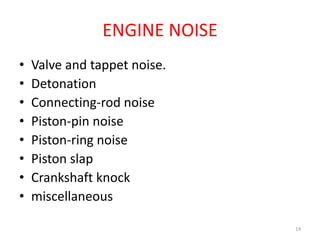
ENGINE NOISEValve and tappet noise.DetonationConnecting-rod noisePiston-pin noisePiston-ring noisePiston slapCrankshaft knockmiscellaneous 14
MEASUREMENT OF FUEL CONSUMPTIONThere are various mainly two types of measurementsAutomatic means using electronics.Manually
MEASUREMENT OF VIBRATIONVibration meter is used to measure the vibration of particular component.The result is shown in the form of digits in display.Reasons:high tolerancemis-alignmentShocks produced due to sudden change in acceleration.16
MEASUREMENTS OF SPEEDEDDY CURRENT TACHOMETERTACHOGENERATORSTROBOSCOPEPULSE COUNTER
EDDY CURRENT TACHOMETERShaft whose rpm to be measured is made to drive a U-shaped magnet.This magnet rotates inside the soft-iron casing.An aluminum cup is placed between these two, so field magnet pass through the aluminum.With the relative rotation of magnet with respect to cup, eddy current is generated.
19
20
EDDY CURRENT TACHOMETERThis eddy current generates its own magnetic field. This magnetic field attracts the field of rotating magnet (earlier field).As a result of it the cup tend to be carried round by a magnetic torque.This torque is proportional to the eddy current, hence in turn proportional to speed of magnet.
EDDY CURRENT TACHOMETERThe cup is carried by spindle which is free to rotate through part of revolution.The pointer indicates the speed of on the dial of the instrument means dial.Speedometer works on this principle.
TACHOGENERATORHere the armature of the dynamo rotates in the alnico of permanent magnetic field.Its electrical output is the signal of rpm.It is connected to a voltmeter graduated In rpm or km per hour.
24
PULSE COUNTERThree main parts are required-A 60 toothed mild steel wheel.A magnetic transducer.A pulse counter.The geared wheel which contains the equally spaced 60 slots is mounted on a shaft.Now here magnetic transducer is a bar magnet and has a coil of a wire wound around it.
PULSE COUNTERThe ends of the coil are connected to the signal i/p of the pulse generator.As a tooth on a wheel approaches the end of bar magnet, the steel of the tooth provides an easier path for the magnetic field than the gap between the teeth did.Due to this flux density of field increases. Hence generation of voltage occurs.
27
PULSE COUNTERSo, frequency of AC voltage = no of teeth      passing through itWith the help of magnetic transducer the ac o/p is collected by the pulse counter ckt (timer ckt ).The rpm of the rotating shaft is then displayed in the form of digital o/p.
StroboscopePrincipal-Light flashes at the same frequency as that of rotating shaft.
Adjusting knob, light characteristics-xenon lamp, short duration, high frequency, marked wheel.Rpm of shaft =no. of flashes /min.

Mechanical Measurement

  • 1.
  • 2.
    WEARWear is theremoval of material from the component due to friction or contact with other component.It is necessary to measure the wear of a part because excessive wear may cause the failure of the component and accident may take place.
  • 3.
    MEASUREMENT OF WEARTheparts having wear is measure by different gauges.Internal wear of a component is measure by depth gauge.External wear of any part can be measure by height gauges.
  • 4.
    MEASUREMENT OF WEARThewear between two surfaces which are very close to each other, can be measured by slip gauges as shown in fig.The wear of cylindrical part is measured by bore gauges.
  • 5.
  • 6.
  • 7.
  • 8.
    MEASUREMENT OF NOISENoiseis any unpleasant sound such as booming, buzzing, whistling.While driving or in idle position if there is some undesirable noise of vehicle component, it should be checked.This noise is due to undesirable contact with other part or vibration.Hence we need to check these noises so we can avoid damage of vehicle component.8
  • 9.
    MEASUREMENT OF NOISETocheck the noise we use “Db Meter”.Decibel Meter is designed for situations where small size, simple operation and high performance are all required.It allows noise levels to be checked quickly and simply with the large LCD digital display showing Sound Level in decibels. 9
  • 10.
    MEASUREMENT OF NOISEFORTHE TRAFFIC NOISE MEASUREMENT AND ENGINE NOISE MEASUREMENT, THIS METER IS USED.10
  • 11.
  • 12.
  • 13.
    Using automotive stethoscope to locate the source of engine noise.13
  • 14.
    ENGINE NOISEValve andtappet noise.DetonationConnecting-rod noisePiston-pin noisePiston-ring noisePiston slapCrankshaft knockmiscellaneous 14
  • 15.
    MEASUREMENT OF FUELCONSUMPTIONThere are various mainly two types of measurementsAutomatic means using electronics.Manually
  • 16.
    MEASUREMENT OF VIBRATIONVibrationmeter is used to measure the vibration of particular component.The result is shown in the form of digits in display.Reasons:high tolerancemis-alignmentShocks produced due to sudden change in acceleration.16
  • 17.
    MEASUREMENTS OF SPEEDEDDYCURRENT TACHOMETERTACHOGENERATORSTROBOSCOPEPULSE COUNTER
  • 18.
    EDDY CURRENT TACHOMETERShaftwhose rpm to be measured is made to drive a U-shaped magnet.This magnet rotates inside the soft-iron casing.An aluminum cup is placed between these two, so field magnet pass through the aluminum.With the relative rotation of magnet with respect to cup, eddy current is generated.
  • 19.
  • 20.
  • 21.
    EDDY CURRENT TACHOMETERThiseddy current generates its own magnetic field. This magnetic field attracts the field of rotating magnet (earlier field).As a result of it the cup tend to be carried round by a magnetic torque.This torque is proportional to the eddy current, hence in turn proportional to speed of magnet.
  • 22.
    EDDY CURRENT TACHOMETERThecup is carried by spindle which is free to rotate through part of revolution.The pointer indicates the speed of on the dial of the instrument means dial.Speedometer works on this principle.
  • 23.
    TACHOGENERATORHere the armatureof the dynamo rotates in the alnico of permanent magnetic field.Its electrical output is the signal of rpm.It is connected to a voltmeter graduated In rpm or km per hour.
  • 24.
  • 25.
    PULSE COUNTERThree mainparts are required-A 60 toothed mild steel wheel.A magnetic transducer.A pulse counter.The geared wheel which contains the equally spaced 60 slots is mounted on a shaft.Now here magnetic transducer is a bar magnet and has a coil of a wire wound around it.
  • 26.
    PULSE COUNTERThe endsof the coil are connected to the signal i/p of the pulse generator.As a tooth on a wheel approaches the end of bar magnet, the steel of the tooth provides an easier path for the magnetic field than the gap between the teeth did.Due to this flux density of field increases. Hence generation of voltage occurs.
  • 27.
  • 28.
    PULSE COUNTERSo, frequencyof AC voltage = no of teeth passing through itWith the help of magnetic transducer the ac o/p is collected by the pulse counter ckt (timer ckt ).The rpm of the rotating shaft is then displayed in the form of digital o/p.
  • 29.
    StroboscopePrincipal-Light flashes atthe same frequency as that of rotating shaft.
  • 30.
    Adjusting knob, lightcharacteristics-xenon lamp, short duration, high frequency, marked wheel.Rpm of shaft =no. of flashes /min.