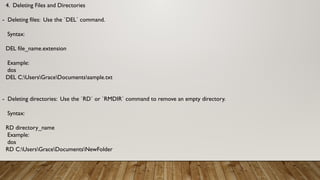
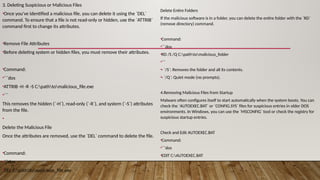
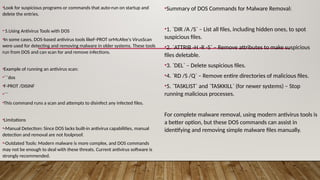
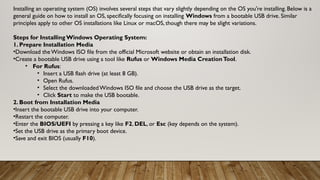
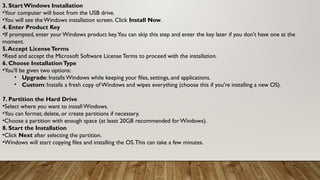
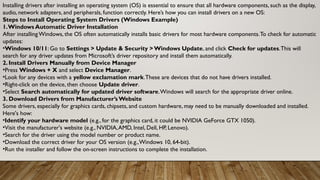
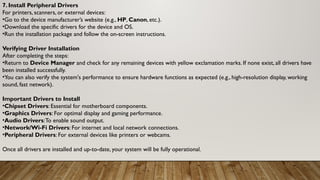
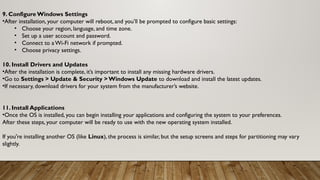
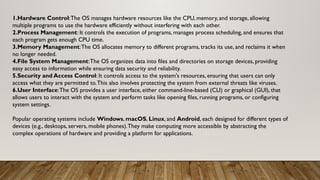
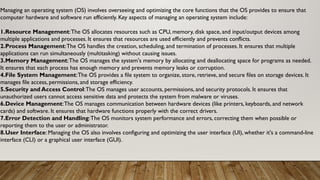
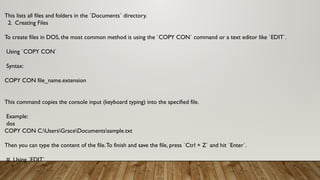
The document discusses the definition and functions of an operating system (OS), detailing the steps to install Windows from a bootable USB drive and how to manage drivers afterward. It highlights various aspects of OS management, including resource and process management, memory allocation, and security controls, while also providing basic DOS commands for file and directory management. Overall, it serves as a guide for setting up and maintaining a computer's operating system effectively.

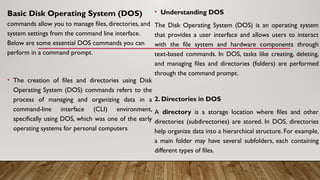
![To create files and directories using DOS (Disk Operating System) commands, you can follow these steps:
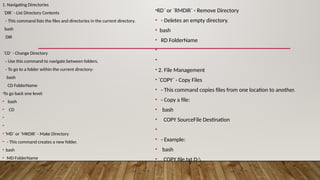
1. Creating Directories
To create a directory, use the `MD` or `MKDIR` command.
Syntax:
MD [drive:][path]directory_name
or
MKDIR [drive:][path]directory_name
Example:
dos
MD C:UsersGraceDocumentsNewFolder
This creates a directory named `NewFolder` inside the `Documents` folder.](https://image.slidesharecdn.com/mantainingoperatingsystem-241103203212-21ef0618/85/MANTAINING-OPERATING-SYSTEM-analysis-pptx-14-320.jpg)
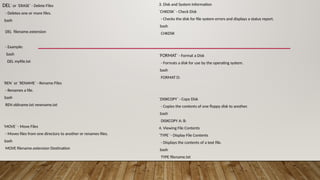
![If the DOS environment has the `EDIT` command installed, you can create a file directly in a text editor.
Syntax:
dos
EDIT file_name.extension
Example:
dos
EDIT C:UsersGraceDocumentsreport.txt
3. Displaying Files and Directories
To view files and directories in a folder, you can use the `DIR` command.
Syntax:
DIR [drive:][path]
Example:
dos
DIR C:UsersGraceDocuments](https://image.slidesharecdn.com/mantainingoperatingsystem-241103203212-21ef0618/85/MANTAINING-OPERATING-SYSTEM-analysis-pptx-16-320.jpg)