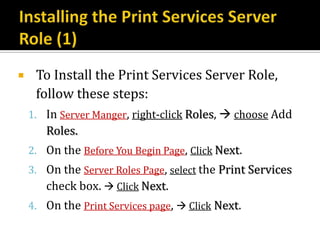
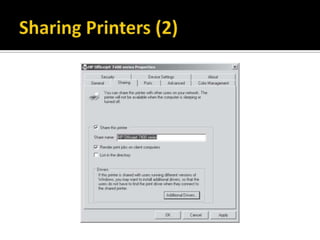
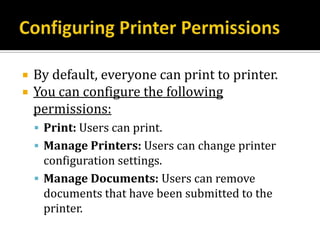
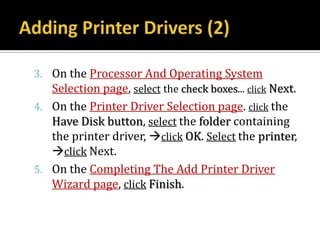
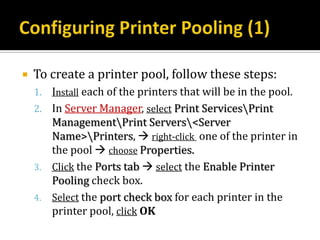
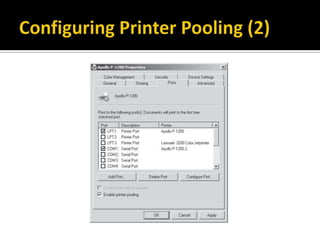
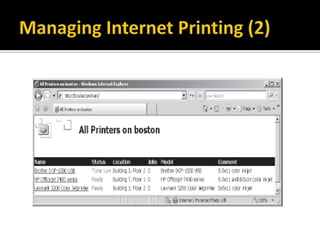
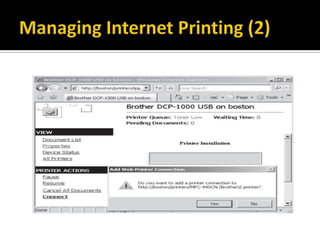
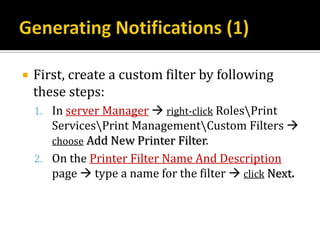
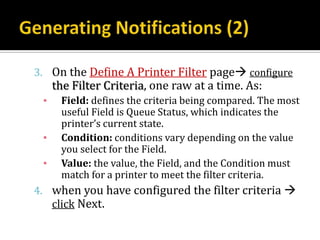
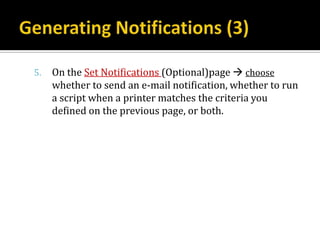
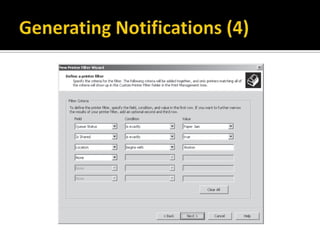
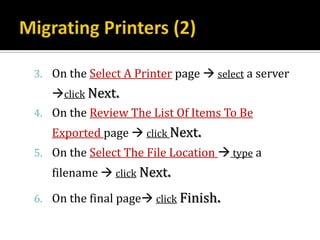
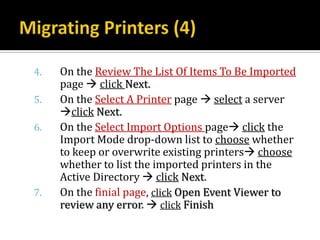
Mahmmoud A. Mahdi
   How to install, share and mange printers.
   Configure and monitor print services
   Lesson 1: Managing Printers
Lesson 1
   Installing the Print Services Server Role
   Installing Printers
   Sharing Printers
   Configuring Printer Permissions
   Adding Printer Drivers
   Configuring Printer Pooling
   Configuring Printer Priorities
   Managing Internet Printing
   Generating Notifications
   Deploying Printers with Group Policy
   Migrating Printers
    To Install the Print Services Server Role,
     follow these steps:
    1. In Server Manger, right-click Roles,  choose Add
       Roles.
    2. On the Before You Begin Page, Click Next.
    3. On the Server Roles Page, select the Print Services
       check box.  Click Next.
    4. On the Print Services page,  Click Next.
5. On the Select Role Services Page, select the
   appropriate check boxes for the following roles,
    click Next:
 1. Printer Server (Installs the print management)
 2. LPD Service (Allow clients to print using the Line
    Printer Daemon (LPD) protocol
 3. Internet Printing (Allow clients to print using the
    Internet Printing Protocol (IPP) and Create a web
    site to manage print jobs )
6. If you are prompted to install the Web Server
   (IIS) role service, click Add Required Role
   Services,  click Next.
7. If the Web Server (IIS) page appears, click Next.
   Then, On the Select Role Services page,
   configure the required IIS role services  click
   Next again
8. On the Confirm Installation Selections Page, Click
   Install.
9. On the Installation Results page, Click Close.
   You Can install printers using :
     the Control Panel
     the Print Management Snap-in
   After connecting a printer either to the network or
    to a server, follow these steps
    1. Click Start  choose Control Panel
    2. Below Hardware and Sound  Click Printer
    3. Double-click Add Printer.
    4. On the Choose A Local Or Network Printer page,
        select the appropriate
    5. On the Choose A Printer Port Page, Select the
        physical port.
6. If you are installing a network printer,
    Select the printer or that I want Isn’t Listed. Click Next
    Select A Printer Using A TCP/IP Address or Hostname, Click Next
7. If the Install the printer Driver page
   appear, select the driver location,…  Click Next
8. On the Type A Printer Name Page, type a name
   for the printer,  Click Next.
9. On the Printer Sharing Page, choose whether to
    share the printer, type the location. Click Next
10. Click Finish
   After connecting a printer either to the network or to a
    server, follow these steps:
    1. In Server Manager, right-click RolesPrint
        ServicesPrint ManagementPrint Servers <server>,
         choose Add Printer.
    2. On the Printer Installation page, choose an installation
        method,  click Next.
    3. The Pages that follow will vary depending on the
        printer installation method you choose.
    4. On the Printer Driver page, choose whether to use an
        existing driver, install a new driver or use the printer
        driver.  click Next.
    5. If you choose to install a new driver, the Printer
        Installation page appears. Select a driver,  click Next.
6. On the Printer Name and Sharing Settings page, type a
   name for the printer. To immediately share the
   printer, select the share This Printer check box
   and type a name and location. Click Next.
7. On the Printer Found page, click Next.
8. Depending on the type of printer, you might be
   prompted to perform printer-specific
   configuration.
9. On the Completing The Network Printer Installation
   Wizard page, click Finish.
   Using Control Panel
     Right-Click the printer choose sharing
   Using Print Management snap-in
     Right-Click the printer choose Manage Sharing.
   By default, everyone can print to printer.
   You can configure the following
    permissions:
     Print: Users can print.
     Manage Printers: Users can change printer
      configuration settings.
     Manage Documents: Users can remove
      documents that have been submitted to the
      printer.
   To add printer drivers using the Print
    management snap-in, follow these steps:
    1. In Server Manager, right-click RolesPrint
       ServicesPrint ManagementPrint
       Servers<Server Name>Drivers  choose Add
       Driver.
    2. On the Welcome to The Add Printer Driver
       Wizard page, click Next.
3. On the Processor And Operating System
   Selection page, select the check boxes... click Next.
4. On the Printer Driver Selection page. click the
   Have Disk button, select the folder containing
   the printer driver, click OK. Select the printer,
   click Next.
5. On the Completing The Add Printer Driver
   Wizard page, click Finish.
   To create a printer pool, follow these steps:
    1. Install each of the printers that will be in the pool.
    2. In Server Manager, select Print ServicesPrint
       ManagementPrint Servers<Server
       Name>Printers,  right-click one of the printer in
       the pool  choose Properties.
    3. Click the Ports tab  select the Enable Printer
       Pooling check box.
    4. Select the port check box for each printer in the
       printer pool, click OK
   To Configure the printer priorities, follow these
    steps:
    1.   Install the printer that will have multiple priorities.
         install the same printer again using the same port.
    2.   In Server manager, right-click one of the logical
         printer. choose Properties.
    3.   Click the Advanced tab and specify a priority for the
         Logical printer.
    4.   Repeat steps 2 and 3 for each of the logical printers.
    5.   Connect higher-priority logical printer and lower-
         priority users to lower- priority logical printer 
         Configure printer permissions to restrict access to
         specific groups.
   If you install the Internet Printing role
    service, you can manage printers by using a
    web browser to visit the URL
     http://<Server Name>/Printers.
   To connect directly to a printer shared with
    Internet printing, provide the URL in the
    format
     http://<ServerName>/Printers/<PrinterName>
     /.printer.
   First, create a custom filter by following
    these steps:
    1. In server Manager  right-click RolesPrint
       ServicesPrint ManagementCustom Filters 
       choose Add New Printer Filter.
    2. On the Printer Filter Name And Description
       page  type a name for the filter  click Next.
3. On the Define A Printer Filter page configure
     the Filter Criteria, one raw at a time. As:
 ▪    Field: defines the criteria being compared. The most
      useful Field is Queue Status, which indicates the
      printer’s current state.
 ▪    Condition: conditions vary depending on the value
      you select for the Field.
 ▪    Value: the value, the Field, and the Condition must
      match for a printer to meet the filter criteria.
4. when you have configured the filter criteria 
   click Next.
5.   On the Set Notifications (Optional)page  choose
     whether to send an e-mail notification, whether to run
     a script when a printer matches the criteria you
     defined on the previous page, or both.
   To deploy a Printer with Group Policy settings, follow these steps:
    1.   In Server Manager  select RolesPrint ServicesPrint
         ManagementPrint Servers<Server-Name>Printers. In the details
         pane right-click the printer  choose Deploy With Group Policy.
    2.   In the Deploy With Group Policy dialog box  click the Browse button
         to select the Group Policy object (GPO) that you want to use  click
         Next.
    3.   To deploy the printer to all users who log on to a particular computer 
         select the The Computers That This GPO Applies To check box.
    4.   To deploy the printer to specific users regardless of which computers
         they log on to  select the The Users That This GPO Applies To
         check box.
    5.   You can select both check boxes to deploy the printer using both the
         Computer Configuration and User Configuration nodes in a GPO.
6. Click the Add button to add the GPO to the
   list.
7. Repeat steps 2 and 3 to deploy the printer to
   additional GPOs.
8. Click OK.
9. Click OK to confirm that the printers were
   successfully added to the GPO  click OK
   again to close the Deploy With Group Policy
   dialog box.
   Exporting Printers:
                           Print
    1. In Server Manager right-click
       Management choose Migrate
       Printers.
    2. On the Getting Started With Printer Migration
       page select Export Printer Queues And
       Printer Drives To A File click Next.
3. On the Select A Printer page  select a server
   click Next.
4. On the Review The List Of Items To Be
   Exported page  click Next.
5. On the Select The File Location  type a
   filename  click Next.

6. On the final page click Finish.
   Importing Printers:
    1. In Server Manager right-click Print
       Management choose Migrate Printers.
    2. On the Getting Started With Printer Migration
       page select Import Printer Queues And
       Printer Drives To A File click Next.
    3. On the Select The File Location  type the
       name of the exported file  click Next.
4.   On the Review The List Of Items To Be Imported
     page  click Next.
5.   On the Select A Printer page  select a server
     click Next.
6.   On the Select Import Options page click the
     Import Mode drop-down list to choose whether
     to keep or overwrite existing printers choose
     whether to list the imported printers in the
     Active Directory  click Next.
7.   On the finial page, click Open Event Viewer to
     review any error.  click Finish
Contact Me: qursaan@gmail.com

Lesson 10: Managing Printers

  • 1.
  • 2.
     How to install, share and mange printers.
  • 3.
     Configure and monitor print services
  • 4.
     Lesson 1: Managing Printers
  • 5.
  • 6.
     Installing the Print Services Server Role  Installing Printers  Sharing Printers  Configuring Printer Permissions  Adding Printer Drivers  Configuring Printer Pooling  Configuring Printer Priorities  Managing Internet Printing  Generating Notifications  Deploying Printers with Group Policy  Migrating Printers
  • 7.
     To Install the Print Services Server Role, follow these steps: 1. In Server Manger, right-click Roles,  choose Add Roles. 2. On the Before You Begin Page, Click Next. 3. On the Server Roles Page, select the Print Services check box.  Click Next. 4. On the Print Services page,  Click Next.
  • 8.
    5. On theSelect Role Services Page, select the appropriate check boxes for the following roles,  click Next: 1. Printer Server (Installs the print management) 2. LPD Service (Allow clients to print using the Line Printer Daemon (LPD) protocol 3. Internet Printing (Allow clients to print using the Internet Printing Protocol (IPP) and Create a web site to manage print jobs )
  • 9.
    6. If youare prompted to install the Web Server (IIS) role service, click Add Required Role Services,  click Next. 7. If the Web Server (IIS) page appears, click Next. Then, On the Select Role Services page, configure the required IIS role services  click Next again
  • 10.
    8. On theConfirm Installation Selections Page, Click Install. 9. On the Installation Results page, Click Close.
  • 11.
     You Can install printers using :  the Control Panel  the Print Management Snap-in
  • 12.
     After connecting a printer either to the network or to a server, follow these steps 1. Click Start  choose Control Panel 2. Below Hardware and Sound  Click Printer 3. Double-click Add Printer. 4. On the Choose A Local Or Network Printer page, select the appropriate 5. On the Choose A Printer Port Page, Select the physical port.
  • 13.
    6. If youare installing a network printer, Select the printer or that I want Isn’t Listed. Click Next Select A Printer Using A TCP/IP Address or Hostname, Click Next 7. If the Install the printer Driver page appear, select the driver location,…  Click Next 8. On the Type A Printer Name Page, type a name for the printer,  Click Next. 9. On the Printer Sharing Page, choose whether to share the printer, type the location. Click Next 10. Click Finish
  • 14.
     After connecting a printer either to the network or to a server, follow these steps: 1. In Server Manager, right-click RolesPrint ServicesPrint ManagementPrint Servers <server>,  choose Add Printer. 2. On the Printer Installation page, choose an installation method,  click Next. 3. The Pages that follow will vary depending on the printer installation method you choose. 4. On the Printer Driver page, choose whether to use an existing driver, install a new driver or use the printer driver.  click Next. 5. If you choose to install a new driver, the Printer Installation page appears. Select a driver,  click Next.
  • 15.
    6. On thePrinter Name and Sharing Settings page, type a name for the printer. To immediately share the printer, select the share This Printer check box and type a name and location. Click Next. 7. On the Printer Found page, click Next. 8. Depending on the type of printer, you might be prompted to perform printer-specific configuration. 9. On the Completing The Network Printer Installation Wizard page, click Finish.
  • 19.
     Using Control Panel  Right-Click the printer choose sharing  Using Print Management snap-in  Right-Click the printer choose Manage Sharing.
  • 21.
     By default, everyone can print to printer.  You can configure the following permissions:  Print: Users can print.  Manage Printers: Users can change printer configuration settings.  Manage Documents: Users can remove documents that have been submitted to the printer.
  • 22.
     To add printer drivers using the Print management snap-in, follow these steps: 1. In Server Manager, right-click RolesPrint ServicesPrint ManagementPrint Servers<Server Name>Drivers  choose Add Driver. 2. On the Welcome to The Add Printer Driver Wizard page, click Next.
  • 23.
    3. On theProcessor And Operating System Selection page, select the check boxes... click Next. 4. On the Printer Driver Selection page. click the Have Disk button, select the folder containing the printer driver, click OK. Select the printer, click Next. 5. On the Completing The Add Printer Driver Wizard page, click Finish.
  • 24.
     To create a printer pool, follow these steps: 1. Install each of the printers that will be in the pool. 2. In Server Manager, select Print ServicesPrint ManagementPrint Servers<Server Name>Printers,  right-click one of the printer in the pool  choose Properties. 3. Click the Ports tab  select the Enable Printer Pooling check box. 4. Select the port check box for each printer in the printer pool, click OK
  • 26.
     To Configure the printer priorities, follow these steps: 1. Install the printer that will have multiple priorities. install the same printer again using the same port. 2. In Server manager, right-click one of the logical printer. choose Properties. 3. Click the Advanced tab and specify a priority for the Logical printer. 4. Repeat steps 2 and 3 for each of the logical printers. 5. Connect higher-priority logical printer and lower- priority users to lower- priority logical printer  Configure printer permissions to restrict access to specific groups.
  • 27.
     If you install the Internet Printing role service, you can manage printers by using a web browser to visit the URL  http://<Server Name>/Printers.  To connect directly to a printer shared with Internet printing, provide the URL in the format  http://<ServerName>/Printers/<PrinterName> /.printer.
  • 30.
     First, create a custom filter by following these steps: 1. In server Manager  right-click RolesPrint ServicesPrint ManagementCustom Filters  choose Add New Printer Filter. 2. On the Printer Filter Name And Description page  type a name for the filter  click Next.
  • 31.
    3. On theDefine A Printer Filter page configure the Filter Criteria, one raw at a time. As: ▪ Field: defines the criteria being compared. The most useful Field is Queue Status, which indicates the printer’s current state. ▪ Condition: conditions vary depending on the value you select for the Field. ▪ Value: the value, the Field, and the Condition must match for a printer to meet the filter criteria. 4. when you have configured the filter criteria  click Next.
  • 32.
    5. On the Set Notifications (Optional)page  choose whether to send an e-mail notification, whether to run a script when a printer matches the criteria you defined on the previous page, or both.
  • 34.
     To deploy a Printer with Group Policy settings, follow these steps: 1. In Server Manager  select RolesPrint ServicesPrint ManagementPrint Servers<Server-Name>Printers. In the details pane right-click the printer  choose Deploy With Group Policy. 2. In the Deploy With Group Policy dialog box  click the Browse button to select the Group Policy object (GPO) that you want to use  click Next. 3. To deploy the printer to all users who log on to a particular computer  select the The Computers That This GPO Applies To check box. 4. To deploy the printer to specific users regardless of which computers they log on to  select the The Users That This GPO Applies To check box. 5. You can select both check boxes to deploy the printer using both the Computer Configuration and User Configuration nodes in a GPO.
  • 35.
    6. Click theAdd button to add the GPO to the list. 7. Repeat steps 2 and 3 to deploy the printer to additional GPOs. 8. Click OK. 9. Click OK to confirm that the printers were successfully added to the GPO  click OK again to close the Deploy With Group Policy dialog box.
  • 36.
     Exporting Printers: Print 1. In Server Manager right-click Management choose Migrate Printers. 2. On the Getting Started With Printer Migration page select Export Printer Queues And Printer Drives To A File click Next.
  • 37.
    3. On theSelect A Printer page  select a server click Next. 4. On the Review The List Of Items To Be Exported page  click Next. 5. On the Select The File Location  type a filename  click Next. 6. On the final page click Finish.
  • 38.
     Importing Printers: 1. In Server Manager right-click Print Management choose Migrate Printers. 2. On the Getting Started With Printer Migration page select Import Printer Queues And Printer Drives To A File click Next. 3. On the Select The File Location  type the name of the exported file  click Next.
  • 39.
    4. On the Review The List Of Items To Be Imported page  click Next. 5. On the Select A Printer page  select a server click Next. 6. On the Select Import Options page click the Import Mode drop-down list to choose whether to keep or overwrite existing printers choose whether to list the imported printers in the Active Directory  click Next. 7. On the finial page, click Open Event Viewer to review any error.  click Finish
  • 40.