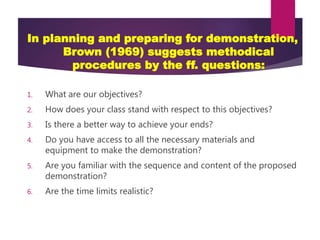
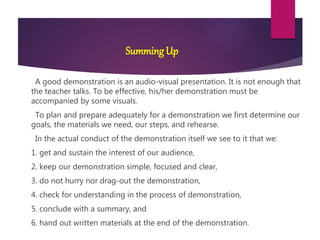
Lesson 10
Demonstrations In Teaching
“GOODDEMONSTRATIONIS GOODCOMMUNICATION”
Introduction
 Like role playing and pantomime of
the dramatized experiences
demonstration is also something
very handy.
 It requires no elaborate preparation
and yet as effective as the other
instructional materials when done
properly.
What then is a demonstration?
 It is defined as a public showing emphasizing
the salient merits, utility, efficiency, etc., of an
article or product.
 In teaching it is showing how a thing is done
and emphasizing of the salient merits, utility
and efficiency of a concept, a method, or a
process or an attitude.
Guiding Principles.
In the teaching learning experience… (Edgar Dale,
1969)
1. ESTABLISH RAPPORT
Greet your audience. Make them feel at
ease by your warmth and sincerity.
Stimulate their interest by making your
demonstration and yourself interesting.
Sustain their attention .
2. Avoid the COIK fallacy (Clear
Only If Known.)
What is this fallacy?
It is the assumption that what is clear to the expert
demonstrator is also clearly known to the person for
who the message is intended. To avoid the fallacy it is
best for the expert demonstrator to assume that his
audience knows nothing or a little about what he is
intending to demonstrate for him to be thorough, clear
and detailed in his demonstration even to a point of
facing the risk of being repetitive.
3. Watch for key points. What are
key points?
Dale (1996) says, “they are the ones at
which an error is likely to be made, the places
at which many people stumble and where the
knacks and tricks of the trade are especially
important”. The good demonstrator recognizes
possible stumbling blocks to learners and
highlights them in some way. What are usually
highlighted are the “don’ts” of a process or
strategy.
In planning and preparing for demonstration,
Brown (1969) suggests methodical
procedures by the ff. questions:
1. What are our objectives?
2. How does your class stand with respect to this objectives?
3. Is there a better way to achieve your ends?
4. Do you have access to all the necessary materials and
equipment to make the demonstration?
5. Are you familiar with the sequence and content of the proposed
demonstration?
6. Are the time limits realistic?
Dale (1969) gives several points to observe during
demonstration:
1. Set the tone for good communication. Get and keep your audience’s
interest.
2. Keep your demonstration simple.
3. Do not wander from the main ideas.
4. Check to see that your demonstration is being understood.
5. Do not hurry your demonstration. Asking questions to check
understanding an serve as a “brake”.
6. Do not drag out the demonstration.
7. Summarize as you go along and provide a concluding summary.
8. Hand out written materials at the conclusion.
Questions to evaluate classroom
demonstration
 Was your demonstration adequately and skillfully prepared? Did you select
demonstrable skills or ideas? Were the desired behavioral outcomes clear?
 Did you follow the step-by-step plan? Did you make use of additional
materials appropriate to your purposes- chalkboard, felt board, pictures,
charts, diagrams, models, overhead transparencies, or slides?
 Was the demonstration itself correct? Was your explanation simple enough
so that most of the students understood it easily?
 Did you keep checking to see that all your students were concentrating on
what you are doing?
 Could every person see and hear? If a skill was demonstrated for imitation,
was it presented from the physical point of view of the learner?
 Did you help your students do their own generalizing?
 Did you take enough time to demonstrate the key points?
 Did you review and summarize the key points?
 Did your students participate in what you were doing by asking thoughtful
questions at the appropriate time?
 Did your evaluation of student learning indicate that your demonstration
achieved its purpose?
In the actual conduct of the demonstration
itself we see to it that we:
1. Get and sustain the interest of our audience,
2. Keep our demonstration simple, focused and clear,
3. Do not hurry or drag out the demonstration,
4. Check for understanding in the process of demonstration,
5. Conclude with a summary, and
6. Hand out written material at the end of the demonstration.
Application
1. “less is more.” if you have too many steps to include in a
demonstration, what should you do?
2. Is it better to entertain questions as you go along your
demonstration or postpone them till the end of demo to avoid
disruption or possible digression?
3. Is it sufficient to look for puzzled faces in your audience to find
out if your demonstration is clear?
4. Brown (1969) cites guide questions that can help us conduct
effective demonstrations. Find out if all these are covered in
the steps given by Dale (1969) in the ABSTRACTION phase of
this lesson.
 Can the students see and hear?
 Do you use chalkboard outlines or drawings?
 Do you define unfamiliar terms, parts, or processes?
 Do you note signs of confusion, disbelief, inattention?
 Do you use “good showmanship”?
 Do you intersperse film, transparency, or other appropriate
audio-visual materials?
 Do you move at the right pace?
 Do you invite participation as appropriate?
5. Evaluate the evaluation questions for demonstration. Can you
add or delete or merge some items? Improve on them.
6.Why is demonstration called audiovisual presentation?
7. Go over the K to 12 Curriculum Guide. Find out which objectives and
competencies lend themselves to the demonstration method.
8. Demonstrate how to use the overhead projector to the class. Be
guided by the principles, steps and guide questions learned from this
lesson. Evaluate the demonstration process by using the evaluation
questions you learned from this lesson.
9. Ask a classmate to demonstrate to the class how to make stick
drawings. Evaluate the demonstration process. Use the evaluation
questions you learned in this lesson.
SummingUp
A good demonstration is an audio-visual presentation. It is not enough that
the teacher talks. To be effective, his/her demonstration must be
accompanied by some visuals.
To plan and prepare adequately for a demonstration we first determine our
goals, the materials we need, our steps, and rehearse.
In the actual conduct of the demonstration itself we see to it that we:
1. get and sustain the interest of our audience,
2. keep our demonstration simple, focused and clear,
3. do not hurry nor drag-out the demonstration,
4. check for understanding in the process of demonstration,
5. conclude with a summary, and
6. hand out written materials at the end of the demonstration.
PREPARED BY:
 RAFAELA JOY M. FAJARDO
 JONALYN FRANCISO
 EMMANUEL RAPSING
BEED GEN.ED 2B

Lesson 10; Demonstration in Teaching

  • 1.
    Lesson 10 Demonstrations InTeaching “GOODDEMONSTRATIONIS GOODCOMMUNICATION”
  • 2.
    Introduction  Like roleplaying and pantomime of the dramatized experiences demonstration is also something very handy.  It requires no elaborate preparation and yet as effective as the other instructional materials when done properly.
  • 3.
    What then isa demonstration?  It is defined as a public showing emphasizing the salient merits, utility, efficiency, etc., of an article or product.  In teaching it is showing how a thing is done and emphasizing of the salient merits, utility and efficiency of a concept, a method, or a process or an attitude.
  • 4.
    Guiding Principles. In theteaching learning experience… (Edgar Dale, 1969) 1. ESTABLISH RAPPORT Greet your audience. Make them feel at ease by your warmth and sincerity. Stimulate their interest by making your demonstration and yourself interesting. Sustain their attention .
  • 5.
    2. Avoid theCOIK fallacy (Clear Only If Known.) What is this fallacy? It is the assumption that what is clear to the expert demonstrator is also clearly known to the person for who the message is intended. To avoid the fallacy it is best for the expert demonstrator to assume that his audience knows nothing or a little about what he is intending to demonstrate for him to be thorough, clear and detailed in his demonstration even to a point of facing the risk of being repetitive.
  • 6.
    3. Watch forkey points. What are key points? Dale (1996) says, “they are the ones at which an error is likely to be made, the places at which many people stumble and where the knacks and tricks of the trade are especially important”. The good demonstrator recognizes possible stumbling blocks to learners and highlights them in some way. What are usually highlighted are the “don’ts” of a process or strategy.
  • 7.
    In planning andpreparing for demonstration, Brown (1969) suggests methodical procedures by the ff. questions: 1. What are our objectives? 2. How does your class stand with respect to this objectives? 3. Is there a better way to achieve your ends? 4. Do you have access to all the necessary materials and equipment to make the demonstration? 5. Are you familiar with the sequence and content of the proposed demonstration? 6. Are the time limits realistic?
  • 8.
    Dale (1969) givesseveral points to observe during demonstration: 1. Set the tone for good communication. Get and keep your audience’s interest. 2. Keep your demonstration simple. 3. Do not wander from the main ideas. 4. Check to see that your demonstration is being understood. 5. Do not hurry your demonstration. Asking questions to check understanding an serve as a “brake”. 6. Do not drag out the demonstration. 7. Summarize as you go along and provide a concluding summary. 8. Hand out written materials at the conclusion.
  • 9.
    Questions to evaluateclassroom demonstration  Was your demonstration adequately and skillfully prepared? Did you select demonstrable skills or ideas? Were the desired behavioral outcomes clear?  Did you follow the step-by-step plan? Did you make use of additional materials appropriate to your purposes- chalkboard, felt board, pictures, charts, diagrams, models, overhead transparencies, or slides?  Was the demonstration itself correct? Was your explanation simple enough so that most of the students understood it easily?  Did you keep checking to see that all your students were concentrating on what you are doing?
  • 10.
     Could everyperson see and hear? If a skill was demonstrated for imitation, was it presented from the physical point of view of the learner?  Did you help your students do their own generalizing?  Did you take enough time to demonstrate the key points?  Did you review and summarize the key points?  Did your students participate in what you were doing by asking thoughtful questions at the appropriate time?  Did your evaluation of student learning indicate that your demonstration achieved its purpose?
  • 11.
    In the actualconduct of the demonstration itself we see to it that we: 1. Get and sustain the interest of our audience, 2. Keep our demonstration simple, focused and clear, 3. Do not hurry or drag out the demonstration, 4. Check for understanding in the process of demonstration, 5. Conclude with a summary, and 6. Hand out written material at the end of the demonstration.
  • 12.
    Application 1. “less ismore.” if you have too many steps to include in a demonstration, what should you do? 2. Is it better to entertain questions as you go along your demonstration or postpone them till the end of demo to avoid disruption or possible digression? 3. Is it sufficient to look for puzzled faces in your audience to find out if your demonstration is clear? 4. Brown (1969) cites guide questions that can help us conduct effective demonstrations. Find out if all these are covered in the steps given by Dale (1969) in the ABSTRACTION phase of this lesson.
  • 13.
     Can thestudents see and hear?  Do you use chalkboard outlines or drawings?  Do you define unfamiliar terms, parts, or processes?  Do you note signs of confusion, disbelief, inattention?  Do you use “good showmanship”?  Do you intersperse film, transparency, or other appropriate audio-visual materials?  Do you move at the right pace?  Do you invite participation as appropriate?
  • 14.
    5. Evaluate theevaluation questions for demonstration. Can you add or delete or merge some items? Improve on them. 6.Why is demonstration called audiovisual presentation? 7. Go over the K to 12 Curriculum Guide. Find out which objectives and competencies lend themselves to the demonstration method. 8. Demonstrate how to use the overhead projector to the class. Be guided by the principles, steps and guide questions learned from this lesson. Evaluate the demonstration process by using the evaluation questions you learned from this lesson. 9. Ask a classmate to demonstrate to the class how to make stick drawings. Evaluate the demonstration process. Use the evaluation questions you learned in this lesson.
  • 15.
    SummingUp A good demonstrationis an audio-visual presentation. It is not enough that the teacher talks. To be effective, his/her demonstration must be accompanied by some visuals. To plan and prepare adequately for a demonstration we first determine our goals, the materials we need, our steps, and rehearse. In the actual conduct of the demonstration itself we see to it that we: 1. get and sustain the interest of our audience, 2. keep our demonstration simple, focused and clear, 3. do not hurry nor drag-out the demonstration, 4. check for understanding in the process of demonstration, 5. conclude with a summary, and 6. hand out written materials at the end of the demonstration.
  • 16.
    PREPARED BY:  RAFAELAJOY M. FAJARDO  JONALYN FRANCISO  EMMANUEL RAPSING BEED GEN.ED 2B