Downloaded 48 times

![INTERFACING ANDROID WITH EMBEDDED SYSTEMS
Page 35RESEARCH DESIGN LAB | VOLUME 1, ISSUE 1 WWW.RESEARCHDESIGNLAB.COM
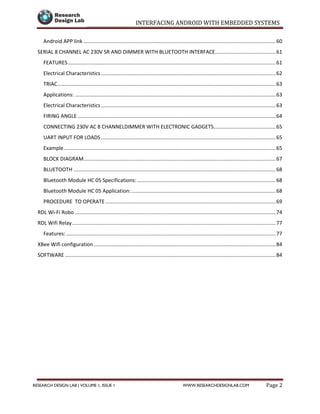
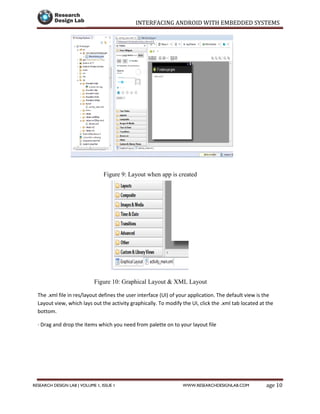
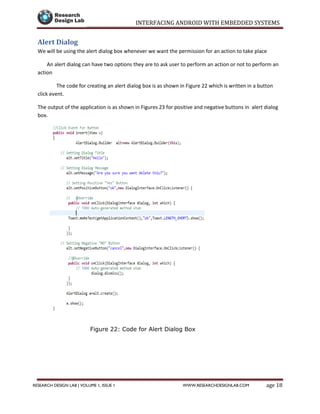
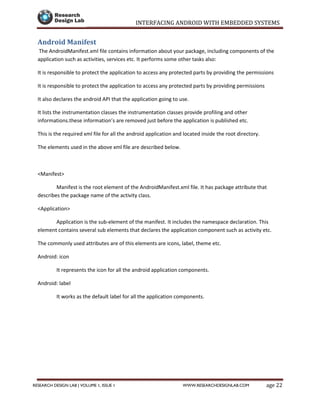
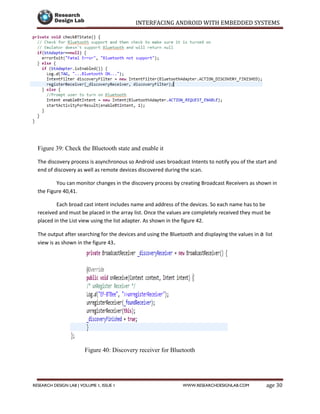
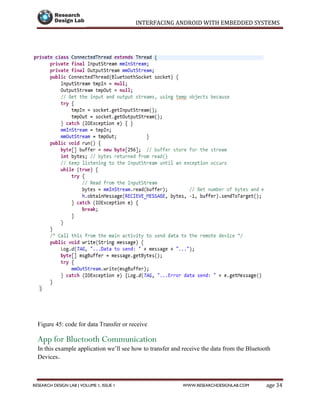
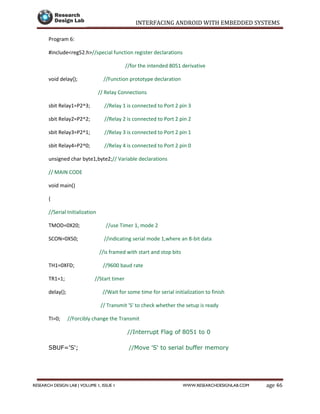
publicclassMainActivityextends Activity {
privatestaticfinal String TAG = "bluetooth2";
finalintRECIEVE_MESSAGE = 1; // Status for Handler
privateBluetoothAdapterbtAdapter = null;
privateBluetoothSocketbtSocket = null;
privateStringBuildersb = newStringBuilder ();
privateConnectedThreadmConnectedThread ;
// SPP UUID service
privatestaticfinal UUID MY_UUID = UUID.fromString ("00001101-0000-1000-8000-
00805F9B34FB");
// MAC-address of Bluetooth module which you want to connect(you must edit this line)
privatestatic String address = "00:12:09:29:42:57";
//this is like a main activity in java
@Override
protectedvoidonCreate (Bundle savedInstanceState ) {
super.onCreate (savedInstanceState );
setContentView (R.layout.terminal );// front end xml file which has to be displayed
h= newHandler () {
publicvoidhandleMessage (android.os.Messagemsg ) {
switch (msg.what ) {
caseRECIEVE_MESSAGE :// if receive massage
byte[] readBuf = (byte[]) msg.obj;](https://image.slidesharecdn.com/interfacing-android-with-embedded-systems-150912043928-lva1-app6891/85/Interfacing-android-with-embedded-systems-36-320.jpg)
![INTERFACING ANDROID WITH EMBEDDED SYSTEMS
Page 36RESEARCH DESIGN LAB | VOLUME 1, ISSUE 1 WWW.RESEARCHDESIGNLAB.COM
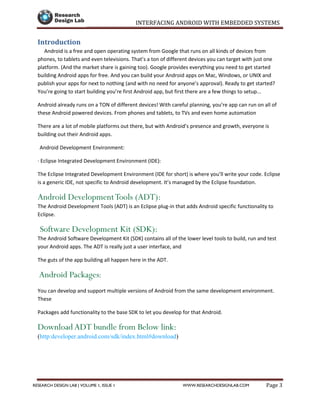
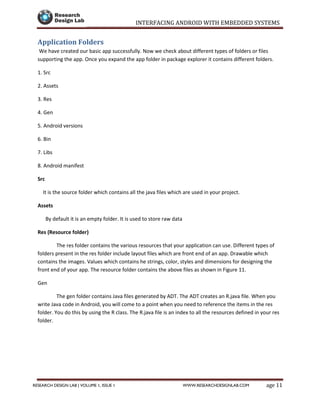
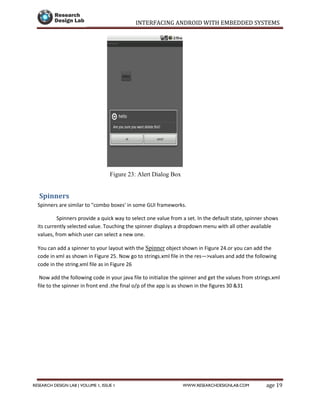
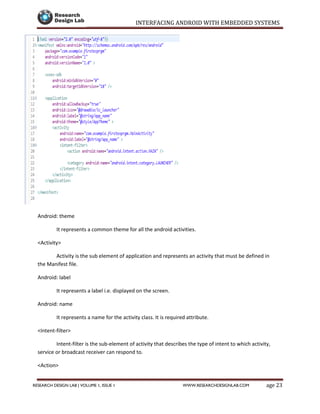
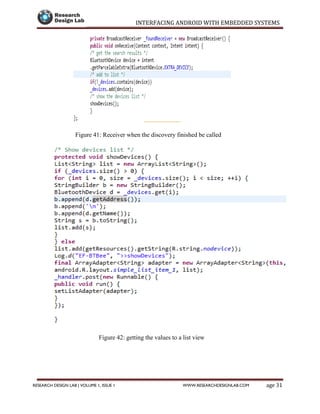
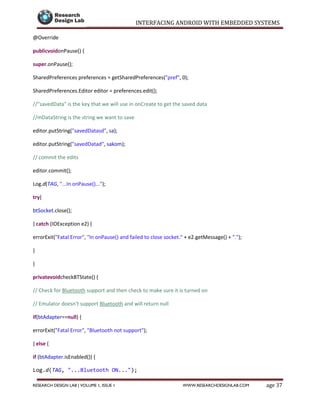
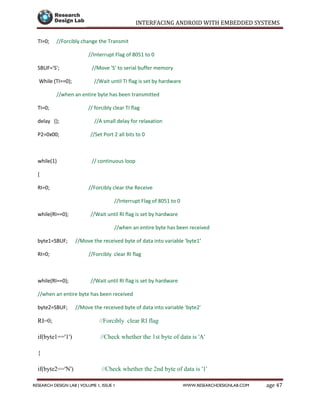
String strIncom = newString (readBuf , 0, msg.arg1);// create string from bytes array
sb.append (strIncom ); // append string
intendOfLineIndex = sb.indexOf ("rn"); // determine the end-of-line
if (endOfLineIndex > 0) {//if end-of-line,
String sbprint = sb.substring (0, endOfLineIndex );// extract string
Toast.makeText (getApplicationContext (), "received message"+"----"+sbprint , 30).show();
sb.delete (0, sb.length ());// and clear
}
break;
}
};
};
btAdapter = BluetoothAdapter.getDefaultAdapter ();// get Bluetooth adapter
checkBTState();
}
privateBluetoothSocketcreateBluetoothSocket(BluetoothDevice device) throwsIOException {
if(Build.VERSION.SDK_INT>= 10){
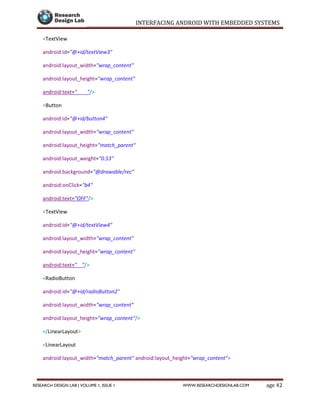
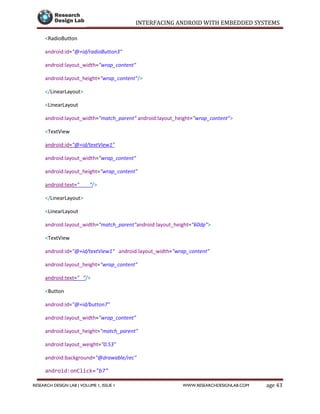
try {
final Method m = device.getClass().getMethod("createInsecureRfcommSocketToServiceRecord",
new Class[] { UUID.class });
return (BluetoothSocket) m.invoke(device, MY_UUID);
} catch (Exception e) {
Log.e(TAG, "Could not create Insecure RFCommConnection",e);
}
}
returndevice.createRfcommSocketToServiceRecord(MY_UUID);](https://image.slidesharecdn.com/interfacing-android-with-embedded-systems-150912043928-lva1-app6891/85/Interfacing-android-with-embedded-systems-37-320.jpg)
![INTERFACING ANDROID WITH EMBEDDED SYSTEMS
Page 38RESEARCH DESIGN LAB | VOLUME 1, ISSUE 1 WWW.RESEARCHDESIGNLAB.COM
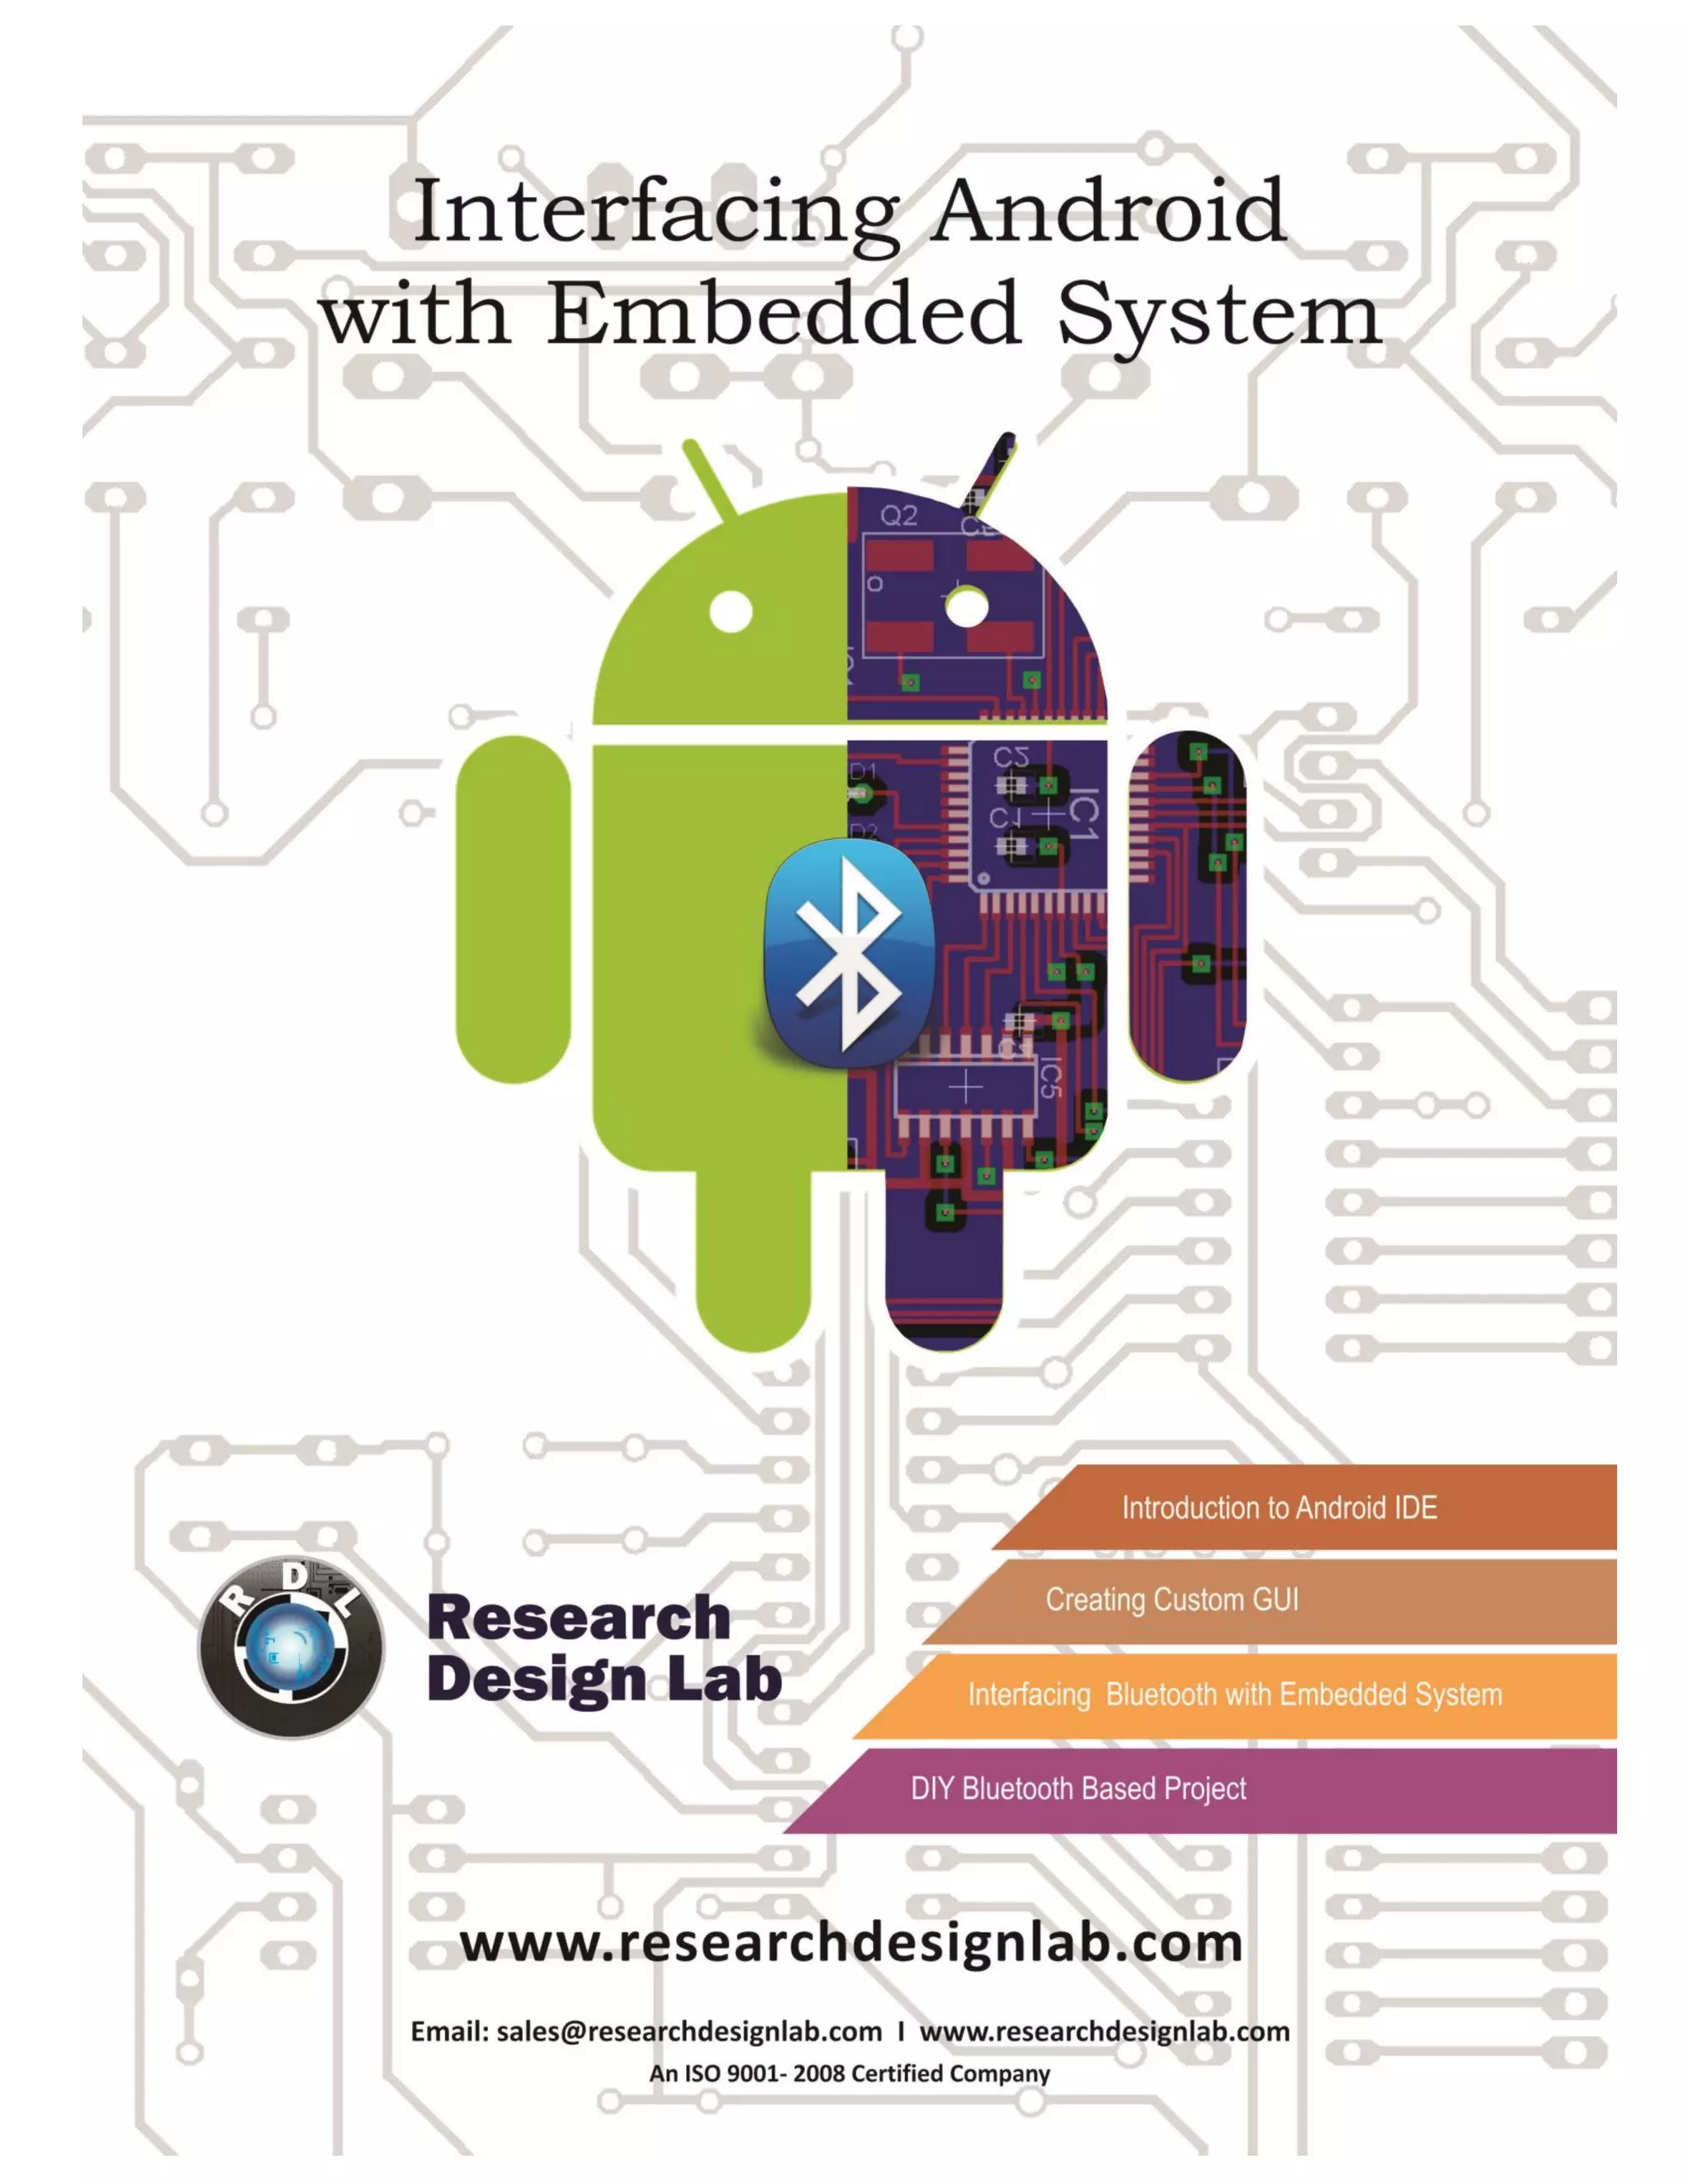
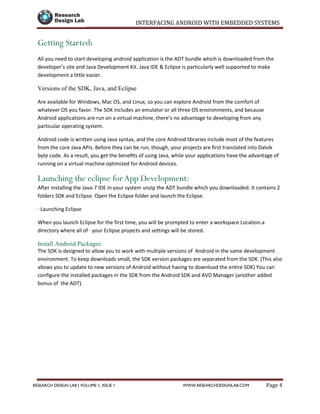
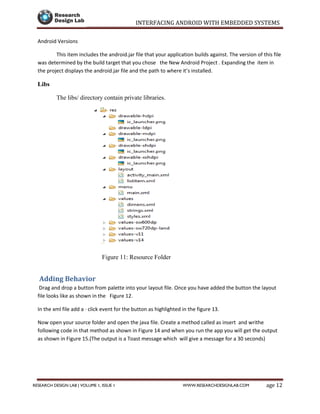
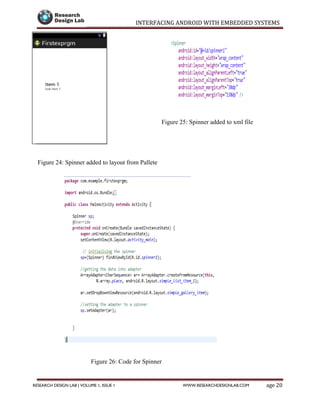
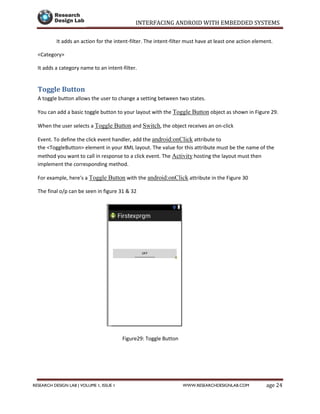
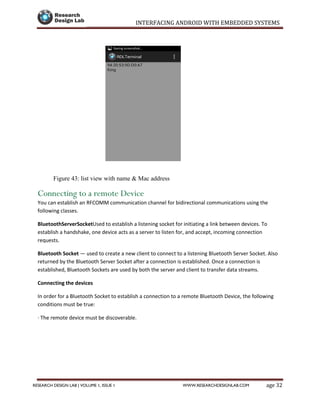
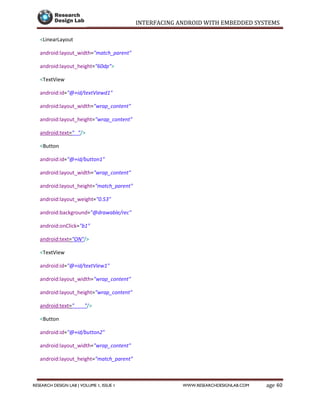
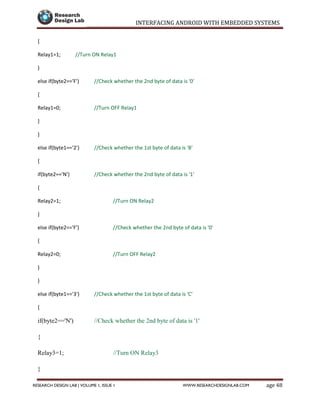
privatevoiderrorExit(String title, String message){
Toast.makeText(getBaseContext(), message, Toast.LENGTH_LONG).show();
finish();
} // writing a thread for read and write the data
privateclassConnectedThreadextends Thread {
privatefinalInputStreammmInStream;//initialising I/P Stream
privatefinalOutputStreammmOutStream;// initializing the o/p Stream
publicConnectedThread(BluetoothSocket socket) {
InputStreamtmpIn = null;
OutputStreamtmpOut = null;
// Get the input and output streams, using temp objects because
// member streams are final
try {tmpIn = socket.getInputStream();//get values to i/p stream from socket
tmpOut = socket.getOutputStream();//get values to i/p stream from socket
} catch (IOException e) { }
mmInStream = tmpIn;
mmOutStream = tmpOut;
}
publicvoid run() {
byte[] buffer = newbyte[256]; // buffer store for the stream
int bytes; // bytes returned from read()
// Keep listening to the InputStream until an exception occurs
while (true) {
try {
// Read from the Input Stream
bytes = mmInStream.read(buffer);// Get number of bytes and message in](https://image.slidesharecdn.com/interfacing-android-with-embedded-systems-150912043928-lva1-app6891/85/Interfacing-android-with-embedded-systems-39-320.jpg)
![INTERFACING ANDROID WITH EMBEDDED SYSTEMS
Page 39RESEARCH DESIGN LAB | VOLUME 1, ISSUE 1 WWW.RESEARCHDESIGNLAB.COM
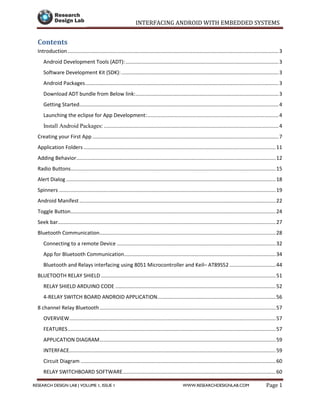
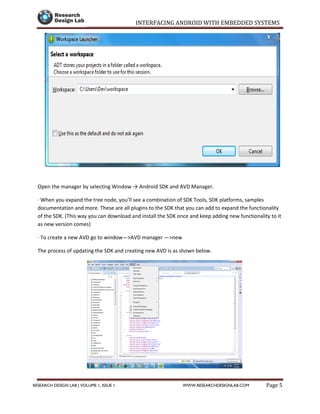
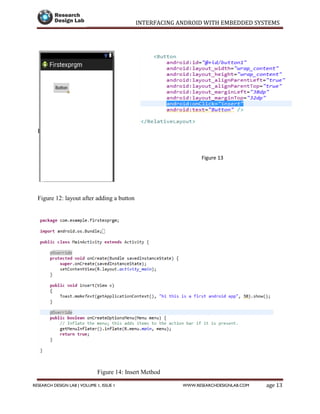
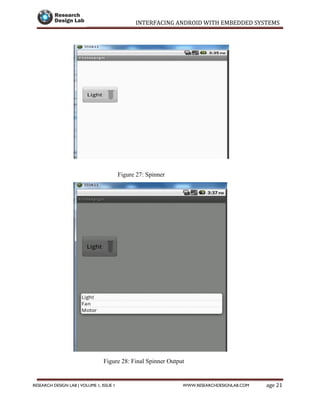
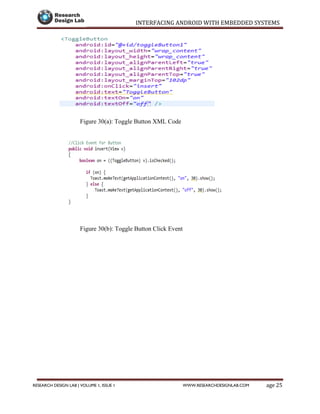
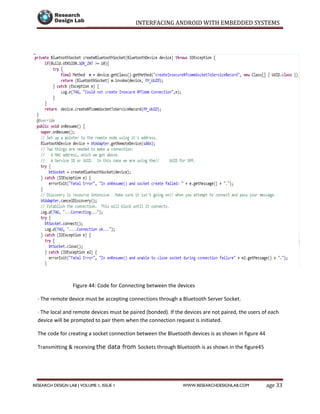
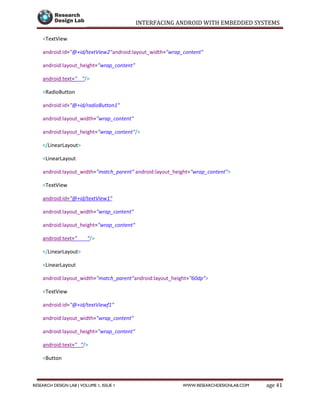
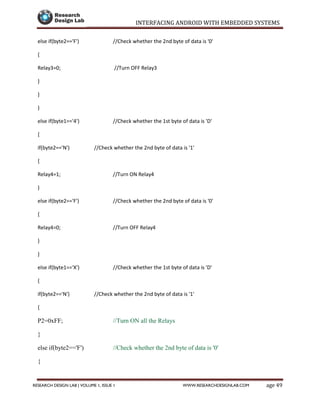
Log.d(TAG, "...Data to send: " + message + "...");
byte[] msgBuffer = message.getBytes();//get the data bytes
try {
mmOutStream.write(msgBuffer);//getting the data to o/p stream
} catch (IOException e) {
Log.d(TAG, "...Error data send: " + e.getMessage() + "...");
}
}
}
//click events for buttons
publicvoid b1(View v)
{ r1.setChecked(true);//Setting radio button to be checked
mConnectedThread.write("1N");//Sending the data via bluetooth
}
publicvoid b2(View v)
{
r1.setChecked(false);//Setting radio button to be unchecked
mConnectedThread.write("1F");//Sending the data via bluetooth
}
publicvoid b3(View v)
{
r2.setChecked(true);//Setting radio button to be checked
mConnectedThread.write("2N");//Sending the data via bluetooth
}
publicvoid b4(View v)
{r2.setChecked(false);//Setting radio button to be unchecked](https://image.slidesharecdn.com/interfacing-android-with-embedded-systems-150912043928-lva1-app6891/85/Interfacing-android-with-embedded-systems-40-320.jpg)


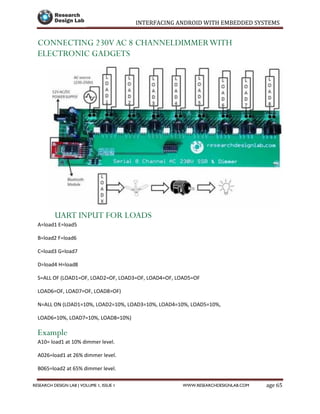
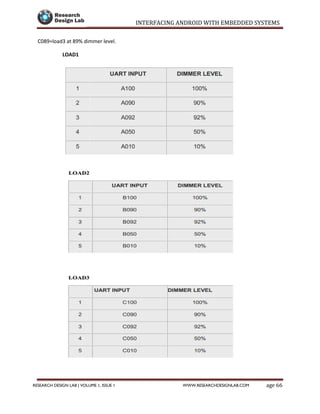
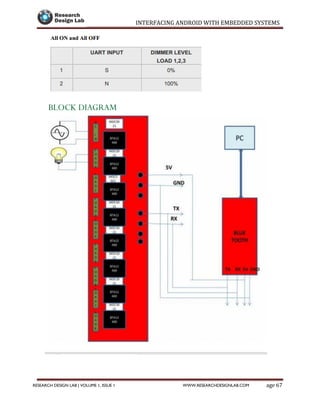
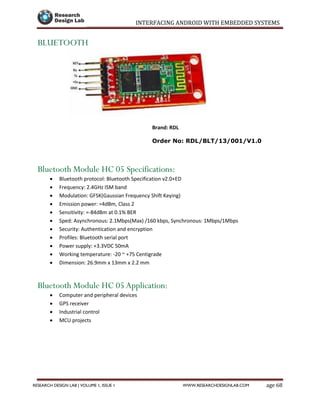
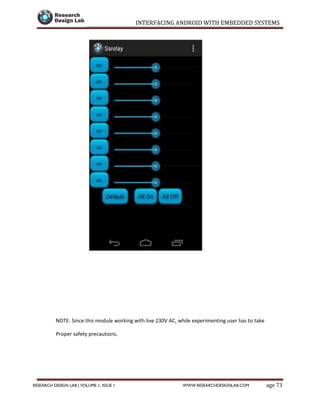


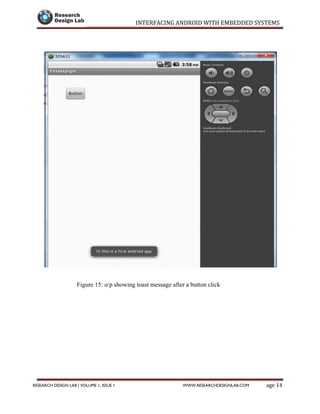
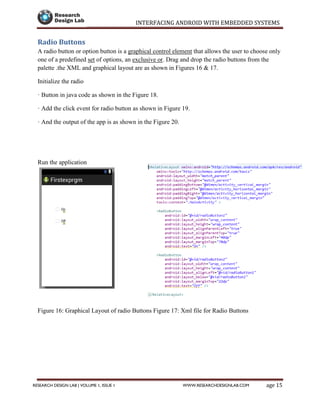
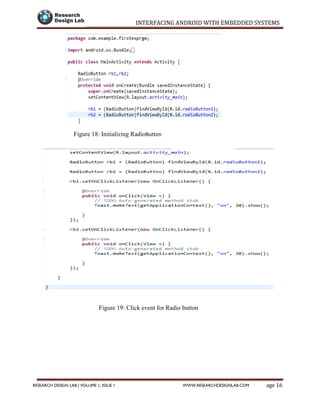
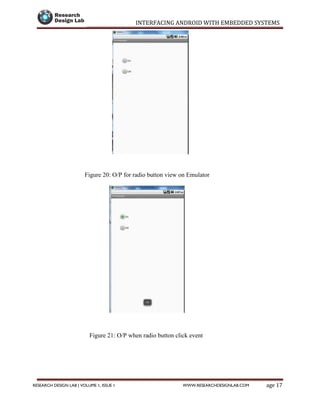
The document provides a comprehensive guide to interfacing Android with embedded systems, detailing the necessary tools, including the Android Development Tools (ADT) and Software Development Kit (SDK). It includes step-by-step instructions for developing Android applications, covering topics such as launching Eclipse, creating an app, using various UI elements like buttons, radio buttons, and spinners, and details about the Android manifest file. Additionally, it describes techniques for Bluetooth communication and interfacing with relays using microcontrollers.