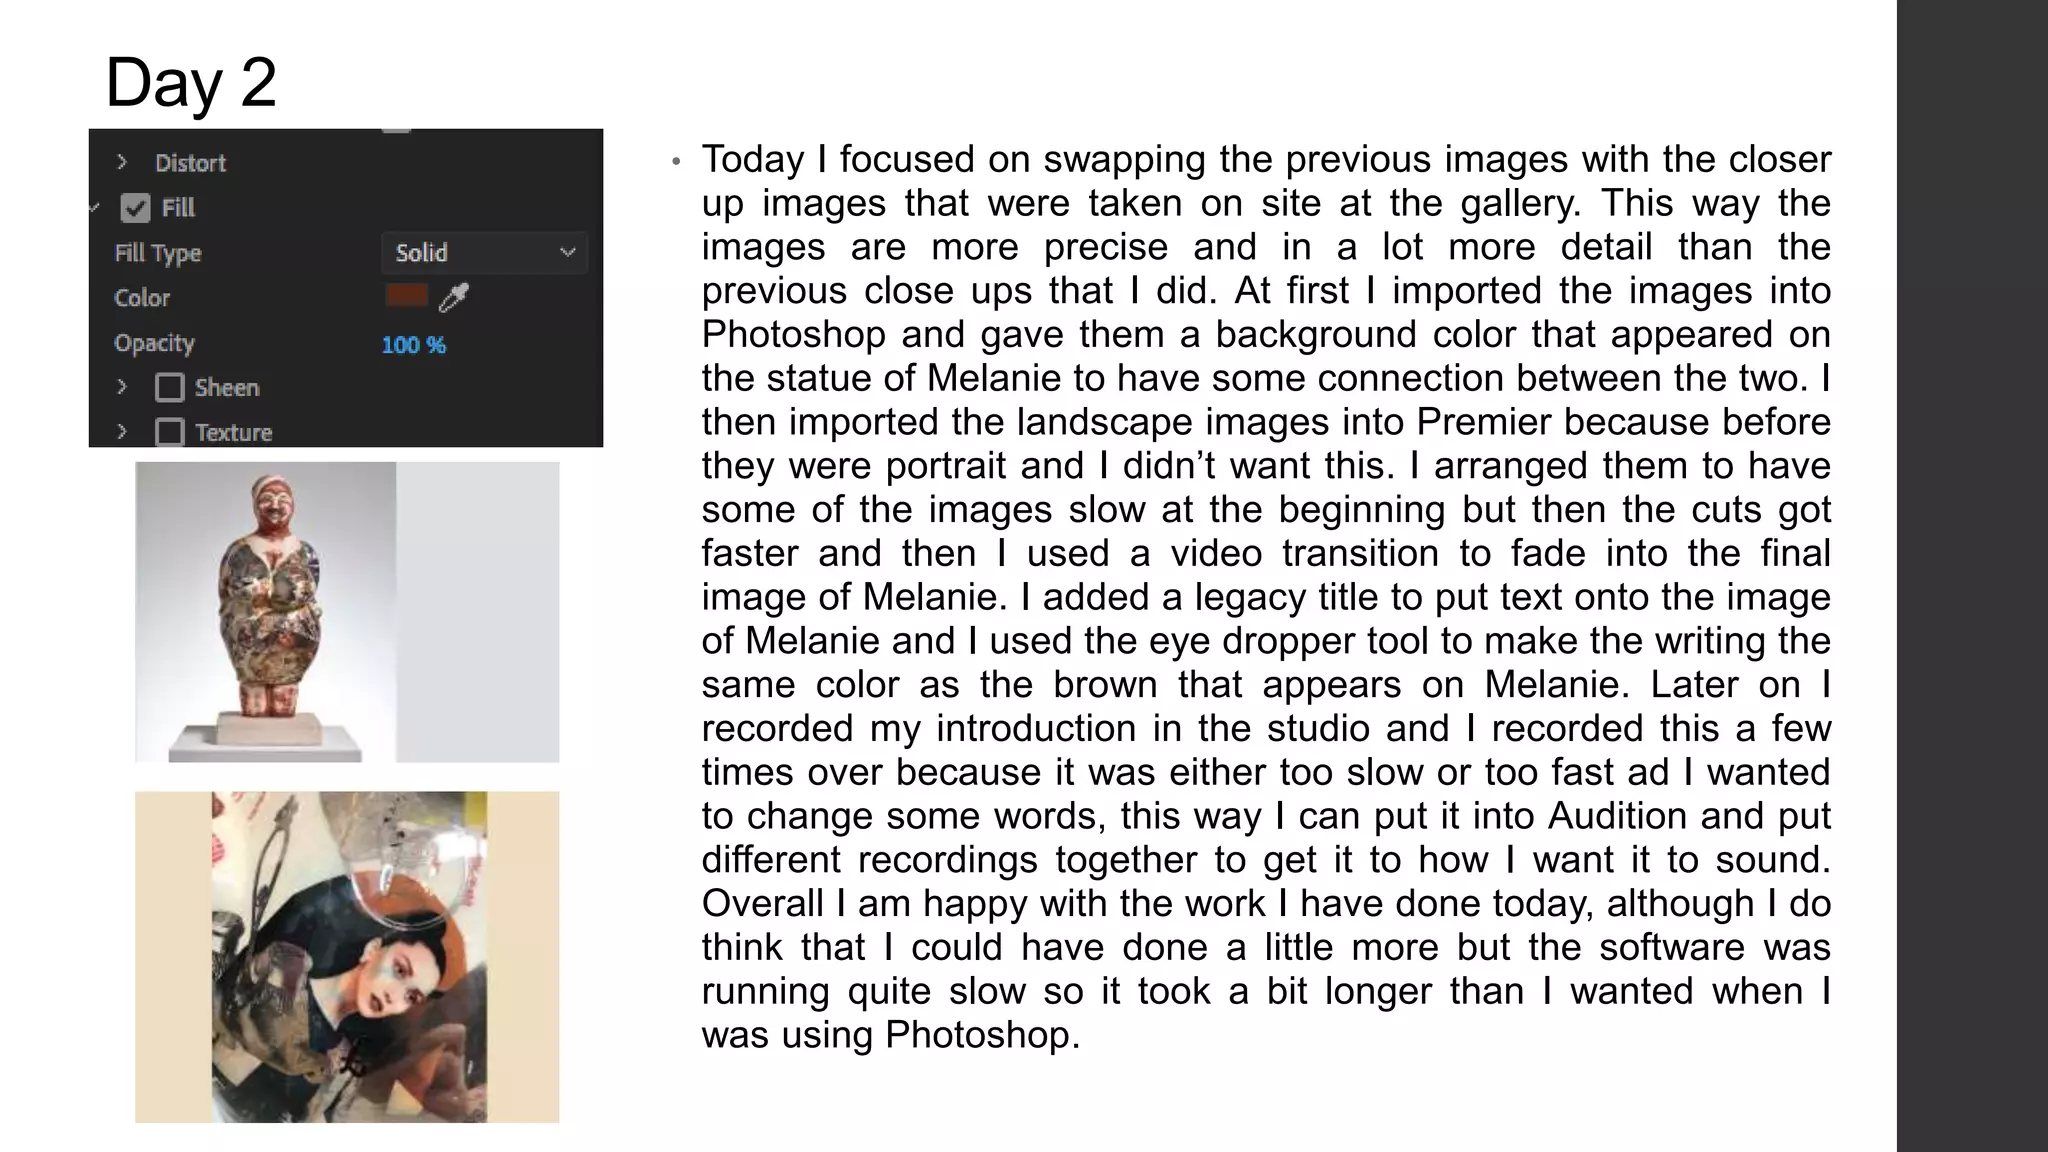
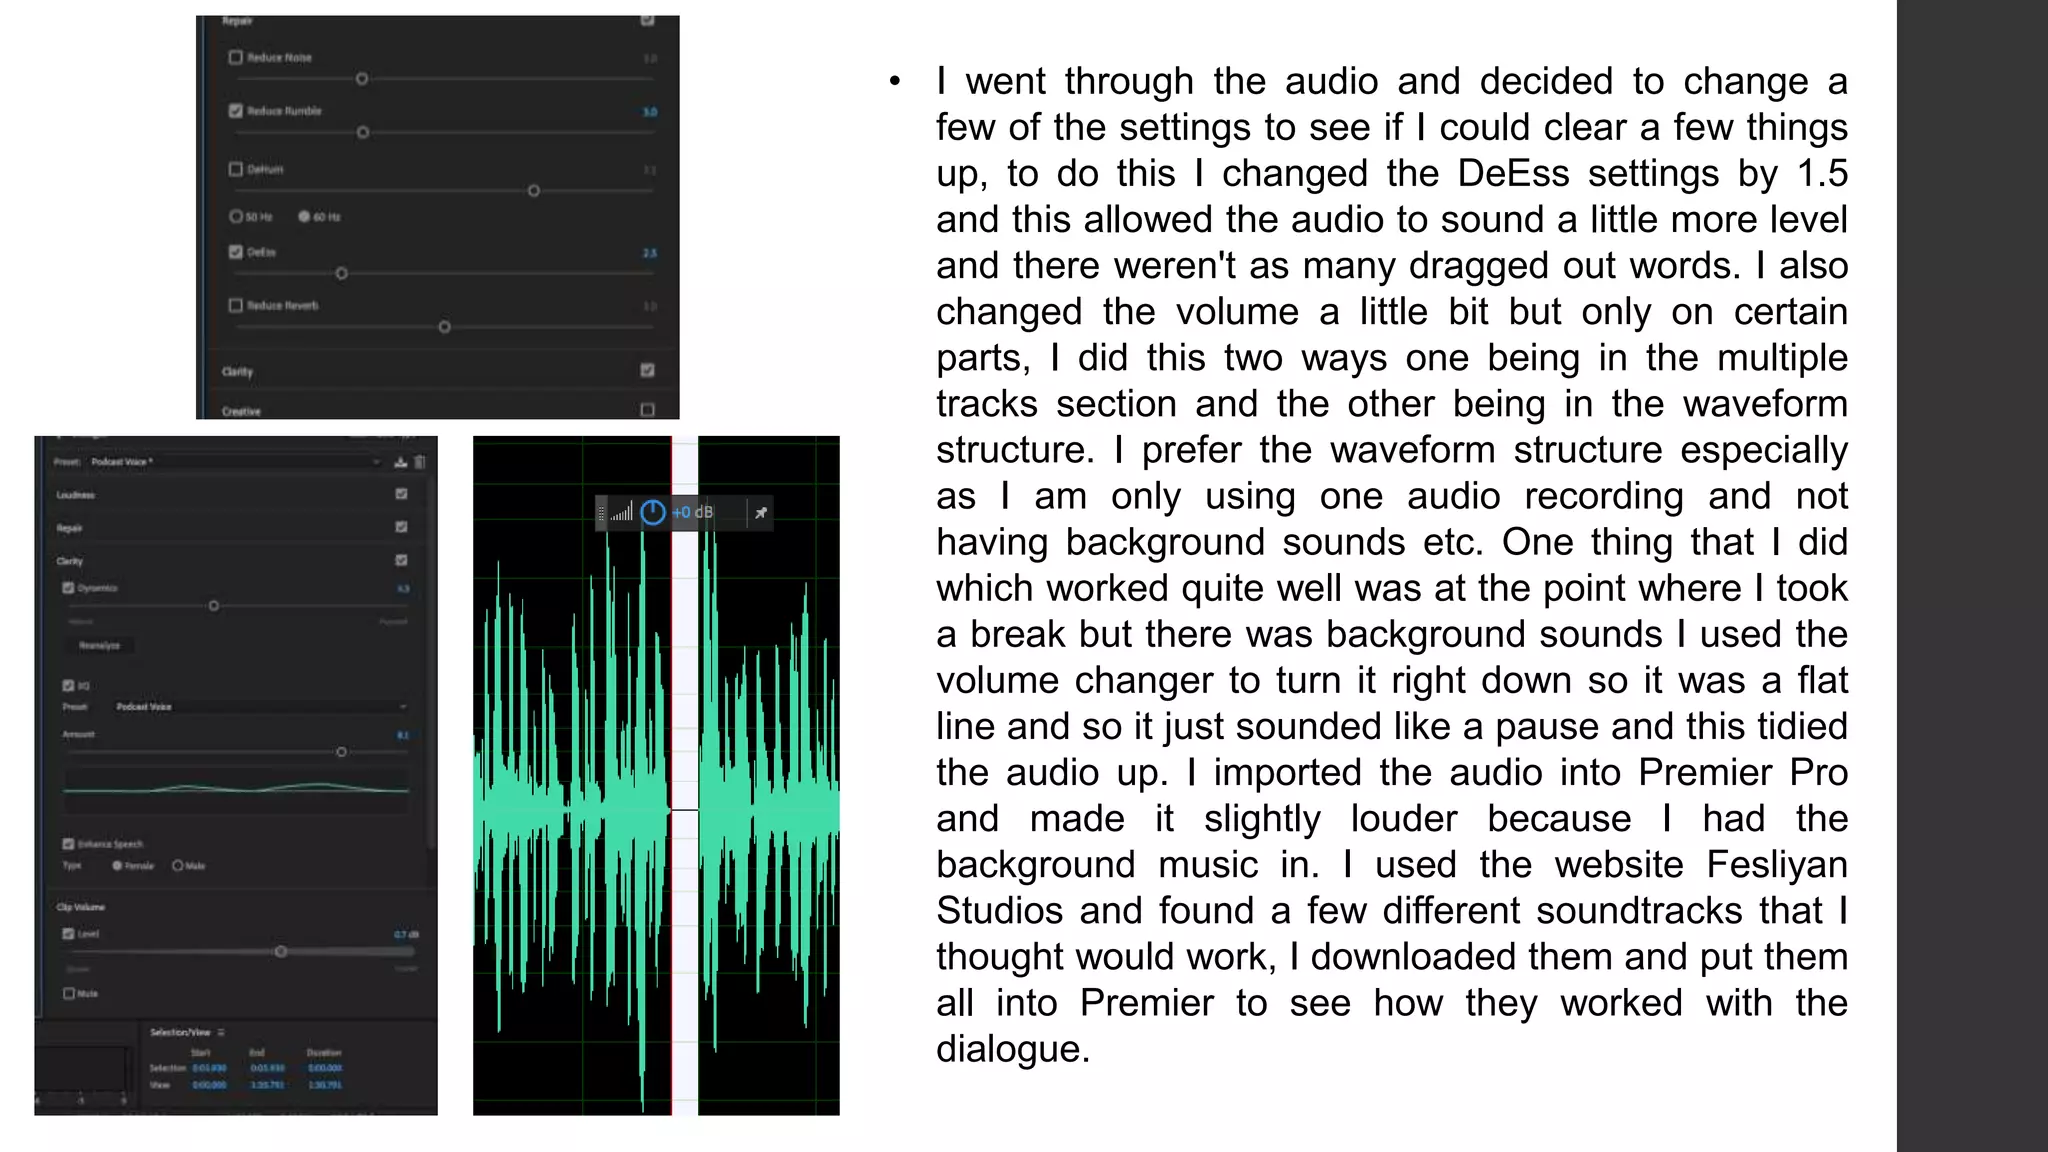
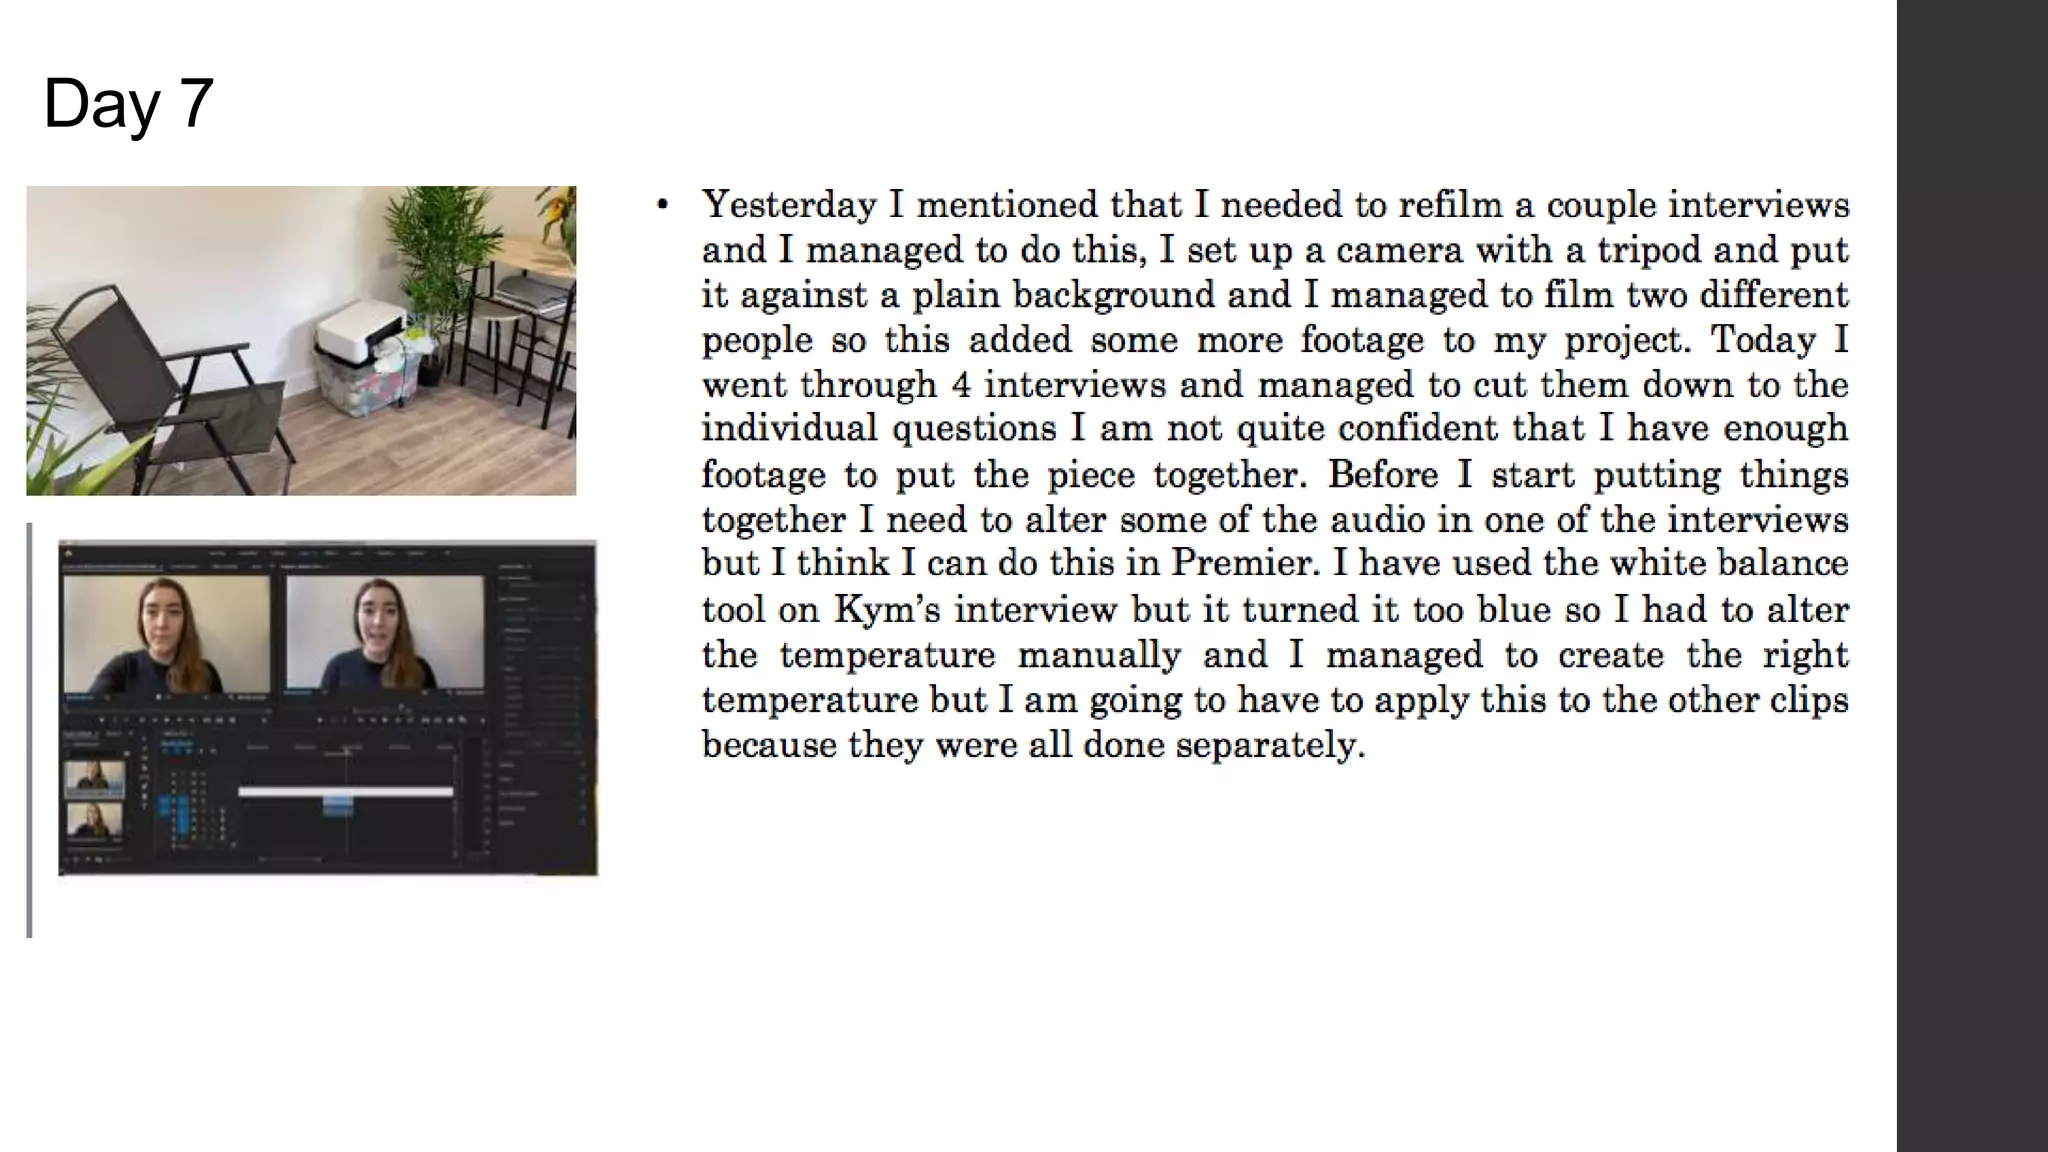
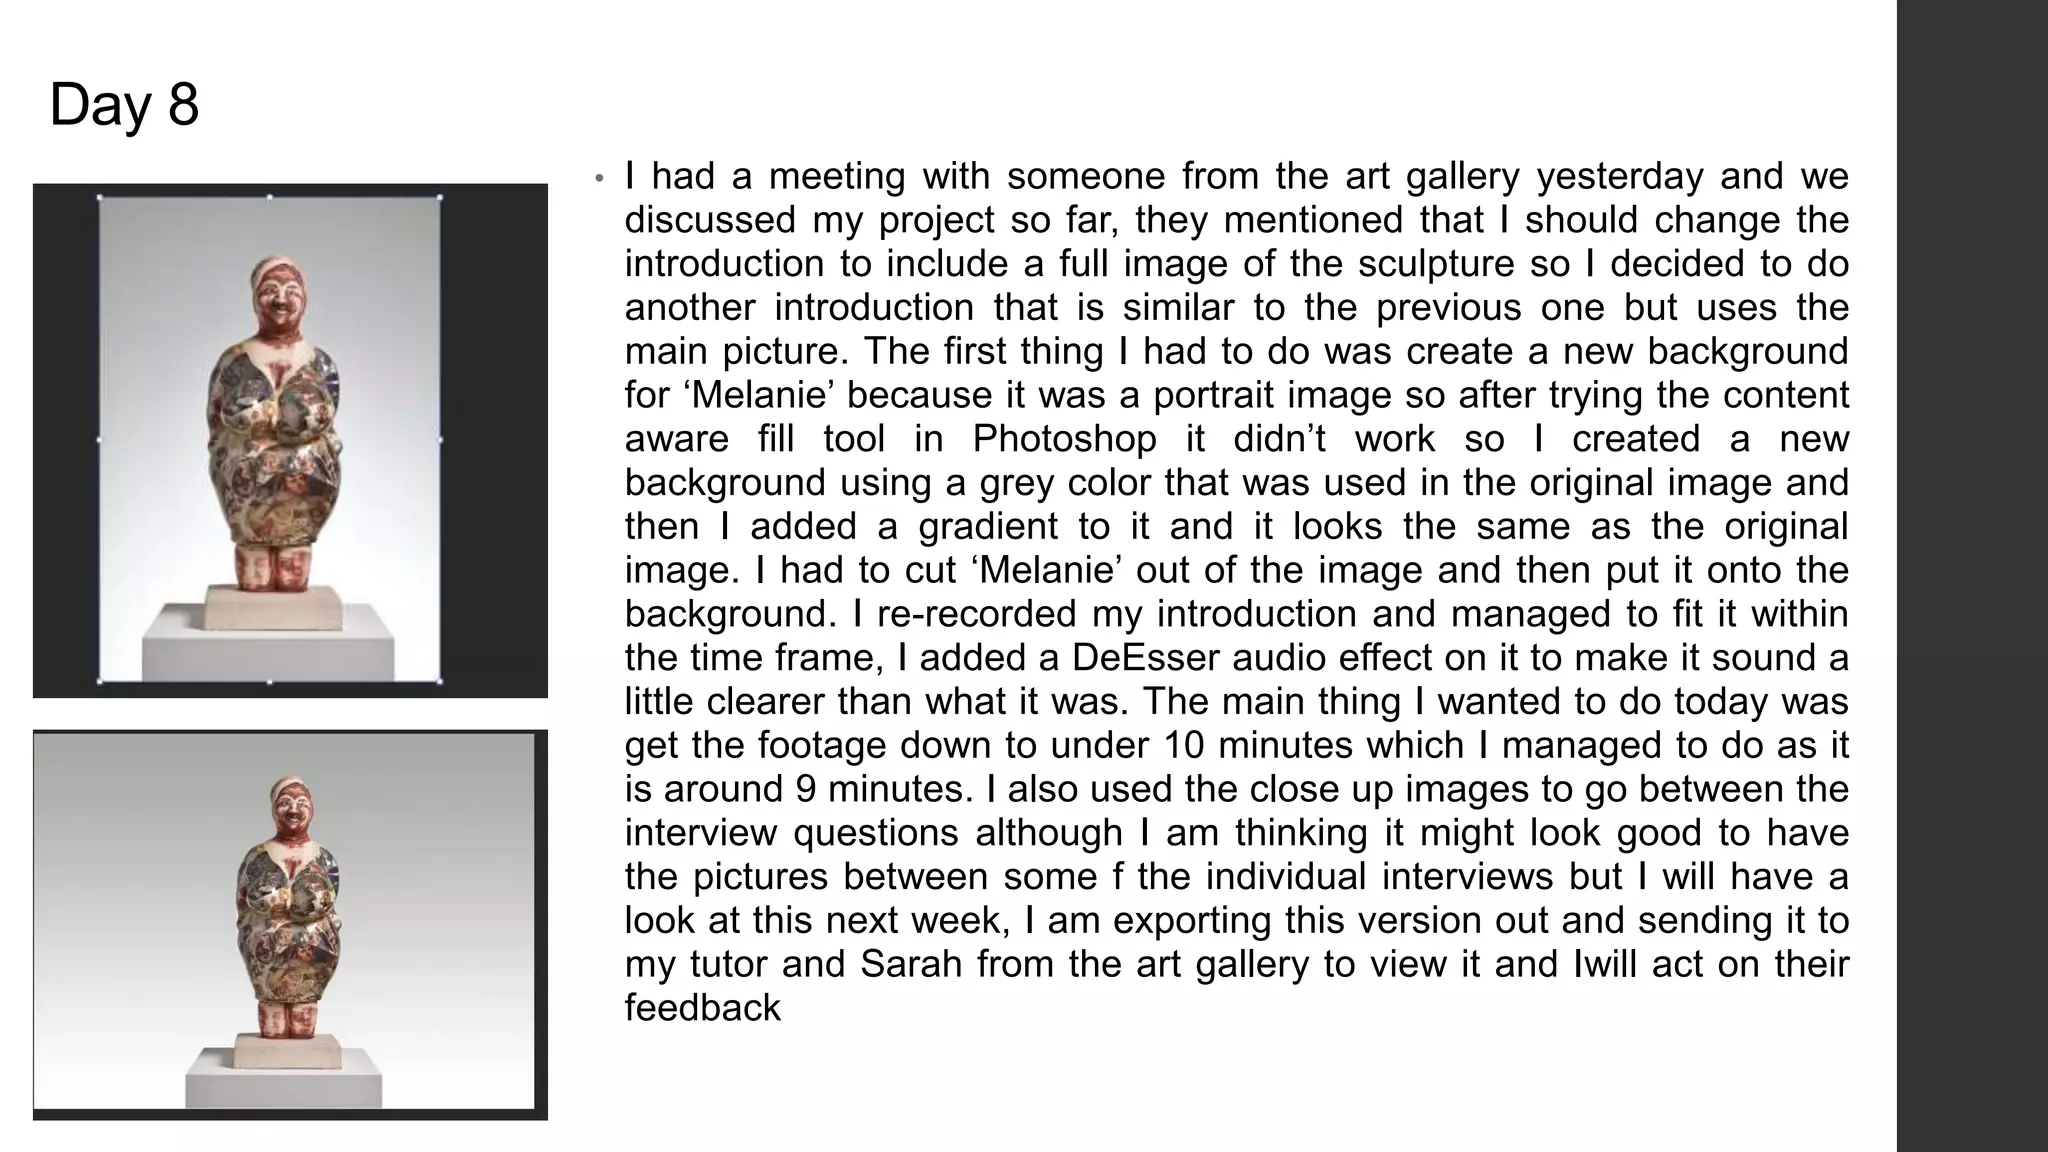
Production Log
Grace Gilbert
Day 1
• On the first day of production I want to start
with working on the introduction as I am still
waiting on the majority of responses. I have
different ideas of how I want to introduce my
project because I didn’t want it to jump straight
into the interviews with no context. After a
discussion I have decided to narrate the
introduction with a little information about
Melanie and what she represents, as well as
talk a little about Grayson Perry. In terms of
the visuals I am going to be showing an image
of Melanie and I am waiting on a few close up
images that I will incorporate into the
introduction as well as the main image. I
started off by researching a bit in particular
about Melanie and what influenced Perry to
create the piece.
Note: When putting together the introduction I want to
try a few different visuals. The first being a picture of
Melanie and looking at the piece from different angles. I
also like the idea of collecting different images of
Perry’s artwork and having the shots get quicker and
then cut to Melanie, this way it ties into the narration.
• I wanted to try out a quick idea for the introduction, the first
thing I had to do was get some images of pieces that Grayson
Perry has done. I had to copy and paste the images and then
save them as JPEG images to allow me to put them into
Premier Pro. After putting some of the images together in a
sequence I realized some of the images didn’t fit the size of
the frame and it wouldn’t look good if I had to change how it fit.
I opened the images in Photoshop and put them against a
plain white background and centered them in the middle. I
exported as a PNG image and then put it back into Premier, I
put the images in a random order because I only want to show
them for a short amount of time. I managed to create a short
sequence and the images only appear for a short amount of
time because I didn’t want the main focus to be on them I just
wanted it to cover my narration when I talk a little bit about
Grayson Perry. Using the website Fesliyan Studios I managed
to find a camera shutter sound effect which I put in time for the
pictures. I had to slow down the timing of the sound effects as
well as I altered the volume so it was quieter because I want it
to be a background noise so the narration can be in the
foreground and in the focus.
• The next step was to introduce Melanie, my plan for this was to slow
down the footage to focus on different parts of the piece. Using
Photoshop I selected sections and created a new layer via copy and
then exported that image as a quick PNG image. At the moment I
think it works well however I am waiting on close up images so I
might swap these at a later date and see which works best. I
imported the separate layers into Premier and I focused on the
Effects Control panel and looked at the keyframing so I could chose
where the image began and ended. This allowed me to start the
image and end it with a different position and therefore as the time
goes on the image looks like it’s moving which is a good aspect to
have because I didn’t want to have multiple still images in the piece
and I wanted to have something that separated Melanie from the
other pieces of art that I included and by having it appear as if the
image is moving I think works quite well and draws the audiences
attention towards the main focus of the project. Towards the end of
the sequence I wanted to have one of the segments go into the main
image without a transition so what I did was position the start of the
main image to be the same as the end of the previous section. It is
as close as I can get it at the moment and I think it works but not
smoothly so this will be something to look at after Easter, because I
could do it where the main image looks at the final part of the statue
and then finishes with the whole thing and if I use the keyframes I
can do this.
Day 2
• Today I focused on swapping the previous images with the closer
up images that were taken on site at the gallery. This way the
images are more precise and in a lot more detail than the
previous close ups that I did. At first I imported the images into
Photoshop and gave them a background color that appeared on
the statue of Melanie to have some connection between the two. I
then imported the landscape images into Premier because before
they were portrait and I didn’t want this. I arranged them to have
some of the images slow at the beginning but then the cuts got
faster and then I used a video transition to fade into the final
image of Melanie. I added a legacy title to put text onto the image
of Melanie and I used the eye dropper tool to make the writing the
same color as the brown that appears on Melanie. Later on I
recorded my introduction in the studio and I recorded this a few
times over because it was either too slow or too fast ad I wanted
to change some words, this way I can put it into Audition and put
different recordings together to get it to how I want it to sound.
Overall I am happy with the work I have done today, although I do
think that I could have done a little more but the software was
running quite slow so it took a bit longer than I wanted when I
was using Photoshop.
Day 3
• Today I watched over the previous work I had done and I
decided I wanted to redo the introduction because it
seemed to 2D and I wanted to add ‘dimension’ to the
images without over using any effects. I started off by
importing my images into After Effects an I noticed that the
images were all portrait so I tried putting them landscape
but it didn’t work because you could tell the images had
been modified and it didn’t look right so I came up with the
idea of having two side by side and this worked well
because it filled the screen without having to change the
shape of the images. I put the images into the workspace
in groups of two because this way I could keep track of
where I was, I used the key frames to set the images in a
certain way at the beginning and then changing them
every couple seconds because this way the images start
to move to get to the right position in time. It worked quite
well however I found that every time I added a new image
to the workspace I would have to go back to the beginning
and key frame them in to have an opacity of 0% otherwise
they would be visible when I didn’t want them to be.
• After I had done a few more I exported the video, and
added it to the render queue. I found that it took quite a
while to render it but after it had finished exporting I
imported it into Premier Pro and watched it over. I kept
finding things that I wanted to change about it so I then
went back into After Effects and made those changes and
then exported it over again and I did this 4 times before I
found the final version that I wanted to use. Something
that was a problem doing this was that because I was
changing little parts of it the rest of the key frames had to
be adjusted on that particular image otherwise it was too
quick or too slow so it took a while to get the version I
wanted. As I am watching it back there are still a few
things I want to change for example the speed of it but
this might be something I can do in Premier Pro so I am
going to see if I can make these changes here otherwise I
might have to go back into After Effects.
• I wasn’t happy with how the intro looked as some parts were too
fast or too quick, I tried to amend it in Premier Pro but if I slowed
the footage down it wouldn’t slow down the actual movement of
the picture which was the issue. I went back into After Effects
and chose to add another 20 seconds to the timeline and to do
this I went onto the composition settings and could change the
time through here. After adding another few seconds this allowed
me to move some of the key frames which then slowed the
movement of the images, this took longer than I wanted because
I had to then alter the further key frames towards the end. I
managed to export it and put it into Premier and I watched it over
and finally found that it looked how I wanted it to look. Overall I
think even though this section took a little longer than I want it
was worth it to get to the point where I was happy with it, the
reason I had to import it into Premier to watch it fully was
because it kept buffering in After Effects and I found that the time
changed slightly in Premier Pro so this is something to remember
if I am going to use After Effects again in this project.
Day 4
• Today I started off by focusing on the audio, I started editing my
introduction recording that I took on my phone and then I emailed
them over so I could access them on the computer. I thought
about editing the audio in Premier Pro however I thought using
Audition would be beneficial because it’s more specified to audio
and I could go into more detail with the editing. I imported all the
audio into Audition and went through each one and decided which
one was better. I ended up taking a few bits out and swapping
them with other recordings and this allowed it to run smoothly,
after listening to the new amended version I found that it wasn’t
very clear so I thought about re-recording it and then found that I
could change the preset of it so I tried each one and it came down
to ‘balanced female voice’ or ‘Podcast voice’ and I found that with
the ‘balanced female voice’ it was slightly echoey so I went with
the podcast voice and this sounded better.
• I went through the audio and decided to change a
few of the settings to see if I could clear a few things
up, to do this I changed the DeEss settings by 1.5
and this allowed the audio to sound a little more level
and there weren't as many dragged out words. I also
changed the volume a little bit but only on certain
parts, I did this two ways one being in the multiple
tracks section and the other being in the waveform
structure. I prefer the waveform structure especially
as I am only using one audio recording and not
having background sounds etc. One thing that I did
which worked quite well was at the point where I took
a break but there was background sounds I used the
volume changer to turn it right down so it was a flat
line and so it just sounded like a pause and this tidied
the audio up. I imported the audio into Premier Pro
and made it slightly louder because I had the
background music in. I used the website Fesliyan
Studios and found a few different soundtracks that I
thought would work, I downloaded them and put them
all into Premier to see how they worked with the
dialogue.
• I tried to make the background music quieter in Premier, however I
couldn’t get it to how I wanted it to be because it was either too quiet
or it was over powering the dialogue so I decided to put the piece into
Audition and tried changing the volume but it didn’t have the effect I
wanted it to be so I went onto the preset section and chose the
‘balanced background music’ this made the music softer and not as
noticeable but it was still present. What I like about this preset is that it
doesn’t necessarily quiet the music but it puts it in the background and
this is exactly what I was after. I listened to it once over again with
both the dialogue and the music and found that the ‘podcast voice’
preset started sounding quite static so I set it back to default and
altered some of the settings such as DeEss, Noise Reduction etc.
Day 5 • Today I started off by going through some of the interviews, the
first one was done by Grace age 18. I watched it through and it
was around 8 minutes so it was a good amount of footage and
there are some detailed responses in there. After watching it
through there are a few things I need to edit out on the audio
because there’s background talking of someone asking the
questions but it is an easy fix. I can either do this is Audition or
Premier Pro. Something that I found you can do is change the
color of the bars, I wanted to do this to have all footage color
coded so the main footage is the color ‘Rose’ then the ‘extra’
footage of the interview where there’s background noise etc is
in yellow so this way it keeps everything separate and allows
me to keep the editing space organized which is something that
I think is important especially when I am going to be mixing
everything up. I also re-wrote my script because after putting it
on top of the visual introduction it was too long and it didn’t fit
with what I was showing so I re-wrote it to be more relevant to
the visuals.
• With Grace’s interview there wasn’t much that I needed to
edit visually because it was clear, however there was a slight
purple tint to the lighting so I tried color grading and using the
‘white balance’ tool to make the background less purple and
more white. This then created a contrast between Grace and
the background because the purple tint had gone from the
footage so there wasn’t an overlay. After sorting out the color
I went through the interview again and started splitting it up
into different sections, this allows me to organize the
questions in groups and arrange them differently. I did keep
the extra footage of them talking ‘behind the scenes’ because
I can use this if I run out of other footage or if I need to fill a
gap. Next week I am going to go through some more of the
interviews and start separating them into questions.
Day 6
• Today I re-recorded some audio because I had made changes to the script
as I came across an issue with the previous version. The previous version
was too long for my graphic introduction and I had an idea of putting video
footage of interviews with Grayson Perry but this would cause copy right
issues so I decided to re-record my introduction as it should be a little
shorter so there’s less footage I would have to find if it runs over the graphic
introduction. I went through Hetty’s interview today and some of the
responses were really good, it’s interesting listening to it because she
mentions how where she comes from beauty standards are completely
different to here and I think it is really interesting to get another perspective
from someone who has grown up with completely different ideas of beauty.
It took me a while to go through the interview as it was 12 minutes long but
this has given me plenty of opportunity to gather plenty of footage and
responses, at first I was worried I wouldn’t have enough but not I am
thinking I might have too much but this is good because it will be easier to
cut footage out rather than have to get new footage. After cutting the
interview into certain sections depending on the question I left this interview
blue because this way I can distinguish between each person. I also noticed
there was a slightly blue overlay on this interview so I used the white
balance tool which evened out the background. I had to add an adjustment
layer because I had already cut the interview into pieces and this allowed
me to save time because I didn’t have to go through every little bit and
change it.
• I went to start going through the next interview and the audio is too
echoey, so I put it into Audition an used the DeReverb effect but it still
sounds too echoey so I am going to try and get them to refilm it which
shouldn’t be an issue I will just have to tell them not to film in that
particular space. A few of the interviews weren’t fitting the frame so I
had to scale to frame size and this allowed the footage to fit the frame
without distorting the image of it, one of the interviews was filmed
portrait and I tried putting it to fit the frame but there were still black
borders around it so I changed the color of them however it didn't’t look
how I wanted it to so I have asked the person to refilm it and they
agreed. The majority of today was just going through some more
responses and it took longer than I wanted because I had to go through
two of the same person’s as they had to versions so I was combining
them both depending on which was the better answer. In terms of re-
recording my introduction I was planning on doing that however I
managed to get in touch with a photographer enquiring about using an
image of Grayson which I could put in the introduction and this would
give me more stuff to fill out the narration with so I am waiting on a
response.
Day 7
Day 8
• I had a meeting with someone from the art gallery yesterday and we
discussed my project so far, they mentioned that I should change the
introduction to include a full image of the sculpture so I decided to do
another introduction that is similar to the previous one but uses the
main picture. The first thing I had to do was create a new background
for ‘Melanie’ because it was a portrait image so after trying the content
aware fill tool in Photoshop it didn’t work so I created a new
background using a grey color that was used in the original image and
then I added a gradient to it and it looks the same as the original
image. I had to cut ‘Melanie’ out of the image and then put it onto the
background. I re-recorded my introduction and managed to fit it within
the time frame, I added a DeEsser audio effect on it to make it sound a
little clearer than what it was. The main thing I wanted to do today was
get the footage down to under 10 minutes which I managed to do as it
is around 9 minutes. I also used the close up images to go between the
interview questions although I am thinking it might look good to have
the pictures between some f the individual interviews but I will have a
look at this next week, I am exporting this version out and sending it to
my tutor and Sarah from the art gallery to view it and Iwill act on their
feedback
Day 9 • Today I was focusing on audio, I started by going through the clips and
editing some of the volume because this was the main issue as all of
the audio quality was good just not loud enough. I started by changing
the volume through the levels under the effect control tab but I found
this was key framing it so the volume would fluctuate to reach a
particular level at a certain time. I found by changing the audio gain
through right clicking was he better way to keep the volume the same
throughout and it was easier to tell what volume it was at so I could
apply that to other sections. It took me a while to chose the right
background music because I kept coming across ones that I liked but
didn’t work with the ‘theme’ of the video, I tried a few different websites
but it was difficult trying to find one that was copyright free. When I
found the music that I though suited the footage it was only 3 minutes
long so I had to copy and paste it a few times, but I changed the volume
of certain sections to make it sound like it was all one.
Day 10
• Today I focused on acting on the notes that I had, I started off by editing
the introduction and adding a full image of Melanie at the beginning and
then having it go into the moving section. I deleted my introduction
because I am going to re-record it and re-write it so it is a little shorter
and to the point. I am also wanting to do an outro with my point of view on
the interviews but I am not sure what I want to say at the moment so this
is something to do in future lessons. I wanted to ad some ‘extra’ footage
in so it broke up from the interviews so what I did was find royalty free
footage off of pexels and put it over the audio of some of the clips. An
example would be when there is reference to gardening I got some
footage and put it over the audio and I think it works quite nicely. In
Jane’s interview she starts talking about Melanie I show an image of
Melanie but I used key frames to make it look at certain parts, at first I
tried doing a parallax effect but this didn’t work because there wasn’t
anything in the background so I decided to go back into Premier and use
the key frames to give it some focus on certain areas of the sculpture and
again I think this works quite well because it just adds something different
rather than having to sit and watch all these interviews.
Day 11
• I started off today by changing the background music, I found one that
has a neutral tone to it so it doesn’t build up to anything which I like
because I don’t want to influence the audience to feel a certain emotion
so I did need music that was neutral. I found that when I put music over
the interviews I could tell there might be a little influence in making the
audience feel a certain way so I only put it in the intro and at the parts
where I transition between questions and I prefer it this way because
then you can focus on what people are saying as well as have some
music to move onto the next question. I have an extra person to add
into the interviews because I thought her response was really good but
the only issue is that she shot it in portrait and the rest of it is in
landscape so I need to fix this issue.
• I wanted to incorporate Alice’s interview into my project because
she had some really good answers, however I got her to record
this before I changed my questions so I could only include the first
answer because that’s the only question I kept the same. Alice
filmed her interview portrait which wasn’t how I wanted it to be,
and she isn’t available to re-film it so what I did was copy and
paste the footage and layered them over each other then I scaled
them up to fill more of the frame and then put them side by side
and added a Gaussian blur to both and increased it so it faded
into the background. I then added a third layer of the same
footage and scaled that up and positioned it into the middle. I was
going to fade the edges but I prefer it without otherwise it looks
too busy because there’s so much movement whereas this way
there’s limited blurred movement. This has added length to the
project it added another minute on which isn't what I wanted to do
however I might be able to cut some other stuff out. I went
through the interviews again and cut some people out because
there response wasn’t what I wanted, although I swapped it out
for another one although I'm not sure if I'm going to keep it or not
due to the time of the project.
Day 12 • After receiving some feedback I have made a few small changes,
today I started off by adding names to the people who feature in the
video. I did this by adding some text under the graphics tab and then
choosing the one that doesn’t have any effects on it. I set the text size
to 108 and also used the font Big Caslon which is the same font I use
in the title so there is some continuity throughout the piece, I wanted
the names to fade in so they didn’t just appear and to do this I used the
key frames in the effects controls and what I did was have the opacity
at 0% to begin with then halfway through have it at 100% and this way
the name would slowly fade in. I also then faded it back to 0% at the
end but the problem I was having was that the name would never be in
‘focus’ because by the time it had to fade in I set it to fade out again so
I went back through all the names and added another key frame after
the opacity had reached 100% because this way it would stay visible
for longer an then fade out which I think works quite nicely. Another
thing I did was add an adjustment layer, I added this to get some
continuity between the clips as I was finding that they all looked really
different and quite flat so under the effects tab you can set a filter to
the layer and I chose one that had a warm tone to it called ‘Kodak
5205 Fuji 3510 (by Adobe)’ and this equaled out the blue tone that was
over some of the clips and makes it look warmer.
Day 13
• Today I received a list of feedback to act on that I discussed in a one to one meeting
yesterday. The first part of the feedback was to cut out some of the responses of the
people sat down as they talked to much without sticking to the question so I did this
and I managed to cut the length down a little bit. It was suggested to me that I
incorporate the question onto a ‘slide’ before the interviews and I wasn’t too sure
about this because I didn’t plan it this way as I think it can appear messy but I gave it
a go and put the question over a still of Melanie and I think it works quite well, it also
makes it more accessible to those who visit the Art Gallery and therefore is
accessing a wider audience. This allowed me to cut out parts of the responses that
had the question worked into the answer and therefore it stopped repetition and it
made the piece slightly shorter and more focused on the point. I was also asked to
incorporate some more footage of the man talking because I only had him in one
response and it could appear biased which is something I didn’t want to do so I went
through his response again and managed to find a bit that was useful because a lot
of his response wasn’t really answering the question so I managed to incorporate
this into it towards the end and I also added another section of Alice’s response but
this was difficult because she had answered different questions so I found a bit that I
could use that fitted with one of the questions so I put this towards the end and
therefore it feels more like an ‘arc’ because it started with those two people and we
see them again at the end.
Day 14
• Today I started off by acting on the rest of the feedback, this meant changing the music which is
something I was considering doing because I wasn’t sure what direction to take. I went online and
searched through different royalty free music and found one that was just a piano changing between
2/3 keys and I think it works with what I have but I might change it depending on the voiceover. The
only things left that I need to do is the intro and the outro, I have been thinking about how I am going
to be doing the outro and thought about summarizing the responses but I don’t think you can
summarize the responses because they are all different and I didn’t want to conclude everything
because it’s all interpretation so I thought about doing a quote at the end and I found a quote by
Grayson Perry that ties into the theme of my project. I want to have the quote appear over an image
of him however I am still waiting on the image that I can use so for now I have put it over a white
background with the adjustment layer making it fit in with the rest of the project. I used a linear wipe
transition to make it appear as if it was a type writer effect and chose the American typewriter font to
create the illusion and added a typing sound effect and I think it works quite well however I might
change it depending on how it looks with the image. I re-recorded my introduction using a
microphone and an audio recorder because this was clearer and in a better quality than my phone.
Day 15
• Today I feel like I am close to finishing my production, however I am still needing the
photo of Grayson Perry from Andrew so I am going to see if I can get that and if not I
will keep the text against a plain background. I started by going through the entire
thing and making a few adjustments the first being my introduction, I had to get it off
the audio recorder and imported it in and I was impressed with how it sounded as I
thought there was going to be some background noise but when I put it into Premier it
sounded fine the only thing I had to do was change the volume so it blended in better
with the background music which I also made a little quieter. I mixed a few of the
recordings to get it how it sounded because there were parts of it that I wanted from
one section but not the other so I combined them to get it to how I wanted. I then
went through and altered the titles of the question as I thought they cant be seen in
white so I tried a few other colors but these blended in more so white seemed the
best option so what I did was change the size of the font and turn on the small caps
box to make it all stand out and then I applied this to all the titles as well as making
sure the X and Y axis were all the same so they were all in the same position. I did
have an issue when I deleted the introduction files off of the audio recorder the media
went offline so I had to search through the trash folder to try and find it and then go
and link the media back up by locating it in a certain file, this was sorted pretty quickly
but it means keeping all the files on until I am ready to export the piece. I also started
cutting a few bits off the interview especially one of Grace’s because she talks for 30
seconds so I cut out the bit that I didn’t need and tried to make it a clean cut with little
noticeability.
• I managed to get the photo of Grayson and at first I was
trying different ways to have it within the frame, I tried going
into Photoshop and using the content aware fill to fill the
image out but it didn’t look right and I didn’t want to make
amendments to a really great picture so I used the key
frames to have it begin at the bottom of the picture and work
its way up the image then zoom out but not too far that it
doesn’t fit the frame I then added the text over the top of a
quote about beauty that Perry said. I had the issue of it not
standing out but then I realized that I could add a shadow on
and this made it stand out so I went back to the text with the
questions and added the shadow effect which made it more
prominent. I then needed to put credits at the end with the
references to the images so under the graphics tab in
Premier pro I chose the one that said classic graphics and
then typed up what was needed. I changed the font size to
113/110 and also the font type because then this would fit
with the font throughout the entire piece.
Day 16 • Today I started by acting on the feedback that I was given from Sarah at the
gallery, I started by changing the color of the text because it didn’t stand out
enough from the background so I thought about changing the background but I
think it’s better with the still of Melanie. I tried changing the text to
black/grey/brown but all these just blended into the piece so I decided to use a
white box to put behind the text to do this I added a color matte and set the
color to white then under the effects tab I chose the ‘CROP’ option and then
under the effects control section I could adjust the color matte to how I want it. I
then went through and changed the scale of all the text to 86.4 so they were all
the same and then used the key frames to fade the text/boxes in and out
mainly using the opacity key. Changing the way the text was, was a good idea
because it makes it more accessible to those who might have trouble seeing.
The next bit of feedback was to incorporate a question at the end to the
audience saying ‘What is your opinion on feminine beauty?’ I put this at the end
after Jane’s section because the end finishes with a shot of Melanie and I could
zoom out to reveal the question so I did this and then it fades into Grayson with
a quote.

Fmp produciton log 2

  • 1.
  • 2.
    Day 1 • Onthe first day of production I want to start with working on the introduction as I am still waiting on the majority of responses. I have different ideas of how I want to introduce my project because I didn’t want it to jump straight into the interviews with no context. After a discussion I have decided to narrate the introduction with a little information about Melanie and what she represents, as well as talk a little about Grayson Perry. In terms of the visuals I am going to be showing an image of Melanie and I am waiting on a few close up images that I will incorporate into the introduction as well as the main image. I started off by researching a bit in particular about Melanie and what influenced Perry to create the piece. Note: When putting together the introduction I want to try a few different visuals. The first being a picture of Melanie and looking at the piece from different angles. I also like the idea of collecting different images of Perry’s artwork and having the shots get quicker and then cut to Melanie, this way it ties into the narration.
  • 3.
    • I wantedto try out a quick idea for the introduction, the first thing I had to do was get some images of pieces that Grayson Perry has done. I had to copy and paste the images and then save them as JPEG images to allow me to put them into Premier Pro. After putting some of the images together in a sequence I realized some of the images didn’t fit the size of the frame and it wouldn’t look good if I had to change how it fit. I opened the images in Photoshop and put them against a plain white background and centered them in the middle. I exported as a PNG image and then put it back into Premier, I put the images in a random order because I only want to show them for a short amount of time. I managed to create a short sequence and the images only appear for a short amount of time because I didn’t want the main focus to be on them I just wanted it to cover my narration when I talk a little bit about Grayson Perry. Using the website Fesliyan Studios I managed to find a camera shutter sound effect which I put in time for the pictures. I had to slow down the timing of the sound effects as well as I altered the volume so it was quieter because I want it to be a background noise so the narration can be in the foreground and in the focus.
  • 4.
    • The nextstep was to introduce Melanie, my plan for this was to slow down the footage to focus on different parts of the piece. Using Photoshop I selected sections and created a new layer via copy and then exported that image as a quick PNG image. At the moment I think it works well however I am waiting on close up images so I might swap these at a later date and see which works best. I imported the separate layers into Premier and I focused on the Effects Control panel and looked at the keyframing so I could chose where the image began and ended. This allowed me to start the image and end it with a different position and therefore as the time goes on the image looks like it’s moving which is a good aspect to have because I didn’t want to have multiple still images in the piece and I wanted to have something that separated Melanie from the other pieces of art that I included and by having it appear as if the image is moving I think works quite well and draws the audiences attention towards the main focus of the project. Towards the end of the sequence I wanted to have one of the segments go into the main image without a transition so what I did was position the start of the main image to be the same as the end of the previous section. It is as close as I can get it at the moment and I think it works but not smoothly so this will be something to look at after Easter, because I could do it where the main image looks at the final part of the statue and then finishes with the whole thing and if I use the keyframes I can do this.
  • 5.
    Day 2 • TodayI focused on swapping the previous images with the closer up images that were taken on site at the gallery. This way the images are more precise and in a lot more detail than the previous close ups that I did. At first I imported the images into Photoshop and gave them a background color that appeared on the statue of Melanie to have some connection between the two. I then imported the landscape images into Premier because before they were portrait and I didn’t want this. I arranged them to have some of the images slow at the beginning but then the cuts got faster and then I used a video transition to fade into the final image of Melanie. I added a legacy title to put text onto the image of Melanie and I used the eye dropper tool to make the writing the same color as the brown that appears on Melanie. Later on I recorded my introduction in the studio and I recorded this a few times over because it was either too slow or too fast ad I wanted to change some words, this way I can put it into Audition and put different recordings together to get it to how I want it to sound. Overall I am happy with the work I have done today, although I do think that I could have done a little more but the software was running quite slow so it took a bit longer than I wanted when I was using Photoshop.
  • 6.
    Day 3 • TodayI watched over the previous work I had done and I decided I wanted to redo the introduction because it seemed to 2D and I wanted to add ‘dimension’ to the images without over using any effects. I started off by importing my images into After Effects an I noticed that the images were all portrait so I tried putting them landscape but it didn’t work because you could tell the images had been modified and it didn’t look right so I came up with the idea of having two side by side and this worked well because it filled the screen without having to change the shape of the images. I put the images into the workspace in groups of two because this way I could keep track of where I was, I used the key frames to set the images in a certain way at the beginning and then changing them every couple seconds because this way the images start to move to get to the right position in time. It worked quite well however I found that every time I added a new image to the workspace I would have to go back to the beginning and key frame them in to have an opacity of 0% otherwise they would be visible when I didn’t want them to be.
  • 7.
    • After Ihad done a few more I exported the video, and added it to the render queue. I found that it took quite a while to render it but after it had finished exporting I imported it into Premier Pro and watched it over. I kept finding things that I wanted to change about it so I then went back into After Effects and made those changes and then exported it over again and I did this 4 times before I found the final version that I wanted to use. Something that was a problem doing this was that because I was changing little parts of it the rest of the key frames had to be adjusted on that particular image otherwise it was too quick or too slow so it took a while to get the version I wanted. As I am watching it back there are still a few things I want to change for example the speed of it but this might be something I can do in Premier Pro so I am going to see if I can make these changes here otherwise I might have to go back into After Effects.
  • 8.
    • I wasn’thappy with how the intro looked as some parts were too fast or too quick, I tried to amend it in Premier Pro but if I slowed the footage down it wouldn’t slow down the actual movement of the picture which was the issue. I went back into After Effects and chose to add another 20 seconds to the timeline and to do this I went onto the composition settings and could change the time through here. After adding another few seconds this allowed me to move some of the key frames which then slowed the movement of the images, this took longer than I wanted because I had to then alter the further key frames towards the end. I managed to export it and put it into Premier and I watched it over and finally found that it looked how I wanted it to look. Overall I think even though this section took a little longer than I want it was worth it to get to the point where I was happy with it, the reason I had to import it into Premier to watch it fully was because it kept buffering in After Effects and I found that the time changed slightly in Premier Pro so this is something to remember if I am going to use After Effects again in this project.
  • 9.
    Day 4 • TodayI started off by focusing on the audio, I started editing my introduction recording that I took on my phone and then I emailed them over so I could access them on the computer. I thought about editing the audio in Premier Pro however I thought using Audition would be beneficial because it’s more specified to audio and I could go into more detail with the editing. I imported all the audio into Audition and went through each one and decided which one was better. I ended up taking a few bits out and swapping them with other recordings and this allowed it to run smoothly, after listening to the new amended version I found that it wasn’t very clear so I thought about re-recording it and then found that I could change the preset of it so I tried each one and it came down to ‘balanced female voice’ or ‘Podcast voice’ and I found that with the ‘balanced female voice’ it was slightly echoey so I went with the podcast voice and this sounded better.
  • 10.
    • I wentthrough the audio and decided to change a few of the settings to see if I could clear a few things up, to do this I changed the DeEss settings by 1.5 and this allowed the audio to sound a little more level and there weren't as many dragged out words. I also changed the volume a little bit but only on certain parts, I did this two ways one being in the multiple tracks section and the other being in the waveform structure. I prefer the waveform structure especially as I am only using one audio recording and not having background sounds etc. One thing that I did which worked quite well was at the point where I took a break but there was background sounds I used the volume changer to turn it right down so it was a flat line and so it just sounded like a pause and this tidied the audio up. I imported the audio into Premier Pro and made it slightly louder because I had the background music in. I used the website Fesliyan Studios and found a few different soundtracks that I thought would work, I downloaded them and put them all into Premier to see how they worked with the dialogue.
  • 11.
    • I triedto make the background music quieter in Premier, however I couldn’t get it to how I wanted it to be because it was either too quiet or it was over powering the dialogue so I decided to put the piece into Audition and tried changing the volume but it didn’t have the effect I wanted it to be so I went onto the preset section and chose the ‘balanced background music’ this made the music softer and not as noticeable but it was still present. What I like about this preset is that it doesn’t necessarily quiet the music but it puts it in the background and this is exactly what I was after. I listened to it once over again with both the dialogue and the music and found that the ‘podcast voice’ preset started sounding quite static so I set it back to default and altered some of the settings such as DeEss, Noise Reduction etc.
  • 12.
    Day 5 •Today I started off by going through some of the interviews, the first one was done by Grace age 18. I watched it through and it was around 8 minutes so it was a good amount of footage and there are some detailed responses in there. After watching it through there are a few things I need to edit out on the audio because there’s background talking of someone asking the questions but it is an easy fix. I can either do this is Audition or Premier Pro. Something that I found you can do is change the color of the bars, I wanted to do this to have all footage color coded so the main footage is the color ‘Rose’ then the ‘extra’ footage of the interview where there’s background noise etc is in yellow so this way it keeps everything separate and allows me to keep the editing space organized which is something that I think is important especially when I am going to be mixing everything up. I also re-wrote my script because after putting it on top of the visual introduction it was too long and it didn’t fit with what I was showing so I re-wrote it to be more relevant to the visuals.
  • 13.
    • With Grace’sinterview there wasn’t much that I needed to edit visually because it was clear, however there was a slight purple tint to the lighting so I tried color grading and using the ‘white balance’ tool to make the background less purple and more white. This then created a contrast between Grace and the background because the purple tint had gone from the footage so there wasn’t an overlay. After sorting out the color I went through the interview again and started splitting it up into different sections, this allows me to organize the questions in groups and arrange them differently. I did keep the extra footage of them talking ‘behind the scenes’ because I can use this if I run out of other footage or if I need to fill a gap. Next week I am going to go through some more of the interviews and start separating them into questions.
  • 14.
    Day 6 • TodayI re-recorded some audio because I had made changes to the script as I came across an issue with the previous version. The previous version was too long for my graphic introduction and I had an idea of putting video footage of interviews with Grayson Perry but this would cause copy right issues so I decided to re-record my introduction as it should be a little shorter so there’s less footage I would have to find if it runs over the graphic introduction. I went through Hetty’s interview today and some of the responses were really good, it’s interesting listening to it because she mentions how where she comes from beauty standards are completely different to here and I think it is really interesting to get another perspective from someone who has grown up with completely different ideas of beauty. It took me a while to go through the interview as it was 12 minutes long but this has given me plenty of opportunity to gather plenty of footage and responses, at first I was worried I wouldn’t have enough but not I am thinking I might have too much but this is good because it will be easier to cut footage out rather than have to get new footage. After cutting the interview into certain sections depending on the question I left this interview blue because this way I can distinguish between each person. I also noticed there was a slightly blue overlay on this interview so I used the white balance tool which evened out the background. I had to add an adjustment layer because I had already cut the interview into pieces and this allowed me to save time because I didn’t have to go through every little bit and change it.
  • 15.
    • I wentto start going through the next interview and the audio is too echoey, so I put it into Audition an used the DeReverb effect but it still sounds too echoey so I am going to try and get them to refilm it which shouldn’t be an issue I will just have to tell them not to film in that particular space. A few of the interviews weren’t fitting the frame so I had to scale to frame size and this allowed the footage to fit the frame without distorting the image of it, one of the interviews was filmed portrait and I tried putting it to fit the frame but there were still black borders around it so I changed the color of them however it didn't’t look how I wanted it to so I have asked the person to refilm it and they agreed. The majority of today was just going through some more responses and it took longer than I wanted because I had to go through two of the same person’s as they had to versions so I was combining them both depending on which was the better answer. In terms of re- recording my introduction I was planning on doing that however I managed to get in touch with a photographer enquiring about using an image of Grayson which I could put in the introduction and this would give me more stuff to fill out the narration with so I am waiting on a response.
  • 16.
  • 17.
    Day 8 • Ihad a meeting with someone from the art gallery yesterday and we discussed my project so far, they mentioned that I should change the introduction to include a full image of the sculpture so I decided to do another introduction that is similar to the previous one but uses the main picture. The first thing I had to do was create a new background for ‘Melanie’ because it was a portrait image so after trying the content aware fill tool in Photoshop it didn’t work so I created a new background using a grey color that was used in the original image and then I added a gradient to it and it looks the same as the original image. I had to cut ‘Melanie’ out of the image and then put it onto the background. I re-recorded my introduction and managed to fit it within the time frame, I added a DeEsser audio effect on it to make it sound a little clearer than what it was. The main thing I wanted to do today was get the footage down to under 10 minutes which I managed to do as it is around 9 minutes. I also used the close up images to go between the interview questions although I am thinking it might look good to have the pictures between some f the individual interviews but I will have a look at this next week, I am exporting this version out and sending it to my tutor and Sarah from the art gallery to view it and Iwill act on their feedback
  • 18.
    Day 9 •Today I was focusing on audio, I started by going through the clips and editing some of the volume because this was the main issue as all of the audio quality was good just not loud enough. I started by changing the volume through the levels under the effect control tab but I found this was key framing it so the volume would fluctuate to reach a particular level at a certain time. I found by changing the audio gain through right clicking was he better way to keep the volume the same throughout and it was easier to tell what volume it was at so I could apply that to other sections. It took me a while to chose the right background music because I kept coming across ones that I liked but didn’t work with the ‘theme’ of the video, I tried a few different websites but it was difficult trying to find one that was copyright free. When I found the music that I though suited the footage it was only 3 minutes long so I had to copy and paste it a few times, but I changed the volume of certain sections to make it sound like it was all one.
  • 19.
    Day 10 • TodayI focused on acting on the notes that I had, I started off by editing the introduction and adding a full image of Melanie at the beginning and then having it go into the moving section. I deleted my introduction because I am going to re-record it and re-write it so it is a little shorter and to the point. I am also wanting to do an outro with my point of view on the interviews but I am not sure what I want to say at the moment so this is something to do in future lessons. I wanted to ad some ‘extra’ footage in so it broke up from the interviews so what I did was find royalty free footage off of pexels and put it over the audio of some of the clips. An example would be when there is reference to gardening I got some footage and put it over the audio and I think it works quite nicely. In Jane’s interview she starts talking about Melanie I show an image of Melanie but I used key frames to make it look at certain parts, at first I tried doing a parallax effect but this didn’t work because there wasn’t anything in the background so I decided to go back into Premier and use the key frames to give it some focus on certain areas of the sculpture and again I think this works quite well because it just adds something different rather than having to sit and watch all these interviews.
  • 20.
    Day 11 • Istarted off today by changing the background music, I found one that has a neutral tone to it so it doesn’t build up to anything which I like because I don’t want to influence the audience to feel a certain emotion so I did need music that was neutral. I found that when I put music over the interviews I could tell there might be a little influence in making the audience feel a certain way so I only put it in the intro and at the parts where I transition between questions and I prefer it this way because then you can focus on what people are saying as well as have some music to move onto the next question. I have an extra person to add into the interviews because I thought her response was really good but the only issue is that she shot it in portrait and the rest of it is in landscape so I need to fix this issue.
  • 21.
    • I wantedto incorporate Alice’s interview into my project because she had some really good answers, however I got her to record this before I changed my questions so I could only include the first answer because that’s the only question I kept the same. Alice filmed her interview portrait which wasn’t how I wanted it to be, and she isn’t available to re-film it so what I did was copy and paste the footage and layered them over each other then I scaled them up to fill more of the frame and then put them side by side and added a Gaussian blur to both and increased it so it faded into the background. I then added a third layer of the same footage and scaled that up and positioned it into the middle. I was going to fade the edges but I prefer it without otherwise it looks too busy because there’s so much movement whereas this way there’s limited blurred movement. This has added length to the project it added another minute on which isn't what I wanted to do however I might be able to cut some other stuff out. I went through the interviews again and cut some people out because there response wasn’t what I wanted, although I swapped it out for another one although I'm not sure if I'm going to keep it or not due to the time of the project.
  • 22.
    Day 12 •After receiving some feedback I have made a few small changes, today I started off by adding names to the people who feature in the video. I did this by adding some text under the graphics tab and then choosing the one that doesn’t have any effects on it. I set the text size to 108 and also used the font Big Caslon which is the same font I use in the title so there is some continuity throughout the piece, I wanted the names to fade in so they didn’t just appear and to do this I used the key frames in the effects controls and what I did was have the opacity at 0% to begin with then halfway through have it at 100% and this way the name would slowly fade in. I also then faded it back to 0% at the end but the problem I was having was that the name would never be in ‘focus’ because by the time it had to fade in I set it to fade out again so I went back through all the names and added another key frame after the opacity had reached 100% because this way it would stay visible for longer an then fade out which I think works quite nicely. Another thing I did was add an adjustment layer, I added this to get some continuity between the clips as I was finding that they all looked really different and quite flat so under the effects tab you can set a filter to the layer and I chose one that had a warm tone to it called ‘Kodak 5205 Fuji 3510 (by Adobe)’ and this equaled out the blue tone that was over some of the clips and makes it look warmer.
  • 23.
    Day 13 • TodayI received a list of feedback to act on that I discussed in a one to one meeting yesterday. The first part of the feedback was to cut out some of the responses of the people sat down as they talked to much without sticking to the question so I did this and I managed to cut the length down a little bit. It was suggested to me that I incorporate the question onto a ‘slide’ before the interviews and I wasn’t too sure about this because I didn’t plan it this way as I think it can appear messy but I gave it a go and put the question over a still of Melanie and I think it works quite well, it also makes it more accessible to those who visit the Art Gallery and therefore is accessing a wider audience. This allowed me to cut out parts of the responses that had the question worked into the answer and therefore it stopped repetition and it made the piece slightly shorter and more focused on the point. I was also asked to incorporate some more footage of the man talking because I only had him in one response and it could appear biased which is something I didn’t want to do so I went through his response again and managed to find a bit that was useful because a lot of his response wasn’t really answering the question so I managed to incorporate this into it towards the end and I also added another section of Alice’s response but this was difficult because she had answered different questions so I found a bit that I could use that fitted with one of the questions so I put this towards the end and therefore it feels more like an ‘arc’ because it started with those two people and we see them again at the end.
  • 24.
    Day 14 • TodayI started off by acting on the rest of the feedback, this meant changing the music which is something I was considering doing because I wasn’t sure what direction to take. I went online and searched through different royalty free music and found one that was just a piano changing between 2/3 keys and I think it works with what I have but I might change it depending on the voiceover. The only things left that I need to do is the intro and the outro, I have been thinking about how I am going to be doing the outro and thought about summarizing the responses but I don’t think you can summarize the responses because they are all different and I didn’t want to conclude everything because it’s all interpretation so I thought about doing a quote at the end and I found a quote by Grayson Perry that ties into the theme of my project. I want to have the quote appear over an image of him however I am still waiting on the image that I can use so for now I have put it over a white background with the adjustment layer making it fit in with the rest of the project. I used a linear wipe transition to make it appear as if it was a type writer effect and chose the American typewriter font to create the illusion and added a typing sound effect and I think it works quite well however I might change it depending on how it looks with the image. I re-recorded my introduction using a microphone and an audio recorder because this was clearer and in a better quality than my phone.
  • 25.
    Day 15 • TodayI feel like I am close to finishing my production, however I am still needing the photo of Grayson Perry from Andrew so I am going to see if I can get that and if not I will keep the text against a plain background. I started by going through the entire thing and making a few adjustments the first being my introduction, I had to get it off the audio recorder and imported it in and I was impressed with how it sounded as I thought there was going to be some background noise but when I put it into Premier it sounded fine the only thing I had to do was change the volume so it blended in better with the background music which I also made a little quieter. I mixed a few of the recordings to get it how it sounded because there were parts of it that I wanted from one section but not the other so I combined them to get it to how I wanted. I then went through and altered the titles of the question as I thought they cant be seen in white so I tried a few other colors but these blended in more so white seemed the best option so what I did was change the size of the font and turn on the small caps box to make it all stand out and then I applied this to all the titles as well as making sure the X and Y axis were all the same so they were all in the same position. I did have an issue when I deleted the introduction files off of the audio recorder the media went offline so I had to search through the trash folder to try and find it and then go and link the media back up by locating it in a certain file, this was sorted pretty quickly but it means keeping all the files on until I am ready to export the piece. I also started cutting a few bits off the interview especially one of Grace’s because she talks for 30 seconds so I cut out the bit that I didn’t need and tried to make it a clean cut with little noticeability.
  • 26.
    • I managedto get the photo of Grayson and at first I was trying different ways to have it within the frame, I tried going into Photoshop and using the content aware fill to fill the image out but it didn’t look right and I didn’t want to make amendments to a really great picture so I used the key frames to have it begin at the bottom of the picture and work its way up the image then zoom out but not too far that it doesn’t fit the frame I then added the text over the top of a quote about beauty that Perry said. I had the issue of it not standing out but then I realized that I could add a shadow on and this made it stand out so I went back to the text with the questions and added the shadow effect which made it more prominent. I then needed to put credits at the end with the references to the images so under the graphics tab in Premier pro I chose the one that said classic graphics and then typed up what was needed. I changed the font size to 113/110 and also the font type because then this would fit with the font throughout the entire piece.
  • 27.
    Day 16 •Today I started by acting on the feedback that I was given from Sarah at the gallery, I started by changing the color of the text because it didn’t stand out enough from the background so I thought about changing the background but I think it’s better with the still of Melanie. I tried changing the text to black/grey/brown but all these just blended into the piece so I decided to use a white box to put behind the text to do this I added a color matte and set the color to white then under the effects tab I chose the ‘CROP’ option and then under the effects control section I could adjust the color matte to how I want it. I then went through and changed the scale of all the text to 86.4 so they were all the same and then used the key frames to fade the text/boxes in and out mainly using the opacity key. Changing the way the text was, was a good idea because it makes it more accessible to those who might have trouble seeing. The next bit of feedback was to incorporate a question at the end to the audience saying ‘What is your opinion on feminine beauty?’ I put this at the end after Jane’s section because the end finishes with a shot of Melanie and I could zoom out to reveal the question so I did this and then it fades into Grayson with a quote.