Ez10 Steps to master your DSLR
•Download as PPT, PDF•
8 likes•1,808 views

This document provides a crash course on how to master the basic settings and controls of a DSLR camera. It covers 10 steps, including how to set up the camera by adjusting quality controls like ISO and white balance, understanding key controls like aperture and shutter speed, choosing the right exposure mode, and exploring additional settings and accessories. It emphasizes the importance of understanding how different settings affect exposure and image quality in order to take creative photos.

Recommended
Recommended
More Related Content
What's hot
What's hot (20)
Viewers also liked
Viewers also liked (10)
Similar to Ez10 Steps to master your DSLR
Similar to Ez10 Steps to master your DSLR (20)
More from Timothy Wooi
More from Timothy Wooi (20)
Recently uploaded
Recently uploaded (7)
Ez10 Steps to master your DSLR
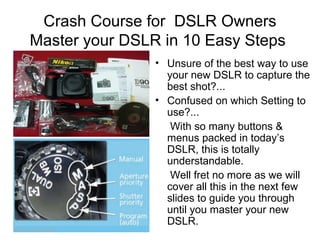
- 1. Crash Course for DSLR Owners Master your DSLR in 10 Easy Steps • Unsure of the best way to use your new DSLR to capture the best shot?... • Confused on which Setting to use?... With so many buttons & menus packed in today’s DSLR, this is totally understandable. Well fret no more as we will cover all this in the next few slides to guide you through until you master your new DSLR.
- 2. 1. Right way to set up your DSLR DSL enable you to take much more creative photos but,,,, You have to know how to set the DSLR before starting to Shoot. This can be frustrating but it’s the only way to ensure your DSLR is set up for the best results.
- 3. 1.Right way to set up your DSLR QUALITY CONTOL • Which File format? • Shoot RAW instead of JPEG if possible. Extra Data in uncompress RAW give more flexibility in post processing.
- 4. 1.Right way to set up your DSLR QUALITY CONTOL • Try to keep ISO low as possible,100-400. High ISO - Noise that looks like Image Grain. • White balance-Auto Set it when you are confident – Cloudy, Tungsten.
- 5. 1.Right way to set up your DSLR KEY CONTROL • Aperture & Shutter Speed Explained. Combination affects amount of Light captured & also the way Image looks. • Aperture controls Depth of Field-area of Image in Sharpness. • Small f/2.8 gives sharp image & Blurred background -Portrait • Big f/16 gives all sharpness from Subject till background -Landscapes
- 6. 1.Right way to set up your DSLR Key KEY CONTROLS • Shutter speed controls blurring a moving subject or freezing it. • Slow shutter speed creates motion blurr as well as camera Shake. • Fast Speed freezes motion & also prevents camera shake
- 7. 1.Right way to set up your DSLR SETTINGTHE RIGHT EXPOSURE MODE DSLR offers a range of Exposure modes from fully automated –Compact camera to fully Manual mode. 2 popular Semi Auto modes are -Aperture Priority and -Speed Priority. • In A mode, you set the Aperture & the Camera decides the Shutter Speed. In S mode ,you set the Shutter Speed & the Camera decides the Aperture.
- 8. 1.Right way to set up your DSLR Key GETTING METERING RIGHT Metering modes varies with camera but 3 most common are 1.Multizone, 2.Center Weighted & 3.Spot 1. Multi-zone reads across a whole scene.-Everyday use & pretty accurate 2. Center Weight reads 70% center of frame & features out. –Portrait 3. Spot reads a tiny area & is most advance & precise metering.
- 9. 1.Right way to set up your DSLR SETTING THE AF & DRIVE MODE To make your pictures pin sharp, DSLR offers a number of Focus modes. 2 main modes are: • Single Servo - Stationary • Continuous Servo - Moving • Drive Mode allows Single (S) frame shot or Continuous (C) frame shot for as long as the shutter is press down. Most DSLR allow you to manually select a focus point to lock focus on off center
- 10. 1.Right way to set up your DSLR MAKE FULL USE OF THE LCD SCREEN • Use the big LCD screen properly to Zoom in to check for Sharpness & Image Noise. • Check the exposure using the Histogram. Histogram bunch up to the Left – Under-exposure. Right –Over-exposure
- 11. 2.LANDSCAPES Landscapes contain Large bright areas causing difficulty for right exposure. Expose Sky or Foreground? Best time ,1st and last 3 to 4 hours of Sunrise/Daylight. Great punchy & golden glow instead of flat & dull contrasting Midday. • Use a graduated ND or a Circular Polarising Filter. • Small aperture of f 16/22 for Sharpness. • Tripod for low shutter speed.
- 12. 3.KNOW YOUR DSLR TOP DIAL Auto (Green Square) Choosing which Exposure mode to use is about giving you the freedom to stop worrying about settings and to concentrate on taking great shots. Auto settings(Green) with modes for Portraits, Landscapes, Kids, Sports Action & Close-ups. This mode is ideal for beginner converting the DSLR like a Compact Point & Shoot with Shutter speed, Aperture, Flash & ISO all taken care off.
- 13. 3.KNOW YOUR DSLR TOP DIAL Deciding Priorities- Auto,P,S,A,M On many of the digital cameras, there are four basic exposure shooting modes on top of Auto. It provides different approaches for setting the camera's aperture and shutter speed to suit the light in the scene.
- 14. 3.KNOW YOUR DSLR TOP DIAL Program (P)-Auto In the Program (Auto) mode, the Camera adjust the optimum Aperture and Shutter speed depending on focal length of lens used. You control the ISO, Exposure Compensation (Lighter or Darker) This mode handles a very wide range of lighting and you can even change the camera setting to takes care of the ISO. You just have to pay attention to composition and switch on the Flash if it is too dark or back lit. The camera Program Auto mode is the easiest to use and extremely accurate. This option is a foolproof setting for immediate shooting where you don’t have time to decide.
- 15. 3.KNOW YOUR DSLR TOP DIAL Shutter Priority mode - S Shutter Priority (S) mode works the other way. You sets the shutter speed and the camera selects the aperture automatically to suit the light in the scene. The mode is useful in Sports & Action Photography where you want to freeze motion using a high Shutter Speed or to create image blur by using a slow Shutter speed.
- 16. 3.KNOW YOUR DSLR TOP DIAL Aperture Priority mode-Av In the Aperture Priority (Av) mode, You set the Aperture and the camera adjusts the Shutter speed automatically. The mode will handle a very wide range of lighting conditions, since cameras offer far more potential Shutter settings than f-stops. You just have to pay attention if the camera is picking a slow shutter speed thus resulting in blur. This option is helpful for Close-ups, where the depth of field is critical or using a small f-stop for Portrait to get a blurred background.
- 17. 3.KNOW YOUR DSLR TOP DIAL Deciding Priorities- Auto,P,S,A,M The Manual Mode is the most basic and flexible option. You set both the Aperture and Shutter speed for a given scene and the camera adjust the ISO for a correct Exposure within the range. The Bulb B mode enables you to shoot long exposure for night scene. Again check the Histogram for correct exposure and change setting to suit.
- 18. 4.EXPLORING YOUR DSLR IN MORE DEPTH White Balance It is possible to rely on the Auto White Balance setting for most scenes. Only a few situation with mixed lighting, under heavy shade, the Auto mode can be confused & fooled. Switch to a custom WB setting that suits like, Shade, Cloudy, Flash, Incandescent and your picture will look the same like the scene you see with your naked eye.
- 19. 4.EXPLORING YOUR DSLR IN MORE DEPTH ISO Sensitivity The ISO sensitivity you choose will affect the your DSLR sensitivity to light. To produce the cleanest image use the lowest ISO rating possible. However it is not always possible in low light or hand held-slow Shutter speed will cause Image blur. In modern DSLR, you can even shoot as high as ISO 800 without Intrusive Noise. High ISO will also allow higher shutter speed helping out camera shake.
- 20. 4.EXPLORING YOUR DSLR IN MORE DEPTH Choosing a File Format The big advantage of shooting RAW is you get full detail image data as your camera captures it. JPEG compresses image so you loose some detail. RAW can be perfected using software & later compresses it back to JPEG to save file space for sharing. Some DSLR allow JPEG & RAW together giving maximum flexibility
- 21. 4.EXPLORING YOUR DSLR IN MORE DEPTH Essential Accessories After having a DSLR with a kit lens, it is good to save up for a better & faster lens and invest in a sturdy portable Tripod. Choose one that is not too big when retracted but sturdy when extended and has a good & smooth swivel head. • A tripod allows you to shoot at small apertures for maximum depth of field. • It also allows low shutter speed without camera shake causing unintended blur.
- 22. 5.SELECTING FOCUS & DRIVES Focus Modes, 3 Available S,C & M Focus & Drive modes are often overlooked, but very essential to cope with challenging conditions. Three available focus modes are. Single- servo AF (S) Focus & stays locked as long as Shutter is pressed halfway, subject must not move Continuous-servo AF (C) Perfect for Moving subject or Sports. Servo will continue to refocus as subject moves as long as Shutter is pressed halfway Manual (M) Bad lighting, Low Contrast, Fine detail ,Shooting through glass. Switch to M focus if your camera fails to focus lock.
- 23. 5.SELECTING FOCUS & DRIVES Focus Points Do not just rely on autofocus AF (S), specify exactly where you want to focus. Two main choices here, let the camera take control by searching a scene or you can select an area manually. Single point AF This mode is best when shooting a Portrait or any subject is relatively still. You can select a focus point manually that doesn’t have to be in the center of the frame Dynamic area AF This mode is perfect for shooting fast moving or erratic moving subjects. Some DSLR like D300 has up to 51 AF points although 9-21 are common. When you choose 1 focus point but the subject if the subject briefly leaves the that point, the camera will re-focus on a point just next to the one you have chosen.
- 24. 5.SELECTING FOCUS & DRIVES Drive Modes The drive modes controls the shutter whether you need a single shot or a burst of frames. Single Frame shooting (S) The Camera will only fire ‘Once’ every time you press the shutter. Best used for still subjects like landscapes, portrait shots & still shot where you don’t a burst of frames to capture it. Continuous Shooting (C) This mode is will fire off shots at the maximum frames set for (2.5-8 fps) for as long as the shutter button is held down. Ideal for Sports or Action.
- 25. 6.SET YOUR CAMERA UP FOR… Portraits For taking shots of friends, family members or fashion in a studio and most important Portrait photography, is to choose the correct focal length of lens for the desired effect. For a good flattening Portrait without facial distortion, you need to be at least 10-12X away from Nose/Ear distance. Classic portrait focal lengths fall into the 85mm to 135mm range for a 35mm film or full frame FX DSLR to achieve a head & shoulder to a full portrait In a DX DSLR (1.5crop) cropped sensor, it is 55-90mm.
- 26. 6.SET YOUR CAMERA UP FOR… Portraits Suggestion for best Results • Use an aperture of around f/5.6 to throw distracting background out of focus. • Set your metering to Center-weighted for optimal exposure of the face or Spot metering if it is a back lit or dark/light back drop. • Focus on the Eye for very best results to make your model stand out and allow the face to be sharp. • For Outdoor, shoot in the shade or later in the day can produce softer and more flattening images. Bright overhead light can cause dark areas in the eyes & produces harsh images.
- 27. 6.SET YOUR CAMERA UP FOR… Portraits Suggestion for best Results For me, Portrait captured around f5.6 with shutter speed near reciprocal of focal length gives the best optimum results. At f2.8 and bigger, eyes may be sharp but not ears... In Portrait, you do not want to show the subject’s eyes only. Try avoid going below f5.6, as DOF starts playing role and facial sharpness decreases to a single point. At a longer focal length, the image background will be more blurry, more ‘bokeh’ will be. This is why a lot of people like to shoot portraits with longer lenses, like 55mm and up for DX format.
- 28. 7.ENSURE PERFECT EXPOSURE EVERY TIME The Camera Auto Exposure Meter Why photos are darker and how to shoot photos brighter and more pleasing to the eyes. The Camera Auto Exposure Meter is easy to use and extremely accurate but….
- 29. 7.ENSURE PERFECT EXPOSURE EVERY TIME Get it right 1st in Camera DSLR have meters to measure light and reflected from the scene. Modern DSR are good at working out the exposure, however there is no such thing as a foolproof system. Certain subject can fool your camera to be either too dark or too bright depending on where the light is coming from. For this, it is vital you know which metering mode to use.
- 30. 7.ENSURE PERFECT EXPOSURE EVERY TIME Get it right 1st from the Camera UNDER-EXPOSED Too little light had been allowed into the sensor, caused either too fast a shutter speed or too small an aperture. The histogram will be bunched to the left, known as ‘clipping’ if printed the clipped area will become black, and all shadow will become lost.
- 31. 7.ENSURE PERFECT EXPOSURE EVERY TIME Get it right 1st from the Camera CORRECT EXPOSURE This correctly exposed image shows lovely crisp colors with light % dark tones throughout. A correct exposure on a histogram will have tonal value as far to the right without clipping the highlights. Note the tell- tale ‘peaked’ shape.
- 32. 7.ENSURE PERFECT EXPOSURE EVERY TIME Get it right 1st from the Camera OVER-EXPOSED This shot is over-exposed as too much light has reached the sensor. Notice the histogram have the tonal distribution pushed to the right .In the print out the supposed detail area are blown out.
- 33. Master the Metering modes MULTI-ZONE METERING A correct exposure on a histogram will have tonal value as far to the right without clipping the highlights. Note the tell-tale ‘peaked’ shape.
- 34. Master the Metering modes SPOT-METERING A correct exposure on a histogram will have tonal value as far to the right without clipping the highlights. Note the tell-tale ‘peaked’ shape.
- 35. Master the Metering modes CENTER-WEIGHTED AVERAGE A correct exposure on a histogram will have tonal value as far to the right without clipping the highlights. Note the tell-tale ‘peaked’ shape.
- 36. 8.Nailing Aperture & Shutter Speed • Shutter speed & Aperture combination have a big Impact on your photograph. • It determines correct Exposure while you choose whether you want to blur or freeze a subject or how much subject you want in focused.
- 37. 8.Nailing Aperture • Wide Aperture
- 38. 8.Nailing Aperture • Small Aperture
- 39. 8.Nailing Shutter Speed • Shutter speed allows control of exact amount of time shutter stays open. • Working in conjunction with selected aperture it determines correct Exposure. • Main function is to determine amount of Subject movements.
- 40. 8.Nailing Shutter Speed • Shutter speed allows control of exact amount of time shutter stays open. • Working in conjunction with selected aperture it determines correct Exposure • Main function is to determine amount of Subject movements. • Shutter Speed are read in fraction of a sec.eg 1/15 to Blur a moving Object and 1/1000 to Freeze a fast moving Subject.
- 41. FART 1st FOR GOOD PICTURES Feel, Ask, Refine & Take • FART is short for Feel, Ask, Refine & Take • Best Pictures are taken when you FART first. • FART helps us remember to make a Strong, Meaningful photo instead of just snapping away with a lot of boring, thoughtless snapshots.
- 42. FART Feel, Ask, Refine & Take F: Feel • A good photo starts when you have the feeling to take a picture. • Many photographers just shoot to get something, but often they don't . • Identify what exactly catches your eye. Do not expect the viewer to figure it out, and as they won't bother instead just move on to the next shot. • Like "a Ferrari." What catches our eye and lead to a great photo is their bold, solid, primary colors and their brilliantly pure styling.
- 43. FART Feel, Ask, Refine & Take A: Ask • Once you feel like stopping over to take a picture, stop and ask yourself exactly what it is that made you stop. • Is it a bold color? Is it a crazy juxtaposition? Is it the wild light? What is it, exactly, that made you want to take a picture? • Is it the brilliant Italian design, lines, motion and proportion of the Ferrari? If so, what exactly about the design caught your eye?
- 44. FART Feel, Ask, Refine & Take R: Refine • Now, refine the image to emphasize whatever it is. If you can emphasize what it was that stopped you, the photo will be more likely to make others say WOW! • In other words, if you liked something, was it because it had a weird texture? If so, show that texture as boldly as you can. • If you like the color of something, fill the whole frame with it. • Get rid of everything that is not directly related to it is that made you want to take the photo.
- 45. FART Feel, Ask, Refine & Take R: Refine • Compose as strongly as you can. Eliminate things not related to the photograph. • In the case of a Ferrari, if you don't FART before snapping, you're likely to make another boring photo of the whole car from eye level. • If you FART first, you'll ask ,what is it about the Ferrari that catches your eye, and when you can Answer that, maybe wind up with a close-up of those big round Hella tail lights, or maybe realize that it was the redhead driving it, and instead, head out to lunch with her and save the photo shoot for later.
- 46. FART Feel, Ask, Refine & Take R: Refine • It's always something more basic and subconscious that draws us to want to make a picture of something. • You always can refine more and more, and as you do, your photos become stronger. If it was the redhead that caught your eye, what exactly about her that caught your eye? If it was her hair, what exactly about her hair grabbed you? • The better you can Answer and keep Refining this, the more your photos will grab people, your friends, family & contest Judges or Art buyers. •
- 47. FART Feel, Ask, Refine & Take T: Take • This is the easy part. Take the picture. • Be sure the exposure and color (WB) are OK, and you're done. • Reprise • Ask yourself first, do your best to Refine and simplify your image, and Take it, You'll get much better images because you were thinking. • Because we forget to ask ourselves before we take a photo, all we get are boring snapshots, regardless of how fancy our camera or how involved our techniques.
- 48. FART Feel, Ask, Refine & Take Reprise • If you forget to FART first, as most people do, your photos will usually be boring. • FART first, and you'll make better pictures. • Forgetting to Ask yourself "why am I taking this picture" is the leading cause getting our pictures back, and having to ask ourselves "what was I thinking?" • Ask yourself first, do your best to Refine and simplify your image, and when you Take it, you should never have to ask yourself later "what was I thinking?"
- 49. Crash Course for DSLR Owners Want to learn More? Contact Person: Timothy Wooi Address: 20C,Taman Bahagia, 06000,Jitra,Kedah. Bio: Wedding / Product Photographer from 1982 & Hands On Technical /Outdoor Photographer & Trainer. H/p: (6) 019 4514007 Office: (6) 04 9171476 FB: https://facebook.com/timothy wooi Email: timothywooi2@gmail.com Onsite Facilitation: Minimum 10 Pack @RM100/Head with copy of Printout.