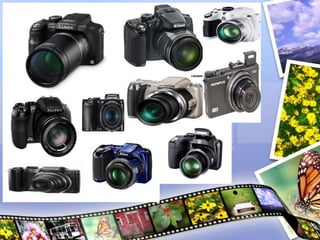
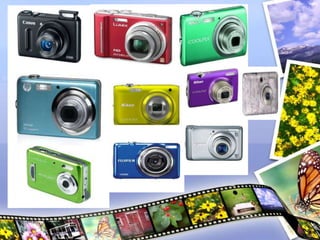
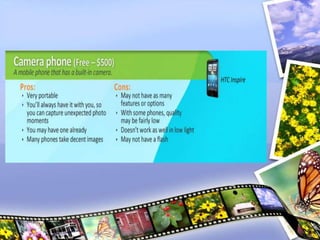
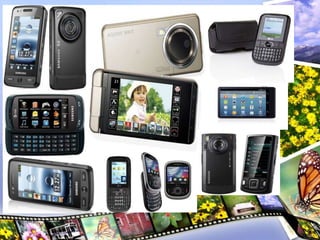
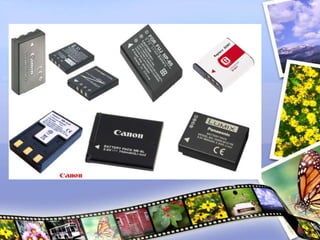
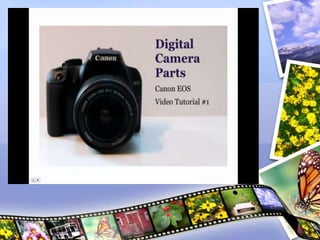
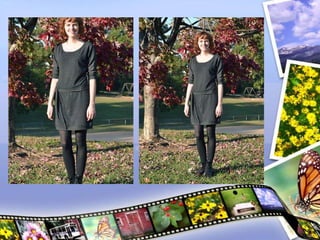
DIGITAL
PHOTOGRAPHY
PREPARED BY: TEACHER CAMILLE
OBJECTIVES:
TO LEARN HOW TO USE LIGHTING,
COMPOSITION AND CAMERA SETTINGS TO
TAKE BETTER DIGITAL PHOTOS
NO MATTER WHAT KIND OF
CAMERA YOU HAVE.
ALL ABOUT DIGITAL
CAMERAS
INTRODUCTION
Since the 1990s, digital cameras have
become more and more common,
and also more affordable. Because of
this, it's now easier than ever to get
started with photography.
The most important factor is the
SKILL OF THE
PHOTOGRAPHER
WHAT CAN YOU DO WITH THE
DIGITAL CAMERA?
1. CAPTURE MEMORIES
2. SHARE YOUR PHOTOS ONLINE
3. USE IT AS A SCANNER
4. CAPTURE DATA
5. START TAKING PHOTOS AS A
HOBBY
CHOOSING A DIGITAL CAMERA
If you're shopping for a digital camera, the
number of choices can be overwhelming.
However, if you can narrow your search to
a specific price range or type of camera,
then it may make your choice much easier.
In addition, many cameras have special
features such as red-eye
correction and anti-blink, so you may want
to think about which features are
important to you.
TYPES OF DIGITAL CAMERAS
1.DIGITAL SLR (DSLR)
2.POINT AND SHOOT
3.BRIDGE CAMERAS
4.CAMERA PHONES
SPECIAL FEATURES
Digital cameras often have special
features designed to help you take
better photos. Depending on what
types of photos you want to take,
some of these features can be very
useful.
RED-EYE CORRECTION
Automatically removes red-eye,
which is useful if you're taking photos
with the flash on. If your camera
doesn't have this feature, you can use
image editing software to remove
red-eye.
SPORTS/ACTIVE CHILD MODE
Allows the camera to focus more
quickly to capture action shots. Some
cameras also use motion detection to
"freeze" a fast-moving subject,
making your photos even sharper.
ANTI-BLINK
Automatically detects whether
someone has blinked, and displays a
warning after the photo is taken so
you know to retake it.
SMILE DETECTION
Uses face recognition technology to
take the photo right when your
subject smiles.
BLEMISH REDUCTION
Automatically retouches your photos
to reduce blemishes and wrinkles.
ARTISTIC EFFECTS
Allows you to add brush stroke
effects, lens distortion, or other
effects to give your photos a unique
look.
MEMORY CARDS
Most digital cameras store the photos
on a separate memory card, such as
a Secure Digital, SDHC, microSD,
or CompactFlash card. These cards
usually have several gigabytes of
storage space, and the exact number
of photos that they can hold will vary
depending on the resolution and file
format of the photos.
You may need to purchase a memory
card separately, and it's important to
choose a card that is
COMPATIBLE WITH YOUR CAMERA
Generally, you'll want to use the
memory card as temporary
storage until you transfer your
photos to your computer. You can
then delete the photos from the
memory card so you'll have plenty of
space for your next photo shoot.
BATTERY
• Cameras use rechargeable lithium-ion
battery packs, although some can
use AA batteries. The battery pack is
usually included with your camera, but
you may want to buy an extra one in
case the battery runs out while you're
shooting. Make sure to buy a battery
pack that is designed to work with your
camera.
GETTING TO KNOW YOUR
CAMERA
GETTING THE RIGHT EXPOSURE
Every digital camera has a sensor located
behind the lens. The sensor is the part
that actually captures the photo, much
like the roll of film in a film camera. When
you take a photo, the sensor is exposed to
light for a fraction of a second, or
sometimes longer. The total amount of
light that is captured is called the
SENSOR
FOCUSING
Your camera's LCD screen has a focus
indicator, which is a box that shows what
your camera is focusing on. To prevent
focusing problems, you'll need to keep an
eye on the focusing indicator whenever
you take a photo.
THE SHUTTER BUTTON
Most digital cameras have a
two-stage shutter button
which means that it can either be
pressed halfway down or all the way
down.
When you press it halfway down, your
camera will lock in the focus and
exposure settings.
COMMON SETTINGS
Flash: Most cameras have a built-in
flash to help you take photos in low-
light situations. If the flash is set to
Auto, then your camera will only use it
when it needs to.
Timer: If you're taking a group photo,
you may not always have an extra
person to take the photo. By setting the
timer and placing the camera on a table
or tripod, you'll have time to join your
friends in the photo.
Macro Mode: This is a setting that
you can use to take close up shots.
It allows the camera to focus on
objects that are only a few inches
away.
Exposure Compensation: If your
photos are coming out too dark or
too light, you can use this setting to
adjust the exposure.
Zoom: If your camera has a zoom lens,
then you can control the optical zoom
using buttons or a dial (depending on the
camera). On many cameras, you can zoom
in even further by using the digital zoom.
SHUTTER SPEED,
APERTURE, AND ISO
The exposure is actually controlled by
three settings:
Shutter speed
Aperture
ISO
SHUTTER SPEED
The shutter speed is the amount of
time that the shutter stays open. A slower
shutter speed (such as 1/4 second) allows
the camera to gather more light, and a
faster shutter speed (such as 1/2000
second) allows you to "freeze" the action
and avoid blurry photos.
SLOW SHUTTER SPEED
FAST SHUTTER SPEED
APERTURE
Camera lenses have a circular "window"
that controls the amount of light that can
reach the sensor (much like your eye's
pupil). The size of this window is called
the:
Aperture
F-number
F-stop.
The aperture also has an interesting effect
on how the light is focused: With a larger
aperture, the background will blur, while
the subject stays in focus. This is known
as
Shallow Depth of Field.
NARROW APERTURE
WIDE APERTURE
ISO
Digital cameras can adjust the sensitivity
of the sensor, and this is known as the ISO
number. For example, ISO 100 is a lower
sensitivity, so it requires more light to
create a good exposure. This often means
that your camera will use a slower shutter
speed and/or a wider aperture to gather
more light. ISO 800 is a higher sensitivity,
so it can create a good exposure with less
light. However, higher ISO numbers also
add more image noise, which may make
your photo too grainy.
LOW ISO
HIGH ISO
DEPTH OF FIELD
In any photo you take, you'll want your
subject to be in focus. However,
sometimes you may want the background
to be out of focus, to give a soft, artistic
appearance to the photo. This is known
as shallow depth of field. With a shallow
depth of field, you can still focus on your
subject, but objects that are closer or
farther away will be out of focus. If you
are using a DSLR or bridge camera, you
can get this effect by choosing a wide
aperture.
SHALLOW DEPTH OF FIELD
DEEP DEPTH OF FIELD
USING SCENE MODES
Many cameras include presets called scene
modes, which you can access from your
camera's menus or from a dial at the top.
Each scene mode is geared toward a specific
situation (or scene). For example,
the Sports scene mode will use a faster
shutter speed, and it may also use motion
detection to help reduce blur. On the other
hand, the Portrait scene mode is designed to
easily focus on your subject, and it also
adjusts the color balance so that skin tones
look as natural as possible.
LIGHTING
Lighting can come from:
The Sun
Your camera's flash
A lamp
Ceiling lights.
The direction, brightness, and color of the
lighting can have a dramatic effect on the
appearance of your photos.
A PHOTO TAKEN FROM NATURAL LIGHT
LIGHTING BASICS
in any photo, the light will fall on the
subject in a certain way,
creating highlights (bright areas)
and shadows (dark areas). The highlights
and shadows create contrast, which can
help to make the photo more interesting
but can also create problems in some
situations.
A PHOTO WITH A GOOD BALANCEOF
HIGHLIGHTS AND SHADOW
USING SHADOWS FOR ARTISTC EFFECT
OUTDOOR PHOTOS
REMINDER:
Avoid having the sun behind your
subject, as this can cause your subject to
be too dark and the background too
bright. Try to find an angle where the sun
is to the side, so that your photo will have
a mixture of shadows and highlights.
A PHOTO WITH THE SUN BEHIND THE
SUBJECTS
PHOTO WITH THE SUN TO THE SIDE OF
THE SUBJECT
THE GOLDEN HOUR
Photos look best when taken just before
the sun sets, or just after it rises. This is
commonly known as the
“golden hour“
Since the sun is lower in the sky, it
creates longer, softer shadows. These
shadows can add contrast to your
photos while still giving them a soft,
pleasant appearance. In addition, the
sunlight has a more golden color, which
adds warmth to your photos.
THE GOLDEN HOUR
MIDDAY
This can create dark shadows and bright
highlights, which can give your photos
a harsher appearance. If you are taking
photos of people, their eyes may be
completely in shadow. Sometimes, you
may be able to reduce these shadows by
turning on your camera's flash, although
this won't work if your subject is too far
away. You can also ask your subject to
face a different way to try to reduce the
shadows.
MIDDAY
CLOUDY WEATHER AND
TWILIGHT
• The softest light occurs when the sun
is covered by clouds, or when it's just
below the horizon. Since the light is
soft, your camera will be able to pick
up details that may have otherwise
been covered by shadows. This can
also be a very good time to
photograph flowers and other colorful
objects.
EXAMPLE OF CLOUDY WEATHER PICTURE
INDOOR PHOTOS
For indoor photography, your light
sources can include lamps, ceiling
lights, sunlight through a window, and
your camera's flash. This gives you
more flexibility, as you can move lights
or turn them on or off to control the
direction and brightness of the lighting.
YOUR CAMERA’S FLASH
You may be tempted to use the flash for
all of your indoor photography, but
pictures taken with flash often have
dark shadows and bright highlights that
can be harsh and unflattering. You may
want to try turning off the flash and
working with the other lights that you
have. You can turn the flash back on if
you find that your pictures aren't
coming out.
INDOOR LIGHTING TIPS
Is located off to the side, but still in
front of the subject. There can also be a
second light called a fill light, which is
located on the other side of the subject
to help reduce shadows. Sometimes
the photographer will use other lights
as well.
Here are a few tips that you can use to take
better indoor photos:
• Avoid having a sunny window
behind your subject.
• Try turning off the ceiling lights
and using one or two lamps as
the light source.
• Use a tripod.
• Try using the Party/indoor scene
mode.
• If you have to use the flash, move
your subject away from the wall.
• Experiment.
COMPOSING YOUR SHOT
In photography, you can do all of these
things simply by changing the position
and angle of the camera. The way that
everything is arranged in your photo is
called the composition. By paying
attention to the composition of your
photos, you can improve and enhance
them.
TIPS FOR COMPOSING YOUR
PHOTOS
Decide how much of the background you
want.
Most of the time, you should avoid including
too much unnecessary background, as it will
cause your subject to look small and
insignificant. If you zoom in or move closer to
the subject, you can reduce the amount of
background that is shown. On the other hand,
if the background is interesting, you can zoom
out to show more of it.
TOO MUCH UNECCESSARY BACKGROUND
GOOD AMOUNT OF BACKGROUND
Avoid mergers.
When a background object is directly
behind the subject, it may look like it is
growing out of the subject's head. This is
called a "merger," and it can ruin an
otherwise great photo. Try to find an
angle where the background is not
distracting.
Be careful not to crop out body parts.
A common mistake is to crop out the tops
of people's heads or their feet. To prevent
this, include some extra space at the top
and bottom of the photo. You can move
farther away from the subject to give
yourself more space to work with. Of
course, if you're doing a close up, it's okay
to have some cropping.
Try changing the distance from the
subject.
Sometimes a close-up works best, but
other times you may want a wider-angle
shot. You can experiment by moving
closer and farther away from your
subject, or by using your camera's zoom.
Try different angles.
You can try moving to the side or moving
the camera higher or lower to get a
different angle. This also lets you control
which background objects are in the
photo.
Experiment.
Professional photographers may take
hundreds of photos just to get one great
shot. Although that may not be practical
in most situations, you may still want to
take a variety of shots so that you can pick
the best one later.
THE RULE OF THIRDS
When you're taking a photo, you don't
have to place your subject exactly in the
center.
In fact, you can often make a photo look
more natural by placing your subject off
center.
You can do this by using a technique that
photographers call the rule of thirds.
Using the Law of Thirds to compose the
picture.
PHOTOGRAPHING AT NIGHT
Taking photos at night can be a challenge,
since your camera doesn't have as much
light to work with. Common problems
include photos that are blurry (due to a
slow shutter speed), grainy (due to a higher
ISO number), or dark (if your camera can't
compensate for the low light). If your
camera has a built-in flash, then that can
add a lot more light, but it can also be
harsh and unflattering.
Sample picture taken at night.
A photo with lots of image noise.
TIPS TO GET BETTER RESULTS WHEN
TAKING PICTURES AT NIGHT
Use your camera's Night Portrait scene
mode.
Using this scene mode may help your
camera deal with low light.
Hold the camera as still as possible, or
use a tripod.
In low light, your camera will use a slower
shutter speed, which means your photos
may come out blurry. Keeping the camera
still will help to keep your photos sharp.
Use the flash if necessary.
Your camera's flash may not be the most
flattering light, but it's often better than
nothing. Many cameras also have a flash
that is designed to reduce red-eye, so
check to see if this is an option on your
camera. Also, keep in mind that the flash
usually won't help if your subject is more
than 15 feet away.
Adjust the exposure compensation.
If your photos are still coming out too
dark, you can adjust the exposure
compensation to increase the
brightness. Although this will make the
photos brighter, it won't actually improve
the quality, so it's not really a substitute
for more lighting.
Try increasing the ISO setting.
If all else fails, you can manually raise the
ISO number in your camera's settings.
This may reduce blurriness, but it will also
make your photo more grainy.
CAPTURING MOTION
Capturing a fast-moving subject can
be one of the biggest challenges for a
photographer. The key to capturing
any kind of fast motion is to use a
Faster Shutter Speed
DSLRs and bridge cameras allow you
to adjust the shutter speed manually.
If you're using a point-and-shoot
camera, you can select the Sports
Scene Mode or turn on motion
detection to help you capture action
shots.
Action Shot
Using a slower shutter speed to capture
motion blur.
Too much motion blur.
TIPS TO CAPTURE ACTION SHOTS
Use the Sports scene mode.
This mode uses a fast shutter speed to
help you capture the action.
Turn on motion detection.
Many cameras have a motion detection
setting that can help to reduce blurring by
using a faster shutter speed when
necessary.
Don't wait for the perfect shot.
By that point, it may be too late. You may
need to take lots of extra photos in order
to capture the perfect shot.
Anticipate your subject's actions.
Try to aim the camera a little bit ahead of
the subject so they don't look like they're
running out of the photo. Also, moving
the camera with the subject can help to
reduce motion blur (although it may blur
the background).
Not enough space in front of the subjects
Plenty of space in front of the subjects.
Press the shutter button halfway down
ahead of time.
You'll need to give your camera time to
adjust the focus and exposure; otherwise,
you may miss the perfect shot. You should
press it halfway down a few seconds
before taking the photo, so that your
camera will be ready to capture the exact
shot that you want.
Use continuous shooting.
Continuous shooting will take several
photos every second as long as you are
holding down the shutter button. This can
help you capture the perfect shot, since
you don't have to wait for the exact
moment to take the photo. If you're using
the Sports scene mode, continuous
shooting may already be turned on.
Otherwise, you can go into your camera's
settings to turn it on.
PHOTOGRAPHING LANDSCAPE
Landscape Photo
TIPS TO IMPROVE LANDSCAPE
PHOTOGRAPHY
Use the Landscape scene mode.
This mode automatically focuses
on infinity, which means it focuses as far
away as possible (and also keeps
the depth of field as large as possible).
This ensures that the background
landscape will be in focus, as well as the
foreground objects.
Use a smaller aperture if possible.
If you are using a DSLR or bridge camera,
use a smaller aperture (such as f/16). This
will increase the depth of field and ensure
that the background and foreground are
in focus.
Keep the camera level.
Landscapes usually look best when the
camera is level. It will be easier to keep
the camera straight if you are using a
tripod.
Try to find an interesting foreground
object.
Landscapes aren't just about the
background. If you can include an
interesting object in the foreground, it will
add a sense of depth to the photo.
Using flowers in the foreground to add
depth.
Use the rule of thirds.
If the horizon is visible, try to place it near
one of the grid lines, instead of in the
middle of the photo.
Use leading lines.
Is there a road, sidewalk, river, or stream
that you can use in your landscape? These
are known as "leading lines" because they
help to lead the eye into the photograph.
CAPTURING CLOSE UP SHOTS
Sometimes, you may want to take
close-up shots of flowers, insects,
food, or any kind of small object. This
is known as
Macrophotography.
In macrophotography, the object in
the photograph is bigger than life
size, so it can reveal details and
textures that you might not normally
see.
One of the biggest challenges with
close-up shots is focusing. As you
move the camera closer to an object,
the depth of field becomes
shallower. That means if the focus
isn't exactly right, your image may be
way out of focus.
A close-up photo of a flower.
A photo with very shallow depth of field.
TIPS TO GET CLOSE UP SHOTS
Use the Close-up scene mode or Macro
mode.
These modes allow the camera to focus
on objects that are only a few inches
away. Also, the Close-up scene mode will
always focus on the center of the image,
which makes focusing easier.
Watch the auto-focus.
Close-up shots have a shallower depth of
field, so it's very important to make sure
that the camera is focusing on the object
and not the background. If you're using
the Close-up scene mode, you can do this
by keeping the object in the center of the
frame.
Once the camera focuses, don't move it.
If you move your camera after it focuses,
your photo may come out blurry. If you
want to move the camera, you'll have to
re-focus it and then take the photo.
Avoid using flash.
Your camera's flash won't work on close-
up objects, so it's best to turn it off.
Try shooting in cloudy weather.
If you really want to bring out details in
your outdoor close-up shots, you might
want to try shooting in cloudy weather.
Bright sunlight can create dark shadows
that block out many of the details, but
sunlight that is filtered by clouds is much
softer.

Digital Photography

  • 1.
  • 2.
    OBJECTIVES: TO LEARN HOWTO USE LIGHTING, COMPOSITION AND CAMERA SETTINGS TO TAKE BETTER DIGITAL PHOTOS NO MATTER WHAT KIND OF CAMERA YOU HAVE.
  • 3.
  • 4.
    INTRODUCTION Since the 1990s,digital cameras have become more and more common, and also more affordable. Because of this, it's now easier than ever to get started with photography.
  • 5.
    The most importantfactor is the SKILL OF THE PHOTOGRAPHER
  • 6.
    WHAT CAN YOUDO WITH THE DIGITAL CAMERA? 1. CAPTURE MEMORIES 2. SHARE YOUR PHOTOS ONLINE 3. USE IT AS A SCANNER 4. CAPTURE DATA 5. START TAKING PHOTOS AS A HOBBY
  • 7.
  • 8.
    If you're shoppingfor a digital camera, the number of choices can be overwhelming. However, if you can narrow your search to a specific price range or type of camera, then it may make your choice much easier. In addition, many cameras have special features such as red-eye correction and anti-blink, so you may want to think about which features are important to you.
  • 9.
    TYPES OF DIGITALCAMERAS 1.DIGITAL SLR (DSLR) 2.POINT AND SHOOT 3.BRIDGE CAMERAS 4.CAMERA PHONES
  • 18.
  • 19.
    Digital cameras oftenhave special features designed to help you take better photos. Depending on what types of photos you want to take, some of these features can be very useful.
  • 21.
    RED-EYE CORRECTION Automatically removesred-eye, which is useful if you're taking photos with the flash on. If your camera doesn't have this feature, you can use image editing software to remove red-eye.
  • 22.
    SPORTS/ACTIVE CHILD MODE Allowsthe camera to focus more quickly to capture action shots. Some cameras also use motion detection to "freeze" a fast-moving subject, making your photos even sharper.
  • 23.
    ANTI-BLINK Automatically detects whether someonehas blinked, and displays a warning after the photo is taken so you know to retake it.
  • 24.
    SMILE DETECTION Uses facerecognition technology to take the photo right when your subject smiles.
  • 25.
    BLEMISH REDUCTION Automatically retouchesyour photos to reduce blemishes and wrinkles.
  • 26.
    ARTISTIC EFFECTS Allows youto add brush stroke effects, lens distortion, or other effects to give your photos a unique look.
  • 27.
  • 28.
    Most digital camerasstore the photos on a separate memory card, such as a Secure Digital, SDHC, microSD, or CompactFlash card. These cards usually have several gigabytes of storage space, and the exact number of photos that they can hold will vary depending on the resolution and file format of the photos.
  • 29.
    You may needto purchase a memory card separately, and it's important to choose a card that is COMPATIBLE WITH YOUR CAMERA
  • 30.
    Generally, you'll wantto use the memory card as temporary storage until you transfer your photos to your computer. You can then delete the photos from the memory card so you'll have plenty of space for your next photo shoot.
  • 32.
  • 33.
    • Cameras userechargeable lithium-ion battery packs, although some can use AA batteries. The battery pack is usually included with your camera, but you may want to buy an extra one in case the battery runs out while you're shooting. Make sure to buy a battery pack that is designed to work with your camera.
  • 35.
    GETTING TO KNOWYOUR CAMERA
  • 37.
  • 38.
    Every digital camerahas a sensor located behind the lens. The sensor is the part that actually captures the photo, much like the roll of film in a film camera. When you take a photo, the sensor is exposed to light for a fraction of a second, or sometimes longer. The total amount of light that is captured is called the SENSOR
  • 39.
  • 40.
    Your camera's LCDscreen has a focus indicator, which is a box that shows what your camera is focusing on. To prevent focusing problems, you'll need to keep an eye on the focusing indicator whenever you take a photo.
  • 42.
  • 43.
    Most digital camerashave a two-stage shutter button which means that it can either be pressed halfway down or all the way down. When you press it halfway down, your camera will lock in the focus and exposure settings.
  • 45.
  • 46.
    Flash: Most camerashave a built-in flash to help you take photos in low- light situations. If the flash is set to Auto, then your camera will only use it when it needs to. Timer: If you're taking a group photo, you may not always have an extra person to take the photo. By setting the timer and placing the camera on a table or tripod, you'll have time to join your friends in the photo.
  • 47.
    Macro Mode: Thisis a setting that you can use to take close up shots. It allows the camera to focus on objects that are only a few inches away. Exposure Compensation: If your photos are coming out too dark or too light, you can use this setting to adjust the exposure.
  • 48.
    Zoom: If yourcamera has a zoom lens, then you can control the optical zoom using buttons or a dial (depending on the camera). On many cameras, you can zoom in even further by using the digital zoom.
  • 49.
  • 50.
    The exposure isactually controlled by three settings: Shutter speed Aperture ISO
  • 51.
  • 52.
    The shutter speedis the amount of time that the shutter stays open. A slower shutter speed (such as 1/4 second) allows the camera to gather more light, and a faster shutter speed (such as 1/2000 second) allows you to "freeze" the action and avoid blurry photos.
  • 53.
  • 54.
  • 55.
  • 56.
    Camera lenses havea circular "window" that controls the amount of light that can reach the sensor (much like your eye's pupil). The size of this window is called the: Aperture F-number F-stop.
  • 57.
    The aperture alsohas an interesting effect on how the light is focused: With a larger aperture, the background will blur, while the subject stays in focus. This is known as Shallow Depth of Field.
  • 58.
  • 59.
  • 60.
  • 61.
    Digital cameras canadjust the sensitivity of the sensor, and this is known as the ISO number. For example, ISO 100 is a lower sensitivity, so it requires more light to create a good exposure. This often means that your camera will use a slower shutter speed and/or a wider aperture to gather more light. ISO 800 is a higher sensitivity, so it can create a good exposure with less light. However, higher ISO numbers also add more image noise, which may make your photo too grainy.
  • 62.
  • 63.
  • 64.
  • 65.
    In any photoyou take, you'll want your subject to be in focus. However, sometimes you may want the background to be out of focus, to give a soft, artistic appearance to the photo. This is known as shallow depth of field. With a shallow depth of field, you can still focus on your subject, but objects that are closer or farther away will be out of focus. If you are using a DSLR or bridge camera, you can get this effect by choosing a wide aperture.
  • 66.
  • 67.
  • 68.
  • 69.
    Many cameras includepresets called scene modes, which you can access from your camera's menus or from a dial at the top. Each scene mode is geared toward a specific situation (or scene). For example, the Sports scene mode will use a faster shutter speed, and it may also use motion detection to help reduce blur. On the other hand, the Portrait scene mode is designed to easily focus on your subject, and it also adjusts the color balance so that skin tones look as natural as possible.
  • 71.
  • 72.
    Lighting can comefrom: The Sun Your camera's flash A lamp Ceiling lights. The direction, brightness, and color of the lighting can have a dramatic effect on the appearance of your photos.
  • 73.
    A PHOTO TAKENFROM NATURAL LIGHT
  • 74.
  • 75.
    in any photo,the light will fall on the subject in a certain way, creating highlights (bright areas) and shadows (dark areas). The highlights and shadows create contrast, which can help to make the photo more interesting but can also create problems in some situations.
  • 76.
    A PHOTO WITHA GOOD BALANCEOF HIGHLIGHTS AND SHADOW
  • 77.
    USING SHADOWS FORARTISTC EFFECT
  • 78.
  • 79.
    REMINDER: Avoid having thesun behind your subject, as this can cause your subject to be too dark and the background too bright. Try to find an angle where the sun is to the side, so that your photo will have a mixture of shadows and highlights.
  • 80.
    A PHOTO WITHTHE SUN BEHIND THE SUBJECTS
  • 81.
    PHOTO WITH THESUN TO THE SIDE OF THE SUBJECT
  • 82.
  • 83.
    Photos look bestwhen taken just before the sun sets, or just after it rises. This is commonly known as the “golden hour“ Since the sun is lower in the sky, it creates longer, softer shadows. These shadows can add contrast to your photos while still giving them a soft, pleasant appearance. In addition, the sunlight has a more golden color, which adds warmth to your photos.
  • 84.
  • 85.
  • 86.
    This can createdark shadows and bright highlights, which can give your photos a harsher appearance. If you are taking photos of people, their eyes may be completely in shadow. Sometimes, you may be able to reduce these shadows by turning on your camera's flash, although this won't work if your subject is too far away. You can also ask your subject to face a different way to try to reduce the shadows.
  • 87.
  • 88.
  • 89.
    • The softestlight occurs when the sun is covered by clouds, or when it's just below the horizon. Since the light is soft, your camera will be able to pick up details that may have otherwise been covered by shadows. This can also be a very good time to photograph flowers and other colorful objects.
  • 90.
    EXAMPLE OF CLOUDYWEATHER PICTURE
  • 91.
  • 92.
    For indoor photography,your light sources can include lamps, ceiling lights, sunlight through a window, and your camera's flash. This gives you more flexibility, as you can move lights or turn them on or off to control the direction and brightness of the lighting.
  • 93.
  • 94.
    You may betempted to use the flash for all of your indoor photography, but pictures taken with flash often have dark shadows and bright highlights that can be harsh and unflattering. You may want to try turning off the flash and working with the other lights that you have. You can turn the flash back on if you find that your pictures aren't coming out.
  • 96.
  • 97.
    Is located offto the side, but still in front of the subject. There can also be a second light called a fill light, which is located on the other side of the subject to help reduce shadows. Sometimes the photographer will use other lights as well.
  • 99.
    Here are afew tips that you can use to take better indoor photos: • Avoid having a sunny window behind your subject. • Try turning off the ceiling lights and using one or two lamps as the light source.
  • 100.
    • Use atripod. • Try using the Party/indoor scene mode. • If you have to use the flash, move your subject away from the wall. • Experiment.
  • 101.
  • 102.
    In photography, youcan do all of these things simply by changing the position and angle of the camera. The way that everything is arranged in your photo is called the composition. By paying attention to the composition of your photos, you can improve and enhance them.
  • 104.
    TIPS FOR COMPOSINGYOUR PHOTOS
  • 105.
    Decide how muchof the background you want. Most of the time, you should avoid including too much unnecessary background, as it will cause your subject to look small and insignificant. If you zoom in or move closer to the subject, you can reduce the amount of background that is shown. On the other hand, if the background is interesting, you can zoom out to show more of it.
  • 106.
  • 107.
    GOOD AMOUNT OFBACKGROUND
  • 108.
    Avoid mergers. When abackground object is directly behind the subject, it may look like it is growing out of the subject's head. This is called a "merger," and it can ruin an otherwise great photo. Try to find an angle where the background is not distracting.
  • 110.
    Be careful notto crop out body parts. A common mistake is to crop out the tops of people's heads or their feet. To prevent this, include some extra space at the top and bottom of the photo. You can move farther away from the subject to give yourself more space to work with. Of course, if you're doing a close up, it's okay to have some cropping.
  • 112.
    Try changing thedistance from the subject. Sometimes a close-up works best, but other times you may want a wider-angle shot. You can experiment by moving closer and farther away from your subject, or by using your camera's zoom.
  • 115.
    Try different angles. Youcan try moving to the side or moving the camera higher or lower to get a different angle. This also lets you control which background objects are in the photo.
  • 117.
    Experiment. Professional photographers maytake hundreds of photos just to get one great shot. Although that may not be practical in most situations, you may still want to take a variety of shots so that you can pick the best one later.
  • 119.
  • 120.
    When you're takinga photo, you don't have to place your subject exactly in the center. In fact, you can often make a photo look more natural by placing your subject off center. You can do this by using a technique that photographers call the rule of thirds.
  • 121.
    Using the Lawof Thirds to compose the picture.
  • 122.
  • 123.
    Taking photos atnight can be a challenge, since your camera doesn't have as much light to work with. Common problems include photos that are blurry (due to a slow shutter speed), grainy (due to a higher ISO number), or dark (if your camera can't compensate for the low light). If your camera has a built-in flash, then that can add a lot more light, but it can also be harsh and unflattering.
  • 124.
  • 125.
    A photo withlots of image noise.
  • 126.
    TIPS TO GETBETTER RESULTS WHEN TAKING PICTURES AT NIGHT
  • 127.
    Use your camera'sNight Portrait scene mode. Using this scene mode may help your camera deal with low light.
  • 128.
    Hold the cameraas still as possible, or use a tripod. In low light, your camera will use a slower shutter speed, which means your photos may come out blurry. Keeping the camera still will help to keep your photos sharp.
  • 129.
    Use the flashif necessary. Your camera's flash may not be the most flattering light, but it's often better than nothing. Many cameras also have a flash that is designed to reduce red-eye, so check to see if this is an option on your camera. Also, keep in mind that the flash usually won't help if your subject is more than 15 feet away.
  • 130.
    Adjust the exposurecompensation. If your photos are still coming out too dark, you can adjust the exposure compensation to increase the brightness. Although this will make the photos brighter, it won't actually improve the quality, so it's not really a substitute for more lighting.
  • 132.
    Try increasing theISO setting. If all else fails, you can manually raise the ISO number in your camera's settings. This may reduce blurriness, but it will also make your photo more grainy.
  • 134.
  • 135.
    Capturing a fast-movingsubject can be one of the biggest challenges for a photographer. The key to capturing any kind of fast motion is to use a Faster Shutter Speed
  • 136.
    DSLRs and bridgecameras allow you to adjust the shutter speed manually. If you're using a point-and-shoot camera, you can select the Sports Scene Mode or turn on motion detection to help you capture action shots.
  • 137.
  • 138.
    Using a slowershutter speed to capture motion blur.
  • 139.
  • 140.
    TIPS TO CAPTUREACTION SHOTS
  • 141.
    Use the Sportsscene mode. This mode uses a fast shutter speed to help you capture the action.
  • 142.
    Turn on motiondetection. Many cameras have a motion detection setting that can help to reduce blurring by using a faster shutter speed when necessary.
  • 143.
    Don't wait forthe perfect shot. By that point, it may be too late. You may need to take lots of extra photos in order to capture the perfect shot.
  • 144.
    Anticipate your subject'sactions. Try to aim the camera a little bit ahead of the subject so they don't look like they're running out of the photo. Also, moving the camera with the subject can help to reduce motion blur (although it may blur the background).
  • 145.
    Not enough spacein front of the subjects
  • 146.
    Plenty of spacein front of the subjects.
  • 147.
    Press the shutterbutton halfway down ahead of time. You'll need to give your camera time to adjust the focus and exposure; otherwise, you may miss the perfect shot. You should press it halfway down a few seconds before taking the photo, so that your camera will be ready to capture the exact shot that you want.
  • 148.
    Use continuous shooting. Continuousshooting will take several photos every second as long as you are holding down the shutter button. This can help you capture the perfect shot, since you don't have to wait for the exact moment to take the photo. If you're using the Sports scene mode, continuous shooting may already be turned on. Otherwise, you can go into your camera's settings to turn it on.
  • 150.
  • 151.
  • 152.
    TIPS TO IMPROVELANDSCAPE PHOTOGRAPHY
  • 153.
    Use the Landscapescene mode. This mode automatically focuses on infinity, which means it focuses as far away as possible (and also keeps the depth of field as large as possible). This ensures that the background landscape will be in focus, as well as the foreground objects.
  • 154.
    Use a smalleraperture if possible. If you are using a DSLR or bridge camera, use a smaller aperture (such as f/16). This will increase the depth of field and ensure that the background and foreground are in focus. Keep the camera level. Landscapes usually look best when the camera is level. It will be easier to keep the camera straight if you are using a tripod.
  • 155.
    Try to findan interesting foreground object. Landscapes aren't just about the background. If you can include an interesting object in the foreground, it will add a sense of depth to the photo.
  • 156.
    Using flowers inthe foreground to add depth.
  • 157.
    Use the ruleof thirds. If the horizon is visible, try to place it near one of the grid lines, instead of in the middle of the photo.
  • 158.
    Use leading lines. Isthere a road, sidewalk, river, or stream that you can use in your landscape? These are known as "leading lines" because they help to lead the eye into the photograph.
  • 159.
  • 160.
    Sometimes, you maywant to take close-up shots of flowers, insects, food, or any kind of small object. This is known as Macrophotography.
  • 161.
    In macrophotography, theobject in the photograph is bigger than life size, so it can reveal details and textures that you might not normally see.
  • 162.
    One of thebiggest challenges with close-up shots is focusing. As you move the camera closer to an object, the depth of field becomes shallower. That means if the focus isn't exactly right, your image may be way out of focus.
  • 163.
    A close-up photoof a flower.
  • 164.
    A photo withvery shallow depth of field.
  • 165.
    TIPS TO GETCLOSE UP SHOTS
  • 166.
    Use the Close-upscene mode or Macro mode. These modes allow the camera to focus on objects that are only a few inches away. Also, the Close-up scene mode will always focus on the center of the image, which makes focusing easier.
  • 168.
    Watch the auto-focus. Close-upshots have a shallower depth of field, so it's very important to make sure that the camera is focusing on the object and not the background. If you're using the Close-up scene mode, you can do this by keeping the object in the center of the frame.
  • 170.
    Once the camerafocuses, don't move it. If you move your camera after it focuses, your photo may come out blurry. If you want to move the camera, you'll have to re-focus it and then take the photo. Avoid using flash. Your camera's flash won't work on close- up objects, so it's best to turn it off.
  • 171.
    Try shooting incloudy weather. If you really want to bring out details in your outdoor close-up shots, you might want to try shooting in cloudy weather. Bright sunlight can create dark shadows that block out many of the details, but sunlight that is filtered by clouds is much softer.