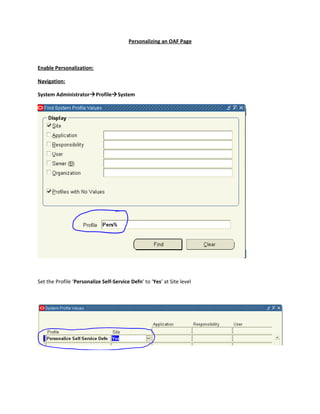
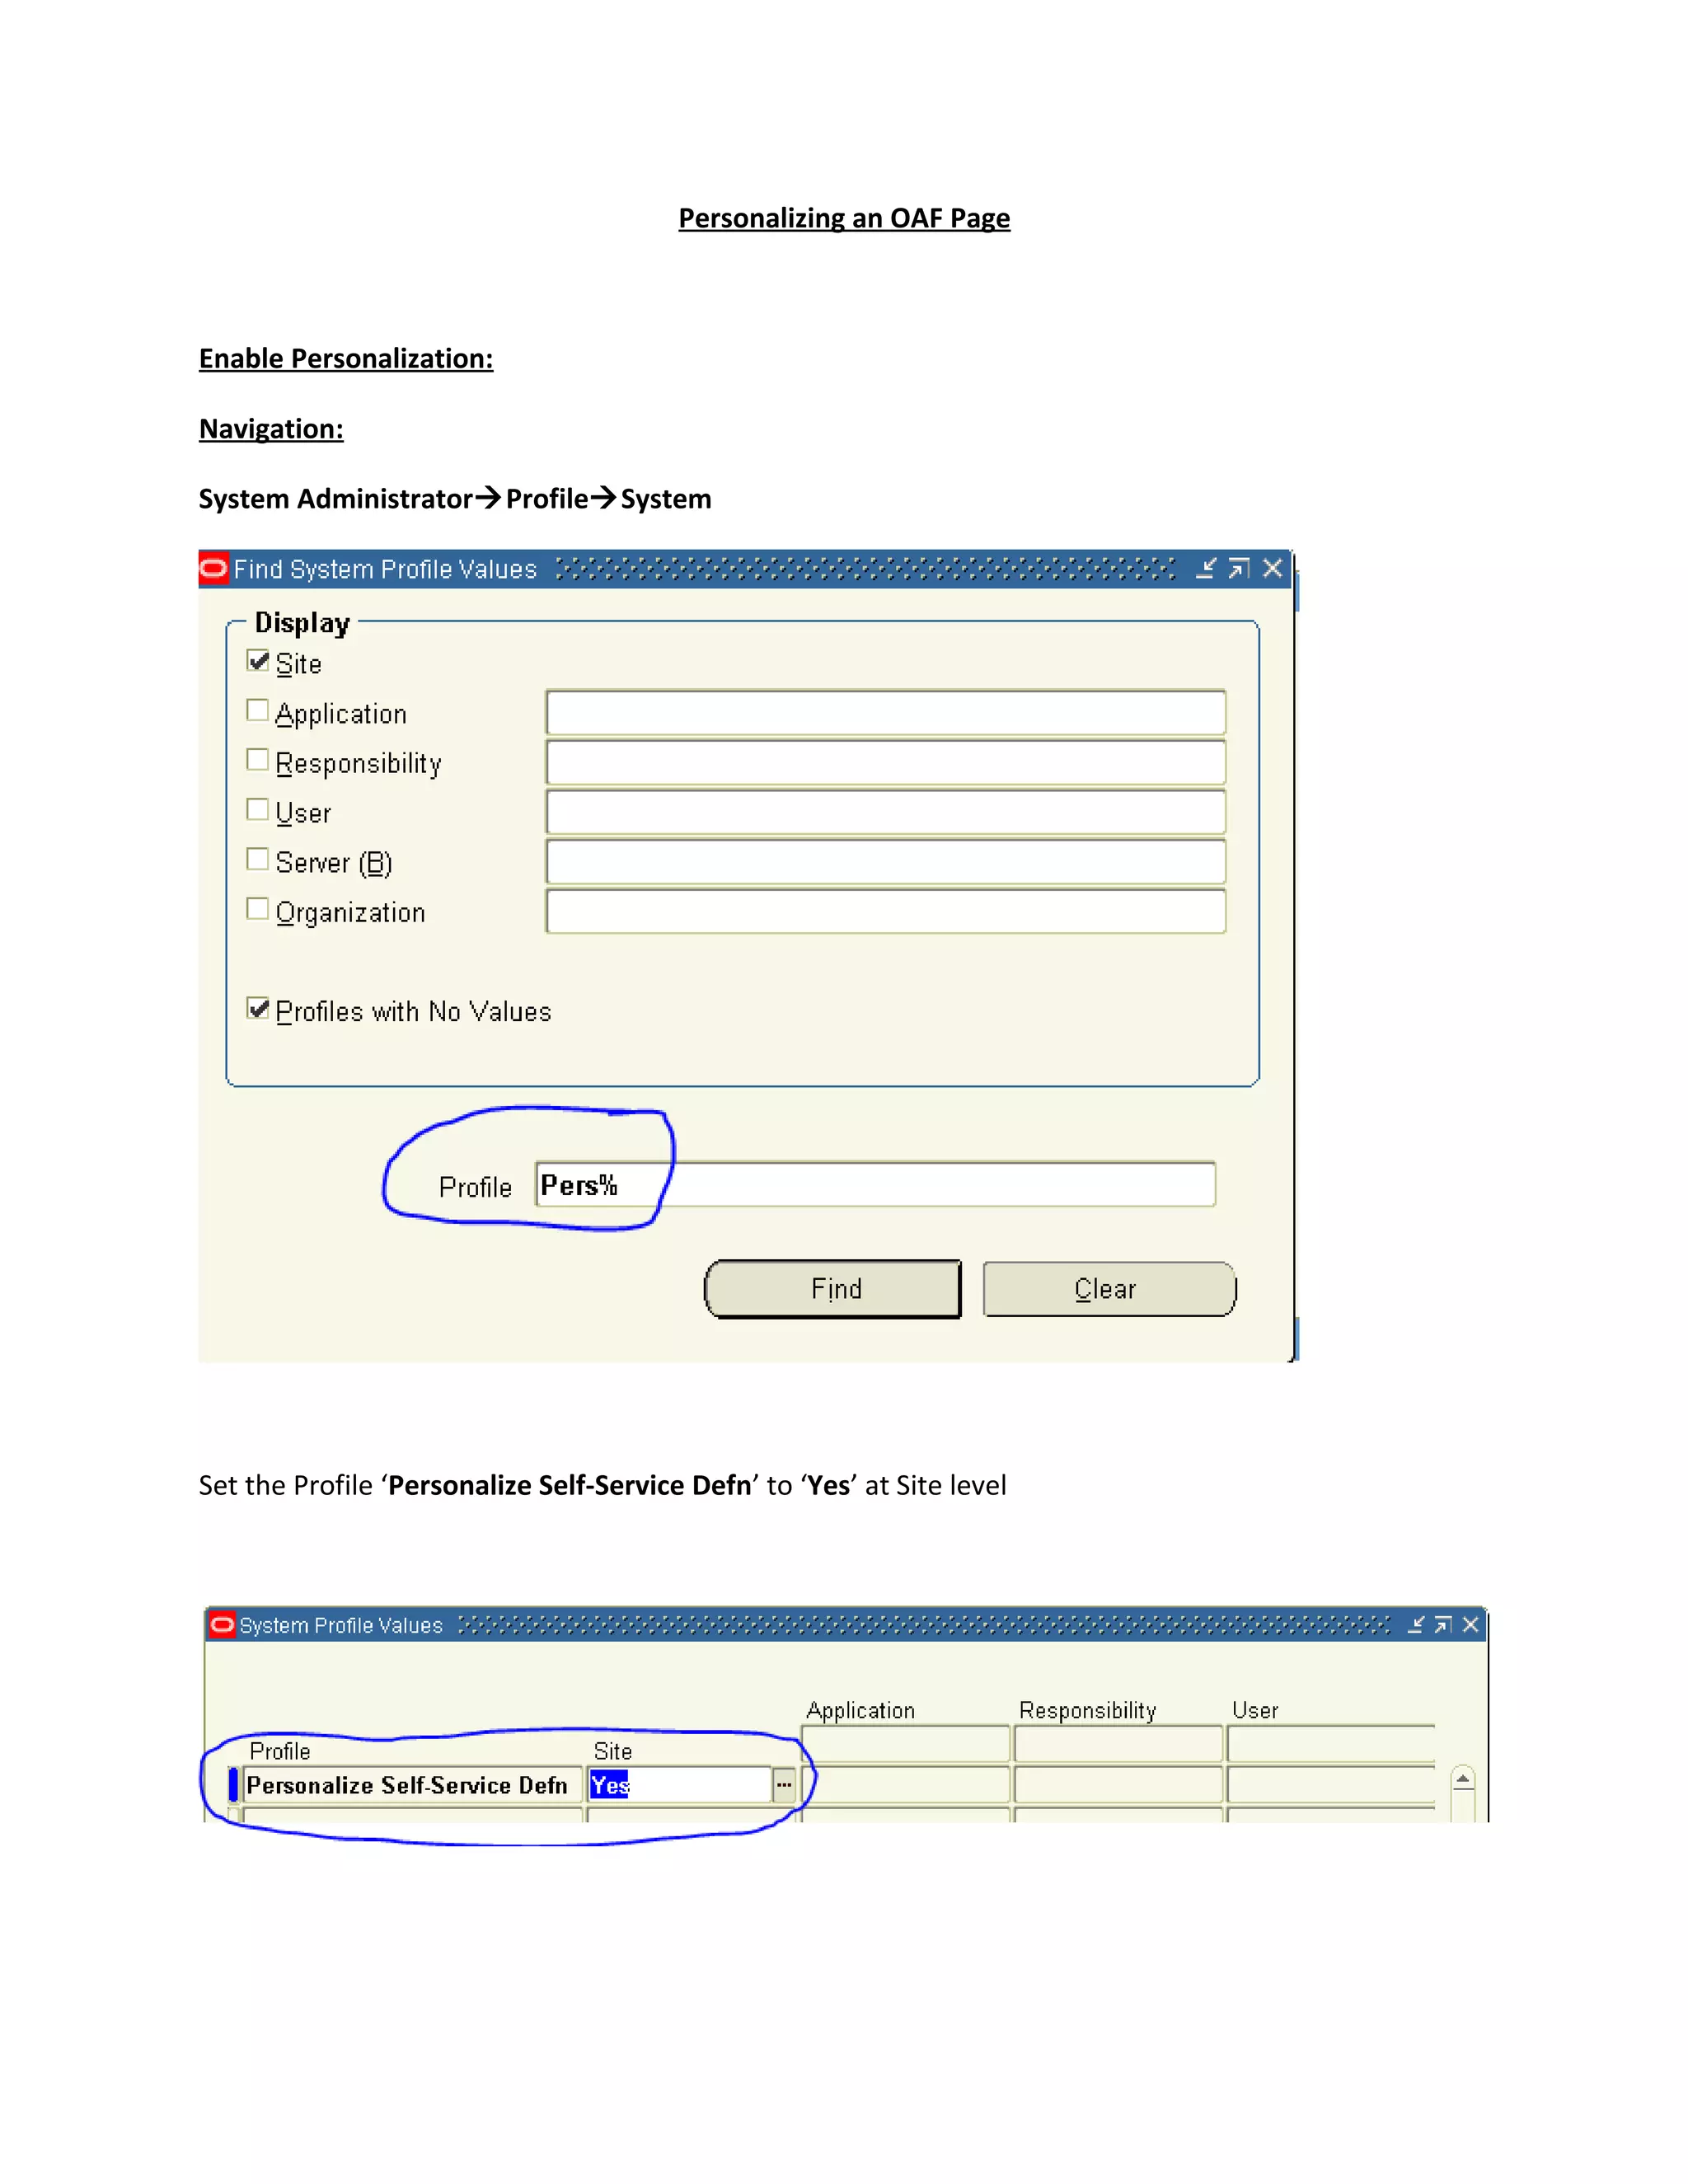
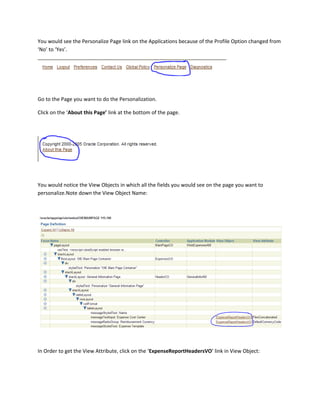
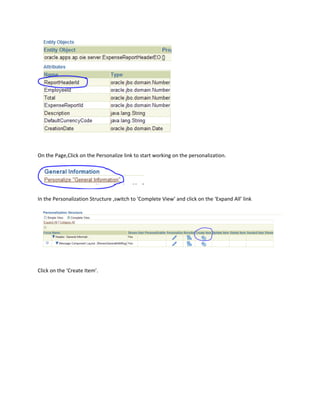
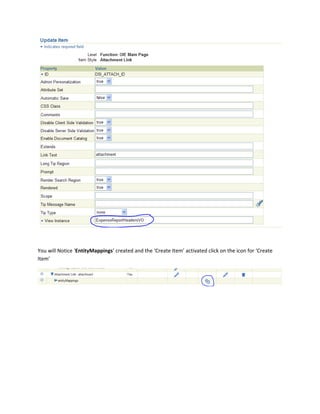
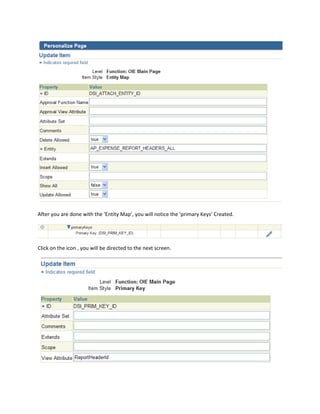
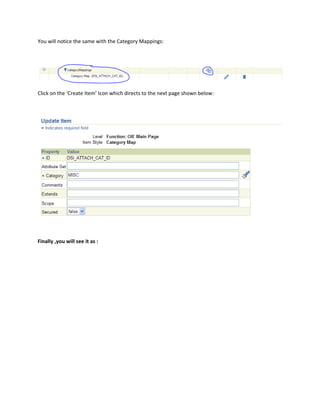
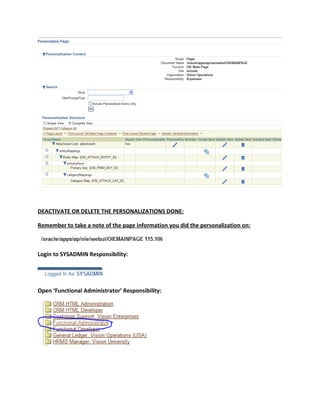
Personalizing an OAF Page


Enable Personalization:

Navigation:

System AdministratorProfileSystem


Set the Profile ‘Personalize Self-Service Defn’ to ‘Yes’ at Site level
You would see the Personalize Page link on the Applications because of the Profile Option changed from
‘No’ to ‘Yes’.


Go to the Page you want to do the Personalization.

Click on the ‘About this Page’ link at the bottom of the page.


You would notice the View Objects in which all the fields you would see on the page you want to
personalize.Note down the View Object Name:


In Order to get the View Attribute, click on the ‘ExpenseReportHeadersVO’ link in View Object:
On the Page,Click on the Personalize link to start working on the personalization.


In the Personalization Structure ,switch to ‘Complete View’ and click on the ‘Expand All’ link


Click on the ‘Create Item’.
You will Notice ‘EntityMappings’ created and the ‘Create Item’ activated click on the icon for ‘Create
Item’
After you are done with the ‘Entity Map’, you will notice the ‘primary Keys’ Created.


Click on the icon , you will be directed to the next screen.
You will notice the same with the Category Mappings:


Click on the ‘Create Item’ Icon which directs to the next page shown below:


Finally ,you will see it as :
DEACTIVATE OR DELETE THE PERSONALIZATIONS DONE:

Remember to take a note of the page information you did the personalization on:


Login to SYSADMIN Responsibility:


Open ‘Functional Administrator’ Responsibility:
Click on the ‘Personalization’ tab:


Now enter the document path you took a not of in the document path field and check the
personalization.


Click on the Manage Personalizations:


It shows you the personalizations you did and now you have the option to either delete or deactivate it
completely.

Expense personalization

  • 1.
    Personalizing an OAFPage Enable Personalization: Navigation: System AdministratorProfileSystem Set the Profile ‘Personalize Self-Service Defn’ to ‘Yes’ at Site level
  • 2.
    You would seethe Personalize Page link on the Applications because of the Profile Option changed from ‘No’ to ‘Yes’. Go to the Page you want to do the Personalization. Click on the ‘About this Page’ link at the bottom of the page. You would notice the View Objects in which all the fields you would see on the page you want to personalize.Note down the View Object Name: In Order to get the View Attribute, click on the ‘ExpenseReportHeadersVO’ link in View Object:
  • 3.
    On the Page,Clickon the Personalize link to start working on the personalization. In the Personalization Structure ,switch to ‘Complete View’ and click on the ‘Expand All’ link Click on the ‘Create Item’.
  • 4.
    You will Notice‘EntityMappings’ created and the ‘Create Item’ activated click on the icon for ‘Create Item’
  • 5.
    After you aredone with the ‘Entity Map’, you will notice the ‘primary Keys’ Created. Click on the icon , you will be directed to the next screen.
  • 6.
    You will noticethe same with the Category Mappings: Click on the ‘Create Item’ Icon which directs to the next page shown below: Finally ,you will see it as :
  • 7.
    DEACTIVATE OR DELETETHE PERSONALIZATIONS DONE: Remember to take a note of the page information you did the personalization on: Login to SYSADMIN Responsibility: Open ‘Functional Administrator’ Responsibility:
  • 8.
    Click on the‘Personalization’ tab: Now enter the document path you took a not of in the document path field and check the personalization. Click on the Manage Personalizations: It shows you the personalizations you did and now you have the option to either delete or deactivate it completely.