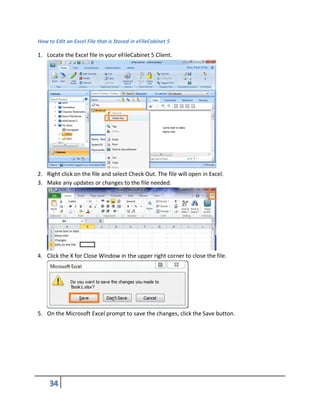
Downloaded 15 times
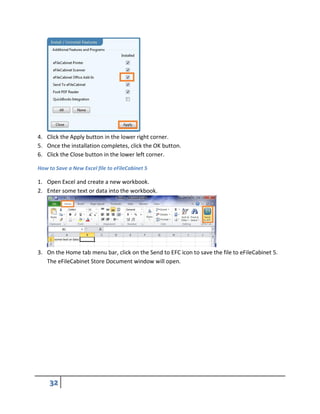
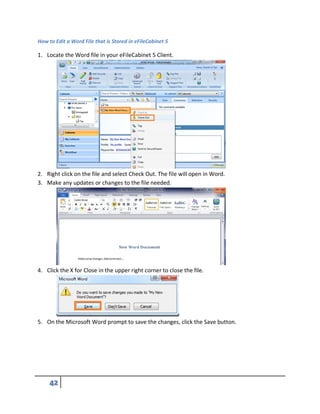
![[Type text]
eFileCabinet
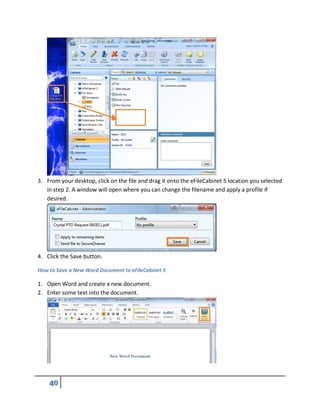
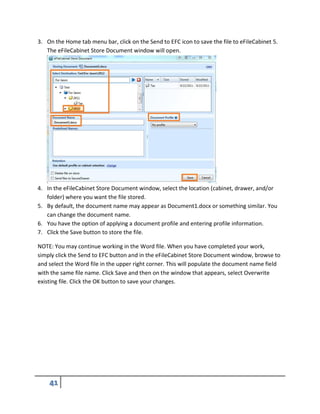
5 Desktop
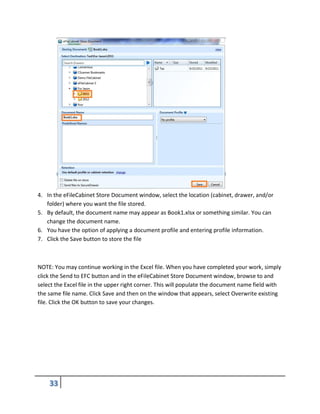
Basic Getting Started
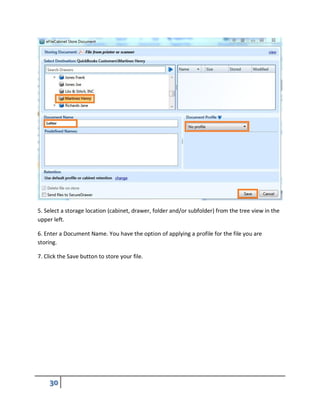
Training Guide
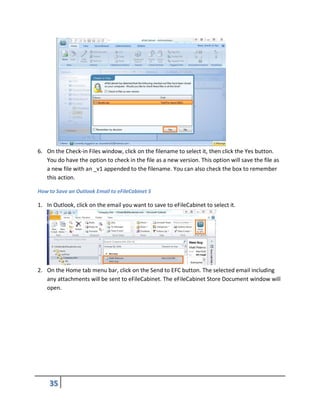
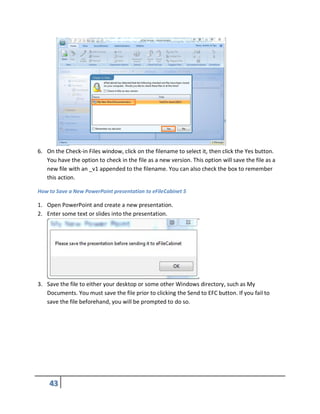
5.1.190](https://image.slidesharecdn.com/efilecabinet5desktopbasicgettingstartedguide-150916202522-lva1-app6892/85/eFileCabinet-5-Desktop-Basic-Getting-Started-Guide-1-320.jpg)
![[Type text]
eFileCabinet
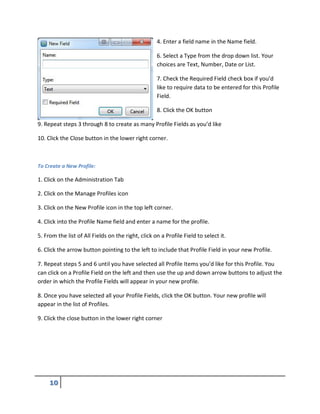
5 Desktop
Basic Getting Started
Training Guide
5.1.190](https://image.slidesharecdn.com/efilecabinet5desktopbasicgettingstartedguide-150916202522-lva1-app6892/75/eFileCabinet-5-Desktop-Basic-Getting-Started-Guide-1-2048.jpg)


The eFileCabinet 5 Desktop Getting Started Training Guide provides comprehensive steps for capturing, managing, and protecting files and data using the eFileCabinet software. Users are guided on how to set up groups, users, profiles, libraries, cabinets, and drawers, as well as methods for document capture including scanning, dragging and dropping, printing, and integration with other software. Additionally, the guide includes instructions for utilizing built-in security features and customizing the software for specific needs.


