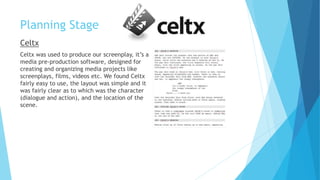
Evaluation Question 4
How did you use new media technologies in the construction and
research, planning and evaluation stages?
Research Stage
Google
For our research, we mainly used Google to
research into different film genres and to watch
other short films. I used Google as a search
engine during my research stage. I used it to
research into other short films that had been
created, also to educate myself about different
conventions and which genre film I would like to
make. Google was helpful to us as you can
access everything, however, websites such as
Wikipedia and SlideShare
can’t always be
trustworthy as they are
made by students themselves.
Research Stage
YouTube
YouTube was useful when researching into genres
as it allows us to view different genres and also,
we could watch different editing techniques that
we may have wanted to use in our film. This scene
uses jump cuts and slow motion, encouraging us to use jump
cuts in our own film.
YouTube also allowed us to listen to radio trailers such as
Star Wars and Alien. We also had access to watch film
trailers and gave us an idea of what genre film we wanted
to create.
Research Stage
BBFC
Upon researching the certificate
for our film, we used the BBFC
website as it’s the British Board of Film Classification. We used this website as it
gives the official guidelines for the age ratings of films, giving us reliable
information on what age rating our film would be.
We decided on an age rating of 15 for our film as the storyline fits within the
guidelines of this age rating.
The only problem with the research stage is that you need internet access to gain
access to the websites.
Planning Stage
Blogger
We consistently use Blogger to post and share our ideas about the film
we wanted to create. Blogger allows us to access others posts all from
the same place. The only problem I had with Blogger is the layout, if
you inserted a photo onto a post, it would handle the image very poorly
and change the entire layout.
It also wasn’t possible to access without internet connection, making it
impossible to read/edit/post when the internet was down.
Planning Stage
Premier Pro
We used the Canon LEGRIA HF G25 to film some practice shots (the journey
exercise), this gave us an idea of how the camera works. To edit the sequence
together, we used Premiere Pro to create our journey. Premier Pro was easy to
use for beginners, encouraging to use it in our construction stage. Premiere Pro
was difficult to use at first, but when we’d learnt all of the tools it became
easier to add effects, sound, music etc. After completing our journey exercise,
we had to create an elliptical journey, allowing us to practice our editing
techniques.
Planning Stage
Celtx
Celtx was used to produce our screenplay, it’s a
media pre-production software, designed for
creating and organizing media projects like
screenplays, films, videos etc. We found Celtx
fairly easy to use, the layout was simple and it
was fairly clear as to which was the character
(dialogue and action), and the location of the
scene.
Planning Stage
Google Forms/Surveys
We used Google Forms to create a questionnaire during pre-production, mid-
production, and post-production.
For the pre-production questionnaire, we gave a brief synopsis of our film and
they had to answer a variety of questions based on what they thought the age
rating would be and whether they liked the plotline.
For our mid-production questionnaire, we had a link to the draft of our film and
asked the public what they would change. The majority said that our storyline
was vague so we added more voiceovers in hope that it would make more sense.
The good thing about Google Forms is that it automatically puts the feedback
into charts, making it easy to understand.
Planning Stage
Location Photos
We used location photos to visualise what
we were planning to film. To create a thriller genre,
we had to be certain that the location would create
realism within our film and certify that our chosen
locations would convey the genre. To take location
photos, I used my iPhone. Some advantages of this is
that I always have my phone on me and it’s easy to
carry, however, the quality wasn’t as good as the canon camera.
Construction Stage
Camera and Tripod
We used the Canon LEGRIA HF G25 camera to film our
short film, this camera was easy to use and provided
us with high quality clips. By using it with the tripod,
it prevented any shaking or unevenness.
We found that the camera had different functions such
as auto focus, this was useful as it saved us time when
wanting to focus on a certain object. The only problem with
the camera was the short batter life, meaning that we had
to take a spare battery with us on the day of filming.
Construction Stage
H1 Zoom Recorder
We used the voice recorder to record the ‘diary
entries’ in our film, and we also used it to record
our radio trailer. We needed a voice over, and by
using this voice recorder it blocked out any
muffling or background noises. It’s also really
easy to upload onto the computer and add it onto
our film.
Construction Stage
Adobe Photoshop CC
During the construction stage, we used Adobe
Photoshop CC to produce the film poster. Personally,
I found Photoshop hard to use as you need to learn what all of the tools are for
before you can create anything.
However, after having a lesson on Photoshop, I found it easier to use and could
make my own, individual poster. Although, we decided on using Owen’s poster
design as the final product.
Evaluation Stage
Prezi
I used Prezi during the production, construction, and evaluation stages. Prezi is a
free website where you can create your own PowerPoint, but also access public
ones that others had created. Prezi allows you to
be more creative with your power points and
add visual effects.
Using Prezi during the evaluation stage has
helped me structure my answers and let me add
photos to describe my answers.
The only problem I had with Prezi is that it can
be difficult to learn how to create a power point.
Evaluation Stage
Slide Share
I used slide share to present my power points, the website allows you to share
your own power points, but also lets you view other peoples. This has helped me
during both the research and evaluation stage
The advantage of using slide share is that it let’s me easily upload my power
point to Blogger, which would be difficult to
do on any other software.
However, when using this for my research, I
had to double check the information I was
reading as anyone can contribute to the
website.

Evaluation question 4

  • 1.
    Evaluation Question 4 Howdid you use new media technologies in the construction and research, planning and evaluation stages?
  • 2.
    Research Stage Google For ourresearch, we mainly used Google to research into different film genres and to watch other short films. I used Google as a search engine during my research stage. I used it to research into other short films that had been created, also to educate myself about different conventions and which genre film I would like to make. Google was helpful to us as you can access everything, however, websites such as Wikipedia and SlideShare can’t always be trustworthy as they are made by students themselves.
  • 3.
    Research Stage YouTube YouTube wasuseful when researching into genres as it allows us to view different genres and also, we could watch different editing techniques that we may have wanted to use in our film. This scene uses jump cuts and slow motion, encouraging us to use jump cuts in our own film. YouTube also allowed us to listen to radio trailers such as Star Wars and Alien. We also had access to watch film trailers and gave us an idea of what genre film we wanted to create.
  • 4.
    Research Stage BBFC Upon researchingthe certificate for our film, we used the BBFC website as it’s the British Board of Film Classification. We used this website as it gives the official guidelines for the age ratings of films, giving us reliable information on what age rating our film would be. We decided on an age rating of 15 for our film as the storyline fits within the guidelines of this age rating. The only problem with the research stage is that you need internet access to gain access to the websites.
  • 5.
    Planning Stage Blogger We consistentlyuse Blogger to post and share our ideas about the film we wanted to create. Blogger allows us to access others posts all from the same place. The only problem I had with Blogger is the layout, if you inserted a photo onto a post, it would handle the image very poorly and change the entire layout. It also wasn’t possible to access without internet connection, making it impossible to read/edit/post when the internet was down.
  • 6.
    Planning Stage Premier Pro Weused the Canon LEGRIA HF G25 to film some practice shots (the journey exercise), this gave us an idea of how the camera works. To edit the sequence together, we used Premiere Pro to create our journey. Premier Pro was easy to use for beginners, encouraging to use it in our construction stage. Premiere Pro was difficult to use at first, but when we’d learnt all of the tools it became easier to add effects, sound, music etc. After completing our journey exercise, we had to create an elliptical journey, allowing us to practice our editing techniques.
  • 7.
    Planning Stage Celtx Celtx wasused to produce our screenplay, it’s a media pre-production software, designed for creating and organizing media projects like screenplays, films, videos etc. We found Celtx fairly easy to use, the layout was simple and it was fairly clear as to which was the character (dialogue and action), and the location of the scene.
  • 8.
    Planning Stage Google Forms/Surveys Weused Google Forms to create a questionnaire during pre-production, mid- production, and post-production. For the pre-production questionnaire, we gave a brief synopsis of our film and they had to answer a variety of questions based on what they thought the age rating would be and whether they liked the plotline. For our mid-production questionnaire, we had a link to the draft of our film and asked the public what they would change. The majority said that our storyline was vague so we added more voiceovers in hope that it would make more sense. The good thing about Google Forms is that it automatically puts the feedback into charts, making it easy to understand.
  • 9.
    Planning Stage Location Photos Weused location photos to visualise what we were planning to film. To create a thriller genre, we had to be certain that the location would create realism within our film and certify that our chosen locations would convey the genre. To take location photos, I used my iPhone. Some advantages of this is that I always have my phone on me and it’s easy to carry, however, the quality wasn’t as good as the canon camera.
  • 10.
    Construction Stage Camera andTripod We used the Canon LEGRIA HF G25 camera to film our short film, this camera was easy to use and provided us with high quality clips. By using it with the tripod, it prevented any shaking or unevenness. We found that the camera had different functions such as auto focus, this was useful as it saved us time when wanting to focus on a certain object. The only problem with the camera was the short batter life, meaning that we had to take a spare battery with us on the day of filming.
  • 11.
    Construction Stage H1 ZoomRecorder We used the voice recorder to record the ‘diary entries’ in our film, and we also used it to record our radio trailer. We needed a voice over, and by using this voice recorder it blocked out any muffling or background noises. It’s also really easy to upload onto the computer and add it onto our film.
  • 12.
    Construction Stage Adobe PhotoshopCC During the construction stage, we used Adobe Photoshop CC to produce the film poster. Personally, I found Photoshop hard to use as you need to learn what all of the tools are for before you can create anything. However, after having a lesson on Photoshop, I found it easier to use and could make my own, individual poster. Although, we decided on using Owen’s poster design as the final product.
  • 13.
    Evaluation Stage Prezi I usedPrezi during the production, construction, and evaluation stages. Prezi is a free website where you can create your own PowerPoint, but also access public ones that others had created. Prezi allows you to be more creative with your power points and add visual effects. Using Prezi during the evaluation stage has helped me structure my answers and let me add photos to describe my answers. The only problem I had with Prezi is that it can be difficult to learn how to create a power point.
  • 14.
    Evaluation Stage Slide Share Iused slide share to present my power points, the website allows you to share your own power points, but also lets you view other peoples. This has helped me during both the research and evaluation stage The advantage of using slide share is that it let’s me easily upload my power point to Blogger, which would be difficult to do on any other software. However, when using this for my research, I had to double check the information I was reading as anyone can contribute to the website.