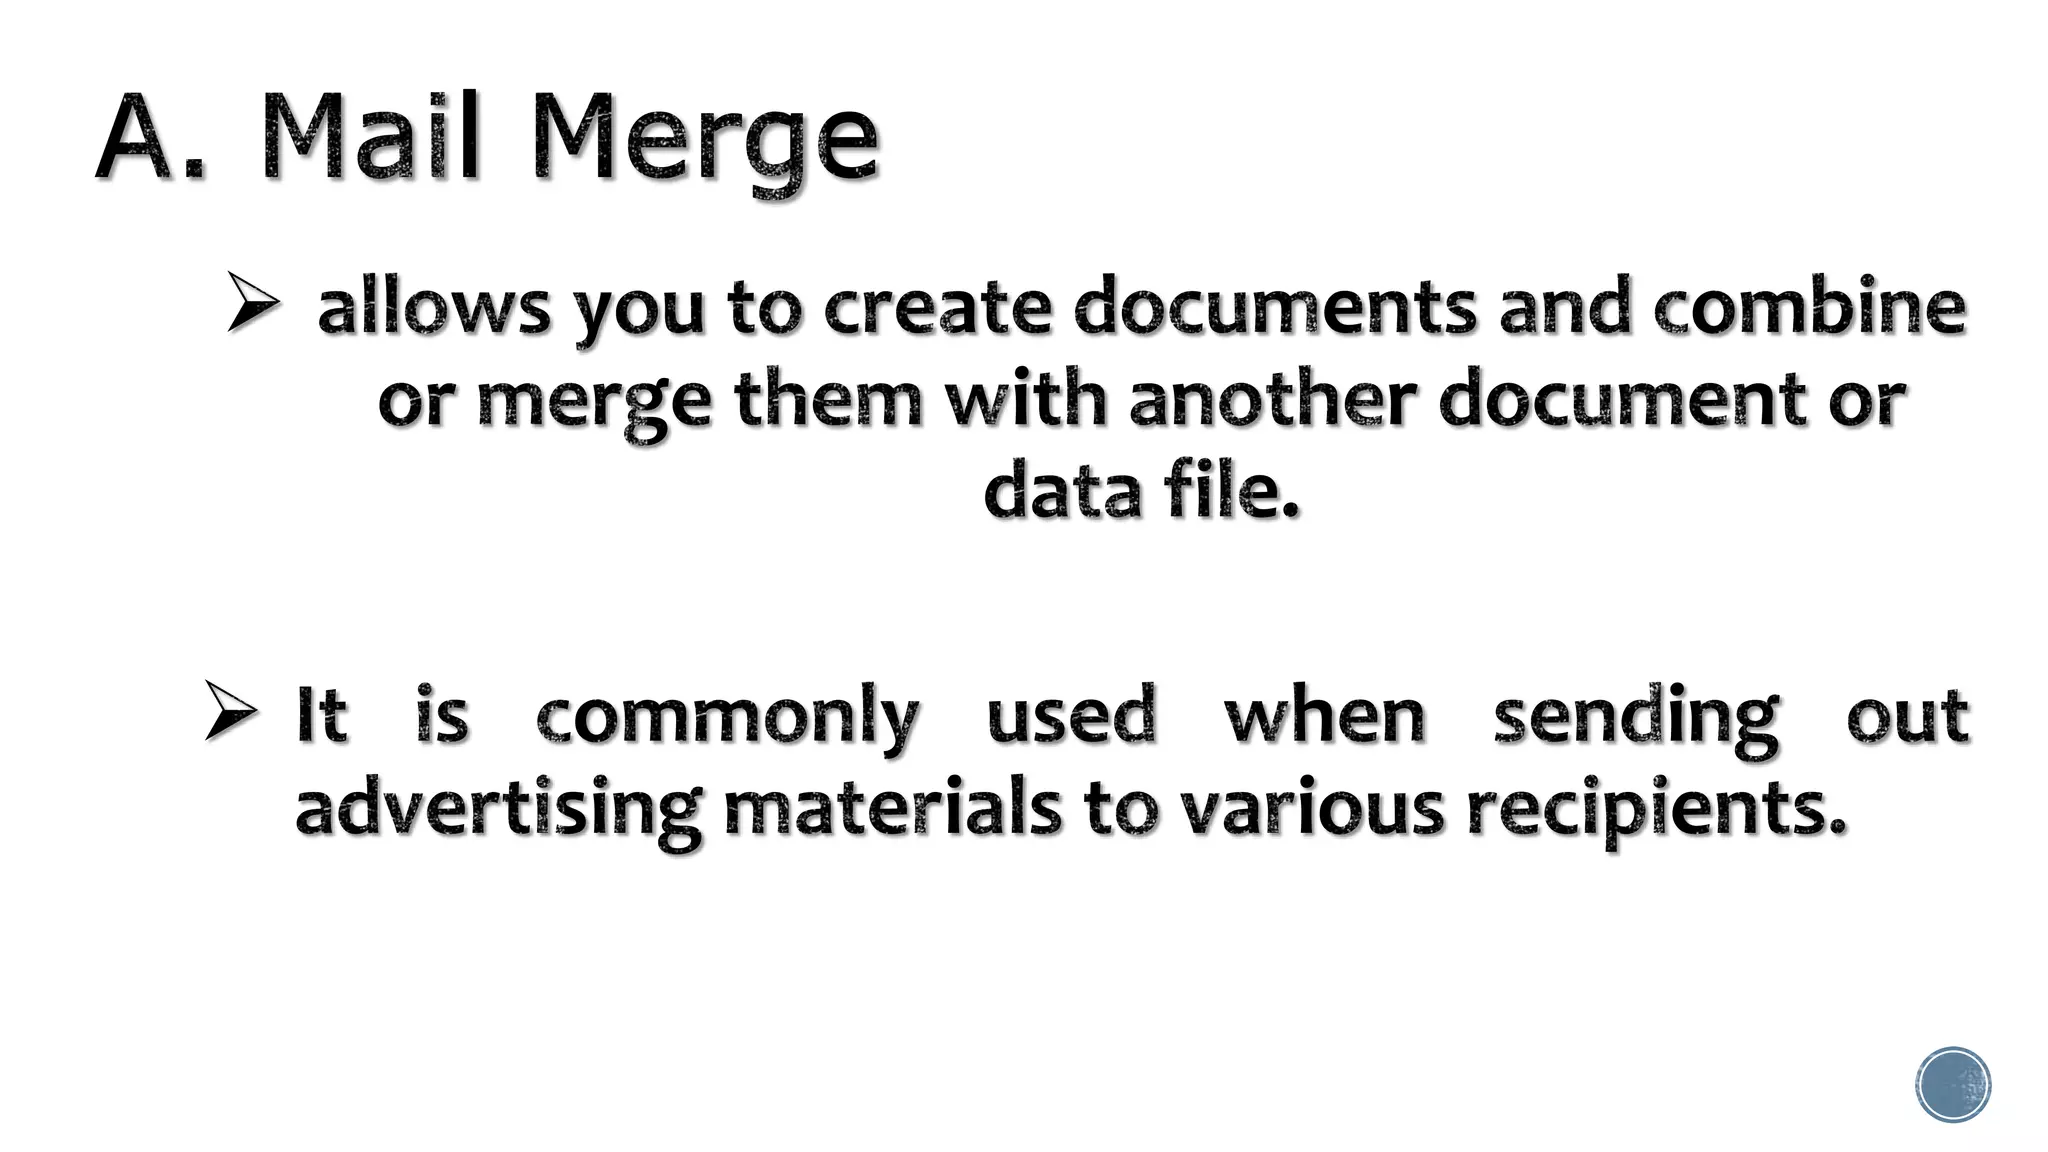
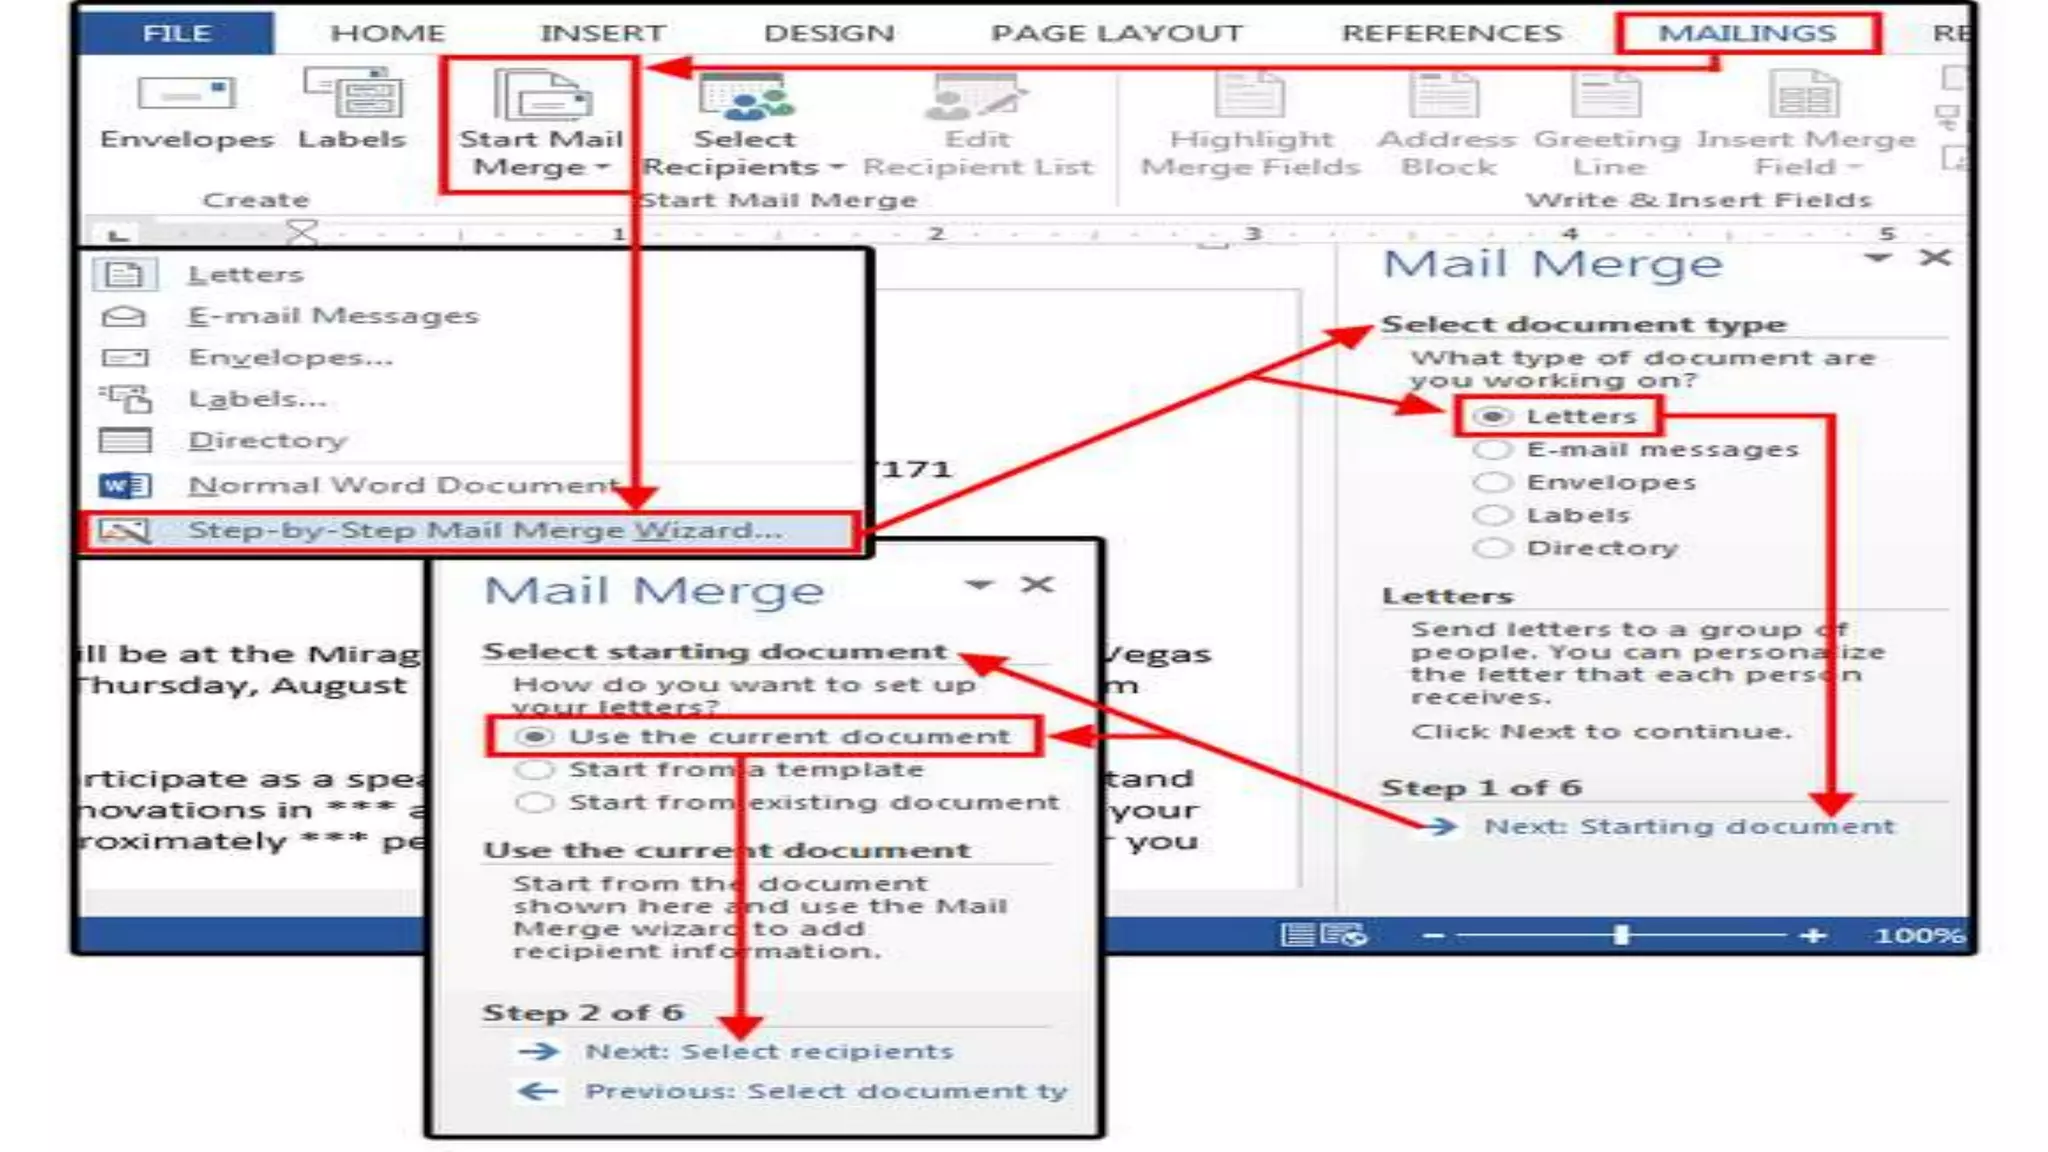
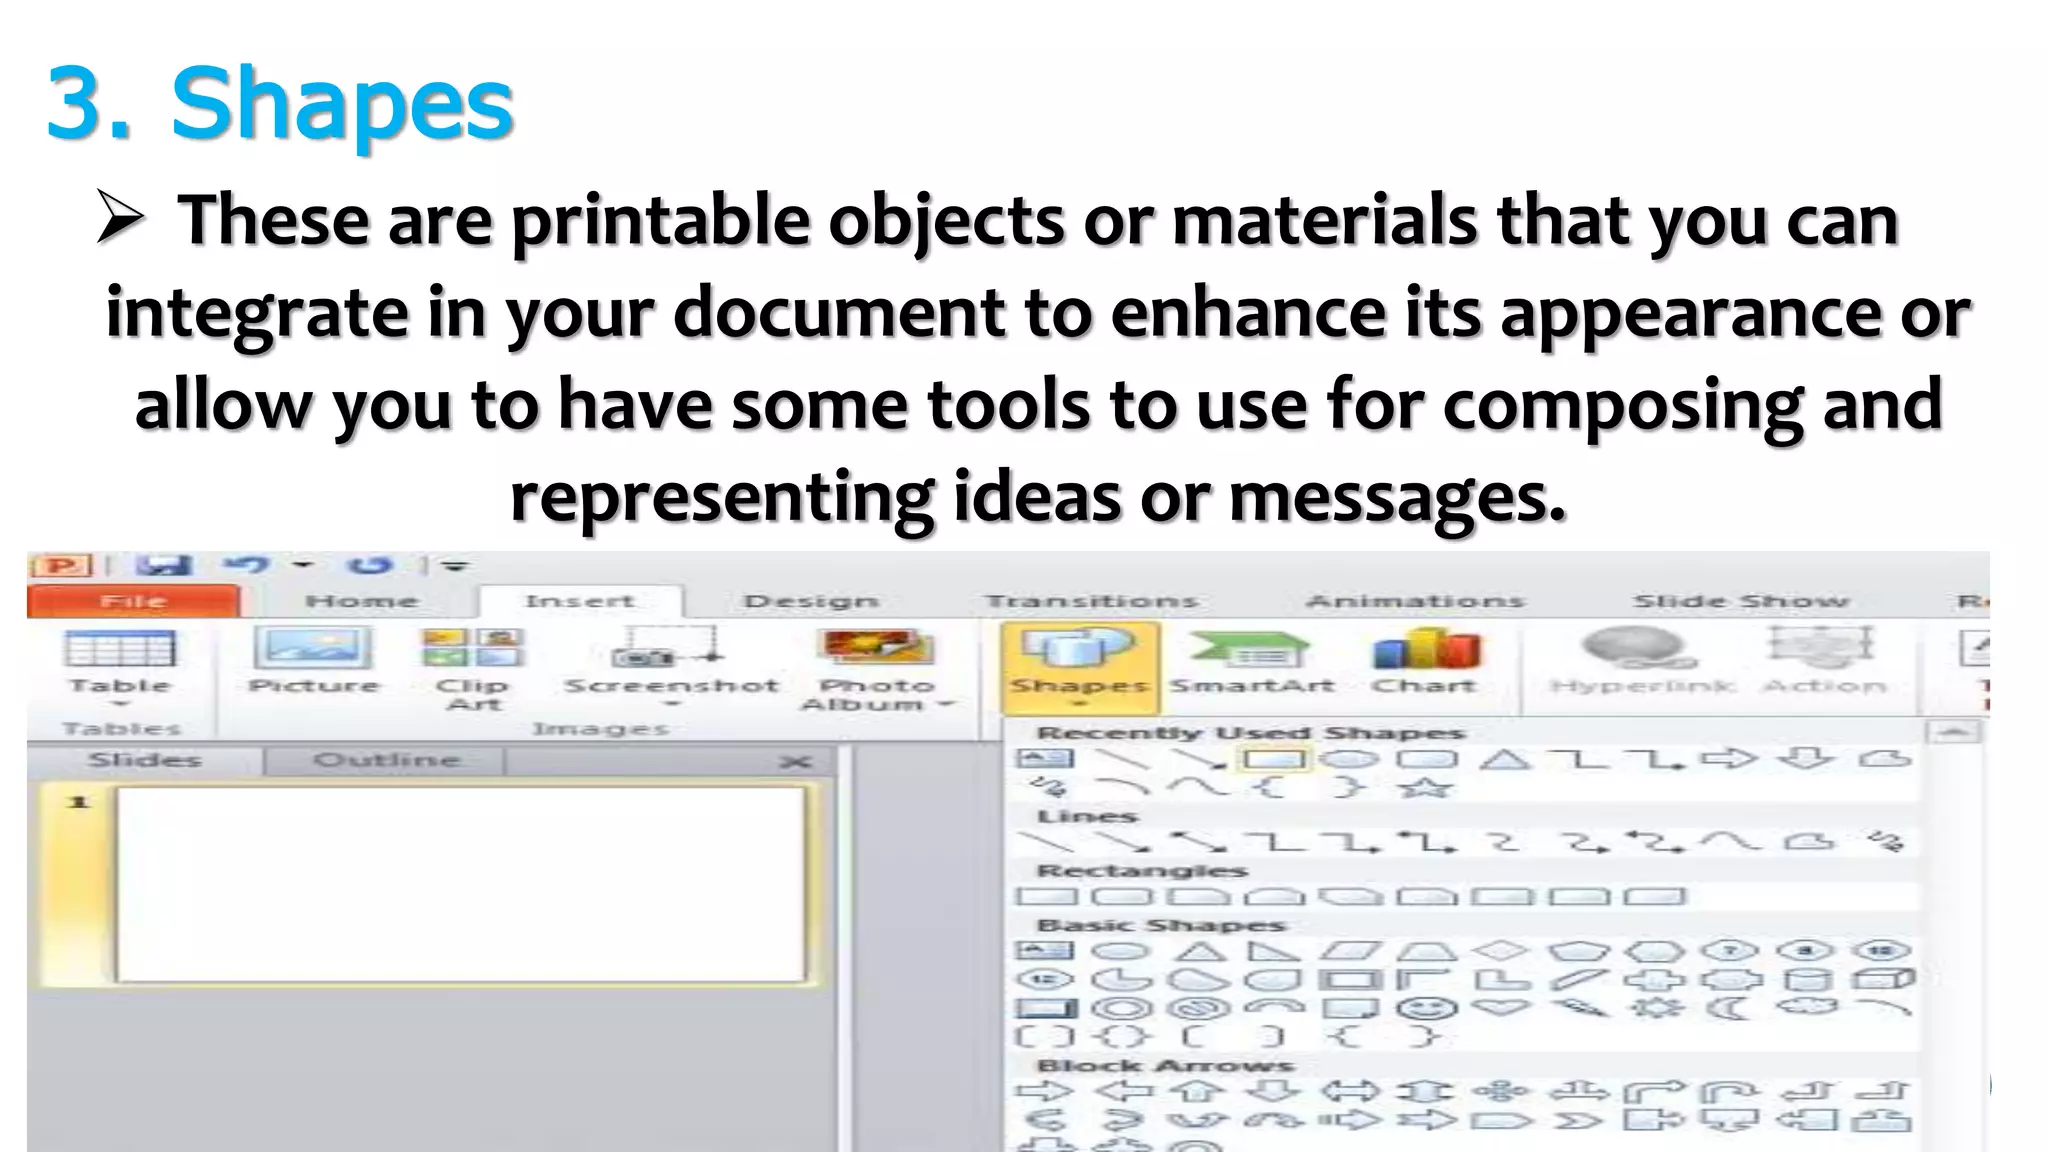
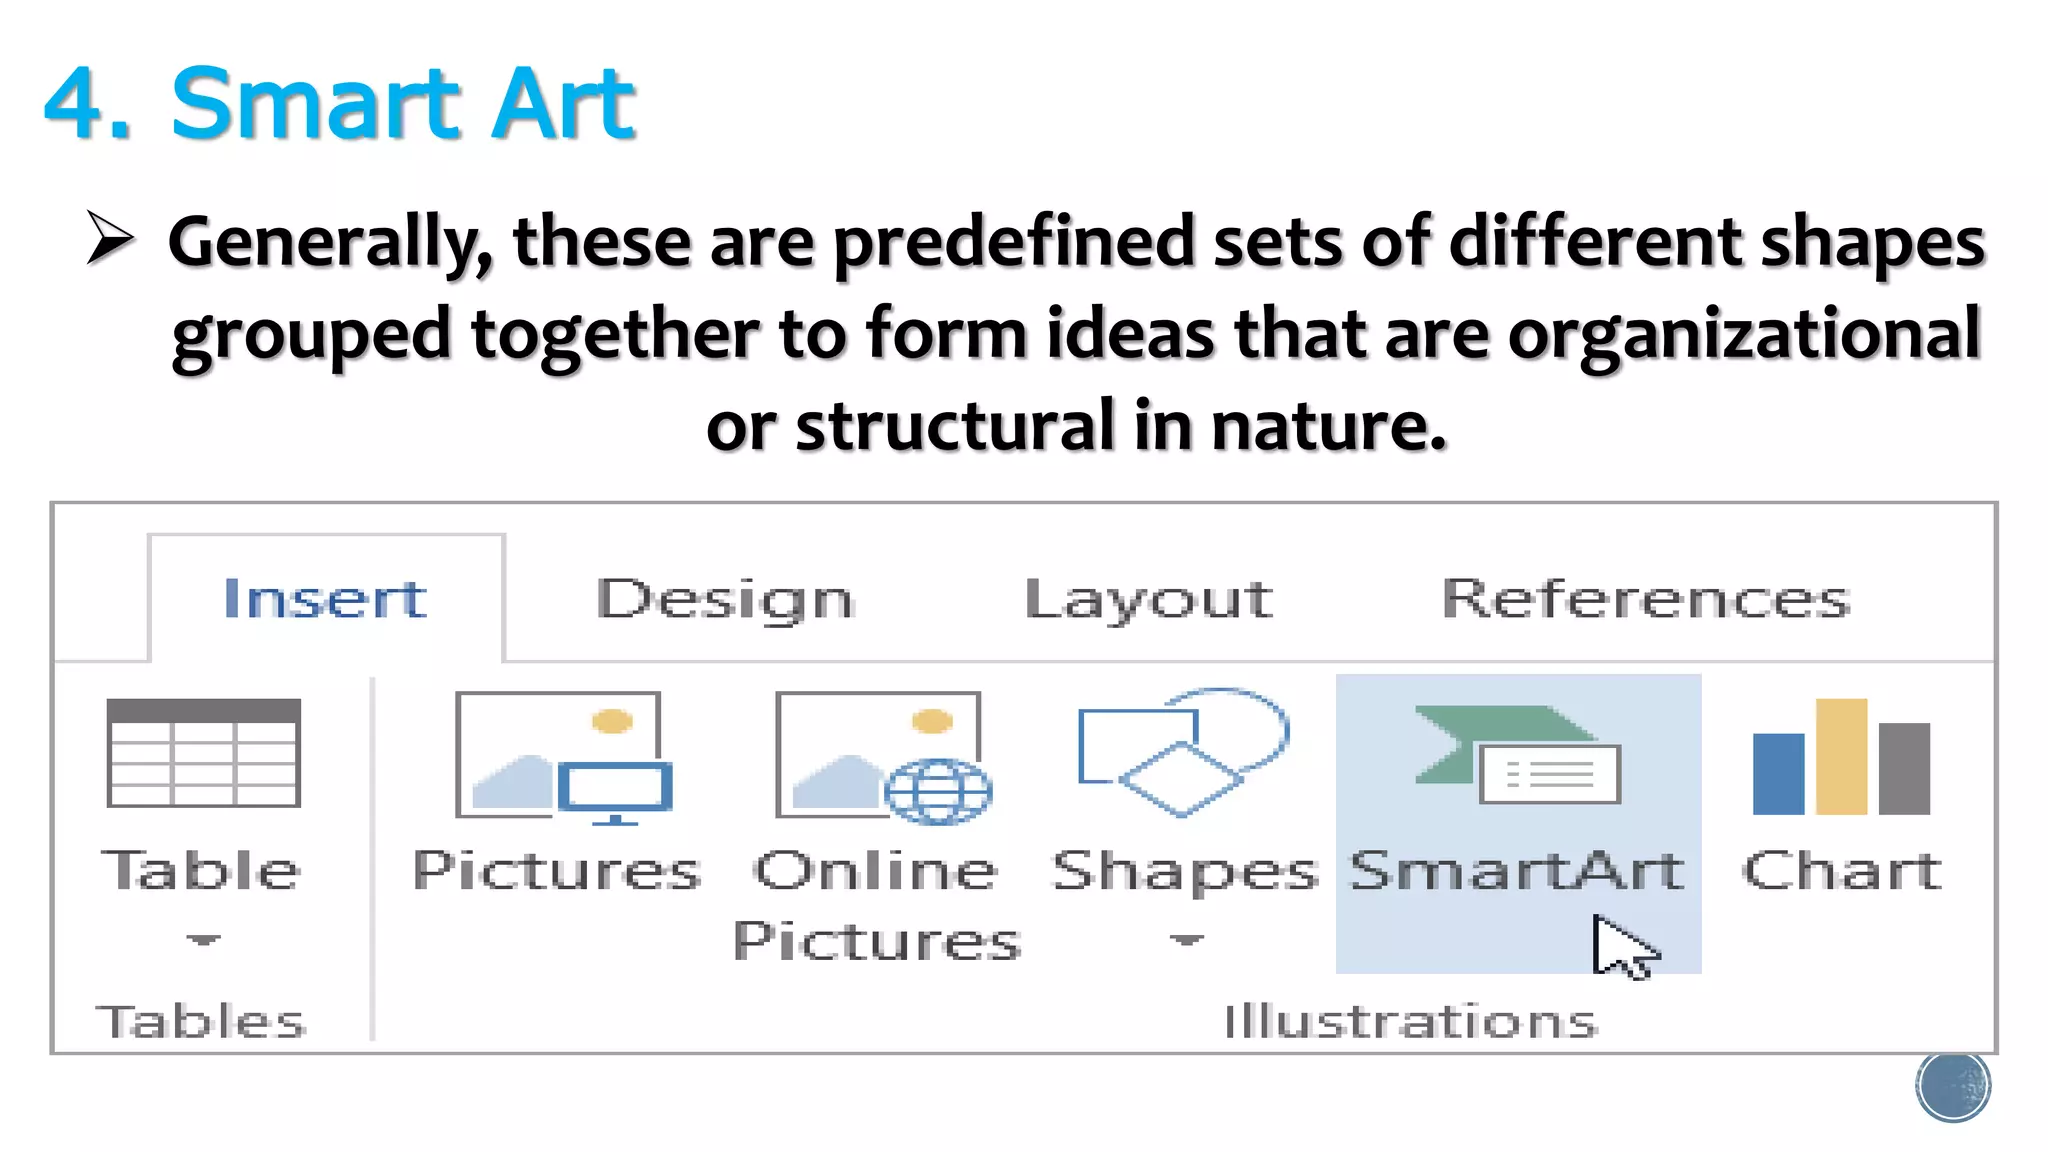
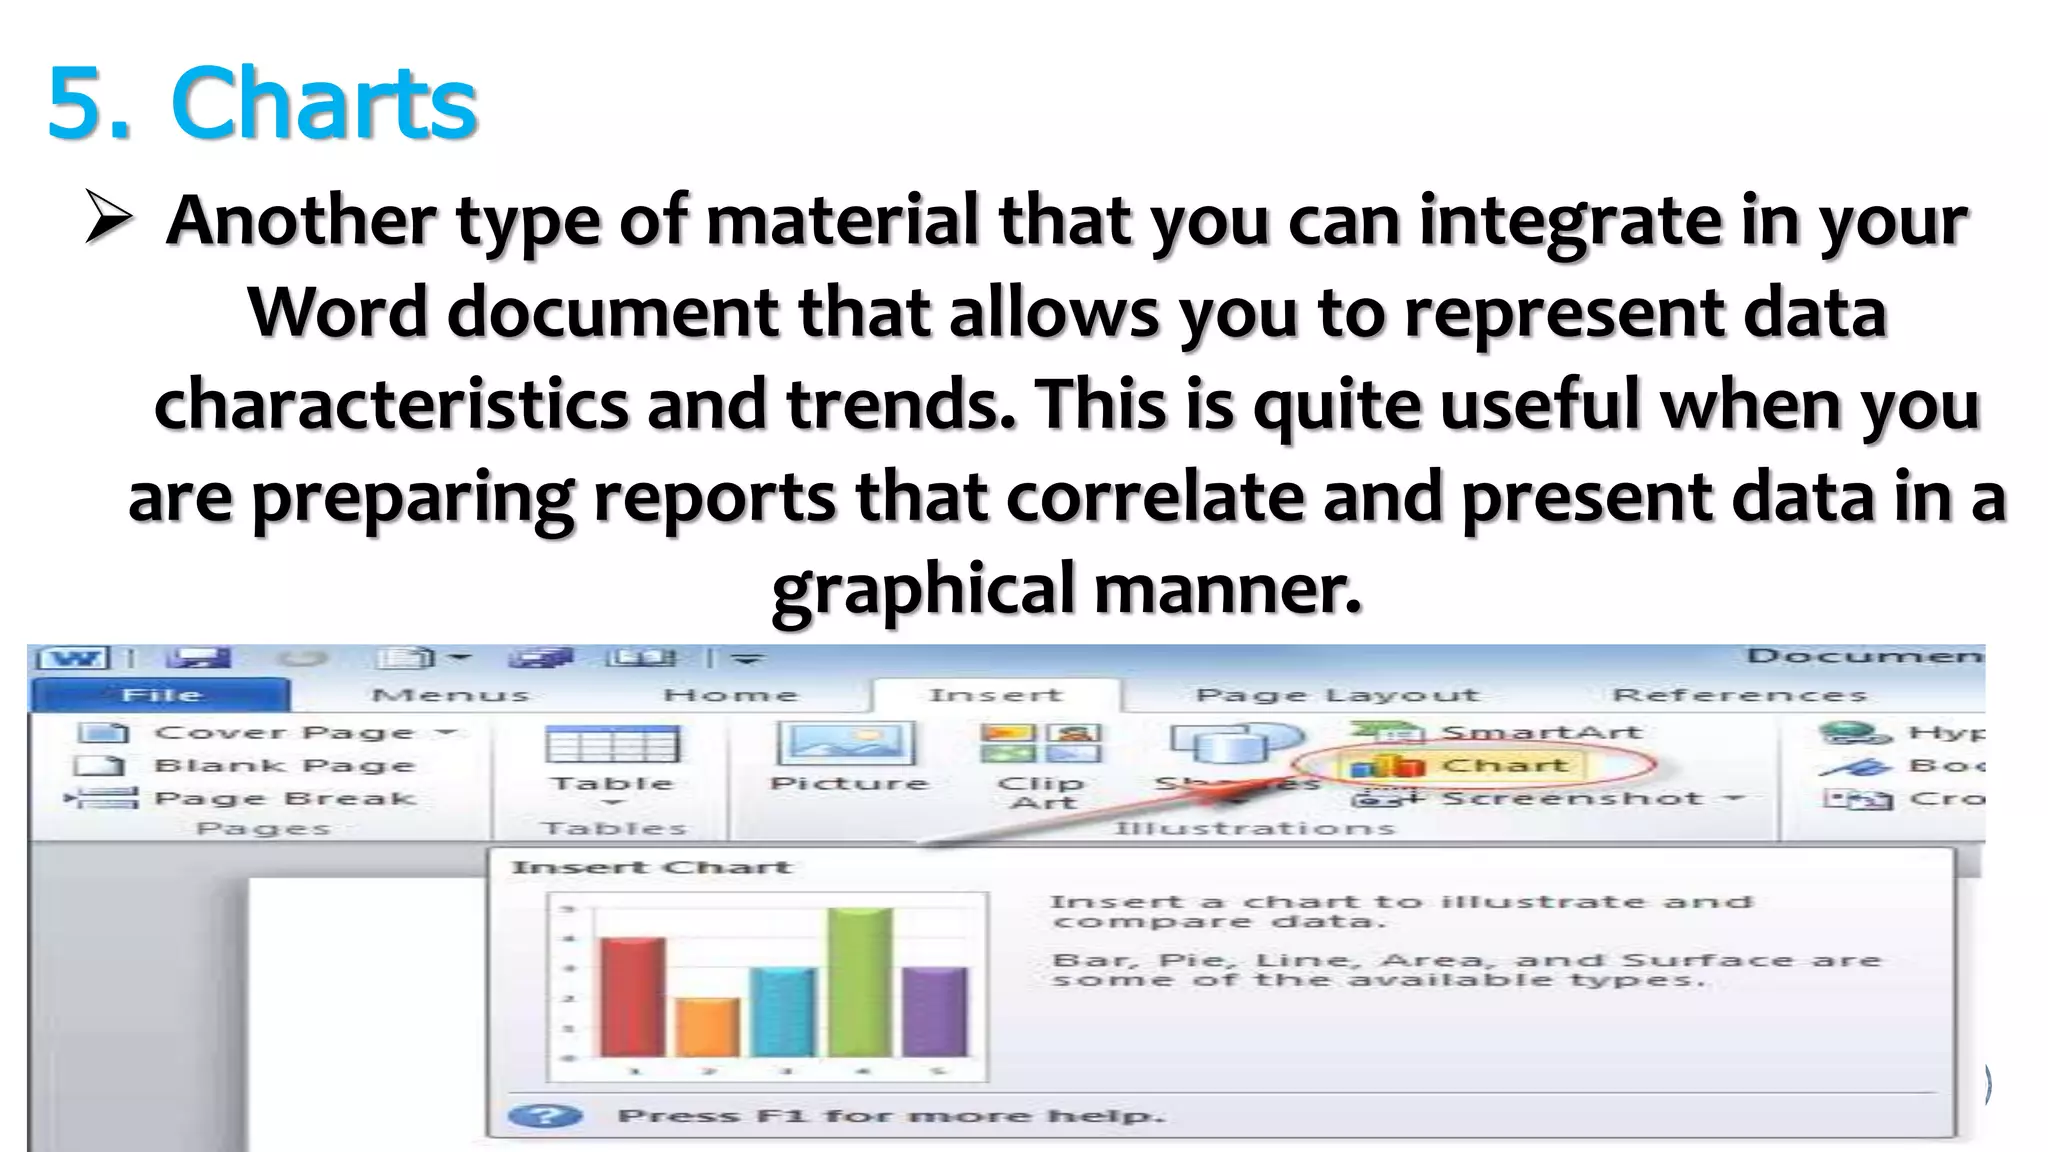
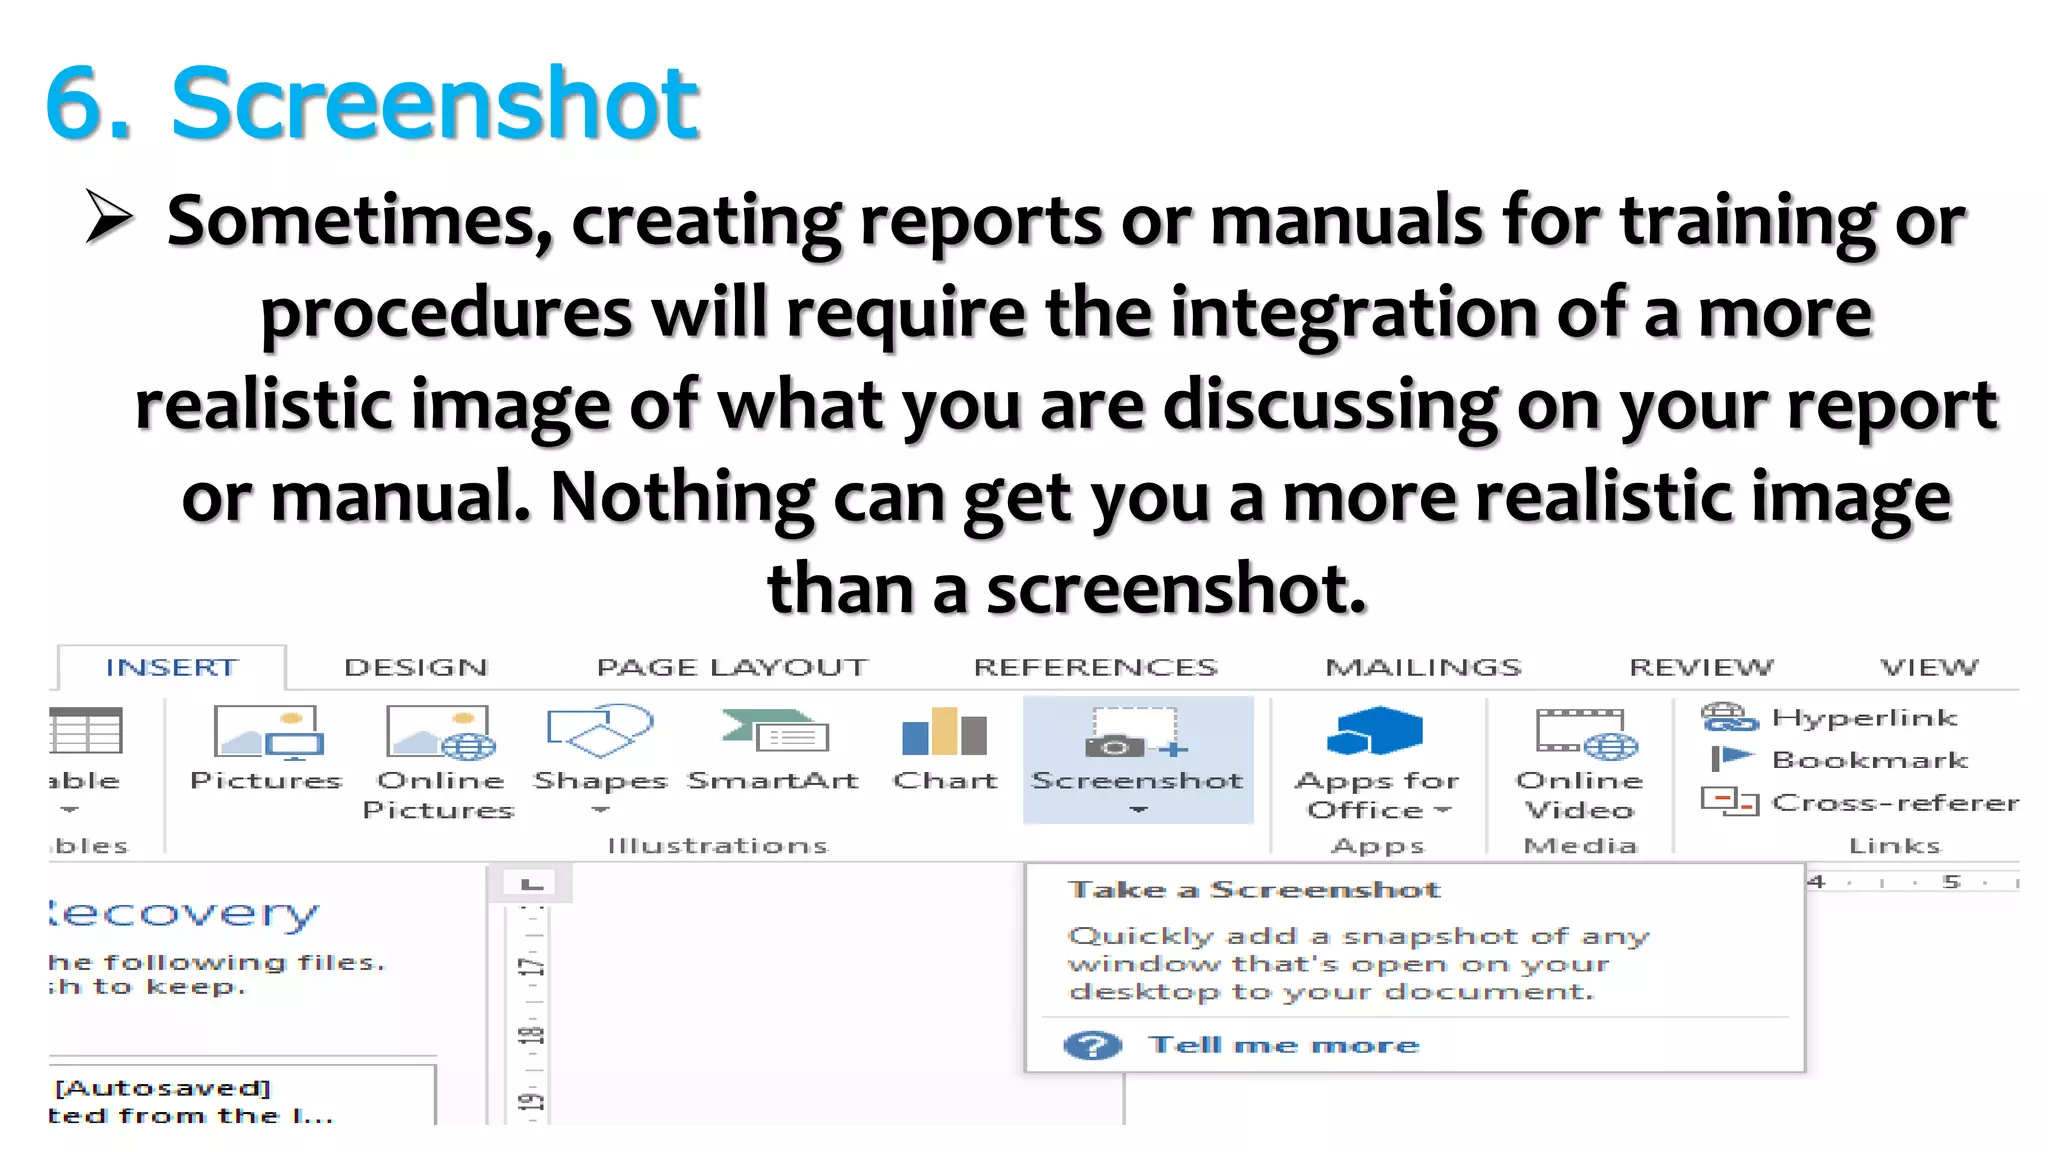
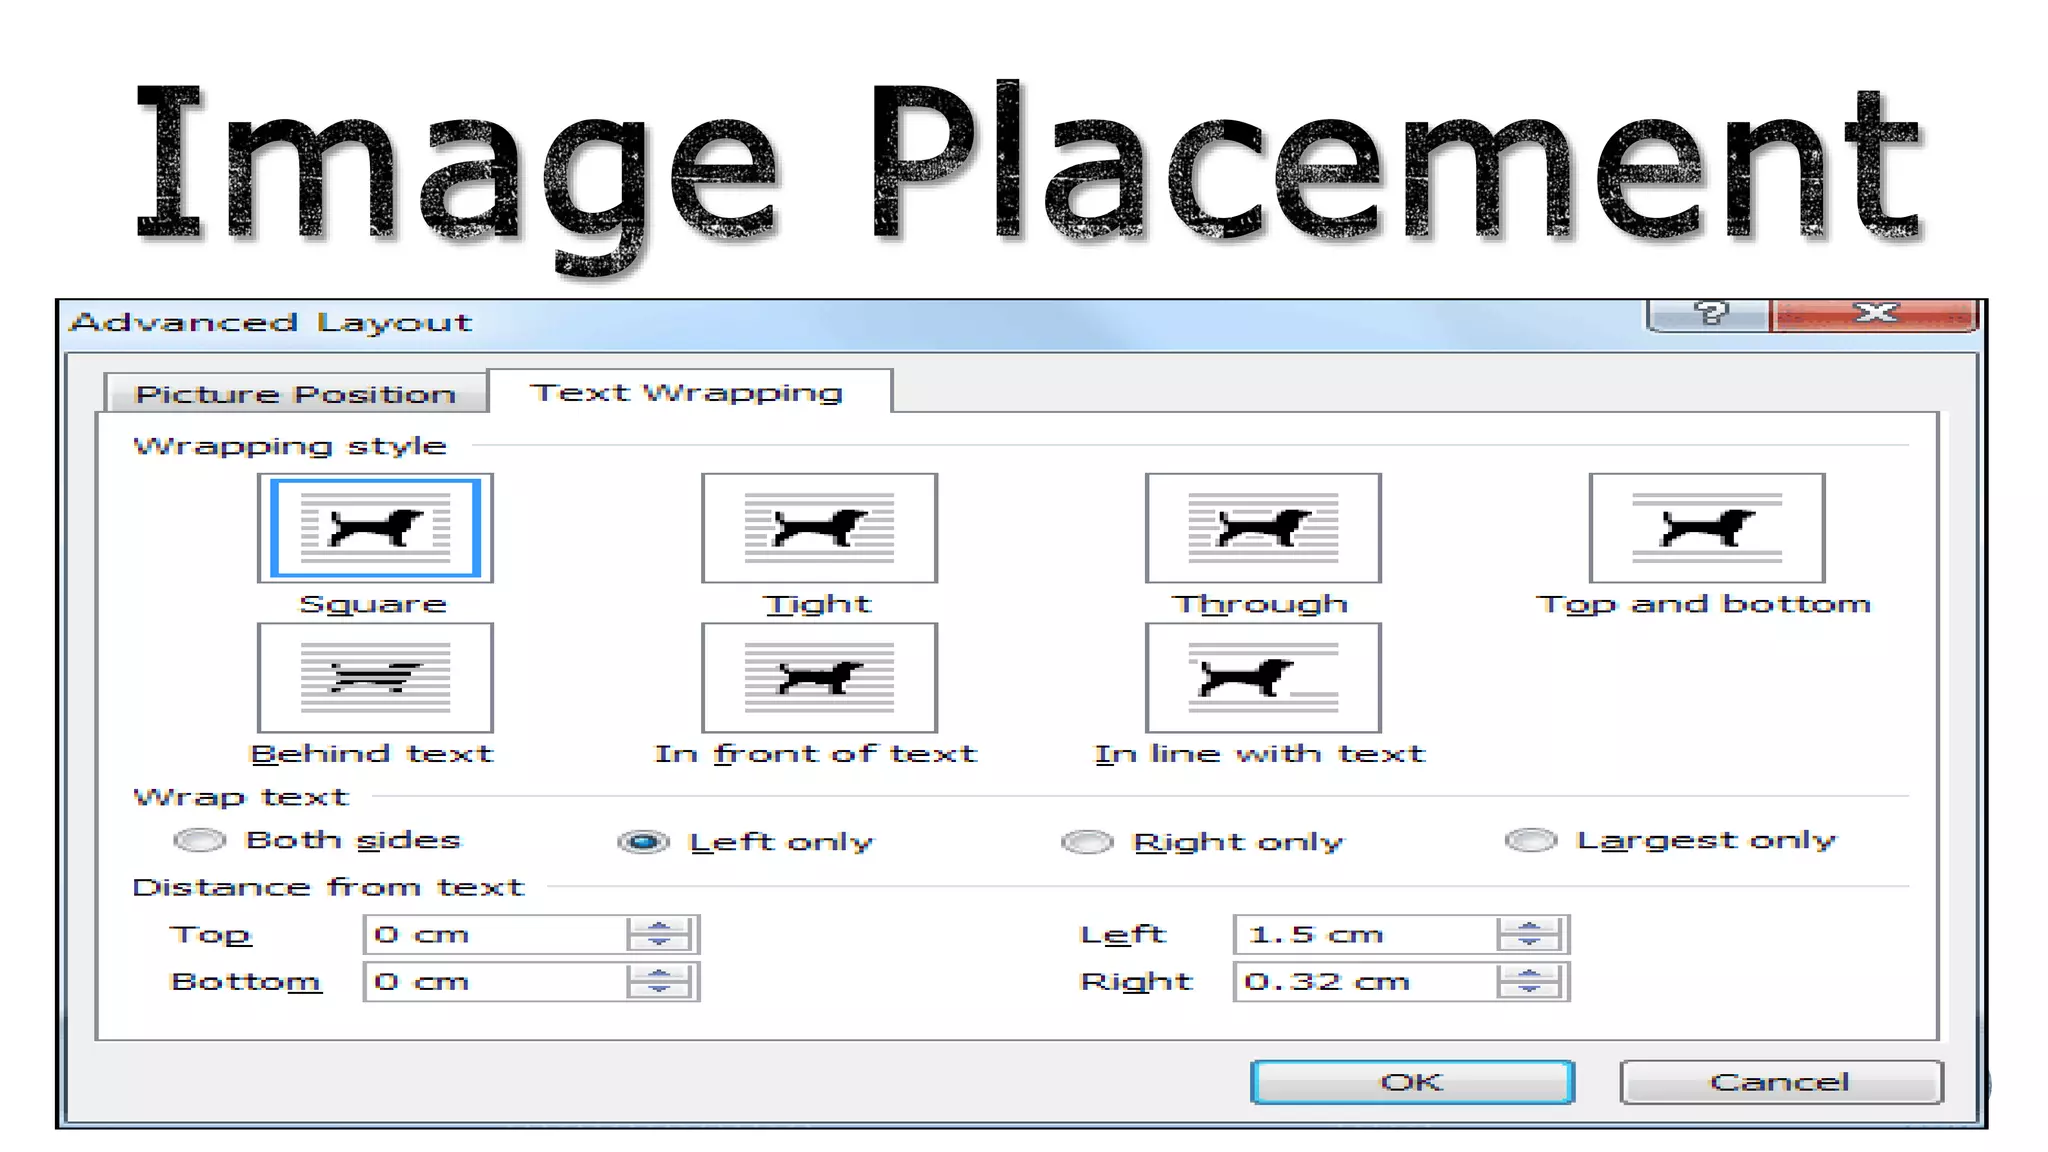
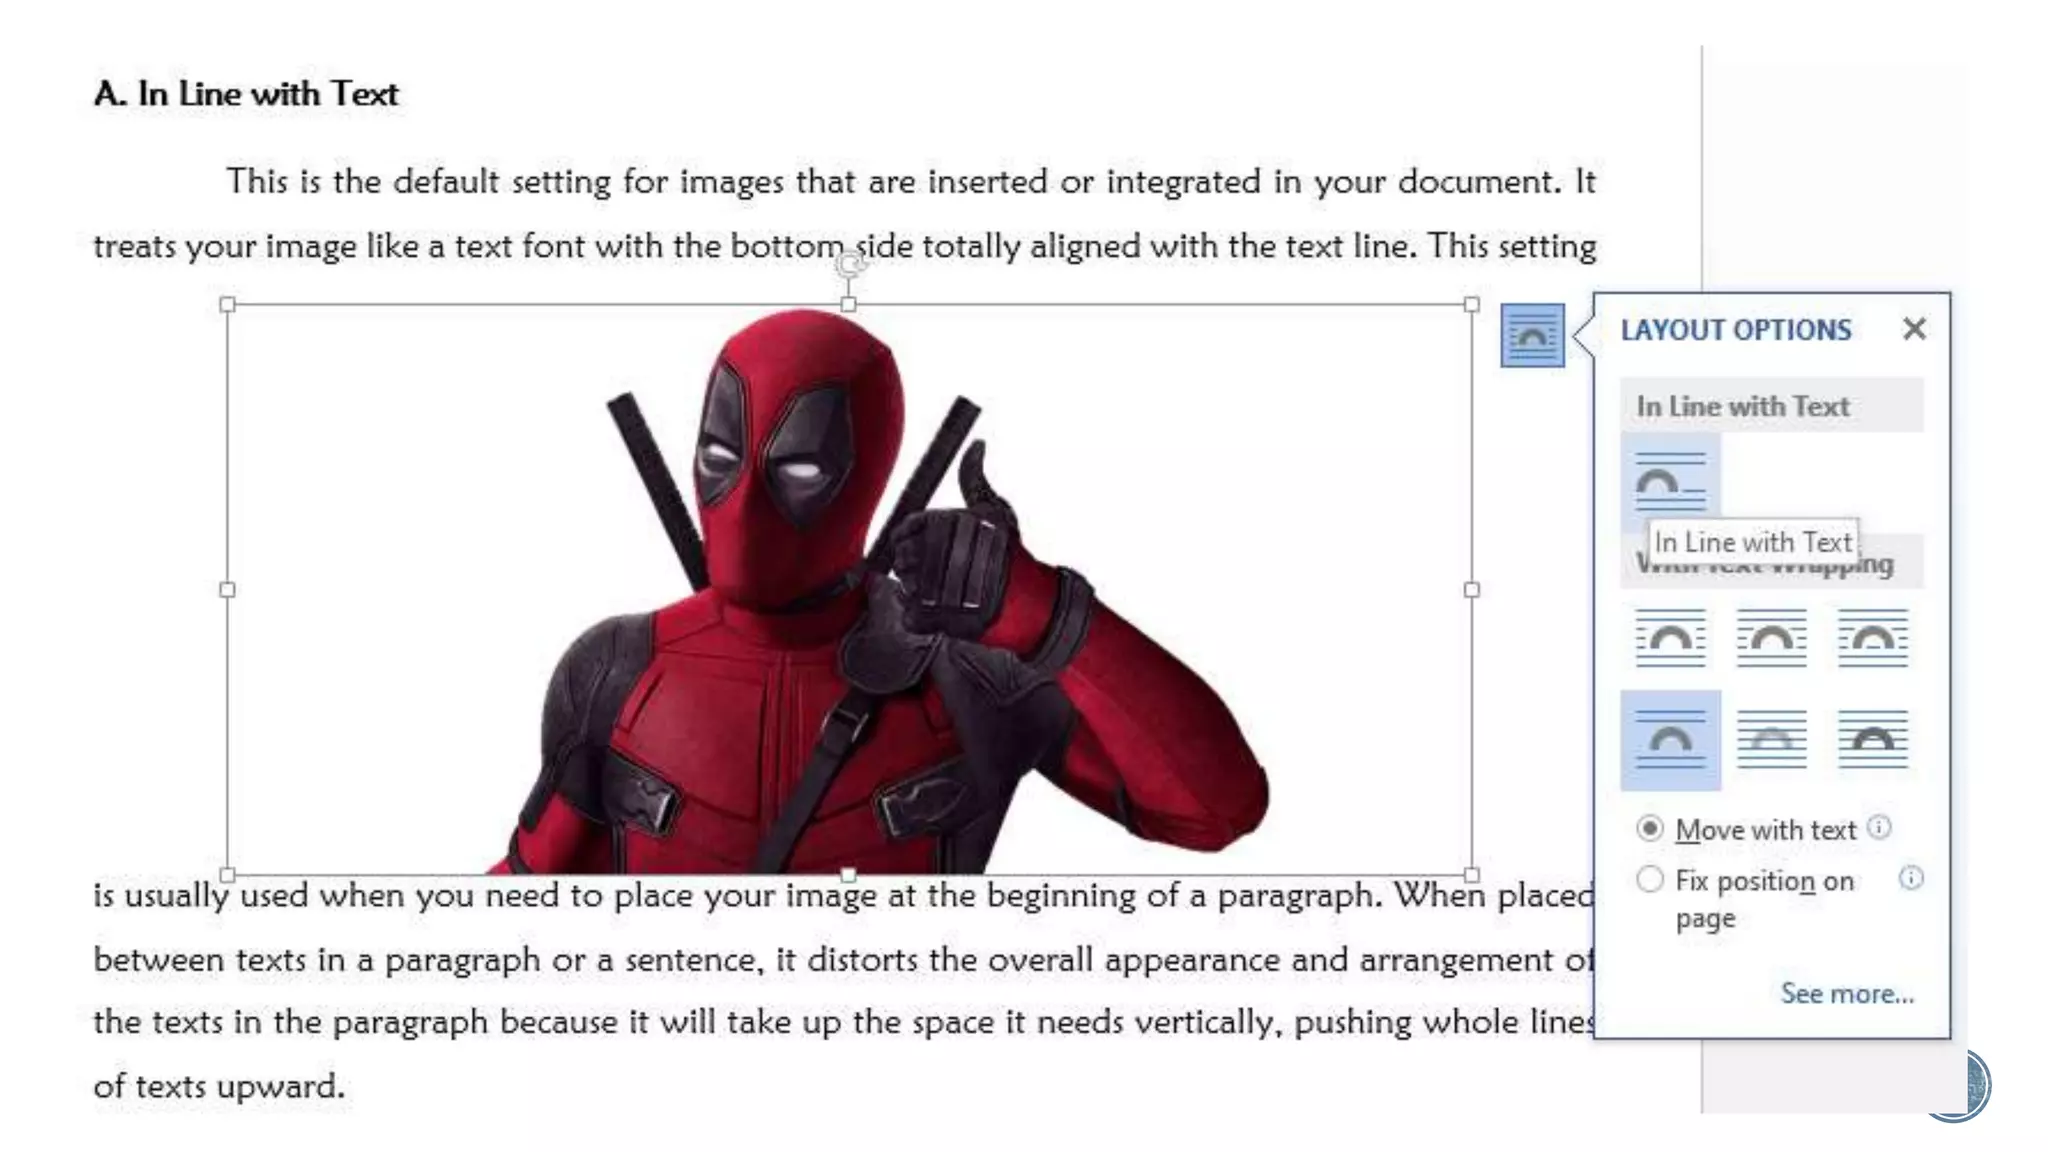
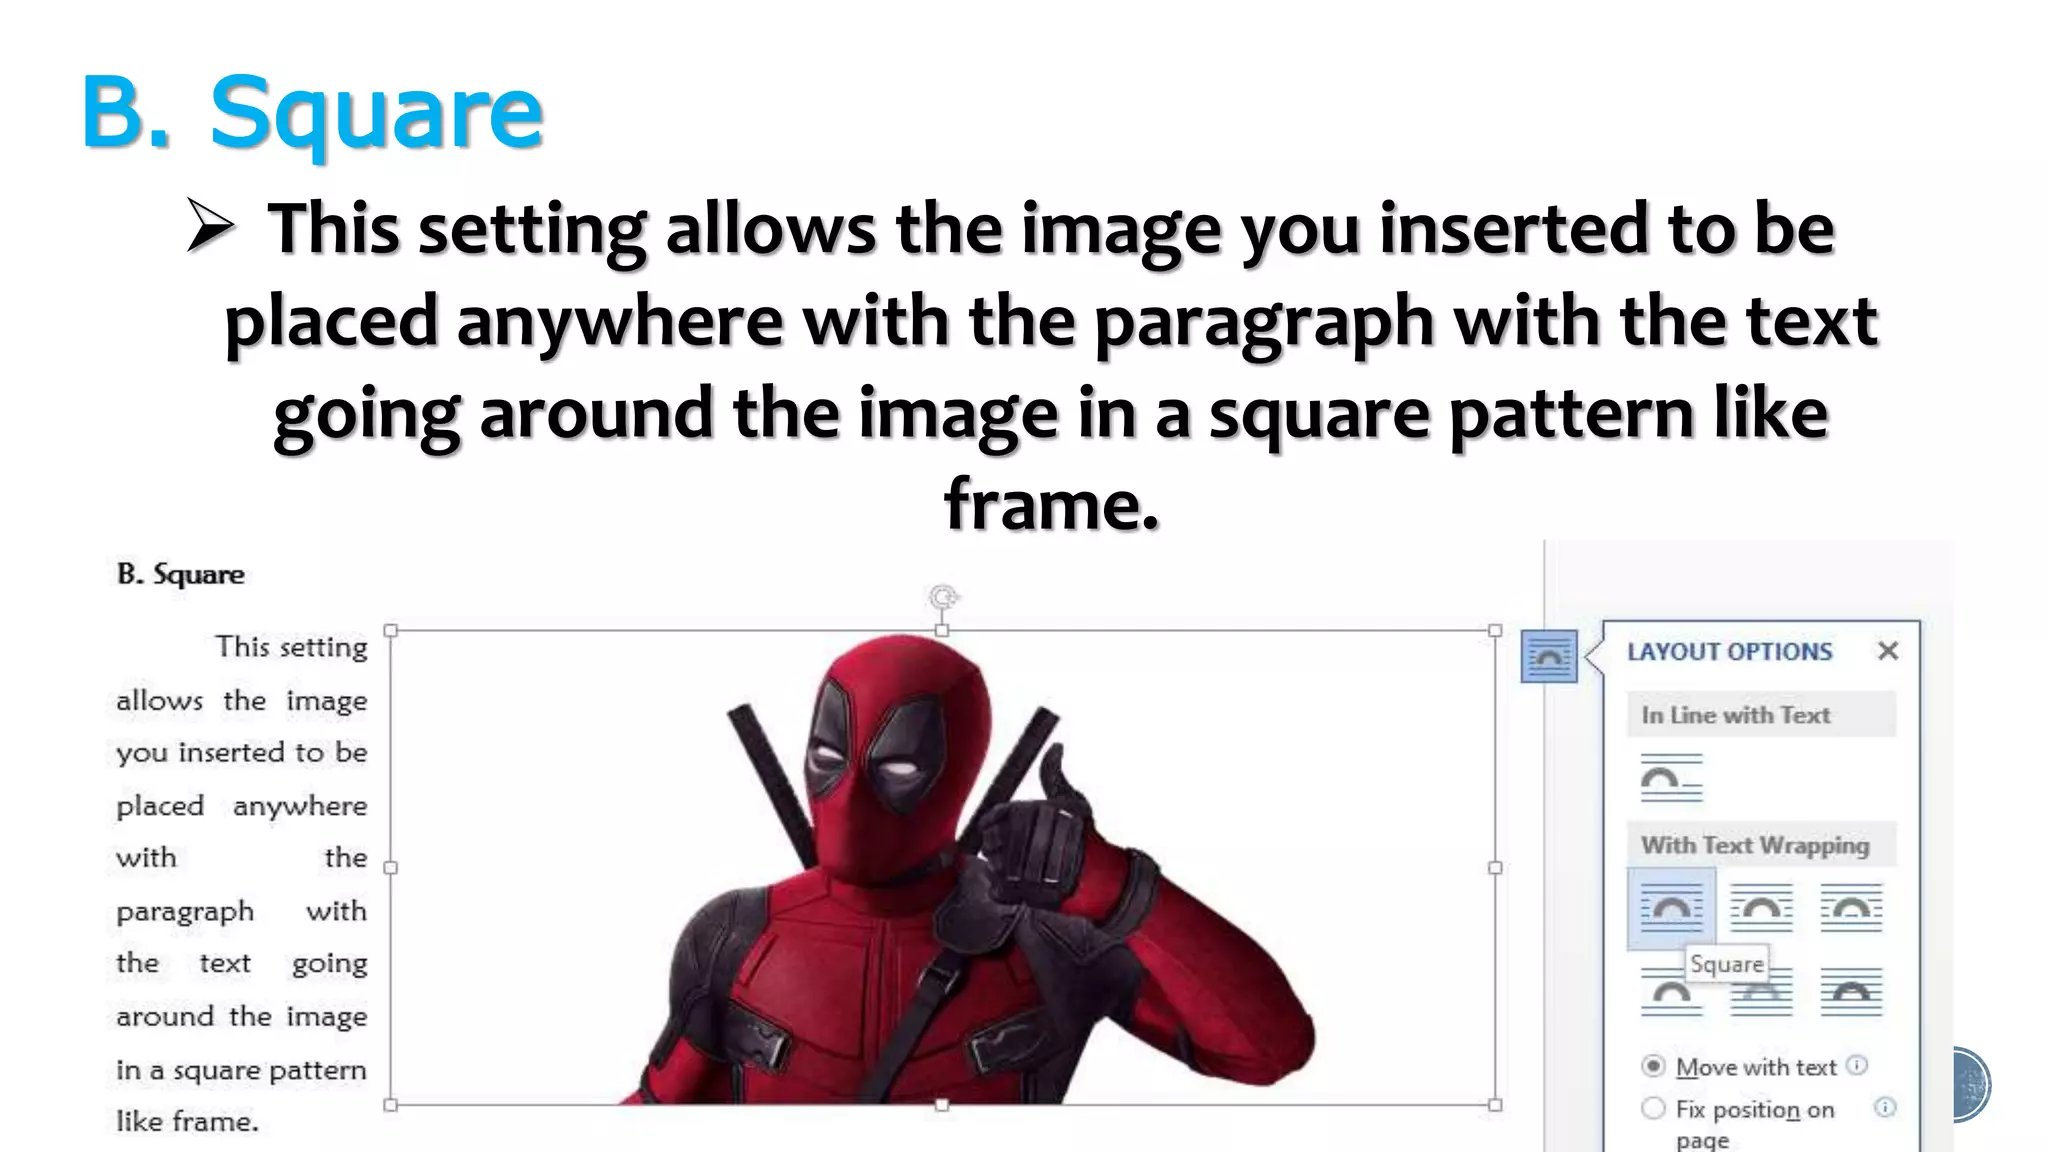
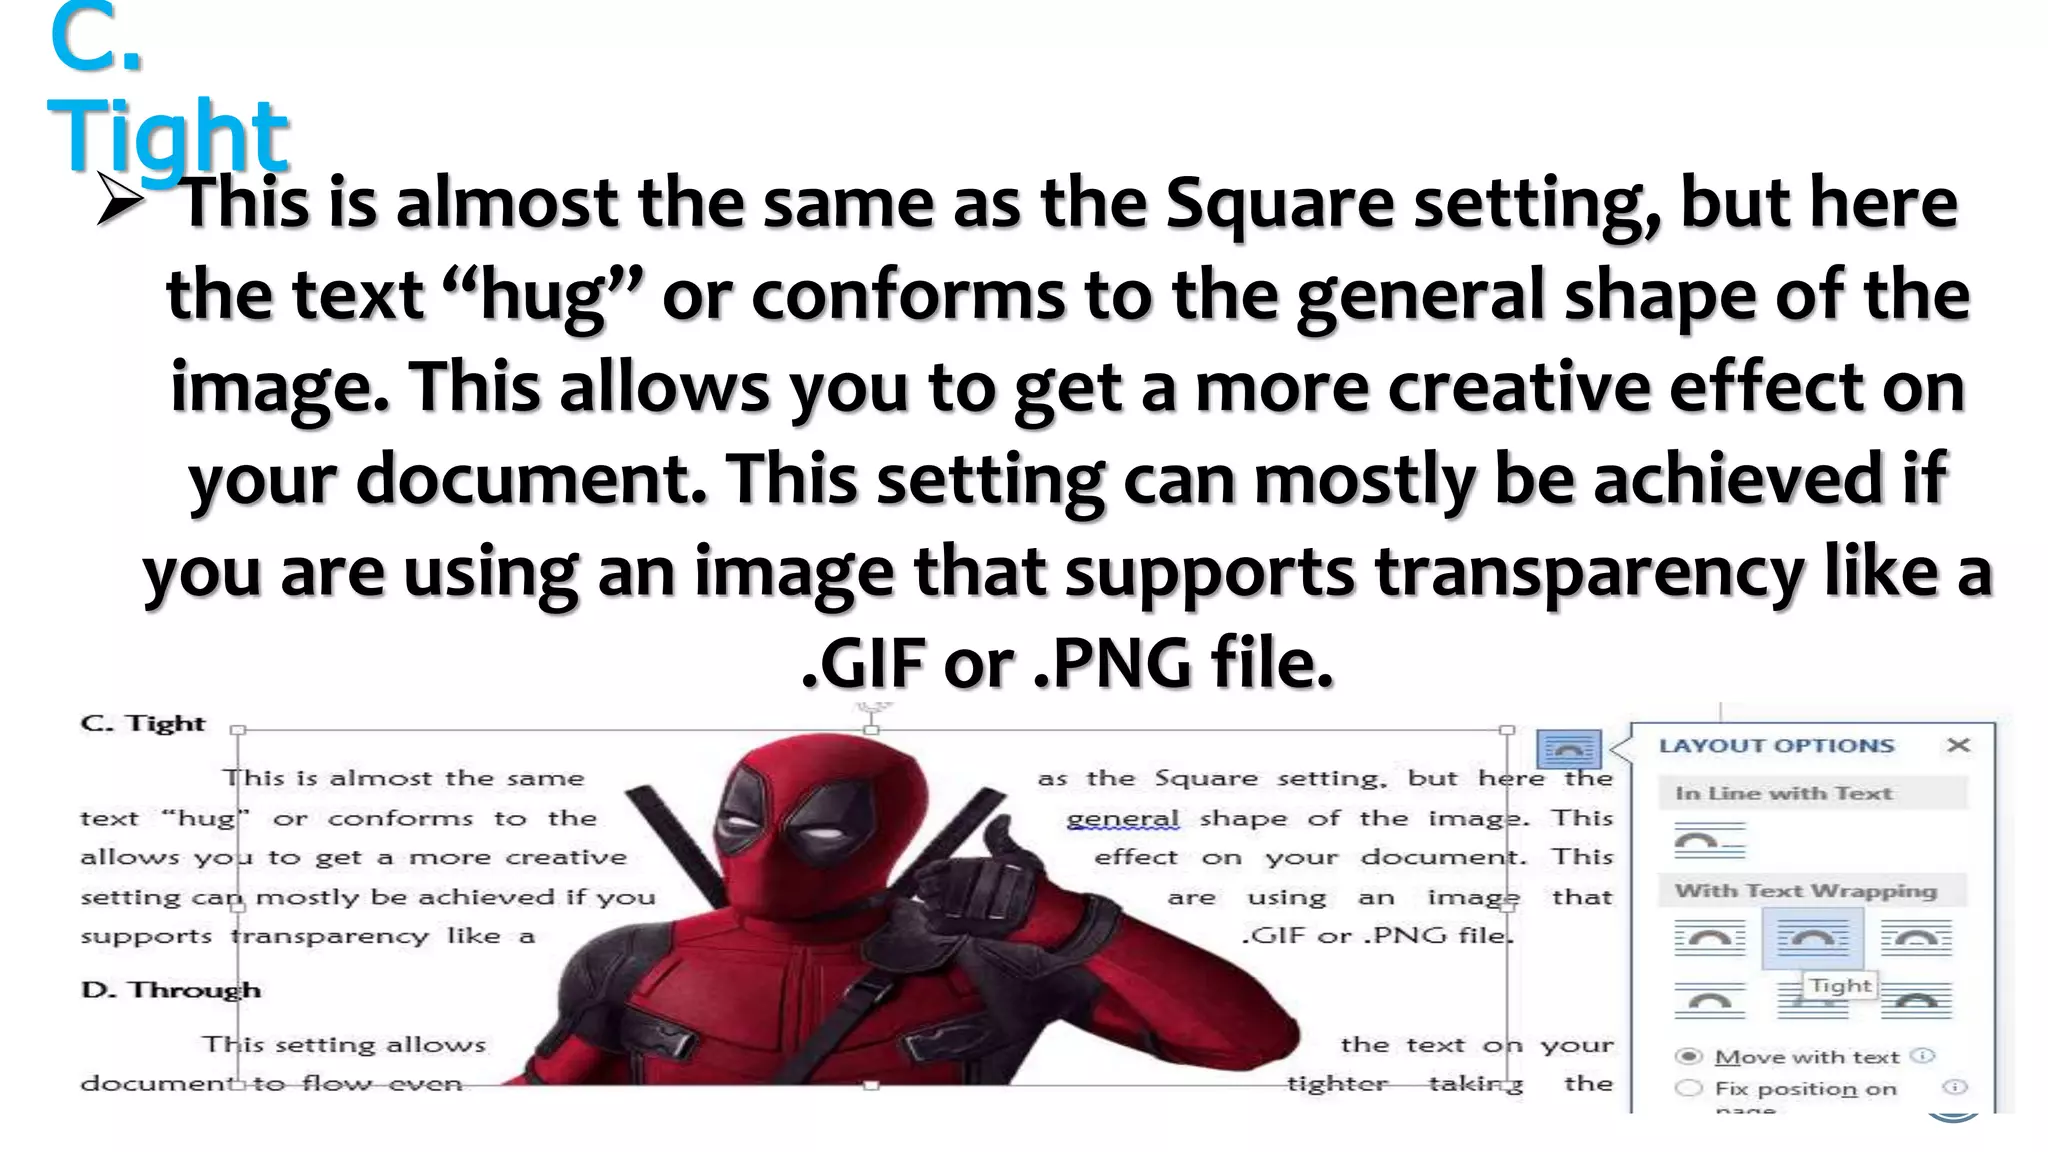
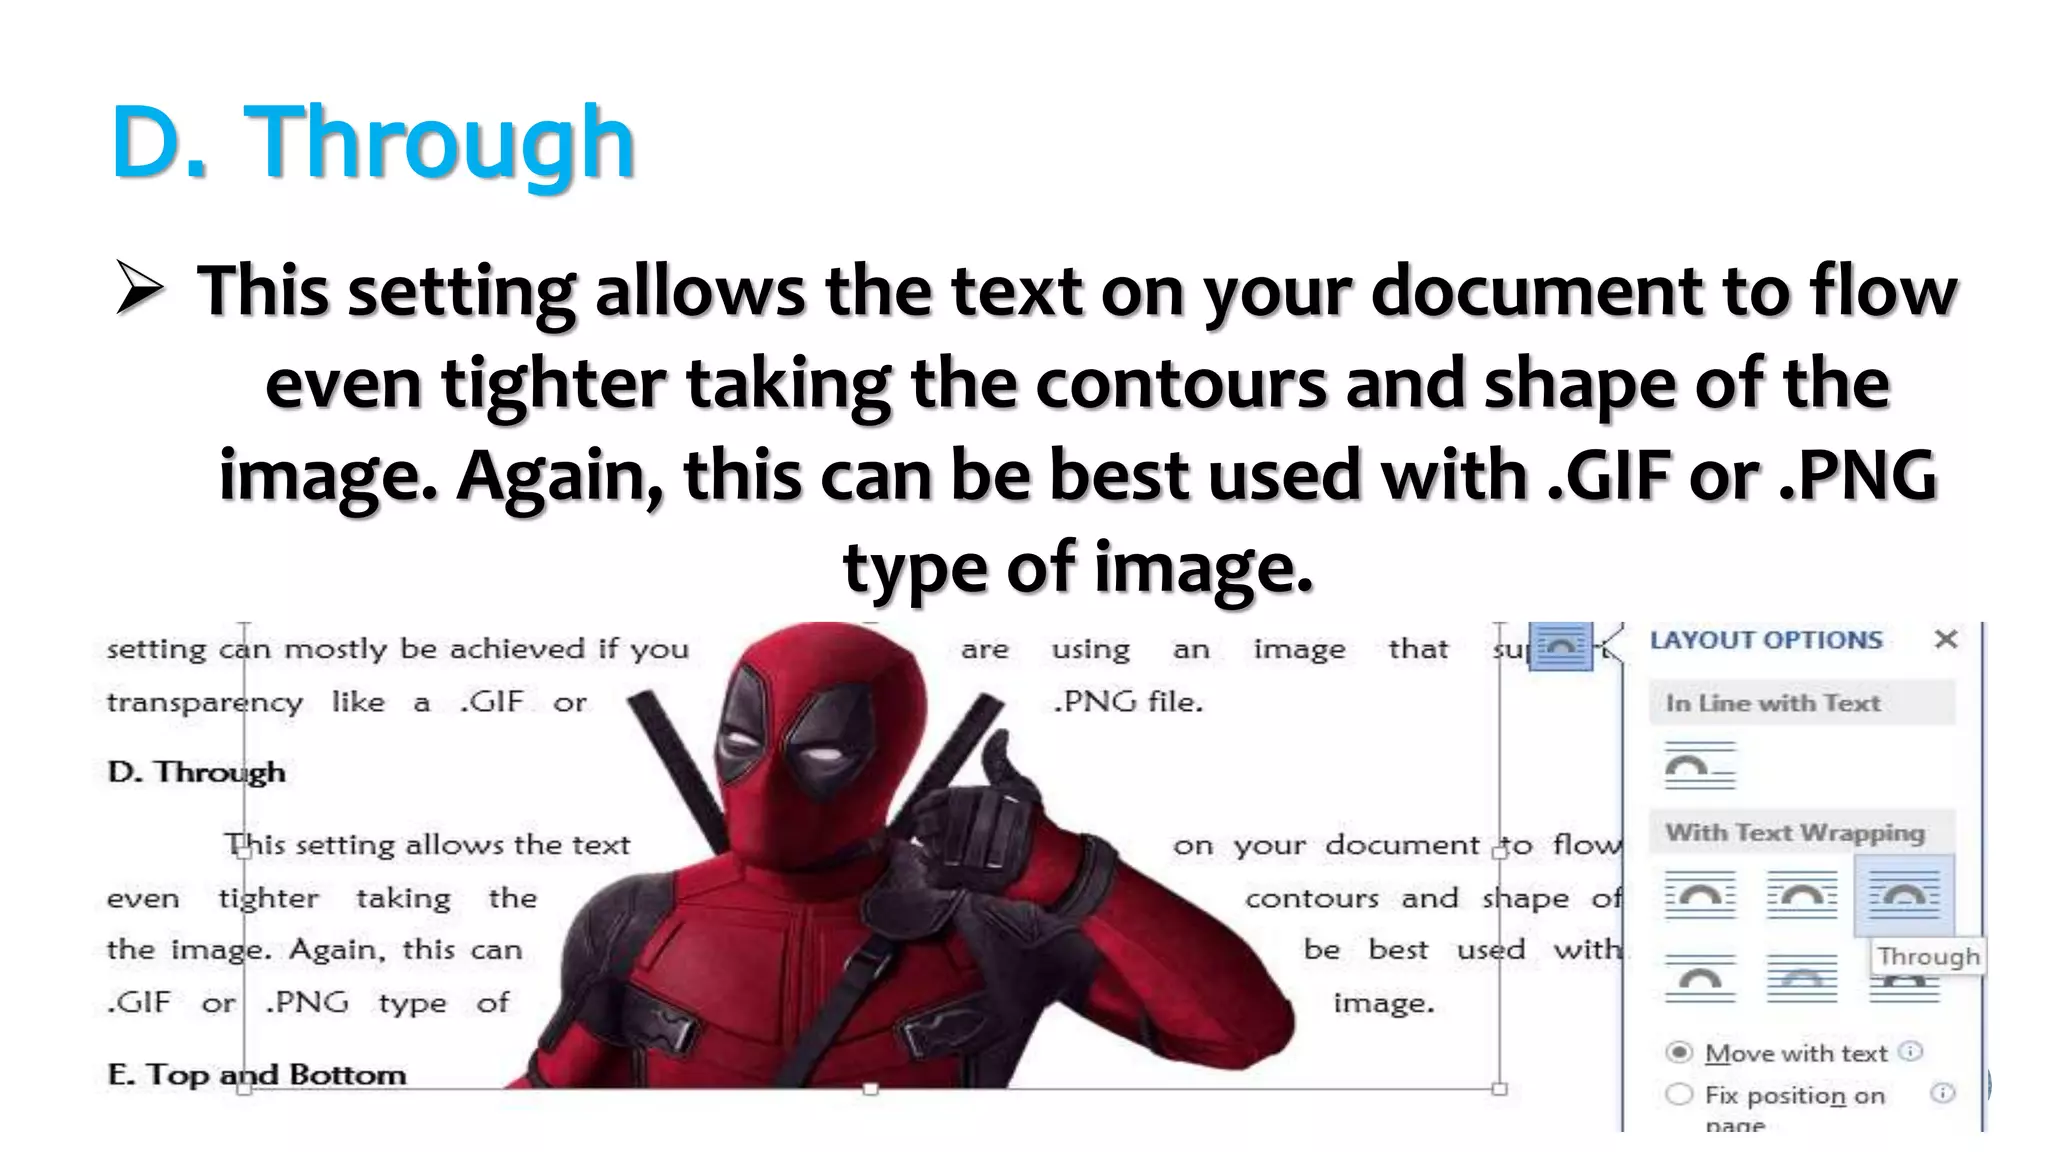
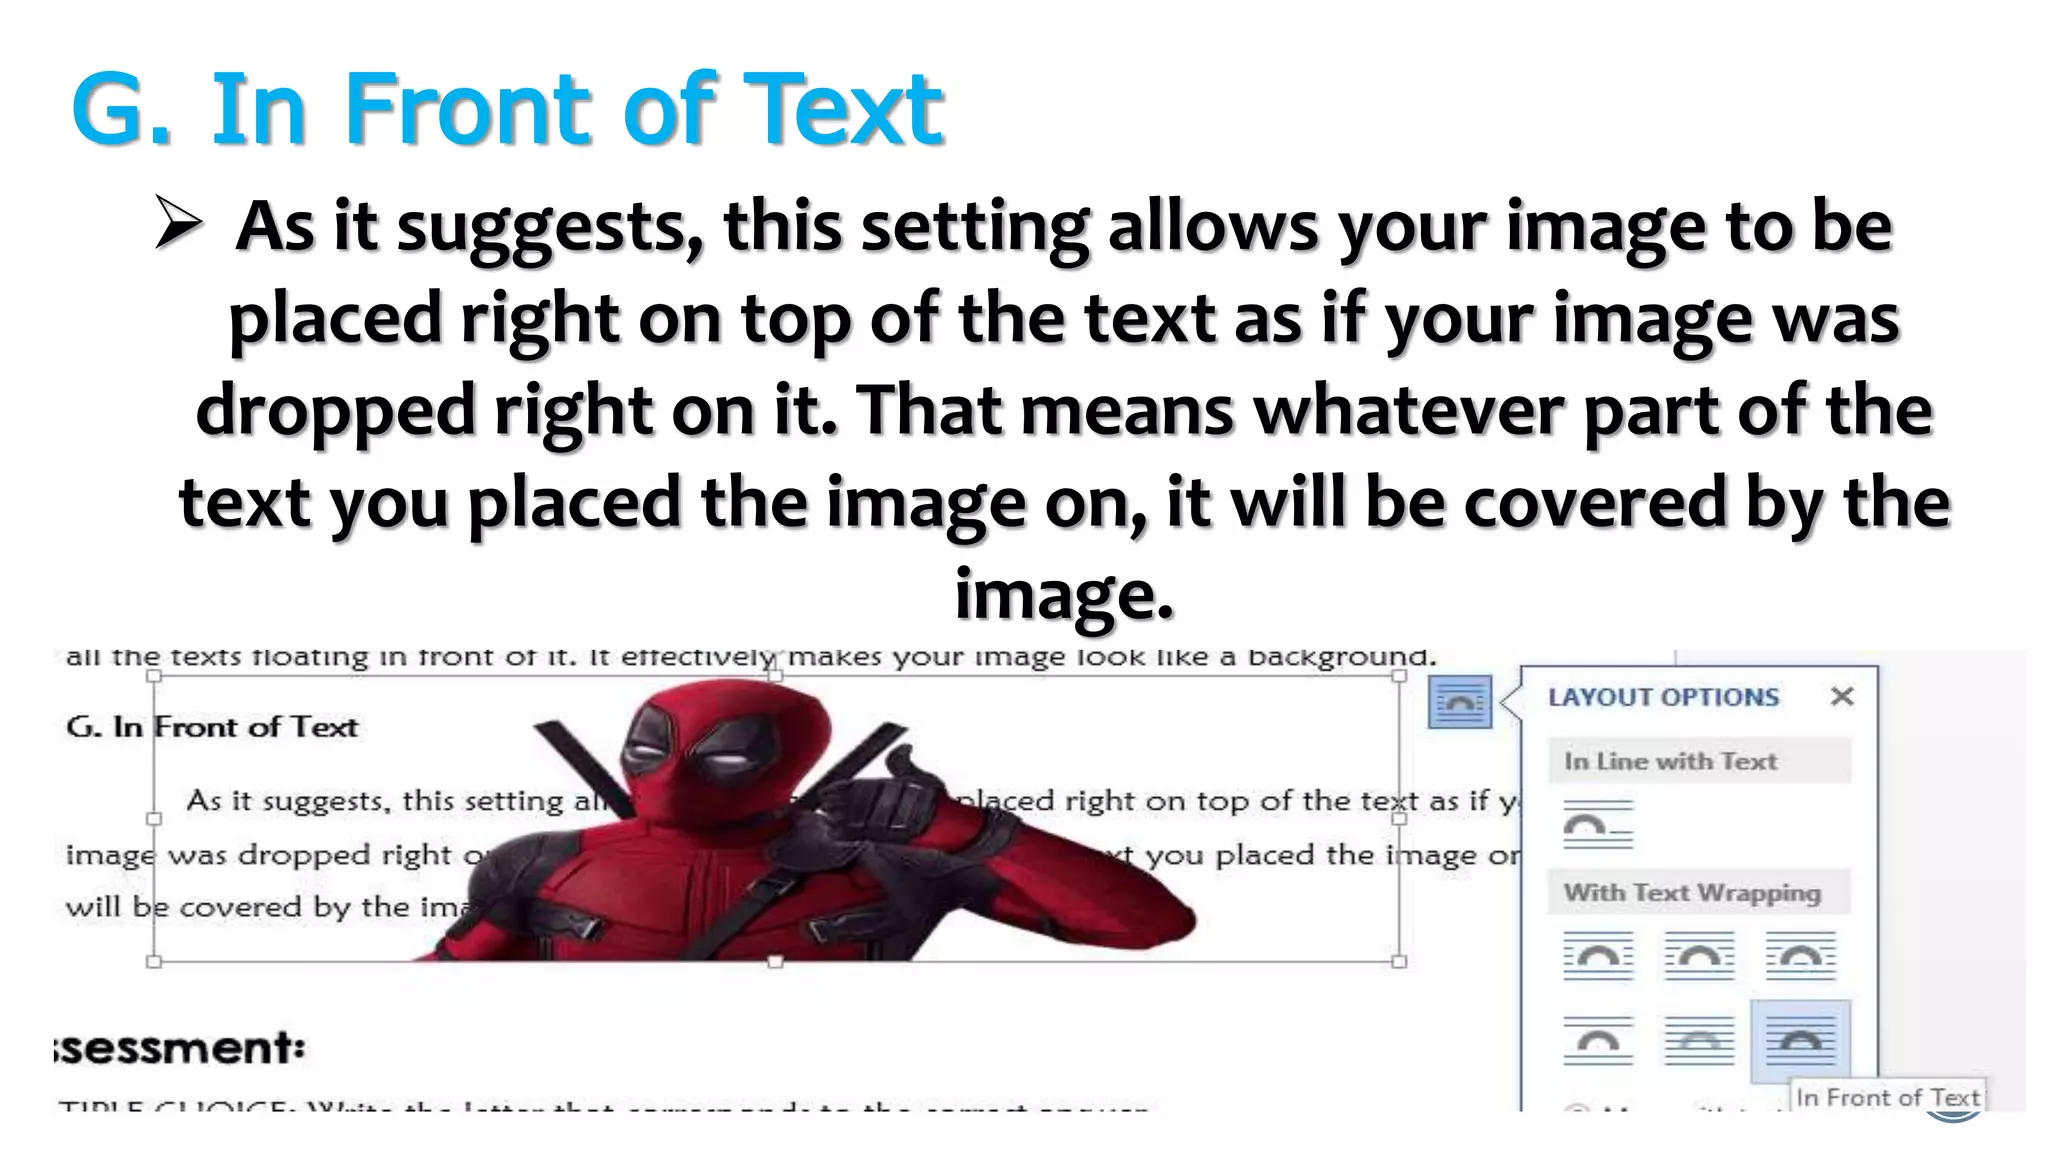
This document discusses two components of mail merge: a form document and a list or data file. It then discusses different types of materials that can be used in a Word document, including pictures, clipart, shapes, smart art, charts, and screenshots. It explains different image positioning options like inline with text, square, tight, through, top and bottom, behind text, and in front of text. Finally, it provides activities for creating a flow chart summarizing mail merge steps using shapes and creating a letter with solar campaign images and charts showing advocacy progress.
LESSON CONTENT:
- Advanced Spreadsheet Skills
- Microsoft Excel: Concept and Features
- Parts and Functions
- Eloctronic Formula
Remider:
- All sets for educational purposes only.
DOWNLOAD SLIDE HERE:
http://adf.ly/1n6wDO
For questions, feel free to LIKE and SEND A MESSAGE on my FB Page.
https://www.facebook.com/ayameproductions/
LESSON CONTENT:
- Advanced Presentation (PPT) Skills
- Microsoft PowerPoint Presentation: Concept and Features
Remider:
- All sets for educational purposes only.
Kinds of Materials use in editing picture.pptxizarahmendoza
In picture editing, various materials are used to achieve desired effects or alterations. These materials can be physical tools, digital software, or resources. Here are some common ones:
Digital Software:
Photo Editing Software: Applications like Adobe Photoshop, Adobe Lightroom, GIMP, Affinity Photo, and Corel PaintShop Pro are widely used for editing pictures digitally.
Vector Graphics Editors: Software such as Adobe Illustrator or CorelDRAW is used for creating and editing vector graphics, which are essential for tasks like logo design or scalable graphics.
Digital Resources:
Stock Images: High-quality images available for purchase or free download from various online platforms like Adobe Stock, Shutterstock, Unsplash, and Pixabay. These can be used as elements in compositions or for inspiration.
Brushes and Textures: Digital brushes and textures add depth and texture to images. They can be used to create effects like watercolor, oil painting, or grunge textures. Websites like BrushLovers or Brusheezy offer free and paid brush sets and textures.
Fonts: Different fonts can drastically change the look and feel of text in images. Fonts can be downloaded from websites like Google Fonts, Adobe Fonts, or Font Squirrel.
Hardware:
Graphic Tablets: Devices like Wacom tablets allow for more precise and natural input when working with digital images, especially for tasks like drawing, painting, or retouching.
Color Calibration Tools: Tools like color calibration monitors or colorimeters ensure accurate color representation during editing, critical for professional work.
Print Materials:
Printing Paper: The choice of paper affects the final appearance and texture of printed images. Different types of paper, such as glossy, matte, or fine art paper, are used based on the desired outcome.
Inks and Printers: High-quality printers and inks are essential for producing professional prints with accurate colors and detail.
Physical Tools (for Analog Editing):
Scissors, Cutters, and Adhesives: Physical tools are used in collage-making or scrapbooking, where printed images or materials are cut, arranged, and pasted manually.
Markers, Pens, and Paints: Traditional drawing and painting tools are used for manual editing and adding artistic elements to images.
Templates and Presets:
Photo Editing Templates: Pre-designed templates for various purposes, such as social media posts, flyers, or business cards, can speed up editing workflows and maintain consistency.
Presets: Presets in photo editing software provide predefined adjustments or effects that can be applied to images with a single click, saving time and effort.
These materials serve different purposes and cater to various editing styles and preferences, whether digital or analog. Choosing the right combination of materials depends on the specific requirements of the editing project and the desired outcome.
Plugins and Extensions:
Filter Plugins: Additional filters and effects can be added to photo edit
Lesson 6: INTEGRATING IMAGES AND EXTERNAL MATERIALSbonzy_30
Discover the fast and easy way to integrate different material in Microsoft Word thru this presentation. We hope you learned about this presentation. we hope that this presentation will provide the information you needed. We are open for comments and suggestions for the enhancement of this presentation. Thank you and Good luck!!!
LESSON CONTENT:
- Advanced Spreadsheet Skills
- Microsoft Excel: Concept and Features
- Parts and Functions
- Eloctronic Formula
Remider:
- All sets for educational purposes only.
DOWNLOAD SLIDE HERE:
http://adf.ly/1n6wDO
For questions, feel free to LIKE and SEND A MESSAGE on my FB Page.
https://www.facebook.com/ayameproductions/
LESSON CONTENT:
- Advanced Presentation (PPT) Skills
- Microsoft PowerPoint Presentation: Concept and Features
Remider:
- All sets for educational purposes only.
Kinds of Materials use in editing picture.pptxizarahmendoza
In picture editing, various materials are used to achieve desired effects or alterations. These materials can be physical tools, digital software, or resources. Here are some common ones:
Digital Software:
Photo Editing Software: Applications like Adobe Photoshop, Adobe Lightroom, GIMP, Affinity Photo, and Corel PaintShop Pro are widely used for editing pictures digitally.
Vector Graphics Editors: Software such as Adobe Illustrator or CorelDRAW is used for creating and editing vector graphics, which are essential for tasks like logo design or scalable graphics.
Digital Resources:
Stock Images: High-quality images available for purchase or free download from various online platforms like Adobe Stock, Shutterstock, Unsplash, and Pixabay. These can be used as elements in compositions or for inspiration.
Brushes and Textures: Digital brushes and textures add depth and texture to images. They can be used to create effects like watercolor, oil painting, or grunge textures. Websites like BrushLovers or Brusheezy offer free and paid brush sets and textures.
Fonts: Different fonts can drastically change the look and feel of text in images. Fonts can be downloaded from websites like Google Fonts, Adobe Fonts, or Font Squirrel.
Hardware:
Graphic Tablets: Devices like Wacom tablets allow for more precise and natural input when working with digital images, especially for tasks like drawing, painting, or retouching.
Color Calibration Tools: Tools like color calibration monitors or colorimeters ensure accurate color representation during editing, critical for professional work.
Print Materials:
Printing Paper: The choice of paper affects the final appearance and texture of printed images. Different types of paper, such as glossy, matte, or fine art paper, are used based on the desired outcome.
Inks and Printers: High-quality printers and inks are essential for producing professional prints with accurate colors and detail.
Physical Tools (for Analog Editing):
Scissors, Cutters, and Adhesives: Physical tools are used in collage-making or scrapbooking, where printed images or materials are cut, arranged, and pasted manually.
Markers, Pens, and Paints: Traditional drawing and painting tools are used for manual editing and adding artistic elements to images.
Templates and Presets:
Photo Editing Templates: Pre-designed templates for various purposes, such as social media posts, flyers, or business cards, can speed up editing workflows and maintain consistency.
Presets: Presets in photo editing software provide predefined adjustments or effects that can be applied to images with a single click, saving time and effort.
These materials serve different purposes and cater to various editing styles and preferences, whether digital or analog. Choosing the right combination of materials depends on the specific requirements of the editing project and the desired outcome.
Plugins and Extensions:
Filter Plugins: Additional filters and effects can be added to photo edit
Lesson 6: INTEGRATING IMAGES AND EXTERNAL MATERIALSbonzy_30
Discover the fast and easy way to integrate different material in Microsoft Word thru this presentation. We hope you learned about this presentation. we hope that this presentation will provide the information you needed. We are open for comments and suggestions for the enhancement of this presentation. Thank you and Good luck!!!
Unit 8 - Information and Communication Technology (Paper I).pdfThiyagu K
This slides describes the basic concepts of ICT, basics of Email, Emerging Technology and Digital Initiatives in Education. This presentations aligns with the UGC Paper I syllabus.
Palestine last event orientationfvgnh .pptxRaedMohamed3
An EFL lesson about the current events in Palestine. It is intended to be for intermediate students who wish to increase their listening skills through a short lesson in power point.
How to Split Bills in the Odoo 17 POS ModuleCeline George
Bills have a main role in point of sale procedure. It will help to track sales, handling payments and giving receipts to customers. Bill splitting also has an important role in POS. For example, If some friends come together for dinner and if they want to divide the bill then it is possible by POS bill splitting. This slide will show how to split bills in odoo 17 POS.
The Indian economy is classified into different sectors to simplify the analysis and understanding of economic activities. For Class 10, it's essential to grasp the sectors of the Indian economy, understand their characteristics, and recognize their importance. This guide will provide detailed notes on the Sectors of the Indian Economy Class 10, using specific long-tail keywords to enhance comprehension.
For more information, visit-www.vavaclasses.com
Instructions for Submissions thorugh G- Classroom.pptxJheel Barad
This presentation provides a briefing on how to upload submissions and documents in Google Classroom. It was prepared as part of an orientation for new Sainik School in-service teacher trainees. As a training officer, my goal is to ensure that you are comfortable and proficient with this essential tool for managing assignments and fostering student engagement.
Synthetic Fiber Construction in lab .pptxPavel ( NSTU)
Synthetic fiber production is a fascinating and complex field that blends chemistry, engineering, and environmental science. By understanding these aspects, students can gain a comprehensive view of synthetic fiber production, its impact on society and the environment, and the potential for future innovations. Synthetic fibers play a crucial role in modern society, impacting various aspects of daily life, industry, and the environment. ynthetic fibers are integral to modern life, offering a range of benefits from cost-effectiveness and versatility to innovative applications and performance characteristics. While they pose environmental challenges, ongoing research and development aim to create more sustainable and eco-friendly alternatives. Understanding the importance of synthetic fibers helps in appreciating their role in the economy, industry, and daily life, while also emphasizing the need for sustainable practices and innovation.
Ethnobotany and Ethnopharmacology:
Ethnobotany in herbal drug evaluation,
Impact of Ethnobotany in traditional medicine,
New development in herbals,
Bio-prospecting tools for drug discovery,
Role of Ethnopharmacology in drug evaluation,
Reverse Pharmacology.
How to Create Map Views in the Odoo 17 ERPCeline George
The map views are useful for providing a geographical representation of data. They allow users to visualize and analyze the data in a more intuitive manner.
Model Attribute Check Company Auto PropertyCeline George
In Odoo, the multi-company feature allows you to manage multiple companies within a single Odoo database instance. Each company can have its own configurations while still sharing common resources such as products, customers, and suppliers.
This is a presentation by Dada Robert in a Your Skill Boost masterclass organised by the Excellence Foundation for South Sudan (EFSS) on Saturday, the 25th and Sunday, the 26th of May 2024.
He discussed the concept of quality improvement, emphasizing its applicability to various aspects of life, including personal, project, and program improvements. He defined quality as doing the right thing at the right time in the right way to achieve the best possible results and discussed the concept of the "gap" between what we know and what we do, and how this gap represents the areas we need to improve. He explained the scientific approach to quality improvement, which involves systematic performance analysis, testing and learning, and implementing change ideas. He also highlighted the importance of client focus and a team approach to quality improvement.
The Roman Empire A Historical Colossus.pdfkaushalkr1407
The Roman Empire, a vast and enduring power, stands as one of history's most remarkable civilizations, leaving an indelible imprint on the world. It emerged from the Roman Republic, transitioning into an imperial powerhouse under the leadership of Augustus Caesar in 27 BCE. This transformation marked the beginning of an era defined by unprecedented territorial expansion, architectural marvels, and profound cultural influence.
The empire's roots lie in the city of Rome, founded, according to legend, by Romulus in 753 BCE. Over centuries, Rome evolved from a small settlement to a formidable republic, characterized by a complex political system with elected officials and checks on power. However, internal strife, class conflicts, and military ambitions paved the way for the end of the Republic. Julius Caesar’s dictatorship and subsequent assassination in 44 BCE created a power vacuum, leading to a civil war. Octavian, later Augustus, emerged victorious, heralding the Roman Empire’s birth.
Under Augustus, the empire experienced the Pax Romana, a 200-year period of relative peace and stability. Augustus reformed the military, established efficient administrative systems, and initiated grand construction projects. The empire's borders expanded, encompassing territories from Britain to Egypt and from Spain to the Euphrates. Roman legions, renowned for their discipline and engineering prowess, secured and maintained these vast territories, building roads, fortifications, and cities that facilitated control and integration.
The Roman Empire’s society was hierarchical, with a rigid class system. At the top were the patricians, wealthy elites who held significant political power. Below them were the plebeians, free citizens with limited political influence, and the vast numbers of slaves who formed the backbone of the economy. The family unit was central, governed by the paterfamilias, the male head who held absolute authority.
Culturally, the Romans were eclectic, absorbing and adapting elements from the civilizations they encountered, particularly the Greeks. Roman art, literature, and philosophy reflected this synthesis, creating a rich cultural tapestry. Latin, the Roman language, became the lingua franca of the Western world, influencing numerous modern languages.
Roman architecture and engineering achievements were monumental. They perfected the arch, vault, and dome, constructing enduring structures like the Colosseum, Pantheon, and aqueducts. These engineering marvels not only showcased Roman ingenuity but also served practical purposes, from public entertainment to water supply.
How to Make a Field invisible in Odoo 17Celine George
It is possible to hide or invisible some fields in odoo. Commonly using “invisible” attribute in the field definition to invisible the fields. This slide will show how to make a field invisible in odoo 17.
19. 1.
Pictures
a. JPG/JPEG
This is pronounced as “jay-peg” and is the short form of .jpeg
or Joint Photographic Experts Group.
This type of image file can support 16.7 million colors that is
why it is suitable for use when working with full color
photographic images.
.JPG does not work well on lettering, line drawings, or simple
graphics. .JPG images are relatively small in file size.
20.
21. 1.
Pictures
b. .GIF
This stands for Graphics Interchange Format.
This type of image file is capable of displaying
transparencies.
.GIF is much better for logos, drawings, small text,
black and white images, or low-resolution files.
22.
23. 1.
Pictures
c. .PNG
This is pronounced as “ping“. It stands for Portable
Network Graphics.
It was built around the capabilities of .GIF. Its
development was basically for the purpose of
transporting images on the Internet at faster rates.
.PNG allows the control of the transparency level or
opacity of images.
24.
25. 2. Clipart
This is generally a .GIF type; line art drawings or images
used as generic representation for ideas and objects that
you might want to integrate in your document.
26. 3. Shapes
These are printable objects or materials that you can
integrate in your document to enhance its appearance or
allow you to have some tools to use for composing and
representing ideas or messages.
27. 4. Smart Art
Generally, these are predefined sets of different shapes
grouped together to form ideas that are organizational
or structural in nature.
28. 5. Charts
Another type of material that you can integrate in your
Word document that allows you to represent data
characteristics and trends. This is quite useful when you
are preparing reports that correlate and present data in a
graphical manner.
29. 6. Screenshot
Sometimes, creating reports or manuals for training or
procedures will require the integration of a more
realistic image of what you are discussing on your report
or manual. Nothing can get you a more realistic image
than a screenshot.
30.
31. This is the default setting for images that are inserted or
integrated in your document. It treats your image like a
text font with the bottom side totally aligned with the
text line. This setting is usually used when you need to
place your image at the beginning of a paragraph. When
placed between texts in a paragraph or a sentence, it
distorts the overall appearance and arrangement of the
texts in the paragraph because it will take up the space it
needs vertically, pushing whole lines of texts upward.
A. In Line with Text
32.
33. This setting allows the image you inserted to be
placed anywhere with the paragraph with the text
going around the image in a square pattern like
frame.
B. Square
34. This is almost the same as the Square setting, but here
the text “hug” or conforms to the general shape of the
image. This allows you to get a more creative effect on
your document. This setting can mostly be achieved if
you are using an image that supports transparency like a
.GIF or .PNG file.
C.
Tight
35. This setting allows the text on your document to flow
even tighter taking the contours and shape of the
image. Again, this can be best used with .GIF or .PNG
type of image.
D. Through
36. This setting pushes the texts away vertically to the top
and/or the bottom of the image so that the image
occupies a whole text line on its own.
E. Top and Bottom
37. This allows your image to be dragged and placed
anywhere on your document but with all the texts
floating in front of it. It effectively makes your image
look like a background.
F. Behind Text
38. As it suggests, this setting allows your image to be
placed right on top of the text as if your image was
dropped right on it. That means whatever part of the
text you placed the image on, it will be covered by the
image.
G. In Front of Text
39. Create and send out an informative campaign letter
to at least 10 sponsors of an environmental
advocacy foundation. The letter must contain
images related to a solar campaign and charts that
will show the progress of the movement.
ACTIVITY 1
40. 1. Using Microsoft Word create a simple flow chart
that summarizes the steps in creation a merged
document by inserting a series of shapes on your
document.
2. Create a screenshot and put a label on each part
of the screen.
3. Take a selfies and transfer the pictures on your
computer and create a collage of your pic using
Microsoft Word.
ACTIVITY 2