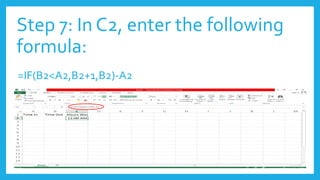
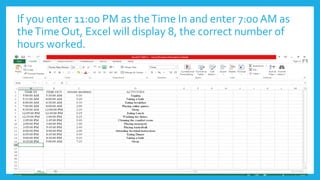
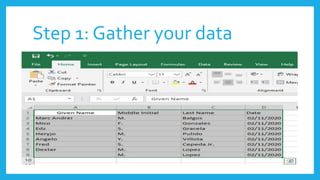
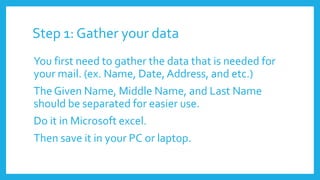
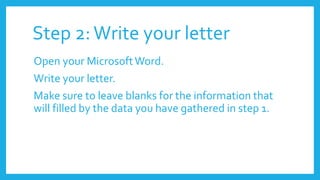
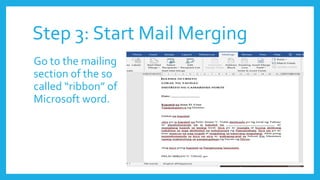
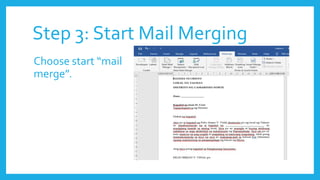
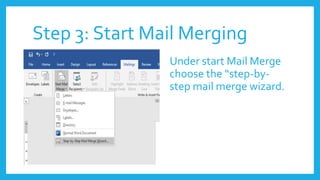
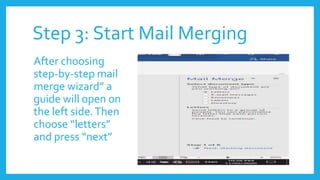
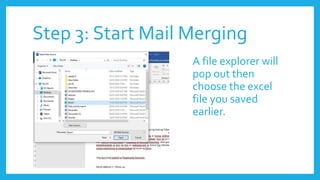
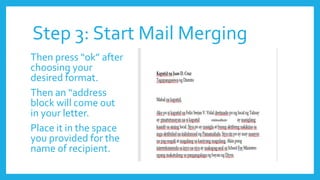
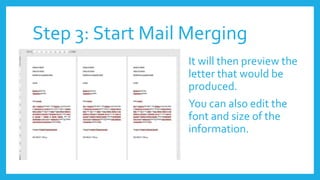
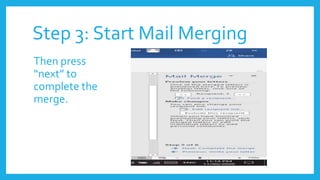
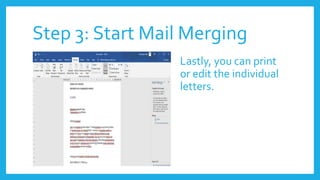
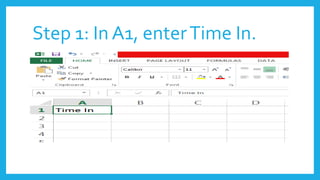
This document provides a 3-step tutorial for using mail merge in Microsoft Word to send personalized letters to multiple recipients using data from an Excel file:
1. Gather contact information for recipients in an Excel file with separate columns for name, address, etc. Save the file.
2. Write a generic letter in Word, leaving blanks for personalized fields.
3. Use Word's mail merge wizard to link to the Excel file, preview and complete the merge to automatically populate each letter with the correct recipient details. Fields from the Excel file will be inserted into the blanks. Letters can then be printed or edited individually.
7. Step 1: Gather your data
You first need to gather the data that is needed for
your mail. (ex. Name, Date, Address, and etc.)
The Given Name, Middle Name, and Last Name
should be separated for easier use.
Do it in Microsoft excel.
Then save it in your PC or laptop.
9. Step 2:Write your letter
Open your MicrosoftWord.
Write your letter.
Make sure to leave blanks for the information that
will filled by the data you have gathered in step 1.
10. Step 3: Start Mail Merging
Go to the mailing
section of the so
called “ribbon” of
Microsoft word.
11. Step 3: Start Mail Merging
Choose start “mail
merge”.
12. Step 3: Start Mail Merging
Under start Mail Merge
choose the “step-by-
step mail merge wizard.
13. Step 3: Start Mail Merging
After choosing
step-by-step mail
merge wizard” a
guide will open on
the left side.Then
choose “letters”
and press “next”
14. Step 3: Start Mail Merging
On the next step
choose “use the current
document” as your
starting document then
press next.
15. Step 3: Start Mail Merging
Next choose your
recipients.
Select existing
recipients because you
have the data earlier.
17. Step 3: Start Mail Merging
A file explorer will
pop out then
choose the excel
file you saved
earlier.
18. Step 3: Start Mail Merging
“select table” will
come out so press
“ok”.
19. Step 3: Start Mail Merging
The recipient list
will come out.
Feel free to
make changes.
Then press “ok”.
20. Step 3: Start Mail Merging
After choosing
the recipients
press “next”
21. Step 3: Start Mail Merging
Choose “address
block”.
Use it for how
the name of the
recipient would
come out.
22. Step 3: Start Mail Merging
Then press “ok” after
choosing your
desired format.
Then an “address
block will come out
in your letter.
Place it in the space
you provided for the
name of recipient.
23. Step 3: Start Mail Merging
Choose “more items”.
Use it for how the date
as an example.
24. Step 3: Start Mail Merging
Then press insert.
After that “date” will
come out in your letter.
Place it in the space
you provided for the
date.