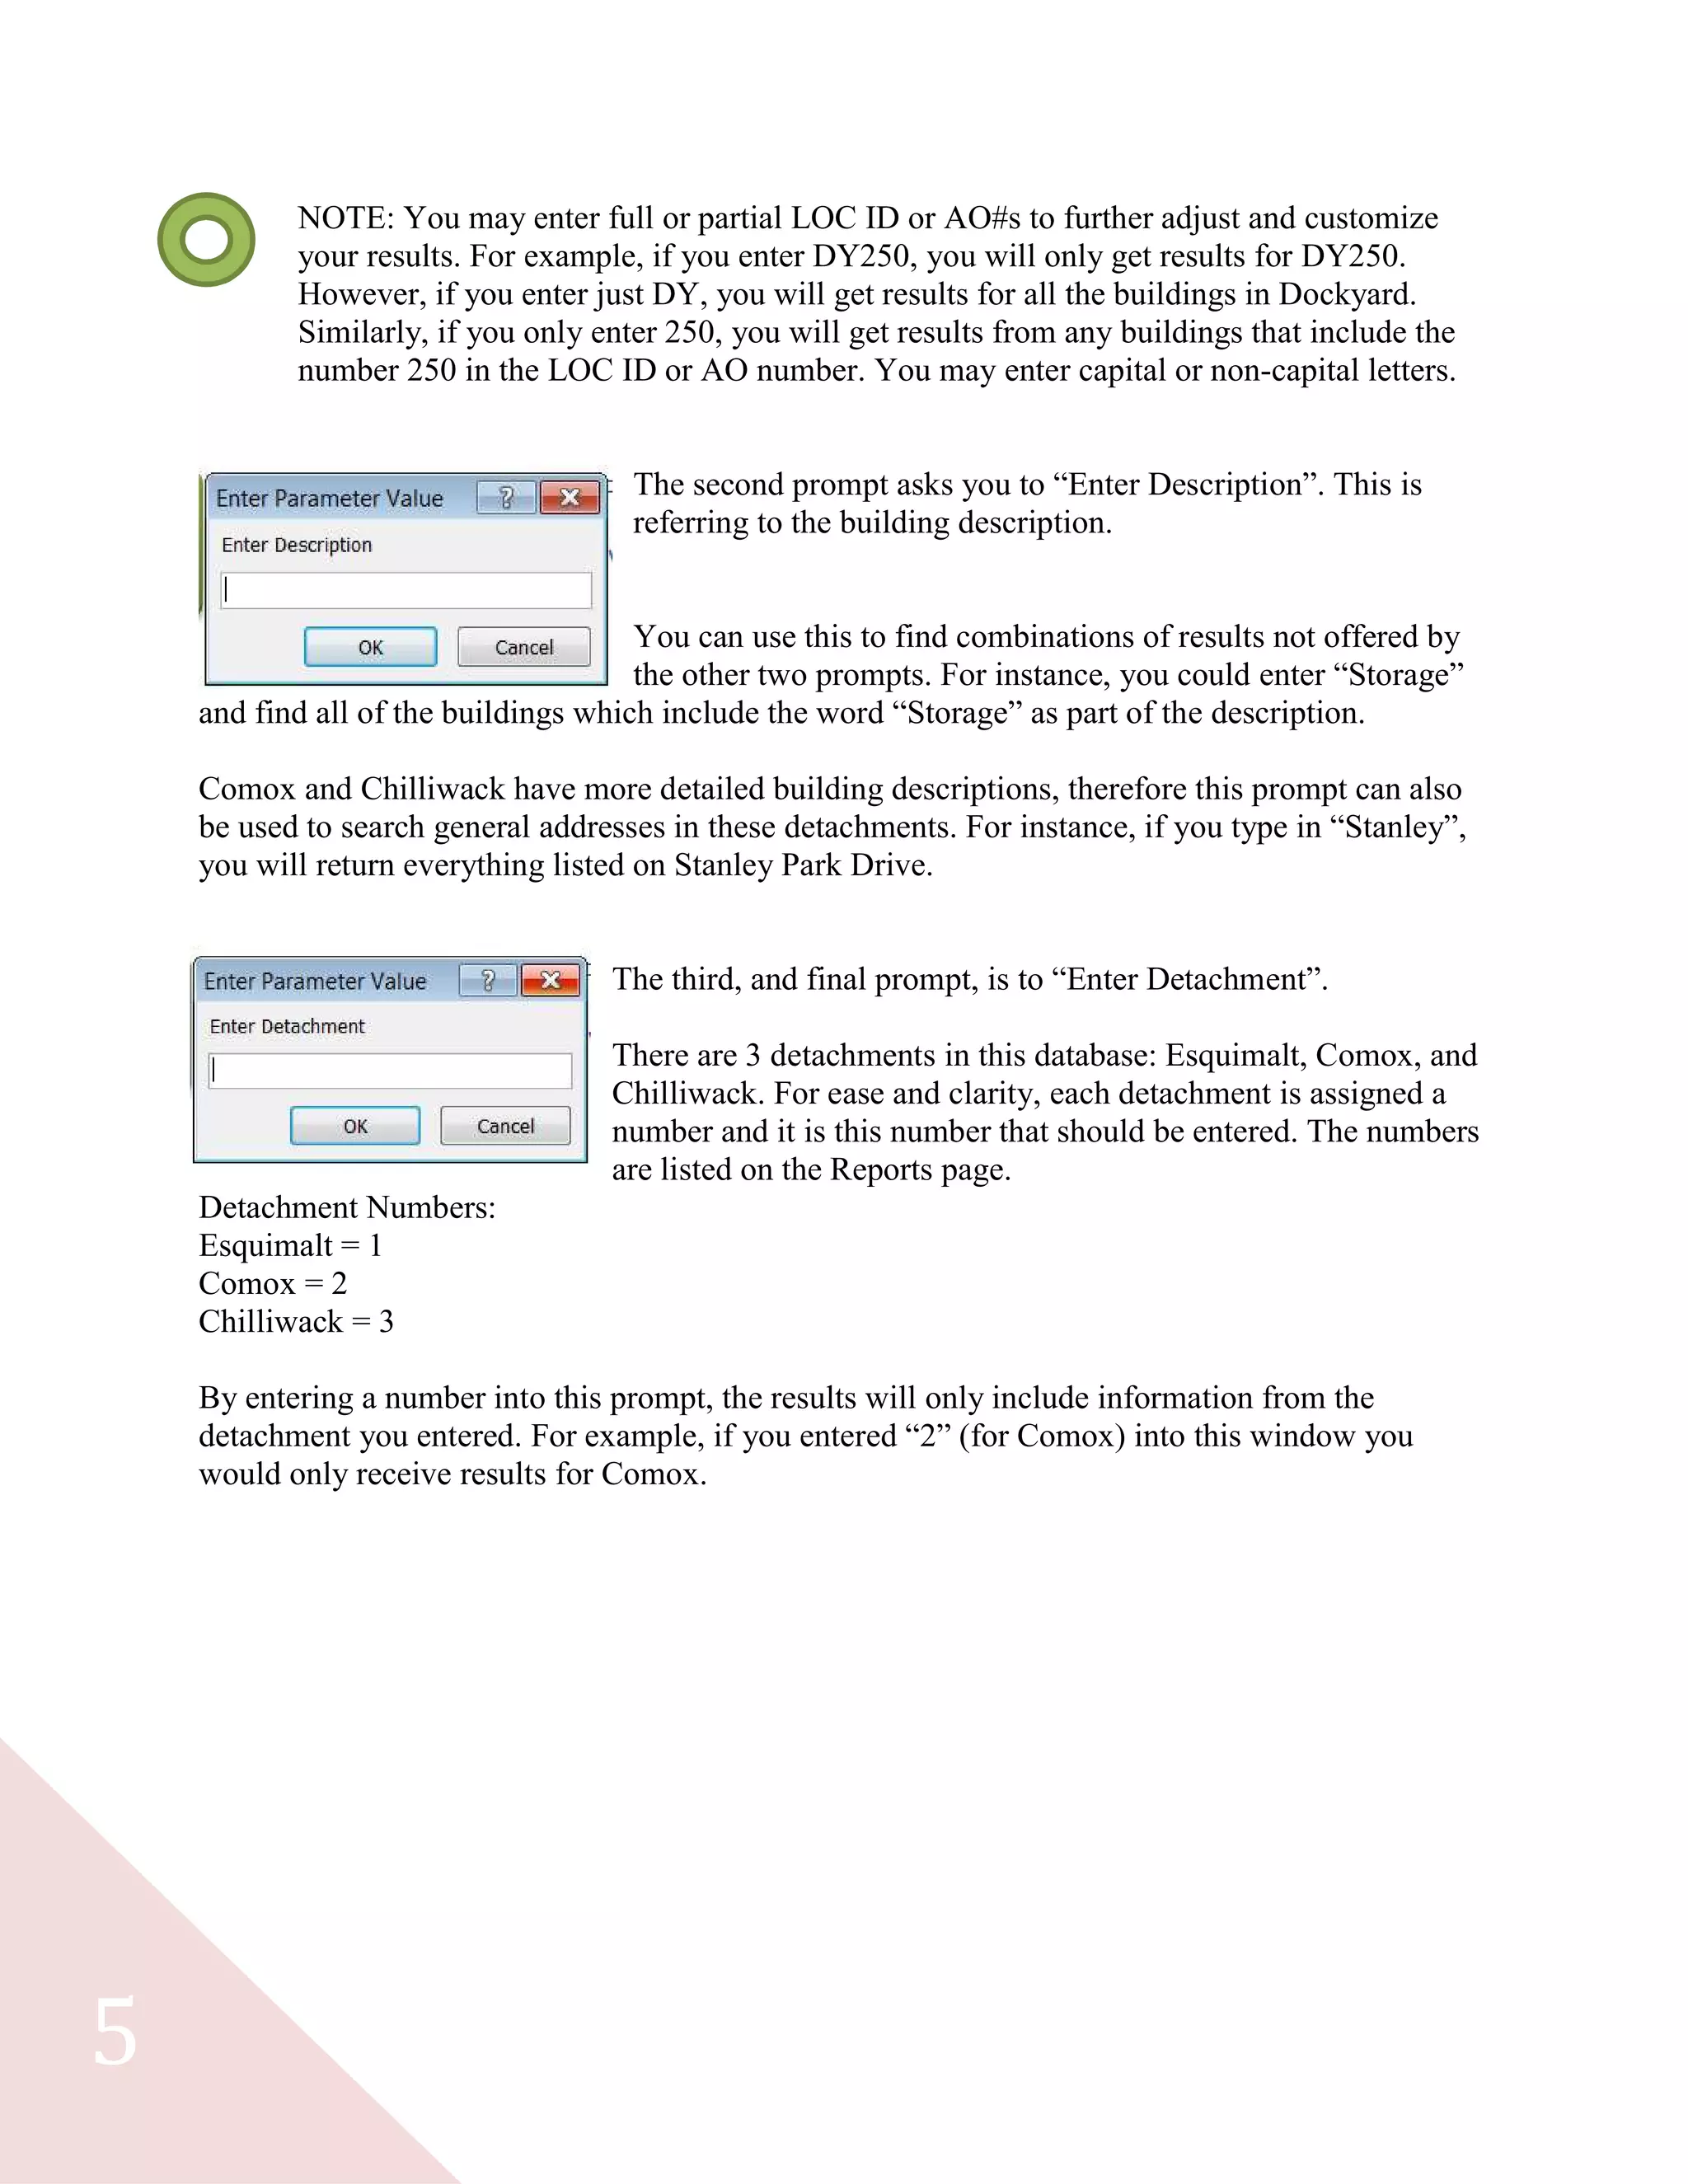
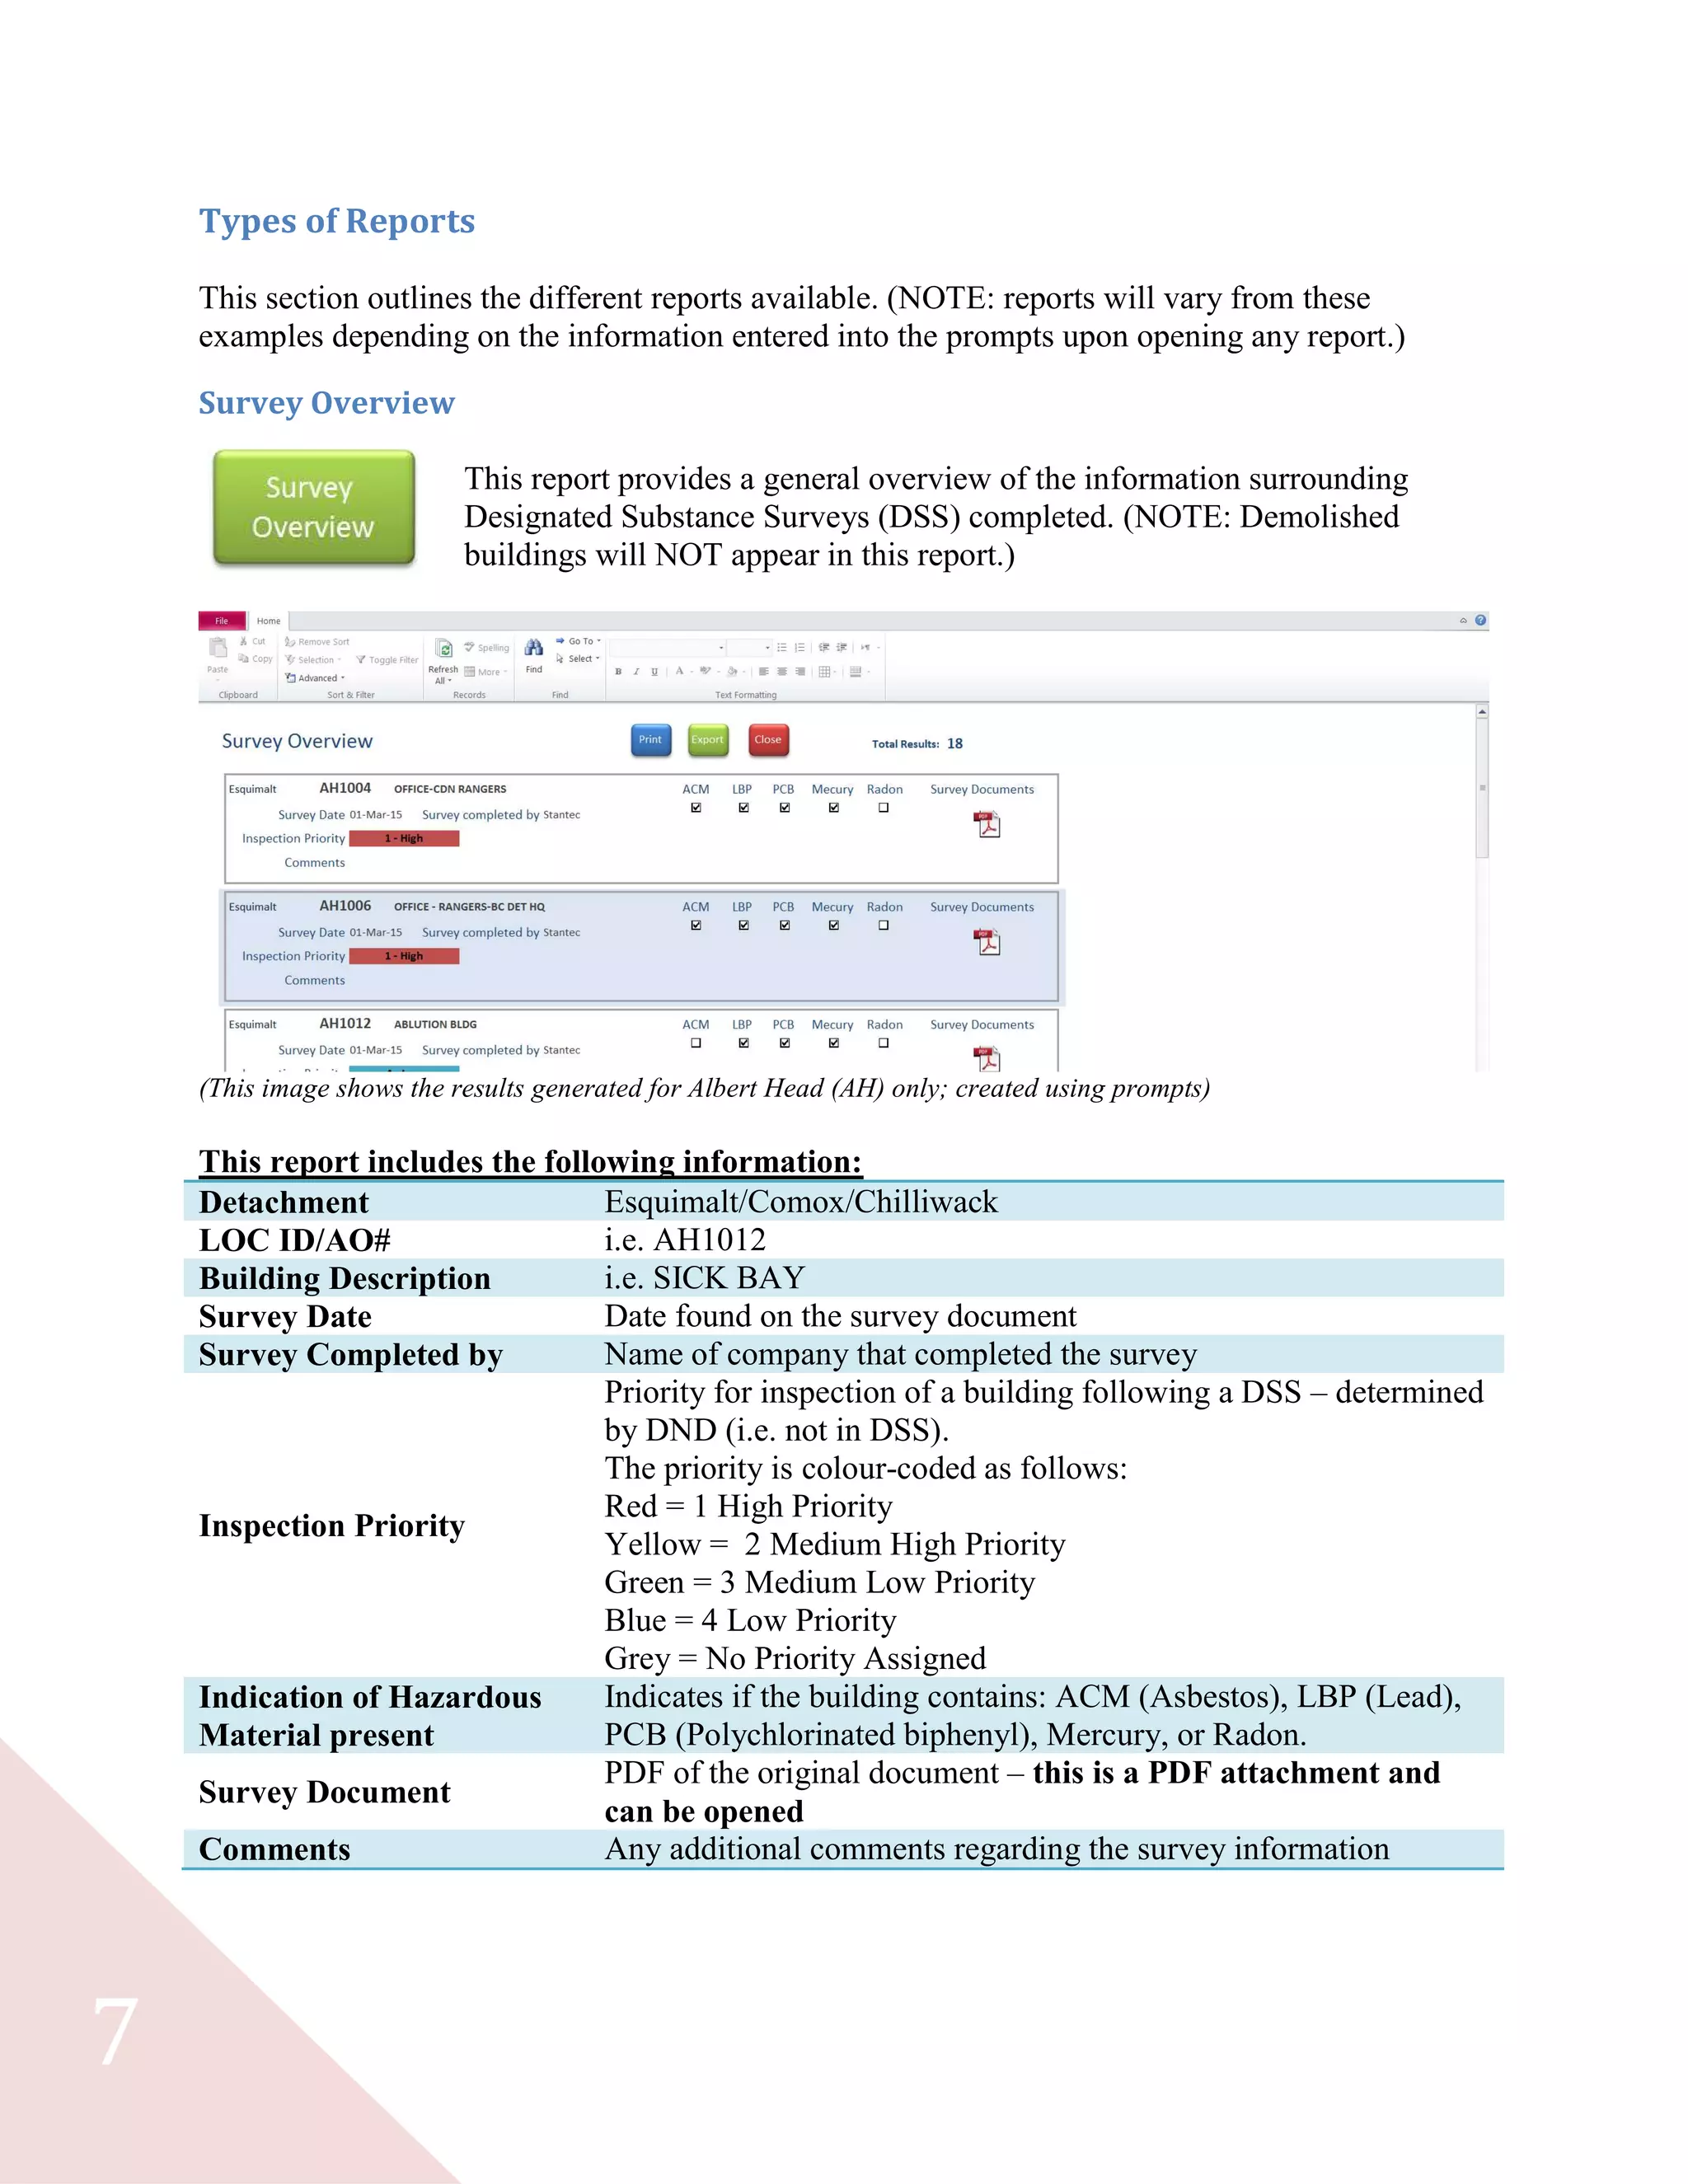
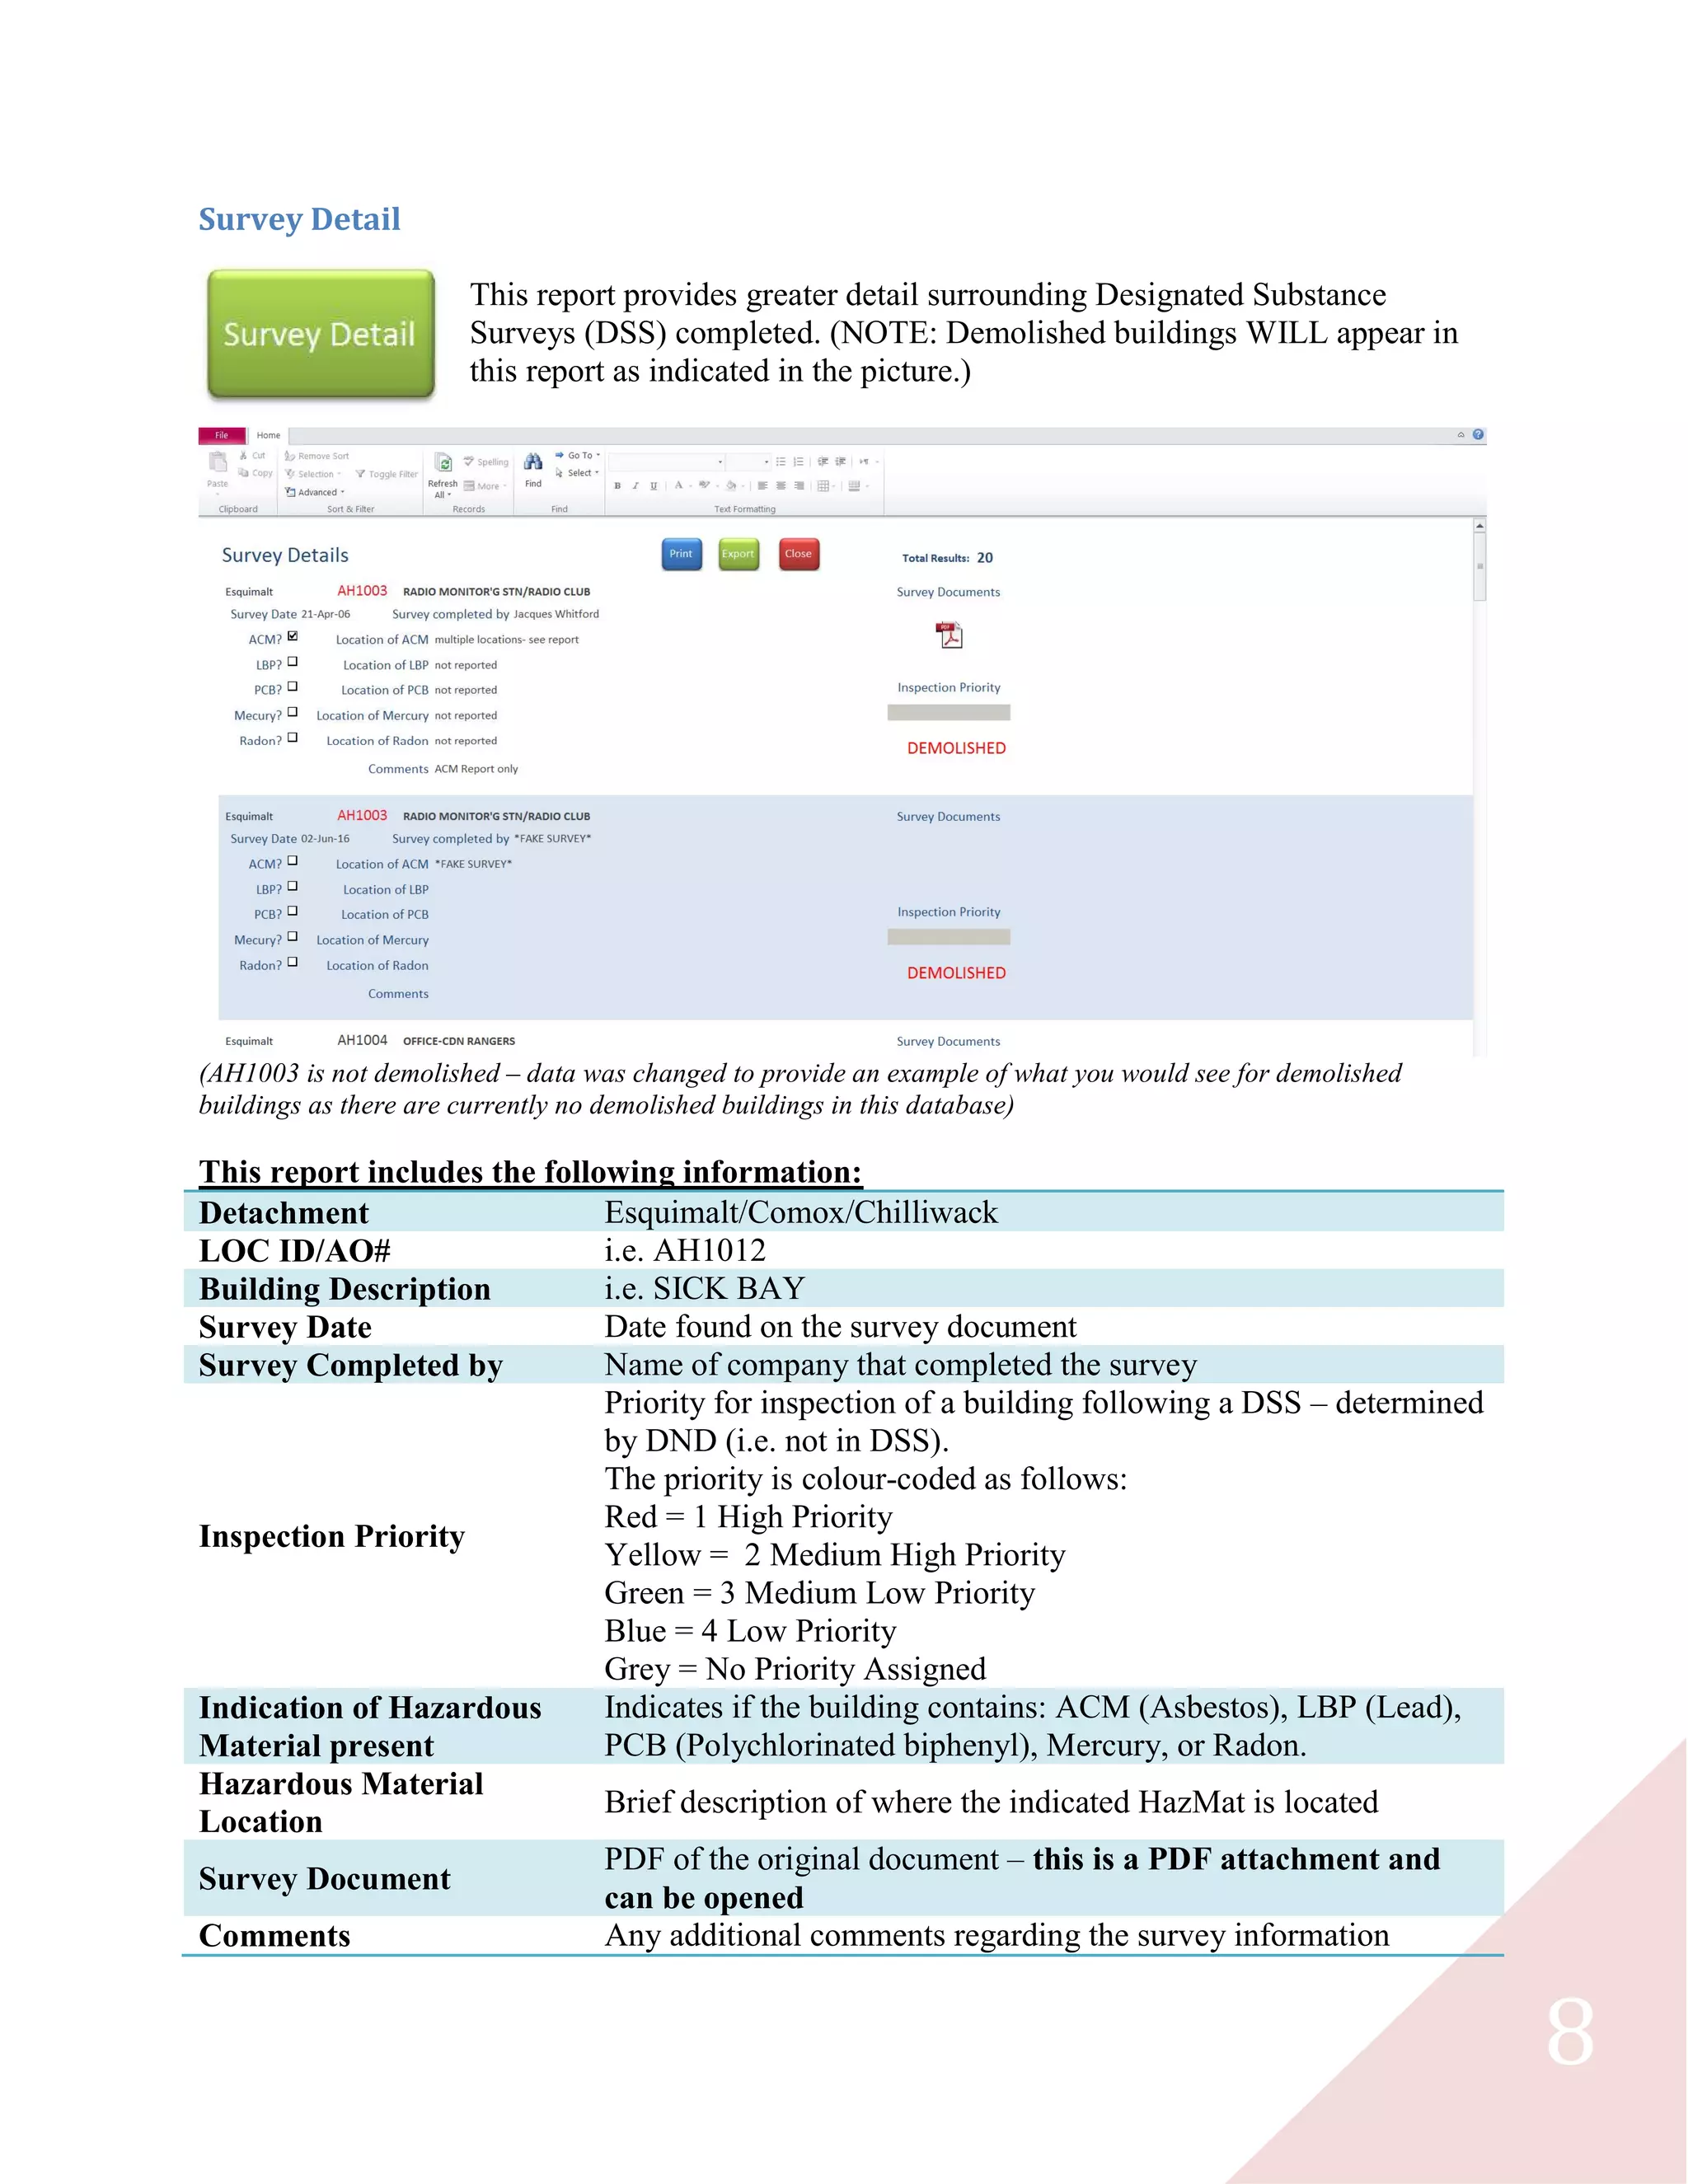
This report provides an overview of designated substance survey information, including the location ID or AO number, building description, survey date, company that completed the survey, inspection priority, indication of any hazardous materials present, a PDF of the original survey document, and any comments. The information can be filtered by location ID or AO number, building description, and detachment location to view customized results.
![1
Table of Contents
Introduction..................................................................................................................................... 2
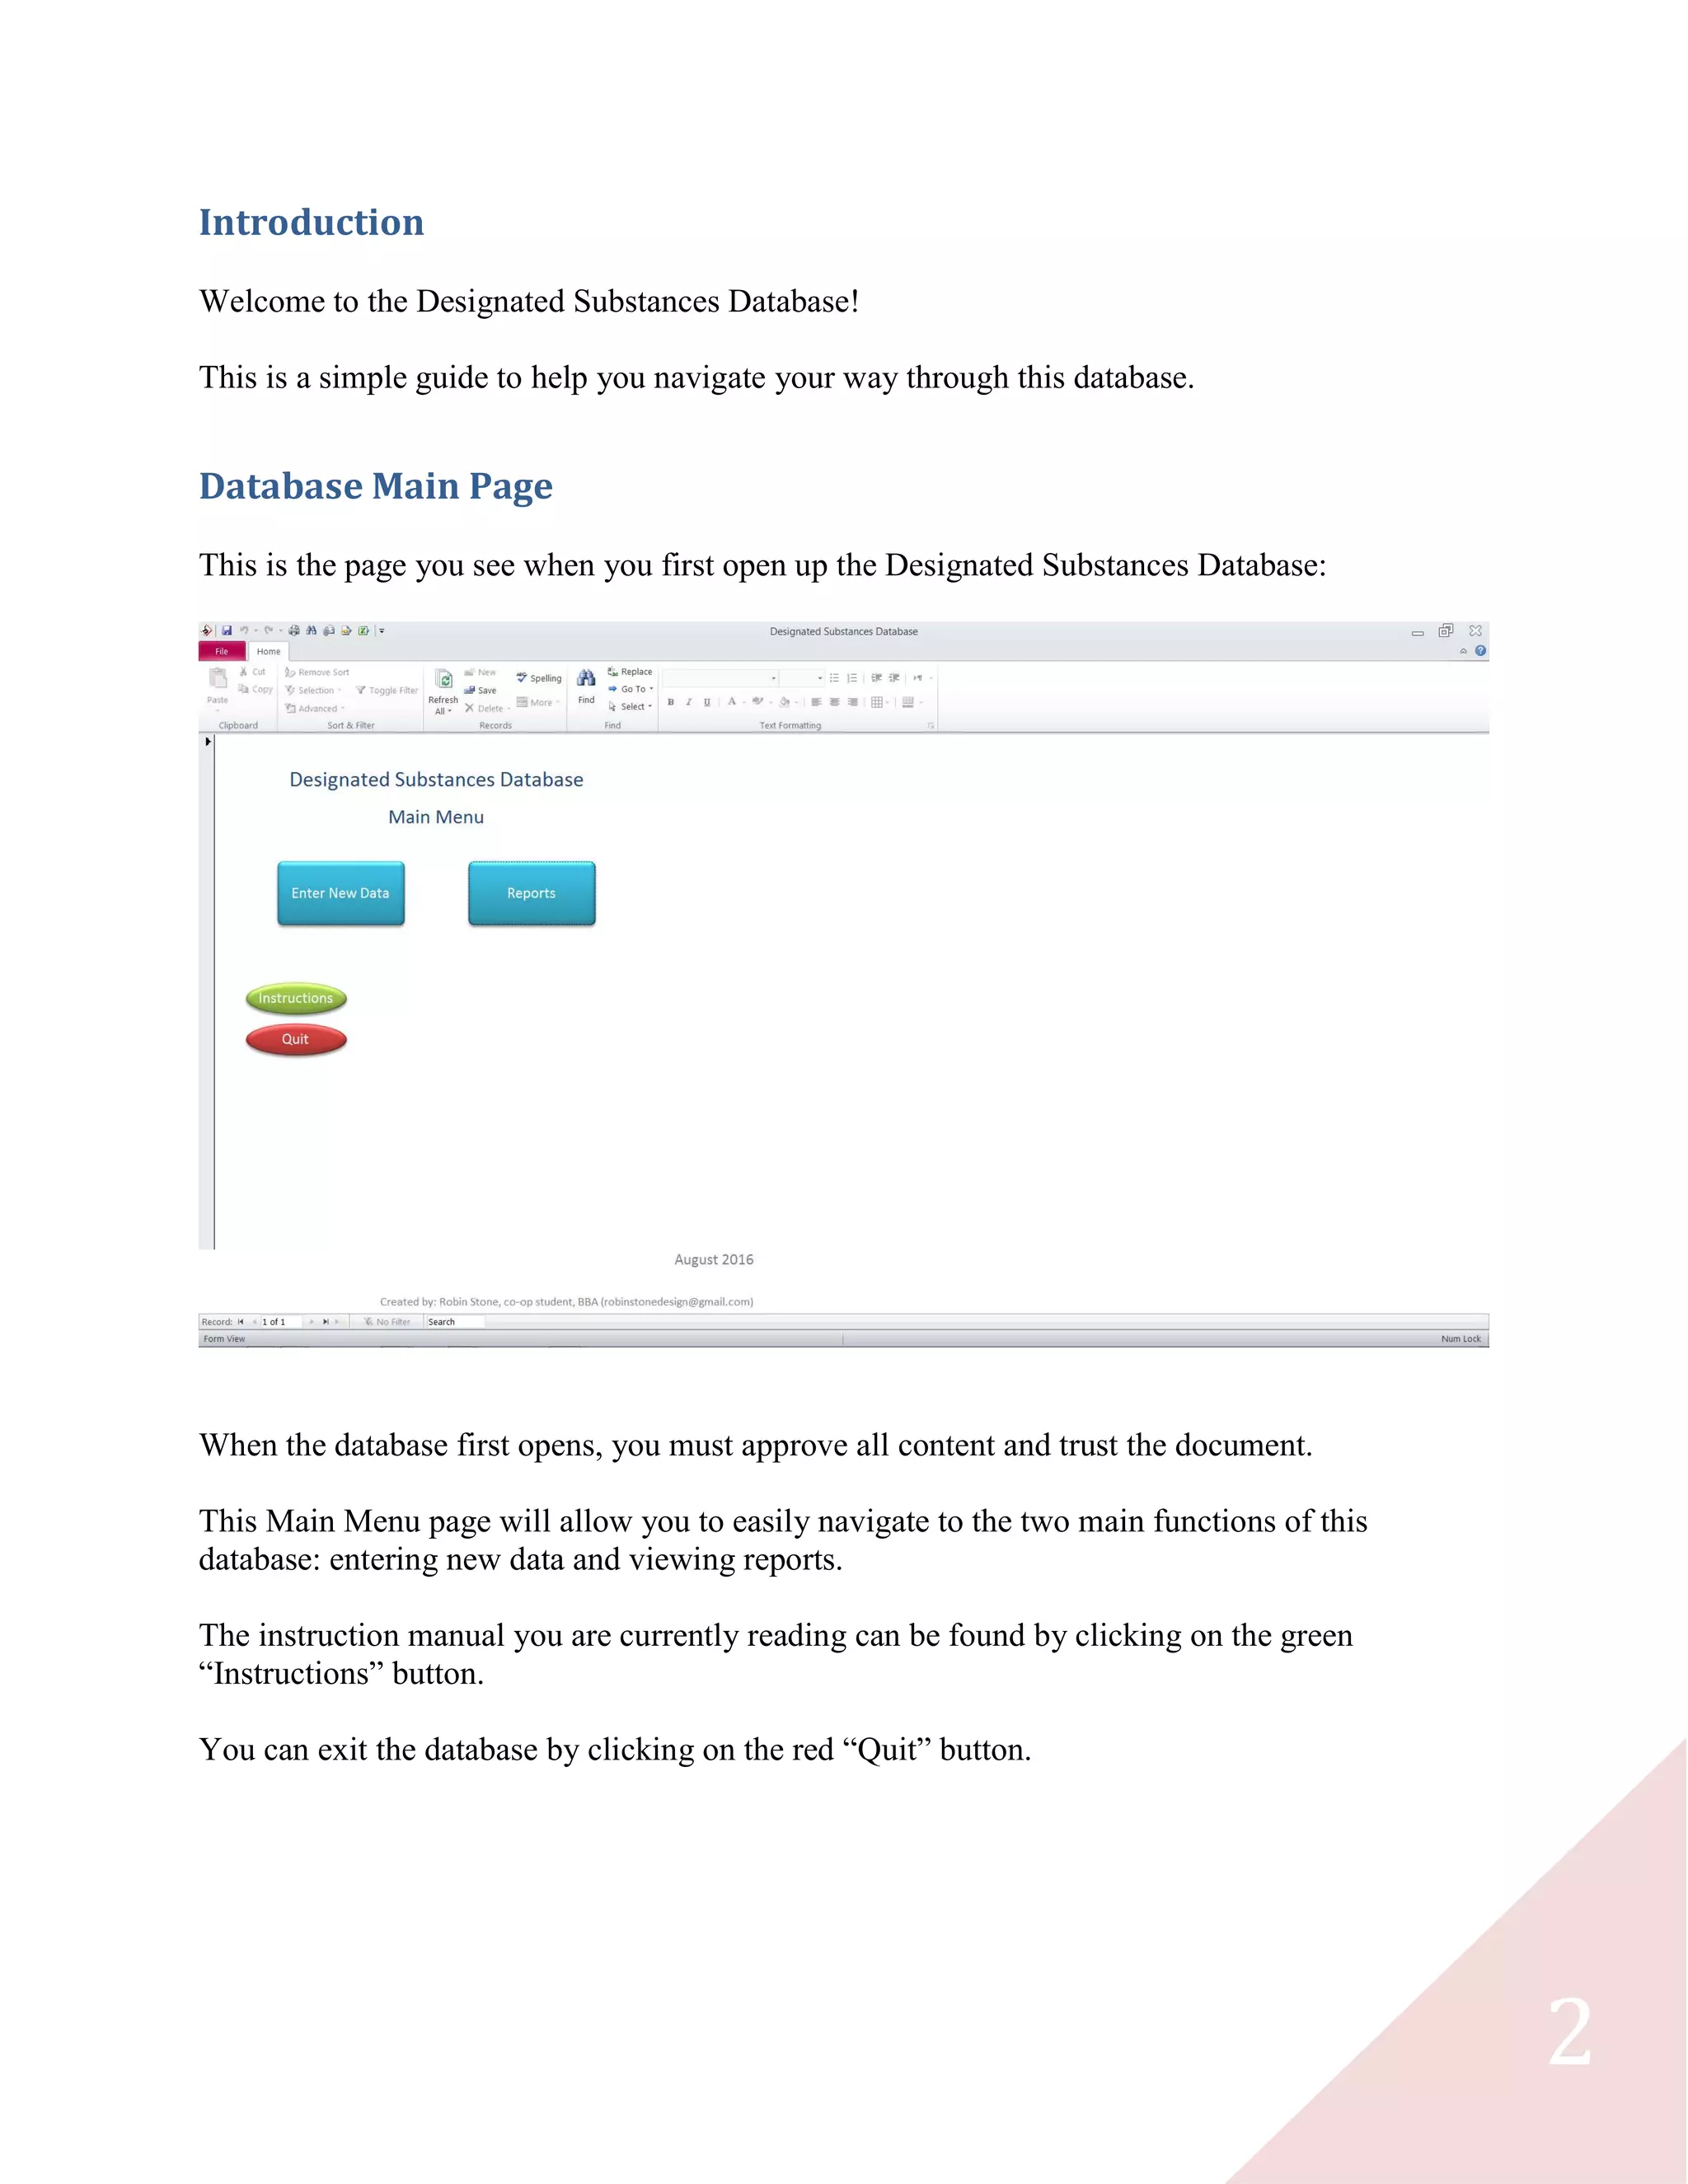
Database Main Page........................................................................................................................ 2
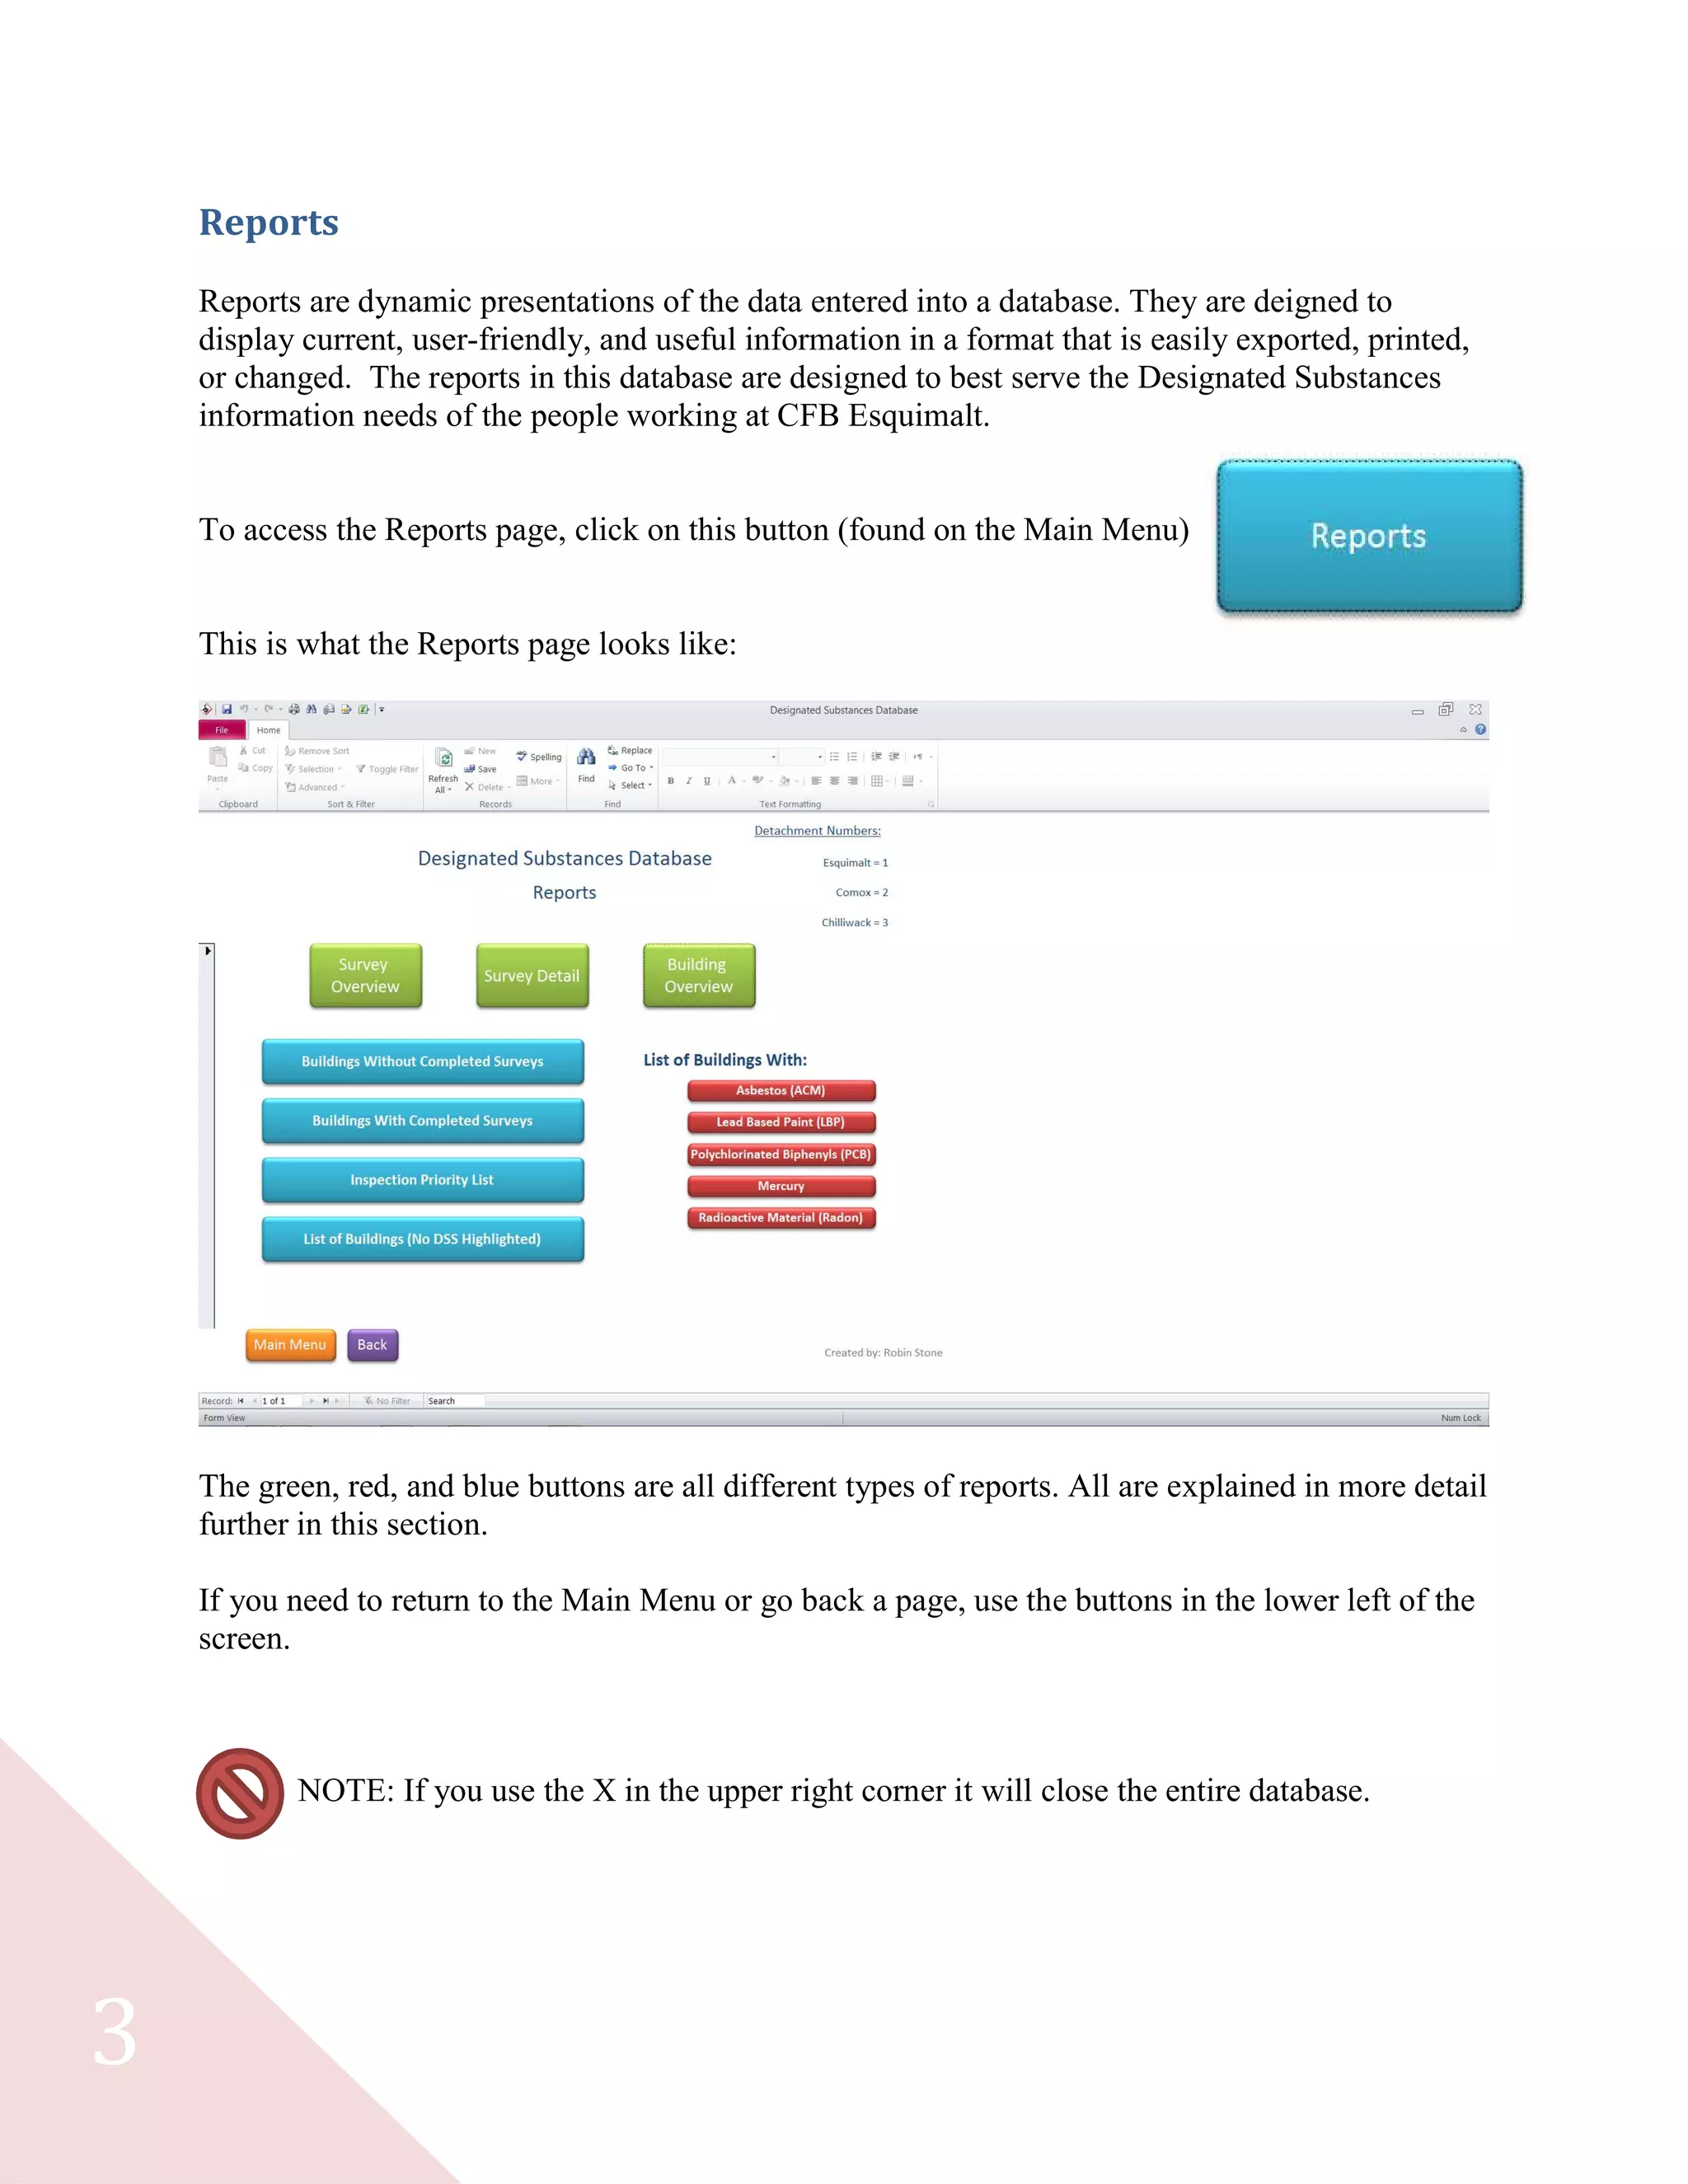
Reports............................................................................................................................................ 3
Report Overview......................................................................................................................... 4
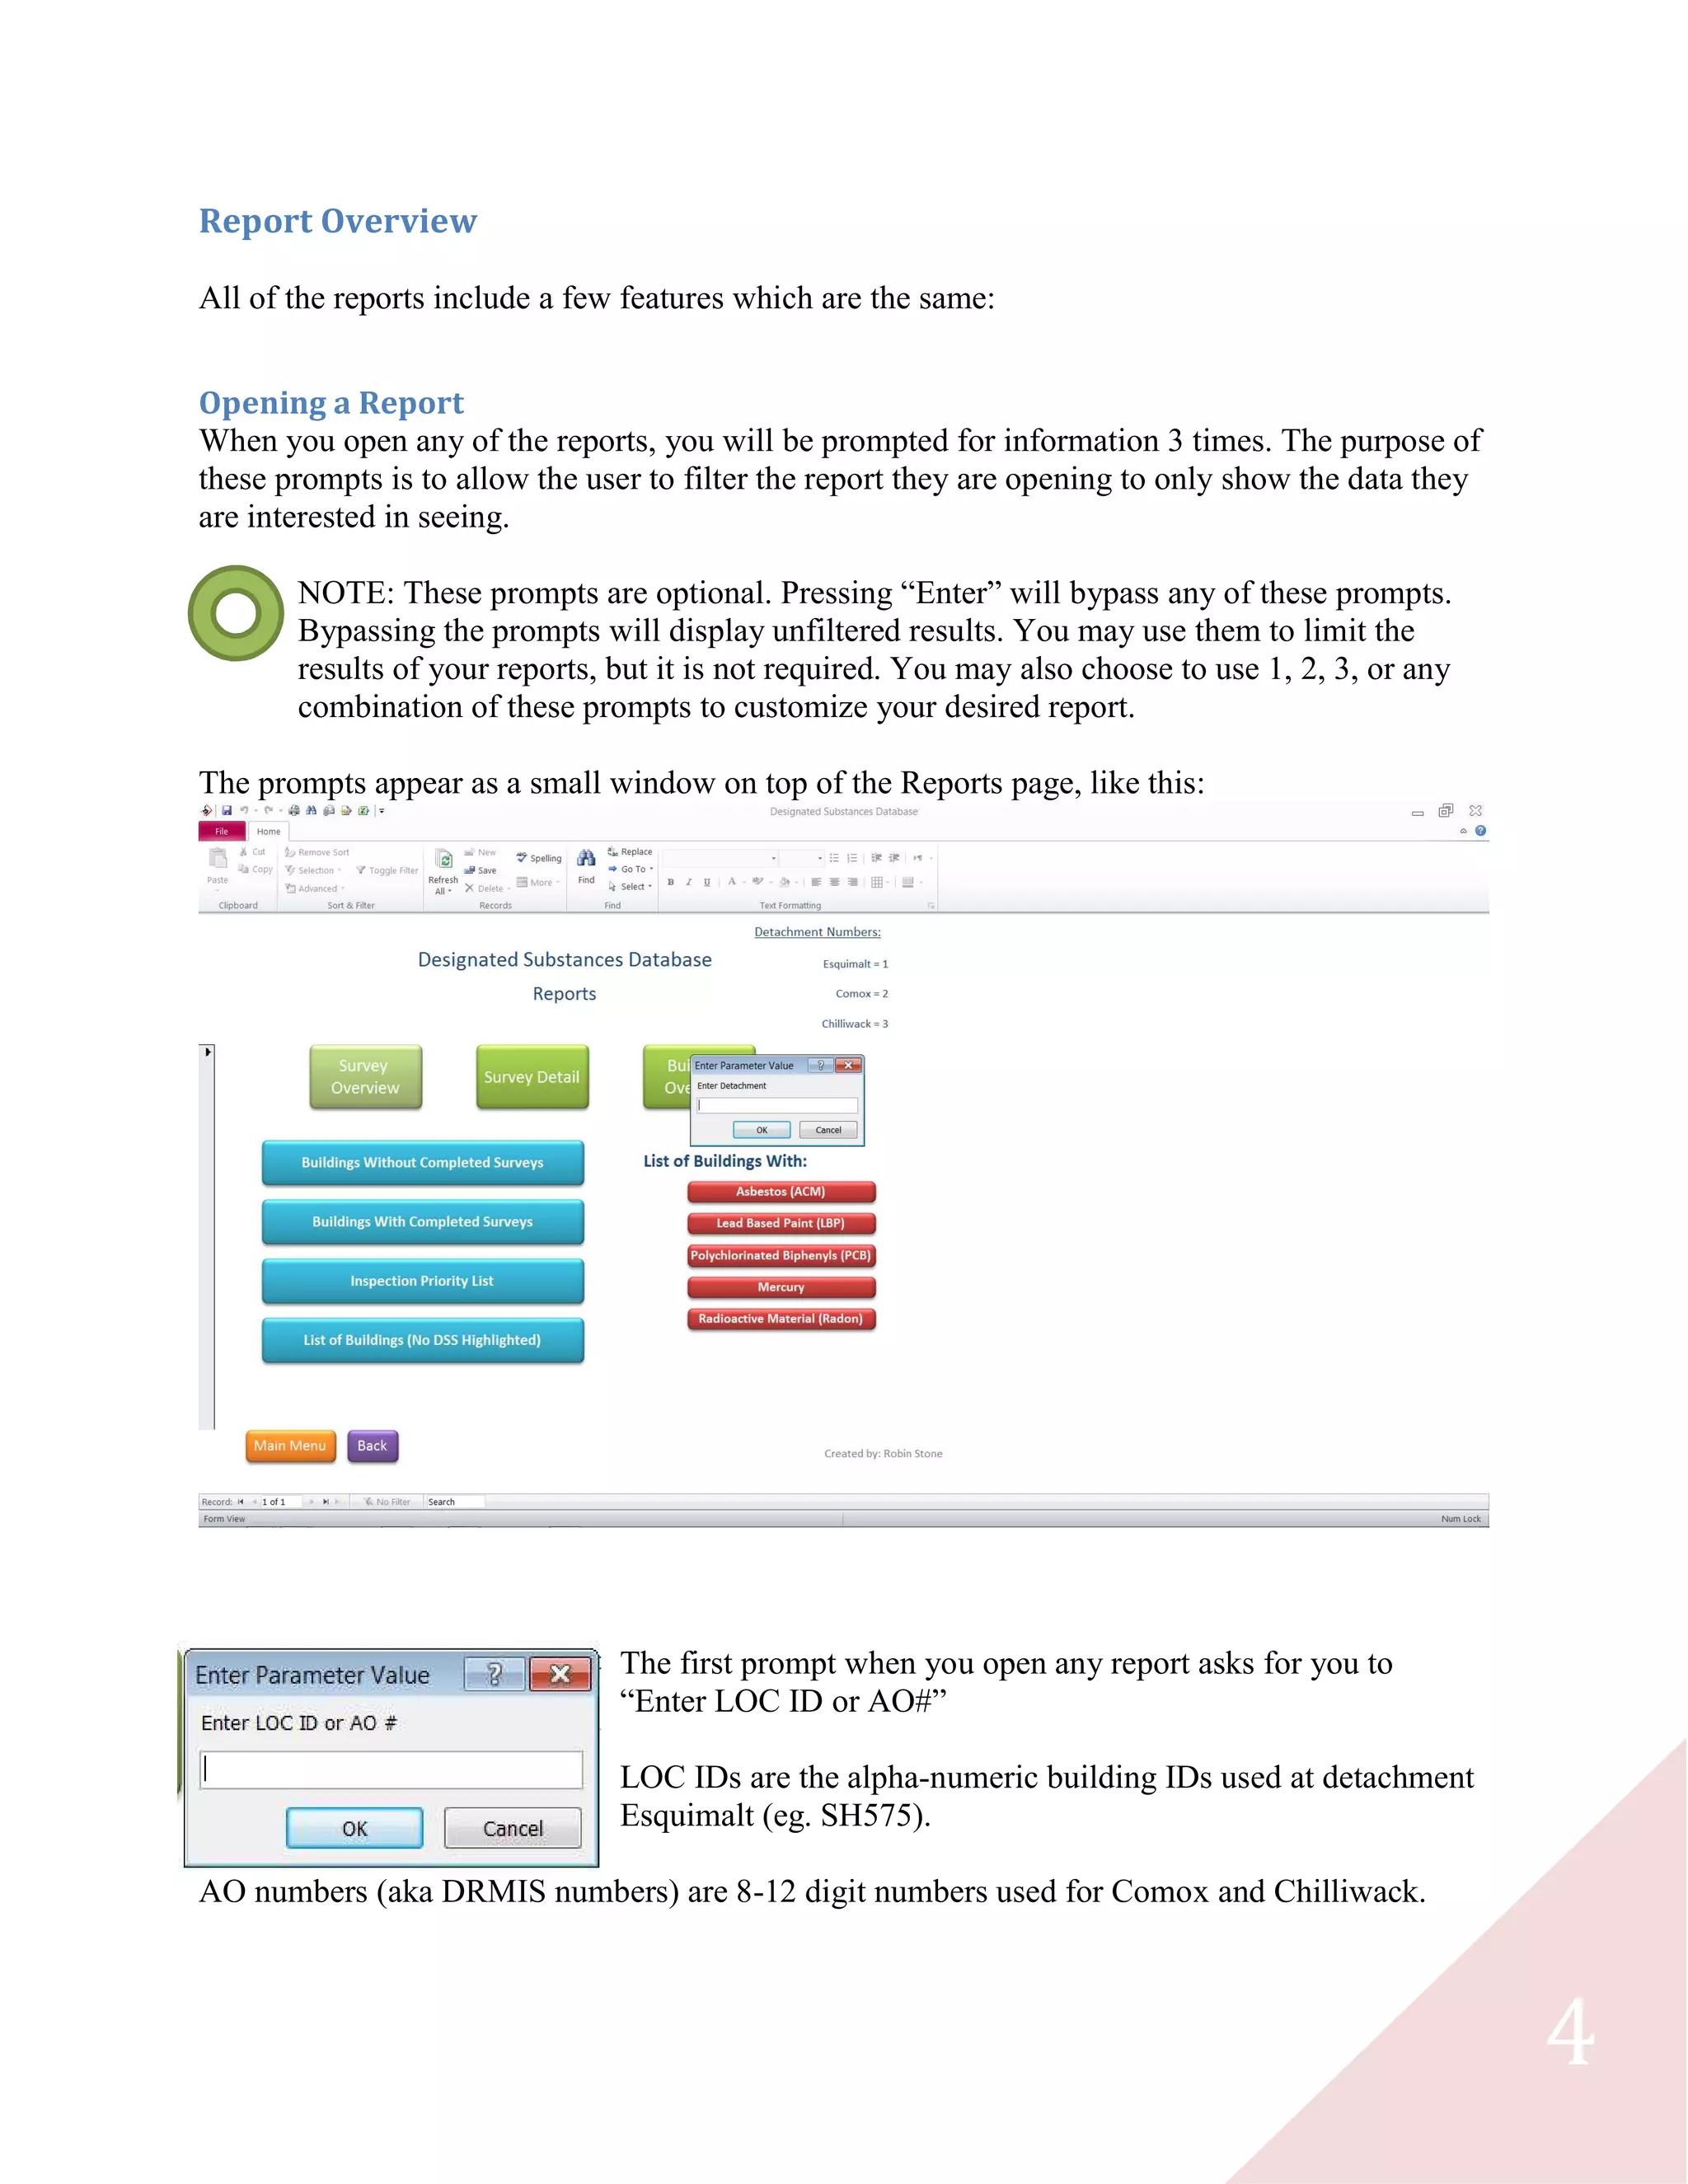
Opening a Report .................................................................................................................... 4
Report Layout ......................................................................................................................... 6
Types of Reports......................................................................................................................... 7
Survey Overview .................................................................................................................... 7
Survey Detail .......................................................................................................................... 8
Building Overview.................................................................................................................. 9
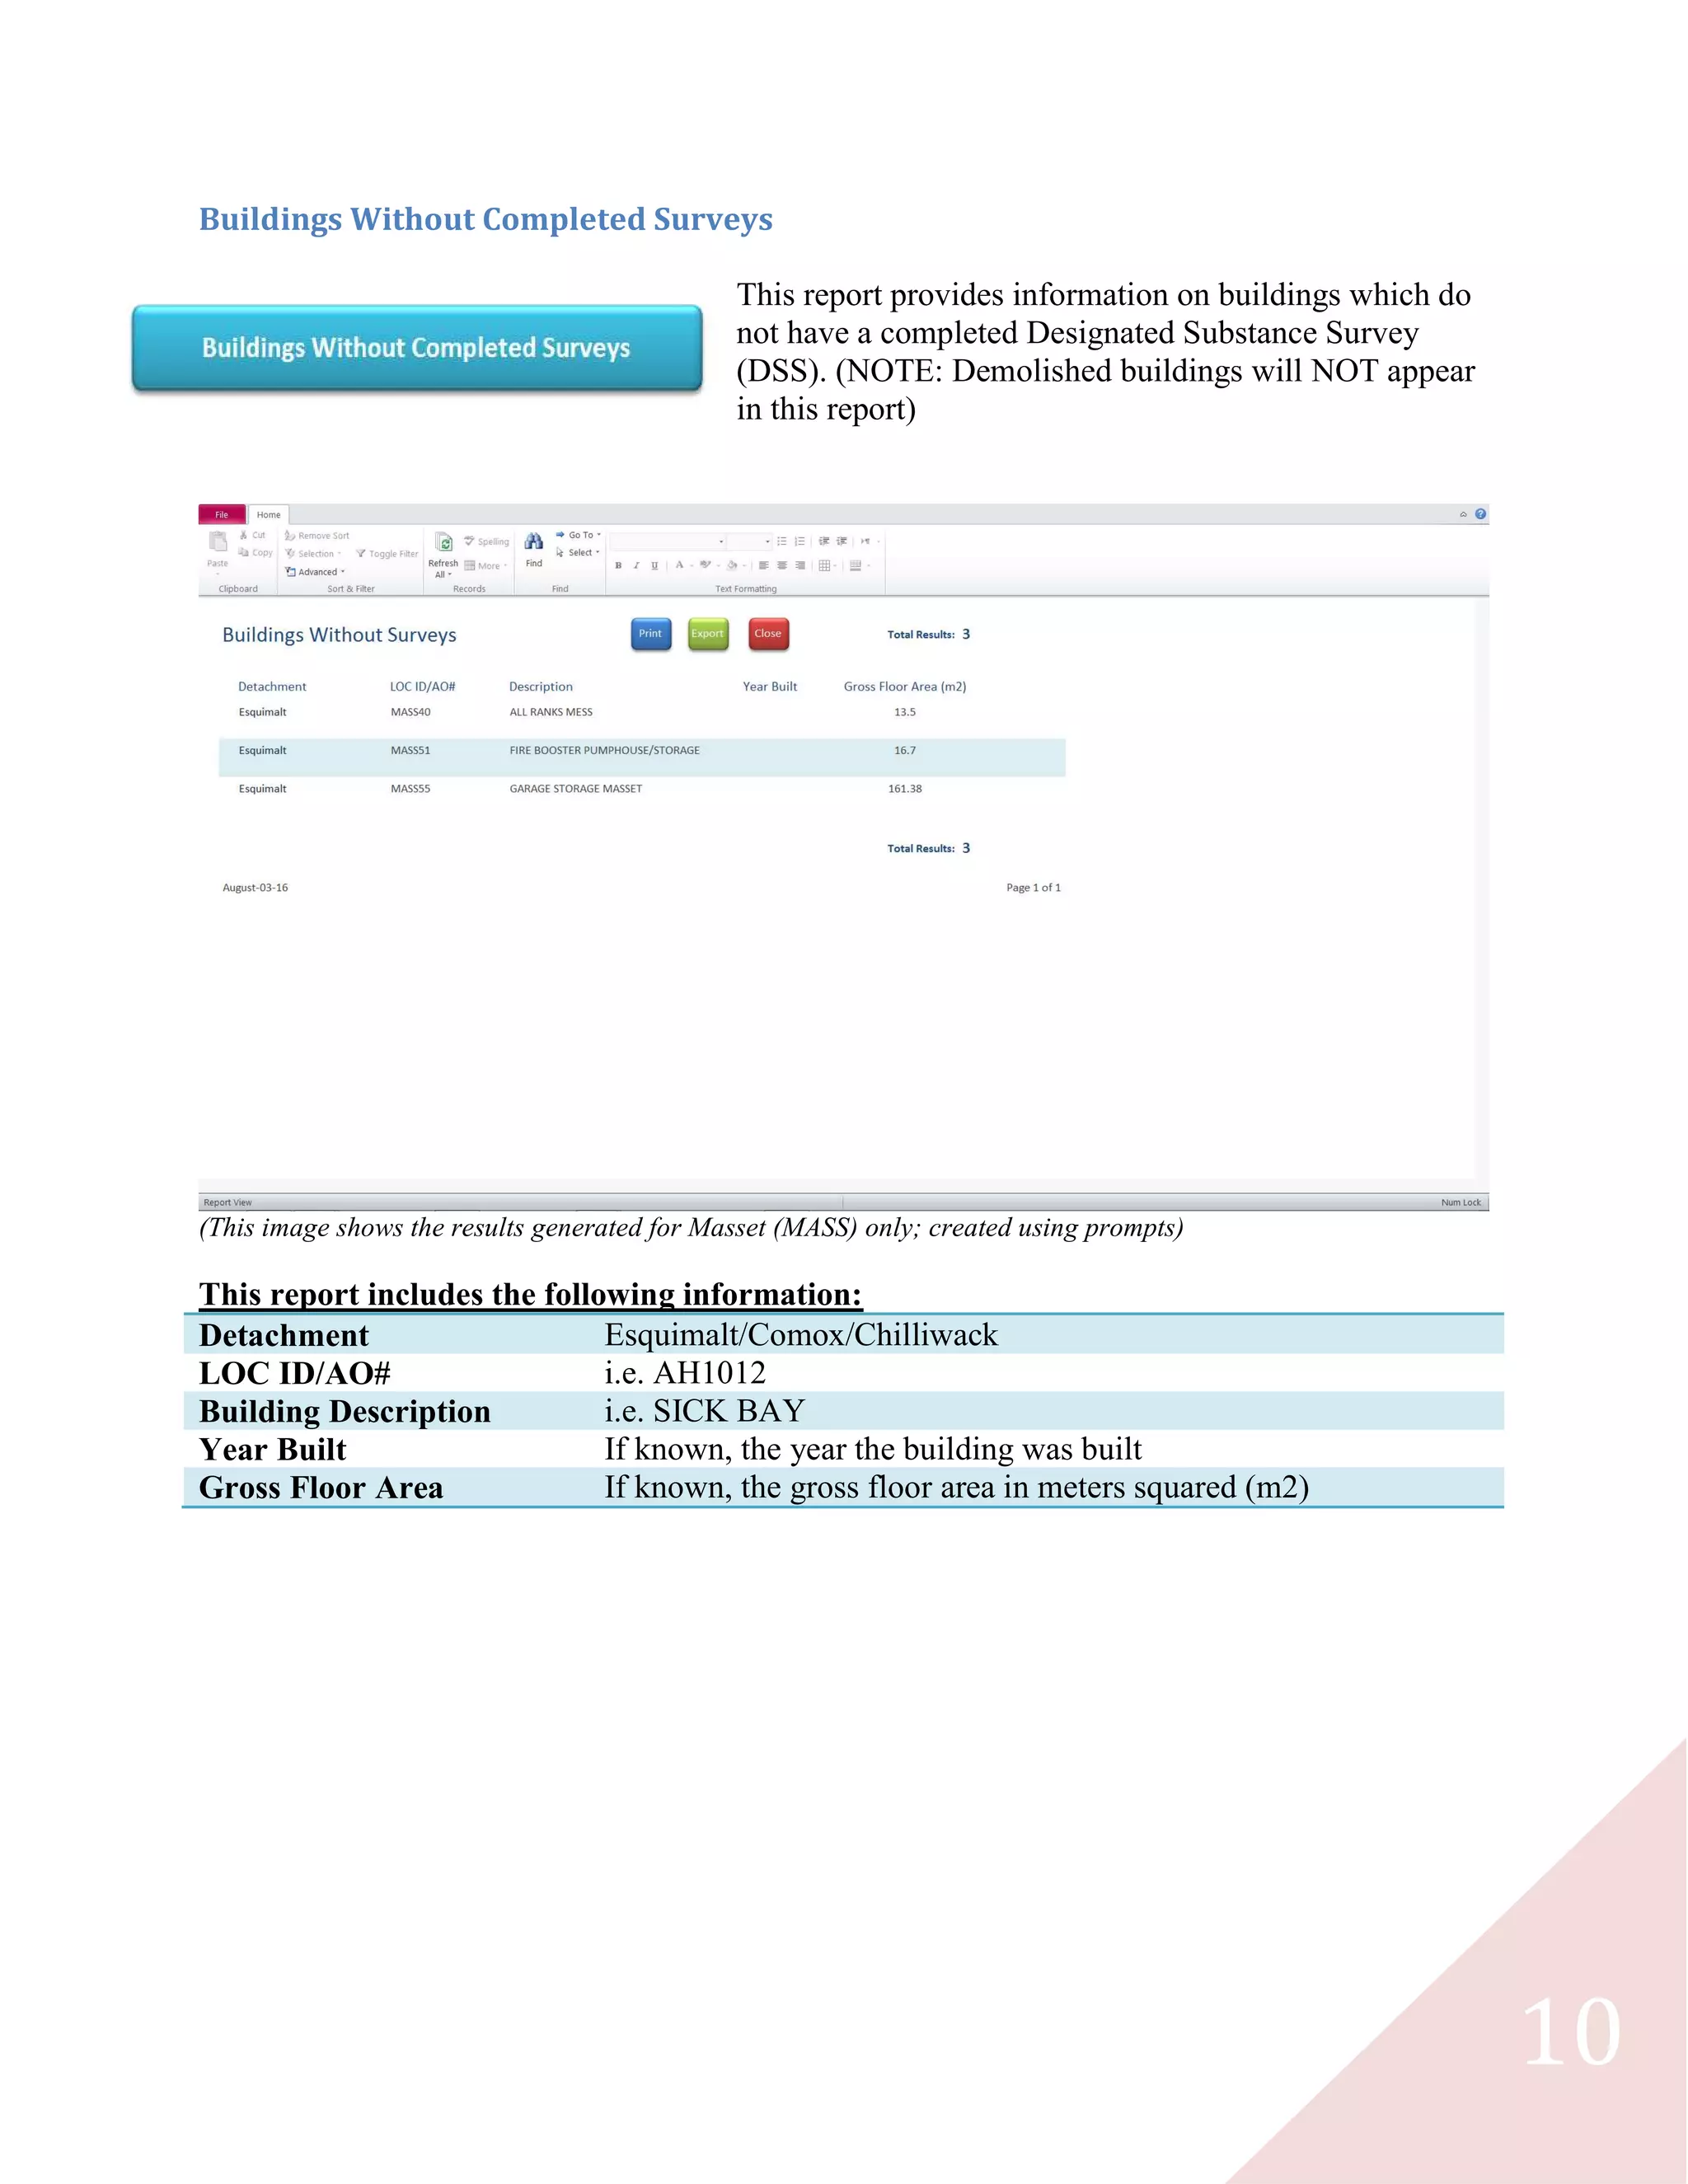
Buildings Without Completed Surveys ................................................................................ 10
Buildings With Completed Surveys...................................................................................... 11
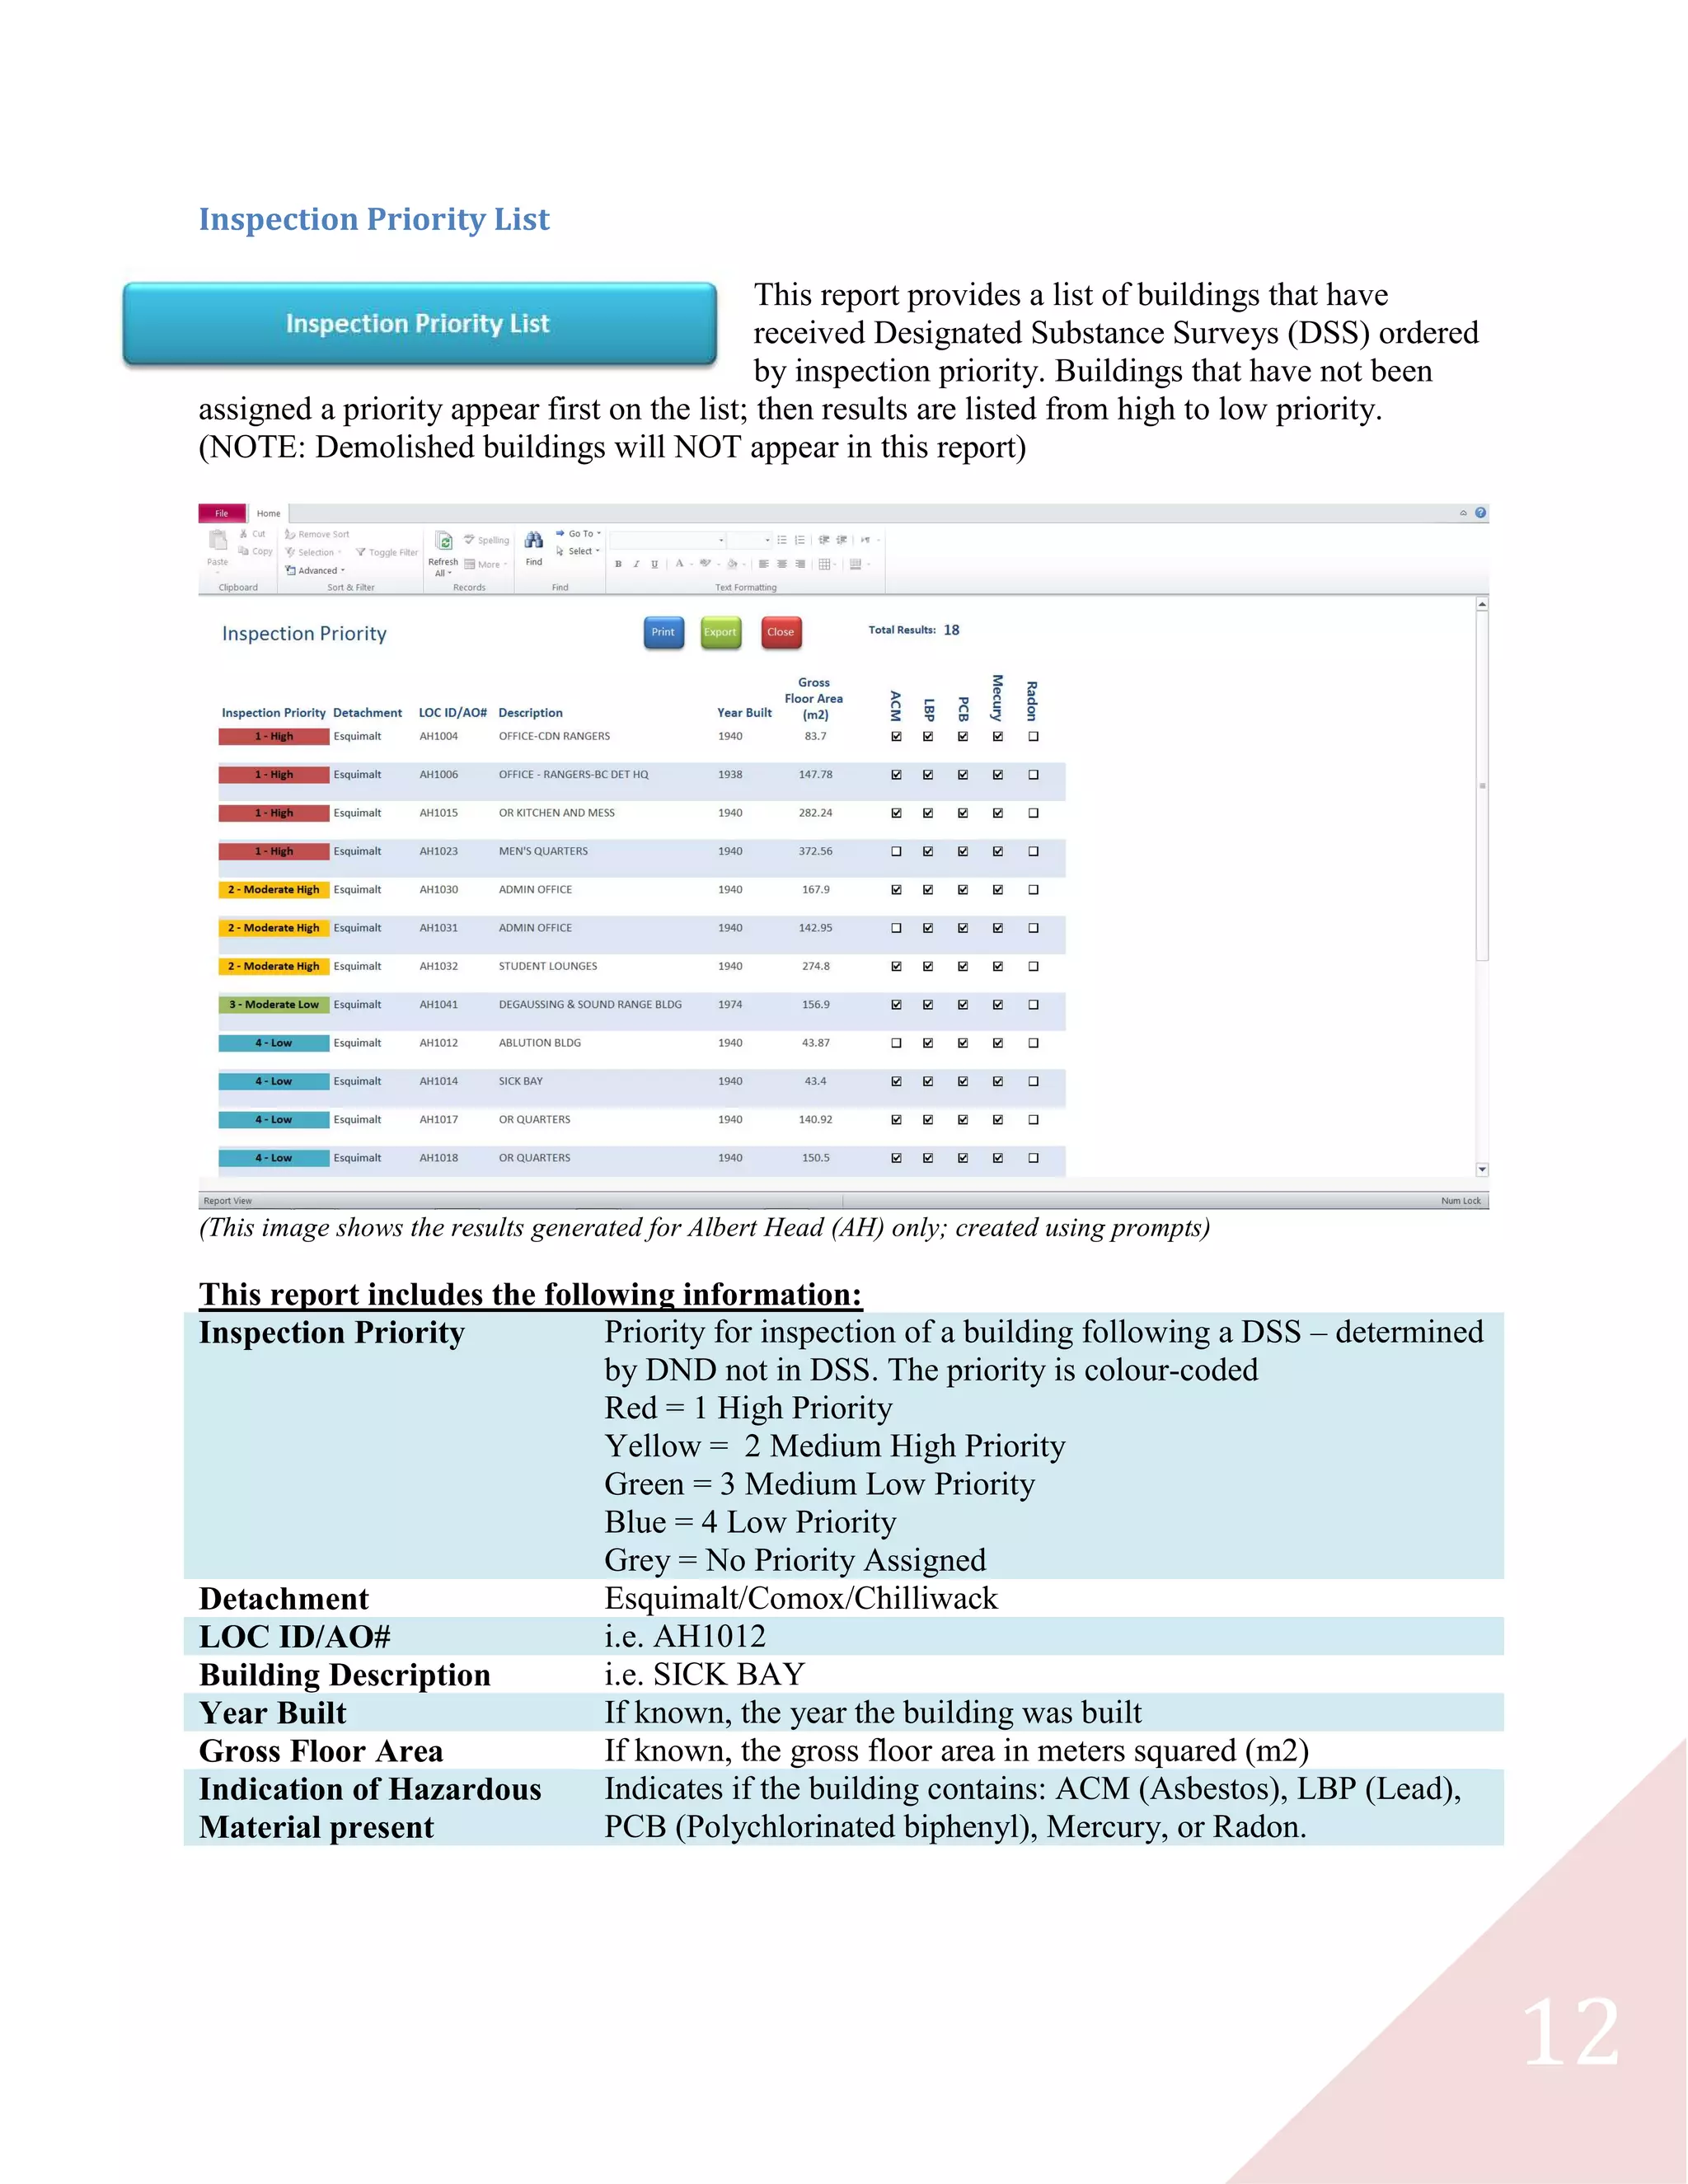
Inspection Priority List ......................................................................................................... 12
List of Buildings (No DSS Highlighted) .............................................................................. 13
List of Buildings With [ACM, LBP, PCB, Mercury, Radon]............................................... 14
Entering New Data........................................................................................................................ 15
Database on the Network.......................................................................................................... 15
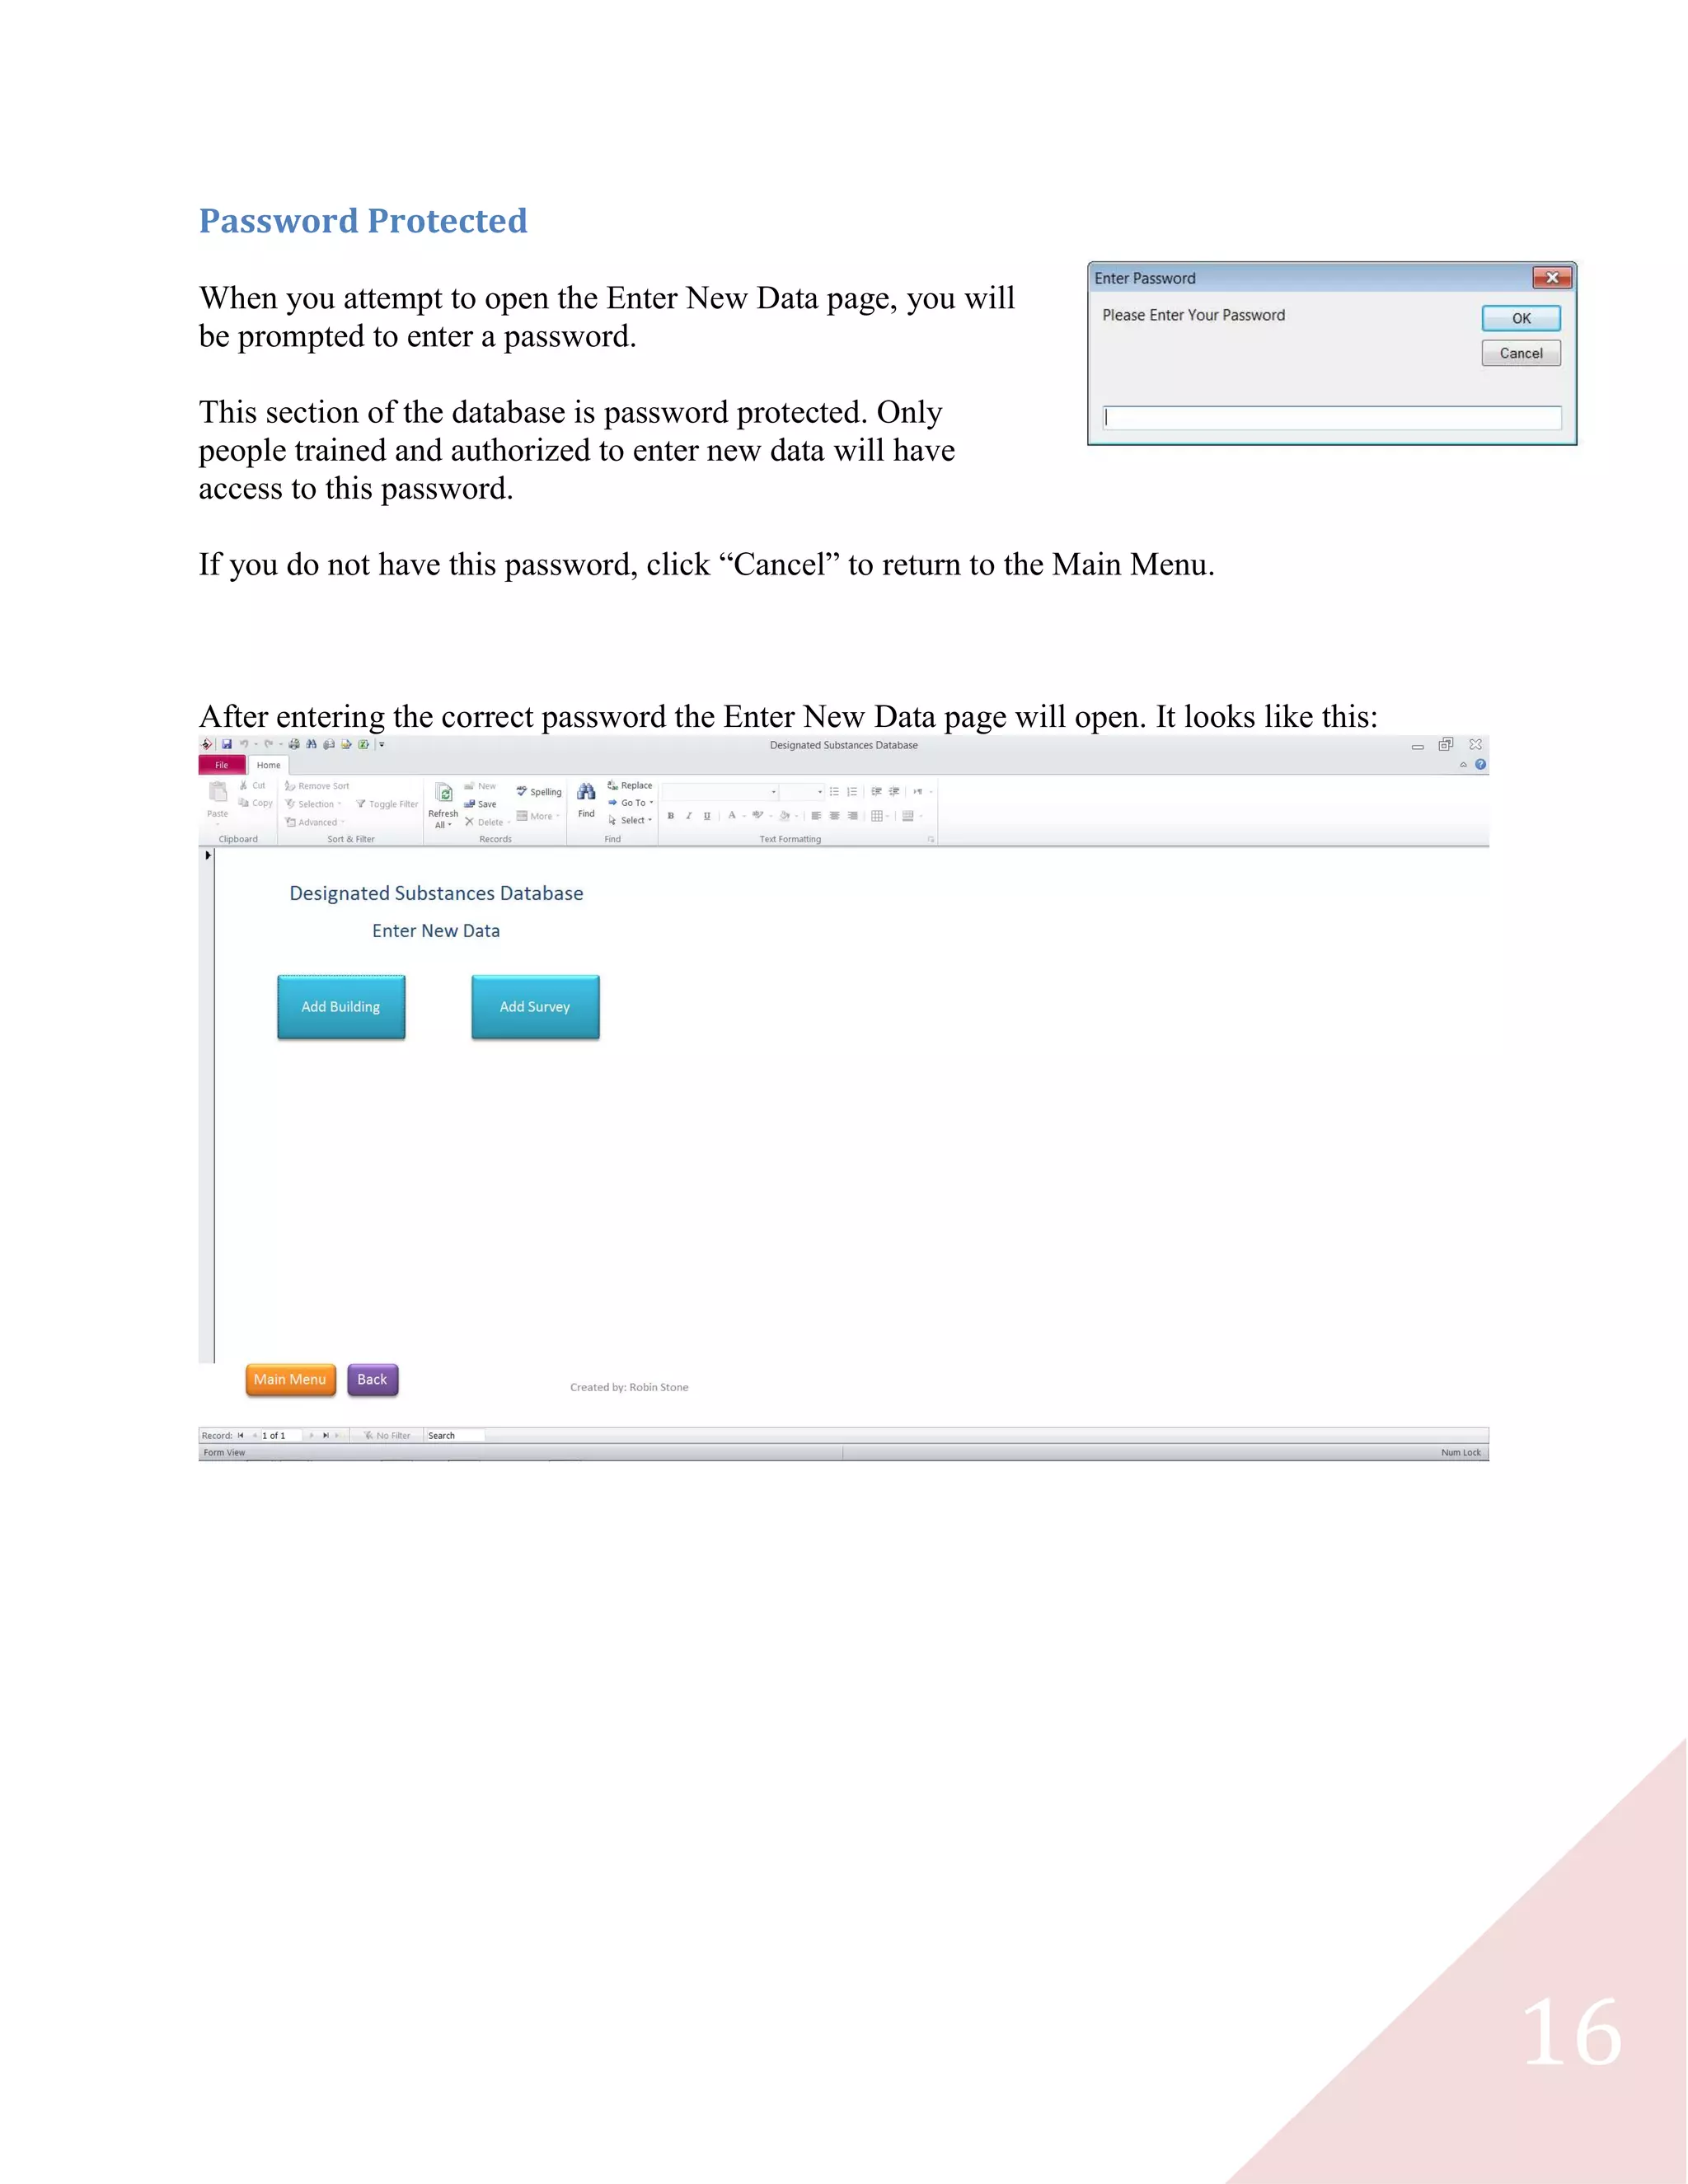
Password Protected................................................................................................................... 16
Adding New Buildings ............................................................................................................. 17
Filling Out a New Form........................................................................................................ 18
Adding a New Survey............................................................................................................... 19
Filling Out a New Form........................................................................................................ 20
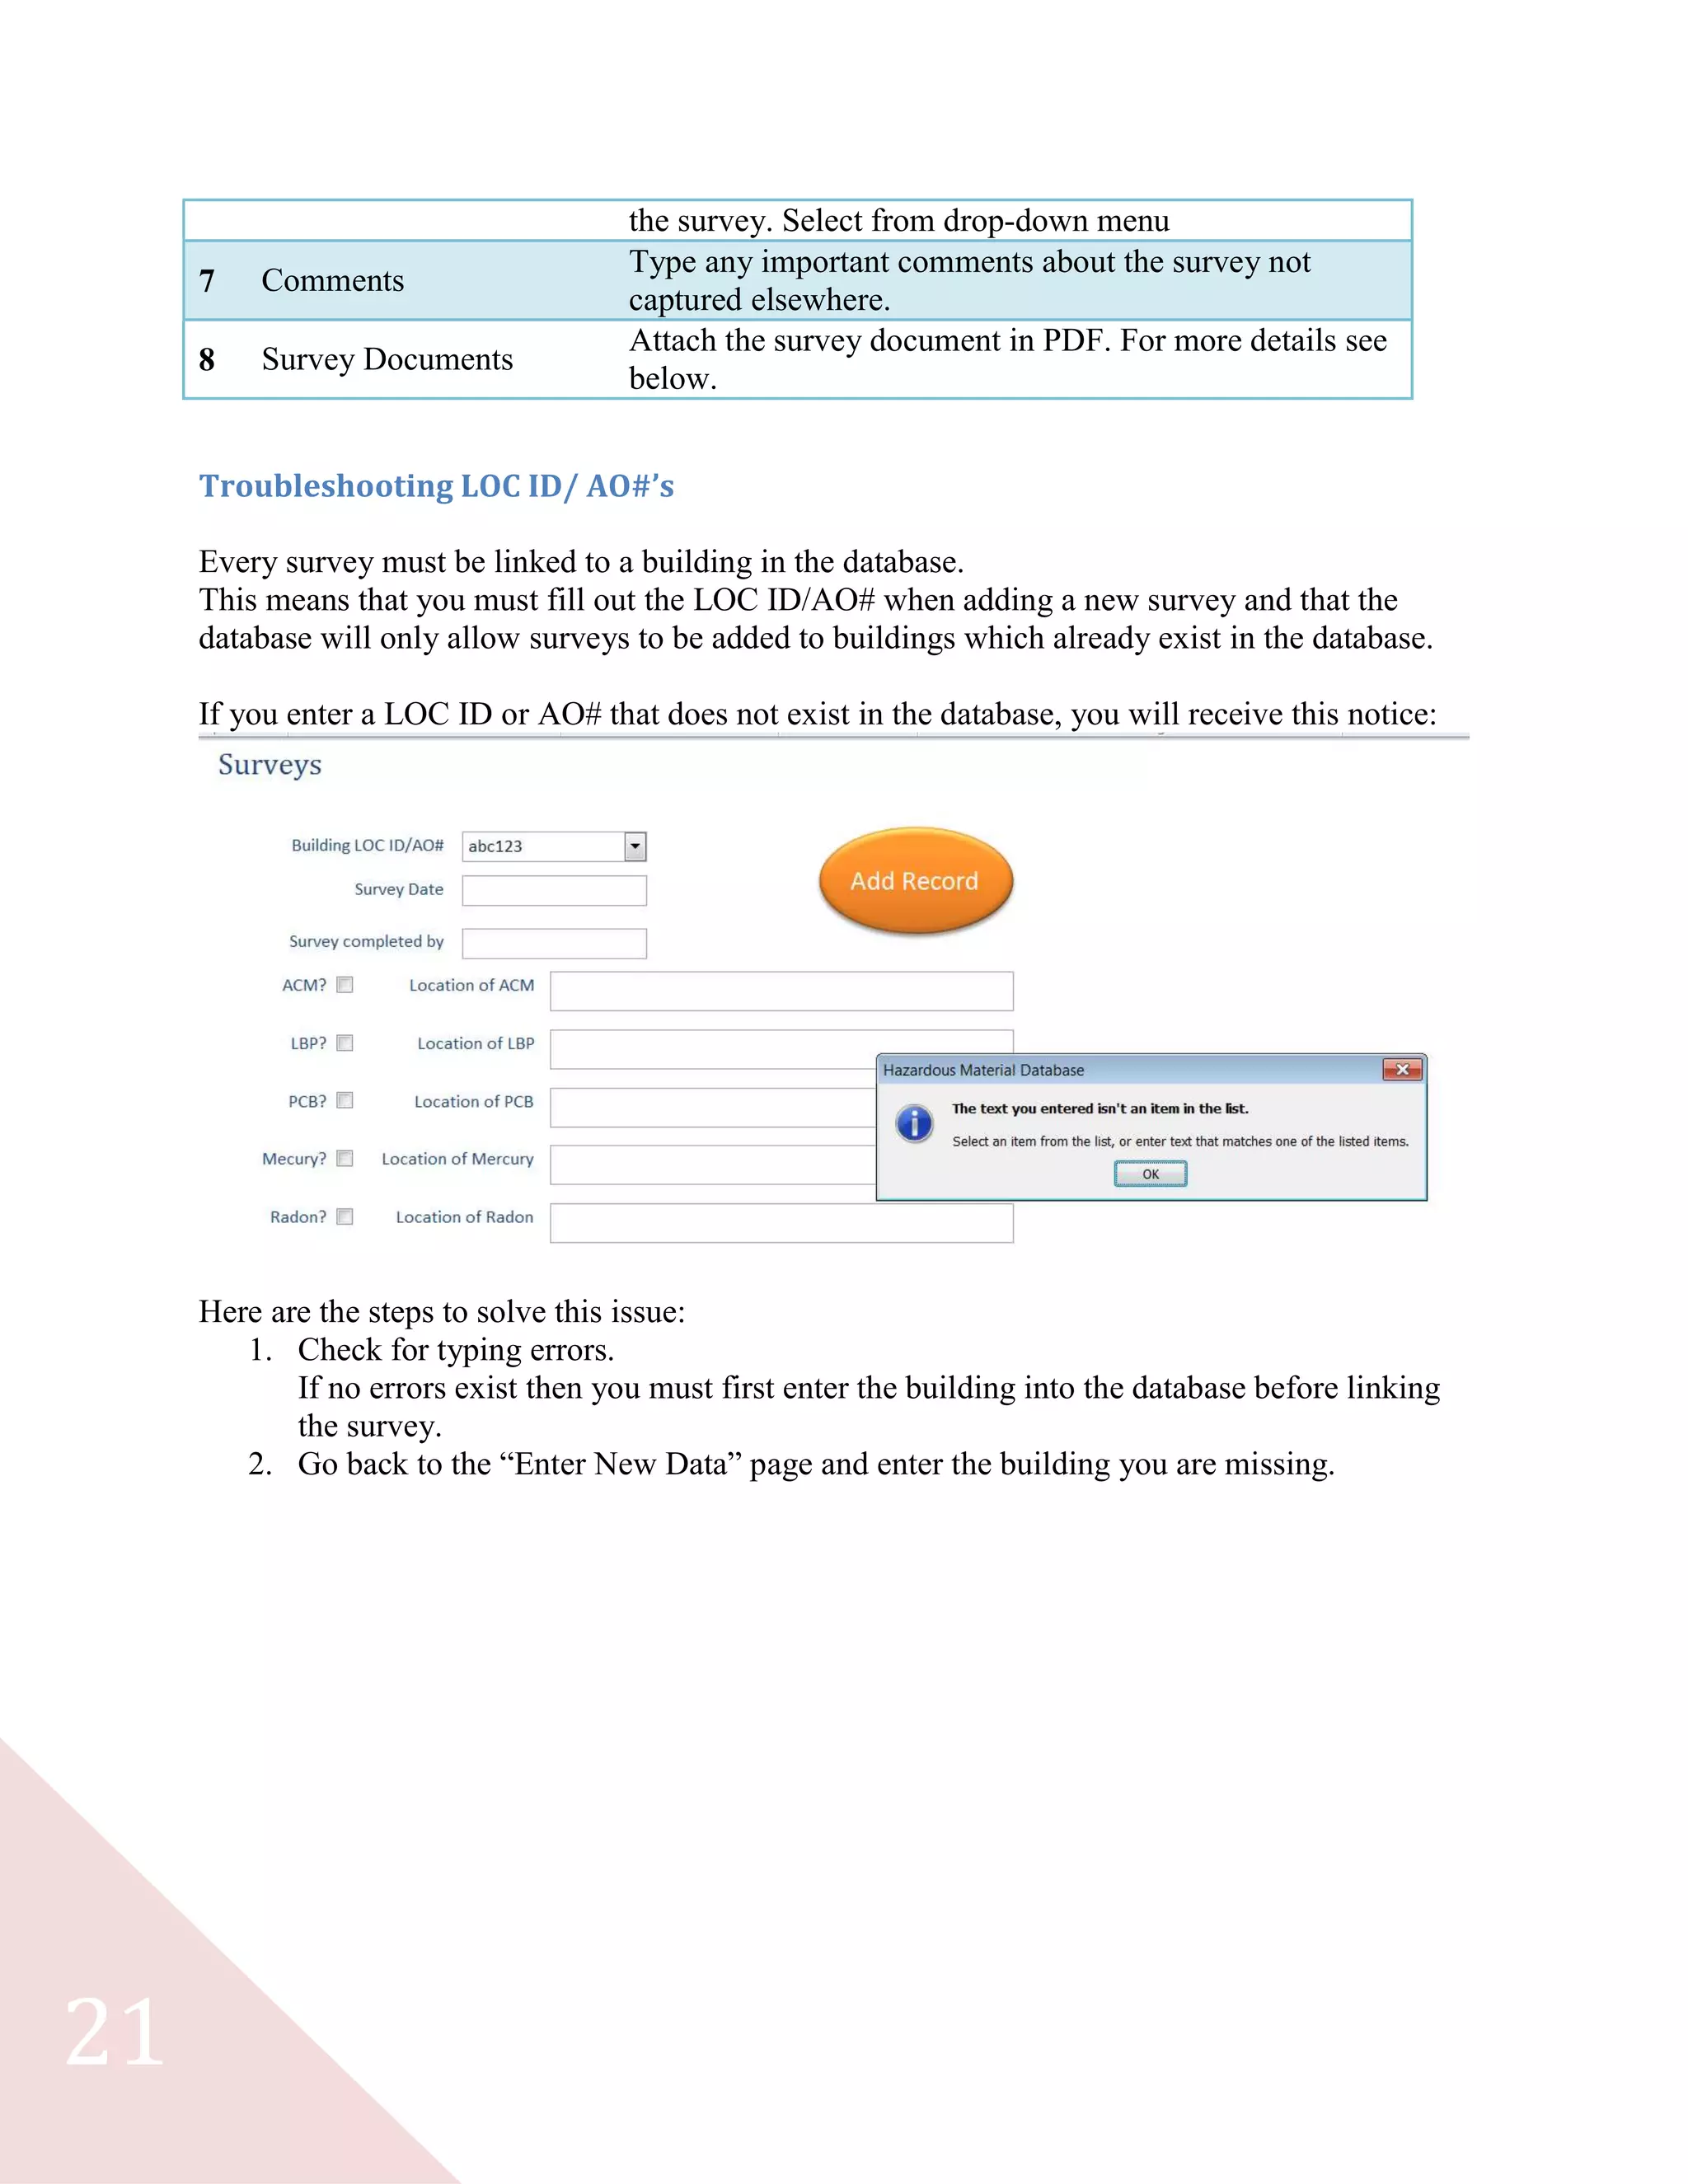
Troubleshooting LOC ID/ AO#’s......................................................................................... 21
Attaching Documents............................................................................................................ 22
Changing Data .............................................................................................................................. 23
Changing or Adding Data to an Existing Entry........................................................................ 23
Changing Database Options...................................................................................................... 24](https://image.slidesharecdn.com/fecb2633-c1d1-42e3-8346-c672cfa3b880-160904145324/75/DSD-2-2048.jpg)


![14
List of Buildings With [ACM, LBP, PCB, Mercury, Radon]
These reports all work in exactly the same way. They
provide details from the Designated Substance Surveys on
the presence of these HazMats. Only buildings with the
indicated HazMat identified in the survey will appear in
these results. (NOTE: Demolished buildings will NOT
appear in this report)
This report includes the following information:
Detachment Esquimalt/Comox/Chilliwack
LOC ID/AO# i.e. AH1012
Building Description i.e. SICK BAY
Hazardous Material
Location
Brief description of where the indicated HazMat is located
Survey Document
PDF of the original document – this is a PDF attachment and
can be opened](https://image.slidesharecdn.com/fecb2633-c1d1-42e3-8346-c672cfa3b880-160904145324/75/DSD-15-2048.jpg)