
Recommended
Recommended
More Related Content
Similar to How to Download IDEA for Windows Based ComputersSelect the dow.docx
Similar to How to Download IDEA for Windows Based ComputersSelect the dow.docx (20)
More from wellesleyterresa
More from wellesleyterresa (20)
Recently uploaded
Recently uploaded (20)
How to Download IDEA for Windows Based ComputersSelect the dow.docx
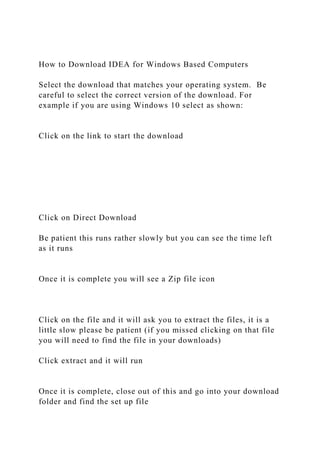
- 1. How to Download IDEA for Windows Based Computers Select the download that matches your operating system. Be careful to select the correct version of the download. For example if you are using Windows 10 select as shown: Click on the link to start the download Click on Direct Download Be patient this runs rather slowly but you can see the time left as it runs Once it is complete you will see a Zip file icon Click on the file and it will ask you to extract the files, it is a little slow please be patient (if you missed clicking on that file you will need to find the file in your downloads) Click extract and it will run Once it is complete, close out of this and go into your download folder and find the set up file
- 2. Click on the set up file and a key code will be preset for you so click OK It may ask you to allow the program to be installed click yes, it may also tell you that other items need to be installed, allow these also. Then click install This may take several minutes and run several screens similar to those below (depending on your operating system). Click Next, Ok or Install then Finish. Keep in mind your screens may vary a little depending on your computer. Be sure to say Yes o accept the license terms If you are having trouble with the install at this point, try this link but note the limitations. As a secondary download that doesn’t require extracting, here is the standard demo version for 1000 records (compatible with the IDEA workbook and the IDEA tutorial) https://support.casewareanalytics.com/public/downloadidea/ This is the easiest version to install. It does not include the workbook or workbook data files though. INTRODUCTION TO CaseWare IDEA Provided by Audimation Services, Inc. & the IDEA Academic Partnership Program 1
- 3. What Is IDEA? CaseWare IDEA is a CAAT(Computer Assisted Audit Tool) designed by auditors for auditors (and other data analysts). IDEA allows auditors to analyze 100% of the data, as opposed to the traditional 10%. IDEA is a user-friendly tool that makes data mining and data analysis easy and efficient. History of IDEA IDEA is a data analysis tool that was originally created in Canada by the Canadian Institute of Chartered Accountants (CICA) in 1987 and is now developed by CaseWare IDEA. IDEA is available in 16 languages and distributed in over 90 countries. Originally created by auditors for auditors, IDEA is user-friendly with an intuitive user interface. IDEA has been distributed in the U.S. by Audimation Services, Inc since 1992 and is located in Houston, Texas. 3 Who Uses IDEA? Big 4 More than 80% of Top 100 CPA Firms in U.S. Fortune 500 Companies Government Agencies - Federal, State & Local (including universities) More than 150,000 Companies Globally The IDEA Process
- 4. Let’s Get Started! Stages of Using IDEA Consider Audit Objectives Determine How IDEA is Appropriate for the Audit Specify the Data Required Arrange Download of the Data Utilize IDEA Review and Housekeeping Create a Project Folder IDEA facilitates organization of your work through Managed Projects. Before doing so, be sure to copy the data files from CD (or network) into the Source Files folder in the Library for this project. Example – The following data files have been provided with our Version Nine Workbook: ACCPAY2012.TXT – Accounts Payable History File SUPPLIER.XLS – Authorized Suppliers Excel worksheet Copy and paste, or drag and drop into the Source Files folder for importing efficiency.
- 5. Create a Project Folder (cont.) After starting IDEA, you are able to create your project with the following procedure: On the Home tab, in the Projects group, click Create. When the Create Project dialog box appears, type the name of your project (for this instance: Accounts Payables) in the Managed project section next to Project name and click OK. The newly created project will remain active until the Project Folder is changed. Importing the Data Files To import the files for testing, access the Import Assistant by clicking Desktop button in the Import section of the menu ribbon. Once loaded, the Import Assistant guides you through the process of importing the data.
- 6. For efficiency, add the needed data files to the Source Files folder in the Library prior to importing. To achieve this, right- click on the Source Fields. Text Example – To import ACCPAY2012.TXT (an ASCII Delimited file), select Text and click Browse button to navigate to and select the file from the Project Folder. Click Open on the Select File dialog box. Click Next. Once the data file has been selected, the Import Assistant will try to determine the details of the file format. Importing the Data Files (cont.) Importing the Data Files (cont.) For Text Files Only – The Field Type will default to what the data seems to be most like, in this case Delimited. The Import Assistant will try to determine the field separators and text encapsulators (if any) for the file as well as if there are any header lines to ignore. For this file, accept the default and click Next to proceed.
- 7. The Import Assistant – Field Details screen will be displayed. This is used to define each field’s name and details in turn, identifying which fields or areas should not be included. Before the import is finished, select the Generate Field Statistics and name the Database Accounts Payables. Use this box to complete the Field Headings Field NameTypeDecimalDate MaskDescriptionSUPPNOCSupplier NumberPAYEECPayeeINVOICECInvoice NumberINV_DATEDYYYYMMDDInvoice DateAMOUNTN2AmountNOT USEDCNot UsedCHECKN0Check NumberPAY_DATEDYYYYMMDDPayment DateAUTHCPayment Authorization Initials Importing the Data Files (cont.) Excel Example – Import the SUPPLIER.XLS file provided on the CD with the Version Nine Workbook. Select in the Import section of the Home tab Select Microsoft Excel and click the Browse button to navigate to and select the file. Click Open. Click Next. The Import Assistant will display a preview of the data and a list of any worksheets defined within the file. Select the Address worksheet in the Select sheets to import box. Select the First row is field names option. In the Output file name box, delete the default name and enter Authorized Supplier.
- 8. 7. Click OK. Importing the Data Files (cont.) Stratification Stratifying the Data Objective – Gain a profile of the number and value of payments by numeric bands to identify any unusual trends and to determine the high-value amount for extractions. Exercise: Select the Accounts Payable database as the active database. On the Analysis tab, in the Categorize group, click Stratification. In the Fields to stratify, select AMOUNT. In the Fields to total on box, select AMOUNT.
- 9. Confirm the increment is set to $10,000 (this may be changed when required). Click the first row of the spreadsheet area which will fill with 0 - 10,000. Click and drag down to row 10. The bands will automatically fill with the increment. Change the increment to $50,000 and complete the final 2 bands (Upper Limit 200,000). Do not check the Create Database option. Click OK. The results of the Stratification are displayed in a new Stratification Results output of the Database window. Stratification (cont.) Stratifying the Data Objective – Gain a profile of the number and value of payments by numeric bands to identify any unusual trends and to determine the high-value amount for extractions.
- 10. 11. To preview the Stratification report, go to Print in the File tab and select the desired option. Stratification (cont.) Performing a Record Extraction Objective – To identify all high value items for testing and to identify items which do not appear to match the profile for payments. Exercise: Select the Accounts Payable database as the active database with the Data property selected in the Properties window. Select Direct, in the Extract group, on the Analysis tab. The Direct Extraction dialog box appears. Enter Unusual and High Payments as the file name. Click the Equation Editor button. In the Equation Editor, enter the equation: AMOUNT >= 70000 .AND. AMOUNT < 80000 .OR. AMOUNT > 100000 Then select the Validate and exit button.
- 11. Direct Extraction If you get a syntax error, check your equation and make sure it was entered properly. In the Records to extract area, accept the default selection for the All option to extract the records from the whole database. Click OK to run the extraction. Results: There should be 87 records totaling $6,850,932.26 *There are a number of large value, round sum payments for Supplier M100. Note the different variants of the payee name, especially the occurrence of “Cash” within the name. Many of the payments were authorized by HMV. However, on further investigation it is determined that HMV may only authorize payments up to $20,000. Further analysis can be done to hone in closer on anomalies. Direct Extraction (cont.) What is Benford’s Law? Frank Benford was a physicist at GE Research Laboratories in the 1920’s. He noted that the first parts of the log table books were more worn than the back parts. The first pages contain logs of numbers with low first digits. The first digit is the left-
- 12. most digit in a number. Benford collected data from 20 lists of numbers totaling 20,229 observations. He found that the first digit of 1 occurred 31 percent of the time. Using integral calculus, he calculated the expected digit frequencies that are now known as “Benford’s Law.” The Benford’s task in IDEA can provide a valuable reasonableness test for large data sets. IDEA only tests items with numbers over 10.00. Number sets with less than 4-digits tend to have more skewed distributions and do not conform as well to Benford’s Law. Positive and negative numbers are analyzed separately. This is due to the fact that abnormal behavior patterns for positive numbers are very different from those for negative numbers. Benford’s Law Data-Based Conditions for Benford’s Law: The data supply is based on a geometrical series (thus, that it is presented as Benford Set). In reality this condition is rarely met. Experience shows however, that data must only partially meet this condition, i.e., the constant increase, percentage-wise of an element compared to the predecessor must only be partially met. Otherwise, this would mean that no number may occur twice which is quite improbably in the case of business data supplies. However, the pre-condition is that there is at least a ‘geometrical tendency’. Therefore, we use the Benford’s Law task to identify unusual transactions. The data must describe the same phenomenon. The data must not be limited by artificial minima and maxima.
- 13. The data must not consist of numbers following a pre-defined system, such as account numbers, telephone numbers and social security numbers. Basically, data complies best with Benford’s Law if it meets the rules mentioned above, namely that the data consists of large numbers with up to 4 digits and the analysis is based on a sufficiently large data supply. A large data supply is necessary in order to come as close to the expected numerical frequencies as possible. If the data supply has, or just roughly has, the characteristics mentioned above it can be analyzed based on Benford’s Law. In the practical use, the expected frequencies according to Benford’s Law often represent nothing more than a benchmark for the observed frequencies. Therefore, since the observed frequencies will only be compared with the legality discovered by Benford, not interpreted accordingly, it is not necessary that all conditions mentioned above be met. Benford’s Law (cont.) Objective – To perform a digital analysis of the amount field of the Accounts Payable database using the Benford’s Law task. Exercise: On the Analysis tab, in the Explore group, click Benford’s Law. In the Benford’s Law dialog box, select the Amount field as the field to be analyzed. Accept the other default options to include Values that are positive and Show boundaries . Unclick the option for Mean absolute deviation and unselect the last three Analysis Types (selecting First digit, First two digits, First three digits and Second digit). Leave the Suspicious option selected.
- 14. Benford’s Law (cont.) Click OK to perform the analyses. The Benford First Digit results in graph form becomes active. The other three test results can be accessed from the taskbar. The data for the four test results can be accessed via the File Explorer window. To view the results in graph form again, open the Accounts Payable database and select Benford in the Results area of the Properties window. The graphic results for the Benford Suspicious First Two Digits test are shown on the First Two Digits test results graph. Benford’s Law (cont.) Analysis: The First Two Digit test is performed to find anomalies in the data that are not readily apparent from either the First Digit test or the Second Digit test when viewed on their own. A spike occurs where the actual proportion exceeds the expected proportion as predicted by Benford’s Law. Positive spikes (above the Benford’s curve) represent excessive duplication. One of the objectives of this test is to look for spikes that conform to internal thresholds such as authorization limits.
- 15. Look at the transactions that comprise the 79 two-digit combinations (indicated as highly suspicious) by double- clicking on the graph and selecting Display Suspicious Records to drill down to the transactions. Notice the number of transactions just under the $80,000 approval limit. Of the 22 transactions that make up the 79 two-digit combination, 17 are between 79,000 and $80,000. Each of the payables clerks authorized some of the 17 transactions, but HMV was responsible for the bulk of these transactions having authorized 9 out of 187. Benford’s Law (cont.) Analysis (cont.) Of the 16 transactions that make up the 76 two-digit combination, 10 are between 76,000 and 77,000. Of these 10 transactions, HMV authorized 7 transactions. Of the 15 transactions in the 75 two-digit combination, 13 are between 75,000 and 76,000. Like before HMV authorized 6 of the 13 transactions. In addition, there are 5 transactions for exactly 75,000. Out of these 5 transactions, 4 were payments to companies with “Cash” in the payee name. Each of these 4 transactions were paid within a few days of their invoice date, clearly a violation of company policy. Because of the size of this data set (under 10,000 records), a number of transactions were identified for further investigation using just the First Digit and First Two Digit analysis. In larger data sets, a fine filter of transactions is necessary (i.e. the First Three Digits test).
- 16. Benford’s Law (cont.) Objective – To test for duplicate payments. Exercise: Open the Accounts Payable database. On the Analysis tab, in the Explore group, click the Duplicate Key drop-down arrow, click Detection. Leave the Output Duplicate Records option selected. In the File name box, enter Duplicate Payments. Click Key. In the Field column, select SUPPNO – Ascending and AMOUNT – Descending. Duplicate Key Detection 6. Click OK in the Define Key box to return to the Duplicate Key Detection dialog box. 7. Click OK in the Duplicate Key Detection dialog box to run the task. 8. View the resultant database of duplicate payments.
- 17. Duplicate Key Detection Results: 3 payments of 75,000 to supplier M100 2 payments of $145.50 to supplier P007 Note: Although the supplier number and amount are the same, other information in the record is different. These will all require follow-up to determine whether or not they are genuine duplicates. In particular, note the different invoice number patterns and all payments to supplier M100 are made within a few days of the invoice date. Additional tests includes testing for: Duplicate supplier invoice number (i.e. test for the same supplier number and invoice number) 9. Close the Duplicate Payments database. Duplicate Key Detection (cont.) Objective: To test for suppliers with multiple payee names. Exercise: Open the Accounts Payable database. On the Analysis tab, in the Explore group, click the Duplicate Key drop-down arrow, click Exclusion. In the Duplicate Key Exclusion dialog box, enter the following settings: Fields to Match: SUPPNO
- 18. Field that must be different: PAYEE File name: Suppno Multiple Payees Click OK to perform the test. Duplicate Key Exclusion Results: There are 120 records where the same supplier number has different payee names. These records total $4,524,529.75. Close the Suppno Multiple Payees database. Duplicate Key Exclusion (cont.) Objective: To test for completeness by testing for missing items in a numeric list. Exercise: Ensure the Accounts Payable database is the active database and the Data property is selected in the Properties window.
- 19. To check the field type for the CHECK field, view the format of the database by double-clicking on the data to open the Field Manipulation dialog box. View the format of the CHECK field and note that its type is Numeric. Close the Field Manipulation dialog box by clicking Cancel. Note: It is possible to test for gaps in Numeric or Date fields or in a numeric sequence within a Character field. On the Analysis tab, in the Explore group, click Gap Detection. From the Field to use drop-down list, select CHECK to test for gaps. Note: It is possible, but do not specify a Criteria for the test (i.e. only checks issued for a date range). Test the whole range of check numbers by accepting the default selection of the ALL option. Note: The value in the Starting key value and Ending key value boxes are provided from the minimum and maximum valued held in the Field Statistics. Accept the Gap Increment of 1 but note that this could be changed if required. Click OK. Gap Detection
- 20. 9. The Gap Detection Results output of the Database window becomes active and displays the results. To view the missing checks, click on the + sign located on the left side of the check sequence. Results: There are 2 gaps in the sequence. However there are 5 missing checks as can be seen from the inclusive ranges, i.e., 701805, 701997, 701998, 701999, 701200. Gap Detection (cont.) Objective: To analyze payment terms and ensure that company policy on payment is being strictly adhered to. Exercise: It is suspected that certain suppliers are rewarding staff for prompt payment of invoices. The number of days between payment and invoice will be calculated and then analyzed. Ensure the Accounts Payable database is the active database and the Data property is selected in the Properties window. On the Data tab, in the Fields group, click Append. The Append Field dialog box opens up. Define the field as follows: Field Name: PAY_DAYS Field Type: Virtual Numeric Field Length: Do not enter
- 21. Decimals: 0 Description: Number of days to pay invoice Appending a Field Click in the Parameter cell to load the Equation Editor and enter the following equation: @Age(PAY_DATE, INV_DATE). Note: @Age(PAY_DATE, INV_DATE) calculates the number of days between the specified dates (fields or date constants). Enter the later date first to report a positive number of days as a difference. Click the Validate and Exit button, returning to the Field Manipulation dialog box. Click OK to append the Virtual field. Appending a Field (cont.) View the results in the new DAYS_TO_PAY field. It will be the right-most column in the database. Note the color of this field indicates that the field is a calculated field and not an
- 22. original imported field. Click the Field Statistics link in the Properties window to view the statistics for DAYS_TO_PAY field. When prompted, calculate the statistics for all fields. Note: The company’s policy is to pay all suppliers within 25-35 days of receipt of the invoice. Appending a Field (cont.) Return to the database by clicking the Data link in the Properties window. Objective: To test the validity of payments to authorized suppliers. Exercise: Step 1: Verify a Common Key Ensure the Accounts Payable database is the active database and the Data property is selected in the Properties window. Double-click over the Database window to open the Field Manipulation dialog box and to display the field layout. Note that the field SUPPNO is a Character field.
- 23. Click Cancel. Joining Databases Open the Authorized Supplier-Address database. Double-click over the Database window to open the Field Manipulation dialog box and to display the field layout. Note that the field SUPPNO is a Character field. Click Cancel. Joining Databases (cont.) Step 2: Join the Databases Make the Accounts Payable database the active database. On the Analysis tab, in the Relate group, click Join. The Join
- 24. Databases dialog box appears with Accounts Payable as the primary database. Click Select to select the secondary database. Select the Authorized Supplier-Address database and then click OK. Joining Databases (cont.) Change the File name in the lower section of the Join Databases dialog box to Supplier Verification. Specify the common match key by clicking on Match to display the Match Key Fields dialog box. Click the Primary text box and select SUPPNO from the list of fields. Note the Order text box and accept the default, Ascending. Click the Secondary text box and select SUPPNO from the list of fields. Click OK. There are 5 join options at the bottom of the screen. Select the option: All records in primary file. Note: All records in Primary file is selected: There are multiple payments for each supplier. The risk is that payments are to unauthorized suppliers so we are not interested in suppliers with no payments (the All records in both files option).
- 25. Joining Databases (cont.) 8. Click the OK button to join the selected databases. View the resultant database. 9. Click the History link in the Properties window, and then locate and expand the section for Join Databases task. Results: Note that there are 999 records in the file and that there are 8 Unmatched Primary record – these are payments to unauthorized suppliers. Joining Databases (cont.) Objective: To analyze payments by supplier to identify large movements. Exercise: Ensure the Supplier Verification database is the active database. On the Analysis tab, in the Categorize group, click Summarization. In the Summarization dialog box, select SUPPNO on Fields to
- 26. summarize. Under Numeric fields to total, select AMOUNT. Click on Fields and select the following fields: PAYEE, SUPPNAME, TOT_PREV_YR. Click OK. Summarization Name the file Payments by Supplier. There should be 48 records totaling $34,145,300.89.
- 27. Summarization (cont.) To create a database where the total payments have increased or decreased by over 25% during the past year, click on the Criteria link in the Properties Window. In the Equation Editor, use the following formula: @Abs(AMOUNT_SUM – TOT_PREV_YR) * 100/ TOT_PREV_YR > 25) Note: @Abs ignores the negative sign; therefore, @Abs (expression) > 25 will identify both increase and decrease greater than 25%. Summarization (cont.) Objective – To view the History maintained by IDEA to check
- 28. what has been done. Exercise: Ensure the Accounts Payable database is the active database and the Data property is selected in the Properties window. In the Properties window, click History. Expand out and examine each section of the History log. Can save the History log to a text file by clicking Export on the taskbar. The History feature shows the actions taken to receive the database results. History and Project Overview History & Project Overview Project Overview is a graphical overview of the actions performed within a Project Folder, including the creation, deletion and modification of databases. Project Overview records all database interactions and shows the complete history of what transpired within the Project Folder. A table view format is also available.
- 29. To access Project Overview: On the Home tab, in the Projects group, click on Project Overview. Have the ability to Export and Print Project Overview from the taskbar. This concludes the Introduction to IDEA for Academics. The information included in this presentation was taken from the IDEA Workbook. For more information, please contact Audimation Services to speak to someone with the IDEA Academic Partnership at: [email protected] or 888-641-2800 opt 5 IDEA Problem 9 There is technical assistance available for the educational version of IDEA, please contact technical support: 1-888-641- 2800 Option#4 or email the help desk at [email protected] You should have the IDEA software and IDEA Manual loaded into your computer from Auditing 1. You may want to review the video called "IDEA 10 Tutorial: Introduction" to get started. Review the samples in the IDEA Manual, Section 3-Accounts Payable to end of this section this week. NOTE :the page numbers will vary depending on the manual you are using due to operating system differences in your computers. Hint: Staying actively involved while reviewing the tutorial assignment will help you to complete the IDEA problems more
- 30. efficiently. Please submit your answers to the following problems to your instructor in a Word document. You may need to take a screen shot of your results and copy them into the Word document to upload if asked to perform any analysis using the software Problem 9a Open the Sample-Payments file. This file was automatically loaded in when you installed the software in week 1. The company has a policy that all cash disbursements be authorized. You want to quickly find all of the payments in this database that were not authorized. Hint: Double click the field name for AUTH to quickly sort by authorizations. Print screen the results to submit in with your answers for this problem. · How many disbursements were not authorized? · What are the risks of unauthorized cash disbursements? Clear the Criteria Problem 9b Using the same Sample-Payments file, determine if all payments were made in 2015. Hint: You can use the extraction technique on PAY_DATE. (From the Analysis tab, in the Extract group, click Direct). Review the video called "IDEA 10 Direct Extraction" Print screen the results to submit in with your answers for this problem. · How many payments were NOT made in 2015? · Do you see anything odd about this payment? What steps
- 31. would you take to investigate? Print screen the history file. Close this file IDEA Problem 10 There is technical assistance available for the educational version of IDEA, please contact technical support: 1-888-641- 2800 Option#4 or email the help desk at [email protected] Review the samples in the IDEA Manual, Section 2-Accounts Receivable to end of this section this week. NOTE:the page numbers will vary depending on the manual you are using due to operating system differences in your computers. Hint: Staying actively involved while reviewing the tutorial assignment will help you to complete the IDEA problems more efficiently. Please submit your answers to the following problems to your instructor in a Word document. You may need to take a screen shot of your results and copy them into the Word document to upload if asked to perform any analysis using the software Open the file called Sample-Detailed Sales. Problem 10a One aspect of gathering evidence is obtaining copies of invoices. IDEA is useful for testing completeness and finding gaps in invoice numbers. With the Sample-Detailed Sales file open on the Analysis tab, select Gap Detection to open the Gap Detection window. Review the video called "IDEA 10: Gap
- 32. Detection". Make sure INV_NO is selected and click ok. Print screen the results to submit in with your answers for this problem. · How many gaps are there within the invoice numbers for the database? · What control procedures should be put into place in order to prevent gaps? Close the file Problem 10b Open the file called Sample-Detailed Sales. Another aspect of gathering evidence is making sure the data is accurate. IDEA is useful for testing duplicate invoices. With the Sample-Detailed Sales file open on the Analysis tab, select Duplicate Key and select Detection to open the Duplicate Key Detection window. Review the video called "IDEA 10 Finding Duplicates". Select Output duplicate records with key of Inv_No. .Print screen the results to submit in with your answers for this problem. · How many duplicates are there within the invoice numbers for the database? · What control procedures should be put into place in order to prevent duplicate invoices? Print screen your results to submit. Print screen the history file. Close the file. --------------------------------------------------------------------------- ------------------------------------------ Submit your answers to Problems 9 and 10 in the same Word
- 33. document. Be sure to label your answers clearly with the problem numbers and clearly identify the print screens of your results. Be sure to include the history files for both problems 9 and 10 as indicated. Adapted from: McGraw Hill Companies, In 2016 IDEA S-1 Solution s Manual, IDEA Assignments