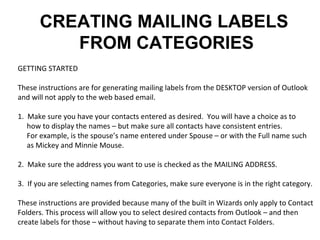
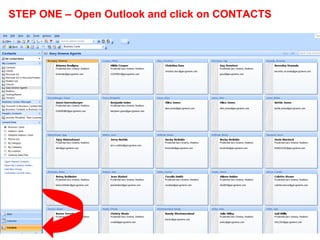
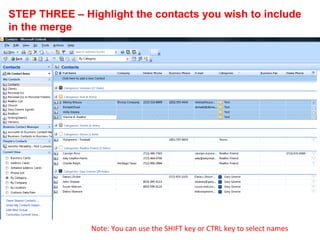
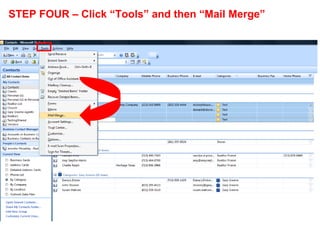
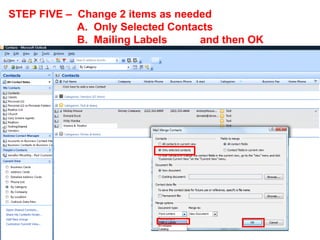
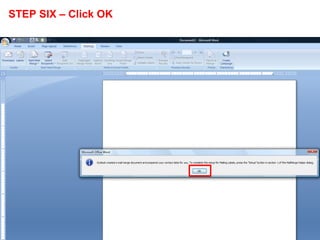
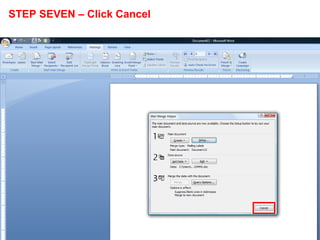
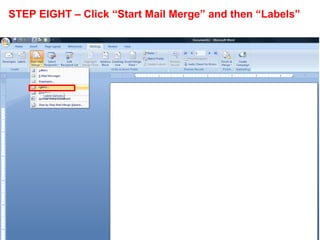
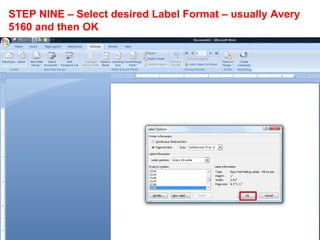
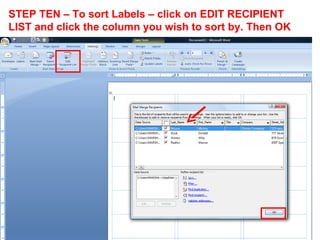
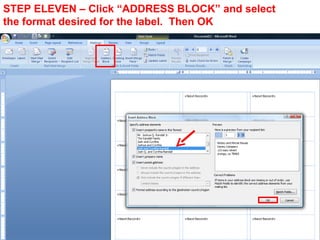
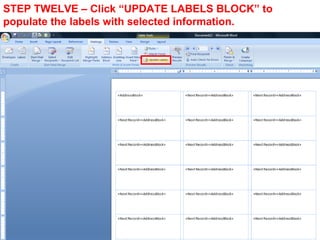
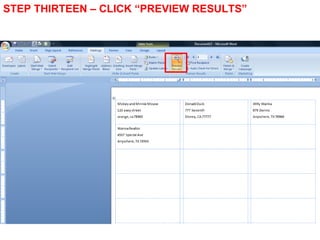
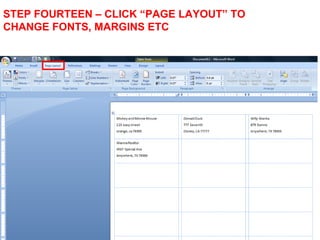
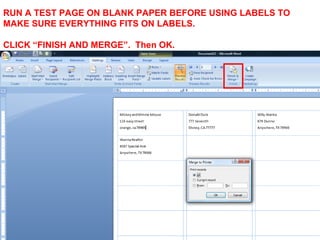
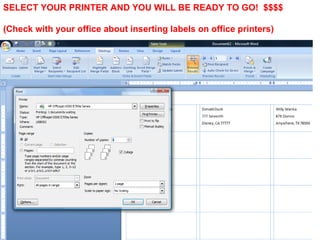
CREATING
                               MAILING LABELS
                              FROM CATEGORIES


By Marsha Mitchell | Technology Coach | Better Homes and Gardens Real Estate Gary
CREATING MAILING LABELS
         FROM CATEGORIES
GETTING STARTED

These instructions are for generating mailing labels from the DESKTOP version of Outlook
and will not apply to the web based email.

1. Make sure you have your contacts entered as desired. You will have a choice as to
   how to display the names – but make sure all contacts have consistent entries.
   For example, is the spouse’s name entered under Spouse – or with the Full name such
   as Mickey and Minnie Mouse.

2. Make sure the address you want to use is checked as the MAILING ADDRESS.

3. If you are selecting names from Categories, make sure everyone is in the right category.

These instructions are provided because many of the built in Wizards only apply to Contact
Folders. This process will allow you to select desired contacts from Outlook – and then
create labels for those – without having to separate them into Contact Folders.
STEP ONE – Open Outlook and click on CONTACTS
STEP TWO – Click CATEGORIES to sort by categories
STEP THREE – Highlight the contacts you wish to include
in the merge


               Note: You can use the SHIFT key or CTRL key to select names
STEP FOUR – Click “Tools” and then “Mail Merge”
STEP FIVE – Change 2 items as needed
            A. Only Selected Contacts
            B. Mailing Labels     and then OK
STEP SIX – Click OK
STEP SEVEN – Click Cancel
STEP EIGHT – Click “Start Mail Merge” and then “Labels”
STEP NINE – Select desired Label Format – usually Avery
5160 and then OK
STEP TEN – To sort Labels – click on EDIT RECIPIENT
LIST and click the column you wish to sort by. Then OK
STEP ELEVEN – Click “ADDRESS BLOCK” and select
the format desired for the label. Then OK
STEP TWELVE – Click “UPDATE LABELS BLOCK” to
populate the labels with selected information.
STEP THIRTEEN – CLICK “PREVIEW RESULTS”
STEP FOURTEEN – CLICK “PAGE LAYOUT” TO
CHANGE FONTS, MARGINS ETC
RUN A TEST PAGE ON BLANK PAPER BEFORE USING LABELS TO
MAKE SURE EVERYTHING FITS ON LABELS.

CLICK “FINISH AND MERGE”. Then OK.
SELECT YOUR PRINTER AND YOU WILL BE READY TO GO! $$$$

(Check with your office about inserting labels on office printers)
Creating mailing labels from outlook contacts

Creating mailing labels from outlook contacts

  • 1.
    CREATING MAILING LABELS FROM CATEGORIES By Marsha Mitchell | Technology Coach | Better Homes and Gardens Real Estate Gary
  • 2.
    CREATING MAILING LABELS FROM CATEGORIES GETTING STARTED These instructions are for generating mailing labels from the DESKTOP version of Outlook and will not apply to the web based email. 1. Make sure you have your contacts entered as desired. You will have a choice as to how to display the names – but make sure all contacts have consistent entries. For example, is the spouse’s name entered under Spouse – or with the Full name such as Mickey and Minnie Mouse. 2. Make sure the address you want to use is checked as the MAILING ADDRESS. 3. If you are selecting names from Categories, make sure everyone is in the right category. These instructions are provided because many of the built in Wizards only apply to Contact Folders. This process will allow you to select desired contacts from Outlook – and then create labels for those – without having to separate them into Contact Folders.
  • 3.
    STEP ONE –Open Outlook and click on CONTACTS
  • 4.
    STEP TWO –Click CATEGORIES to sort by categories
  • 5.
    STEP THREE –Highlight the contacts you wish to include in the merge Note: You can use the SHIFT key or CTRL key to select names
  • 6.
    STEP FOUR –Click “Tools” and then “Mail Merge”
  • 7.
    STEP FIVE –Change 2 items as needed A. Only Selected Contacts B. Mailing Labels and then OK
  • 8.
    STEP SIX –Click OK
  • 9.
    STEP SEVEN –Click Cancel
  • 10.
    STEP EIGHT –Click “Start Mail Merge” and then “Labels”
  • 11.
    STEP NINE –Select desired Label Format – usually Avery 5160 and then OK
  • 12.
    STEP TEN –To sort Labels – click on EDIT RECIPIENT LIST and click the column you wish to sort by. Then OK
  • 13.
    STEP ELEVEN –Click “ADDRESS BLOCK” and select the format desired for the label. Then OK
  • 14.
    STEP TWELVE –Click “UPDATE LABELS BLOCK” to populate the labels with selected information.
  • 15.
    STEP THIRTEEN –CLICK “PREVIEW RESULTS”
  • 16.
    STEP FOURTEEN –CLICK “PAGE LAYOUT” TO CHANGE FONTS, MARGINS ETC
  • 17.
    RUN A TESTPAGE ON BLANK PAPER BEFORE USING LABELS TO MAKE SURE EVERYTHING FITS ON LABELS. CLICK “FINISH AND MERGE”. Then OK.
  • 18.
    SELECT YOUR PRINTERAND YOU WILL BE READY TO GO! $$$$ (Check with your office about inserting labels on office printers)